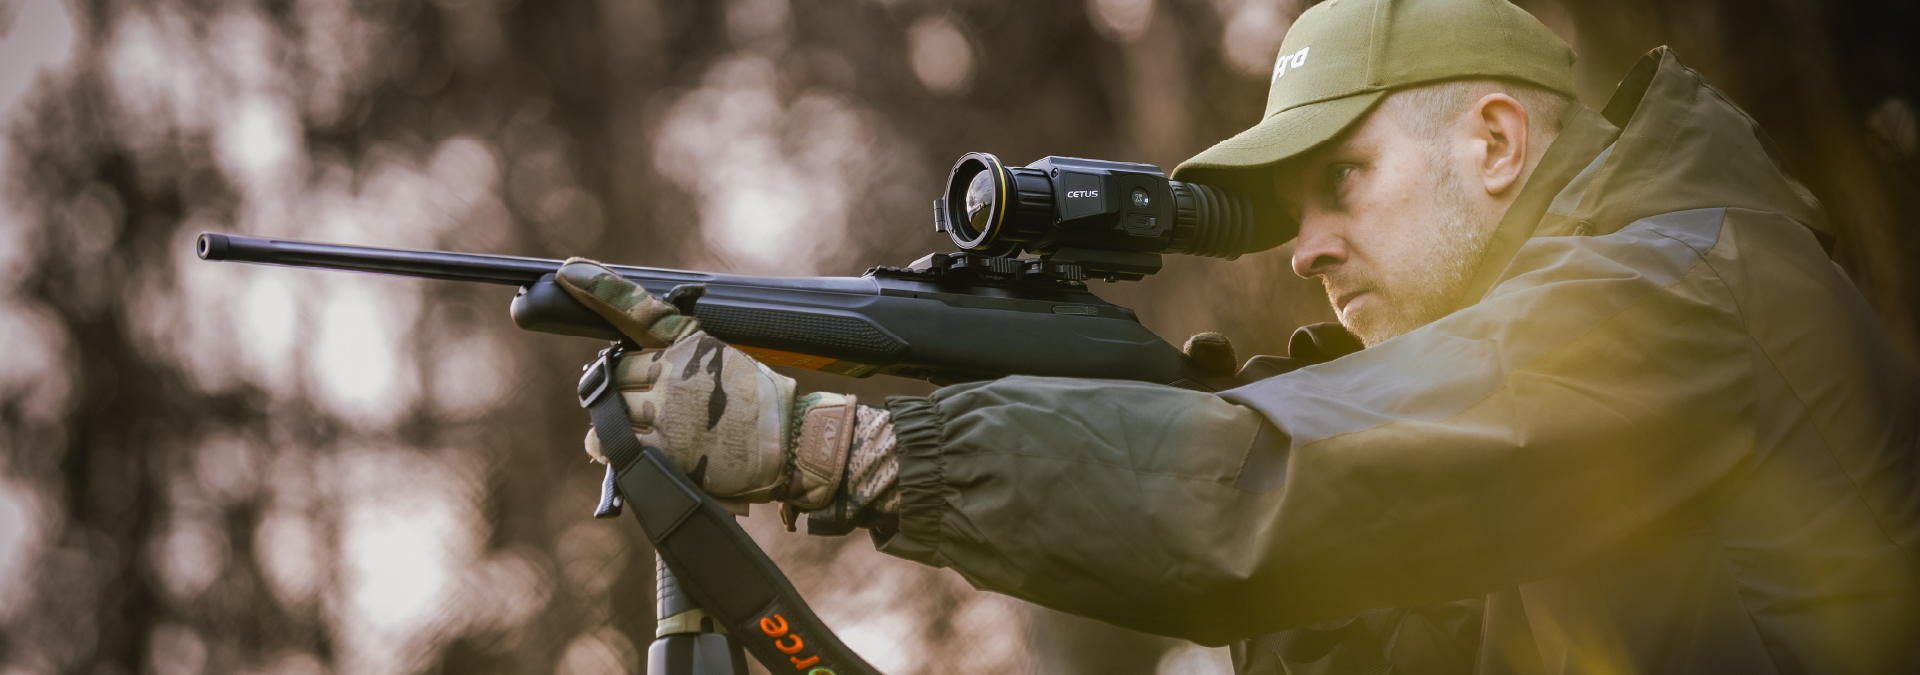
Buying your first thermal scope is one of the most exciting — and most confusing — gear decisions you’ll make as a hunter. The spec sheets are packed with numbers, the price tags are steep, and everybody online has a different opinion about what matters most. At Pixfra, we build thermal scopes and front attachments for night hunters and predator control teams across the country. We hear from first-time buyers every week, and the same mistakes keep popping up. This guide will walk you through the five biggest ones so you spend your money once and spend it right.
Before you even start shopping, do yourself a favor and bookmark our guide on zeroing your thermal scope — because the best scope in the world is useless if you can’t get it sighted in. And once you know what to look for, browse our full thermal scope lineup to see how Pixfra matches real specs to real hunting needs.
How to buy on Specs Alone Without Knowing How You Hunt
This is the number one mistake we see, and it costs hunters more money than any other. You jump online, read a few forum posts, and decide you need the highest resolution, the longest detection range, and the biggest objective lens you can find. Then you end up with a heavy, expensive scope that doesn’t match how you actually hunt.

The truth is that the best thermal scope for you is the one that fits your terrain, your typical shooting distance, and your style of hunting. If you’re set up over a feeder in thick East Texas brush, most of your shots happen inside 150 yards. You don’t need a 75mm objective lens and 4x base magnification for that. You need a wider field of view and a lower base magnification — something in the 1x to 2.5x range — so you can pick up hogs moving through timber fast. On the other hand, if you’re calling coyotes across open Kansas pasture and taking shots past 200 yards, a higher base magnification and larger lens start to earn their keep.
Here’s the question we always ask first-time buyers: What animals are you targeting, at what distance, and in what kind of terrain? Once you answer those three questions, half the models on the market get eliminated right away. A hog hunter working feeders at 80 yards and a coyote hunter shooting across open ground at 350 yards need very different scopes, even if both scopes carry the same price tag. Climate matters too. If you hunt in humid conditions, fog, or light rain, you’ll want a scope with better thermal sensitivity to cut through the atmospheric clutter. Start with your hunting scenario, not a spec sheet, and you’ll avoid the most expensive mistake on this list.
Ignoring NETD and Pixel Pitch
Most first-time buyers zero in on sensor resolution — 256×192, 384×288, or 640×512 — and stop there. Resolution matters, but it’s only one piece of the puzzle. Two other specs play a huge role in what you actually see through the eyepiece: NETD and pixel pitch. If you skip these, you might end up with a scope that looks great on paper but washes out on a foggy December night when you need it most.
NETD stands for Noise Equivalent Temperature Difference. It measures how sensitive the thermal sensor is to tiny differences in heat, and it’s listed in millikelvins (mK). A lower NETD number means the sensor picks up finer heat differences, which translates to sharper contrast between the animal and the background. Pixfra’s thermal devices achieve NETD values of ≤18mK, which puts them in the high-sensitivity category. For comparison, here’s a quick reference on what NETD numbers mean in the real world:
| NETD Rating | Performance Level | Best For |
|---|---|---|
| ≤20 mK | Elite sensitivity | Fog, rain, high humidity, low-contrast scenes |
| 21–30 mK | Excellent | Most hunting conditions, all-season use |
| 31–40 mK | Standard | Clear weather, moderate temps |
| >40 mK | Basic | Fair-weather, short-range only |
Pixel pitch is the physical distance between the center of one pixel and the next on the sensor, measured in microns (µm). The two most common options are 12µm and 17µm. Smaller pixel pitch (12µm) gives you a sharper image and better detail on small or distant targets. Larger pixel pitch (17µm) collects more infrared energy per pixel, which can mean better thermal sensitivity. It’s a trade-off, and neither option is automatically better. A well-designed 384×288 sensor at 17µm with NETD below 25 mK can actually outperform a 640×512 sensor at 12µm with NETD around 40 mK in low-contrast conditions like fog or rain. That seems backwards, but thermal imaging doesn’t work like a regular camera. The entire system — lens, sensor, processing algorithms, and display — has to work together.
The takeaway here is simple: don’t buy a thermal scope based on resolution alone. Check the NETD rating. Look at the pixel pitch. Ask yourself whether you’ll be hunting in fair weather or in conditions where sensitivity matters. If you hunt year-round or in the Southeast where humidity is always a factor, a scope with elite NETD performance will save you from a lot of frustrating nights.
More Digital Zoom Means More Range
This mistake trips up a lot of first-time buyers because it seems logical. You see a scope advertising 8x or 16x total magnification and assume you’ll be able to identify targets at extreme distance. But there’s a big difference between base (native) magnification and digital zoom, and confusing the two will leave you disappointed.

Every thermal scope has a fixed base magnification — that’s the true optical zoom level where you get full sensor resolution and the sharpest image. When you engage digital zoom, the scope crops a section of the image and stretches it to fill the display. The result is a bigger picture, but not a better one. Digital zoom reduces image clarity and can make it harder to identify what you’re looking at, especially at longer distances. Think of it like pinching to zoom on a phone photo — the image gets bigger, but the detail gets worse. A scope with 2x base magnification and 8x digital zoom doesn’t give you 8x worth of real detail. At 8x, you’re looking at a fraction of the sensor’s actual pixels blown up to fill the screen.
What actually drives your usable detection and identification range is the combination of sensor resolution, objective lens size, and NETD. A larger objective lens (measured in millimeters) gathers more infrared energy and gives you more range. A 50mm lens will detect heat signatures farther out than a 25mm lens, regardless of how much digital zoom either scope has. For mid-to-long range predator hunting where shots may stretch past 200 yards, prioritize a 35mm or larger objective lens. Our Pixfra Chiron LRF and Pegasus 2 LRF models pair larger optics with integrated laser rangefinders, so you get real distance data instead of guessing based on a zoomed-in image.
The bottom line: when you’re comparing scopes, look at the base magnification and objective lens diameter first. Digital zoom is nice to have for quick scanning, but it’s not a substitute for real optical performance. If a scope’s biggest selling point is its total digital zoom number, that’s a red flag.
Battery Life, Durability, and Recoil Rating
Here’s a mistake that doesn’t show up until you’re four hours into a hog hunt and your scope dies, or your brand-new optic loses zero after 20 rounds. Too many first-time buyers focus on image quality specs and skip right past the practical stuff: battery life, weather resistance, and recoil tolerance. These things matter just as much as resolution when you’re actually out in the field.
Battery life varies a lot between models. Some scopes run 4–5 hours on a charge, while others go 10 hours or more. If you’re running short night hunts from a blind, 4 hours might be enough. But if you’re doing extended hog eradication or predator control sessions, you need a scope that can keep up. Just as valuable is the type of battery the scope uses. Scopes with removable 18650 batteries let you carry spares and swap them in the field — if your battery runs out at 2 AM, you pop in a fresh one and keep going. Scopes with built-in proprietary batteries leave you stuck if the charge runs out. Pixfra models offer battery life ranging from approximately 4.5 hours to 15 hours depending on the device, and many use standard 18650 batteries that are easy to find and replace.
Durability is another area where cutting corners will burn you. Your thermal scope is going to get rained on, bounced around in a truck, and exposed to dust, humidity, and temperature swings. Look for a scope with a solid IP (Ingress Protection) rating — IP67 or better means it’s sealed against dust and water. Recoil resistance is equally easy to overlook. Every thermal scope has a recoil rating that tells you the maximum caliber it can handle without losing zero or suffering internal damage. Most quality scopes are rated for recoil equivalent to a .375 H&H or 12-gauge shotgun. If you’re running a big-bore rifle, double-check that the scope can take the punishment. A scope that can’t handle your caliber will shift zero or, worse, break internally — and you won’t know until you miss an animal in the dark.
How to skip the Zeroing and Setup Learning Curve
You’d be surprised how many first-time buyers spend weeks researching the perfect thermal scope, drop serious money on it, and then show up to the range with no idea how to zero it. Zeroing a thermal scope is not the same as zeroing a traditional daytime optic. The process is different, the targets are different, and even the direction you move the reticle can catch you off guard.

Most thermal scopes adjust by moving a digital reticle across the display rather than shifting internal erector tubes like a glass optic. That means when your shot hits low and left, you move the reticle down and left to meet the impact — the opposite of what most rifle shooters are trained to do. If you don’t understand that before you get to the range, you’ll burn through ammo chasing your shots in the wrong direction. We wrote a full breakdown of the 5 common zeroing mistakes that covers this in detail, along with target selection, proper bench setup, and confirming your zero with a shot group. Modern Pixfra scopes with one-shot zero and freeze-frame functions make the process faster — fire one shot, freeze the display, drag the reticle to the impact point, save, and confirm with 2–3 follow-up shots.
Beyond zeroing, think about the full setup before you buy. You’ll need quality rings or a mount, torqued to spec (typically 15–20 inch-pounds for most thermal scopes). You might need a Picatinny rail adapter. You may want an external battery pack for extended hunts, a carry case for transport, or a handheld thermal monocular for scanning before you shoulder the rifle. All of this factors into your total cost of ownership. If you spend your entire budget on the scope itself and have nothing left for a proper mount or accessories, you’re setting yourself up for frustration. Plan your total kit, not just the scope, and factor in a trip to the range before your first real hunt so you can zero with confidence and learn the scope’s menu system, color palettes, and recording features while there’s no pressure.
Quick-Reference: What to Check Before You Buy
Here’s a summary table you can save to your phone and use when you’re comparing models:
| Factor | What to Look For | Why It Matters |
|---|---|---|
| Sensor Resolution | 384×288 minimum; 640×512 for long range | Higher pixel count = sharper image and better detail at distance |
| NETD | ≤25 mK for all-weather hunting | Lower NETD = better contrast in fog, rain, and humidity |
| Pixel Pitch | 12µm for distance; 17µm for sensitivity | Affects magnification, sensitivity, and image quality balance |
| Objective Lens | 35mm+ for mid-range; 50mm+ for long range | Larger lens = more infrared energy collected = more real range |
| Refresh Rate | 50 Hz minimum | Smooth tracking of moving targets, less lag and eye fatigue |
| Battery Type | Removable 18650 preferred | Swap batteries in the field; longer total hunt time |
| IP Rating | IP67 or better | Dust-proof, waterproof — built for real field conditions |
| Recoil Rating | Rated for your caliber | Prevents scope damage and zero loss from heavy recoil |
| LRF / Ballistics | Built-in rangefinder for 200+ yard hunting | Removes distance guessing; enables precise holdover |
| Zeroing System | One-shot zero / freeze-frame | Speeds up sighting process; saves ammo and range time |
Frequently Asked Questions
What is the best sensor resolution for a first thermal scope?
We recommend starting with at least 384×288 resolution. At this level, you can detect and identify hog- or coyote-sized animals out to about 200–250 yards, which covers the majority of night hunting scenarios. Scopes with 256×192 sensors cost less but are really only practical for close-range work under 100 yards. If your budget allows it, 640×512 offers a clear step up in image detail and long-range performance. But 384×288 is a solid entry point that won’t leave you feeling limited on most hunts.
Do I need a laser rangefinder (LRF) on my thermal scope?
It depends on how far you’re shooting. For close-range setups — feeders, blinds, brush hunting inside 150 yards — you can estimate distance well enough without one. But for mid- to long-range predator hunting past 200 yards, knowing the exact distance changes everything. An integrated LRF takes the guesswork out of holdover and makes your first shot count. Pixfra models like the Chiron LRF and Taurus LRF pair the rangefinder with a built-in ballistic calculator, so the scope does the math for you.
How much should I spend on my first thermal scope?
Thermal scopes are a real investment. Entry-level models start around $1,000–$1,500 and can work fine for short-range hog hunting. Mid-range scopes in the $2,500–$4,000 bracket typically feature 384×288 sensors, solid NETD performance, and useful extras like recording and multiple reticle options. High-end models with 640×512 sensors, LRF, and ballistic calculators run $4,000–$6,000 or more. The best advice: set a realistic budget, buy the best scope you can within it, and don’t over-buy features you won’t use — but don’t under-buy on sensor quality either.
Can I use a thermal scope during the day?
Yes. Thermal scopes detect heat, not visible light, so they work 24/7. Many hunters actually prefer to zero their thermal scope during daylight hours because visibility, safety, and shooting conditions are better. Just make sure you use a thermal-contrast target (like a hand warmer behind a cardboard cutout), since standard paper bullseye targets won’t show up through a thermal display. And never point the thermal lens directly at the sun — direct sunlight can damage the sensor.
What’s the difference between a thermal scope and a thermal front attachment (clip-on)?
A dedicated thermal scope replaces your daytime optic entirely. It mounts directly to your rifle and handles everything — targeting, reticle, zoom, zeroing. A thermal front attachment, sometimes called a clip-on, mounts in front of your existing daytime scope and converts it into a thermal system. The advantage of a clip-on is that you keep your familiar daytime scope and reticle and only add the thermal layer when you need it. The trade-off is extra weight on the front of the rifle and a more complex setup. If you own multiple rifles and want to move one thermal device between them, a clip-on can be a smart choice. If you’re dedicating a rifle to night hunting, a standalone thermal scope is simpler and lighter.