You’re ready to step up your night hunting game with thermal technology, but now comes the big question: handheld or clip-on? Both options let you see heat signatures in complete darkness, but they serve different purposes and fit different hunting styles. Making the wrong choice means wasted money and frustration in the field.
We’ve tested thermal devices across hundreds of hunting sessions, and the answer isn’t always straightforward. Your choice depends on how you hunt, what you’re hunting, and whether you already own quality day optics. Let’s break down the real differences so you can make the right call.
What’s a Handheld Thermal Monocular?
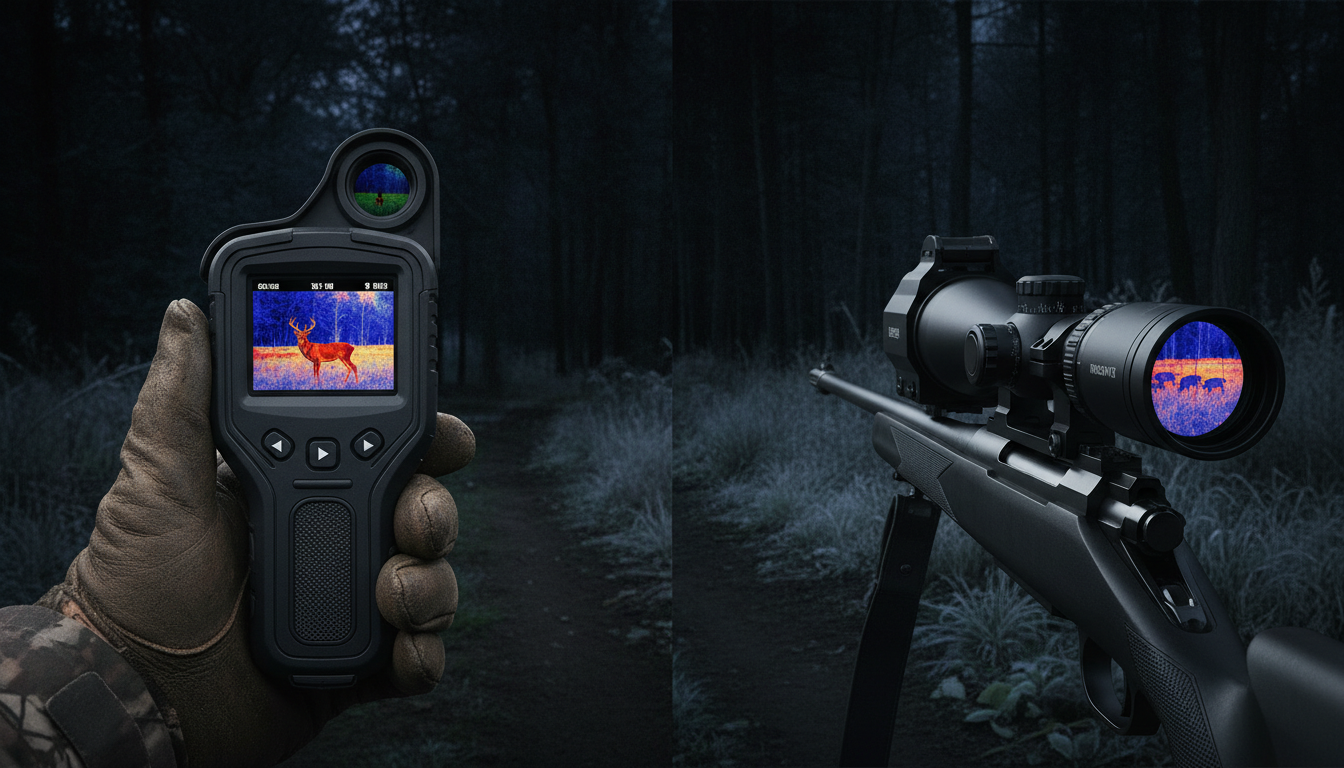
A handheld thermal monocular is a standalone scanning device that detects heat signatures through infrared technology. You hold it in your hand, scan your hunting area, spot your target, then switch to your rifle for the shot. These devices typically weigh 10-15 ounces and fit in your pocket or on a chest rig.
Think of it like thermal binoculars but designed for one-eye viewing. This design keeps your other eye adapted to darkness while you scan. Most handheld units today feature 384×288 or 640×480 resolution sensors, detection ranges from 400 to over 1,500 yards, and battery life between 5-10 hours.
Handheld monoculars work independently of your rifle setup. You can use them with any weapon system, whether it’s a bolt gun, AR platform, or shotgun. Many hunters keep one in their pack as a general-purpose scanning tool for scouting and detection work.
What’s a Clip-On Thermal Device?

A clip-on thermal device mounts in front of your existing daytime rifle scope, converting it into a thermal optic without changing your zero. The thermal sensor projects an image that you view through your day scope’s magnification and reticle. When you’re done hunting, you remove the clip-on and your rifle returns to normal daytime use.
Clip-ons attach using rail mounts or objective lens adapters. They work with most quality daytime scopes that have 24mm to 56mm objective lenses. You’ll need to perform a one-time collimation process to align the thermal image with your scope’s reticle, but after that, the zero holds when you remove and remount the device.
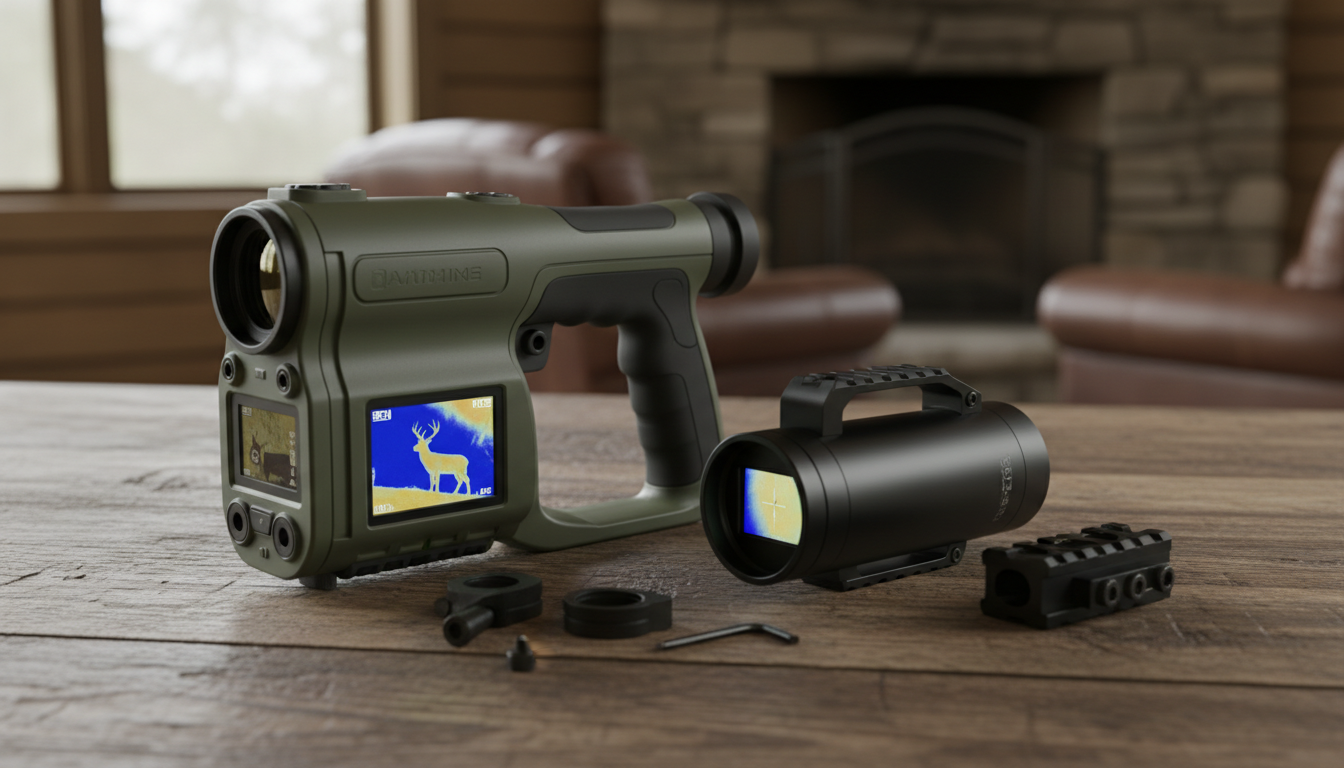
Some clip-on models can double as handheld scanners when not mounted to a rifle. You’ll need an optional eyepiece adapter for comfortable handheld viewing, but this dual-purpose capability gives you flexibility. Products like the Arc LRF offer this versatility.
Handheld Thermal Monoculars: The Pros
Handheld units give you the freedom to scan without pointing a firearm. This matters for safety and comfort. You can glass entire hillsides, check livestock, or monitor property lines without the weight and awkwardness of a rifle. Most hunting involves far more scanning than shooting—handhelds are built for this reality.
Weight and portability rank high among handheld advantages. A 12-ounce thermal monocular slips into a cargo pocket. Try that with a rifle-mounted system. You can scout on foot, climb into stands, or navigate thick brush without bulk. The Draco series exemplifies this compact approach.
Price typically favors handhelds at entry and mid-range levels. A quality 384×288 handheld costs $1,500-$2,500, while comparable clip-on models start around $2,000-$3,000. You’re paying for scanning capability only, not the additional engineering required for recoil resistance and precision collimation.
Battery life tends to run longer on handhelds. Without the need to power complex mounting systems or maintain perfect zero under recoil, these devices can operate 8-12 hours on a single charge. That covers multiple hunting sessions before you need to recharge.
Handheld Thermal Monoculars: The Cons
You can’t shoot through a handheld monocular. Once you spot game, you must set down the thermal, pick up your rifle, relocate your target through your day scope (or thermal rifle scope), and take the shot. In fast-paced predator hunting, this costs precious seconds. Coyotes don’t wait around.
Handheld devices require two separate pieces of gear. You need the thermal monocular plus a separate aiming system on your rifle—either traditional night vision, a dedicated thermal scope, or excellent low-light glass. This doubles your equipment investment if you’re building a complete night hunting system.
Juggling multiple devices in the field creates hassle. Hold the monocular in one hand, your rifle in the other, maybe a call or remote in a third hand you don’t have. Hunters working solo from ground positions feel this pain more than those shooting from blinds or with a partner.
Field of view limitations can frustrate scanning work. While many handhelds offer decent FOV for their sensor class, you’re still looking through one eye with no depth perception. Distances get tricky to judge without a built-in laser rangefinder, which adds cost.
Clip-On Thermal Devices: The Pros
Clip-ons preserve your existing scope setup and zero. If you’ve spent years learning your ballistics, drop, and windage with a particular day scope, a clip-on lets you apply all that knowledge at night. Your reticle, turrets, and parallax settings work exactly the same—just with a thermal image instead of visible light.
Switching between day and night hunting becomes fast and simple. Hunt the morning with your day scope, clip on the thermal unit for an evening predator stand, then remove it for the next day’s deer hunt. Your rifle never needs re-zeroing between modes. This flexibility appeals to hunters who don’t want multiple dedicated rifles.
Some clip-on models double as handheld spotters with an eyepiece adapter. You get two tools in one purchase. Scan from a distance like a handheld, then mount to your rifle when you’re ready to shoot. This dual functionality can justify the higher price tag.
Clip-ons can extend effective range by utilizing high-magnification day scopes. Pair a 640×480 clip-on with a quality 4-16x scope and you’ve got serious long-range capability. The day scope’s magnification multiplies the thermal sensor’s base performance.
Clip-On Thermal Devices: The Cons
Weight distribution gets front-heavy fast. A clip-on mounted ahead of your day scope adds 1-2 pounds to the front end of your rifle. This throws off balance and makes extended shooting sessions tiring. Chassis rifles handle this better than traditionally stocked guns.
Mounting complexity exceeds plug-and-play simplicity. You’ll need proper adapters matched to your scope’s objective diameter. Universal mounts often introduce movement and zero shift. Custom mounts from companies like Rusan cost extra but solve these problems. Budget time and money for getting the setup right.
Image quality depends on your day scope’s glass. The thermal image passes through your daytime scope’s lenses before reaching your eye. Budget day scopes with mediocre glass degrade the thermal image. You need quality host optics—think Nightforce, Vortex Razor, or Swarovski—to maximize clip-on performance.
Collimation requires patience and practice. Aligning a clip-on isn’t hard, but it’s not instant either. Moving your clip-on between rifles means re-collimating for each gun. Some hunters report POI shifts when switching between different magnification levels on variable scopes.
Price often exceeds equivalent handheld or dedicated thermal scopes. A mid-range clip-on runs $2,500-$4,000, while a similar-sensor handheld costs $1,500-$2,500 and a dedicated thermal scope might be $2,000-$3,000. You’re paying for the engineering required to maintain zero and work with existing optics.
Which One Matches Your Hunting Style?
Property owners checking fence lines, monitoring livestock, or doing general observation work benefit most from handhelds. You’re covering large areas, making quick assessments, and rarely taking shots. A lightweight scanning device beats rifle-mounted systems for this application. Detection matters more than precision aiming.
Predator callers working from setups with good visibility should consider handhelds paired with dedicated thermal rifle scopes or quality night vision. Scan with the handheld until you locate coyotes or hogs, set it down, then engage through your rifle-mounted optic. This two-device approach maximizes both scanning efficiency and shooting accuracy.
Long-range precision shooters who’ve invested heavily in quality day optics often prefer clip-ons. If you’ve got a $2,000 day scope with perfect zero and know your ballistics inside-out, a clip-on extends that setup into darkness. You maintain the shooting system you trust.
Hunters who transition between day and night hunting on the same trip lean toward clip-ons. Start your hunt in daylight, stay in the field through dusk, then continue after dark—all with one rifle setup. The ability to remove and remount without affecting zero makes this seamless.
Budget-conscious hunters starting from scratch often do better with a handheld monocular plus a lower-cost dedicated thermal scope. This combination costs less than a clip-on plus quality day scope, and you get better thermal performance for hunting. Save clip-ons for after you’ve established your primary night hunting system.
Real-World Performance: Detection vs. Recognition
Detection range tells you when the device picks up a heat signature. Recognition range tells you when you can identify what that signature actually is. The gap between these numbers can be huge—and it matters more with clip-ons.
A 384×288 handheld might detect a hog at 800 yards but only let you recognize it as a hog (versus a cow or deer) at 300 yards. That’s fine for scanning work. You spot heat, then investigate closer. Clip-ons face the same sensor limitations, but you’re also looking through your day scope’s magnification, which can introduce pixelation when you zoom in.
Resolution becomes the limiting factor. When you magnify a thermal image beyond the sensor’s native capability, you’re just making pixels bigger. A 640×480 clip-on handles more magnification than a 384×288 before the image degrades. Match your clip-on’s resolution to your day scope’s magnification range.
Most experienced hunters suggest keeping day scope magnification at 6x or lower when using clip-ons. Some high-end hunters run clip-ons with LPVOs (1-6x or 1-8x variable scopes) for close to medium range work. Going above 8-10x magnification requires 640-class sensors minimum to maintain usable image quality.
Weather affects both equally. Fog, heavy rain, and extreme temperature differences reduce thermal effectiveness across all device types. Handhelds might be easier to shield with your body, while clip-ons stay protected behind your scope caps until you’re ready to use them.
Price and Value Comparison
Entry-level thermal handhelds ($800-$1,500) offer 256×192 sensors and 300-400 yard detection. They work fine for close-range scanning and learning whether thermal technology fits your needs. Brands like AGM and ATN populate this segment. You’ll outgrow these quickly if serious hunting is your goal.
Mid-range handhelds ($1,500-$3,500) step up to 384×288 or 640×480 sensors with 800-1,200 yard detection. This range delivers serious scanning performance without premium pricing. Most hunters find their sweet spot here. Our Sirius HD falls into this category, balancing capability with affordability.
Premium handhelds ($3,500+) feature 640×480 or higher resolution, detection beyond 1,500 yards, and integrated laser rangefinders. They’re built for professional use or hunters who demand maximum capability. High-end Pulsar and InfiRay models dominate this space.
Clip-ons start higher. Basic models begin around $2,000 for 384×288 sensors. Mid-range options ($2,500-$4,500) offer 640×480 sensors with better sensitivity. Premium clip-ons exceed $6,000 and compete with military-grade equipment. The price reflects complex engineering for maintaining zero under recoil.
Don’t forget hidden costs. Clip-ons require quality day scopes to perform well—add $800-$2,000 for proper glass if you don’t already own it. Mounting systems cost $100-$400. Handhelds need separate aiming solutions, whether thermal scopes, night vision, or premium low-light optics.
Making Your Decision
Start by honestly assessing your current gear. Do you already own quality daytime scopes on rifles you love? A clip-on might make sense. Starting from scratch? A handheld plus dedicated thermal scope often delivers better value and performance.
Consider your typical hunting scenarios. Lots of scanning with occasional shots favors handhelds. Quick transitions from day to night hunting with one rifle favors clip-ons. Dedicated nighttime predator control with calling setups? Either works, but handhelds give you more flexibility.
Think about future expansion. Handhelds work with any rifle system you’ll ever own. Clip-ons lock you into specific scope mounting and magnification constraints. If you like changing rifle configurations, handhelds offer more freedom.
Budget realistically for the complete system. A $1,800 handheld monocular plus a $2,500 dedicated thermal scope gives you a capable two-device setup for $4,300. A $3,500 clip-on plus $1,500 day scope costs $5,000 and might deliver less thermal performance.
Some hunters eventually own both. Use a handheld for general scanning and property checks. Keep a clip-on on your precision rifle for situations where you need to leverage your long-range day scope setup. There’s no rule saying you must choose only one approach forever.
Conclusion
Handheld thermal monoculars excel at scanning, portability, and cost-effectiveness. They’re safer for general observation, lighter to carry, and simpler to use. The downside? You can’t shoot through them, and you’ll need a separate aiming solution on your rifle.
Clip-on thermal devices shine when you want to preserve your existing scope setup and zero. They’re ideal for hunters who transition between day and night with the same rifle. The tradeoffs include higher cost, front-heavy weight distribution, and mounting complexity.
Your hunting style dictates the right answer. Property surveillance and general scanning favor handhelds. Long-range precision work with quality day optics favors clip-ons. Budget-conscious hunters often do best with a handheld plus a mid-range dedicated thermal scope.
Before you buy, think through your typical hunting situations and complete system costs. Both technologies work—they just work best for different applications. Choose based on how you actually hunt, not how you imagine hunting in perfect conditions.