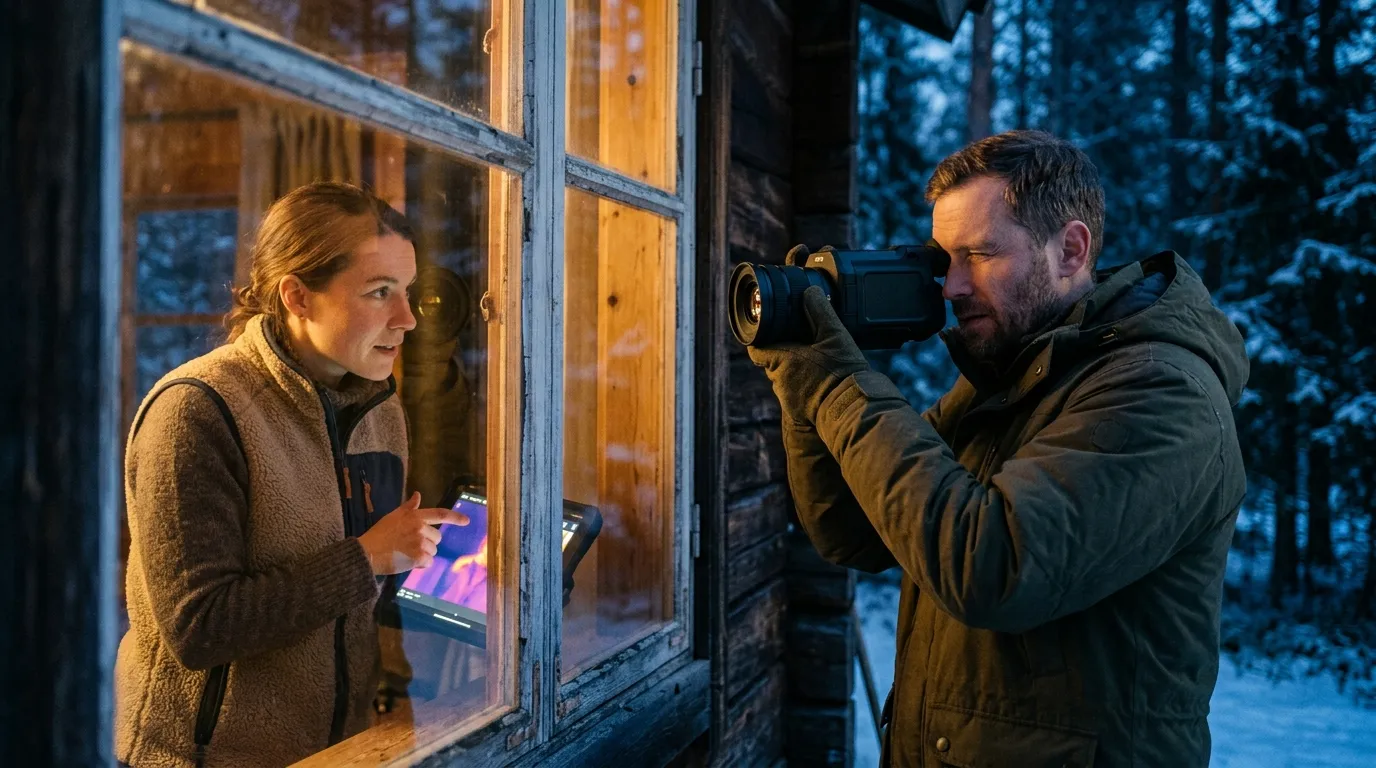
When someone goes missing in dense forest, heavy fog, or total darkness, every second counts. The best thermal devices for search and rescue operations give your team the ability to detect body heat through smoke, rain, foliage, and zero-light conditions — turning invisible heat signatures into clear, actionable images that save lives. At Pixfra, we build thermal monoculars, thermal scopes, thermal front attachments, and multispectral binoculars for exactly these kinds of high-stakes, real-world conditions.
Thermal imaging isn’t new to SAR teams, but the tech behind it has changed dramatically. Thermal imaging is deceptively simple yet profoundly effective. Unlike traditional cameras that capture visible light, thermal imagers detect infrared radiation — the heat emitted by all objects above absolute zero. An electronic sensor (thermal sensor, also known as a microbolometer) translates temperature differences between various surfaces into a visible image, displayed on a screen.

That means your thermal device doesn’t need moonlight, flashlights, or any ambient light to work. The most critical advantage of thermal imaging is its ability to penetrate smoke and darkness. Unlike night-vision cameras that require and amplify existing light, thermal imagers operate in zero-light and can cut through smoke, haze, and fog. For SAR teams working wildfire zones, collapsed buildings, or backcountry wilderness at 3 AM, that advantage is the difference between finding someone and walking right past them.
The use of thermal imaging cameras for search and rescue offers several real advantages: rapid identification of individuals (significantly reducing search times), enhanced situational awareness (helping teams assess surroundings and avoid hazards), non-intrusive searching (detecting heat without disturbing the environment), and increased success rates in locating missing persons. And this tech keeps getting more accessible. Handheld thermal imaging devices that can be purchased over the counter today make the early-2010s military equivalents look prehistoric in comparison. Image quality, detection range, and reliability have all improved massively — and the huge demand for thermal imaging from the outdoors and hunting market has partly driven that development.
At Pixfra, we’ve been part of that development. Our proprietary heat-detection technology is built into every device we ship. If you want to see what specs actually matter when you’re choosing a thermal device — whether for SAR, hunting, or outdoor use — check out our breakdown of the top 6 features needed in the best thermal device in 2026.
Not every thermal device on the market is built for the demands of search and rescue. Flashy spec sheets don’t always translate to real-world performance when you’re scanning a ridgeline in freezing rain at 2 AM. Here are the features that actually matter for SAR.
Thermal Sensitivity (NETD) is the single most telling spec on any thermal device used for SAR. It measures the smallest temperature difference the sensor can pick up, stated in millikelvins (mK). A lower NETD means your device can separate a person’s body heat from a warm background — like sun-heated rocks or pavement — with greater clarity. Our Pixfra devices hit NETD values of ≤18mK, which places them at the high end of thermal sensitivity for outdoor-grade optics. That kind of sensitivity means you’re not squinting at vague blobs — you’re seeing defined human outlines, even when fog, humidity, or rain flatten the thermal contrast around you.
Sensor Resolution is the other half of image quality. Resolution tells you how many pixels the thermal sensor uses to build the image you see. Common options run from 256×192 on entry-level devices to 384×288 and 640×512 on mid-range and premium models. For SAR, higher resolution means you can tell the difference between a person and a rock or stump at longer distances. We pair our sensors with 12μm pixel pitch technology across the Pixfra lineup — from the Mile 2 series for everyday fieldwork to the Sirius HD series for professional-grade long-range detection — so you get sharp, high-contrast images no matter which model you pick.
Detection Range matters a lot when you’re covering large search grids. Our Pixfra lineup covers a wide spectrum — entry-level devices start around 500 meters of detection range, while our premium Sirius HD series pushes out to 3,600 meters. But here’s something many first-time buyers miss: detection range and identification range are two different numbers. A device might detect a heat source at 1,500 meters, but you won’t be able to confirm whether it’s a person, an animal, or a warm rock until you’re much closer. For SAR, always ask about both figures before you commit.
There’s a reason experienced SAR operators obsess over battery life — because a dead device in the middle of a search is worse than no device at all. Thermal devices eat power, especially at higher refresh rates and brightness levels. If you’re running an all-night search or a multi-day backcountry mission, you need a device that keeps up with you.

Our Pixfra devices range from about 4.5 hours to 15 hours of battery life depending on the model and usage conditions. Many of our models run on standard 18650 batteries that you can swap in seconds. That’s a design choice we made on purpose. Proprietary internal batteries save a little weight, but when your power dies in the field, being able to pop in a fresh 18650 from your pocket is worth everything. And here’s a field tip from our own team: cold weather can cut battery performance by 30–50%. Always carry spares in an inside pocket where body heat keeps them ready.
Here’s a quick reference for how battery life should match your SAR scenario:
| SAR Use Case | Minimum Battery Life | Recommended Battery Type |
|---|---|---|
| Short-duration urban search (2–3 hrs) | 4–5 hours | Internal rechargeable |
| All-night wilderness SAR | 8–10 hours | Swappable 18650 |
| Multi-day backcountry operations | 10–15 hours | Swappable + spares |
| Property/perimeter security patrols | 6–8 hours | Rechargeable w/ quick charge |
| Disaster response (flood, earthquake) | 8–12 hours | Swappable 18650 |
Now let’s talk durability. Your SAR thermal device is going to get dropped, rained on, smashed into a pack, and dragged through mud. If it can’t take that kind of punishment, the image quality doesn’t matter. Look for an IP67 rating — that’s the standard in 2026 for any thermal device that sees real field use. IP67 means the device is fully sealed against dust and can survive being submerged in up to one meter of water for 30 minutes. Some budget devices carry only IP54, which handles splashes but won’t survive a real dunk. If your team works in rain, crosses streams, or operates in dusty post-disaster environments, IP67 is non-negotiable. At Pixfra, we build every device for the same conditions we test them in — heavy recoil on our scopes, drop resistance on our monoculars, and corrosion-resistant housings that hold up over years of hard use.
Weight plays a role here too. Fatigue is a silent enemy in rescue operations. Weighing less than 260g, a quality handheld thermal device allows officers to carry it on a lanyard or belt without adding significant bulk. Our Draco series, for example, was designed with a lightweight build specifically for users who need multi-functional performance without the extra weight slowing them down during long search operations.
The best thermal devices for search and rescue operations in 2026 don’t just show you a heat picture — they connect to your phone, record video, stream live footage to a command post, and update firmware over the air. These aren’t gimmicks. In SAR, the ability to share a live thermal feed with an incident commander can change how your entire team deploys in real time.
Our Pixfra Outdoor App supports all current models — Sirius, Arc LRF, Mile 2, Pegasus Pro, Chiron LRF, Taurus, and Taurus LRF. Through the app, you can update firmware, adjust device settings, transfer images and video directly to a smartphone, and share thermal data with your team. That kind of connectivity is a practical tool for documenting search areas, coordinating with other SAR units, or keeping records that help refine future operations.
Color palettes are another smart feature that experienced SAR operators rely on. White Hot is the most common mode and works well for general scanning — heat sources show up white against a darker background. Black Hot reverses that contrast and is often preferred for picking out body-level detail. Red Hot highlights the warmest areas in red, which is great for quickly picking out a human heat signature in a complex scene. Iron Bow and Rainbow use a color spectrum to show temperature gradients, which can help you read terrain or spot heat anomalies during disaster response. Being able to switch palettes on the fly means you can adapt your display to the terrain, weather, and lighting conditions you’re working in — without affecting the detection ability of the device itself.
Refresh rate matters too. A 50Hz refresh rate is the baseline for any SAR-grade thermal device in 2026. That rate gives you smooth, fluid imagery so you can track a moving person — someone stumbling through brush, wading through water, or signaling from a ridgeline — without blur or stutter. Anything below 30Hz will give you choppy, hard-to-read imagery that slows down your search. All Pixfra devices are built with high refresh rates across the board because in the field, smooth imaging isn’t optional.
Our Volans series also stands out for SAR teams that operate around the clock. It features an adjustable aperture from F1.2 to F3.0 that adapts to different lighting conditions, making it one of the few thermal devices on the market that works just as well in broad daylight as it does in pitch darkness. That kind of all-day capability means your team carries one device instead of juggling two.
We build thermal devices for real outdoor conditions — not spec-sheet competitions. Every Pixfra product is engineered around the six features that separate a great thermal device from one that’ll let you down when conditions get ugly: high thermal sensitivity (≤18mK NETD), resolution matched to your use case, reliable detection range with integrated laser rangefinder options, a battery system that outlasts your mission, rugged IP67 construction, and smart features that keep you connected and in control.

For SAR teams that need a laser rangefinder, our models with “LRF” in their names — like the Arc LRF, Chiron LRF, and Taurus LRF — feature integrated laser rangefinders with 1,000-meter range capability. Paired with the built-in ballistic calculators found in models like the Chiron LRF and Taurus LRF, these devices give you precise distance data with the press of a button. In a SAR context, that means you can pinpoint a heat signature across a valley and relay exact coordinates to your ground team without guessing.
According to the U.S. Coast Guard Search and Rescue Statistics, there are over 15,000 reported cases per year in the United States alone. Nearly 86% result in lives saved. The gear your team carries directly affects whether that number goes up or down. Whether you’re a volunteer SAR unit, a fire department running wilderness rescues, a law enforcement agency deploying search teams, or a property manager monitoring large tracts of rural land, having the right thermal device makes a measurable difference in outcomes.
The most critical factor is time sensitivity. In SAR, the “Golden Hour” is a harsh reality — the faster a team can locate a subject, the higher the chance of survival. Delays caused by poor visibility can have tragic consequences. A thermal device with strong NETD, solid detection range, reliable battery life, and rugged build quality is the single best tool you can put in the hands of a SAR responder to beat that clock.
Can you use thermal devices for search and rescue during the day?
Yes. Thermal devices detect heat, not light, so they work just as well during the day as they do at night. Our Pixfra Volans series takes this a step further with all-day vision capability and an adjustable aperture (F1.2–F3.0) that adapts to changing light conditions, making it a strong pick for SAR teams that need 24-hour coverage from a single device.
What NETD rating should a SAR thermal device have?
For search and rescue, you want an NETD of ≤25mK or lower. A device with ≤18mK — like our Pixfra thermal devices — can pick up tiny temperature differences, giving you a clear, detailed image even in heavy fog, rain, or complete darkness where the thermal contrast between a person and their surroundings gets razor-thin.
How does weather affect thermal imaging in SAR operations?
Weather conditions can impact thermal imaging devices. Rain, fog, and snow can reduce their effectiveness. High humidity and extreme temperatures can also interfere with heat detection. Wind can cool surfaces, making thermal signatures less distinct. That said, quality devices with low NETD and high-resolution sensors still perform well in most real-world SAR conditions where traditional visual methods completely fail.
What IP rating do I need for a SAR thermal device?
For any real SAR fieldwork, you need at least IP67. That means full dust sealing and protection against temporary water submersion — covering rain, stream crossings, snow, and accidental drops into puddles. Anything below IP67 puts your gear at risk when conditions get rough, which is basically every SAR mission.
How long does a thermal device battery need to last for SAR?
It depends on your mission type. For short urban searches, 4–5 hours works. For all-night wilderness SAR, target 8–10 hours minimum. Our Pixfra devices range from about 4.5 to 15 hours depending on the model. For extended missions, look for models with swappable 18650 batteries so you can carry spares and swap without downtime — because a dead device in the middle of a search is the last thing any team needs.
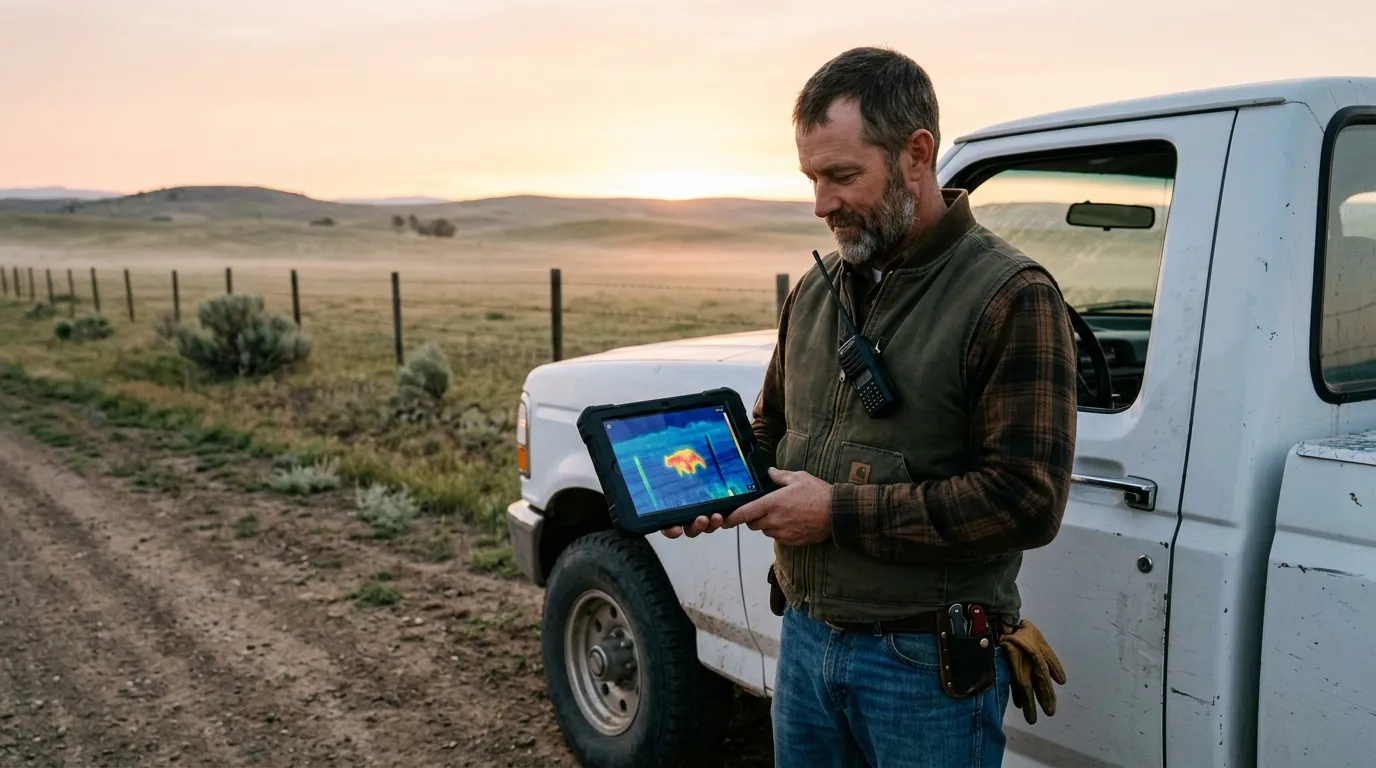
If you run a farm or ranch, you already know that losing even a handful of calves or lambs to predators can wipe out your margins for the season. And most of that damage happens at night, when you’re blind to it. We built this case study at Pixfra to show you — with real numbers — how a thermal monocular pays for itself on a working farm, often in just one season.
Thermal monoculars used to be gear only military operators and big-budget hunters could afford. That’s not the case anymore. As thermal technology becomes more affordable and accessible, more people are discovering just how useful these tools are in everyday life. And farms are one of the places where they make the biggest financial dent.

Farmers and ranchers have dozens of uses for thermal monoculars that save time and prevent losses. You can check on animals at night without disturbing the herd, spot a cow that’s separated from the group, or find one lying down when she shouldn’t be. You can scan fence lines for breaks, catch trespassers before they steal equipment, and spot coyotes stalking your calving pasture — all without a flashlight that gives your position away. Farmers use them to monitor livestock at night or detect predators around barns and fields.
If you’ve been looking at the top features in the best thermal devices for 2026, you already know how much the technology has improved. Sensor resolution that used to cost $5,000+ is now in mid-range devices. NETD sensitivity has gotten sharp enough to pick up a sick calf’s fever from across a pasture. The gear has caught up with what farmers actually need — and the ROI case has never been stronger.
Let’s talk about the money you’re already losing without thermal imaging on your operation. The numbers are eye-opening.
Livestock losses attributed to predators cost U.S. ranchers and producers more than $71 million annually, according to statistics compiled by the USDA’s National Agricultural Statistics Service (NASS). And those are just the reported, confirmed predator kills. The real number is almost certainly higher because many losses go undetected or get logged as “unknown cause.” Coyotes accounted for the highest percentage of cattle deaths due to predators (40.5 percent). Coyotes accounted for the highest percentage of calf deaths due to predators (53.1 percent). In sheep and goat operations, the picture is even worse — losses due to predators accounted for 31 percent of all sheep and lamb deaths in a recent Idaho survey.
Here’s where a thermal monocular changes the math. The economic benefits of protecting your livestock from coyote attacks are significant — with a thermal imager, you not only ensure the safety of your animals but also save money in the long run. When you can spot a coyote or feral dog at 500-1,000 meters in pitch darkness, you stop the attack before it happens. You don’t find a dead calf in the morning — you prevent the dead calf entirely. And for every Federal dollar spent on predation management, $10.88 in livestock is saved. That ratio tells you everything about the value of proactive predator control versus reactive cleanup.
The bottom line is straightforward. If you run cattle, sheep, goats, or poultry, predator pressure is a guaranteed annual expense. A single thermal monocular priced between $500 and $2,000 can prevent losses worth multiples of that cost in year one alone. We’ll walk through the exact math below.
Let’s put real numbers on this. We’ll model a 200-head cow-calf operation in Texas hill country — a common operation size and a region where coyote and feral hog pressure is constant.

The Problem: This rancher was losing an average of 6 calves per year to predators, plus 2-3 calves to illness that went undetected because nighttime checks were too slow or skipped altogether. At a market value of roughly $800-$1,200 per calf, that’s $6,400-$10,800 walking out the pasture gate every year. Add in fence damage from feral hogs and the labor hours spent on daylight-only patrols, and the total annual cost easily topped $12,000.
The Investment: One Pixfra thermal monocular (the Arc LRF, with integrated laser rangefinder and 1,000-meter range), plus a spare set of 18650 batteries. Total cost: under $2,000. No subscription fees, no monthly service charges, no installation crew.
The Results After One Year:
| Category | Before Thermal | After Thermal | Annual Savings |
|---|---|---|---|
| Calves lost to predators | 6 head ($7,200) | 1 head ($1,200) | $6,000 |
| Calves lost to undetected illness | 3 head ($3,600) | 1 head ($1,200) | $2,400 |
| Fence & crop damage (hogs) | $2,500 | $800 | $1,700 |
| Labor hours on night patrols | 300 hrs/yr | 120 hrs/yr | 180 hrs saved |
| Total savings | ~$10,100 |
That’s roughly a 5:1 return on a one-time purchase in year one. And because a well-built thermal monocular lasts for years, the ROI only compounds from there. With system costs ranging from $500 for basic devices to $25,000+ for advanced setups, ROI is typically achieved within 12-18 months across agricultural thermal applications, according to industry data. On a livestock operation with active predator pressure, payback can happen even faster.
With lane-side or parlor-side scans, you can identify potential fevers 24–48 hours before clinical signs — and that window is where the money is saved: early treatment, fewer pen-wide protocols, less production loss. The ROI doesn’t come from one flashy feature. It stacks up across every nightly use — predator spotting, health monitoring, hog control, security sweeps, calving checks, and more.
So what does a night on the farm look like with a thermal monocular in your hand? It’s simpler than you’d think, and way faster than a flashlight-and-truck patrol.

Predator control and livestock security are the top use cases. For farmers, thermal monoculars are the ultimate tool for finding coyotes and wild boars You step onto your porch or drive to a high point on the property, power on the monocular, and scan your pastures. Every warm body — cattle, deer, coyotes, hogs, trespassers — pops up as a bright heat signature against the cooler ground. You can tell the difference between a bedded cow and a moving predator in seconds. You can quickly verify the location and count of your cattle or sheep across vast paddocks even on the darkest night, and flag a potential issue like mastitis, lameness, or fever in an animal from a distance.
Nighttime livestock health checks are the second big win. The smallest changes in body temperature can be an indication of developing diseases and enable immediate intervention. Instead of walking into the calving pasture with a spotlight — which stresses the herd and takes 45 minutes — you scan from the truck or fence line. A cow in active labor shows up clearly. A calf that’s down and cooling off shows up differently from a healthy calf lying next to its mother. You see problems early, intervene early, and save animals you’d have lost if you waited until dawn.
Feral hog detection and property security round out the daily use. Hogs do most of their damage between 10 PM and 4 AM. Without thermal, you’re guessing where they hit. With thermal, you’re watching them in real time and can respond — whether that means calling a trapper, setting up for a shot, or simply knowing which pasture they’re tearing up so you can move livestock away from the damage zone. Many property owners use thermal monoculars to check fence lines, outbuildings, and perimeters without walking the entire area — you can cover large spaces quickly from a single vantage point, making rounds faster and safer.
Not every thermal monocular is built for farm work. Some are overkill. Others are underpowered. Here’s what to look for when you’re buying one specifically for agricultural ROI.
Thermal sensitivity (NETD) is the spec that tells you how much detail you’ll see. Lower NETD means the sensor picks up smaller temperature differences. Our Pixfra devices achieve NETD values of ≤18mK — that’s sensitive enough to spot a sick animal running a low-grade fever from the other side of a pasture, even on a warm night. For farmers, field of view and image clarity will likely be the most critical features for target acquisition at night.
Detection range determines how far out you can spot a heat signature. Our Pixfra lineup covers detection ranges from around 500 meters for entry-level devices all the way up to 3,600 meters for premium models like the Sirius HD series. For most farm operations, a mid-range model with 1,000-1,500 meter detection is the sweet spot. That lets you scan a full section of pasture from one high point.
Battery life matters more than most farmers expect. You might check pastures twice a night during calving season, or sit over a hog-damaged field for hours. Our Pixfra devices range from approximately 4.5 hours to 15 hours of battery life depending on the model and usage conditions. Many of our models use standard 18650 batteries that you can swap in seconds, so you never get stuck in the dark with a dead device.
Durability is non-negotiable on a farm. Your thermal monocular will ride in a truck, get rained on, bounce around in a UTV, and get used in every weather condition from August heat to January ice. Look for IP67 weather resistance at a minimum — that means the device is fully dust-sealed and can handle temporary water submersion. Our Pixfra devices are built to handle heavy recoil, drops, and corrosion over years of use. The Draco series is built with a lightweight design specifically for users who need multi-functional performance without the bulk.
Smart features and connectivity tie it all together. The Pixfra Outdoor App supports all our current models — Sirius, Arc LRF, Mile 2, Pegasus Pro, Chiron LRF, Taurus, and Taurus LRF series. Through the app, you can update firmware, adjust settings, transfer images and video to your phone, and share scouting data. For a farm manager who wants to document predator activity, record evidence for wildlife services, or share nightly scan results with a ranch hand, app connectivity is a real working tool — not a gimmick.
Not every operation needs the same thermal monocular. Here’s a quick guide to matching the right Pixfra device to the size and type of your farm.
| Farm Type | Best Pixfra Fit | Why It Works |
|---|---|---|
| Small homestead (under 100 acres) | Mile 2 series | Pocket-sized, easy to use, great for short-range livestock checks |
| Mid-size ranch (100-500 acres) | Arc LRF | Integrated laser rangefinder, 1,000m range, replaceable batteries |
| Large cattle operation (500+ acres) | Sirius HD series | Up to 3,600m detection range, professional-grade NETD ≤18mK |
| Mixed livestock & crop farm | Volans series | All-day vision with adjustable aperture (F1.2 to F3.0) — works from dawn through darkness |
| Active predator control | Chiron LRF + thermal scope | Ballistic calculator and LRF for accurate shot placement at night |
The Arc LRF is the workhorse for most mid-size operations. It gives you laser rangefinding and thermal detection in one handheld device with swappable 18650 batteries — exactly what you need for nightly pasture sweeps and predator patrols. For operations where you also need daytime thermal capability, the Volans series stands out with its all-day vision and adjustable aperture that adapts to changing light conditions, making it one of the few thermal devices that performs just as well in broad daylight as in total darkness.

If you’re running cattle across large acreage and need to scan from a mile away, the Sirius HD series gives you the detection range to glass entire valleys and ridge lines from a single position. And for active predator control — where you’re taking shots beyond 150 yards at night — the Chiron LRF and Taurus LRF models feature integrated ballistic calculators that compute bullet drop and give you an adjusted aiming point on the fly. That’s the difference between a clean shot and a miss in the dark.
How fast does a thermal monocular pay for itself on a farm?
For most livestock operations with active predator pressure, a thermal monocular pays for itself in one season or less. Even preventing 2-3 calf losses at $800-$1,200 per head covers the cost of a mid-range device. For a mid-sized dairy operation, implementing a mid-range system often achieves ROI within 12-18 months. When you add in the labor savings from faster nightly checks and fewer emergency vet calls, the payback window shrinks even further.
Can a thermal monocular really detect a sick animal before symptoms show?
Yes. With non-invasive, real-time data, farmers can detect fever 24–48 hours earlier. Thermal sensors pick up surface temperature changes caused by fever, inflammation, mastitis, or lameness — often before the animal shows visible signs. Especially in the field of animal breeding, monitoring the state of health is where even the smallest changes in body temperature can be an indication of developing diseases and enable immediate intervention.
Do thermal monoculars work in all weather?
They do. Thermal devices detect heat, not light, so rain, fog, darkness, and dust don’t stop them the way they stop regular cameras or night vision. For farm use, look for an IP67 rating — that means full dust sealing and water submersion protection. Many thermal monoculars are designed to be weather-resistant, making them suitable for outdoor use in various conditions.
What’s the best thermal monocular for farmers on a budget?
If you’re under $1,000, focus on a device with at least 256×192 sensor resolution, ≤25mK NETD, and a solid battery life of 6+ hours. Our Pixfra Mile 2 series gives you pocket-size portability with model options up to 640×512 resolution. If you can stretch the budget, the Arc LRF adds a laser rangefinder — which is a real advantage when you’re trying to range a coyote across a dark pasture.
Is a thermal monocular legal for predator control?
Thermal monoculars are legal for hunting in most U.S. states, but some states restrict their use for specific species or on public land. For on-property predator control, thermal is legal and widely used. Always check your state’s specific regulations, especially if you’re using a weapon-mounted thermal scope versus a handheld monocular — a few jurisdictions draw a distinction between handheld thermal devices and weapon-mounted thermal optics, applying different rules to each.
Energy bills in the U.S. are climbing fast, and most homeowners have no idea where their money is actually going. We’re Pixfra — we build thermal monoculars, thermal scopes, and thermal front attachments for outdoor and professional use — and we’ve seen firsthand how thermal imaging changes the game when you point it at the right problem.
Here’s something that catches people off guard: the average American household now spends roughly $163 per month on electricity alone. The average monthly electric bill in the U.S. is $163 as of June 2026, based on an average residential electricity rate of 18.05¢/kWh and average monthly consumption of 903 kWh. And that number has been on a steep upward curve. The average American electric bill has risen 26% over five years — from $129/month in 2022 to $163/month in 2026. When you layer in gas and water costs, the average U.S. household utility bill is $610 per month. Those numbers add up to thousands of dollars every year — and a big chunk of it is wasted energy you never even see leaving your home.

So where does all that wasted energy go? Through your walls, your windows, your attic, and every tiny gap and crack you didn’t know existed. Heat loss can account for up to 50% of total energy consumption in a building with causes ranging from air leakage through chimneys, attics and wall vents to badly sealed doorways and failing argon gas windows to missing insulation. The thing is, you can’t feel a cold spot behind a wall or see warm air slipping through a gap in your attic floor. That’s where a thermal device steps in.
At Pixfra, we’ve built our reputation on proprietary heat-detection technology that picks up minute temperature differences with real precision. And while most folks know us for outdoor hunting and wildlife observation gear, the same infrared tech that helps you spot a deer at 3,600 meters works just as well to spot a $5,000 energy leak in your home. Our devices achieve NETD values of ≤18mK, which means they can detect incredibly small temperature variations — the exact kind that reveal where your heating and cooling dollars are disappearing. If you want to dig into what separates a quality thermal device from a mediocre one, check out the top 6 features needed in the best thermal device in 2026 — it breaks down everything from sensor resolution to battery life.
Let’s get into the real-world story. A property owner in the upper Midwest — we’ll call him Dave — was spending over $2,400 every winter on heating alone. That tracks with national data. Home heating costs will rise 7.6% this winter, with the average seasonal bill increasing from $907 to $976, according to the National Energy Assistance Directors Association (NEADA). But Dave’s bills were nearly triple the national average because of the age and size of his property — a two-story farmhouse built in the 1970s with an attached workshop. He’d tried the usual fixes: new thermostat, caulking around obvious window gaps, even upgraded his furnace two years prior. His bills barely budged.
Dave borrowed a Pixfra thermal monocular from a friend who used it for hunting. On a cold January night, with a 25°F temperature difference between indoors and outdoors, he walked the interior and exterior of his house, scanning walls, windows, ceilings, and doors. What he saw on the screen told a story his eyes never could. The thermal device lit up massive cold zones across the entire north-facing wall of his second floor — a clear sign that the wall insulation had either shifted, settled, or was never properly installed. His attic hatch showed a bright ring of heat escaping around the frame. Two basement rim joist sections radiated heat like open windows. And three of his older double-hung windows showed significant thermal bridging at the frames — not at the glass, but at the edges where the seals had failed.
The total estimated annual energy loss from those combined issues? Just over $5,000 — calculated based on his HVAC runtime, fuel consumption, and the square footage of exposed, uninsulated, or poorly sealed surface area. Dave prioritized the fixes: blown-in insulation for the north wall, a sealed and insulated attic hatch cover, spray foam on the rim joists, and weatherstripping on the three worst windows. Total repair cost came in under $3,200. Within one heating season, his monthly gas bill dropped by about 30%, and his annual energy spend fell by over $5,000 compared to the two-year average before the thermal scan. In most documented cases, thermal audits lead to 10–30% energy savings depending on the building’s initial inefficiency levels.
Most people try to fix energy problems by feel — literally. You hold your hand near a window, feel a draft, and slap on some caulk. That’s not wrong, but it’s wildly incomplete. If the air is cold enough outside and a leak by a door or window is large enough, you can easily feel the air leak with your hand, however, it is not feasible with problems hidden inside a wall or ceiling. The real energy thieves — missing insulation behind drywall, thermal bridges at framing joints, failed seals in places you’d never think to check — are invisible without the right tool.

A thermal device works by capturing infrared radiation emitted by surfaces and turning it into a color-coded visual image. Thermal imaging is a non-invasive technology that uses infrared cameras to detect temperature differences in objects and surfaces. These cameras capture the infrared radiation emitted by an object, converting it into a visual image called a thermogram. Warmer areas show up as reds and yellows, while cooler areas appear in blues and purples. When you scan a wall from the inside during winter and see a cold blue patch in the middle of a warm surface, you know exactly where insulation is missing or damaged. No guesswork. No tearing open walls to look.
This is what separates thermal imaging from a standard home energy audit. Traditional inspections rely a lot on visual checks and general airflow measurements. Traditional audits may guess where energy loss is happening — thermal imaging proves it visually. A thermal device gives you a precise, location-specific heat map of your entire property in minutes. That precision translates directly to smarter, cheaper repairs — because you’re only fixing what actually needs fixing instead of re-insulating an entire house on a hunch.
Research backs this up. In one study, householders who received a thermal image reduced their energy use at a 1-year follow-up, whereas householders who received a carbon footprint audit and a non-intervention control demonstrated no change. In a separate study, householders were nearly 5 times more likely to install draught proofing measures after seeing a thermal image. Seeing heat escape with your own eyes changes how fast you act on it — and how much money you save.
Let’s put some hard numbers on this. The table below shows what different types of thermal inefficiencies can cost the average homeowner annually and what it typically costs to fix them once a thermal device has identified the problem.
| Problem Identified by Thermal Device | Estimated Annual Energy Cost | Typical Fix Cost | Payback Period |
|---|---|---|---|
| Missing attic insulation | $600 – $1,200 | $1,000 – $2,500 | 1 – 2 years |
| Failed window seals / thermal bridging | $300 – $800 | $150 – $600 | Under 1 year |
| Unsealed rim joists | $400 – $900 | $200 – $500 | Under 1 year |
| Air leaks around doors and outlets | $200 – $500 | $50 – $200 | Months |
| Ductwork leaks in unconditioned spaces | $500 – $1,100 | $300 – $1,000 | 1 – 2 years |
| Wall insulation voids or settling | $500 – $1,500 | $800 – $3,000 | 1 – 3 years |
When you stack a few of these problems together — which most older homes absolutely have — it’s easy to hit $5,000 or more in annual wasted energy. Simply sealing in gaps within common problem areas can save up to 20% annually on energy bills. The thermal device is what turns that vague possibility into a specific action plan with clear ROI.
And here’s the thing about older homes — older homes often have poor insulation and inefficient appliances, increasing bills 20–40%. If you’re living in a house built before the 1990s, there is almost certainly hidden energy loss happening right now that a thermal device would show you in seconds.
Not every thermal device is built the same, and what works for a quick peek at your front door won’t necessarily cut it for a full property scan. Here’s what matters when you’re shopping for a device you can trust for energy loss detection.

Thermal sensitivity — measured as NETD — is the single biggest factor. A lower NETD number means the device can pick up smaller temperature differences. Our Pixfra devices achieve ≤18mK, which is at the top end for outdoor-grade optics. That kind of sensitivity means you’ll see the subtle 1–2°F temperature gradients that reveal insulation gaps, not just the obvious cold spots around a broken window. For anyone doing energy work, an NETD below 25mK is the minimum you should accept, and below 18mK is where you start catching things that most devices miss entirely.
Sensor resolution is the other half of the equation. Higher resolution means sharper images and the ability to identify smaller problem areas from farther away. At Pixfra, we pair our sensors with 12μm pixel pitch technology across the lineup, from entry-level monoculars to the Sirius HD series, so the image quality stays sharp regardless of which model you pick. Multiple color palettes — like White Hot, Black Hot, Red Hot, Iron Bow, and Rainbow — let you switch your display mode to best match the type of scan you’re doing. White Hot is great for general detection in open spaces, while Iron Bow and Rainbow use a full color spectrum to show temperature gradients, which is exactly what you want for spotting heat leaks on a wall.
Battery life also matters more than people realize. If you’re scanning an entire property — interior and exterior — you need a device that won’t die halfway through. Our Pixfra devices range from about 4.5 hours to 15 hours of runtime depending on the model, and many use swappable 18650 batteries so you can keep going without waiting for a recharge. Combine that with IP67-rated weather resistance, and you’ve got a tool that works as well in a rainy November inspection as it does on a clear January night.
You don’t need to be a certified energy auditor to get real results from a thermal device. Here’s the straightforward process anyone can follow.

Pick the right conditions first. The most accurate thermographic images usually occur when there is a large temperature difference (at least 20°F [14°C]) between inside and outside air temperatures. Winter evenings are ideal for most of the U.S. Turn your heating system on and let the house warm up for at least two hours before scanning. Close all windows and exterior doors. Move furniture away from exterior walls so the thermal device has a clear line of sight.
Start inside. Scan every exterior wall slowly, paying attention to corners, outlets, window frames, and where walls meet ceilings or floors. Thermal imagers excel in pinpointing areas of energy loss, such as gaps in insulation or faulty seals. Mark any blue or purple cold spots that shouldn’t be there. Then move to the attic — scan the attic floor and hatch for heat escaping from below. Check the basement, especially the rim joists and any ductwork running through unheated spaces. Then go outside and scan the exterior walls and roof. Warm spots on the outside surface in winter mean heat is pouring through.
Document everything. A Pixfra device paired with the Pixfra Outdoor App lets you capture images and video directly to your smartphone, so you’ve got a visual record of every problem area. That record becomes your repair checklist — and later, your before-and-after proof that the fixes actually worked. Thermal imaging can also be used to validate the effectiveness of repairs and improvements such as caulking, filling voids with spray foam and adding insulation by performing a follow-up infrared inspection.
Can a thermal camera really save you money on energy bills?
Yes — and it’s not a small amount. Thermal cameras reveal hidden heat loss from insulation gaps, air leaks, and window seal failures that you’d never find with a visual inspection alone. Once you know exactly where the problems are, you can make targeted repairs that typically pay for themselves within one to two heating seasons. Simply sealing gaps within these issue areas can save the homeowner up to 20% annually on energy bills each year. For homes with multiple undetected issues, annual savings of $2,000 to $5,000 or more are realistic.
How much does a home energy audit with thermal imaging cost?
Professional energy audits that include thermal imaging typically run between $400 and $700. Lower-cost audits ($200–$400) are typically basic assessments with visual inspection and limited testing. Comprehensive audits ($400–$700) include full diagnostic testing with blower door, thermal imaging, combustion safety testing, and detailed written reports with cost-benefit analysis. But owning your own thermal device means you can scan your property whenever you want — before and after repairs, across seasons, and year after year — without paying for a professional each time.
What is the best time of year to use a thermal device for energy inspection?
Winter is the best season in most of the U.S. because the large temperature gap between your heated interior and the cold outdoors makes heat loss patterns show up clearly on the thermal image. In northern states, thermographic scans are generally done in the winter. In southern states, however, scans are usually conducted during warm weather with the air conditioner on. Evenings and early mornings provide the most stable conditions.
Do thermal devices work during the day for building inspections?
Absolutely. Thermal devices detect heat, not light, so they work 24 hours a day. Our Pixfra Volans series takes this a step further with all-day vision capability and an adjustable aperture from F1.2 to F3.0 to adapt to changing light conditions. That said, for building energy scans, nighttime or early morning tends to give cleaner results because there’s no solar radiation heating up exterior surfaces and masking the real thermal patterns underneath.
Where do most homes lose the most heat?
Air leakage accounts for 25–40% of heating and cooling energy loss in typical homes, making it the most common and impactful finding in energy audits. After air leaks, the biggest offenders are poorly insulated attics, walls with missing or settled insulation, old window seals, and leaky ductwork in unconditioned spaces. In a typical house, 20–30% of the air that moves through the duct system is lost to leaks, holes, and poor connections.A thermal device shows you all of these in one scan.
Whether you’re building your first gaming rig or repasting an older system that’s running hot, picking the right thermal paste can feel confusing. With dozens of thermal compound brands on the shelf, how do you know which ones actually deliver? We’re here to help. As Pixfra, we live and breathe thermal technology — we build thermal imaging devices that detect heat at the highest levels of sensitivity. So when it comes to heat transfer and cooling, we know what good thermal performance looks like. And if you’re into the thermal tech world beyond your PC, check out the top 6 features needed in the best thermal device in 2026 to see how thermal sensitivity plays out in outdoor gear too.
Thermal paste — also called thermal compound, thermal grease, heat paste, or thermal interface material (TIM) — is a heat-conductive substance you apply between your CPU (or GPU) and the cooler sitting on top of it. It fills the microscopic gaps between the processor and the cooler’s cold plate. Those tiny gaps normally trap air, which is a terrible heat conductor. Thermal paste fills them and creates a smooth thermal path, letting heat flow out of the processor far more effectively. Without it, even the best air cooler or AIO liquid cooler can’t do its job properly.

Here’s the thing most people miss: thermal interface materials have quietly become one of the most significant tuning knobs for modern desktop and mobile systems, as CPU and GPU power levels keep climbing. At the same time, cooler dimensions stay limited by case formats and noise targets. Today’s multi-chiplet processors, dense GPU dies, and compact SFF enclosures push stock coolers to their limits, making even a small gain in thermal resistance translate into lower fan speeds, less noise, and extra frequency headroom.
Thermal paste is typically made from a silicone or synthetic base compound mixed with thermally conductive fillers such as ceramic, metal, or carbon-based particles. The specific blend affects how well the paste transfers heat, how easy it is to spread, how long it lasts before drying out, and whether it conducts electricity (which matters if it leaks onto your motherboard). Standard non-metallic pastes have thermal conductivity values in the range of about 3–9 W/mK, while premium pastes can push 11–15 W/mK. Some liquid metal pastes even reach 73 W/mK, but they’re costly and need expert handling.
After digging through benchmark data, user feedback, and real-world test results, three brands come out on top for most PC builders in 2026. These aren’t random picks — they show up in nearly every major review, every enthusiast forum, and every temperature comparison chart for good reason.

1. Arctic
Arctic is the go-to name for thermal paste, and they’ve earned that spot. The Arctic MX-6 offers a thermal conductivity of 8.5 W/mK at around $8 for a 4g tube and is non-conductive. It’s the paste we’d recommend if you want a single, reliable compound that works on everything — CPUs, GPUs, laptops, and even game consoles. In testing on a Ryzen 7 7800X3D, the MX-6 held CPU package temperatures 3°C lower than the MX-4 it replaced. It’s non-conductive, easy to spread, and doesn’t pump out or dry up over years of use.
Arctic also offers the classic MX-4, which has been a fan favorite for years. The Arctic MX-4 is a solid choice for gamers who want to play AAA titles and run professional workstations. It’s the best pick for people focused on ease of application, long-term durability, and a strong balance between performance and cost per gram. If you’re on a tight budget, the MX-4 still performs perfectly well — the difference between MX-4 and MX-6 is only a couple of degrees for most users.
2. Noctua
Noctua has built a reputation for premium cooling products, and their thermal paste keeps that standard going. The NT-H2 carries a relatively “budget” price tag of only $12.95 for a 3.5G tube that also includes three cleaning wipes. What makes Noctua stand out is longevity. In a 3-year longevity test, the NT-H2 showed absolutely no signs of drying or degradation, maintaining temperatures within 1°C of when it was first applied. That kind of stability means you can apply it once and forget about it for years.
Noctua provides the best longevity with NT-H2 lasting up to 5 years. For builders who don’t want the hassle of repasting every year or two, Noctua is a rock-solid choice. The paste’s no-spread-required formula makes it beginner-friendly as well — drop a pea-sized amount in the center of your IHS, mount the cooler, and you’re done.
3. Thermal Grizzly
When you need peak cooling performance — for overclocking, for squeezing every last MHz out of your processor, for pushing your rig to the edge — Thermal Grizzly is the brand that overclockers swear by. In the PC building space, the Thermal Grizzly Kryonaut has a long-standing reputation and enthusiasts love this paste for extreme overclocking. It has a thermal conductivity of 12.5 W/mK. Compared to other non-metallic thermal pastes, it has consistently topped benchmarks.
With an exceptional thermal conductivity of 14.2 W/(m·K), the Kryonaut Extreme handles heat loads that other compounds struggle with. In extreme overclocking tests, it maintained temperatures 5–7°C lower than the standard Kryonaut, allowing for stable clocks that were previously out of reach. However, Thermal Grizzly pastes do tend to have shorter lifespans — the primary concern is the limited lifespan of approximately 18 months, requiring more frequent reapplication than standard pastes. If you’re fine with repasting once a year or so, the raw performance is tough to beat.
Here’s a quick-reference table comparing the key specs of our three top picks:
| Feature | Arctic MX-6 | Noctua NT-H2 | Thermal Grizzly Kryonaut |
|---|---|---|---|
| Thermal Conductivity | 8.5 W/mK | ~9 W/mK | 12.5 W/mK |
| Electrically Conductive | No | No | No |
| Typical Price (per tube) | ~$8 (4g) | ~$13 (3.5g) | ~$10 (1g) |
| Longevity | 4–5 years | Up to 5 years | ~1.5–2 years |
| Best For | All-around builds | Long-term stability | Overclocking / enthusiasts |
| Ease of Application | Easy | Very Easy | Moderate |
| Cleaning Wipes Included | Yes | Yes | No |
This table tells the story pretty clearly. If you want value and reliability, go Arctic. If you want apply-it-and-forget-it stability, go Noctua. If you want the absolute best cooling numbers and don’t mind repasting more often, go Thermal Grizzly.
Getting the right brand of thermal paste is only half the battle. How you apply it makes a big difference in your CPU temps. How you apply thermal paste and mount your cooler are the two biggest factors in real-world performance — more so than which specific paste you pick, in many cases.

The standard method that works for most people: clean the old paste off your CPU’s integrated heat spreader (IHS) and the cooler’s base plate using 90%+ isopropyl alcohol and a lint-free cloth. Then apply a small amount of fresh paste — about the size of a pea or a grain of rice — to the center of the IHS. Don’t spread it with your finger or a card. The paste will spread out under heat and pressure without leaving air bubbles. Just mount the cooler directly on top and let the mounting pressure do the work.
For modern AMD chiplet-design CPUs (like the Ryzen 7000/9000 series), some builders find that a small line or X-pattern works better than a single dot, since the chiplets sit off-center from the IHS. For AMD’s chiplet design, a slightly larger line across the center works better than a single dot. For Intel’s 12th through 14th Gen and Core Ultra processors, apply one small 3–4mm dot of paste in the center of the CPU and four smaller dots a couple of millimeters in from each corner.
A common mistake is applying too much paste. Excessive application can result in excess pressure between the CPU and the heat sink, causing the compound to squeeze out and create a mess. More is not better here. A thin, even layer under pressure is what you’re after.
Thermal paste doesn’t last forever. Over time, it dries out, cracks, or separates — and when it does, your CPU temps start creeping up. Quality thermal pastes should maintain performance for 3–5 years under normal conditions. Factors like high temperatures, frequent thermal cycling, and paste quality affect how long it lasts before needing a replacement.
There are some clear signs you need a fresh application. If CPU temperatures have increased 5°C or more compared to when the system was new, if thermal throttling is happening at loads that previously ran fine, if fan noise has increased noticeably during gaming or heavy workloads, or if your system is over 4 years old and has never been repasted — it’s time to clean and reapply.
For anyone using Thermal Grizzly Kryonaut or Kryonaut Extreme, you’ll want to check more frequently. Since Kryonaut is targeted at overclockers, it’s designed for high performance more than longevity, so it has a tendency to dry out after a few months. Factor in frequent repastes if you plan to use this for your daily driver PC. Arctic MX-6 and Noctua NT-H2, on the other hand, are built for multi-year stability — you can set them and forget them for the most part.
If you’re repasting, always clean both surfaces thoroughly before putting fresh paste down. Use 90%+ isopropyl alcohol and take your time — old, dried-out paste can be stubborn. Some pastes, like the NT-H2 and MX-6, include cleaning wipes in the box, which is a nice touch that saves you the extra step of hunting down supplies.
Does thermal paste brand really make a difference in PC cooling?
Yes, but the difference between top brands is smaller than most people think. The three best pastes in testing — the Arctic MX-6, the Thermal Grizzly Kryonaut, and the Noctua NT-H2 — are about 1.4 to 1.7°C ahead of weaker competitors. The three front-runners are so close together, with just 0.3°C difference, that it probably falls within error tolerance. So pick any of the three brands we listed and you’ll get top-tier results. Application technique matters just as much.
How often should you replace thermal paste on a CPU?
Thermal paste typically lasts 2–5 years, depending on quality, usage, and operating temperatures. Budget pastes and overclocker pastes like Kryonaut may need refreshing sooner. High-stability pastes like Noctua NT-H2 can go a full five years without any drop in performance.
Can you use the same thermal paste on a GPU?
Yes, most CPU thermal pastes are compatible with GPUs and work well for repasting GPU dies. Arctic MX-6 is a popular choice for GPU repastes because its thicker consistency resists pump-out on vertical surfaces. Just be careful with liquid metal — it reacts with aluminum and can damage components if it spills.
Is liquid metal better than regular thermal paste?
Liquid metal like Thermal Grizzly Conductonaut drops temperatures 10–15°C lower than standard pastes. However, it’s electrically conductive, reacts with aluminum coolers, and needs careful application. For most users, Arctic MX-6 or Kryonaut is a better choice. Only go liquid metal if you’re experienced and know the risks.
Does expensive thermal paste improve gaming performance?
Indirectly, yes. Lower temperatures help prevent thermal throttling, allowing the CPU or GPU to maintain stable performance.[3] You won’t see a massive FPS jump from swapping paste alone, but you will see more consistent frame rates and fewer stutters during heavy loads — especially on high-TDP chips.
Use invasive species control with thermal imaging when the target animal is active at night, hides in cover, or moves along water where a flashlight gives you away. Thermal helps teams find nutria, feral hogs, green iguanas, and other problem species faster, but it works best as a disciplined workflow: scan first, confirm second, document third, and act only when the species, method, and location are legal.
Thermal imaging helps invasive species teams find warm-bodied animals before visible-light optics can confirm them. For nutria control, the main gain is night scanning along levees, ditches, ponds, and marsh edges, where a heat signature can flag movement near burrows, slides, and feeding areas.
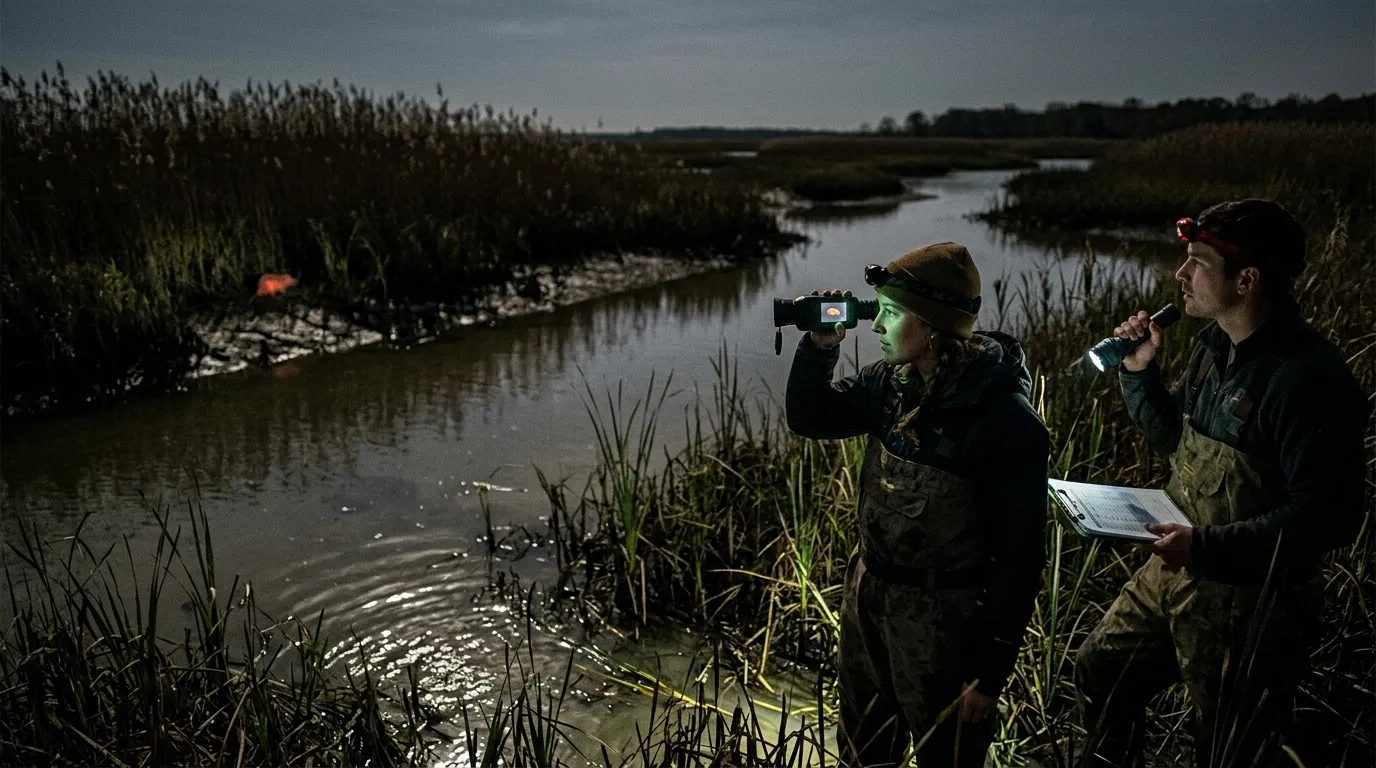
Nutria are a good test case because their damage is physical and easy to map. The problem isn’t just “there’s an animal in the marsh.” The problem is bank failure, crop loss, and wetland conversion. In its nutria management page, USDA APHIS, 2025 lists nutria as invasive in the United States and says their burrows can extend up to 150 feet, damaging stream banks, canals, levees, roadways, and structural foundations.
Thermal won’t show white whiskers or orange teeth. It gives you the first lead: a warm body in reeds, a head cutting across a ditch, or a cluster of heat signatures near a burrow entrance. Species confirmation still comes from body shape, travel route, sign, and local knowledge.
| Field situation | Thermal advantage | Watch-out |
|---|---|---|
| Marsh edges at dusk | Finds movement before glassing works | Reeds can hide body shape |
| Levee or canal banks | Spots animals near burrow systems | Muskrat and beaver confusion |
| Crop margins | Covers more ground quietly | Deer, livestock, and people |
| Cold mornings | Stronger heat contrast | Sun-warmed concrete can mislead |
For invasive species control with thermal imaging, the biggest mistake is treating every heat signature as a target. Treat every heat signature as a lead.
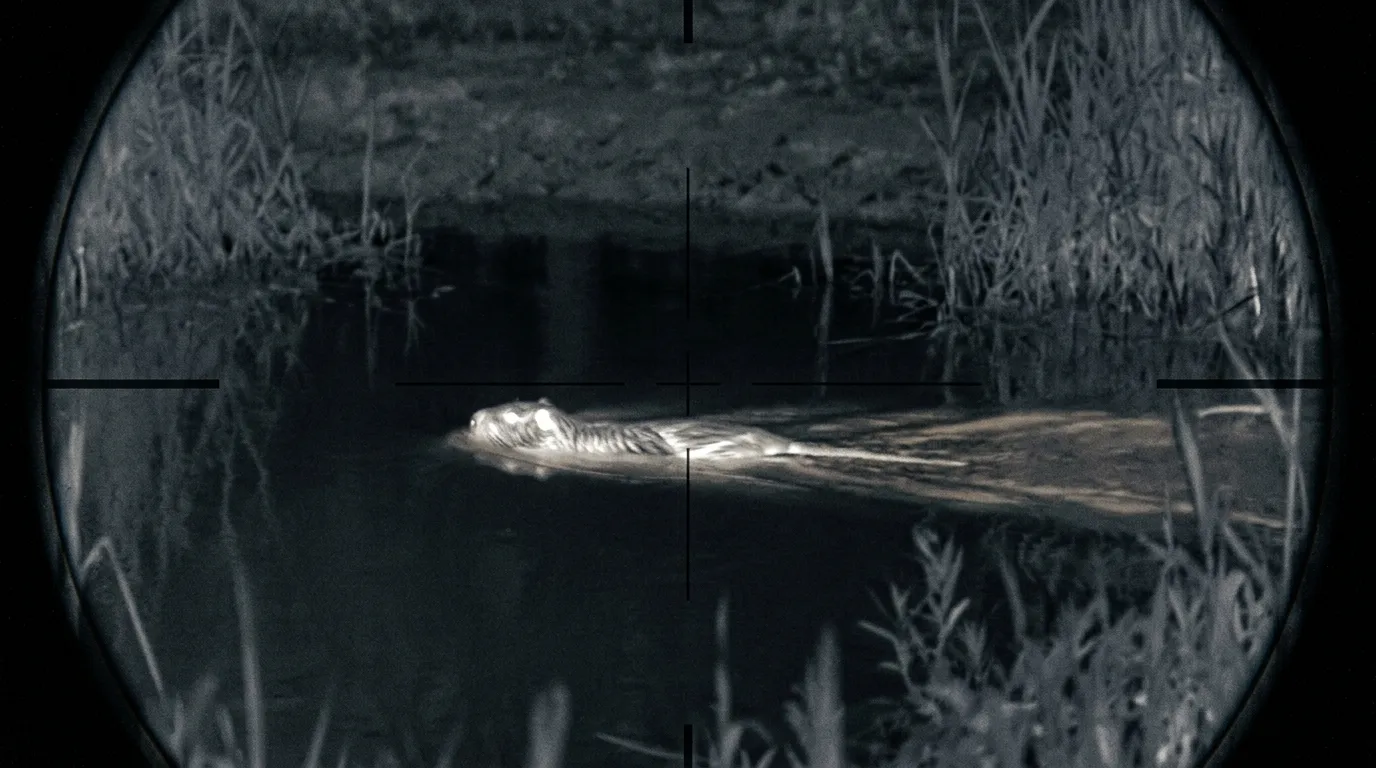
A nutria in thermal often looks lower and more stretched than a beaver, especially when it swims. The head and upper back may show as separate hot zones above the waterline. On land, look for a low, arched body moving from vegetation to water, not a tall silhouette crossing open ground.
Then slow down.
Beaver, muskrat, otter, pets, livestock, and people can all show up hot. If the animal is moving along a bank with fresh slides, clipped vegetation, and burrow openings, you have a stronger case. If it’s only a blob in cattails at 90 yards, you have homework.
Good nutria confirmation usually combines:
Maryland gives the useful lesson here. The Chesapeake Bay Nutria Eradication Project didn’t rely on one tool. The U.S. Fish and Wildlife Service, 2022 reported that more than 14,000 nutria were removed over a 20-plus-year effort, with private landowners accounting for about half of those removals and over 250,000 acres of Delmarva marsh protected. The project used trapping, surveys, newer detection methods, and trained detector dogs.
Thermal fits that model. It helps you find and pattern the animal; it doesn’t replace the control plan.
Start in daylight. Walk the bank. Mark burrows, slides, damaged vegetation, trails, culverts, levee weak spots, and safe observation points. A thermal scan after dark is far more useful when you already know where animals should appear.
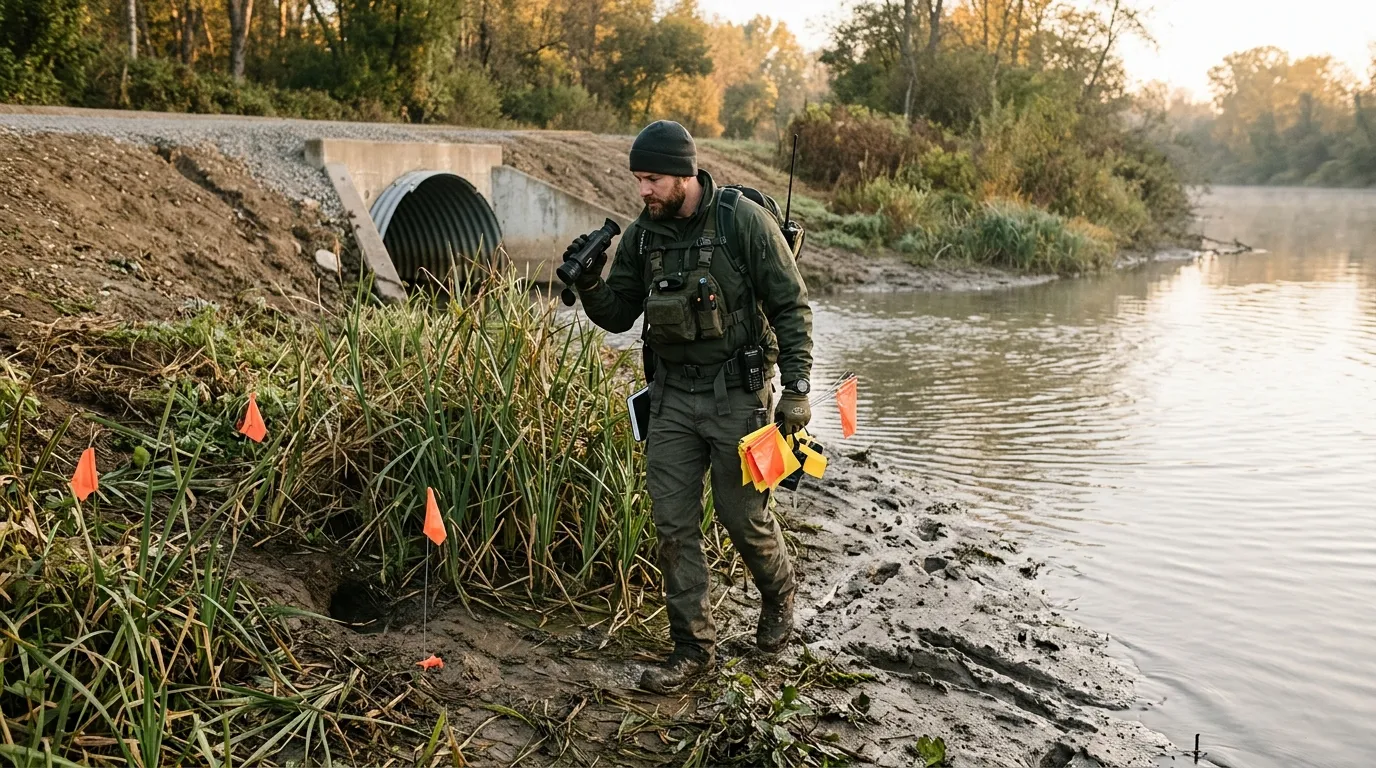
A practical sequence looks like this:
For nutria in wetlands, trapping may beat shooting because animals use repeat routes and burrow systems. Around homes, roads, livestock, or public trails, reporting and agency-led control may be the only responsible path. On large farms or private drainage systems, a trained team may combine thermal scanning, remote cameras, and scheduled removal over several nights.
A scanning monocular is the right first tool for most invasive-species work. It keeps the muzzle out of the scanning process, reduces fatigue, and lets one person search while another records or handles the follow-up. For canal banks and marsh edges, a handheld scanner from the Pixfra thermal monocular range makes more sense than swinging a rifle-mounted optic across every warm spot in the dark.
Pixfra model choice should follow the job. A compact Mile 2 monocular fits short patrols along ditches, small ponds, and narrow levee roads where portability matters. An Arc LRF or Ranger monocular is better for canal-bank scanning and wider farm fields where distance judgment helps you separate a near muskrat from a farther nutria-sized animal. For longer observation lanes, Sirius HD gives teams more image detail when body shape matters.
Rifle scopes have a narrower job: confirmed, safe, legal removal. If night shooting is allowed for the target species, a Pixfra Pegasus 2 LRF or Chiron LRF thermal scope can suit trained hog-control teams that need ranging and shooting-side workflow after the animal has already been confirmed. For predator-control users and farm teams, the Pixfra thermal rifle scope lineup covers that removal-side role rather than the survey role.
Front attachments sit between those two worlds. A Taurus LRF front attachment can help trained shooters keep a familiar day optic on a verified rifle system while adding thermal capability, but it still does not turn an unidentified heat source into a confirmed target.
Image quality matters more than people admit. Lower NETD helps in damp grass and mild weather. Higher resolution helps when you need to separate a nutria-sized animal from a muskrat or read body shape at longer range. Edge enhancement and noise reduction help when mud, water, and reeds clutter the view. Pixfra’s PIPS image-processing family is built around that practical need: make the heat signature readable enough for the next decision.
Thermal is strongest when the animal and background have a clear temperature gap. Cold nights, shaded banks, and wet animals moving against cooler vegetation can look sharp. Hot afternoons, sun-baked rocks, warm concrete, rain, fog thick enough to wet the lens, and dense reeds all reduce confidence.
Dense cover is the hard limit. A nutria inside a burrow won’t appear just because the optic is good. A hog behind a berm may show as a partial heat smear. A green iguana on a sun-warmed wall can blend into the wall after several hours of heat soak. Thermal detects temperature differences; it doesn’t see through earth, water, or ethics.
Use this quick go/no-go check before any control action:
| Question | If the answer is no |
|---|---|
| Is the species confirmed? | Observe, record, or report |
| Is the method legal here tonight? | Stop and check regulations |
| Is the backstop safe? | Move or do nothing |
| Is there a record of damage or sign? | Build the case first |
| Is the landowner or agency aligned? | Get written permission |
Don’t chase one animal across a property line. Don’t shoot at a heat source behind grass. Don’t assume open season means every method is legal. Some states treat nutria as furbearers or regulate thermal optics, night shooting, trapping support, and nuisance control differently, so the state wildlife agency and landowner permission decide what tools are allowed.
This advice doesn’t apply to random public-land sightings, protected species, or areas where thermal optics are restricted. It also doesn’t apply when your only evidence is “something hot moved.” That’s useful for scouting. It isn’t enough for removal.
Nutria get the headline because wetland damage is so visible, but thermal also has a place in other invasive or nuisance-species programs. Feral hogs are the obvious example. They move at night, group in sounders, and damage crops, pasture, water sources, and native habitat. Thermal scanning from a fixed point can show where they enter a field before anyone starts guessing.
Green iguanas in Florida canal systems are another fit, especially on cool mornings when reptiles may contrast against concrete, trees, or seawalls. The tradeoff is identification distance. A thermal blob on a branch tells you “animal.” It doesn’t always tell you “legal target.”
Then there are regional cases: rabbits in agricultural control programs, invasive goats in island ecosystems, and predator-control work where coyotes or foxes are legal targets under local rules. A Pixfra monocular is usually the starting point for scanning and patterning; a scope or front attachment belongs later in the workflow, after the target species and removal method are confirmed.
Species status changes by country, state, and even property type, so the equipment choice is only half the answer. The rulebook and the biology drive the plan.
Thermal imaging can help locate likely nutria, but it can’t confirm color details such as white whiskers. Use thermal with body shape, swimming behavior, tracks, burrows, feeding sign, and local agency guidance.
Thermal rules vary by state, species, land type, season, and method of take. Check your state wildlife agency before using thermal for hunting, trapping support, night shooting, or nuisance control.
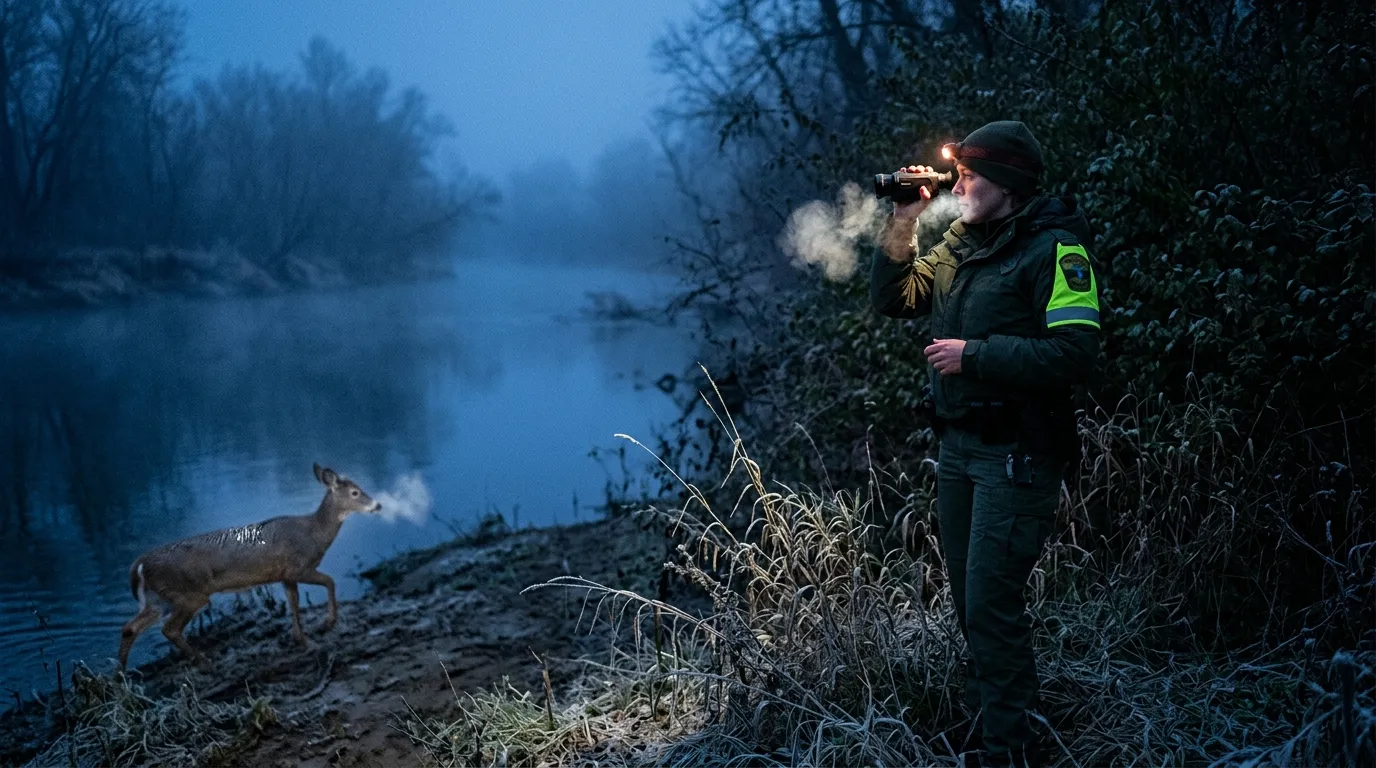
Warm-bodied animals in cool surroundings show up best. Nutria, feral hogs, foxes, coyotes, deer, pets, livestock, and people can all appear clearly, which is why species confirmation matters.
Often, yes. Traps can work better than shooting around burrows, urban water, levees, and repeated travel routes. Thermal helps you place and check the control plan more intelligently.
Pixfra builds thermal optics for the first hard step in invasive-species work: finding heat signatures when visible light isn’t enough. Start with a scanner that fits the field, document what you see, confirm local rules, and choose the removal method only after species ID, permission, and safety are clear.
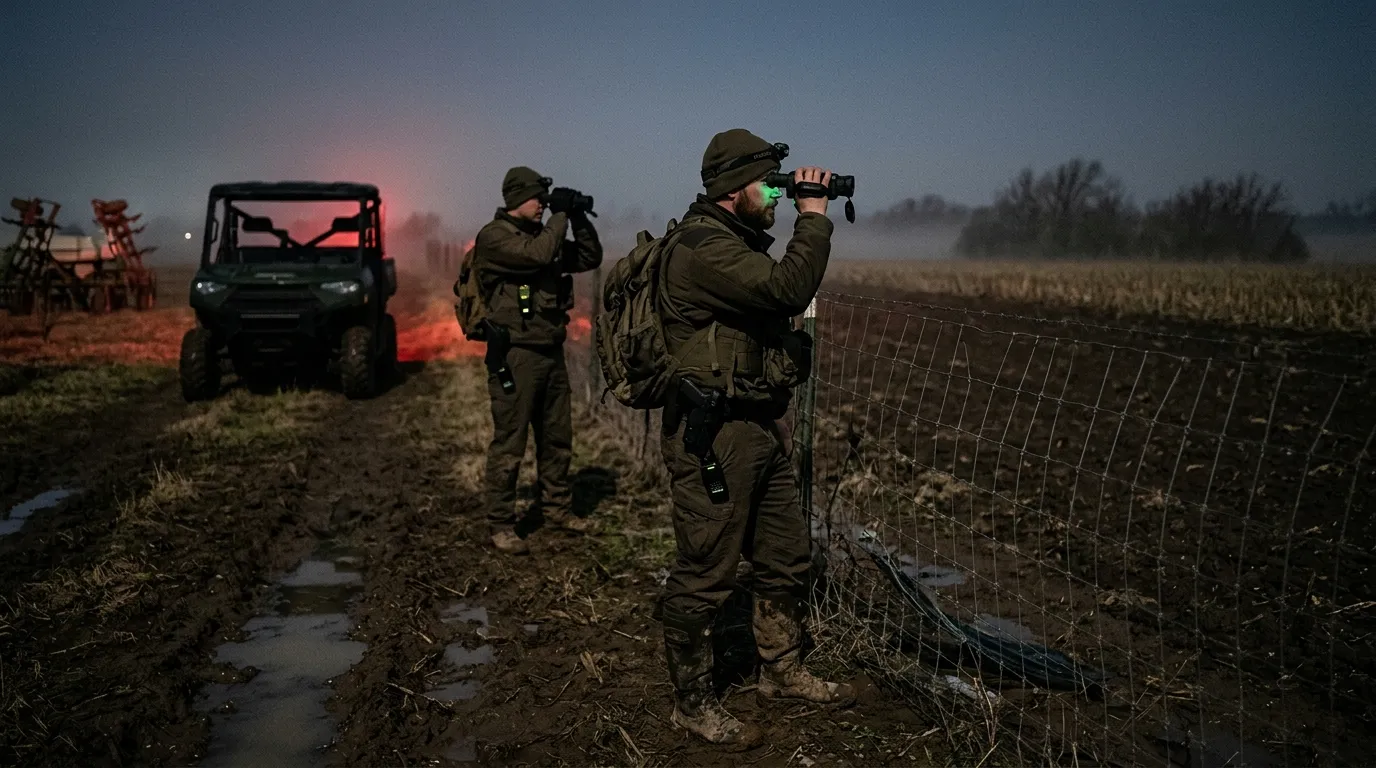
Perimeter security for farms and ranches using thermal cameras starts with one practical goal: spotting heat before a problem reaches your animals, sheds, fuel tanks, or equipment yard. A good thermal setup helps you see people, coyotes, feral hogs, stray dogs, vehicles, and warm machinery in darkness, haze, glare, and light cover, where visible-light cameras usually give you a black frame or a floodlit guess.
Perimeter security for farms and ranches using thermal cameras works by placing handheld or fixed thermal imagers where animals, people, vehicles, and heat-producing equipment cross likely approach routes. Thermal cameras don’t need visible light, so they detect movement through darkness, haze, glare, and light cover before a barn camera or gate alarm confirms the event.
That early warning matters because rural security usually has a distance problem. A farmhouse may sit 300 yards from the calving lot. The machine shed may be near a county road. The back fence may run through brush where a standard camera sees branches and shadow. Thermal cuts through that first layer of confusion by showing temperature contrast, not color.
Use thermal for detection and assessment. Use fences, gates, locks, guard animals, lighting, visible-light cameras, and radios for delay and response. That’s the working setup. Thermal tells you where to look; the rest of the system gives you time to act.
USDA APHIS Wildlife Services states that wildlife damage management includes protecting livestock from predators and protecting property from wildlife damage. The USDA APHIS Wildlife Damage Operational Activities page is a useful reminder: farm security isn’t only a theft issue. Animal pressure belongs in the plan too.
Start with the places where heat signatures mean something. A warm shape in open pasture at 2:00 a.m. may be a deer. A warm shape slipping along a lambing pen fence is a different call.

The highest-value zones are usually close to animals, equipment, feed, and access points:
| Zone | What thermal should catch | Best camera approach |
|---|---|---|
| Calving, lambing, kidding pens | Coyotes, dogs, people, downed animals | Fixed thermal plus handheld confirmation |
| Gates and farm lanes | Vehicles, trespassers, late-night entry | Thermal overview plus visible camera at plate height |
| Fuel tanks and tool sheds | People, warm engines, repeated movement | Fixed camera with alert zones |
| Woodlots and fence breaks | Predator travel, feral hogs, unknown movement | Handheld patrol or long-view fixed thermal |
Predator risk is measurable. In the USDA APHIS 2015 cattle and calves death loss report, coyotes accounted for 53.1% of predator-related calf deaths and 40.5% of predator-related adult cattle deaths. Those numbers don’t mean every ranch has the same problem. They do mean perimeter security has to account for animal movement, especially around young stock.
For theft and trespass, thermal has a different job: shorten the time between entry and awareness. A truck with headlights off, a person walking a fence line, or a warm engine behind a shed will stand out far earlier on thermal than on a standard camera waiting for visible detail.
Mounting height, angle, and lane choice beat raw specs more often than people expect.
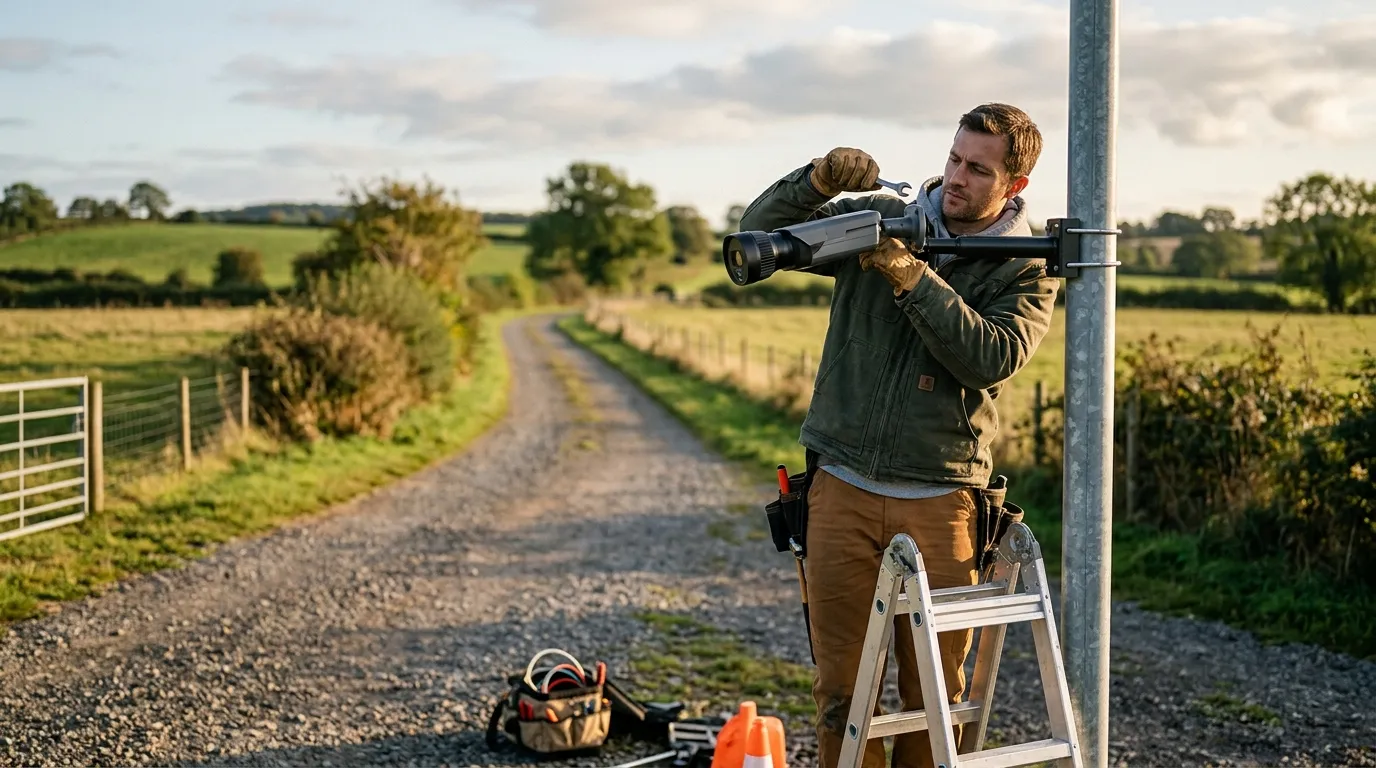
A fixed thermal camera should watch across an approach path instead of staring straight down it. Crossing movement is easier to verify, and the body profile is clearer. On a gate lane, angle the camera 15 to 45 degrees across the opening. Around a pen, aim along the outside fence, then set the alert area to ignore normal livestock movement inside the pen.
For most farm structures, start with a mounting height around 8 to 13 feet if you have a solid post, barn wall, or pole. Higher mounting reduces tampering and keeps the view above weeds. Too high, though, and small predators turn into small dots. There’s the tradeoff.
A simple layout:
Thermal works best when you give it clean contrast. Avoid aiming across hot metal roofs, exhaust vents, bonfire areas, or sun-baked rock if you can. After a 95 degrees F afternoon, a gravel lane may stay warm long after sunset. The camera still works, but the image takes more reading.
Pixfra covers handheld and mounted-style outdoor thermal use cases, so a farm buyer can start with Pixfra outdoor thermal devices before narrowing the setup by detection range, field of view, battery format, and whether the job is scouting or fixed observation.
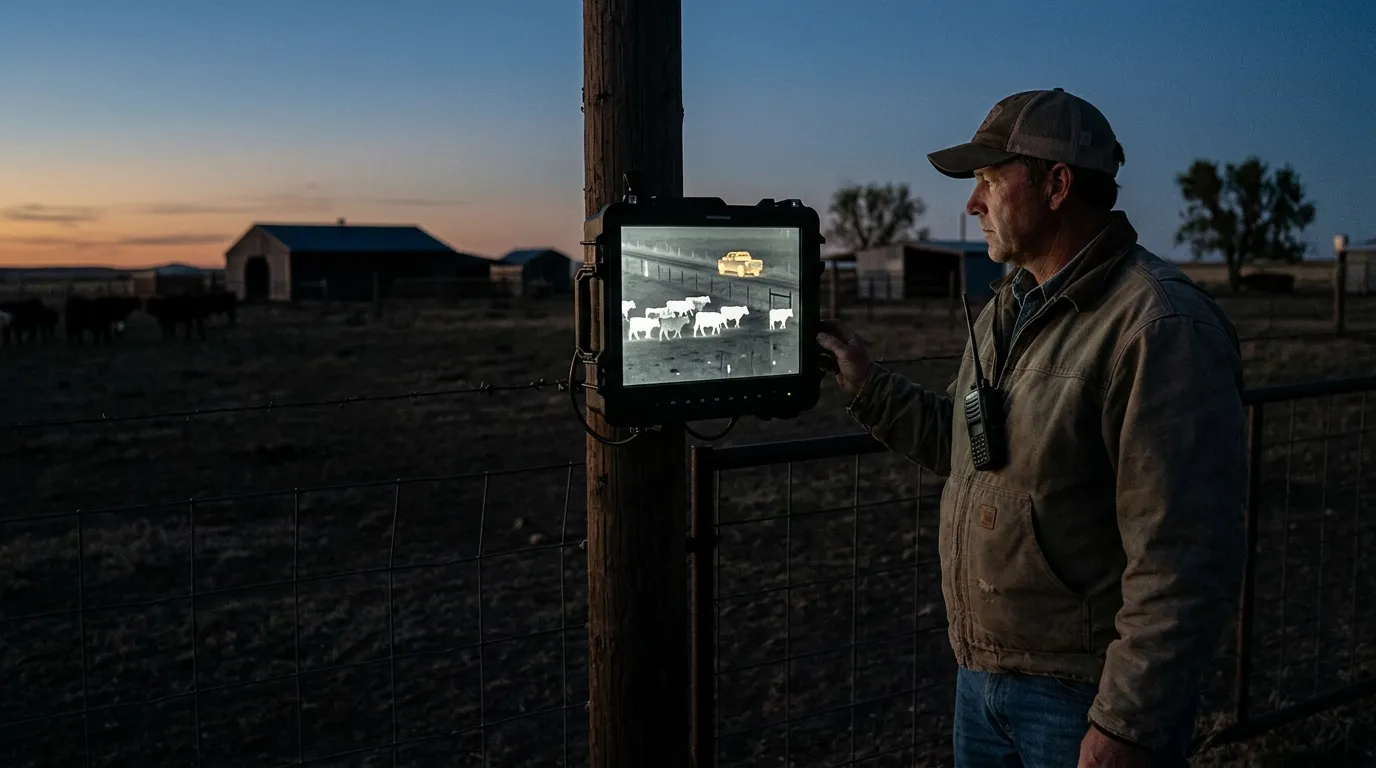
Fixed thermal cameras are better for repeatable choke points. Handheld thermal is better for judgment.
If you run cattle, sheep, goats, horses, poultry, or a mixed farm, don’t think of this as one device doing every job. The better plan is a small system where each device has a job you can explain in one sentence.
| Device type | Best farm use | Drawback |
|---|---|---|
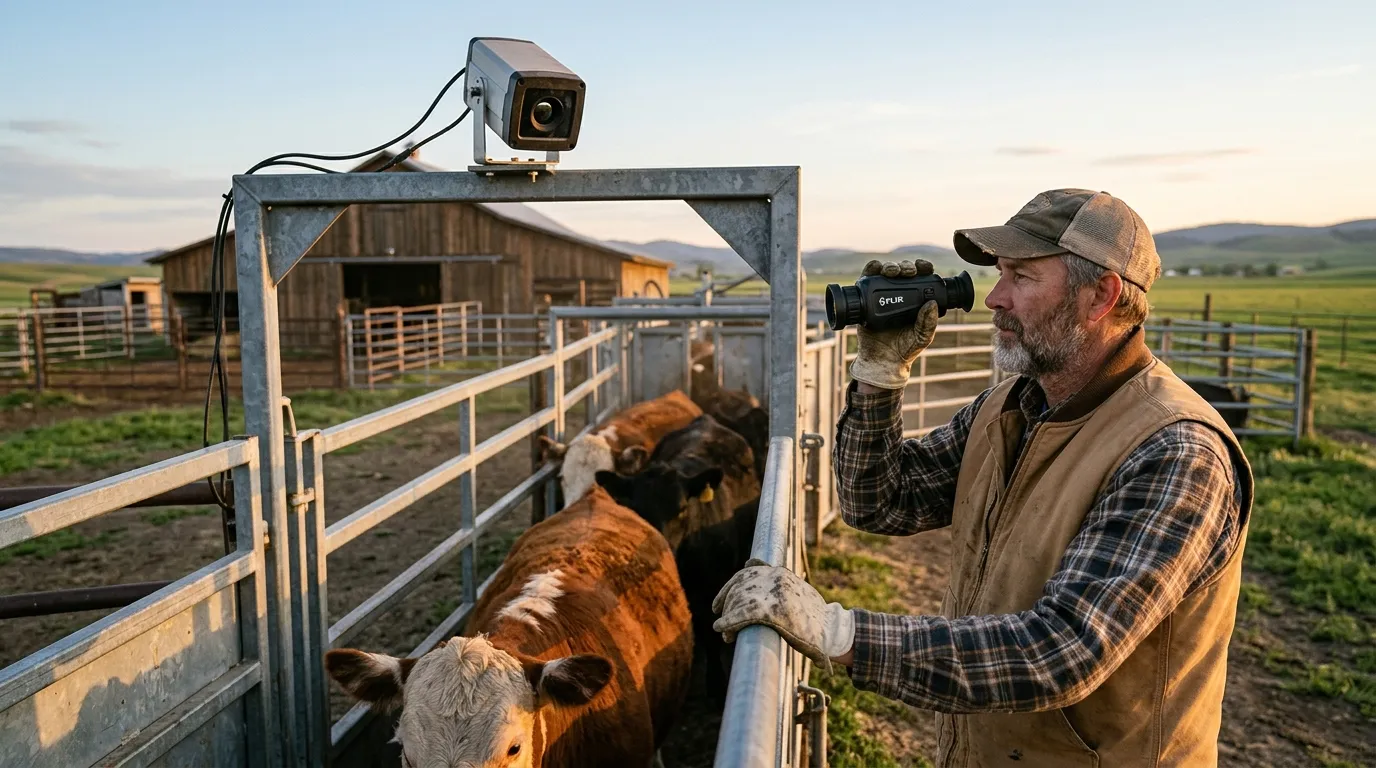
| Fixed thermal camera | Gates, pens, sheds, lanes | Needs power, mounting, and alert tuning |
| Handheld thermal monocular | Patrol, predator check, downed animal search | Depends on someone being awake and looking |
| Multispectral binocular | Longer observation with thermal plus visual context | More cost and more gear to carry |
| Visible-light camera | Identification at doors, gates, and yards | Weak at night without lighting |
A handheld monocular is often the first purchase that makes sense. You can scan before walking into a field, check a tree line without turning on a spotlight, and confirm whether an alert is a deer, a dog, or a person. For farms with rotating risk zones (freshly moved calves this week, hay barn next week), handheld gear stays useful.
Fixed thermal starts paying off when the same spot creates the same problem. A back gate gets opened. A fuel tank is approached. Coyotes work the same draw during calving season. In those cases, a fixed thermal camera gives you a repeatable watch point, especially when paired with mobile alerts or a recorder.
For scouting and patrol, Pixfra thermal imaging monoculars are the category to compare first. Look at detector resolution, NETD rating, lens size, field of view, battery life, and weight. A wide field of view helps close-range pen work. A narrower, longer lens helps across pasture.
Thermal cameras are powerful, but they don’t perform magic.
Glass blocks much of the long-wave infrared energy that most thermal imagers rely on, so a thermal camera usually can’t see through a house window or truck windshield. Heavy rain and dense fog can reduce range because water in the air weakens contrast. Wet brush can hide small animals. A coyote behind a thick cedar line may be partly hidden until it steps into a gap.
Then there’s identification. Thermal can show size, movement, body shape, and behavior. It may show a predator slipping low along a fence while cattle bunch up. It may show two people walking toward a shed. It won’t reliably give you a face or license plate. Put visible-light cameras at gates and doors for that.
Privacy and law matter too. Point cameras at your own property, livestock areas, lanes, and buildings. Avoid aiming into neighboring homes, public roads beyond your entrance, or employee housing. For shared ranch roads, post signage and keep access to recordings limited. Practical security gets easier when everyone knows what the system is for.
One more field note: alerts need discipline. If every deer triggers your phone, you’ll mute the system by Friday. Draw detection zones around the actual risk path, then test them with a person walking, a dog crossing, and a vehicle entering. Tune from real movement, not a desk guess.
A thermal alert is only useful if you know the next move.
Set a response plan before the first night of monitoring. Who gets the alert? Who checks the handheld? Who calls law enforcement, a neighbor, or the ranch manager? What happens if the alert is near livestock instead of equipment? Write it down. Keep it boring.
Use this short checklist before buying or installing:
For dealers and ranch supply retailers, demo units should be tested on real farm distances. A 50-yard barnyard demo tells one story. A 250-yard pasture edge with wet grass tells another. Ask for footage at the distances your customers actually use.
Thermal cameras usually perform better than visible-light cameras in light fog, haze, smoke, and glare. Dense fog, heavy rain, and wet vegetation can reduce detection range because water weakens thermal contrast.
Use fixed thermal cameras for repeated risk zones such as gates, pens, fuel tanks, and machine sheds. Use handheld thermal for patrols, predator checks, and quick confirmation after an alert.
Thermal can help identify coyotes by size, gait, shape, and behavior, especially near livestock. Reliable identification depends on distance, lens, detector resolution, weather, and operator experience.
Point farm cameras at gates, fence gaps, calving or lambing pens, feed areas, fuel tanks, and equipment sheds. Aim across likely travel routes so people, animals, and vehicles cross the view.
For a Pixfra setup, start with one high-risk zone and one handheld thermal device. Test at night, record what you actually see, then add fixed coverage where the same problem repeats. That staged approach keeps the system practical, affordable, and matched to real farm work.
