


Mushroom foraging has always relied on sharp eyes and patience. But recent videos online show hunters using thermal scopes to spot morels through the woods. Sound too good to be true? We dug into the science and real-world experiences to see if this method works—and when it doesn’t.
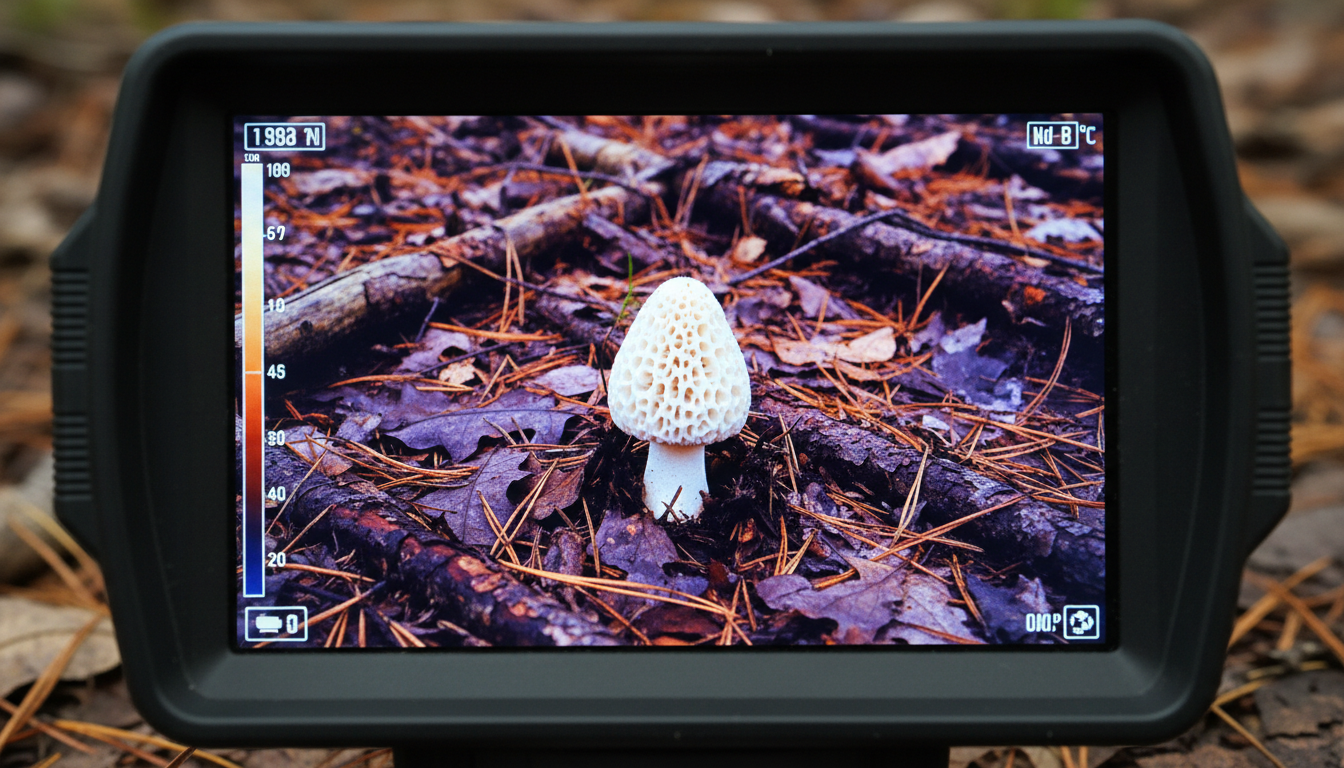
Thermal imaging cameras capture temperature differences, and morels release cool, moist air through evaporation, creating a cold pocket that shows up on thermal scopes. When tested, morels measured less than 70 degrees Fahrenheit while the surrounding area was warmer, with the mushroom appearing bright white on the thermal image. The bigger the temperature gap between the mushroom and its surroundings, the easier it is to spot.
Thermal devices work by detecting infrared radiation from objects. Morels and other fungi can be up to 36 degrees cooler than their surroundings in natural settings. That’s a pretty big difference. This temperature contrast is what makes detection possible, though conditions need to be right.
If you’re looking to expand your outdoor gear arsenal, check out Pixfra’s thermal imaging devices that offer high-resolution detection for various applications.
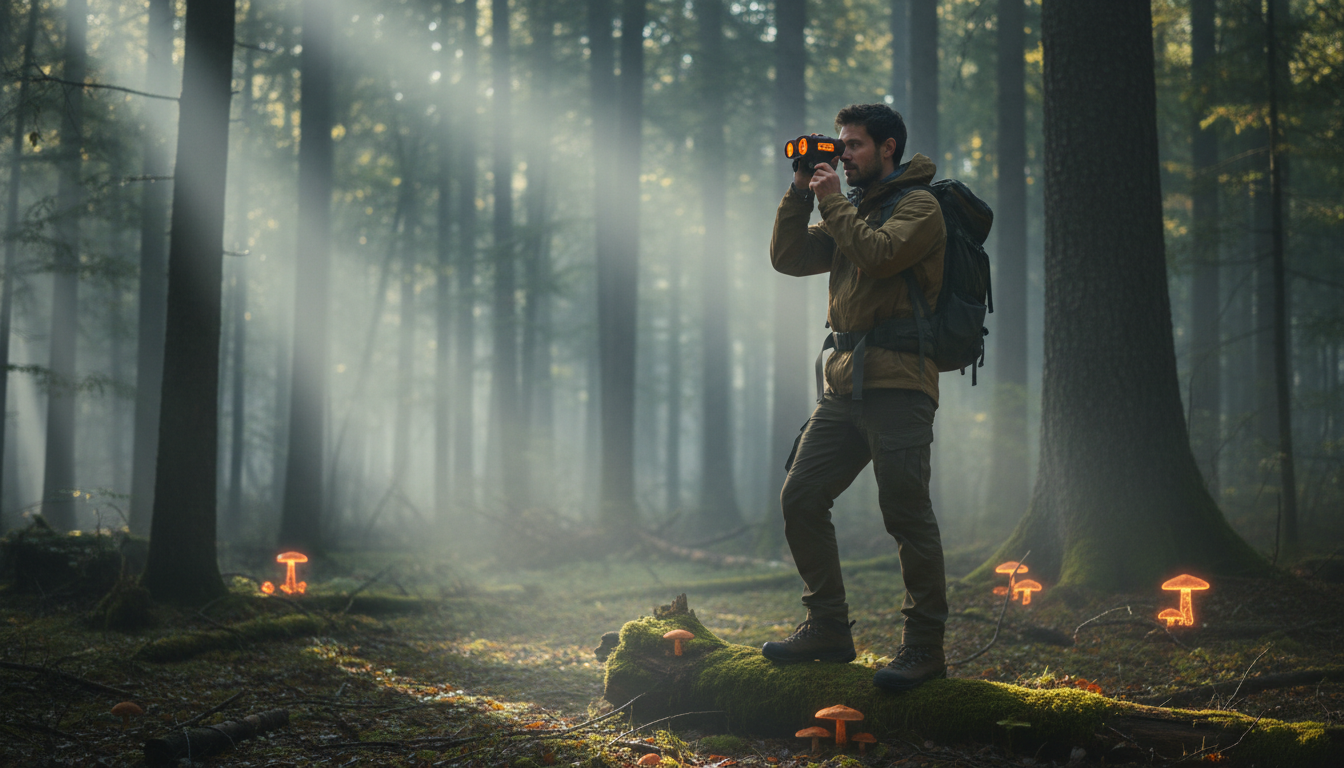
Field testers using a Hogster 35 on white hot mode confirmed the method works, with mushrooms standing out as bright white. One Oklahoma forager reported finding 643 morels in a single season using thermal scopes. But here’s the catch: not everyone sees the same success.
Some hunters with 640 resolution thermal scopes found no success, particularly when sunlight warmed the ground and created too much image detail. The method works best in specific conditions, which we’ll get to next.
Whether this counts as a “cheat code” depends on who you ask. Wildlife photographer Kyle Underwood proved morels show up on thermal cameras but faced criticism for sharing what some called an unfair advantage. But the technology isn’t perfect—it’s another tool that requires skill to use right.
Early mornings or late evenings work best for thermal mushroom hunting because cooler temperatures create a bigger contrast between mushrooms and their environment. Midday heat can wash out the temperature differences that make morels visible.
Temperature sensitivity limits thermal detection—ambient warmth makes it harder to distinguish mushrooms, and dense foliage, moisture, and humidity can affect thermal readings. You can’t just scan any forest at any time and expect results. Conditions matter.
For serious outdoor enthusiasts, devices like the Pixfra Sirius HD or Pegasus 2 LRF offer the resolution and sensitivity needed to pick up subtle temperature differences in challenging conditions.
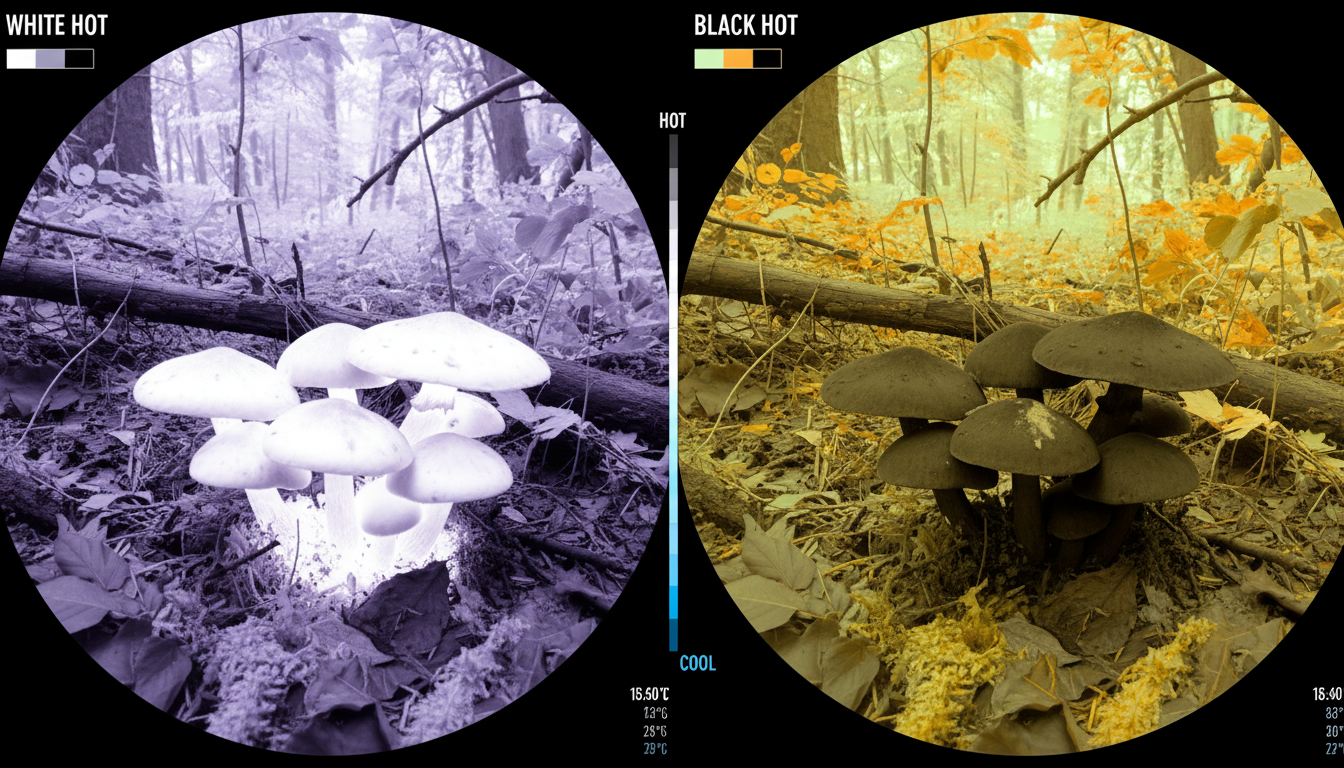
Mushrooms are cooler than ambient temperature, so using white hot or black hot settings on your thermal device is key. White hot mode shows cooler objects as brighter, making morels stand out against warmer ground. While you can’t scan entire woods effectively, thermal scopes work well for peering through briars and dense undergrowth.
Resolution matters too. Lower-resolution devices might struggle to pick up the subtle temperature differences, especially in variable conditions. Higher-end thermal optics give you better chances of success, though they come with higher price tags.
Not all mushrooms are easily detectable with thermal imaging—effectiveness depends on temperature differences, with morels standing out because they’re cooler than their environment. Other mushroom varieties might not create enough temperature contrast to show up clearly.
Don’t expect to replace traditional foraging skills with technology. Even advocates of thermal mushroom hunting emphasize you don’t need thermal cameras to find morels—the technology works but isn’t necessary. You still need to know where morels grow, what trees they prefer, and how to identify them properly.
Using thermal scopes effectively requires practice to interpret images correctly and distinguish between different fungi and environmental features. There’s a learning curve. And you’ll still walk past plenty of mushrooms if you’re only relying on your scope.
For mushroom hunters who already own thermal optics for other activities, it’s worth testing. The method has proven results in the right conditions. But buying a thermal scope just for mushroom hunting? That’s a tougher call.
Thermal scopes range from budget models around $200 to professional units over $1,000. Consider what else you’d use the device for—wildlife observation, property security, or nighttime navigation. Multi-use tools justify the investment better than single-purpose gear.
Devices like the Pixfra Draco or IR Torch offer versatility for various outdoor applications beyond mushroom hunting, making them smarter purchases for outdoor enthusiasts.
Can you find mushrooms with a thermal scope? Yes, when conditions align. Morels create detectable temperature differences that thermal imaging can pick up, especially in early morning or evening when cooler air increases contrast. Real foragers have found hundreds of mushrooms using this method. But it’s not magic—you need the right conditions, proper settings, and practice interpreting thermal images. Traditional foraging skills still matter. Thermal scopes work best as a supplementary tool, not a replacement for knowledge and experience. If you already own thermal optics, give it a shot during mushroom season. Just don’t expect to scan the forest from your truck and fill a basket.
Do thermal scopes work for all types of mushrooms?
No. Thermal detection works best for morels because they’re significantly cooler than their surroundings. Other mushroom species might not create enough temperature contrast to show up clearly on thermal imaging. The effectiveness depends on how much cooler the mushroom is compared to the ground and vegetation around it.
What time of day is best for thermal mushroom hunting?
Early mornings and late evenings give the best results. Cooler air temperatures during these times create bigger contrasts between the mushrooms and their environment. Midday heat reduces the temperature difference, making mushrooms harder to detect on thermal scopes.
What thermal scope settings work for finding mushrooms?
Use white hot mode, which displays cooler objects as brighter. Since mushrooms are cooler than the surrounding ground and vegetation, they’ll appear as bright white spots. Black hot mode can also work—it reverses the display, showing hot objects as black and cool objects as white.
Can I scan large areas of forest with a thermal scope for mushrooms?
Not really. Thermal scopes work better for looking through dense undergrowth, briars, and areas you’ve already identified as good mushroom habitat. Scanning entire forests isn’t practical because of distance limitations, foliage interference, and the small size of individual mushrooms.
Is using thermal imaging legal for mushroom foraging?
Yes, in most places. Unlike hunting game animals—where thermal optics are illegal in many states—there are typically no restrictions on using thermal imaging for mushroom foraging. However, always check local foraging regulations and land-use rules before heading out.
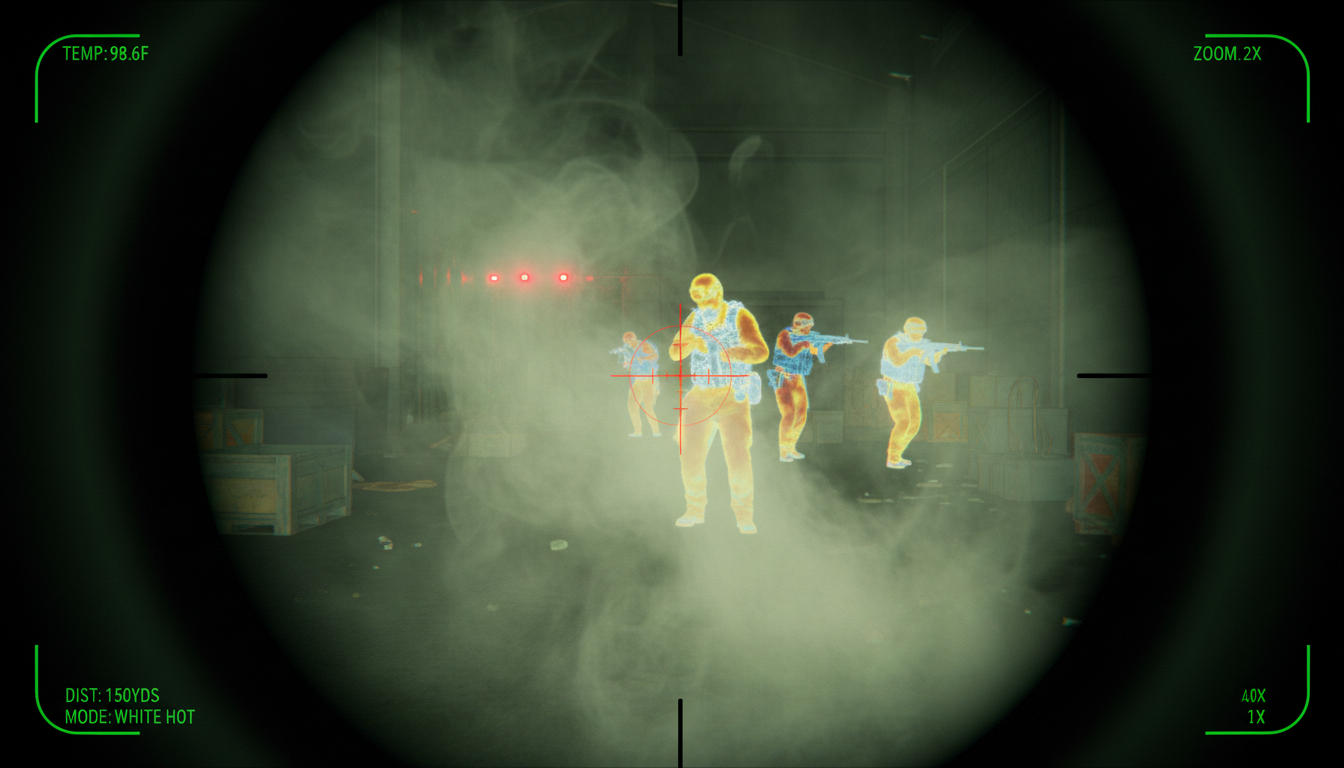
Thermal scopes have changed the game for hunters, tactical professionals, and outdoor enthusiasts. But there’s one question that comes up again and again: can these devices actually see through smoke? The answer isn’t a simple yes or no. We’re going to walk you through how thermal imaging interacts with smoke, what affects performance, and what you can realistically expect in different situations.
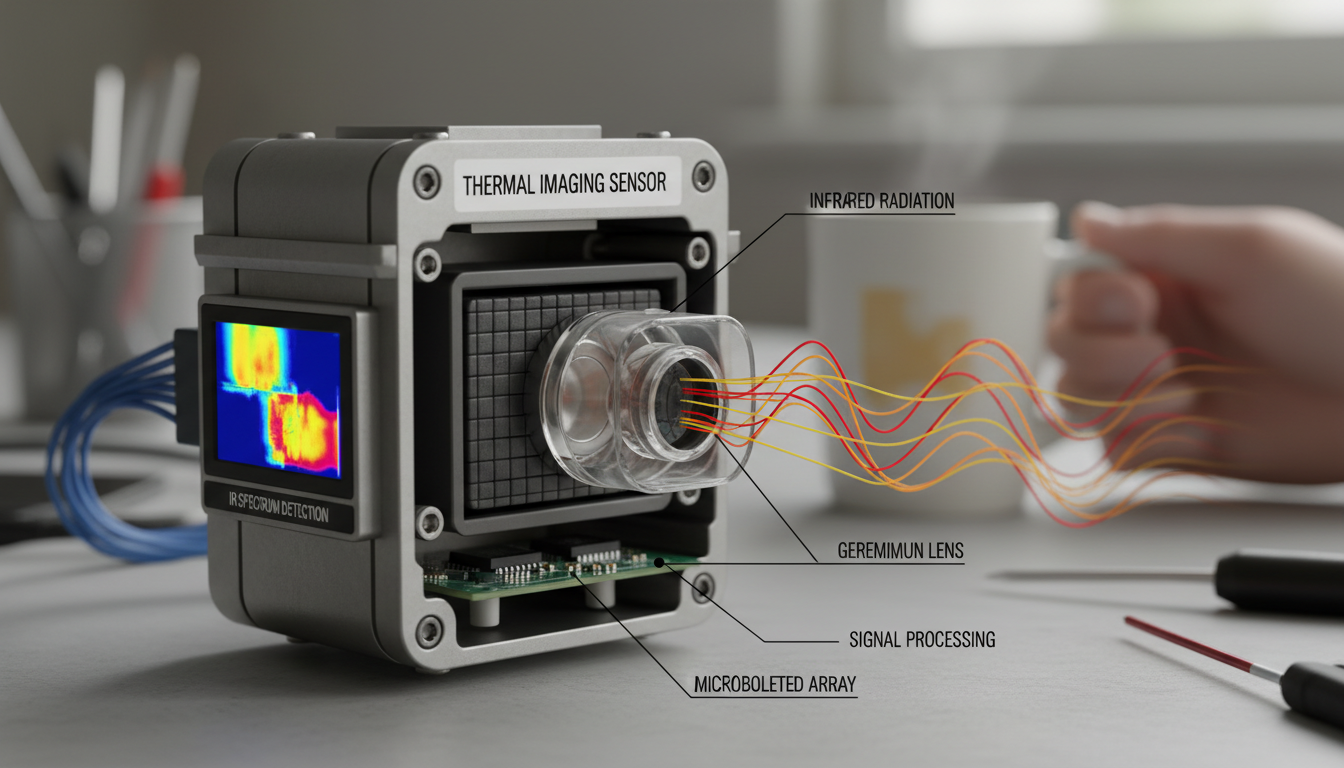
Before we talk about smoke, let’s cover the basics. Thermal imaging detects infrared radiation emitted by objects based on their heat, unlike conventional cameras that capture images based on light reflections. Your thermal scope picks up heat signatures and converts them into a visible image. This is why they work in total darkness—they don’t need light at all.
Every object above absolute zero gives off heat. What you see with a thermal scope are hot and cold spots, as thermal scopes detect the heat coming off objects and living things. The bigger the temperature difference, the clearer the image. This makes thermal devices like the Pixfra Sirius HD and Pixfra Pegasus 2 LRF excellent for spotting game or people against cooler backgrounds.
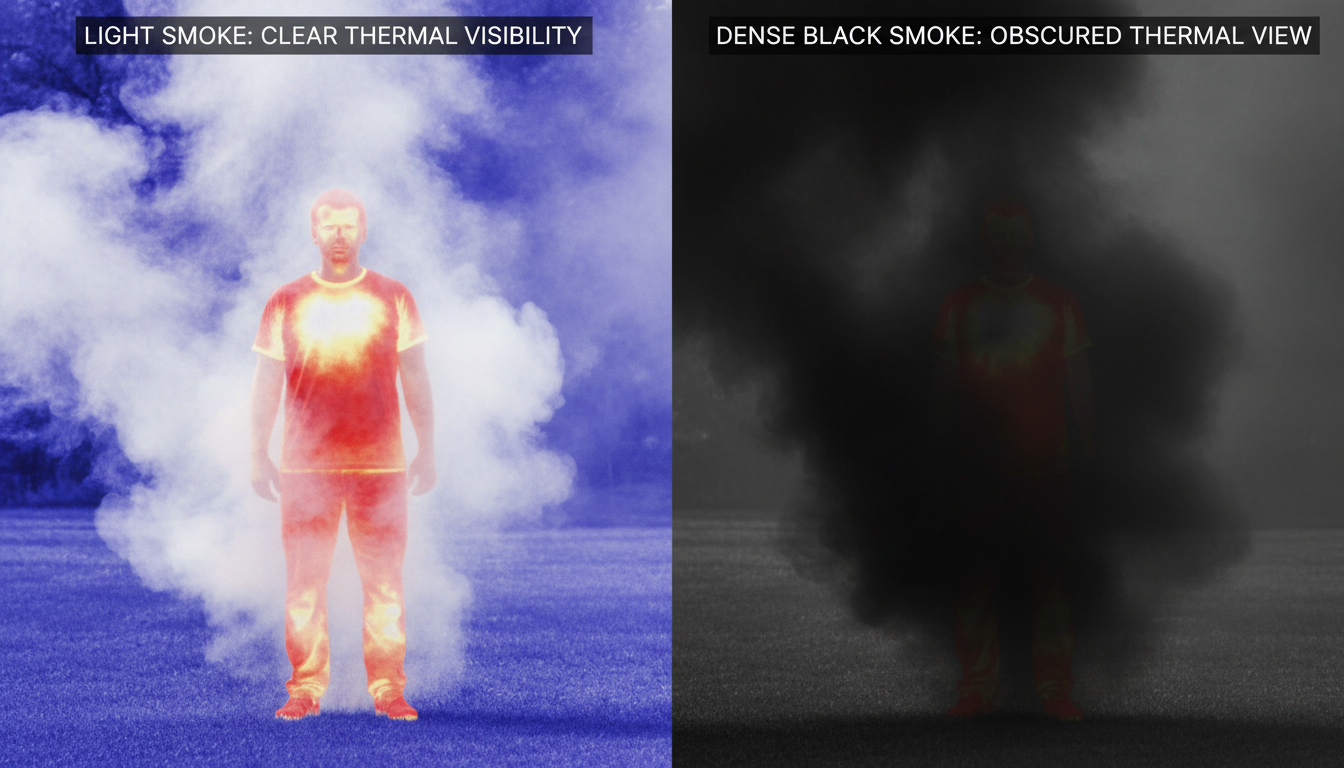
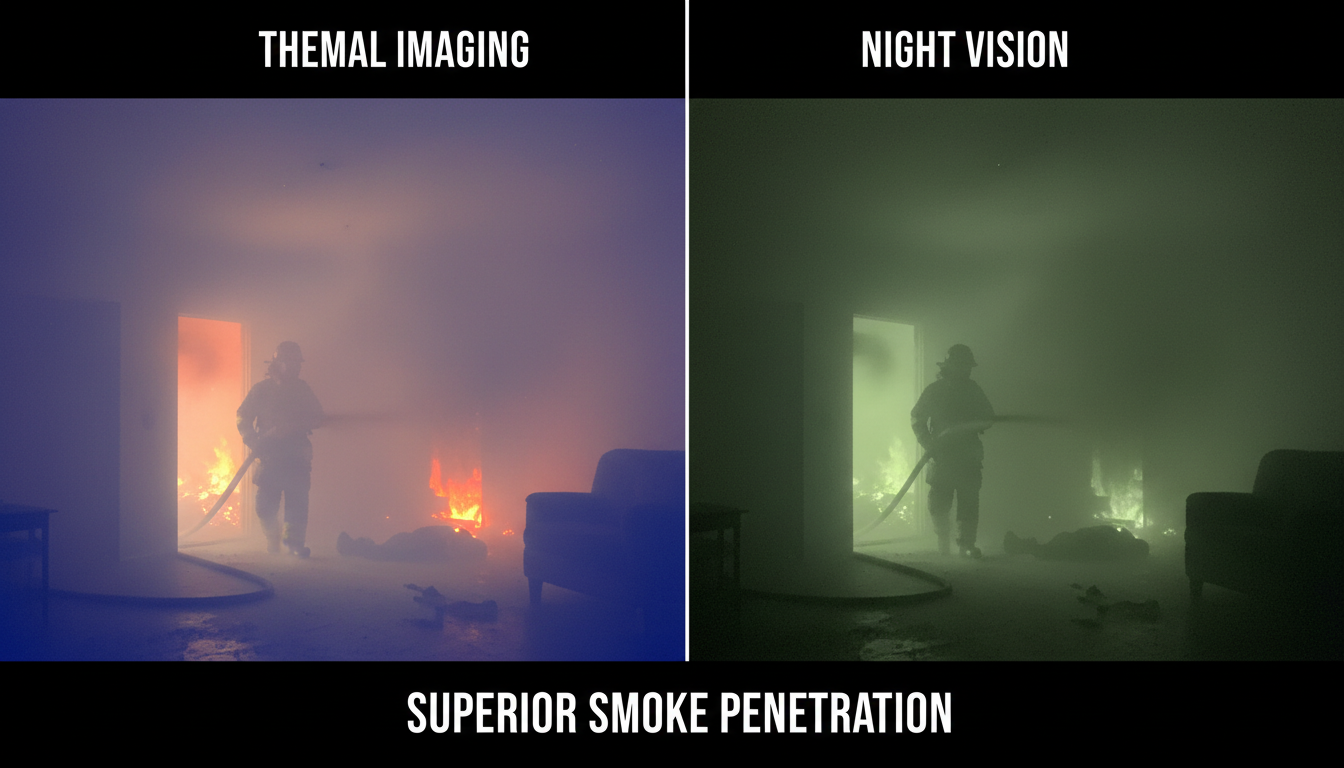
Here’s where it gets interesting. Yes, thermal scopes can see through smoke because particles in the smoke block visible light but allow heat signatures to penetrate. Firefighters use thermal scopes for this very reason. By rendering infrared radiation as visible light, such cameras allow firefighters to see areas of heat through smoke, darkness, or heat-permeable barriers.
But—and this is a big but—performance depends on several factors. You won’t always get a crystal-clear view through every type of smoke.
Light smoke may not significantly obstruct thermal imaging, allowing heat signatures to be visible, however dense smoke which contains a higher concentration of particles can absorb and scatter infrared radiation, making it challenging to detect objects behind it. Think of it like this: a thin wisp from a campfire? No problem. Thick black smoke from a structure fire? That’s going to limit what you can see.
Smoke is made of heated particles and has to be created by something hot, and if the heat source making the smoke is close, the thermal scope may pick up that heat and therefore not see very clearly through the smoke. The smoke itself can emit infrared radiation, which saturates your sensor and washes out the image.
The effectiveness of a thermal scope in smoke depends on the temperature difference between the target and the surrounding environment—a person’s body heat may still be detectable through light smoke if there’s a significant contrast between their temperature and the ambient conditions. On a cold night, you’ll spot heat signatures better than on a warm day.
The composition of smoke can vary based on its source—smoke from fires may contain hot gases that emit infrared radiation, potentially interfering with the thermal image, while smoke from smoke grenades may have different thermal properties. Silica particles in smoke can prevent thermals from being able to see through it.
We’ve seen thermal imaging prove itself in countless scenarios. In firefighting or search and rescue operations, the ability to see through smoke can mean the difference between life and death, as firefighters rely on thermal imaging to locate victims trapped in smoke-filled environments. Deep learning models trained with thermal cameras can achieve over 95% precision for locating people in low-visibility smoky scenarios, with results reported to control centers to help provide timely rescue.
For hunters using devices like the Pixfra Draco or Arc LRF, smoke is less of an issue than fog or rain. But understanding these limitations helps you make better decisions in the field.
In severe, thick smoke conditions, thermal imaging effectiveness can be reduced as smoke particles can obscure the infrared radiation emitted by the heat source. Infrared thermal imaging is significantly affected in foggy environments, while its impact is minor in smoky environments.
You also need to consider your equipment’s sensor quality. Thick smoke with intense heat can saturate the sensor, especially if the environment itself emits high thermal signatures, though advanced thermal monoculars use image optimization algorithms to enhance clarity even in dense smoke.
Let’s clear up another common question. Night vision amplifies existing light, so it’s completely useless in smoke. Night vision amplifies existing light while thermal detects heat, with thermal working in total darkness and through obscurants like smoke. That’s why search and rescue teams choose thermal over night vision for smoky environments.
If you’re evaluating different technologies, check out our guide on the best remote visual inspection devices with thermal imaging for more comparisons.
Thermal scopes have their limits. Thermal imaging cannot see through walls, as walls—especially solid ones like concrete, brick, or wood—block the transmission of heat. Thermal scopes can’t see through glass because it’s a very good insulator, and if you focus a scope on glass, it’ll pick up the heat reflected off it.
So while smoke is generally permeable to infrared radiation, solid objects are not.
When you’re shopping for thermal equipment, look for:
Brands like Pixfra focus on these features, designing scopes that perform when conditions get tough.
So, can a thermal scope see through smoke? Yes, but with conditions. Light to moderate smoke? You’ll get decent visibility of heat signatures. Dense, hot smoke from an active fire? Your view will be degraded. The technology works by detecting infrared radiation that passes through smoke particles, but density, heat, and composition all play a role.
Thermal imaging gives you a real advantage in low-visibility situations where standard optics fail completely. Whether you’re hunting in foggy conditions, conducting search and rescue, or need reliable inspection devices, understanding how your thermal scope interacts with smoke helps you use it more effectively. Just remember—thermal scopes are powerful tools, but they’re not magic. Know their limits, and you’ll know when to trust what you’re seeing.
Does thermal imaging work better in fog or smoke?
Thermal imaging generally works better in smoke than fog. While both can reduce visibility, smoke particles have less impact on infrared radiation than water droplets in fog. Research shows thermal imaging is significantly affected in foggy environments but only minimally impacted in smoky conditions. You’ll still get usable images through moderate smoke, though very dense smoke near a heat source will limit effectiveness.
Can military thermal scopes see through smoke grenades?
It depends on the type of smoke grenade. Standard smoke grenades that produce regular smoke can often be penetrated by thermal imaging. However, specialized thermal-blocking smoke grenades contain particles like silica that specifically obstruct infrared radiation. Military-grade thermal scopes work well against most tactical smoke screens, which is why they’re widely used in combat situations where smoke is deployed as cover.
Why do firefighters use thermal cameras if smoke blocks the view?
Firefighters use thermal cameras because they can detect heat signatures through most smoke conditions, even when visibility is severely reduced. The human body emits enough heat to create a detectable signature against cooler backgrounds, allowing rescuers to locate victims in smoke-filled rooms. While extremely thick, hot smoke can degrade the image, thermal cameras still outperform all other vision technologies in these conditions, making them life-saving tools.
Will a thermal scope help hunters in smoky forest conditions?
Yes, thermal scopes help hunters see through light to moderate smoke from wildfires or controlled burns. The scope will pick up the heat signature of animals even when smoke obscures your normal vision. However, if you’re hunting near an active fire or in very dense smoke, the heat from the smoke itself may interfere with target detection. Temperature contrast matters too—cooler weather gives you better thermal images.
What’s the difference between cheap and expensive thermal scopes in smoke?
Expensive thermal scopes typically have higher resolution sensors, better image processing algorithms, and superior optics that make a real difference in challenging conditions like smoke. Budget models may show washed-out images or struggle with dense smoke, while premium scopes use advanced filtering to enhance heat signatures even when smoke partially obscures the view. The sensor quality and processing power directly impact how well you can see through smoke.
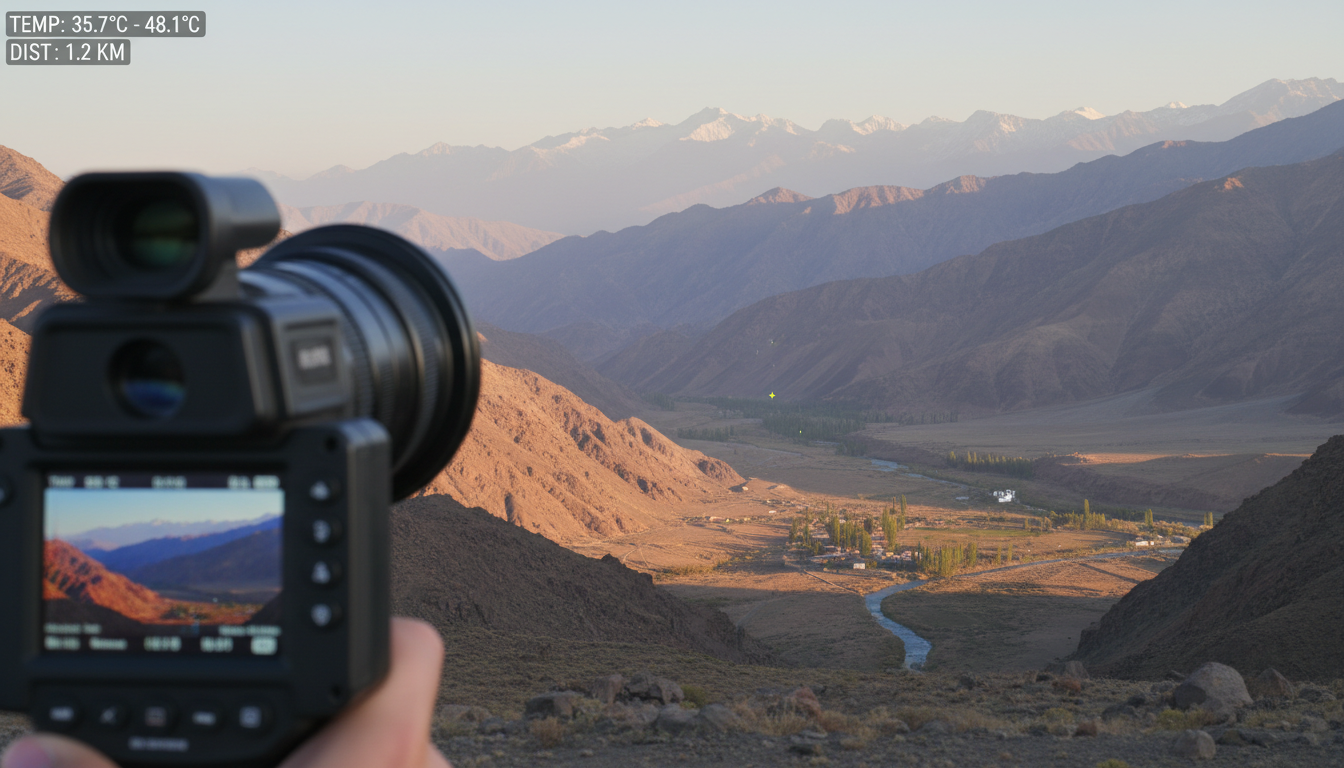
Thermal devices have become game-changers for everything from security to wildlife observation. But here’s what most people want to know: can these devices actually work from far away?
The short answer is yes. High-end thermal cameras can detect vehicles at up to 60 km and humans at up to 30 km. That said, distance performance depends on several factors. We’ll break down how thermal devices work at different ranges and what affects their performance.
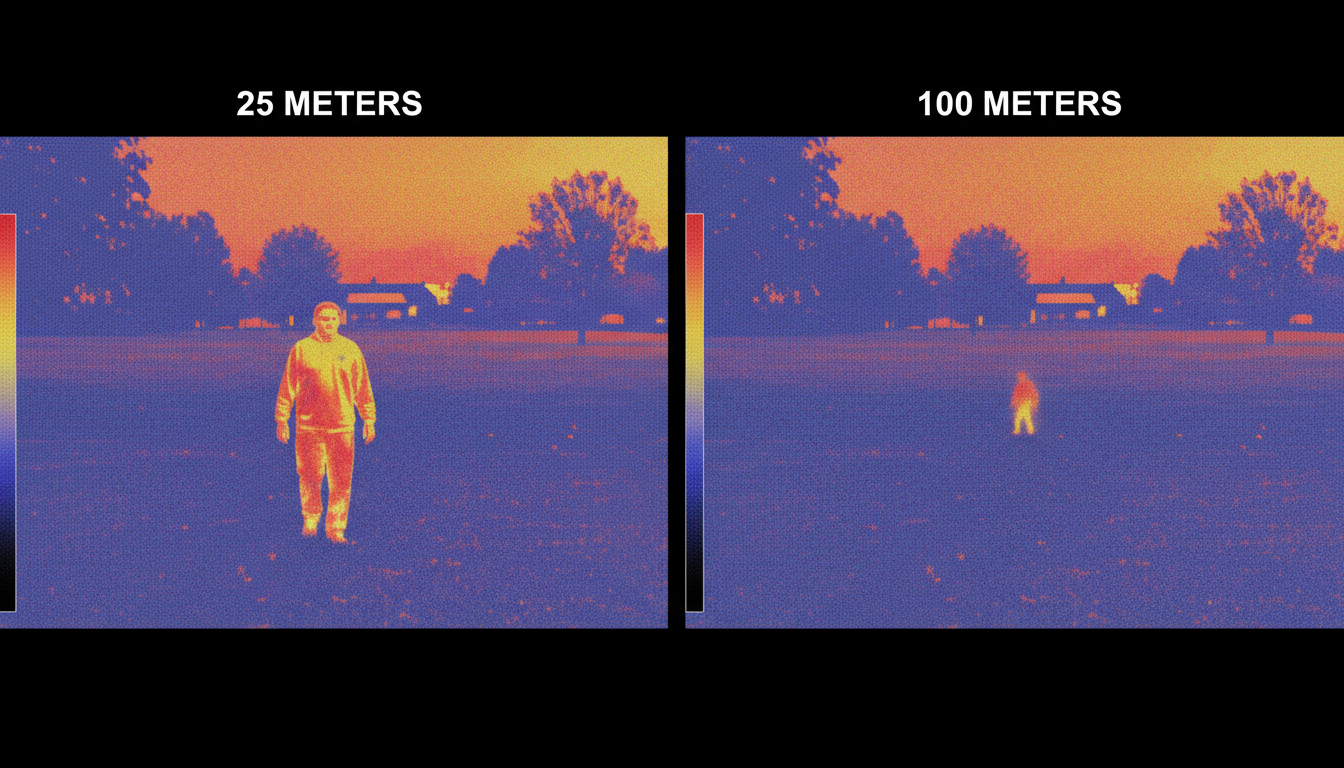
A thermal camera works by detecting the heat emitted by objects and converting it into an electronic signal. Unlike regular cameras that need visible light, thermal devices pick up infrared radiation that all objects emit based on their temperature.
Humans, animals and vehicles are typically warmer than their environment, providing a high contrast that allows for fast wide-angle detection of threats from a much further distance (sometimes up to 50km). This makes thermal imaging particularly effective for long-range surveillance and outdoor applications.
At Pixfra, we’ve designed our thermal imaging devices to maximize detection capabilities across various distances. Our Pegasus 2 LRF and Sirius HD models offer different range options depending on your specific needs.
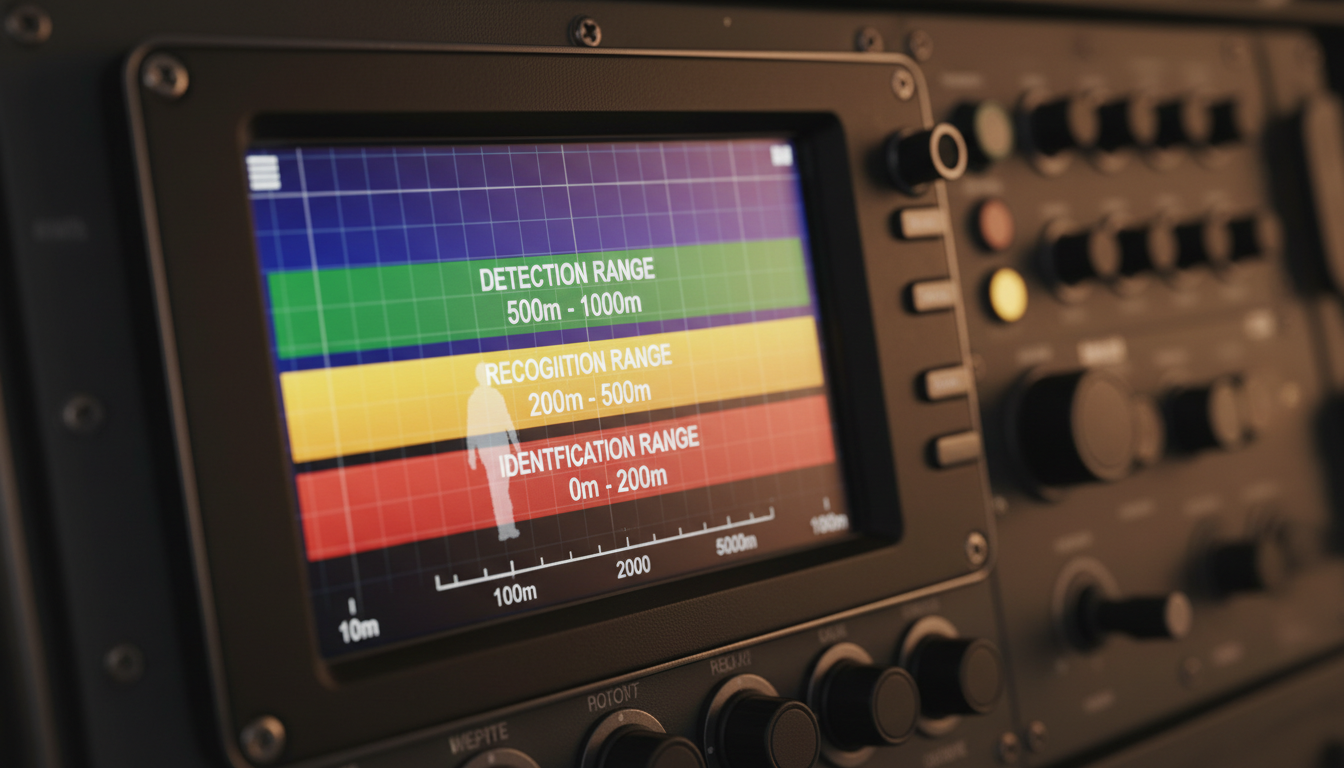
Not all “seeing” is the same. There’s a big difference between spotting something and actually identifying what it is.
Detection range is the distance at which the critical mass on your subject covers around 2 or more pixels, recognition range is approximately 40% of the detection range where you can discern what type of animal you’re looking at, and identification range is approximately 20% of the detection range where the critical mass covers at least 12 pixels.
For example, you might detect a heat signature at 2 kilometers, but you’ll only be able to tell if it’s a person versus a deer at 800 meters. And you’d need to be within 400 meters to identify specific features. These distances vary based on your device’s specifications.
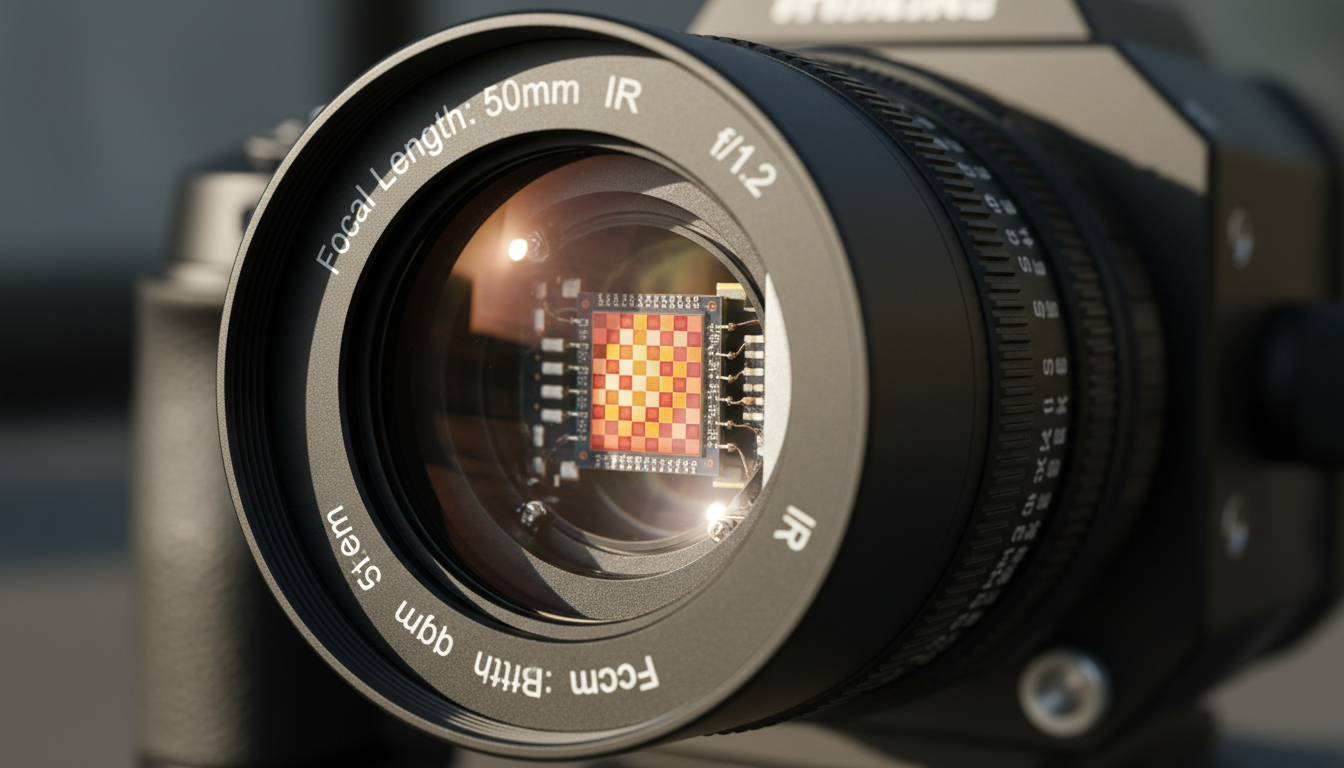
The resolution of a thermal camera significantly impacts its ability to detect distant objects. Higher resolution cameras capture more pixels, providing clearer and more detailed images. A 640×480 camera will outperform a 320×240 camera when it comes to distance work.
The lens focal length directly affects the image size formed by the target, which corresponds to how many pixels it occupies on the focal plane. Longer focal length lenses let you see farther, but with a narrower field of view. Short focal length lenses give you a wider view but less distance.
Most thermal cameras have a range of several hundred meters. However, the detection range can be significantly reduced in conditions of high humidity, fog, or heavy rain, as these conditions can attenuate the thermal radiation emitted by objects.
Clear, dry conditions give you the best performance. Heavy fog or rain can cut your effective range in half or more.
The size, distance, and temperature difference of the target significantly affect the camera’s ability to detect and measure it accurately. Larger targets with significant temperature differences are easier to identify and measure from a distance.
A warm vehicle against a cool background? Easy to spot from miles away. A person wearing insulated clothing in moderate weather? Much harder at the same distance.
Let’s get specific about what different thermal devices can actually do.
Handheld thermal cameras generally have a range of several hundred yards to about 1,000 yards, depending on the model and specifications. These work well for most home inspection, hunting, and basic security applications.
Specialized models can identify heat signatures from power lines or solar panels at distances of up to 2 kilometers or more. Industrial and professional models go much further.
Some high-end security models can have ranges exceeding several miles, with certain models offering a range of up to 4 miles. Military and border security applications use the longest-range thermal devices available.
Our best remote visual inspection devices with thermal imaging offer various detection ranges suited to different professional applications.
Detecting heat and measuring temperature are two different things.
When measuring temperature with a thermal camera, you want at least 3 × 3 pixels on your target to ensure you’re getting an accurate measurement. This means your effective measurement distance is much shorter than your detection distance.
Lower-resolution options should not be used for distance measurements, especially if it’s important for your application to have accurate temperature measurements. Higher-resolution cameras like those in professional series will be better suited to making measurements at a distance.
If you need precise temperature data, plan to get closer or invest in higher resolution equipment.
For long-range detection or detailed inspections, a larger lens size and a narrower FOV may be preferred. On the other hand, for broader scene coverage or close-range applications, a wider FOV may be more suitable.
Think about your actual use case. Security perimeter monitoring? You’ll want long-range detection with a narrow field of view. Wildlife observation in your backyard? A wider view at shorter ranges makes more sense.
Our Draco, IR Torch, and ARC LRF models each serve different distance and field of view requirements.
Thermal devices absolutely work from far away, with detection capabilities ranging from hundreds of yards for consumer models to dozens of kilometers for professional systems. But “working” means different things depending on whether you need to detect, recognize, or identify targets.
Your effective range depends on resolution, lens quality, environmental conditions, and target characteristics. Higher-end devices with better sensors and longer lenses will always outperform budget models when distance matters. And remember: detection distance and measurement accuracy are two separate considerations.
For professional applications requiring reliable long-range thermal imaging, investing in quality equipment with higher resolution and appropriate lens options will give you the performance you need.
Can thermal cameras see through walls from a distance?
No. Thermal cameras detect heat radiating from surfaces, not through them. While they can detect temperature differences on wall surfaces that might indicate issues behind the wall, they can’t actually see through solid materials like walls, glass, or dense foliage.
How far can a consumer-grade thermal camera detect a person?
Most consumer and entry-level thermal cameras can detect a person at 300 to 1,000 yards depending on conditions and specifications. Recognition (telling it’s a person rather than an animal) typically happens at about 40% of that distance, while identification of specific features requires getting much closer.
Does zoom improve thermal camera distance performance?
Digital zoom doesn’t improve detection capability—it just enlarges existing pixels. For better distance performance, you need higher resolution sensors or optical telephoto lenses. Digital zoom can help you see detected targets more clearly but won’t let you detect new targets farther away.
What’s the maximum distance thermal cameras can work?
Professional long-range thermal systems can detect vehicles at distances up to 60 kilometers and humans at 30 kilometers under ideal conditions. However, these are specialized military or security systems. Most commercial applications work within a few kilometers at most.
Do thermal devices work better at night for distance detection?
Thermal devices work equally well day or night since they detect heat, not visible light. However, temperature contrasts are often greater at night when ambient temperatures drop, which can improve detection of warm targets. Weather conditions affect performance more than time of day.
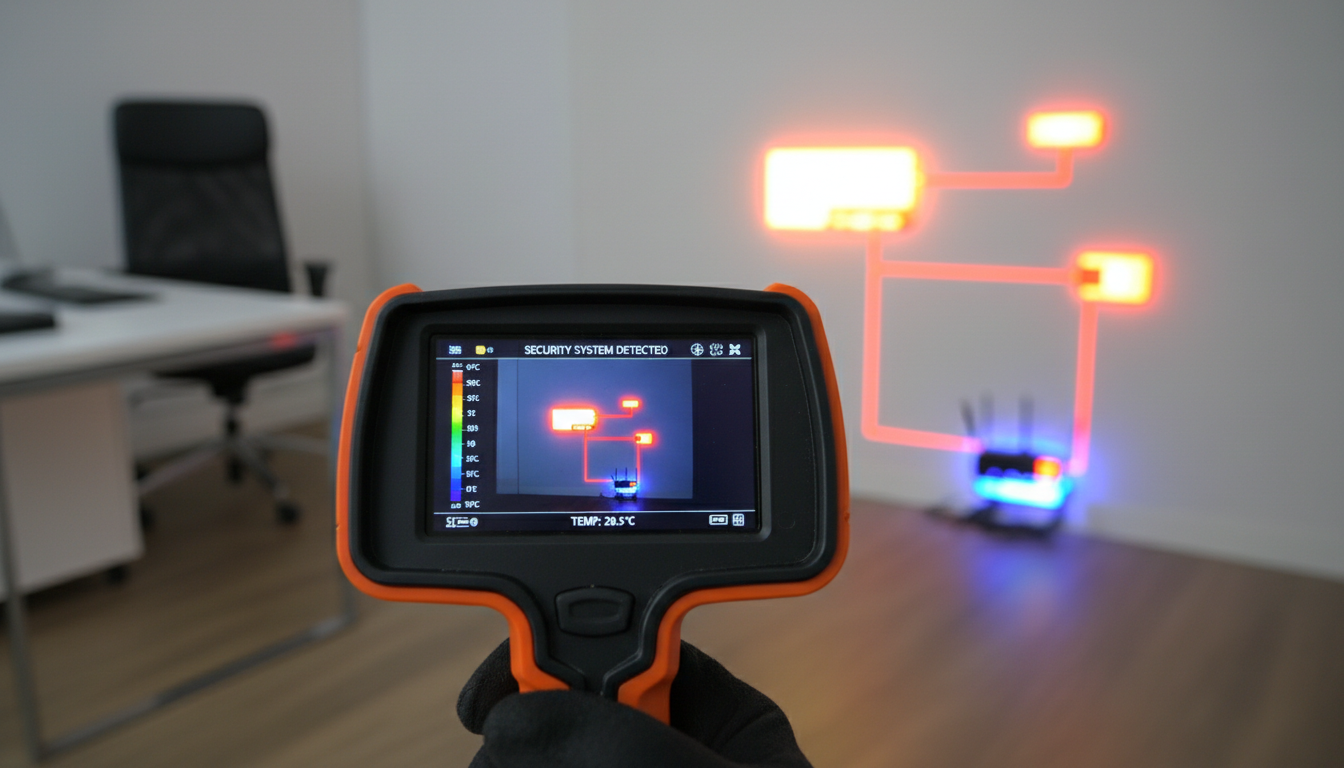
Security professionals and privacy-conscious individuals face a growing challenge: hidden surveillance devices. As these gadgets get smaller and easier to conceal, detection methods need to keep pace. Thermal imaging cameras have emerged as a potential solution, but how well do they actually work?
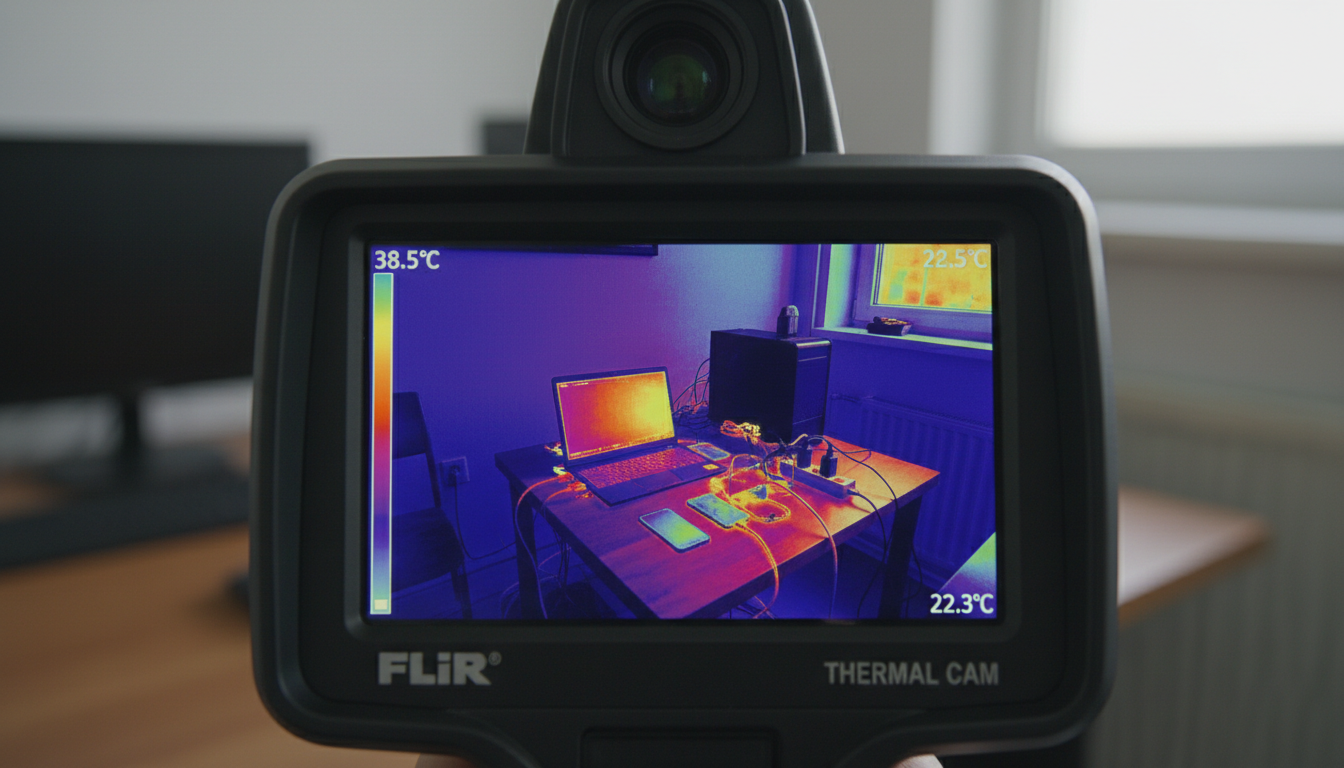
Thermal imaging cameras work differently from standard security cameras. Instead of capturing visible light, they translate thermal energy (heat) into visible light to analyze objects or scenes, displaying temperature profiles as thermal images. Every electronic device generates heat when powered on, which creates a detectable signature.
These cameras can detect surveillance devices the moment they’re powered on, and even if a device has been hidden for an extended period, once activated, it will emit heat that can be detected. This makes them particularly useful for remote visual inspection devices that combine multiple detection capabilities.
The science is straightforward: thermal imaging cameras detect infrared radiation emitted by all objects with a temperature above absolute zero. Security devices like hidden cameras, motion sensors, and recording equipment all produce heat during operation. Digital camera sensors always have an elevated temperature compared to ambient temperatures, making them stand out on thermal scans.
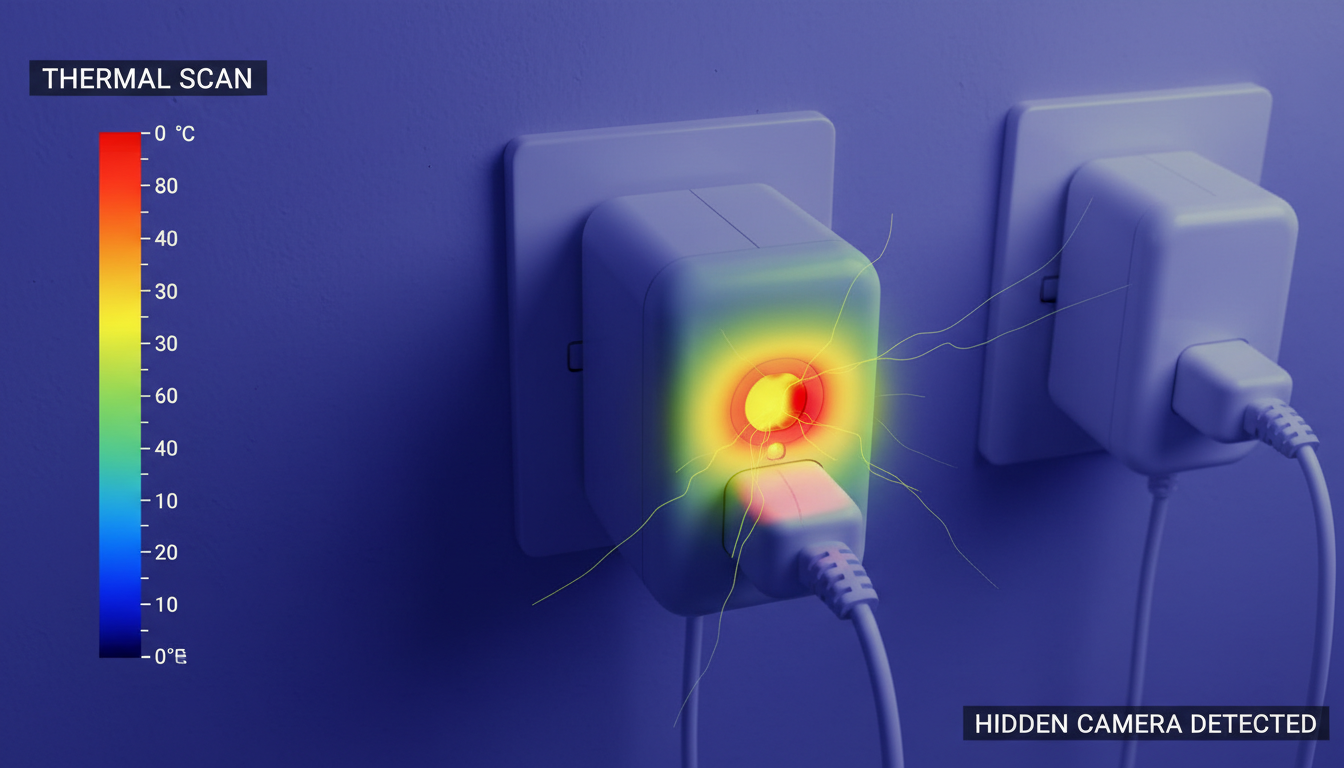
Thermal cameras excel at finding powered electronic equipment. They’re great for locating spy cameras hidden in hotels or short-term rentals, revealing water leaks in houses, and finding overheating electrical components. You’ll likely spot wall plugs, computers, and televisions showing elevated temperatures, which is normal.
The camera’s thermal sensitivity determines its ability to detect small temperature differences, which is critical for spotting low-power electronics like bugs, hidden cameras, or wiring, and the lower the NETD value, the better the camera can detect subtle heat signatures from surveillance equipment.
Research backs this up. HeatDeCam, a thermal-imagery-based detector, achieved over 95% accuracy in detecting hidden cameras. Spy cameras disguised as charger plugs exhibit additional uneven heat distribution compared to regular charger plugs because they have to add unique hardware components like SD cards and image sensors without changing the original form factor.
Professionals using thermal imaging devices like the Sirius HD can scan rooms for unusual heat patterns that indicate hidden electronics. Look for small spots of elevated temperature in unexpected places—especially near private areas like bedrooms or bathrooms.
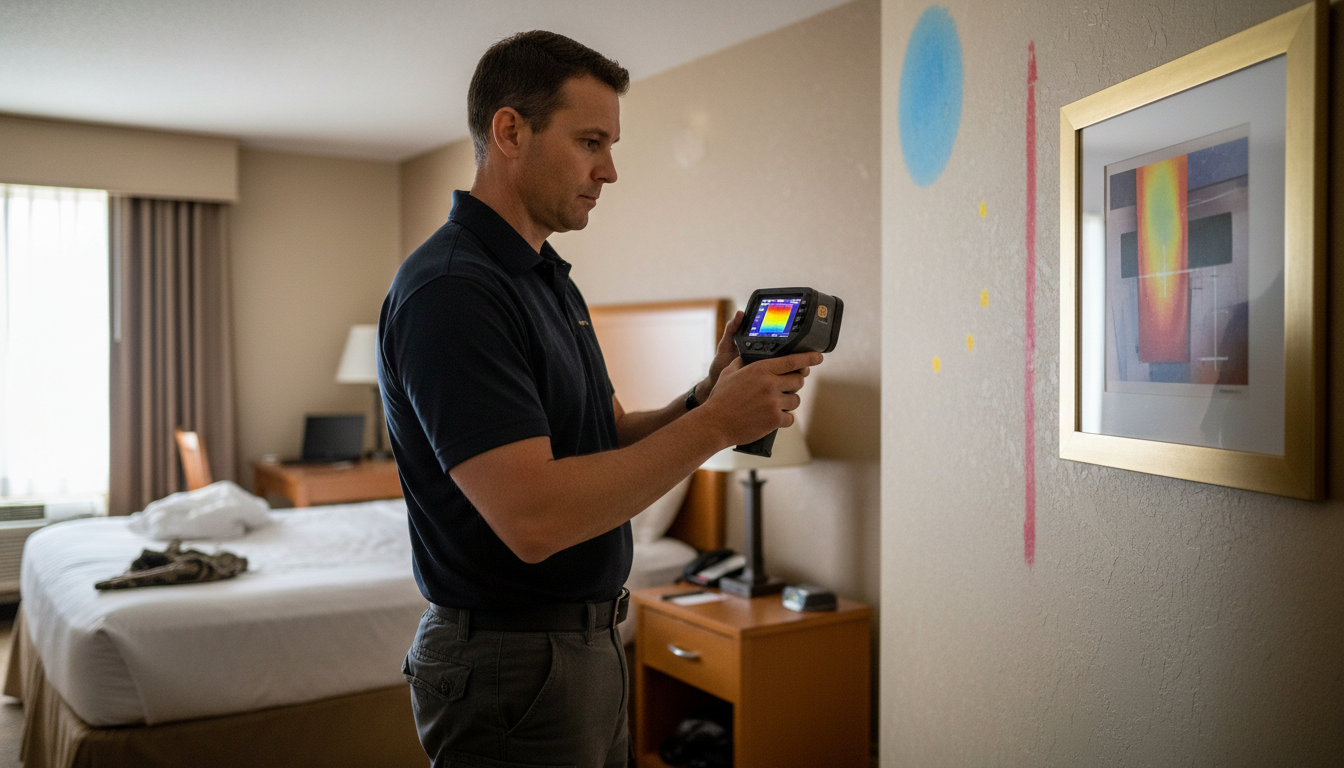
Thermal cameras aren’t perfect. In general, a thermal camera can’t detect hidden cameras if those devices aren’t powered on or generating sufficient heat. Devices in standby mode or those designed with heat-dissipating features become harder to spot.
You may encounter problems when the surroundings or backgrounds are the same temperature as an object in the image, and during very hot days, thermal cameras may be unable to distinguish an object from its surroundings. Temperature contrast matters more than absolute heat levels.
Thermal cameras cannot see through walls—they detect the thermal radiation emitted from surfaces, so they can only visualize heat patterns on the surface of objects. Glass and aluminum foil also block infrared rays, making detection impossible through these materials.
Another challenge: thermal cameras do not capture visible light, so details such as faces, license plates, or clothing color are not visible, making identification difficult. They’re better for detecting and tracking than recognition.
Thermal cameras help identify unusual heat patterns in the environment—a warm spot on a wall may suggest a hidden device, or a cooler area might indicate tampering or a secret compartment, and they provide a quick way to scan large areas. Security professionals can instantly identify potential heat sources by pointing the camera at a wall or room.
For professional security work, advanced thermal cameras like the Pegasus 2 LRF offer the resolution and sensitivity needed for thorough inspections. Higher resolution allows for clearer images and better detection of smaller or more subtle thermal signatures, which is especially important for checking devices hidden behind objects or in complex environments.
Thermal cameras provide a level of discretion that traditional surveillance systems cannot, and since they don’t rely on visible light, intruders are unlikely to see the camera or know they’re being monitored. This makes them valuable for covert operations.
When selecting a thermal camera for security device detection, specs matter. At least 256×192 pixels resolution is recommended, with 320×240 or higher preferred. Frame rate affects how quickly you can scan an area, with 25Hz or higher being standard.
A narrower FOV (closer to 30°) is ideal for pinpoint accuracy and focused inspections, while a wider FOV (closer to 50°) can help you scan large areas quickly. Depending on your inspection needs, you might need both capabilities.
Advanced thermal cameras offer “fusion” modes that combine thermal and visible light images, making it easier to detect hidden devices when combined with visual inspections. These hybrid systems, like the Draco model, give you the best of both worlds.
Battery life matters for field work. Professional models typically offer 4-6 hours of operation. Look for waterproof ratings (IP65 or higher) if you’ll be working outdoors or in harsh conditions.
To find a spy camera in a room, you just scan the room with a thermal camera, looking for small spots of elevated temperature. If you find something odd, usually with a small glass lens that you don’t think should be receiving an electrical signal and is showing an elevated temperature, it might be a spy camera.
Start your scan methodically. Check common hiding spots: smoke detectors, air vents, electrical outlets, decorative items, and anywhere with a small hole or lens. Move slowly and give the camera time to register temperature differences.
Thermal cameras enable early detection of surveillance devices, allowing countermeasures to be implemented promptly, and even low-power or low-heat devices can be identified early in the process. Time your scans for when you expect devices to be active—most surveillance equipment runs continuously or on motion activation.
For professionals, specialized tools like the IR Torch combine thermal imaging with other detection methods for comprehensive sweeps. Multiple detection vectors increase your chances of finding hidden devices.
Thermal imaging cameras offer a powerful tool for detecting security devices, but they’re not magic. They work best on powered electronics that generate detectable heat signatures. Professional-grade models with high sensitivity, good resolution, and fusion modes provide the most reliable results. While limitations exist—especially with unpowered devices or high-temperature environments—thermal cameras remain one of the most effective counter-surveillance tools available. Whether you’re checking a hotel room or conducting professional security sweeps, understanding what thermal cameras can and can’t detect helps set realistic expectations and develop effective inspection strategies.
Can thermal cameras detect hidden cameras that are turned off?
No, thermal cameras can’t reliably detect hidden cameras that are completely powered off. They work by identifying heat signatures from active electronics. If a surveillance device isn’t generating heat, it won’t show up on thermal scans. You’ll need to power on the device or use other detection methods like RF detectors for wireless cameras or physical visual inspections.
What’s the difference between thermal cameras and night vision for finding security devices?
Thermal cameras detect heat signatures and work in total darkness without any light source. Night vision cameras amplify existing light and need at least some ambient light or infrared illuminators to function. For finding hidden security devices, thermal cameras are more effective because electronic components generate heat regardless of lighting conditions. Night vision won’t help you spot a hidden camera inside a clock or smoke detector.
How close do I need to be for a thermal camera to detect a hidden device?
Detection distance depends on your thermal camera’s resolution and sensitivity. Consumer-grade models work best within 10-15 feet for small devices like hidden cameras. Professional models can detect heat signatures from farther away, but for counter-surveillance work, closer is better. Scan slowly from 3-10 feet away for optimal results. Higher resolution cameras (320×240 or better) can spot smaller temperature differences at greater distances.
Will glass block thermal cameras from detecting devices behind it?
Yes, glass blocks infrared radiation, making it impossible for thermal cameras to see through windows or glass barriers. The camera will only show the temperature of the glass surface itself, not objects behind it. This limitation also applies to some plastics and reflective materials like aluminum foil. If you suspect a device is behind glass, you’ll need to use different detection methods or physically access the area.
Are thermal cameras better than RF detectors for finding spy cameras?
Both tools have strengths. Thermal cameras detect any powered electronic device, including wired cameras that don’t emit radio frequencies. RF detectors find wireless cameras and transmitters but miss hardwired devices. For comprehensive counter-surveillance, professionals use both methods together. Thermal cameras excel at spotting disguised devices based on heat patterns, while RF detectors identify wireless transmission signals. The best approach combines multiple detection techniques.
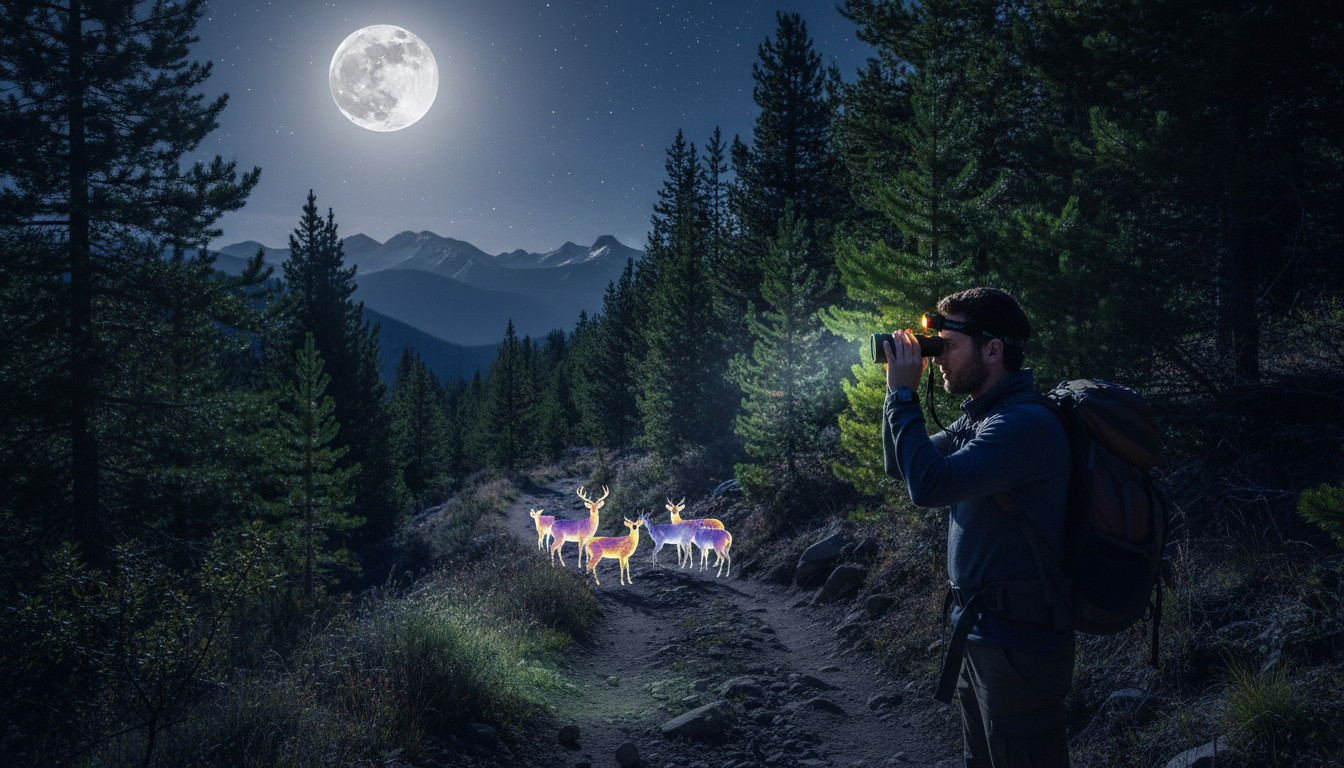
More than half of all wildlife species are active at night, but most hikers never get to see them. We spend our days on the trail watching for deer and birds, then pack up before sunset—missing an entire world of nocturnal activity happening right under our noses.
The short answer? Yes, you can absolutely observe wildlife while hiking at night. In fact, nighttime offers some of the best opportunities to spot animals that stay hidden during daylight hours. From owls hunting in the darkness to foxes trotting along forest edges, the nocturnal world is far more active than most people realize.
But night hiking for wildlife isn’t the same as a daytime hike. You’ll need different gear, a shift in your approach, and a solid understanding of safety practices. Here’s what we’ve learned from our own nighttime adventures and what works when you want to see wildlife after dark.
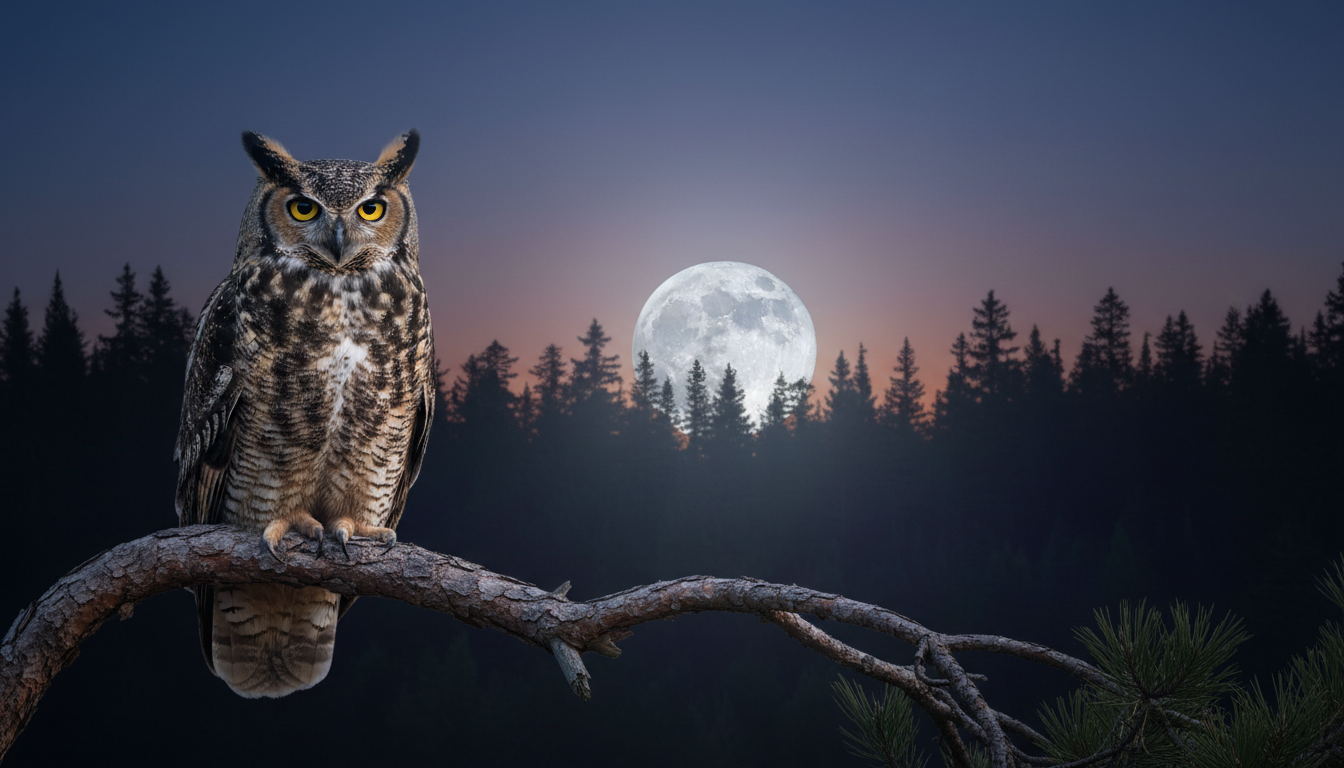
The forest comes alive at night. Creatures that spend daylight hours hiding in burrows, trees, and dense brush emerge to hunt, forage, and move through their territories.
Owls are some of the most common nocturnal sightings. Great horned owls, barn owls, and screech owls hunt rodents and small mammals throughout the night. You’ll often hear them before you see them—their distinctive hoots and calls echo through dark forests. Bats dart overhead, eating insects by the hundreds. Deer become more active during twilight hours and continue moving through the night, especially in areas with heavy daytime human traffic.
Raccoons, opossums, and skunks are opportunistic feeders that prefer nighttime activity. Foxes—both red and gray varieties—hunt small prey along trail edges. In some regions, you might spot bobcats, coyotes, or even bears, though these encounters are less common. Porcupines, badgers, and various rodent species also join the nighttime activity.
Many of these animals have excellent camouflage that makes them nearly invisible during the day. At night, with the right equipment and techniques, they’re often easier to detect than you’d think.
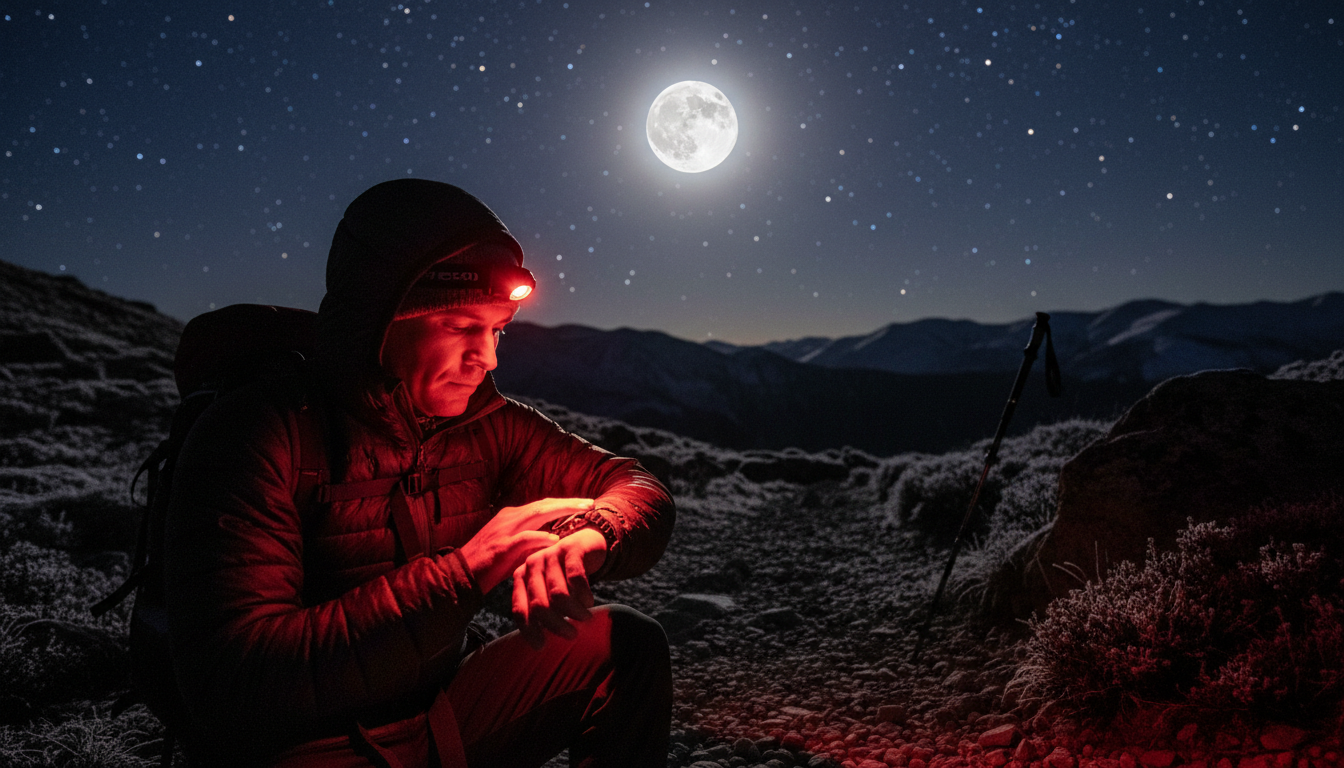
Timing matters when you’re hoping to observe nocturnal wildlife. We’ve found that the transition periods—dusk and dawn—offer the highest activity levels. These “between times” bring out both crepuscular animals (active at twilight) and truly nocturnal species starting their nightly routines.
Full moon nights provide natural illumination that helps you navigate trails while still allowing your eyes to adjust to darkness. Moonlight creates enough visibility to see animal silhouettes and movement without needing constant artificial light. Plan your hikes around the lunar calendar for the best natural viewing conditions.
Seasonal considerations also play a role. Spring and early summer bring increased activity as animals raise young and take advantage of longer nights. Fall sees animals preparing for winter, leading to more foraging behavior. Winter nights can be productive too, especially in areas where snow reflects available light and makes tracks easy to follow.
Avoid hiking during storms or heavy rain—wildlife activity drops significantly in poor weather, and trail conditions become dangerous.
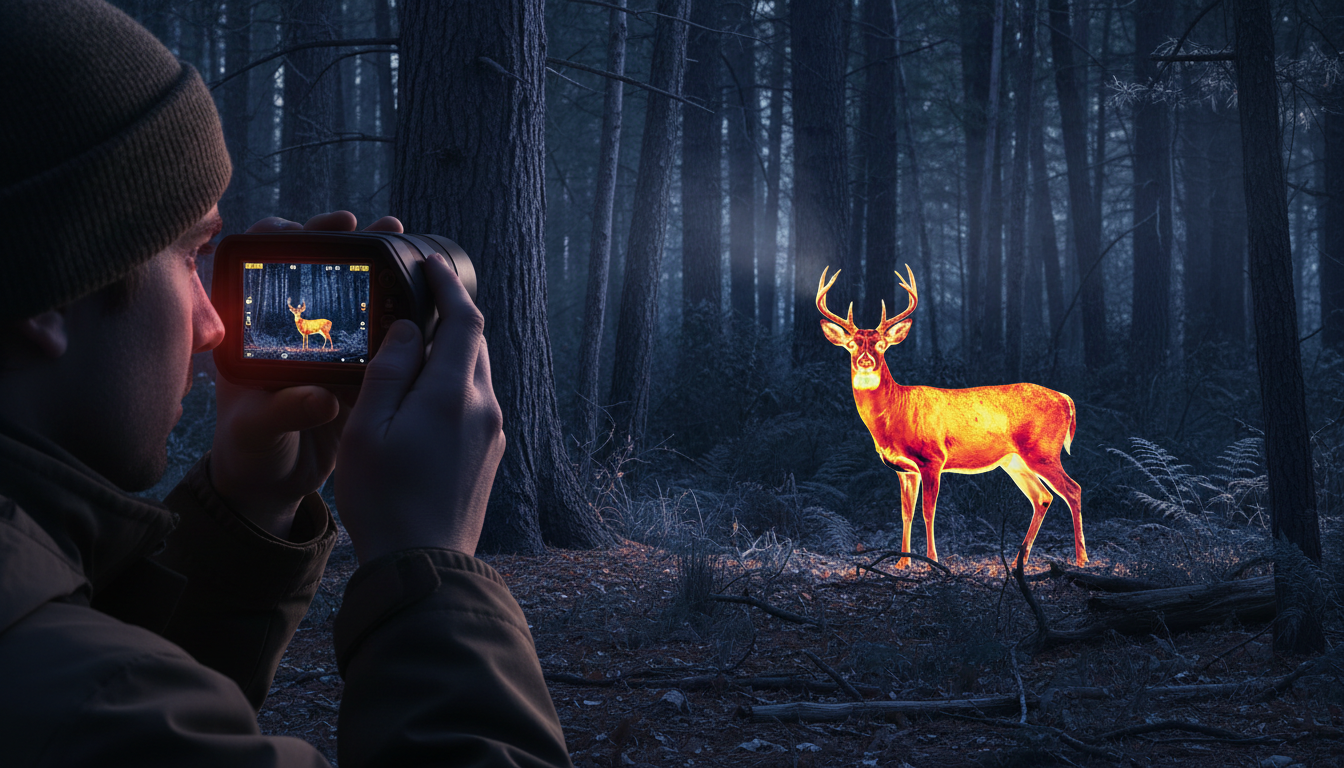
The right equipment transforms night hiking from a stumbling adventure into a genuine wildlife observation opportunity. We rely on headlamps with red-light settings, which preserve night vision while providing enough illumination for navigation. White light destroys the night vision your eyes spend 30-45 minutes developing, forcing you to start the adjustment process over with every use.
Thermal imaging technology has changed the game for nighttime wildlife observation. Devices like the Pixfra Sirius HD detect heat signatures from animals, making them visible even in complete darkness. Unlike traditional night vision that requires ambient light, thermal imaging works by sensing infrared radiation emitted by warm-blooded creatures.
We’ve used the Pixfra Pegasus 2 LRF on multi-day trips and found its extended detection range incredibly useful for scanning meadows and clearings where deer and other large mammals feed. For closer observation, compact options like the Draco fit easily in a jacket pocket without adding bulk to your pack.
Bring extra batteries or a power bank—nothing’s worse than losing your thermal capability halfway through a night hike. A detailed trail map, compass, and GPS device are non-negotiable safety items. Dress in layers; nighttime temperatures drop significantly, even during summer months.
Night hiking carries different risks than daytime excursions. We always hike in groups when possible—multiple sets of eyes and ears increase safety and reduce the chance of getting lost. Solo night hiking is doable but requires extra caution and preparation.
Make noise while you hike. This seems counterintuitive when you’re trying to observe wildlife, but it’s the safest approach in areas with bears or mountain lions. Talk with your hiking partners, sing occasionally, or call out “hey” every few minutes. Most animals will move away before you ever see them, which is actually the goal—surprise encounters with large predators are dangerous for everyone involved.
Stick to familiar trails, especially when you’re new to night hiking. A route you’ve walked dozens of times during the day becomes disorienting in darkness. Trail markers are harder to spot, and wrong turns happen easily. Start with short, simple hikes and gradually work up to longer distances.
Research the wildlife in your specific area before heading out. Know what animals are present, understand their behavior, and learn appropriate responses for encounters. Carry bear spray in bear country and keep it accessible—not buried in your pack.
Move slowly and deliberately. Rocks, roots, and uneven terrain that you’d easily navigate during the day become tripping hazards at night. We hike at roughly half our normal daytime pace, which also gives us more time to actually observe the wildlife we came to see.
Seeing nocturnal animals requires patience and a different sensory approach. Your eyes need time to adjust—at least 30 minutes in darkness before your night vision reaches full capability. Even a quick glance at a bright phone screen resets this process.
Use your peripheral vision. The rod cells in your eyes that detect movement and shapes in low light are concentrated around the edges of your retina, not the center. Instead of staring directly at something, try looking slightly to the side. This technique reveals movement and shapes that disappear when you look straight at them.
Listen more than you look. Night hiking forces you to rely on hearing, and you’ll be surprised how much information your ears provide. The snap of a twig, rustling leaves, or a splash near water all indicate animal presence. Cup your hands behind your ears to amplify distant sounds—it actually works.
Move during active periods, then stop and stay still. We’ll hike for 10-15 minutes, then find a good vantage point and simply wait. Animals that moved away from the noise of our approach often return within 10-20 minutes if you remain quiet and motionless.
Watch for eyeshine. When you do use your light, many animals’ eyes reflect it back with a distinctive glow. Different species produce different colored eyeshine—deer show white or pale yellow, while raccoons reflect bright yellow-green.
Observing wildlife while hiking at night opens up a completely different outdoor experience. The nocturnal world is active, diverse, and accessible to anyone willing to adjust their approach and gear up properly. From common species like owls and raccoons to more elusive creatures like foxes and bobcats, there’s an entire ecosystem operating after sunset.
Success comes down to preparation: know your trails, bring the right equipment, understand the animals in your area, and prioritize safety. Start with short hikes on familiar paths during full moon periods. As you gain experience and confidence, you’ll develop an intuition for where and when to find nocturnal wildlife.
The darkness that once seemed limiting becomes an advantage. With thermal imaging, proper lighting, and patience, you’ll see animals that remain hidden from daytime hikers. And you’ll gain a deeper appreciation for just how alive the natural world is when most humans are asleep.
Is it safe to hike at night to see wildlife?
Yes, with proper preparation. Hike in groups when possible, make periodic noise to avoid surprising large animals, stick to familiar trails, and research the wildlife in your area beforehand. Carry appropriate safety gear including a reliable light source, navigation tools, and bear spray in bear country. Most wildlife encounters at night are harmless if you follow basic safety protocols and give animals space.
What animals are most commonly seen on night hikes?
Owls, bats, deer, raccoons, opossums, foxes, and skunks are the most frequently observed nocturnal animals. Depending on your region, you might also see coyotes, bobcats, porcupines, badgers, or various rodent species. Over 50% of wildlife species are active at night, so you’ll often see more animal diversity during nighttime hikes than daytime ones.
Do I need special equipment to observe wildlife at night?
A headlamp with a red-light setting is the minimum requirement—it preserves your night vision while providing illumination. Thermal imaging devices dramatically improve your ability to spot animals in complete darkness by detecting their heat signatures. You’ll also want extra batteries, navigation tools, appropriate clothing for cooler temperatures, and a detailed trail map.
When is the best time of night to see wildlife?
Dusk and dawn offer peak activity as crepuscular and nocturnal animals begin their routines. Full moon nights provide natural illumination that helps both navigation and observation. Many nocturnal animals remain active throughout the night, but the hours just after sunset and before sunrise typically show the highest wildlife movement and feeding behavior.
How long does it take for eyes to adjust to darkness?
Your eyes need 30-45 minutes to fully adjust to darkness and develop maximum night vision. Even a brief exposure to bright white light—including phone screens or headlamps—resets this process, requiring another 30 minutes to regain full adjustment. This is why red lights are recommended; they provide visibility without destroying your natural night vision adaptation.
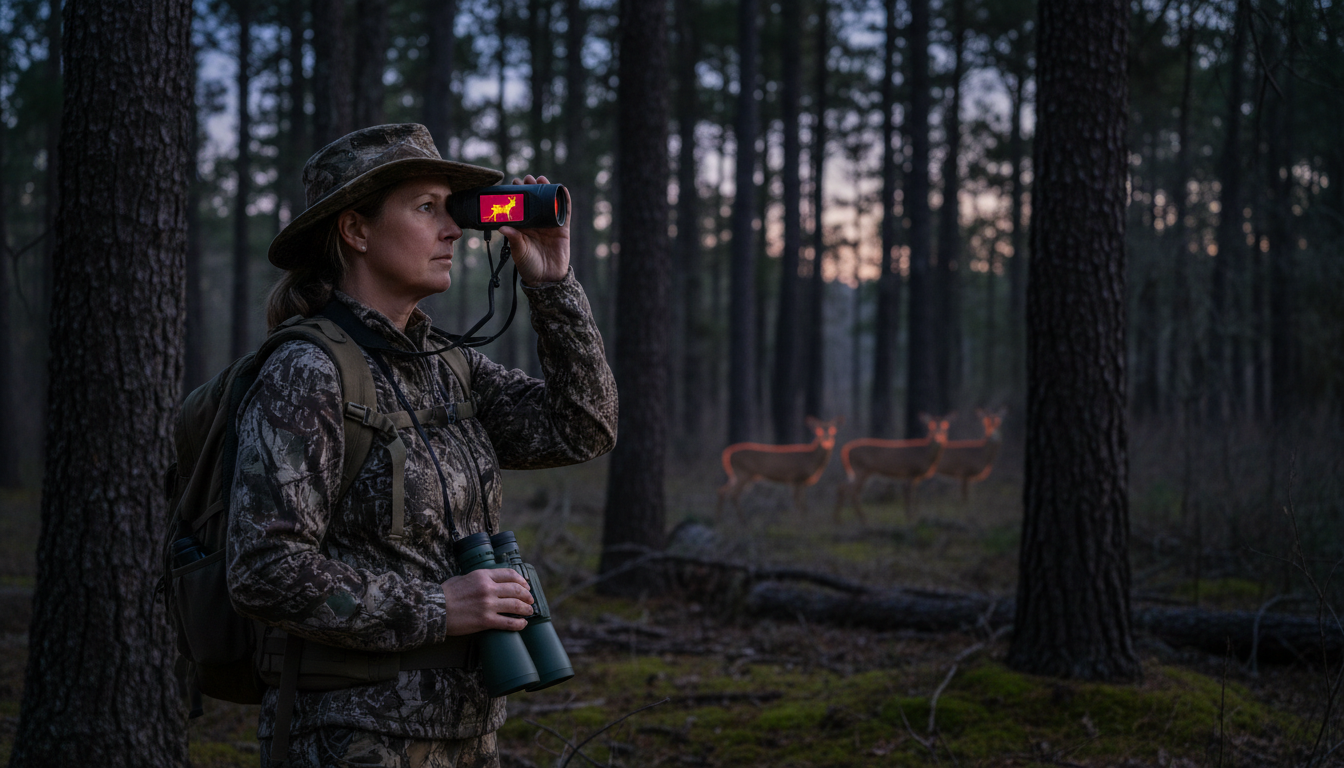
Ever missed spotting a deer because it blended too well into the brush? Or wondered what’s rustling around your backyard after dark? The right observation gear changes everything. We’ve spent years testing equipment in the field, and we’re here to share what actually works for spotting wildlife—without the gear-snob talk.
Whether you’re tracking nocturnal animals, birdwatching at dawn, or just curious about your local ecosystem, modern technology makes it easier than ever to connect with nature on your terms. Let’s break down the tools that’ll take your wildlife watching from guesswork to real-time observation.
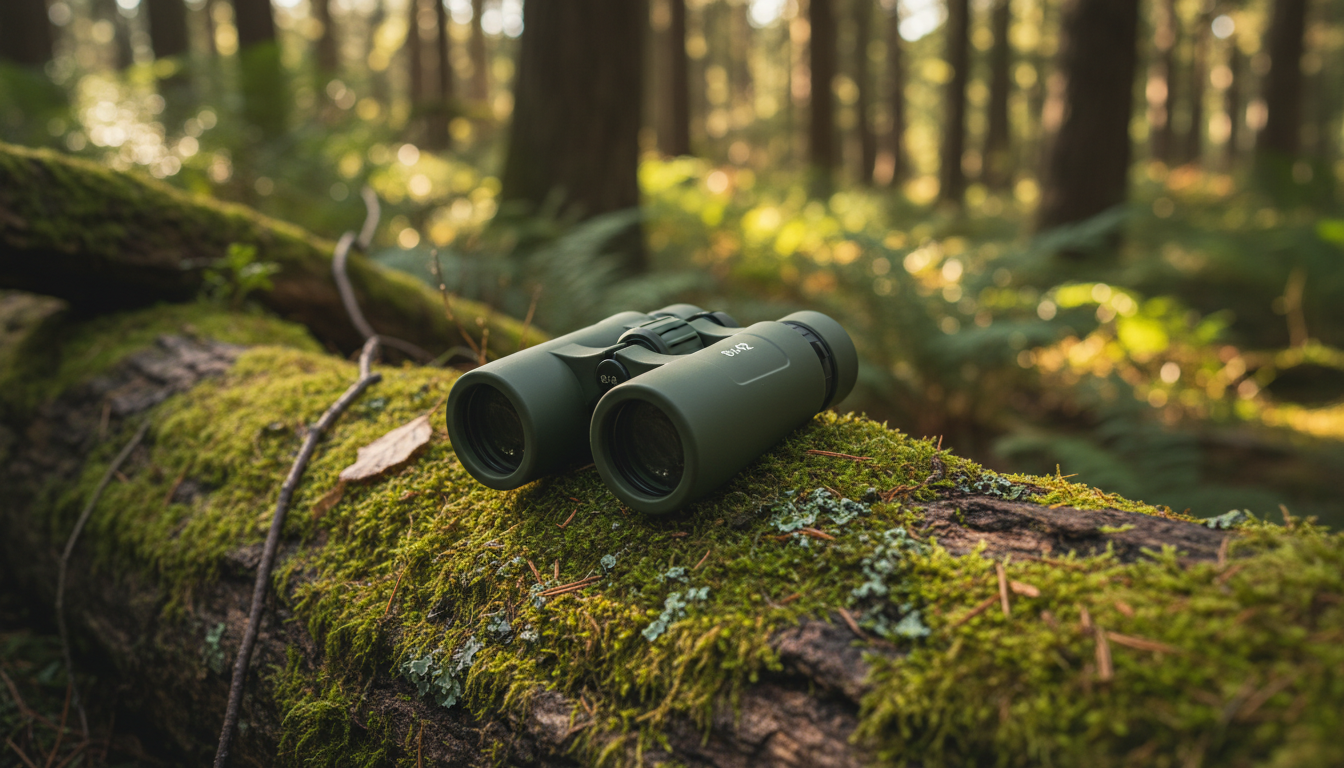
Binoculars are a must-have for any nature watcher or birder. But forget the expensive models that require a mortgage. What matters is finding a pair that’s lightweight, waterproof, and has moderate magnification—typically 8x or 10x power.
Here’s the deal with binocular specs: those numbers like 8×42 tell you the magnification (8x) and the lens diameter in millimeters (42mm). Bigger lenses gather more light, which helps in low-light conditions like early morning or dusk. We recommend starting with an 8×42 configuration for most wildlife watching—it’s the sweet spot between power and stability.
Look for models with good grip, especially if you’re planning multi-hour observation sessions. Your hands will thank you. And waterproofing isn’t just nice to have—it’s a must when weather turns or you’re near water.
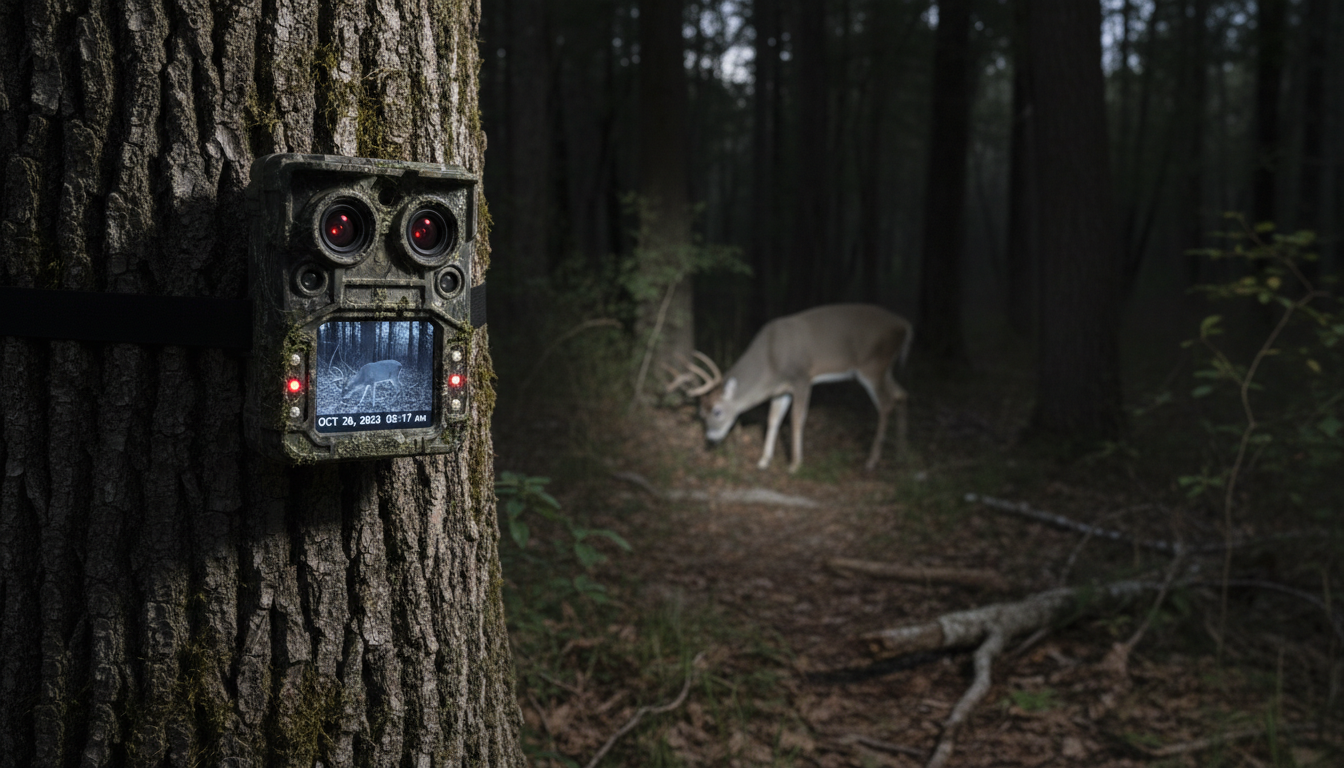
Trail cameras are a wonderful way to capture wildlife without disturbing it, as they are placed in strategic locations and set to take pictures or video whenever they detect motion. These weatherproof cameras have become surprisingly affordable and user-friendly.
Modern trail cameras offer features like fast trigger speeds (under 0.5 seconds), high-resolution sensors, and night vision capabilities. Some even have cellular connectivity that sends images straight to your phone. Battery life on quality models can last weeks, making them perfect for long-term monitoring of animal patterns.
Set them up near trails, water sources, or feeding areas. You’ll be amazed at what passes by when you’re not around.
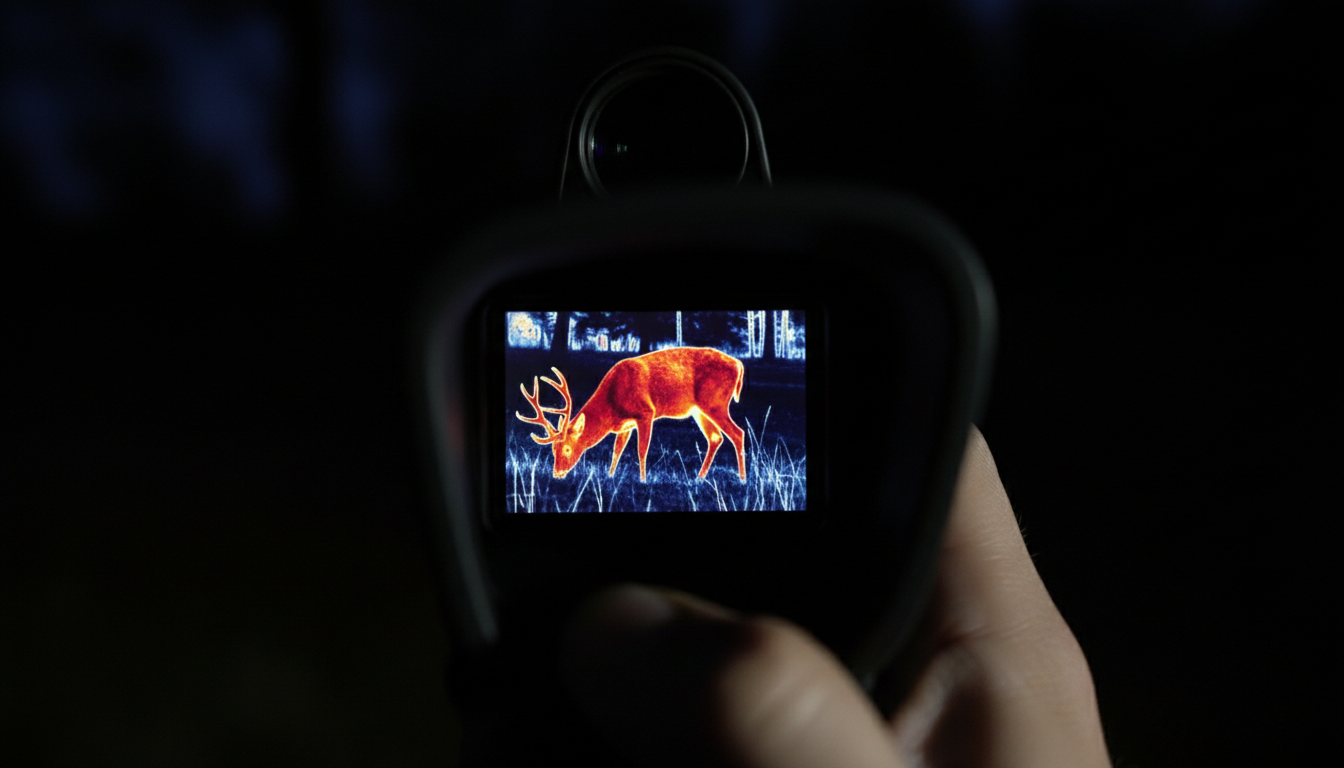
This is where things get interesting. Thermal imaging technology has changed the game for wildlife observation. Thermal imaging cameras see through darkness and ignore visual camouflage, and unlike all other nighttime vision systems, they require no light whatsoever to produce a clear image.
Thermal devices detect heat signatures—not light. That means total darkness, fog, or light vegetation won’t stop you from spotting animals. We’ve found thermal imaging particularly valuable for nocturnal species like owls, bats, and foxes that are nearly impossible to observe with traditional methods.
Thermals can work just as well in daytime as at nighttime, as it matters much less what time of day it is, and much more what the temperature differential is. On cold days, warm-blooded animals stand out brilliantly even at noon.
Products like the Pixfra Sirius HD, Draco, or Pegasus 2 LRF offer different ranges and features depending on your budget and observation needs. Pairing thermal with traditional optics—using thermal to locate, then binoculars to identify—gives you the best of both worlds.
When binoculars don’t cut it distance-wise, spotting scopes step in. These are essentially small telescopes that excel at observing distant birds, waterfowl, or wildlife across open terrain.
Spotting scopes typically offer magnifications from 15x to 60x and require a tripod for stable viewing. They perform well in low-light conditions when paired with larger objective lenses. The downside? They’re bulkier and less portable than binoculars, so they’re best for stationary observation points.
Pair your scope with a quality tripod—shaky images at high magnification are useless.
Magnifying Glasses: Don’t overlook the micro-world. A simple magnifying glass opens up observation of insects, plants, and small creatures that are easy to miss.
Weatherproof Field Notebooks: Apps are great, but a waterproof notebook never runs out of battery. Record what you see, when, and where. Over time, you’ll build a valuable personal database of wildlife patterns.
GPS Devices: Track your locations and mark spots where you’ve seen specific species. This data helps you return to productive areas and understand animal territories.
Quality Backpack: You need somewhere to carry all this gear. Look for cases with waterproof ratings (IP67 or higher), foam padding, and customizable compartments. Your expensive optics deserve protection from the elements.
People often confuse these two technologies. Night vision amplifies existing light—it needs at least some ambient light to work. Thermal imaging doesn’t use any light – it detects heat signatures, which means thermal can see in absolute darkness and through light cover like grass or fog, which night vision cannot do.
For wildlife observation, thermal wins for pure detection capability. For species identification at closer ranges, night vision or quality binoculars provide better detail. Many serious observers use both.
Start simple. If you’re new to wildlife watching, begin with quality 8×42 binoculars and a field guide for your region. That’s enough to get you started and hooked.
As your interest grows, add a trail camera to monitor a specific area. This passive observation teaches you about animal behavior and patterns without requiring your constant presence.
When you’re ready to explore nocturnal wildlife or want to spot camouflaged animals, invest in thermal imaging. The IR Torch or ARC LRF offer different approaches to low-light observation.
Quick Setup Recommendation:
Remember: the best tool is the one you’ll actually use. Don’t buy equipment that’s so complicated or heavy you’ll leave it home.
Better tools mean you can observe from farther away—and you should. Just because you can see that sleeping deer in the dark doesn’t mean you should approach and startle it. Maintain respectful distances, especially during breeding seasons or with protected species.
Your gear should help you appreciate wildlife without disturbing their natural behaviors. Stay quiet, move slowly, and remember you’re visiting their home.
The best tools for wildlife observation depend on what you want to see and when. Binoculars remain the foundation for any setup, offering versatility and portability. Trail cameras provide 24/7 monitoring without your presence. And thermal imaging opens up the nocturnal world in ways traditional optics simply can’t match.
Start with the basics, learn what works for your local environment and target species, then expand your kit as needed. Technology has made wildlife observation more accessible than ever—the hard part is choosing where to start watching. But that’s the fun part.
Grab your gear and get out there. The wildlife won’t watch itself.
What’s the best magnification for wildlife binoculars?
For most wildlife watching, 8x or 10x magnification works best. Higher magnification makes the image shakier and reduces your field of view, making it harder to locate and track moving animals. An 8×42 or 10×42 setup balances magnification, brightness, and stability well.
Can thermal imaging work during the day?
Yes, thermal imaging works any time there’s a temperature difference between the animal and its surroundings. On cold days, thermal can be just as effective at noon as midnight. It’s particularly useful for spotting animals hidden in tall grass or dense vegetation, regardless of lighting conditions.
How far can trail cameras detect motion?
Most quality trail cameras detect motion up to 60-80 feet, though this varies by model. Detection range depends on the camera’s sensor sensitivity and the size of the animal. Look for cameras with trigger speeds under 0.5 seconds to avoid missing fast-moving wildlife.
Do I need waterproof binoculars for wildlife watching?
We strongly recommend waterproof binoculars. Weather changes quickly outdoors, and moisture can permanently damage non-waterproof optics. Even morning dew or high humidity can be problematic. The small price premium for waterproofing is worth it for long-term reliability.
What’s the difference between thermal imaging and night vision?
Night vision amplifies existing light, so it needs at least minimal ambient light to function. Thermal imaging detects heat signatures and works in complete darkness. Thermal can also see through light fog, rain, and vegetation. For pure detection capability, thermal is superior, but night vision often provides clearer detail for species identification.
