Thermal imaging has become a game-changer for everything from hunting and security to industrial inspections and medical diagnostics. But here’s the thing—not all thermal imaging works the same way. Different technologies operate at different wavelengths, and picking the right one can make or break your results.
We’re breaking down the three main types of thermal imaging technology based on wavelength ranges. Each type offers unique advantages and works best in specific situations. Whether you’re trying to spot heat loss in buildings, detect equipment failures, or track wildlife at night, knowing which technology to use will save you time and money.
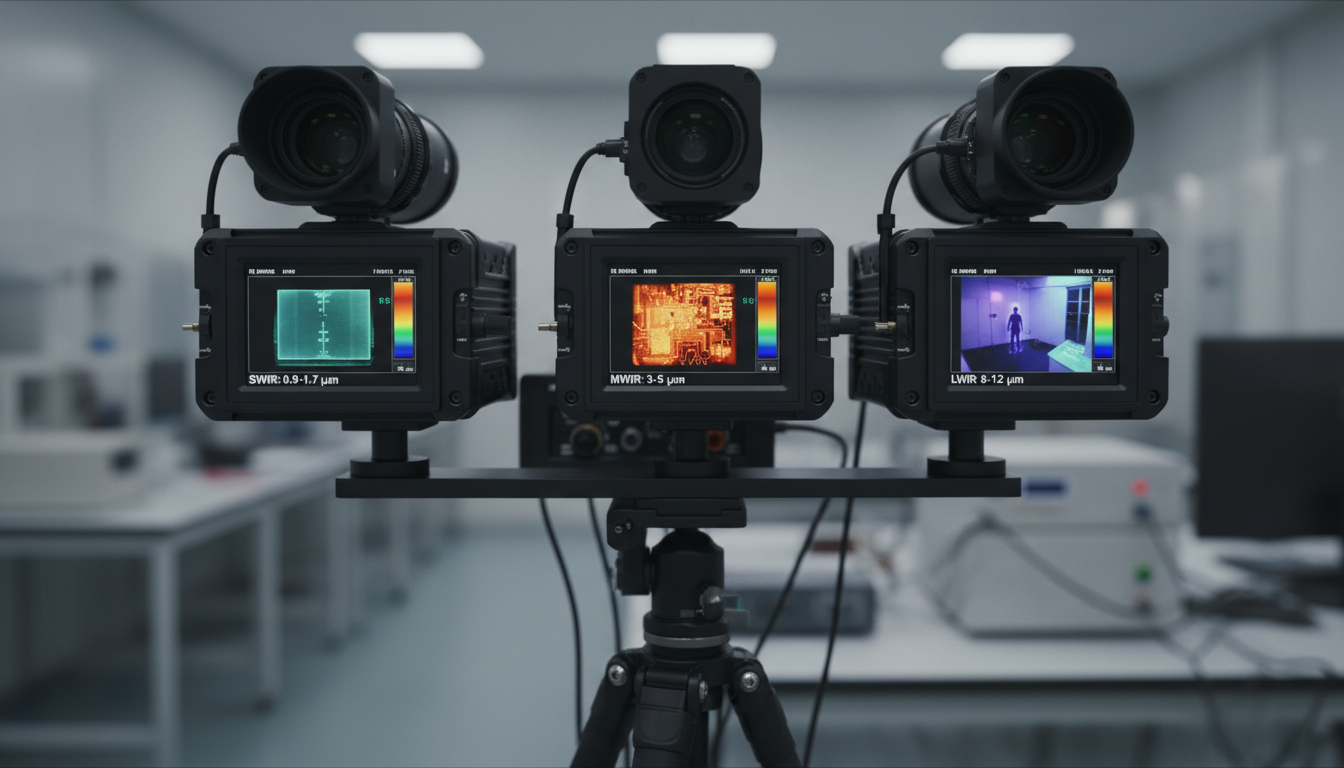
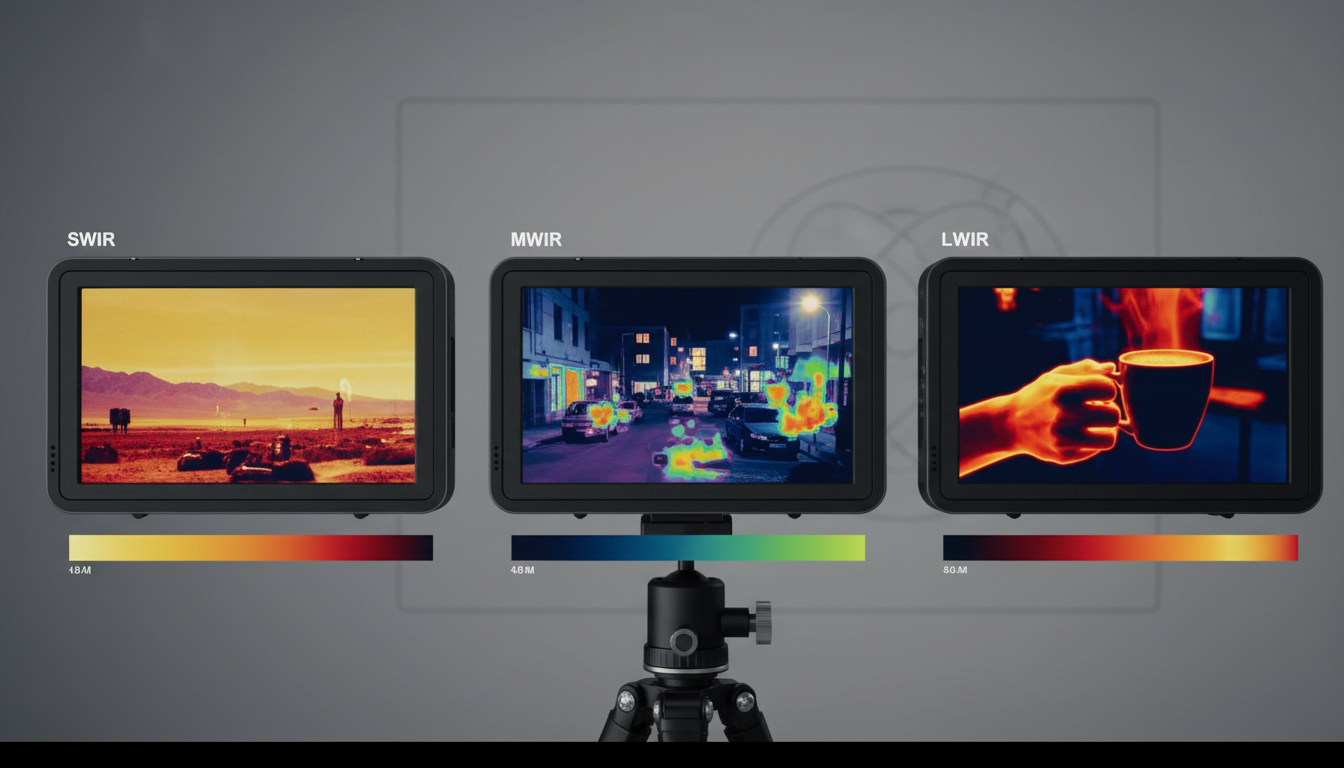
Thermal cameras come in three basic wavelength categories: short-wave infrared (SWIR), mid-wave infrared (MWIR), and long-wave infrared (LWIR). Think of these as different “channels” in the infrared spectrum, each tuned to capture specific types of heat signatures.
SWIR typically operates in the 0.9–1.7 μm wavelength range, while MWIR is defined as the 3.0–5.0 μm wavelength range. Long-wavelength cameras detect infrared wavelengths in the range of 7-12 microns. Each range reveals different information about the objects you’re viewing.
The wavelength you choose affects everything from image quality to what you can see through obstacles. Let’s look at how each type actually works.
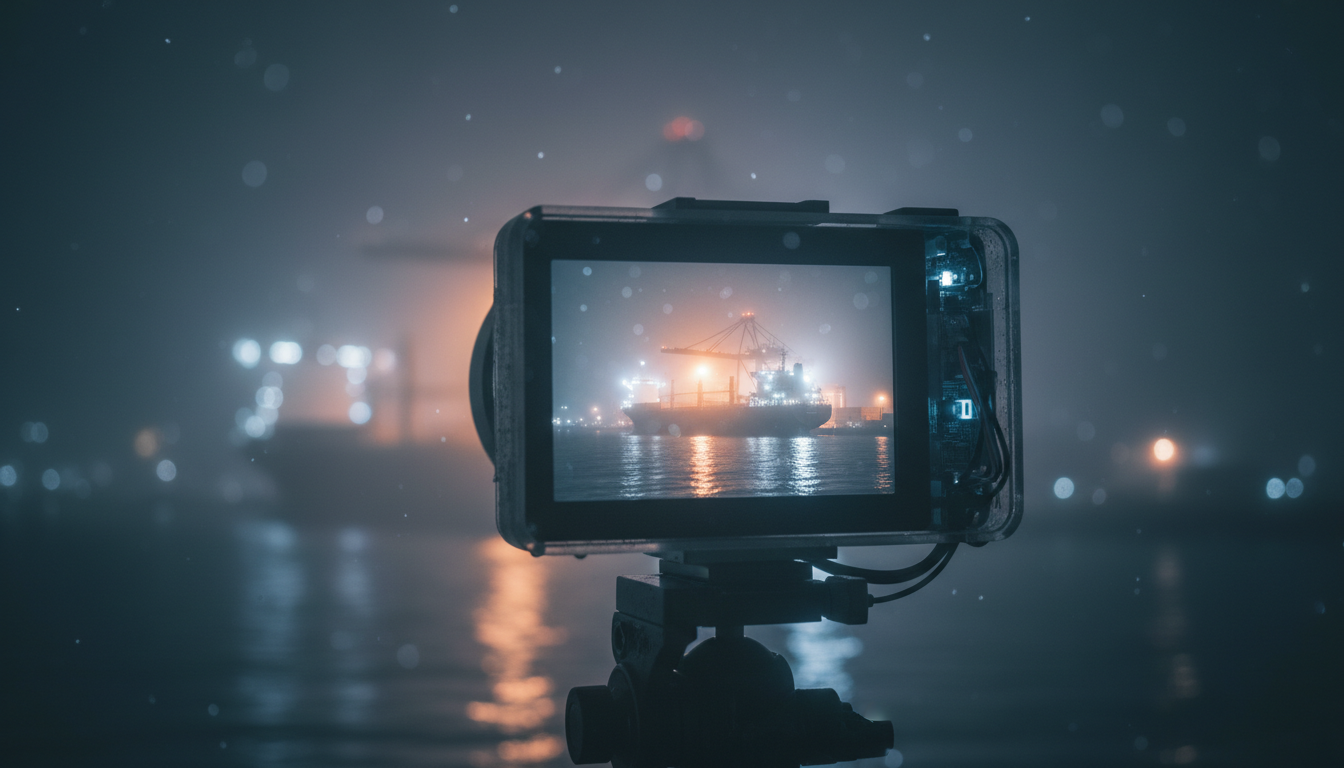
SWIR cameras work differently than you might expect. Short wave infrared uses reflected light imaging instead of thermal imaging. This means they’re more like enhanced vision cameras than traditional heat detectors.
An atmospheric phenomenon called night sky radiance emits five to seven times more illumination than starlight, nearly all of it in the SWIR wavelengths, allowing us to see objects with great clarity on moonless nights. Short-wave infrared is more like enhanced vision, and its image is very similar to that seen by human eyes.
SWIR cameras excel at penetrating haze, smoke, and fog. Short-wave infrared imaging has a major advantage that infrared thermal imaging technology does not have—it can image through the windshield. This makes SWIR perfect for surveillance, quality inspection, and applications where you need to see fine details rather than just heat signatures.
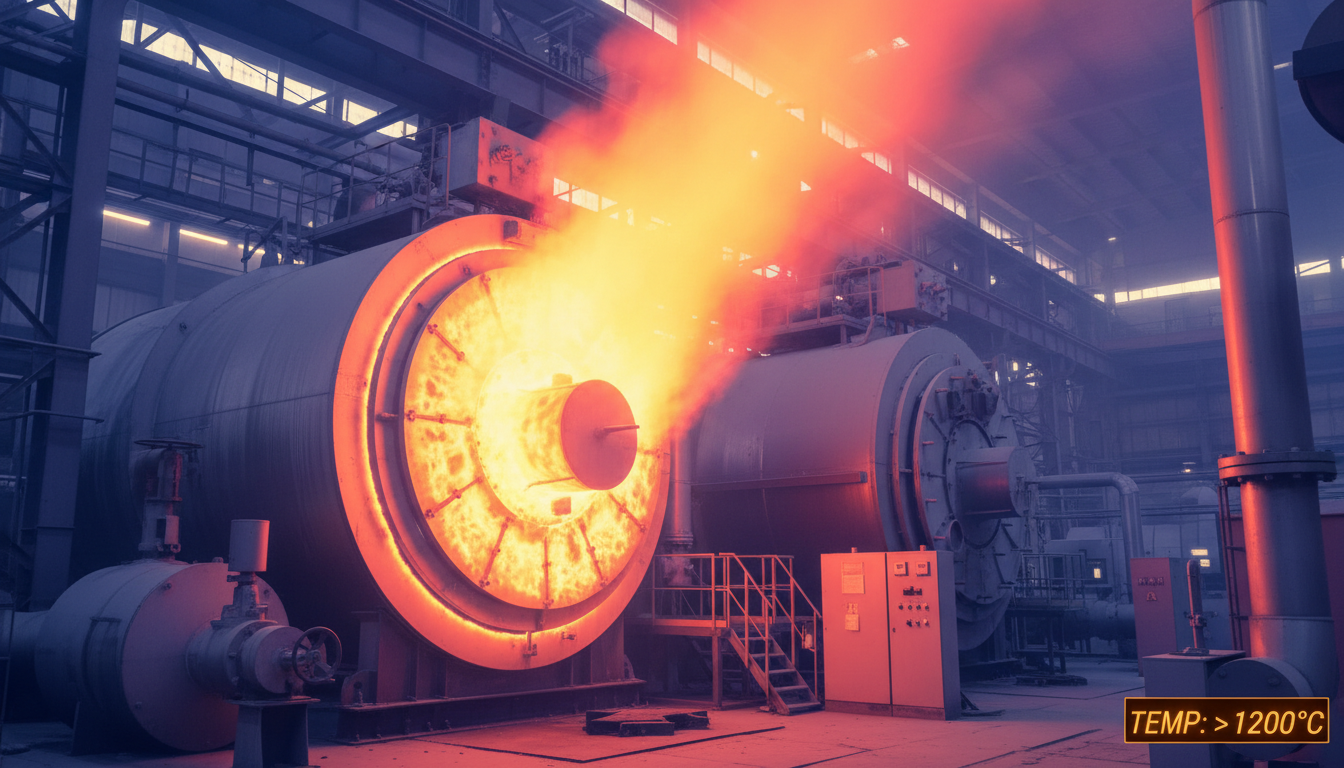
MWIR cameras sit in the middle ground between SWIR and LWIR. Mid-wavelength cameras typically detect infrared wavelengths in the spectral range of 2-5 microns and deliver higher resolution with accurate readings, though images are not as detailed as those produced by long wavelength cameras due to increased atmospheric absorption.
Cameras in this range are used for extreme high-temperature readings, such as scanning boiler applications and ballasted, single-ply roofing systems. When you need to measure really hot objects—think industrial furnaces or manufacturing processes—MWIR cameras give you the precision you need.
MWIR systems often require cooling to work properly, which makes them more expensive. But for gas leak detection and military applications, that extra cost pays off with better sensitivity and accuracy.
Long-wavelength cameras, the most popular infrared camera type, typically detect infrared wavelengths in the range of 7-12 microns and provide a great deal of detail because atmospheric absorption is minimal. This is what most people think of when they hear “thermal camera.”
Long Wavelength Infrared is the most commonly used form of infrared technology, with LWIR imagers detecting radiated temperatures that indicate information to the operator. These cameras work great for spotting people, animals, and equipment at normal temperatures.
The majority of all thermal cameras sold and used today operate in the LWIR band, using uncooled micro-bolometer detectors. They’re cheaper than MWIR cameras, don’t need cooling systems, and work reliably for building inspections, firefighting, and security applications.
Beyond wavelengths, thermal imaging can also be classified by how it captures heat. Thermography can be classified as either passive or active, with passive thermography involving observing an object’s naturally emitted thermal energy.
Active thermography applies external energy sources to an object or process to induce a variation in temperature for analysis with an infrared camera. If a defect is present inside an object, it interrupts the heat flow from an external source like a halogen lamp, causing a variation in temperature distribution at the object’s surface.
Passive thermography works well for electrical inspections, surveillance, and medical screenings where objects already have temperature differences. Active thermography shines when you’re looking for hidden defects in materials or checking composite structures like aircraft wings.
Another way to classify thermal cameras is by detector type. Thermographic cameras can be broadly divided into two types: those with cooled infrared image detectors and those with uncooled detectors.
Cooled detectors deliver better image quality and precision, while uncooled detectors are less precise but also less expensive. Uncooled detector resolution and image quality tend to be lower than cooled detectors, but they’re lighter, smaller, and start up instantly.
Most LWIR cameras use uncooled sensors, making them affordable for everyday use. MWIR cameras typically need cooling, which is why they cost more but perform better for demanding applications.
Picking the right thermal imaging type depends on what you’re trying to accomplish. For general surveillance, building inspections, or hunting applications like those we discuss in our professional hunting guide, LWIR cameras offer the best value and performance.
If you’re working in industrial settings with high-temperature equipment, MWIR gives you better accuracy. For seeing through smoke or capturing fine details, SWIR technology delivers images that look more natural to our eyes. Check out our Sirius HD thermal monocular to see how modern LWIR technology performs in real-world conditions.
The technology keeps evolving. Modern thermal cameras now combine features from different types, offering multi-spectral imaging that gives you the best of multiple wavelengths in one device.
Thermal imaging technology breaks down into three main wavelength types—SWIR, MWIR, and LWIR—each optimized for different applications. SWIR uses reflected light for detail-rich images, MWIR handles extreme temperatures with precision, and LWIR dominates everyday thermal imaging with affordable, reliable performance. You can also classify systems by passive versus active methods or cooled versus uncooled detectors.
Your choice depends on your specific needs: detection range, temperature measurement accuracy, environmental conditions, and budget. LWIR cameras handle most common tasks, MWIR excels at industrial applications, and SWIR works best when you need to see through obscurants or capture fine details. Understanding these differences helps you pick the right tool and get better results, whether you’re inspecting equipment, monitoring wildlife, or conducting security operations.
What’s the difference between SWIR and thermal imaging?
SWIR cameras detect reflected infrared light, similar to how visible cameras work, creating images based on light reflection rather than heat emission. Traditional thermal cameras (MWIR and LWIR) detect heat radiated by objects. SWIR produces images that look more like regular photographs but can see through smoke and haze, while thermal cameras show temperature differences regardless of lighting conditions.
Which type of thermal imaging camera is best for hunting?
LWIR cameras work best for hunting because they detect body heat from animals at normal outdoor temperatures. They’re more affordable than other types, don’t need external light sources, and can spot wildlife in complete darkness. LWIR cameras also come in compact, uncooled designs perfect for handheld monoculars and scopes. Visit our homepage to explore hunting-specific thermal devices.
Why are MWIR cameras more expensive than LWIR?
MWIR cameras typically require cryogenic cooling systems to reduce noise and maintain sensor sensitivity, which adds cost, weight, and power consumption. The cooling mechanism keeps the detector at very low temperatures for accurate readings at higher temperature ranges. LWIR cameras use uncooled microbolometer detectors that work at room temperature, making them cheaper and simpler to manufacture.
Can thermal cameras see through walls?
No, thermal cameras cannot see through solid walls. They detect infrared radiation from surfaces, not through them. However, they can detect temperature differences on wall surfaces caused by issues behind the wall, like water leaks, missing insulation, or electrical hot spots. SWIR cameras can penetrate some thin materials better than other types, but no thermal camera provides X-ray vision.
What does passive versus active thermography mean?
Passive thermography observes objects using their naturally occurring heat without adding external energy sources. It’s used for electrical inspections, building surveys, and security. Active thermography applies an external heat source to the object being inspected, then monitors how heat flows through it to reveal hidden defects or structural issues. Active methods work better for non-destructive testing of materials and finding subsurface problems.
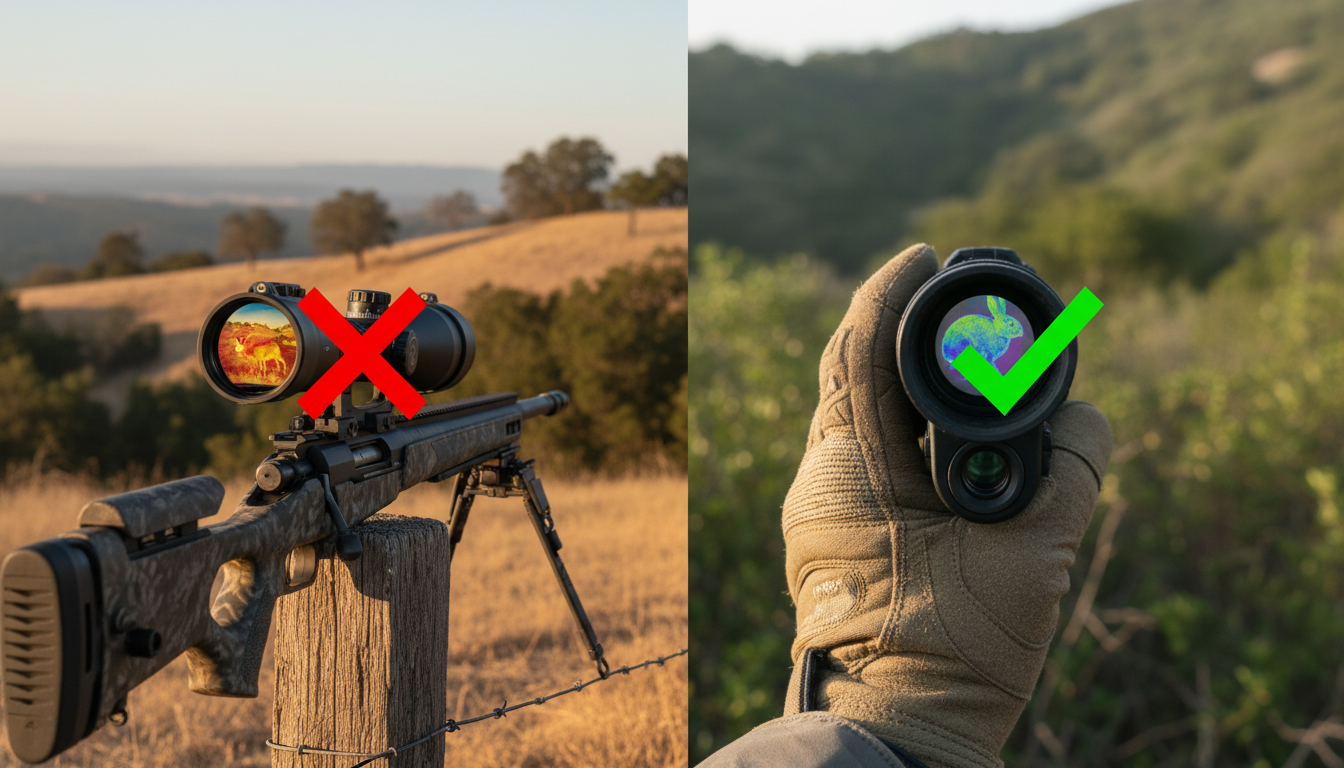
If you’re looking into thermal scopes in California, you’ve probably run into conflicting information. Some retailers won’t ship to the state, legal forums debate the fine print, and hunters aren’t sure what’s allowed. Let’s clear up the confusion around thermal scope legality in California and what the law actually says.

California Penal Code Section 468 defines a “sniperscope” as any device designed for use on a firearm that uses “a PROJECTED infrared light source and electronic telescope” to locate objects at night. The key word here is “projected.” This refers to flashlight-like devices that project IR light, which were common when the law was written decades ago.
Modern thermal scopes work differently. Thermal scopes detect heat signatures and typically do not emit visible or infrared light. They’re passive devices that read thermal radiation rather than projecting anything. This technical distinction matters when reading the law.
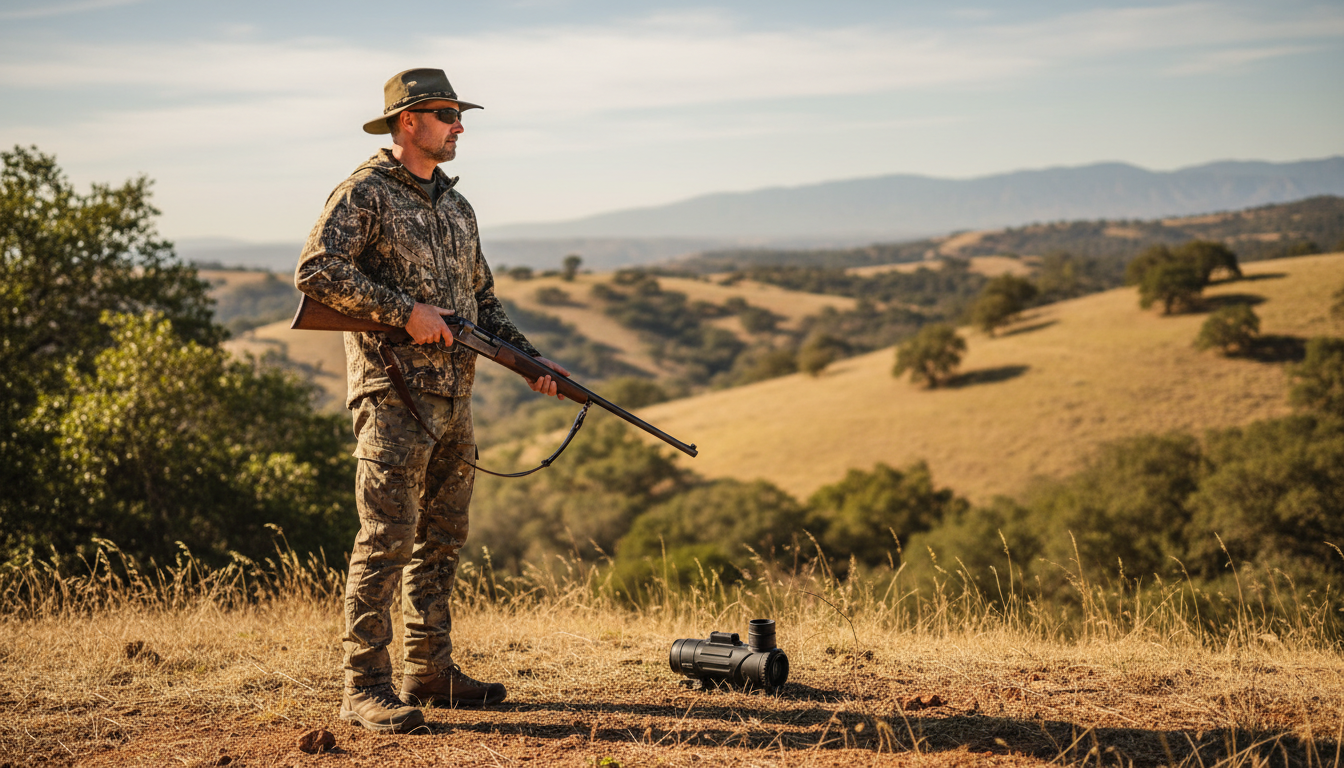
According to discussion among California gun owners and legal interpretations, a thermal scope on its own appears to be legal in the state. The problem starts when you talk about mounting it to a firearm. California law prohibits possessing devices like thermal imaging equipment “intended for use with or adapted for use with a firearm” that allow determining the presence of objects at night.
Here’s where things get murky. The issue is weapon mounting, and using a thermal scope for hunting while not attached to your rifle would be a grey area. Many retailers refuse to ship to California not because ownership is clearly illegal, but because they don’t want the legal headaches if someone mounts the device to a gun.
We recommend checking out our professional hunting guide for more context on thermal monocular applications.
For hunting purposes, California explicitly prohibits thermal devices mounted to firearms. Heat-sensing or other non-visible spectrum technology used to enhance visibility of animals or provide a visible point of aim is prohibited while taking or attempting to take big game.
But there are some exceptions worth knowing about. Fish and Game Code regulations vary by zone and species. Some interpretations suggest that landowners in agricultural areas might be able to use passive thermal for certain pest control situations like coyotes. Before you head out, check with local fish and game authorities for your specific area.
Looking for alternatives? Our Sirius HD thermal monocular offers powerful detection without the legal complications of scope mounting.
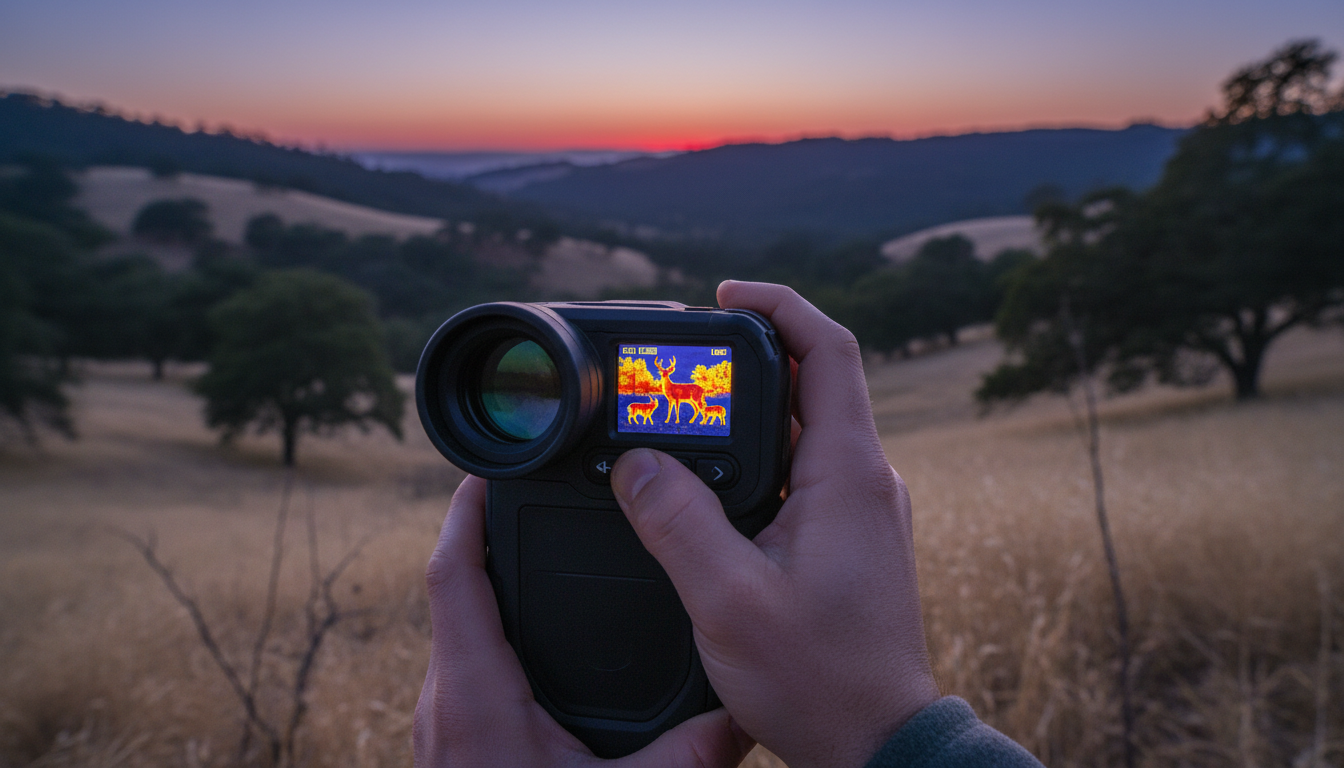
The prohibition does not apply to binoculars, monoculars with night vision function, or night vision goggles. This creates a practical workaround for many users. You can legally own and use thermal monoculars for observation, navigation, wildlife watching, and other non-hunting purposes.
Thermal monoculars are handheld devices that don’t attach to firearms. They’re used for spotting, tracking, and general thermal imaging without raising the same legal concerns as weapon-mounted scopes. We’ve seen growing interest in these devices precisely because they avoid the legal ambiguity.
Many vendors stay far away from legal boundaries and decline sales that could even remotely be viewed as illegal, because they lose more money in lawsuits than in potential sales. Even if a product might be legal under a strict reading of PC 468, companies don’t want to risk prosecution or bad publicity.
Many manufacturers list California as “ILLEGAL” in their state guides, stating that California law considers all night vision or thermal imaging devices for firearms illegal. This blanket approach is simpler than explaining nuances, but it doesn’t tell the full story about ownership for non-firearm uses.
For quality thermal imaging solutions that work within California’s framework, visit Pixfra’s homepage to explore our full range of thermal monoculars and imaging devices.
Based on current law and expert interpretation, here’s what we understand:
Likely legal: Owning a thermal scope or monocular for observation, research, or educational purposes. Using thermal binoculars or handheld monoculars for non-hunting activities.
Gray area: Possessing a thermal scope that could be mounted to a firearm, even if you don’t mount it. Using thermal devices for hunting when not attached to your weapon.
Clearly prohibited: Attaching a night vision or thermal device to a firearm. Using thermal scopes mounted to firearms for hunting.
The safest approach? Stick with handheld thermal monoculars for observation and leave weapon-mounted devices out of the picture. And definitely consult with a legal professional if you have specific questions about your situation.
The question “are thermal scopes legal in California” doesn’t have a simple yes or no answer. While thermal imaging technology itself isn’t banned, how you use it and whether it’s attached to a firearm makes all the difference. PC 468 technically targets devices with projected IR illuminators, which modern thermal scopes don’t use. But the broader interpretation and hunting regulations create real limitations.
For most California residents, thermal monoculars and binoculars offer the best path forward—you get thermal imaging capability without the legal concerns. Stay informed about current regulations, check with local authorities before hunting, and consider handheld options that keep you on the right side of the law.
Can I legally own a thermal scope in California?
Owning a thermal scope appears to be legal under a strict interpretation of PC 468, since thermal devices don’t use projected infrared illumination. However, possession with intent to mount it to a firearm creates legal risk. Many California residents own thermal monoculars and binoculars without issue since these aren’t designed for firearm mounting.
Is it illegal to hunt with thermal in California?
Yes, hunting with thermal devices mounted to firearms is prohibited in California. The state bans heat-sensing and non-visible spectrum technology for taking big game. Some exceptions may exist for agricultural landowners dealing with specific pests, but you should verify with California Department of Fish and Wildlife before hunting.
Why do so many websites say thermal scopes are illegal in California?
Retailers and manufacturers often take a conservative approach, listing California as “illegal” to avoid potential legal liability. While PC 468’s language specifically addresses projected IR illuminators (which thermal scopes don’t use), companies prefer blanket restrictions over explaining technical distinctions that could be challenged in court.
What’s the difference between thermal scopes and night vision under California law?
Both fall under similar restrictions when mounted to firearms. Night vision amplifies existing light (sometimes using IR illuminators), while thermal detects heat signatures. PC 468 targets devices with projected IR sources, but broader interpretations and hunting regulations restrict both technologies when attached to weapons.
Can I use a thermal monocular for wildlife observation in California?
Yes, thermal monoculars and binoculars are generally legal for observation, navigation, and non-hunting purposes. These handheld devices aren’t designed for firearm attachment and don’t fall under the same restrictions as weapon-mounted scopes. Many outdoor enthusiasts use them for wildlife watching, hiking, and property monitoring without legal concerns.
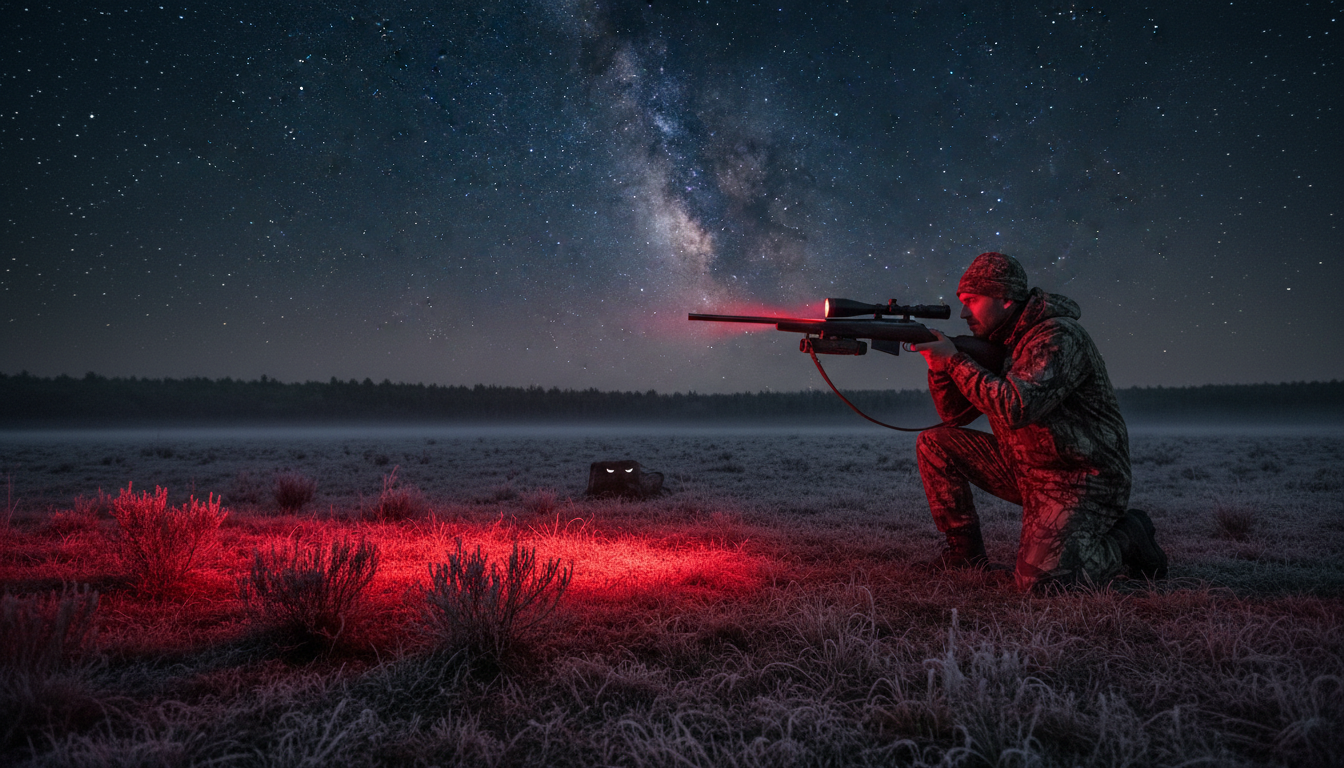
When you’re out hunting coyotes after dark, having the right light can make or break your entire night. We’ve spent countless hours in the field testing different hunting lights, and we know how frustrating it is to spook a coyote because your light wasn’t up to the task. The good news? Today’s hunting lights are better than ever, with advanced LED technology that gives you the brightness you need without sending every predator within a mile running for cover. Whether you’re a seasoned predator hunter or just getting started with nighttime pursuits, choosing the right light involves understanding color options, brightness levels, beam patterns, and mounting systems. Before we dive into specific recommendations, it’s worth noting that modern technology like thermal monoculars has changed the game for many hunters, but traditional hunting lights still play a crucial role in shot placement and ethical hunting practices.
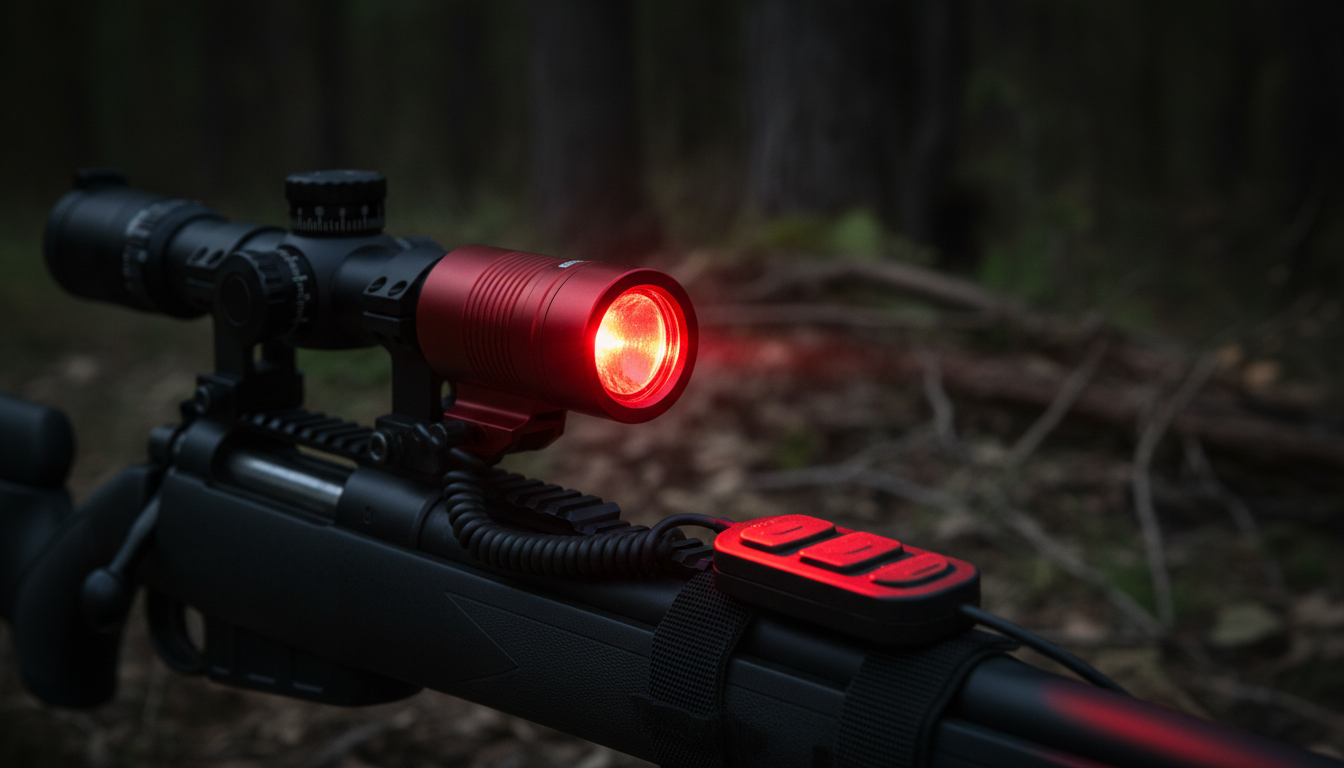
The color of your hunting light isn’t just about personal preference—it directly affects how coyotes react when you illuminate them. Red lights have been the go-to choice for predator hunters for decades, and there’s solid reasoning behind this. Coyotes have dichromatic vision, meaning they see the world primarily in shades of blue and yellow. They’re far less sensitive to red wavelengths, which is why a red light appears much dimmer to them than it does to us. This gives you a significant advantage when scanning fields or making that final shot.
Green lights have gained popularity in recent years because they offer a middle ground between visibility and stealth. While coyotes can see green better than red, green lights provide superior clarity for human eyes, making it easier to identify your target and assess the situation. Many experienced hunters report that green lights work especially well in areas with dense vegetation, where the enhanced contrast helps you pick out movement more easily. White lights are the brightest option and give you the best overall visibility, but they’re also the most likely to spook wary coyotes. Some hunters save white lights for the moment of the shot, using colored lights for scanning and switching to white for maximum clarity when it counts.
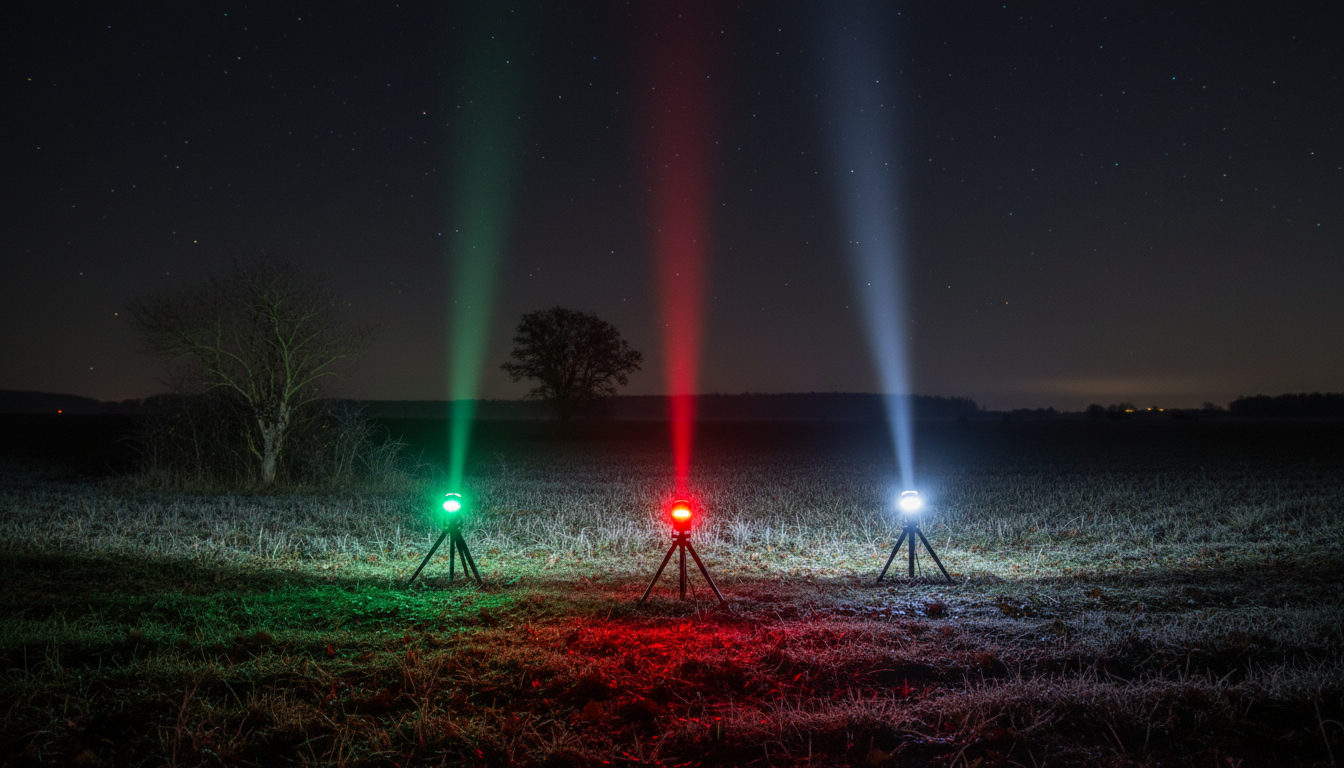
When you’re shopping for a hunting light, you’ll see lumens thrown around as the main specification, but raw lumen count doesn’t tell the whole story. Lumens measure the total amount of light output, but for hunting purposes, you need to pay equal attention to beam distance and beam pattern. A light with 1000 lumens and a focused beam will reach much farther than a 1000-lumen light with a flood pattern. For coyote hunting, you typically want a light that can reach at least 300-500 yards, though your actual shooting distance will likely be considerably less.
Most serious coyote hunters look for lights in the 500-1000 lumen range with a focused or mixed beam pattern. This gives you enough power to identify targets at distance while still maintaining good peripheral vision for scanning. Keep in mind that brighter isn’t always better—an overly powerful light can actually make it harder to see details because of glare and reflection. The sweet spot depends on your hunting environment. In open country with long sight lines, you might want more throw. In timber or broken terrain, a wider beam with moderate power often works better. Battery life also decreases as brightness increases, so you need to find a balance that works for your typical hunting sessions.
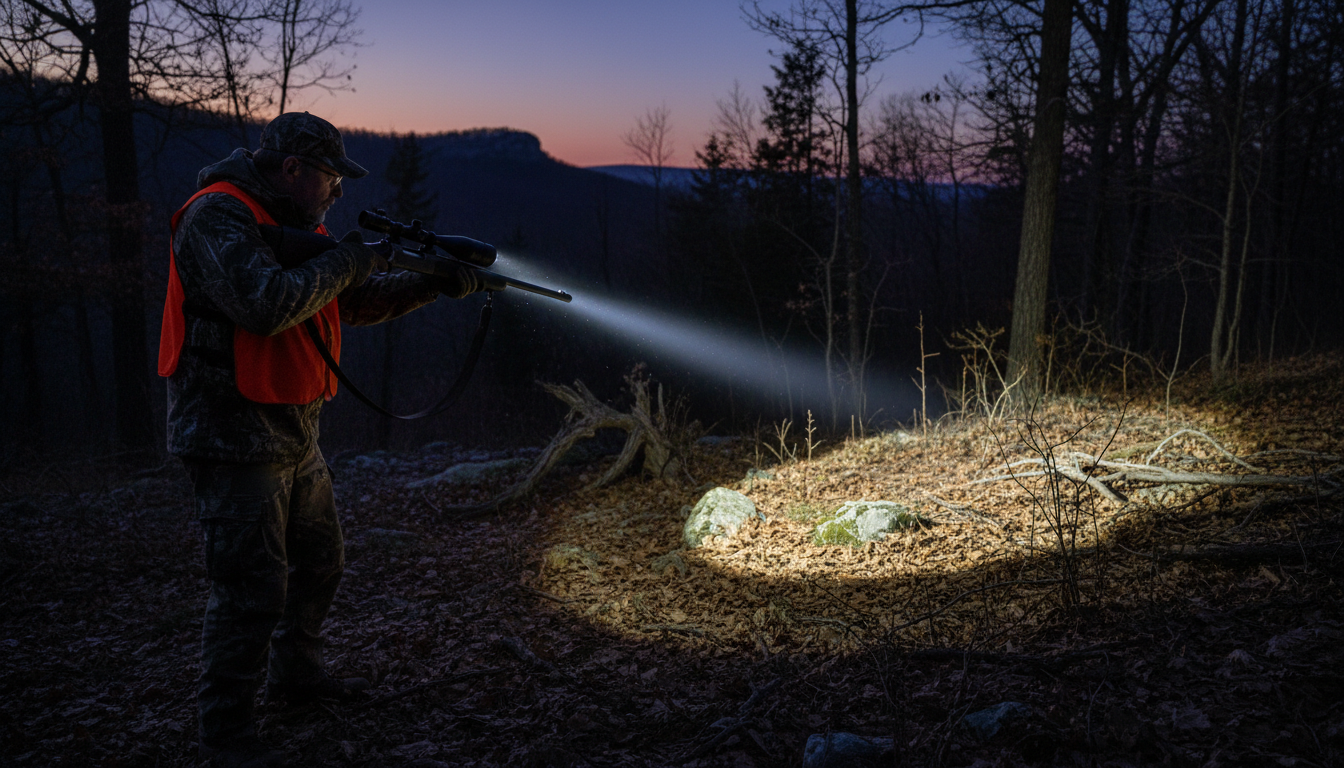
This debate rages on in hunting forums everywhere, and honestly, there’s no single right answer for everyone. Red lights remain the most popular choice among traditional predator hunters because they offer the best stealth factor. When you shine a red light on a coyote, especially from a distance, they often show minimal reaction. They might pause or look around, but they rarely bolt immediately like they would with a white light. This gives you precious seconds to assess the shot and settle your crosshairs. Red lights also preserve your night vision better than other colors, which matters if you’re hunting in areas where you might need to navigate in the dark between setups.
Green lights have carved out a significant following because of their superior performance for human eyes. The human eye is most sensitive to green wavelengths, which means a green light at the same power level as a red light will appear much brighter and clearer to you. This translates to better target identification and easier scanning. While coyotes can theoretically see green better than red, many hunters report excellent results with green lights, especially when calling in thick cover where you need every advantage to spot movement quickly. Some experts believe that coyote reactions have more to do with light intensity and movement than color alone.
White lights deliver unmatched clarity and color rendering, making species identification absolutely certain. This matters in areas where you might encounter non-target animals or where regulations require positive identification before shooting. The downside is that white lights are definitely the most visible to coyotes. Many experienced hunters use a combination approach: they scan with red or green and then switch to white for the final moments before the shot. This strategy gives you the best of both worlds—stealth when you need it and maximum visibility when accuracy matters most.
How you mount or carry your hunting light significantly impacts your success rate and hunting style. Gun-mounted lights are the most popular choice for serious predator hunters because they keep your hands free and ensure your light is always pointed exactly where your rifle is aimed. This coordination is critical when a coyote comes in fast or when you’re dealing with multiple animals. Quality gun-mounted systems attach to your rifle’s Picatinny rail or scope rings and offer quick-release mechanisms so you can adjust or remove the light as needed. The main downside is added weight on your rifle and the need for remote pressure switches, which add another element to manage.
Handheld spotlights give you maximum flexibility and often deliver the most powerful beam distances. They’re excellent for scanning large areas before a stand or checking out suspicious movement without moving your rifle. However, when it comes time to shoot, you face a dilemma: set the light down (and possibly lose your illumination angle) or try to manage both the light and your rifle simultaneously. Some hunters work with a partner where one person handles the light while the other shoots, which is arguably the most effective setup. Handheld lights also excel as backup options or for use when you’re calling in heavy cover where you might need to react quickly in any direction.
Headlamps offer the ultimate in hands-free convenience and are increasingly popular among mobile hunters who cover lots of ground. Modern hunting headlamps come with red, green, and white LED options, and they keep your hands completely free for carrying your rifle, using calls, or navigating terrain. The challenge with headlamps is that your light always points where your head points, which isn’t necessarily where your rifle points. This can create awkward situations when you need to illuminate a coyote while looking through your scope. Many hunters use headlamps for general tasks and navigation but switch to gun-mounted or handheld options when they’re actually set up and calling.
Durability ranks at the top of the must-have list because hunting lights take a beating in the field. Look for lights with aluminum or reinforced polymer bodies, proper waterproof ratings (IPX7 or better), and impact resistance. You’ll likely drop your light, bang it against equipment, and expose it to rain, snow, and temperature extremes. Cheap lights fail exactly when you need them most. Quality manufacturers back their products with solid warranties, which tells you something about their confidence in durability.
Battery life and power options deserve serious consideration. Nothing’s worse than having your light die in the middle of a productive night. Rechargeable lithium-ion batteries are convenient and cost-effective long-term, but they require planning and access to charging facilities. Lights that run on standard AA or CR123 batteries offer the advantage of field-swappable power—just carry spares and you’re good for days. Many modern lights offer multiple brightness modes, which lets you conserve battery when you don’t need full power. A good hunting light should give you at least 2-3 hours of runtime at the brightness level you’ll actually use in the field.
Beam adjustability and multiple color options in one package add versatility without requiring you to carry multiple lights. Some of the best hunting lights on the market today feature interchangeable lens covers or built-in LED arrays that let you switch between red, green, and white at the press of a button. Zoom or focus functions that let you adjust between spot and flood beams are also valuable. You might want a tight spot for long-range scanning and a wider flood for checking nearby cover. Remote pressure switches are essential for gun-mounted setups, and the quality of these switches varies widely. Look for switches with positive tactile feedback and durable cords that won’t fail after a season of use.
Understanding how brightness levels and beam patterns work together helps you match a light to your specific hunting situations. Beam patterns generally fall into three categories: spot, flood, and combination. A spot beam concentrates light into a narrow, focused column that reaches maximum distance. This pattern works great for scanning open fields or checking distant treelines, but it can be like looking through a tunnel—you see what’s directly in front of you but miss peripheral movement. Flood beams spread light across a wide area with less distance penetration. They’re excellent for close-range work in timber or when a coyote is working in close and you need to track movement across a broader field of view.
Combination beams, sometimes called mixed or hybrid beams, attempt to give you both distance and width. These patterns typically feature a bright central hotspot for distance work surrounded by a softer corona of spill light that maintains peripheral awareness. Many hunters find this the most versatile pattern for predator hunting because you can scan at distance while still catching movement to the sides. Some lights offer adjustable focus that lets you dial in the exact beam pattern you want, though this adds mechanical complexity that can potentially fail.
The relationship between brightness, distance, and usability isn’t linear. Doubling the lumens doesn’t double your effective range, and at some point, more brightness actually hurts more than it helps. Excessive brightness creates glare, washes out details, and can actually make it harder to see subtle movements or features. Most experienced coyote hunters settle on lights in the 500-800 lumen range for colored lights and 800-1200 lumens for white lights, with multiple brightness modes to adjust based on conditions.
How you use your hunting light matters just as much as which light you choose. One of the biggest mistakes new predator hunters make is leaving their light on constantly while calling. This reduces your battery life and potentially educates wary coyotes that might be hanging up just outside your beam. Instead, use an intermittent scanning technique: call for 30-60 seconds, then scan with your light for 10-15 seconds, then turn the light off and wait. This pattern lets you cover ground without constantly announcing your presence.
When you do illuminate a coyote, avoid the temptation to swing your light around erratically. Sudden, jerky movements with your light beam spook animals far more than steady illumination. If a coyote is approaching and you spot it with your light, keep the beam steady and let the animal continue its approach. If it stops and stares, which is common, keep the light on it and prepare for your shot. Many coyotes will stand still under light for several seconds, giving you time to aim carefully. If you’re using a handheld light, practice your shooting position beforehand so you know exactly how you’ll manage both the light and rifle when the moment comes.
For gun-mounted lights, zero your light beam to match your rifle’s point of impact at a specific distance—typically 100 yards. This ensures that when you’re aimed on target, your light is illuminating exactly where you’re shooting. Some hunters prefer to have their light positioned slightly to the side rather than directly above or below the bore, which can reduce shadows and give better definition. Remote switch placement is also critical. Position the switch where you can activate it naturally without breaking your shooting grip or having to shift your hand position. Practice dry runs in daylight until light activation becomes second nature.
The battery debate in hunting lights mirrors the same discussion in the flashlight world, but hunting adds specific considerations. Rechargeable lithium-ion batteries offer the best performance per weight, highest capacity, and lowest long-term cost. Modern Li-ion cells deliver consistent brightness throughout their discharge cycle and can be recharged hundreds of times. If you hunt from a base camp or vehicle where you can charge between outings, rechargeable systems make tremendous sense. They’re also better for the environment since you’re not constantly discarding disposable batteries.
However, rechargeable systems require planning and infrastructure. If you’re on an extended hunting trip far from power sources, or if you simply forget to charge your batteries between hunts, you’re stuck. This is where replaceable batteries shine—you can carry spares and swap them in seconds. CR123A lithium batteries are popular in hunting lights because they offer excellent cold-weather performance and long shelf life. They’re more expensive per use than rechargeables, but the reliability and convenience matter when you’re miles from civilization. AA batteries are even more accessible since you can buy them almost anywhere, though they generally don’t perform as well as CR123s in terms of output and cold tolerance.
Some of the best hunting lights offer hybrid systems that accept both rechargeable and disposable batteries. This flexibility means you can use rechargeables for regular hunting and keep disposable batteries as backup or for extended trips. Whatever system you choose, always carry spare batteries or a backup light. Murphy’s Law applies doubly to hunting equipment—lights fail when you need them most, usually right when a coyote is coming in. Smart hunters carry redundancy.
For the mobile hunter who covers lots of ground and sets up frequently, a combination of a good headlamp and a gun-mounted light delivers the best results. Use the headlamp for navigation, setting up equipment, and general tasks, then switch to the gun-mounted light when you’re actively calling and scanning. This setup keeps your hands free for carrying gear, using electronic or hand calls, and managing your rifle. Look for gun-mounted lights in the 600-800 lumen range with both red and green LED options, and choose headlamps with similar color choices plus white for camp tasks.
Static hunters who set up in blinds or use the same stands repeatedly often prefer the power and flexibility of handheld spotlights. These hunters can set up shooting sticks or rests, position their spotlight on a tripod or mount, and create a more controlled shooting environment. In this setup, maximum beam distance becomes more important since you’re covering the same territory repeatedly and might be working longer sight lines. Spotlights in the 1000+ lumen range with focused beams excel here. Having a hunting partner who handles the spotlight while you focus on shooting dramatically increases success rates in this scenario.
For those hunting in pressured areas where coyotes are educated and extremely wary, stealth matters more than raw power. Red lights in the 400-600 lumen range, used sparingly and strategically, work better than blasting high-powered beams across the landscape. These situations call for gun-mounted lights with excellent beam quality that delivers maximum effective illumination with minimum actual light output. Quality optics and LED selection matter more than raw lumens. Some specialized predator hunting lights are specifically designed for this application, with carefully tuned beam patterns that balance distance and discretion.
Remote pressure switches transform gun-mounted lights from awkward to essential. The switch lets you control your light without breaking your shooting grip or moving your hand. Quality matters enormously here—cheap switches fail regularly, often at the worst possible moment. Look for switches with coiled cords that stay out of the way, durable construction, and positive on/off feedback. Some advanced systems offer multiple activation modes (momentary, constant-on, and strobe) controlled through different press patterns.
Color filters or interchangeable lenses expand a single light’s versatility without requiring multiple complete lights. Many lights come with flip-up filters or screw-on lens covers in red, green, and sometimes amber. This lets you switch colors based on conditions, animal behavior, or personal preference. Some hunters carry multiple filters even if their light has built-in color options, since filters can add another layer of light control and beam modification. Diffusion filters that soften hard beam edges are also worth considering for close-range work.
Mounting solutions beyond basic scope rail mounts include barrel clamps, adjustable offset mounts, and magnetic mounts. Offset mounts position your light to the side of your scope, which some hunters prefer for reducing shadows and improving beam angle. Adjustable mounts let you fine-tune your light position without permanent modification to your rifle. Quick-detach systems are valuable if you use the same light on multiple rifles or if you want to remove the light for other uses. Quality mounts are rigid, hold zero, and survive recoil without loosening.
Before you invest in any night hunting equipment, thoroughly research your local regulations. Night hunting laws vary dramatically by state and even by county. Some states prohibit all night hunting, others allow it only for specific species with permits, and some have wide-open seasons for predators. Artificial light regulations can be particularly complex—some jurisdictions allow lights attached to firearms but prohibit handheld spotlights, or vice versa. Some areas restrict certain light colors or brightness levels. Ignorance isn’t a defense, so do your homework before heading out.
Ethical considerations extend beyond legal requirements. Night hunting demands absolute certainty in target identification because visibility is inherently limited. Using adequate lighting is actually an ethical requirement—you need enough light to be completely certain of your target species, to assess whether it’s a legal animal, and to make an accurate, humane shot. This is why many ethical hunters prefer white lights for the final moment before shooting, even if they use colored lights for scanning. Target identification errors are inexcusable and can have serious legal and ecological consequences.
Landowner relations also factor into night hunting ethics. Even in states where night hunting is legal, be considerate of neighbors and other landowners who might be disturbed by lights sweeping across their property or shots in the night. Communicate with adjacent landowners, stay well within your permission boundaries, and hunt responsibly. Building positive relationships with landowners and neighbors ensures continued access and helps maintain the reputation of the hunting community.
Proper care extends the life of your hunting lights and ensures they work when you need them. After each hunt, inspect your light for damage, clean off any mud or debris, and check that all O-rings and seals are intact. Even waterproof lights can fail if seals are compromised. Dry off your light thoroughly if it got wet, and store it with battery contacts clean and corrosion-free. Many hunters remove batteries during extended storage periods to prevent corrosion from battery leakage, though this is less of an issue with quality lithium cells.
For rechargeable lights, follow proper charging protocols. Lithium-ion batteries perform best when kept between 20-80% charge for storage. Fully discharging them regularly or keeping them at 100% charge for extended periods reduces overall lifespan. Most quality hunting lights have built-in charging protection, but it still pays to unplug them once charged rather than leaving them on the charger indefinitely. Keep spare O-rings and know how to disassemble and maintain your light’s waterproof seals. A small amount of silicone grease on O-rings maintains their flexibility and sealing performance.
Lens care often gets overlooked but matters significantly for beam quality. Scratched or dirty lenses scatter light, reduce effective distance, and create glare. Use proper lens cleaning solutions and soft cloths, never abrasive materials or harsh chemicals. Some hunters apply lens protectors or protective films to expensive lights, though these can slightly affect beam quality. Store your lights in padded cases or dedicated compartments rather than loose in a gear bag where they can get scratched or damaged. With proper care, a quality hunting light will provide years of reliable service.
What’s the best color light for coyote hunting at night? Red lights remain the most popular choice because coyotes are less sensitive to red wavelengths, making them harder to spook. However, green lights offer better visibility for human eyes and work well in many situations. Many experienced hunters carry both colors or use lights with multiple color options to adapt to different scenarios.
How many lumens do I need for night coyote hunting? Most hunters find that 500-800 lumens provides the sweet spot for colored lights (red or green), giving enough brightness to identify targets at 200-400 yards without excessive glare. White lights can go higher, up to 1000-1200 lumens, since they’re typically used briefly for final shot confirmation.
Should I use a gun-mounted light or handheld spotlight for coyotes? Gun-mounted lights are generally more effective for solo hunters because they keep your hands free and ensure your light always points where your rifle aims. Handheld spotlights work great if you’re hunting with a partner or if you need maximum beam distance for scanning large areas.
Will a bright hunting light scare away coyotes? It depends on the light color, brightness, and how you use it. Red lights used intermittently tend to spook coyotes less than constant white light. Sudden movements with your light beam alarm coyotes more than steady illumination. In heavily hunted areas, coyotes may be conditioned to avoid lights regardless of color.
Do I need special lights for thermal scope use at night? If you’re using thermal optics like those from Pixfra, you don’t need traditional hunting lights for target detection since thermal imaging works independently of visible light. However, many hunters still carry lights for navigation, safety, and confirming targets before shooting.
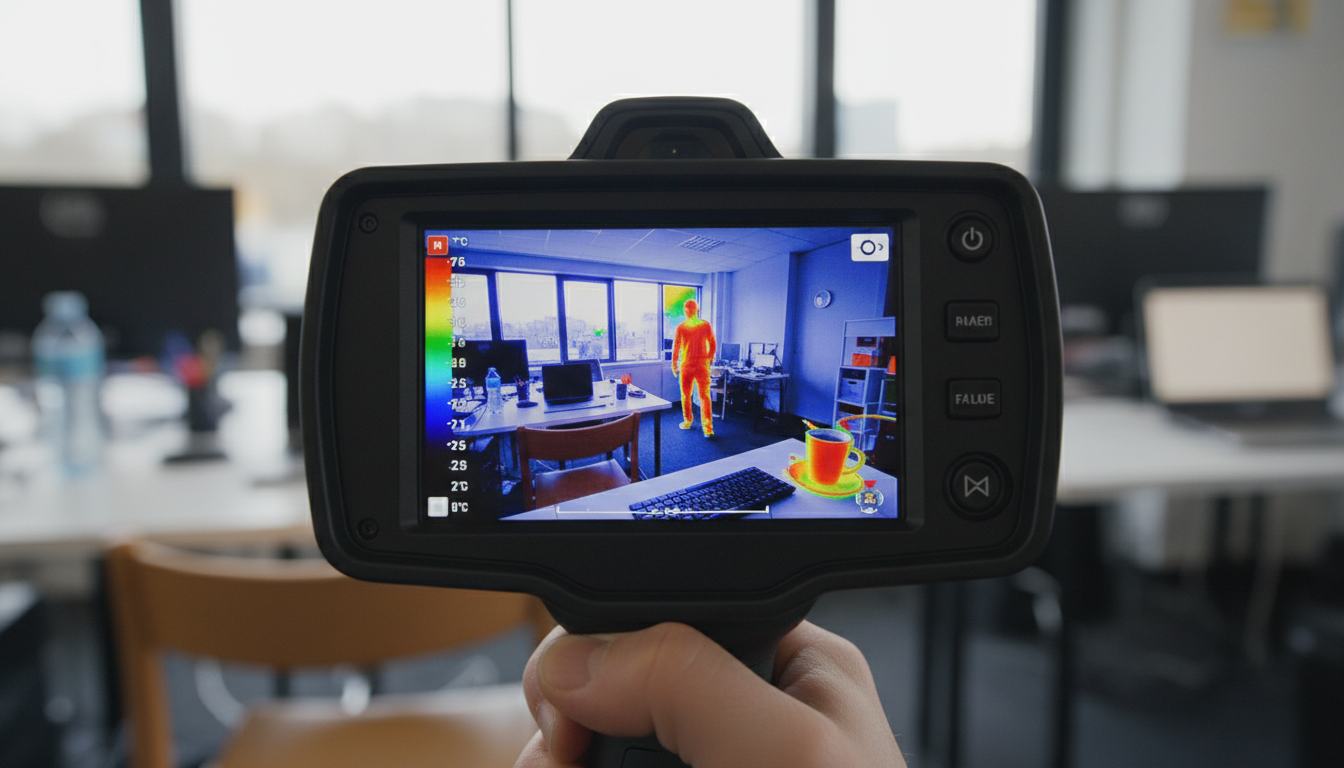
Thermal imaging technology has changed how we see the world around us. If you’ve ever wondered how firefighters find people in smoke-filled buildings or how electricians spot overheating wires without touching them, the answer is thermal cameras. These devices let us see heat instead of light, opening up a whole new way to detect problems, stay safe, and make smarter decisions across countless industries.
Whether you’re thinking about buying your first thermal camera, curious about how the technology works, or looking to expand your knowledge, this guide breaks down everything you need to know. We’ll walk through the science behind thermal imaging, the different types of cameras available, real-world uses, and practical tips for choosing the right equipment. If you’re interested in professional hunting applications, we’ve got you covered there too. Let’s get started and see what thermal imaging can do for you.
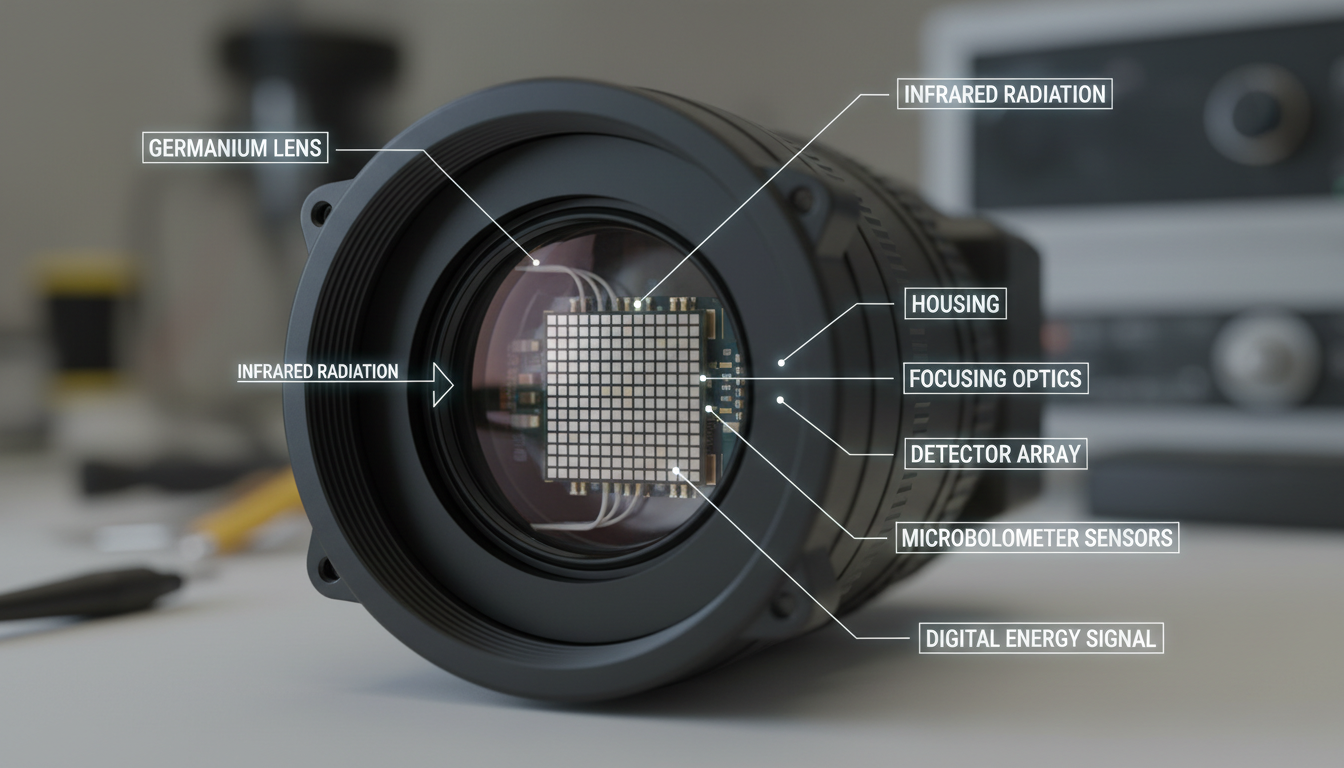
Thermal imaging, also known as thermography, is the process of capturing and analyzing the heat emitted by objects. Think of it as a way to see temperature differences instead of colors or shapes. Every object with a temperature above absolute zero (-273.15°C or -459.67°F) emits infrared radiation, which is invisible to the human eye. That’s where thermal cameras come in.
Thermal cameras detect this radiation and convert it into an image where different colors represent temperature variations. Typically, warmer areas show up in red or white, while cooler spots appear blue or purple. This color-coding makes it super easy to spot hot or cold areas at a glance. Unlike regular cameras that need light to work, thermal cameras can see in total darkness because they’re reading heat, not light. That’s why they’re so valuable for nighttime operations, search and rescue missions, and any situation where visibility is limited.
The key difference: Regular cameras capture visible light bouncing off objects. Thermal cameras capture infrared energy radiating from objects. This means a thermal camera can show you what’s hot or cold even when there’s no light at all.
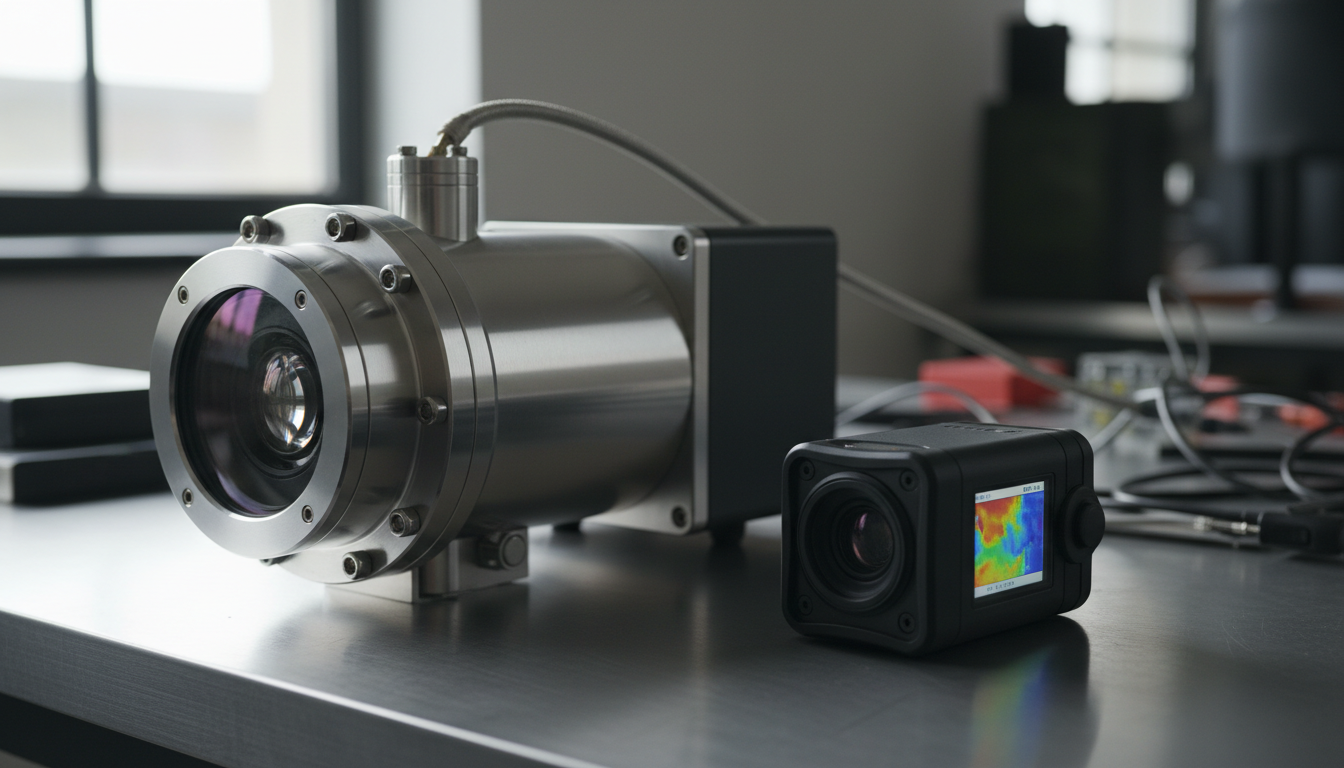
A thermal camera is made up of a lens, a thermal sensor, processing electronics, and a mechanical housing. Here’s how these parts work together to create those colorful heat maps you see:
The lens focuses infrared energy onto the sensor. This isn’t a regular glass lens like you’d find on a smartphone camera – it’s specially designed to let infrared wavelengths pass through. Once the heat hits the sensor, something interesting happens.
A bolometer is a simple sensor that absorbs thermal radiation and changes resistance as a result. This change in resistance can be electrically measured, and the incident radiation can be determined. Modern thermal cameras use thousands of these tiny sensors arranged in an array called a microbolometer. When infrared radiation reaches the microbolometer, each tiny sensor absorbs the energy and experiences a slight temperature increase.
The processing electronics then convert these resistance changes into electrical signals. These temperature readings are transformed into a colored image. A thermal camera typically displays warmer regions in tones such as red or yellow, while cooler surfaces take on colors like blue or green. All of this happens in real-time, so you’re seeing live heat patterns as they change.
The sensor can come in a variety of pixel configurations from 80 × 60 to 1280 × 1024 pixels or more. This is the resolution of the camera. These resolutions are low in comparison to visible light imagers because thermal detectors need to sense energy that has much larger wavelengths than visible light.
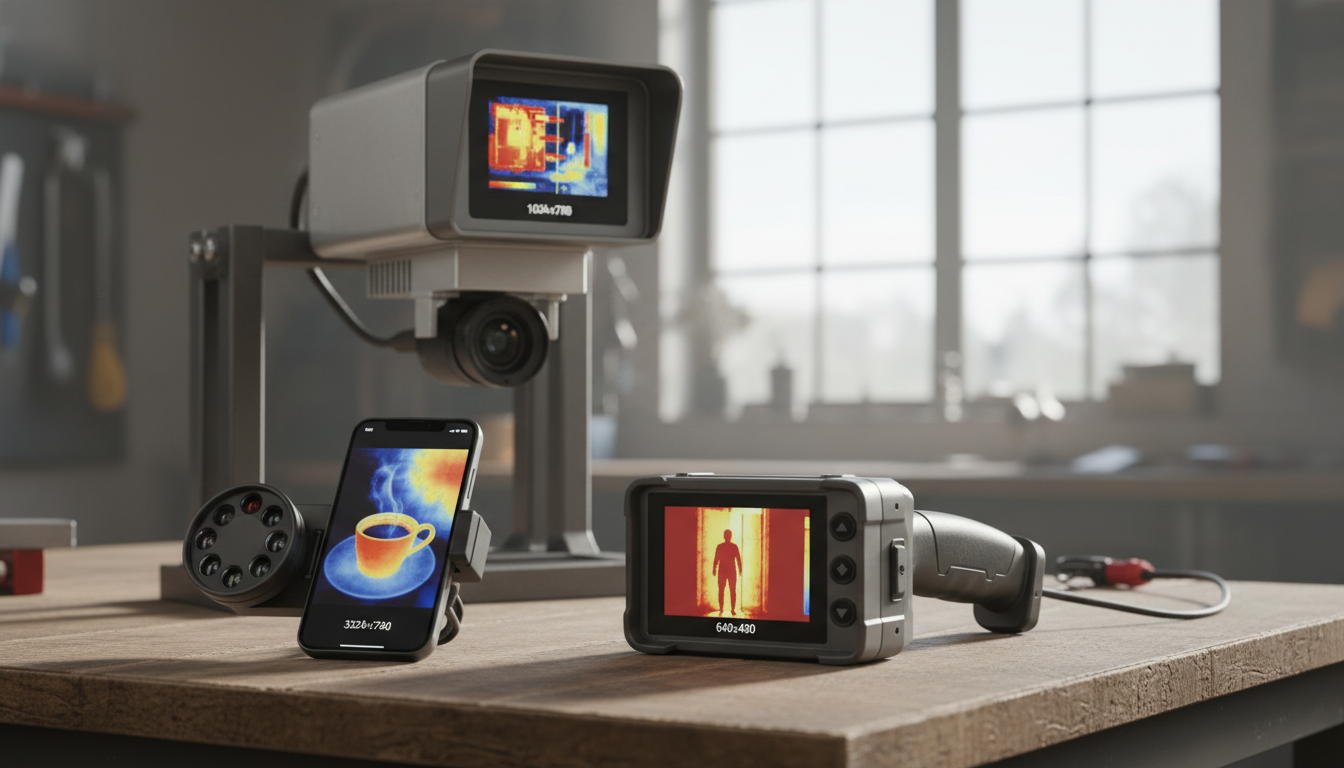
Not all thermal cameras are built the same. They fall into different categories based on how their sensors operate. Let’s break down the main types you’ll come across.
Cooled cameras have a cooling mechanism within the sensor to improve sensitivity. They are typically more expensive and used in high-precision tasks like military surveillance or medical diagnostics. They operate with sensors that are cryogenically cooled, usually within a vacuum-sealed case. This cooling process improves their sensitivity, allowing them to detect even the tiniest temperature differences.
Cooled detectors can sense temperature variations as small as 0.02°C. This level of precision makes them perfect for scientific research, military operations, and other specialized applications where every degree matters. The downside? They’re pricey, complex, and need time to cool down before they’re ready to use.
Uncooled thermal cameras use uncooled infrared sensors. They are common, cost-effective, and suitable for many applications such as building inspections and preventive maintenance. These cameras operate at room temperature, so they don’t need bulky cooling systems.
Uncooled thermal imaging cameras are more common and affordable. They operate at ambient temperature, without the need for complex cooling systems. These cameras are designed to detect temperature differences as small as 0.2°C. While they’re not quite as sensitive as cooled cameras, they’re more than good enough for most everyday uses – from home inspections to industrial maintenance to security work.
The big advantage here is simplicity. Uncooled cameras are lighter, more reliable, and way more budget-friendly. They’re the go-to choice for most commercial and consumer applications. If you’re browsing options at Pixfra, you’ll find plenty of uncooled models that deliver excellent performance without breaking the bank.
Focal plane arrays (FPAs) form the heart of both cooled and uncooled thermal cameras. Think of the FPA as the “film” in a thermal camera – it’s the grid of sensors that captures the heat image. Higher-quality FPAs have more pixels packed into the same space, which means sharper, more detailed images. Whether you’re looking at a cooled or uncooled camera, the FPA quality matters a lot for overall performance.
When you’re shopping for a thermal camera, the spec sheet can look like alphabet soup. Here are the most important numbers to pay attention to:
Thermal or infrared resolution indicates the detail captured by the thermal detector. For example, ‘160 x 120’ means the thermal camera has an array of 160 x 120 sensors or pixels that create its baseline thermal image. A higher thermal resolution provides more clarity, so more is better.
The standard resolutions are 160 x 120, 320 x 240 and 640 x 480 pixels. A 160 x 120 resolution will have 19,200 pixels while a 640 x 480 resolution will have 307,200 pixels. That’s a huge difference in image detail. Higher resolution lets you see smaller objects more clearly and work from farther away.
Thermal sensitivity defines the minimum temperature difference an infrared camera can detect. It is also called the Noise Equivalent Temperature Difference (NETD). The lower the number, the more sensitive the detector. Thermal sensitivity describes the smallest temperature difference observed when using a thermal device.
Most consumer cameras have NETD values around 40-100 mK (milliKelvins). High-performance models can go as low as 20 mK or even 10 mK. If you’re hunting for tiny temperature differences – like finding moisture behind walls or spotting early equipment failures – you’ll want a camera with better (lower) NETD.
According to the temperature ranges we want to measure, the most commonly used industrial thermal cameras are of the following: LWIR for “low” temperature measurements between -50°C and 900°C, NIR-SWIR for high temperature measurements (450°C to 2450°C), and MWIR for measuring low and intermediate temperatures with high precision.
For most home and general industrial use, a range of -20°C to 400°C will cover your needs. Specialized applications might need cameras that can handle much higher (or lower) temperatures.
The field of view (FOV) determines how wide an area your camera can see. A wider FOV is great for scanning large spaces, while a narrower FOV (telephoto lens) helps you zoom in on distant targets. Some advanced thermal cameras offer interchangeable lenses, giving you flexibility for different situations.
Thermal imaging isn’t just for one industry – it’s everywhere. Here are some of the most popular ways people put thermal cameras to work:
In construction, thermal cameras detect heat loss, moisture issues, and insulation problems in buildings, promoting energy efficiency and safety. You can spot drafts around windows, missing insulation in walls, and even hidden water leaks before they cause serious damage. Home inspectors and energy auditors rely on thermal cameras to give homeowners a clear picture of where their heating and cooling dollars are escaping.
Thermal imaging identifies overheating circuits or equipment that could lead to failures, allowing for proactive maintenance. An overheating electrical connection shows up bright on a thermal camera, giving electricians an early warning before things catch fire or fail completely. This predictive maintenance approach saves companies tons of money and prevents dangerous situations.
Thermal cameras aid firefighters and search & rescue teams in locating hotspots, victims, and hidden hazards in smoke-filled environments, enhancing safety and efficiency during emergency operations. When visibility drops to zero in a burning building, thermal cameras become a firefighter’s best friend. They can see through smoke to find people who need rescue and identify where the fire is burning hottest.
Thermal cameras are integrated into security systems for perimeter monitoring, intruder detection, and surveillance in low-light or adverse weather conditions. Unlike regular security cameras that need light or infrared illuminators, thermal cameras work in complete darkness, through fog, and even light rain. They can spot intruders from far away based on their heat signature.
Industrial plants use thermal cameras to monitor machinery, inspect manufacturing processes, and catch overheating components before damage occurs. From production lines to power plants, thermal cameras help keep operations running smoothly by identifying problems early.
Thermal technology has become hugely popular among hunters and outdoor enthusiasts. Thermal monoculars and scopes let you spot game in total darkness or thick brush. For a deep dive into this application, check out our guide on thermal monoculars for hunting or explore the Sirius HD model.
In the medical field, thermal cameras are utilized for diagnostic purposes, detecting abnormalities in blood flow, inflammation, and tissue temperature. Doctors use thermal imaging to spot inflammation, monitor circulation, and even identify potential tumors based on temperature differences in body tissue.
Picking the right thermal camera depends on what you’re trying to do with it. Here’s a practical approach:
1. Define Your Use Case: Are you inspecting buildings? Monitoring electrical panels? Hunting? Each application has different requirements for resolution, temperature range, and features.
2. Set Your Budget: Thermal cameras range from a few hundred dollars for smartphone attachments to tens of thousands for high-end professional models. Know what you can spend before you start shopping.
3. Consider Resolution Needs: The higher the resolution of the detector, the sharper and more accurate each individual point in the image will be. Higher resolution infrared cameras can measure smaller targets at a greater distance. If you need to see fine details or work from a distance, invest in higher resolution.
4. Check Thermal Sensitivity: For applications that need to detect subtle temperature differences – like finding moisture or spotting early equipment wear – look for cameras with NETD values of 50 mK or better.
5. Verify Temperature Range: Make sure the camera can measure the temperatures you care about. Building inspections typically need -20°C to 150°C, while industrial monitoring might need much higher ranges.
6. Look for Useful Features: Modern thermal cameras often include extras like built-in digital cameras for context photos, WiFi connectivity for sharing images, picture-in-picture modes, and software for analysis. Decide which features actually add value for your work.
7. Think About Form Factor: Handheld cameras are great for walk-around inspections. Fixed-mount cameras work better for continuous monitoring. Smartphone attachments offer portability and affordability for casual use.
Once you have a thermal camera, here are some tips to get accurate, useful images:
Understand Emissivity: Different materials emit infrared radiation differently. Most thermal cameras let you adjust the emissivity setting to match what you’re measuring. Shiny metal surfaces have low emissivity and can be tricky – they reflect heat from other sources rather than showing their true temperature.
Watch for Reflections: Shiny surfaces can reflect heat from other objects, giving false readings. Be aware of this when interpreting your images.
Consider Environmental Factors: Wind, rain, and ambient temperature can all affect your readings. Try to measure in stable conditions when possible.
Get the Right Distance: Each camera has an optimal distance range. Too close or too far, and you might not get accurate measurements.
Use Context Images: Many thermal cameras can capture both thermal and visible light photos. These context images make it much easier to understand what you’re looking at and to communicate findings to others.
Can thermal cameras see through walls?
Contrary to popular belief, infrared cameras cannot see through walls or other solid objects. They can only measure the heat emitted by the scene being observed. A thermal image of a wall will show the flow of heat through the wall if there is a heat source behind it, but it cannot “see” the heat source itself. Thermal cameras detect surface temperatures, so they can reveal patterns that suggest what’s behind a wall (like a hot pipe), but they can’t actually see through solid objects.
What’s the difference between thermal imaging and night vision?
Regular cameras and the human eye both work on the same basic principle: visible light energy hits something, bounces off it, a detector receives the reflected light, and then turns it into an image. Thermal imagers make pictures from heat, not visible light. Heat and light are both parts of the electromagnetic spectrum, but a camera that can detect visible light won’t see thermal energy, and vice versa. Night vision amplifies available light to help you see in the dark. Thermal imaging detects heat and works even in total darkness.
How much does a good thermal camera cost?
Prices vary widely based on specifications and intended use. Entry-level smartphone attachments start around $200-400. Quality handheld cameras for home inspection and general use run $500-2,000. Professional-grade models for industrial or scientific applications can cost $5,000-$50,000 or more. For most DIY and professional trades applications, cameras in the $800-1,500 range offer excellent value.
Do thermal cameras work in daylight?
Yes! Because a thermal camera reads heat instead of visible light, it can reveal crucial information even in darkness or visually obstructed settings. Thermal cameras detect infrared radiation, which is always present regardless of lighting conditions. They work equally well day or night.
What resolution thermal camera do I need?
The two major factors that you should keep in mind when buying a thermal imager are Detector Resolution and Thermal Sensitivity. For basic home inspections and casual use, 160×120 resolution is adequate. For professional building inspection, electrical work, or industrial applications, 320×240 offers a good balance of detail and cost. High-end applications requiring precise measurements at distance should consider 640×480 or higher. Remember that more pixels mean more detail, which translates to better decisions and more accurate measurements.
We all love the thrill of spotting wildlife in their natural surroundings. Whether you’re hoping to catch a glimpse of a deer grazing in a meadow or watching birds build their nests, wildlife observation connects us to nature in ways few other activities can. But here’s the thing—getting too close or making the wrong moves can stress animals out, mess with their natural behavior, and even put you in danger.
That’s why we put together this guide to help you watch wildlife the right way. We’ll walk you through proven best practices that keep both you and the animals safe, so you can enjoy these amazing moments without causing any harm. If you’re interested in observing wildlife at night, check out our guide on fox hunting at night behavior and techniques for more specialized tips.
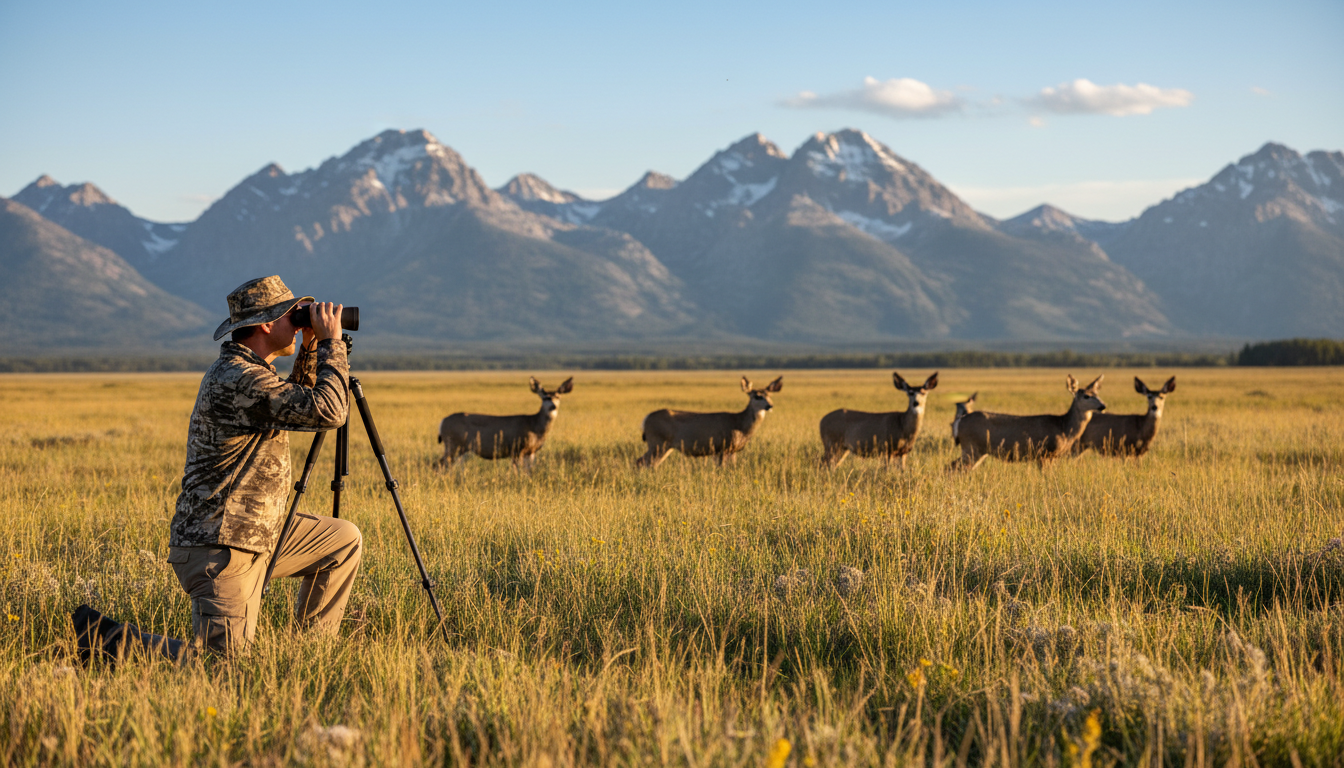
Many parks require you to stay a minimum distance of 25 yards from most wildlife and 100 yards from predators like bears and wolves. That’s roughly two bus lengths for smaller animals and a whole football field for the big predators. If you can take a selfie with an animal without zooming in, you’re way too close.
Use binoculars, spotting scopes, or cameras with zoom lenses to get a better view without crowding the animals. Binoculars and telephoto lenses are essential tools for creating physical distance and allow you to observe wildlife discreetly, while offering a much more rewarding glimpse into the animals’ natural behavior. When animals don’t know you’re watching, they act naturally—and that’s when you see the really cool stuff.
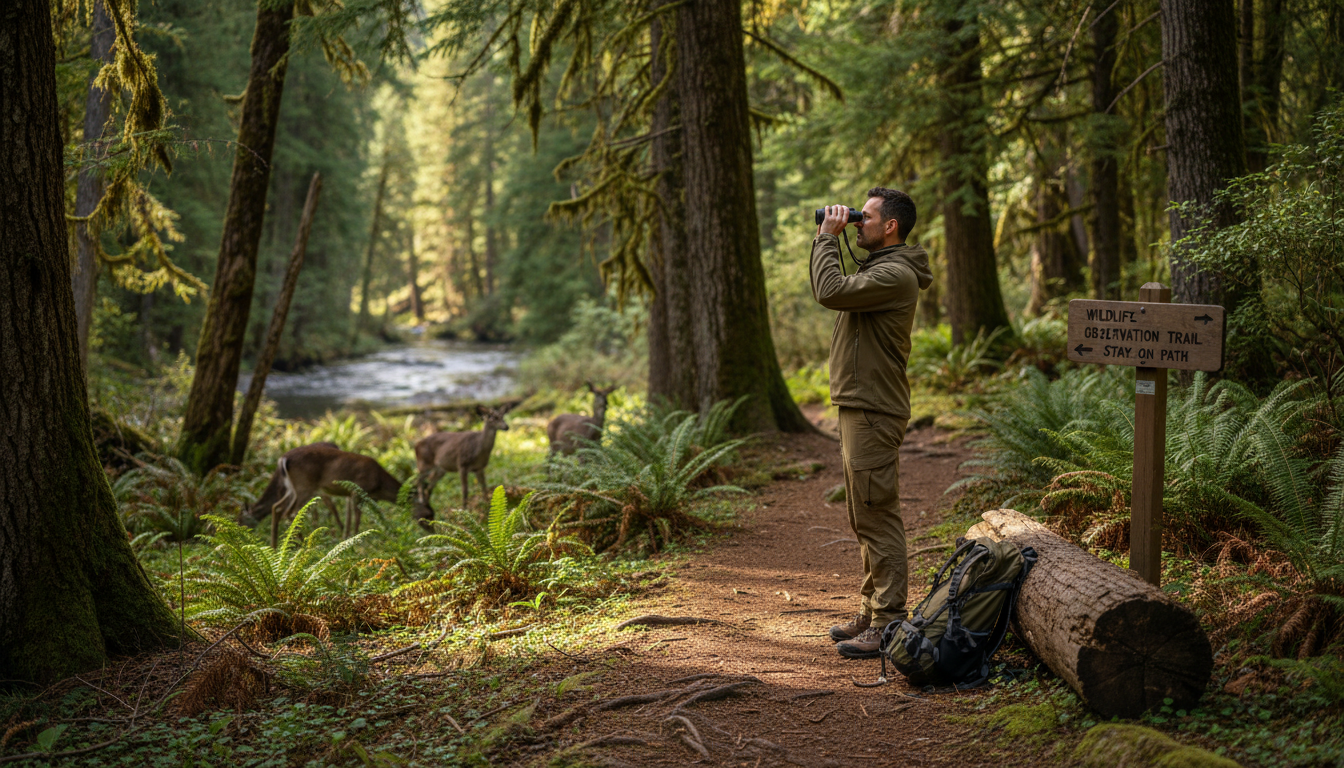
Simply put, leave animals alone—no touching, no feeding, no harassing. It sounds obvious, but you’d be surprised how many people forget this basic rule. It’s illegal to feed, touch, tease, frighten, or intentionally disturb wildlife.
Feeding wildlife might seem harmless or even kind, but it creates serious problems. Feeding wildlife in parks can make them come looking for more, and once they have learned that people are a source of food, wildlife can become aggressive toward people. Animals that get used to human food lose their natural foraging skills and can end up dependent on handouts. Worse, they might approach roads or populated areas looking for snacks, which often ends badly.
Silence is paramount, whether you’re in motion or simply observing, and shouting to catch the attention of an animal, imitating birdsong to attract a bird, or mimicking an animal call is not okay. Using animal calls or bird call apps counts as harassment and is actually illegal in many places. It can cause birds to abandon nests, leaving their babies vulnerable to predators, or make animals waste precious energy responding to fake calls.
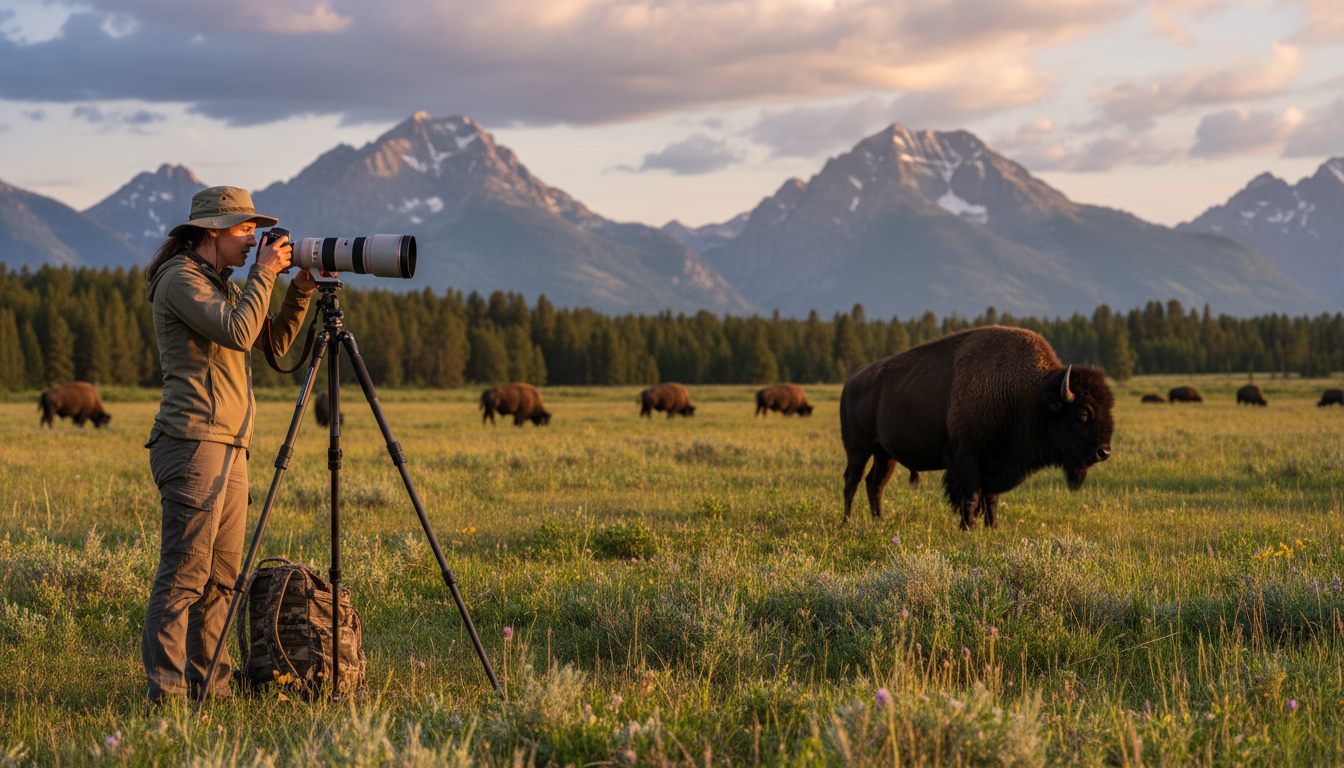
Stay on trails to help keep human presence in predictable areas, and if dogs are allowed, keep them on-leash. Wandering off-trail might feel adventurous, but it can damage delicate habitats and disturb nesting sites or burrows you might not even see.
Sticking to designated paths helps protect vegetation that provides food and shelter for countless species. By staying on marked trails, you’re also less likely to disturb the homes of the animals you’re trying to observe, and these paths help keep visitors safe and prevent them from accidentally trampling on delicate plants.
If you’re hiking in an area where pets are allowed, keep them leashed at all times. Wild animals see dogs as predators, which can cause unnecessary stress or trigger defensive behavior. Plus, pets can spread diseases to wildlife or pick up parasites themselves.
Access to trash, and even crumbs left on picnic tables can attract animals, and feeding wildlife in parks can make them come looking for more. To an animal, anything that smells like food is food. That means properly storing your snacks and packing out every bit of trash you bring.
Feeding wildlife puts you at risk of injury and the wildlife at risk of being removed and humanely killed by wildlife managers—don’t be responsible for the death of wildlife! Use bear-proof containers where required and make sure trash bins are fully closed. A clean campsite or picnic area isn’t just good manners; it’s a matter of life and death for some animals.
The “leave no trace” principle applies to all outdoor recreation. Everything you carry in should come back out with you—wrappers, bottles, food scraps, all of it. Littering spoils natural beauty and poses real threats to wildlife that might eat or get tangled in your garbage.
Vehicle strikes are one of the most deadly types of encounters for wildlife in parks, as roads cut through their habitats or migration routes. When you’re driving through wildlife areas, slow down and stay alert. Animals can dart into the road without warning, especially at dawn and dusk when many species are most active.
When you want to stop to watch wildlife, pull your vehicle completely off of the road into a designated pull-out—this keeps wildlife safe as well as other motorists. Don’t just slam on the brakes in the middle of the road. Find a proper pull-off, park safely, and then enjoy your observation from there.
Following posted speed limits gives you more time to react if an animal appears. It also reduces the severity of any collision that might occur. Remember, you’re driving through their home—they have the right of way.
Tell a ranger if you come into physical contact with wildlife, and also tell a ranger if you see wildlife that are sick, dead, or acting strangely, including wildlife that approach you. Reporting these incidents helps park managers track disease outbreaks, monitor animal behavior, and keep other visitors safe.
The best thing you can do to help in these situations is to keep your distance and leave it to the experts, as sick or dead wildlife can potentially transmit diseases to you or your pets. Don’t try to rescue or touch sick animals yourself. Wildlife professionals have the training and equipment to handle these situations properly.
If you see other visitors breaking wildlife observation rules—getting too close, feeding animals, or harassing wildlife—speak up politely or report it to park staff. We all have a role in protecting these animals and their habitats.
Having proper equipment makes your wildlife observation experience better and safer. Binoculars are perfect for watching birds and smaller animals without disturbing them. Look for models with good magnification and a wide field of view so you can spot animals quickly and track their movements easily.
For larger animals at greater distances, a spotting scope works wonders. It’s basically a small telescope that lets you see fine details and colors from far away. A quality spotting scope can turn a distant speck into a clear view of an elk or moose going about its day.
Avoid using flash photography, as it can startle animals and disrupt their natural behavior. Flash can startle animals, causing them stress and potentially disrupting their natural behaviors—instead, practice patience and wait for the perfect lighting to naturally capture your subject. Natural light photography takes more patience, but the results are worth it, and you’re not stressing out the wildlife.
Don’t bring spotlights, laser pointers, or devices that make animal sounds. These can disorient animals, cause them to abandon nests, or trigger defensive responses. If you want to document your sightings, consider using apps like iNaturalist that let you contribute to citizen science projects.
When viewing wildlife, your actions should never cause a change in animal behavior, as fidgeting and fleeing are universal signs of disturbance in wildlife. Learning to read animal body language helps you recognize when you need to back off.
For your best chance to observe some amazing natural behaviors, avoid making animals feel stressed or threatened by moving back to the recommended distance, and if an animal starts to stare, fidget or flee, calmly back away and give them more space. If a deer stops eating and stares at you, or if a bird keeps glancing your way instead of tending its nest, you’re too close.
Some animals freeze when threatened rather than running away. Just because an animal isn’t moving doesn’t mean it’s comfortable with your presence. Pay attention to ear position, body tension, and vocalizations. If an animal seems alert to your presence, increase your distance slowly and calmly.
Different species show stress in different ways. Birds might flush from nests, marine mammals might dive repeatedly, and large mammals like bears or moose might lower their heads or paw the ground. Do your homework before heading out so you know what warning signs to watch for with the species you hope to see.
Before heading out for wildlife observation, research the area you’ll be visiting. Learn about local regulations, required permits, and seasonal closures. Some areas restrict access during nesting season or other sensitive times to protect wildlife.
There has been an increase in the popularity of wildlife observation and nature photography, and while there is no universal manual for respecting nature, here are five principles worth keeping in mind. Understanding the species you hope to see—their habits, habitats, and behaviors—makes for a better experience and helps you know what to expect.
Check the weather forecast and dress appropriately. Bring plenty of water, snacks, sun protection, and a basic first aid kit. If you’re heading into bear country, carry bear spray and know how to use it. Being prepared means you can focus on enjoying wildlife rather than dealing with emergencies.
Consider joining guided tours led by experienced naturalists or park rangers. They offer valuable insights into animal behavior and habitat conservation while ensuring you follow best practices. For more tips on respectful outdoor adventures, visit our outdoor resources page.
What’s the safest distance for watching bears and wolves in the wild?
Stay at least 100 yards (the length of a football field) away from bears, wolves, and other large predators. If the animal changes its behavior because of you, you’re too close—back away slowly and calmly.
Can I feed wild animals if I’m just giving them healthy food?
No, never feed wildlife. Even “healthy” human food disrupts their natural diet and foraging behavior, causes them to become dependent on people, and can make them aggressive. Feeding wildlife is illegal in most parks and protected areas.
How can I tell if I’m disturbing an animal while watching it?
Watch for behavior changes like staring at you, stopping normal activities (eating, grooming), fidgeting, vocalizing, or moving away. If the animal seems aware of your presence and alters what it’s doing, you’re too close and need to back off.
Is it okay to use my phone’s bird call app to attract birds for photos?
Absolutely not. Using bird calls or animal sounds—whether from apps or your own voice—is considered harassment and is illegal in many areas. It can cause birds to abandon nests, waste energy responding to fake calls, and expose them to predators.
What should I do if a wild animal approaches me?
Stay calm and don’t run. Back away slowly while facing the animal (but avoid direct eye contact with predators). Make yourself look larger if it’s a predator, speak calmly, and give the animal space to leave. Report the encounter to park rangers afterward.
When the sun sets and darkness blankets the landscape, a whole new world of predators comes alive. Snakes, those mysterious reptiles that have fascinated and frightened people for centuries, are among the most skilled nocturnal hunters on the planet. Whether you’re curious about when these serpents are most active or how they track down prey in complete darkness, we’ve got the answers you’ve been looking for. And if you’re interested in learning more about other fascinating nighttime predators, check out our guide on fox hunting at night to see how different species master the dark.

Snakes have evolved some seriously cool tricks to survive and thrive when most of us are fast asleep. From heat-sensing superpowers to silent ambush tactics, these reptiles are way more than just creepy crawlers. Let’s dive into the secret lives of snakes after dark and uncover what makes them such effective hunters when the lights go out.
Here’s the thing: not all snakes follow the same schedule. The truth is actually way more interesting than a simple yes or no answer. Different snake species can be strictly diurnal (active during the day), crepuscular (active at dawn and dusk), or nocturnal (active at night). For example, a black mamba is a diurnal snake, while a ball python is nocturnal, and corn snakes are crepuscular, meaning they’re most active during twilight hours.
Snakes decide when to be active based on a bunch of factors. Some are naturally wired to hunt at certain times because of their genes, while others adapt their schedules based on food availability, temperature, and danger from predators. Many species are nocturnal primarily to avoid predators and reduce competition for food. The cooler temperatures at night also help them manage body heat, especially in hotter climates, and hunting at night lets them catch prey without being spotted as easily.
Most snakes are actually most active during the twilight hours – those periods just before sunrise and after sunset. During these times, the temperature hits that sweet spot where snakes can move efficiently without overheating or getting too cold. The low light also gives them natural camouflage, making it easier to hunt without being seen by bigger predators or their next meal.
If you’re wondering when you’re most likely to encounter a snake after dark, the answer depends on the season and local climate. Generally, snakes are most active during the twilight hours – both at dusk and dawn. These transition periods offer the perfect hunting conditions with moderate temperatures and dim lighting.

During hot summer months, many snakes shift to being more nocturnal to escape the scorching daytime heat. They can only survive extreme temperatures for about 10-20 minutes, so nighttime activity is a survival strategy. Even after the sun goes down, these cold-blooded creatures can absorb warmth from rocks, roads, and other objects that retain heat from the day.
In spring and fall, when daytime temperatures are more comfortable, snakes tend to be more active during the day or at twilight. Temperature is the main driver behind when snakes come out to hunt. Snakes are ectothermic (cold-blooded), which means they rely on external heat sources to power their bodies and regulate their metabolism. When it’s too cold, they become sluggish and can’t hunt effectively. When it’s too hot, they risk overheating and must find shade quickly.
Snakes use two main hunting strategies, and understanding these can give us major insights into their after-dark behaviors. The vast majority of snakes are ambush predators – they prefer to lie in wait for prey to come close rather than actively chasing it down. These patient hunters rely heavily on camouflage to stay hidden while they wait for the perfect moment to strike.
Ambush predators like rattlesnakes, pythons, and vipers typically have thick, powerful bodies and large heads. This body type isn’t great for speed, but it’s perfect for delivering a quick, powerful strike when prey wanders within range. These snakes will often sit motionless for hours or even days, waiting for an unsuspecting meal to pass by. Their patience is seriously next-level.
On the flip side, some snakes are active foragers that search their environment for food. Garter snakes, king snakes, and rat snakes fall into this category. These hunters tend to have longer, thinner bodies that give them better agility and speed. They use their excellent sense of smell to track down prey, poking their heads through leaves and loose soil to find hidden meals. Active foragers rely heavily on their vomeronasal organ (also called Jacobson’s organ) to detect chemical scents in their environment.
One of the coolest things about nocturnal snakes is how they’ve adapted to hunt when they can’t rely on sight alone. These reptiles have developed some seriously impressive sensory tools that let them find and catch prey in complete darkness.
Heat-Sensing Pits: Many nocturnal snakes, especially pit vipers like rattlesnakes and copperheads, have specialized heat-sensing organs called pit organs located between their eyes and nostrils. These pits can detect the infrared radiation (body heat) given off by warm-blooded prey like rodents and birds. Even in pitch-black conditions, these snakes can “see” the heat signature of an animal, making them incredibly effective nighttime hunters.
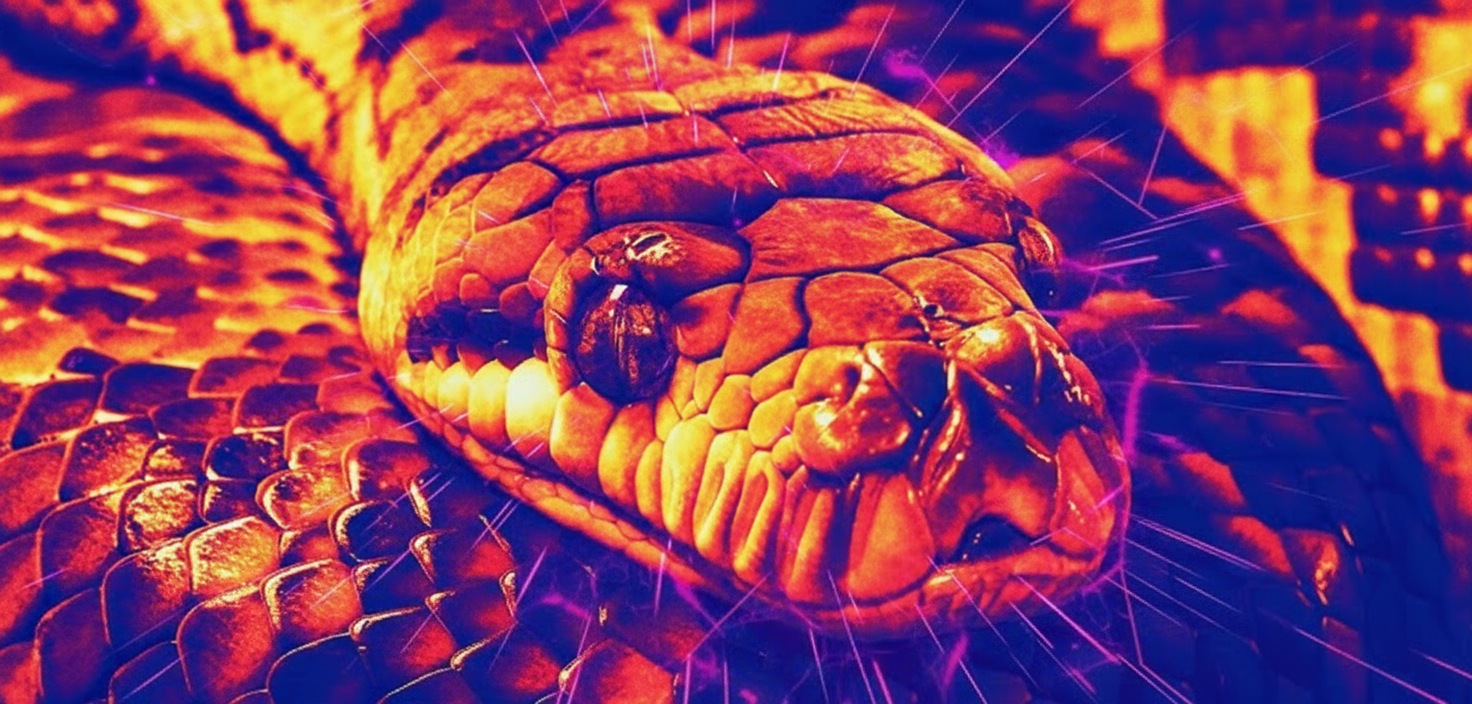
Chemical Detection: All snakes have forked tongues that they flick in and out constantly. They’re not tasting the air – they’re actually collecting chemical information. When a snake flicks its tongue, it picks up scent particles from the environment. The forked design lets them determine which direction a smell is coming from, since each tip collects slightly different amounts of scent. This information gets transferred to the vomeronasal organ on the roof of their mouth, which processes the chemical data and helps the snake locate prey, identify potential mates, or detect danger.
Vibration Detection: Snakes don’t have external ears, but they’re excellent at picking up vibrations through the ground. Their jawbones are connected to inner ear structures that sense vibrations, allowing them to detect the movement of prey animals walking or scurrying nearby. This sense is especially useful for ambush predators waiting silently for the right moment to strike.
Night Vision: While snakes generally don’t have amazing eyesight compared to other predators, nocturnal species often have adaptations for seeing in low light. Some snakes, like the Texas night snake, have vertical pupils that can expand widely to let in more light, similar to how a cat’s eyes work. This gives them better vision in darkness compared to their diurnal cousins.
Once a snake has located its prey, the next step is capturing and killing it. Snakes have evolved two primary methods for subduing their meals: venom and constriction.
Venomous Strikes: Venomous snakes like copperheads, rattlesnakes, and cottonmouths use toxic substances to immobilize prey. These snakes typically strike quickly, inject venom through their fangs, and then release the prey. The venom goes to work immediately, either attacking the nervous system (neurotoxic venom) or destroying blood cells and tissue (hemotoxic venom). After striking, the snake often tracks the dying animal using its sense of smell, following the chemical trail until it finds the prey and swallows it whole. This “strike and release” method is smart because it reduces the risk of injury from a struggling animal.
Constriction: Pythons, boas, and many colubrids (like rat snakes) use a different approach. These non-venomous snakes grab their prey with their teeth and quickly coil their powerful bodies around it. Contrary to popular belief, constrictors don’t crush their prey – instead, they squeeze tightly enough to prevent the animal from breathing. Each time the prey exhales, the snake tightens its grip a bit more until the animal suffocates or dies from circulatory failure. Some venomous snakes also use constriction along with their venom to ensure the prey doesn’t escape or injure them during the struggle.
Specialized Tactics: Research has revealed some truly surprising hunting techniques. Some water snakes in Southeast Asia hunt crabs using methods that break all the normal rules. Instead of the typical open-mouthed strike, these snakes pin crabs down with their chin, then coil around them to manipulate and swallow them. Even more interesting, some snakes hunt soft-shelled crabs during molting, when the crab’s hard protective shell is temporarily vulnerable, allowing them to consume prey four times bigger than they could normally swallow whole.
Temperature is hands-down the most significant factor controlling when and how snakes hunt. As ectothermic animals, snakes need external heat to function properly. Their bodies work best when their internal temperature is between 70-90 degrees Fahrenheit. Below 60 degrees, snakes become sluggish and struggle to move or hunt. Above 95 degrees, they risk overheating and must find shelter fast.

In hot climates like Texas, Arizona, and Florida, snakes often become nocturnal during summer to avoid deadly daytime heat. They emerge from their hiding spots after sunset when the air cools down but can still absorb residual warmth from sun-heated rocks and pavement. In cooler northern states or during spring and fall, snakes are more likely to be active during the day when they need the sun’s warmth to raise their body temperature.
This temperature dependency also explains seasonal patterns. Snakes typically emerge from brumation (a hibernation-like state) in March or April when average daytime temperatures consistently reach and stay above 60 degrees Fahrenheit. They remain active through October before retreating to underground burrows or other protected spots for the winter. During their active months, daily activity patterns shift based on temperature fluctuations.
Smart predators know that hunting is easier when your prey is active, and snakes are no exception. Many of the animals that snakes feed on are also most active during twilight hours or at night, which influences when snakes choose to hunt.
Rodents like mice and rats, which make up a huge part of many snakes’ diets, are primarily nocturnal. These small mammals come out after dark to forage for food while avoiding daytime predators like hawks and eagles. Snakes have adapted their hunting schedules to match this peak prey activity. Amphibians like frogs and toads are also more active during humid nighttime hours, especially near water sources. Nocturnal snakes living near wetlands or ponds can capitalize on this abundant food source.
Some prey species are active both day and night, giving snakes flexibility in their hunting schedules. Lizards, for example, might bask in the sun during the day but can also be active during warm nights. This allows species like ratsnakes to adjust their activity patterns based on temperature and other environmental conditions rather than being locked into a strict nocturnal or diurnal schedule.
Knowing when snakes are most active can help you avoid unwanted encounters, especially if you live in or visit snake country. Here are some practical tips:
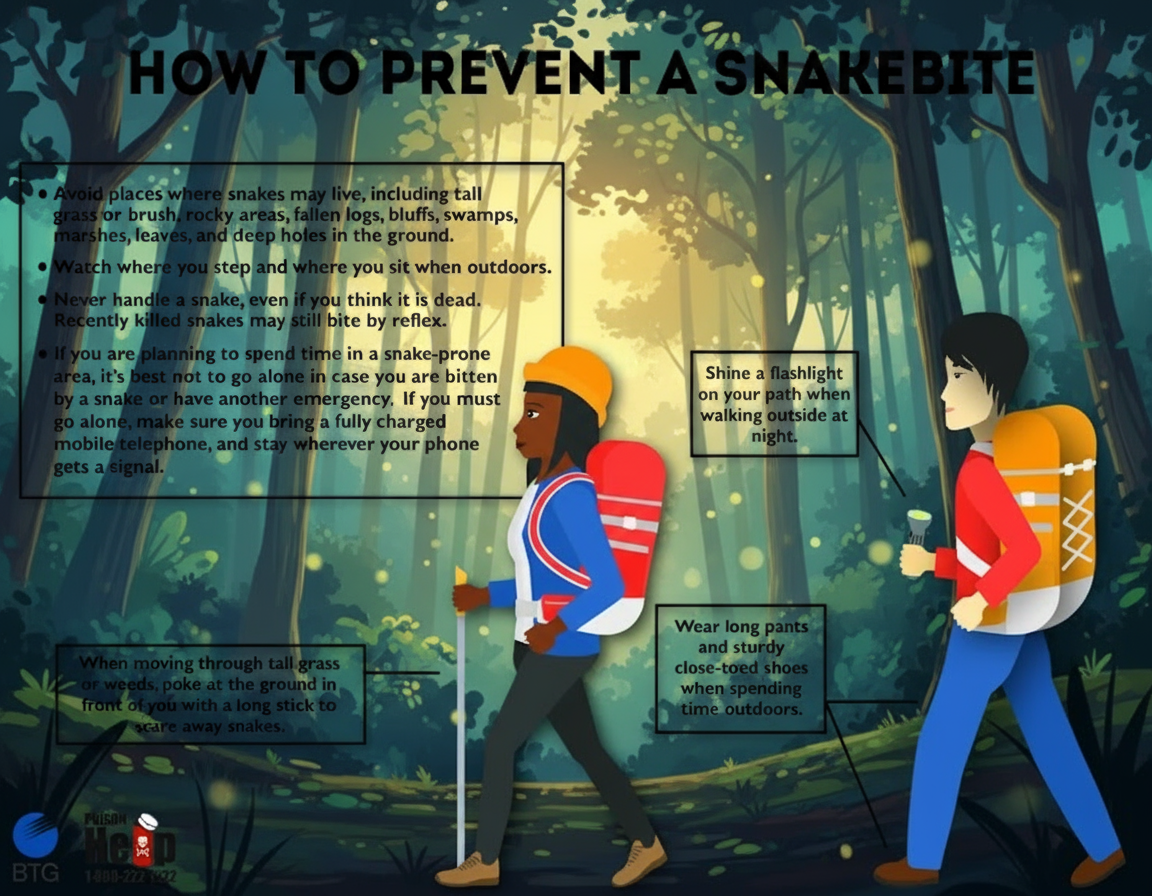
Time Your Outdoor Activities Wisely: If you’re hiking, camping, or working outdoors in snake habitat, be extra cautious during dawn and dusk hours when snakes are most active. During hot summer months, remember that snakes may be moving around at night to stay cool.
Use a Flashlight: Always carry a strong flashlight and scan the ground ahead of you when walking at night. Snakes can be difficult to spot in low light, even on trails or roads.
Watch Your Step: Snakes often rest on warm surfaces like rocks, logs, or paved roads at night. Step carefully and avoid reaching into areas you can’t see clearly, like under wood piles or inside tall grass.
Keep Your Property Less Attractive: Snakes come to your yard for food and shelter. Reducing rodent populations by securing garbage and eliminating food sources makes your property less appealing. Keep grass trimmed short and remove brush piles, rock piles, and other hiding spots.
Stay Calm During Encounters: If you do spot a snake, the best thing to do is give it space and back away slowly. Most snakes aren’t aggressive toward humans and will retreat if given the chance. Never try to catch or kill a snake, as this is when most bites occur.
For more outdoor safety tips and wildlife behavior insights, visit our homepage for additional resources.
Can snakes see in total darkness? While snakes don’t have night-vision goggles, many nocturnal species have adapted eyes with vertical pupils that expand to gather more light. Additionally, pit vipers can detect infrared heat from warm-blooded prey, essentially allowing them to “see” heat signatures even in complete darkness.
Do all venomous snakes hunt at night? Not all venomous snakes are nocturnal. While copperheads and rattlesnakes are often most active from late afternoon into the evening (crepuscular behavior), other venomous species like the black mamba are strictly diurnal and hunt during daylight hours. It really depends on the species and the climate where they live.
Why do I see snakes on roads at night? Roads and pavement retain heat from the sun and stay warm long after sunset. During cooler nights or in spring and fall, snakes will often rest on these warm surfaces to regulate their body temperature. This behavior is called thermoregulation, and it’s why you’ll frequently spot snakes crossing roads or basking on pavement after dark.
What’s the difference between nocturnal and crepuscular snakes? Nocturnal snakes are active throughout the night, from sunset to sunrise. Crepuscular snakes are most active during twilight periods – specifically at dawn and dusk. Many people think snakes are nocturnal, but the truth is that a large number of species are actually crepuscular, taking advantage of those in-between times when temperatures are ideal and prey is active.
Do snakes sleep with their eyes open? Yes! Snakes don’t have eyelids, so their eyes are always “open.” However, they sleep by closing their retinas, which prevents light from entering their eyes. If you see a snake that’s completely still and not flicking its tongue, it’s probably sleeping, even though its eyes appear wide open.
















