You’ve seen the price tags. A solid thermal monocular or scope can run you anywhere from a few hundred bucks to well over $5,000. And if you’re staring at those numbers wondering whether spending more actually gets you more, you’re not alone. We’re Pixfra, and we build thermal devices for hunters, wildlife watchers, and outdoor professionals — so we’ve got a front-row seat to this debate. Let’s break it all down.
Before we get into whether a premium thermal device is worth your money, it helps to understand why these things cost more than a standard optic in the first place. A thermal device isn’t just a camera with a fancy filter. A thermal imaging scope combines specialized infrared materials, expensive sensing hardware, real-time processing, strict calibration, and recoil-rated durability in one hunting optic. That’s a lot of tech packed into a single piece of gear.

At the core of every thermal device sits an infrared sensor — usually a microbolometer made from vanadium oxide or amorphous silicon. The heart of every thermal camera lies in its infrared sensor, and unlike a normal camera that depends on visible light, a thermal imager captures infrared radiation emitted by objects, requiring specialized materials and ultra-precise manufacturing. These sensors aren’t cheap to produce. The raw materials alone, like germanium used in high-quality thermal lenses, carry a steep cost. Germanium metal costs $1,500 per kg in its raw form, and when you add the price of refining and processing it into a high-performance lens, the total cost increases exponentially. Then add proprietary image processing algorithms, precision calibration for each individual unit, and housings built to handle drops, rain, dust, and recoil — and you start to see where the money goes.
The good news? Prices have come down a lot. In 2025–2026, prices have fallen 40%. What used to be premium-only tech is now showing up in mid-range and even some entry-level devices. At Pixfra, we’ve built our entire lineup around delivering real performance — from the Mile 2 series for everyday outdoor use to the Sirius HD for professionals who need maximum range and clarity — without charging you for stuff you don’t need. If you want a closer look at what separates a great thermal device from a frustrating one, check out our breakdown of the top 6 features needed in the best thermal device in 2026.
So what’s the real difference between a budget thermal and a premium one? It’s not just about bragging rights or a flashy spec sheet. The gap shows up the moment you’re in the field — especially when conditions get tough.
The first thing you’ll notice is image clarity. Pricing in the premium thermal category is driven by the quality of the thermal sensor. High-end scopes use ultra-sensitive thermal detectors with a sub-15mK NETD, meaning the scope can detect incredibly slight temperature differences, cutting through dense humidity, fog, and total darkness to give you a crisp image. Our Pixfra devices hit NETD values of ≤18mK, which places them at the high end of sensitivity for outdoor-grade thermal optics. That means you’re not squinting at washed-out blobs at 2 AM — you’re seeing defined outlines of animals against their background, even in rain or humidity.
Sensor resolution is the other half of the equation. Entry-level devices typically run 256×192 sensors, which work fine inside 100–150 yards. Step up to 384×288, and you’re getting solid performance out to 300–500 yards. Premium devices running 640×512 sensors give you positive identification at distances that budget models simply can’t match. At Pixfra, we pair our high-resolution sensors with 12μm pixel pitch technology across our product lines, giving you sharper, more detailed thermal images regardless of which model you choose. That 12μm pixel pitch — compared to older 17μm designs — produces noticeably sharper images that help you tell the difference between a coyote and a stump at real hunting distances.
Then there’s detection range. Our lineup covers everything from around 500 meters on entry-level models up to 3,600 meters on the Sirius HD series. But here’s something a lot of buyers miss: detection range and identification range are two different numbers. A device might detect a heat signature at 1,500 meters, but you won’t know what you’re looking at until much closer. Detection means you can tell something is there; identification means you are confident what it is. Premium devices close that gap by giving you the resolution, sensitivity, and processing power to confidently ID targets at longer distances. For hunters, that’s the difference between a clean shot and a pass.
Let’s be honest — not everyone needs a premium thermal device. If you’re setting up over a feeder and your shots are all inside 100 yards, a solid mid-range unit will do the job. But the performance gap between budget and premium gets real once you push past those comfortable distances or deal with difficult conditions.

The performance gap between budget ($1,500–$2,500) and premium ($4,000–$8,000) thermal scopes is substantial and immediately noticeable in actual hunting conditions. Premium models offer significantly better image clarity, longer detection ranges, smoother image processing, and more reliable performance in challenging environments. The difference becomes particularly apparent when hunting in difficult conditions — like spotting a partially obscured hog in thick brush at 300 yards, or quickly identifying a coyote moving through tall grass at dusk.
Here’s a quick breakdown of how the tiers stack up:
| Feature | Budget ($500–$1,500) | Mid-Range ($1,500–$3,500) | Premium ($3,500+) |
|---|---|---|---|
| Sensor Resolution | 256×192 | 384×288 | 640×512 |
| NETD Sensitivity | 35–50 mK | 20–35 mK | ≤18 mK |
| Pixel Pitch | 17 µm | 12 µm | 12 µm |
| Detection Range | 300–800 m | 800–1,800 m | 1,800–3,600 m |
| Refresh Rate | 25–30 Hz | 50 Hz | 50–60 Hz |
| Battery Life | 4–6 hours | 6–10 hours | 8–15 hours |
| Integrated LRF | Rare | Common | Standard |
| Build Rating | IP54 | IP67 | IP67/IP68 |
The mid-range sweet spot is where a lot of hunters land — and for good reason. Models like our Pixfra Arc LRF and Mile 2 series hit that balance between performance and price. You get solid sensor resolution, ≤18mK sensitivity, integrated laser rangefinders with 1,000-meter capability, and swappable 18650 batteries that last through an all-night session. For most recreational hunters and outdoor enthusiasts working inside 300–600 meters, that’s more than enough.
But if you regularly scan wide open fields, need to ID targets past 500 yards, or use your device in professional roles like wildlife management or law enforcement, the premium tier earns its price. Models like our Sirius HD series push detection out to 3,600 meters and deliver the kind of image quality that lets you make confident decisions at distances budget devices simply can’t reach.
Not all premium features are gimmicks. Some of them genuinely change how you use your thermal device in the field. Here’s what actually matters when you’re spending more.
A built-in laser rangefinder (LRF) is one of the biggest value-adds on any thermal device. For hunters shooting beyond 150 yards at night, an integrated LRF removes the need for a separate ranging device and gives you exact distance to your target with one button press. Our Pixfra Arc LRF, Chiron LRF, and Taurus LRF models all come with integrated 1,000-meter rangefinders. When paired with the built-in ballistic calculators on models like the Chiron LRF and Taurus LRF, you get real-time bullet drop calculations and an adjusted aiming point on the fly. That’s not a luxury — that’s the difference between an ethical shot and a miss. The addition of a true laser rangefinder makes a thermal a much more useful device; on a sight, the LRF is generally tied to a ballistic calculator, so you can make distance-informed shots.
Durability is another area where premium devices pull ahead. A cheaper device might carry an IP54 rating, which handles splashes — but won’t survive a dunk. Look for IP67 or higher. IP67 means full dust sealing and protection against temporary water submersion, covering rain, stream crossings, snow, and accidental drops. At Pixfra, we build our devices for the same conditions we use them in. Our thermal scopes handle heavy recoil, our monoculars survive drops, and our housings resist corrosion over years of field use.
Smart features round out the premium experience. Wi-Fi connectivity, onboard video recording, multiple color palettes, companion app support, and over-the-air firmware updates are now standard on serious devices. Our Pixfra Outdoor App works with all current models — Sirius, Arc LRF, Mile 2, Pegasus Pro, Chiron LRF, Taurus, and Taurus LRF — letting you update firmware, adjust settings, and transfer images and video straight to your phone. The Volans series takes it even further with all-day vision capability and an adjustable aperture from F1.2 to F3.0, so you carry one device instead of two regardless of lighting conditions.
Here’s where we keep it real. A premium thermal device is not the right buy for everyone. For casual use, a handheld thermal or digital night vision device may be the better first move. The smartest buy is the one that matches your real hunting distance, terrain, and budget, not the one with the flashiest spec sheet.

If you hunt a few times a year, mostly over feeders at distances under 150 yards, and you’re not dealing with extreme weather, you don’t need a $5,000 scope. A reliable mid-range thermal monocular or scope will cover you just fine. For occasional hunters who might use thermal technology a few times annually, mid-range options likely provide the best value proposition. Our Mile 2 series, for example, gives you the core performance you need — strong NETD, clean image quality, 12μm pixel pitch — at a price point that doesn’t require a second mortgage.
The real question isn’t “Is premium worth it?” — it’s “Is premium worth it for me?” If you spend 30+ nights a year in the field, need to ID targets at long distances, manage property for predator control, or work in law enforcement or wildlife management, then yes — premium thermal devices pay for themselves through better performance, fewer missed targets, and gear that doesn’t fail when conditions turn ugly. If you hunt casually and keep your distances short, save the extra money for ammo and gas.
Are high-end thermal scopes really that much better than budget ones?
Yes, the difference is real and immediately noticeable. Budget scopes can get the job done in ideal conditions, but premium options dramatically expand your effective hunting window and target identification confidence. You’ll see sharper images, detect targets at longer distances, get smoother tracking on moving animals, and experience fewer washed-out images in humidity, fog, or low-contrast environments. The gap is most obvious when you push past 200 yards or hunt in tough conditions.
Why are thermal devices so expensive compared to regular optics?
Thermal scopes use different optics, different sensors, and more intensive image processing — they detect heat instead of amplifying light, which usually makes the hardware and calibration more expensive. The infrared sensors, germanium lenses, proprietary algorithms, and ruggedized housings all add up. That said, prices are dropping fast, and mid-range devices today deliver what only premium models could a couple of years ago.
What specs matter most when choosing between budget and premium?
Focus on NETD sensitivity, sensor resolution, pixel pitch, and real-world identification range — not just detection range. A device with ≤18mK NETD, a 12μm pixel pitch, and 384×288 or higher resolution will give you strong real-world performance. An integrated laser rangefinder is also a big plus for anyone shooting beyond 150 yards. Battery life, IP rating, and refresh rate are your next priorities.
Do I need a premium thermal monocular for wildlife observation?
Not always. For casual wildlife watching at shorter distances, a mid-range monocular with solid sensitivity and a comfortable battery life does the job well. But if you’re doing serious nocturnal wildlife research, covering large areas, or working in demanding weather, premium models give you the detection range, image clarity, and durability to make those sessions productive rather than frustrating.
Will thermal device prices keep dropping?
Thermal will probably keep getting more affordable at the entry and mid levels, but top-end scopes will still command premium prices because the best performance is expensive to build. Specialized infrared optics, image calibration, and recoil-rated engineering aren’t getting cheap anytime soon. The sweet spot for most buyers is the mid-range tier, which keeps getting better every year — and that’s exactly where we focus a lot of our effort at Pixfra.
When a rescue team gets the call that someone is missing in the backcountry at night, every minute matters. Traditional search methods — flashlights, headlamps, ground sweeps — are slow and burn through manpower fast. We at Pixfra have seen firsthand how thermal imaging technology changes the entire equation, turning what used to be a desperate guessing game into a fast, targeted operation.
Before we get into the case study itself, let’s cover the basics so you know exactly what’s happening when a thermal device hits the field during a rescue mission. Thermal cameras work by detecting infrared radiation emitted by all objects, including people and animals. That radiation gets converted into a thermal image, displaying varying temperatures in different colors. Warmer objects, such as a human body, appear brighter against cooler backgrounds. That’s the whole trick — your body is basically a beacon of heat in a cold landscape, and a thermal device picks that up whether it’s pitch black, foggy, or raining sideways.

Search and rescue missions at night present unique challenges. Limited visibility, difficult terrain, and unpredictable weather can hinder even the most well-trained teams. Traditional night-vision devices and spotlights have their limitations, especially in environments like forests, mountains, or urban areas with obstructed views. This is exactly where a handheld thermal monocular or scope gives you an edge that nothing else can match. Unlike night vision, which needs at least some ambient light to work, thermal devices detect heat rather than light. That means total darkness, dense fog, and heavy rain don’t shut you down.
This tech isn’t new, but what’s changed in 2026 is the accessibility. You no longer need a government budget to get a solid thermal device with high sensitivity and long detection range. Our lineup at Pixfra, for example, offers NETD values of ≤18mK and detection ranges reaching up to 3,600 meters — specs that were strictly military-grade not long ago. If you want to know what separates the best thermal devices in 2026 from mediocre ones, check out our breakdown of the top 6 features needed in the best thermal device in 2026. Those same features — thermal sensitivity, rugged build, battery life, detection range — are exactly what determine whether a thermal device performs when a life is on the line.
Here’s the scenario. A 68-year-old man with early-stage cognitive decline wanders off a well-marked trail in a wooded mountain area during the late afternoon. By the time his family calls it in, the sun is already setting. Temperatures are dropping fast — into the low 30s°F — and the terrain is a mix of dense forest, rocky outcrops, and brush-covered ravines. A ground search team is mobilized, but within the first two hours, they’ve covered very little ground. The flashlights barely cut through the trees, and the terrain is too dangerous to move through quickly at night.
This is a scenario that plays out across the United States more often than most people realize. According to the U.S. Coast Guard Search and Rescue Statistics, there are over 15,000 reported cases per year in the United States alone. Nearly 86% result in lives saved. But that 14% gap — the cases that don’t end well — is often a matter of time and visibility. When you can’t see the person you’re looking for, the clock runs out fast, especially in cold weather where hypothermia becomes a real threat in just a few hours.
The search team in this scenario pulled out a handheld thermal monocular — a compact, rugged unit with a 640×512 sensor resolution, ≤18mK NETD, and a detection range well over 1,000 meters. Within minutes of powering up the device and scanning from a ridge, the operator spotted a bright heat signature roughly 400 meters out, partially obscured by brush. The thermal device found the man within just eight minutes. He was lying still in tall sagebrush, making it impossible for the ground search crew to locate him. With its White Hot palette, the cold ground was displayed as dark gray on the thermal camera’s sensor, while the man showed up in bright white, contrasting sharply with the area around him. That contrast — a warm body against cold terrain — is exactly what makes thermal imaging so effective when every other search method fails.
Not every thermal device can deliver in a scenario like this. The difference between a successful rescue and a failed one often comes down to a few specs you might overlook when shopping. Let’s walk through what actually mattered in this case.

Thermal sensitivity, measured by NETD (Noise Equivalent Temperature Difference), was the first factor. The missing man had been stationary for a while, his body temperature dropping toward the ambient surroundings. A device with poor NETD — say, anything above 40mK — might not have picked up the fading contrast between his body and the cold brush around him. Our Pixfra devices hit ≤18mK NETD, which means they detect incredibly small temperature differences and produce clear, high-contrast images even when the heat gap between a person and the environment is narrow. In rescue terms, that’s the difference between a bright, obvious shape on your screen and a smudgy nothing.
Detection range was the second factor. The operator scanned from an elevated ridge roughly 400 meters away. A device with a 256×192 sensor and a short detection range — common in budget thermal units — might not have resolved that heat signature at all. Higher sensor resolutions like 640×512, paired with our 12μm pixel pitch technology, give you the detail you need to distinguish a human body from a warm rock or an animal at distances that matter in the field. Our Sirius HD series, for example, pushes detection range out to 3,600 meters. For search and rescue teams sweeping large areas, that kind of reach means you cover more ground from fewer positions.
Build quality and battery life were the third and fourth factors. This rescue happened in cold, wet conditions — exactly the kind of environment that kills cheap electronics. IP67-rated housing, which all our Pixfra devices carry, means the unit is fully sealed against dust and survives water submersion. On top of that, cold weather can cut battery life by 30-50%. The team used a device with swappable 18650 batteries, which meant they could pop in a warm spare from an inside pocket without any downtime. That kind of real-world readiness isn’t a luxury — it’s what keeps a device running when conditions turn ugly.
To put the value of thermal imaging into perspective during rescue operations, here’s a quick comparison:
| Factor | Traditional Ground Search | Thermal Device-Assisted Search |
|---|---|---|
| Visibility in Darkness | Very limited (flashlights only) | Full visibility via heat detection |
| Average Area Covered per Hour | 0.1–0.5 sq. miles | 1–3+ sq. miles (from elevated position) |
| Effectiveness in Fog/Rain | Severely reduced | Minimal impact on detection |
| Ability to Detect Stationary Persons | Very low | High (body heat still visible) |
| Risk to Search Personnel | High (terrain, fatigue) | Reduced (scan from safe distance) |
| Typical Time to First Detection | Hours | Minutes |
Thermal imaging enables quick identification of individuals, significantly reducing search times. When you’re working against hypothermia, injury, or exposure, cutting your search time from hours to minutes isn’t just a performance stat — it directly translates to lives saved. The ability to detect heat signatures makes thermal devices incredibly effective in pinpointing the exact location of individuals, even in complex terrains. Dense forests, rocky landscapes, and mountainous regions can be navigated with greater accuracy using thermal imaging, reducing false positives and missed targets.
Our Pixfra Outdoor App also plays a role here. Through the app, you can stream live thermal footage, transfer images and video directly to your smartphone, and share data with other team members in real time. In a coordinated search, that means the person with the thermal device can relay a target’s GPS position to ground teams instantly — no radio miscommunication, no wasted time guessing at directions.
If there’s one takeaway from this rescue, it’s that the device you carry needs to match the worst-case scenario, not the best one. A thermal monocular that performs well on a calm, dry evening might fall apart when you actually need it — in the rain, in the cold, at 2 AM, with gloved hands.

Here’s what we recommend based on what worked in this rescue and what we’ve learned from years of building thermal devices at Pixfra. First, don’t compromise on NETD. You want ≤25mK at minimum for any outdoor use, and ≤18mK if you’re serious about detection in tough conditions. Second, match your sensor resolution to your expected range. If you’re scanning wide areas from elevated positions, go for 640×512. If you’re working shorter distances in denser terrain, 384×288 will serve you well and keep costs down. Third, make sure your battery system can handle extended, cold-weather use. Swappable 18650 batteries beat proprietary internal cells every time for field operations. And fourth, insist on IP67 or better weather resistance — no exceptions.
Our Pixfra Outdoor App supports all our current models, including the Sirius, Arc LRF, Mile 2, Pegasus Pro, Chiron LRF, Taurus, and Taurus LRF series. Through the app, you can update firmware, adjust device settings, and transfer scouting data — all useful features whether you’re on a rescue team, managing property security, or tracking wildlife. If you want a device that can pull double duty across hunting, observation, and emergency scenarios, the Volans series stands out with its all-day vision capability and adjustable aperture from F1.2 to F3.0, making it one of the few thermal devices that performs equally well in daylight and total darkness. That kind of flexibility means one device covers all your bases.
While this case study focuses on search and rescue, the same features that saved a life here are the ones that make a thermal device invaluable for hunters, property owners, and wildlife observers. A hunter tracking hogs at night benefits from the exact same NETD sensitivity and detection range that let a rescue team spot a stationary person in dense brush. A rancher checking fence lines after dark relies on the same IP67 weather resistance and battery endurance. The application of thermal imaging technology is not limited by environmental conditions. Even in pitch-dark environments where visibility is zero, or when individuals are unconscious and immobile, thermal imagers can still capture body temperature signals emitted by humans. Swap “humans” for “coyotes approaching your livestock” and the value is identical.
At Pixfra, we build thermal monoculars, thermal scopes, thermal front attachments, and multispectral binoculars — all designed for real outdoor conditions. Whether you need the lightweight portability of our Draco series for all-day carry or the long-range precision of the Sirius HD series for professional applications, we engineer around the six features that matter most: thermal sensitivity, sensor resolution, detection range, battery life, durability, and smart connectivity. We don’t build features for spec sheets — we build them for 2 AM in a hunting blind, for a freezing ridge during a search, for the real moments when gear either performs or fails you.
If you’re ready to see what a properly built thermal device can do, check out our full product lineup at Pixfra and find the right fit for your needs.
Can a thermal device find a person who is unconscious or not moving?
Yes. Even in pitch-dark environments where visibility is zero, or when individuals are unconscious and immobile, thermal imagers can still capture body temperature signals emitted by humans. A thermal device detects heat, not movement. As long as a person’s body is warmer than the surrounding environment — which it almost always is — the device will pick up the contrast. This is one of the biggest advantages thermal has over visual or motion-based search methods.
Does thermal imaging work through fog, smoke, and heavy rain?
Infrared thermal cameras offer a distinct operational advantage as they rely on heat detection, allowing them to penetrate haze, glare, light smoke, or total darkness. Heavy rain and very dense fog can reduce effective range somewhat, but thermal devices still dramatically outperform flashlights, spotlights, and standard night-vision gear in those conditions. For any serious outdoor use, look for a device with high NETD sensitivity (≤18mK) and an IP67 weather rating to ensure it keeps working when the weather turns bad.
What NETD rating do I need for a rescue or outdoor thermal device?
For search and rescue, wildlife observation, and hunting, you want a thermal device with an NETD of ≤25mK or lower. At Pixfra, our devices achieve ≤18mK, which places them at the top end of sensitivity for outdoor-grade thermal optics. Lower NETD means the device can detect smaller temperature differences, which is exactly what you need when you’re trying to spot a person whose body heat is fading in cold conditions.
How far can a thermal device detect a person?
Detection range depends on the sensor resolution, lens size, and environmental conditions. Entry-level handheld thermal devices typically detect a human-sized heat source at 500 meters or less. Mid-range models like our Pixfra Arc LRF and Mile 2 series hit the sweet spot for most users in the 600–1,500-meter range. Our premium Sirius HD series pushes detection out to 3,600 meters — more than enough for large-area scanning during a search operation or open-terrain surveillance.
Is a thermal device worth carrying on backcountry trips for safety?
Absolutely. Beyond the obvious search and rescue applications, a compact thermal monocular lets you scan trail areas for wildlife at night, check your surroundings when you hear something outside camp, and signal rescuers if you become the one who needs help. Lightweight models like our Draco series are built specifically for multi-functional performance without adding bulk to your pack. If you spend any time in the backcountry after dark, a thermal device is one of the highest-value safety tools you can carry.
Most people hear “handheld thermal device” and think it’s just for hunters. But that’s only scratching the surface. A single handheld thermal monocular covers hunting, property security, wildlife observation, boating, search and rescue, camping, and utility inspection. Whether you’re scanning your back forty for coyotes at 2 AM, checking your home for heat leaks, or navigating a foggy trail in the backcountry, a thermal imager earns its place in your gear bag fast. At Pixfra, we build thermal monoculars, thermal scopes, thermal front attachments, and multispectral binoculars — all designed for real outdoor conditions. And we’ve seen firsthand just how many ways people put these devices to work outside of hunting season.
Before we walk through all nine uses, it helps to know what separates a good handheld thermal device from a frustrating one. If you’re still sorting out what specs actually matter when you’re shopping, our guide on the top 6 features needed in the best thermal device in 2026 breaks down everything from NETD sensitivity to battery life and IP ratings — so you can match the right device to the job you need it for.
This is the use case that put handheld thermal devices on the map, and it’s still the number-one reason people buy them. Thermal technology allows hunters to detect and track animals based on their body heat, irrespective of the lighting conditions, offering an undeniable advantage for nighttime hunting and wildlife observation. Whether you’re running hogs in Texas, calling coyotes in Kansas, or sitting a deer stand in Georgia, a thermal monocular lets you spot game before it spots you — in total darkness, through fog, and even in thick brush.

Here’s how it works in practice: instead of picking up your rifle and swinging a scope left and right — which gets tiring and sloppy after a few hours — you scan with your handheld thermal device first. The biggest advantage of owning a thermal monocular is that it saves you from picking up your rifle with a thermal scope and swinging it in different directions, which can be exhausting and inconvenient. With a thermal monocular, you can easily spot game, set the monocular down, and then grab your rifle to take an accurate shot without unnecessary movement. That’s safer and more effective.
Game recovery is the other half of this equation. After making a successful shot, an animal can run out of sight fast. A handheld thermal imager picks up the heat signature of a downed animal from hundreds of yards out — no more crawling through brush with a flashlight. Our Pixfra lineup covers detection ranges from around 500 meters for entry-level models all the way up to 3,600 meters with the Sirius HD series. For most recreational hunters working inside 300 to 600 meters, mid-range models like our Arc LRF and Mile 2 series hit the sweet spot between performance and price. Models with “LRF” in the name also include built-in laser rangefinders with 1,000-meter range — so you get exact distance to your target without fumbling for a separate device in the dark.
You don’t have to be a hunter to get serious use out of a handheld thermal device. Thermal imaging cameras have revolutionised wildlife observation, allowing us to see the unseen in nature. Birders, wildlife researchers, nature photographers, and backyard naturalists are all picking up thermal monoculars to watch nocturnal animals without disturbing them. A flashlight or headlamp scares animals away. A thermal device doesn’t — because it’s completely passive. It doesn’t emit any light or radiation. It just reads the heat that’s already there.
This means you can watch a family of foxes playing in your meadow, track an owl hunting along a tree line, or count deer bedded down in a field — all without the animals ever knowing you’re there. These devices detect heat instead of light, so they work day or night, piercing through darkness, fog, and even camouflage to reveal animals that would otherwise remain hidden. For researchers doing population surveys, thermal monoculars speed up the work and produce more accurate counts.
Our Pixfra thermal devices achieve NETD values of ≤18mK, which gives you crisp contrasts between an animal and its background, even in tricky conditions like fog, rain, or humidity. When we pair that with 12μm pixel pitch technology across our product lines, from the Mile 2 series for everyday use to the Sirius HD series for demanding professional work, you get sharp, high-contrast images that let you tell a raccoon from a possum at distance — not just see a blob of heat.
Nothing beats thermal imaging for keeping an eye on your property after dark. Traditional security cameras struggle in low light, but thermal monoculars work perfectly in total darkness. Whether you own a rural ranch, a suburban home, or a commercial property, a handheld thermal device adds a layer of security that standard cameras and floodlights can’t match.

Think about it this way: a security camera needs light to see. Even a good infrared security camera has limited range and can be fooled by shadows, foliage, or weather. A thermal device reads heat signatures, so a person walking along your fence line at 3 AM lights up on the display like a beacon — regardless of what they’re wearing, how dark it is, or whether it’s raining. In the security and law enforcement sectors, a thermal monocular can detect people and vehicles in total darkness, through fog, and even in densely vegetated areas.
You can scan your entire property in seconds with a quick sweep. There’s no waiting for motion-triggered alerts, no reviewing hours of footage. Just point, look, and you know immediately if something is out there. For folks in rural areas dealing with trespassers, poachers, or livestock predators, this kind of rapid situational awareness is a real game-changer. Our Pixfra Draco series was designed with a lightweight build for exactly these kinds of multi-use scenarios — property security one night, predator control the next.
When someone’s lost or injured, every minute counts. Thermal imaging dramatically improves search and rescue success rates by detecting body heat from distances that would be impossible with flashlights or night vision. This is one of the most life-saving uses for a handheld thermal device, and it’s one that doesn’t get talked about enough outside of professional circles.
For SAR teams navigating thick forests or urban wreckage, thermal imaging monoculars provide a compact, one-handed solution for rapid area sweeps. These devices are essential for detecting the “thermal glow” of a survivor trapped under debris or hidden behind foliage, significantly reducing the time spent on manual ground searches. First responders, volunteer search teams, fire departments, and rural sheriffs all use handheld thermal imagers on the regular. But you don’t have to be a professional to carry one. If you spend time in the backcountry, on the water, or in areas where people get lost, a thermal monocular in your pack could save a life — including your own.
A key spec to watch here is refresh rate. A 50Hz refresh rate gives you smooth, fluid imagery so you can track movement without blur or chop. Anything below 30Hz will stutter and make fast-moving targets hard to follow. Our Pixfra devices are built with high refresh rates across the board because in the field, smooth imaging isn’t a luxury — it’s a necessity. Paired with IP67-rated housing that survives rain, stream crossings, and accidental drops, you’ve got a device that performs when conditions go sideways.
Farmers and ranchers have dozens of uses for thermal monoculars that save time and prevent losses. Check on animals at night without disturbing the herd. Spot a cow that’s separated from the group or lying down when she shouldn’t be. Identify sick animals by detecting fever — elevated body temperature shows up instantly on thermal displays. You can cover large pastures quickly without driving out to every corner of your property.

This is a use case that’s growing fast in the ag community, especially in beef cattle, dairy, and poultry operations. Thermal imaging lets you spot early signs of illness, mastitis, or lameness in livestock before the condition gets worse. You don’t need to run the animal through a chute or get hands on them — you can scan from a distance and flag the ones that need attention. During calving season, ranchers use thermal devices to check pregnant cows overnight without spooking them with headlights or pickup trucks.
Thermal imaging also helps with predator control. Coyotes, feral hogs, or other animals threatening livestock show up clearly, even from long distances. If you’re running livestock in an area with predator pressure, a thermal monocular doubles as both a management tool and a security device. You check on the herd and scan for threats in the same sweep.
Here’s a quick look at how different farming operations benefit from handheld thermal devices:
| Farm Operation | Primary Use | Secondary Use |
|---|---|---|
| Beef cattle ranching | Nighttime herd checks, calving monitoring | Coyote and predator detection |
| Dairy farming | Early illness/fever detection | Facility heat loss inspection |
| Poultry operations | Flock health monitoring | Barn insulation checks |
| Horse ranching | Injury/inflammation detection | Property perimeter security |
| Crop farming | Irrigation leak detection | Wildlife damage assessment |
When the sun sets and the fog rolls in, most boaters know the feeling: disorientation, anxiety, and a deep respect for the power of the water. Whether you’re a mariner navigating the coast, an angler chasing the bite before dawn, or a search-and-rescue responder cutting through rough water at night, visibility can mean the difference between mission success and dangerous uncertainty.
A handheld thermal device gives you the ability to spot floating debris, unlit boats, swimmers, buoys, and shoreline features in total darkness or through fog and haze. Thermal technology makes a valuable difference. For one, it allows you to operate your boat more safely at night or in difficult weather because it can identify bridges, docks, buoys, fixed markers, and other boats. In addition, it will show shoaling rocks, floating debris, and other unlit objects. You don’t need a $20,000 fixed-mount system to get this benefit. A compact handheld thermal monocular you can stow in the console or a dry bag gives you serious situational awareness on any size vessel.
Anglers are getting in on this, too. Thermal imaging can help you spot weed lines, kelp paddies, and surface disturbances from schools of fish at night — all features that attract offshore gamefish. For kayak anglers, bass boaters, and inshore fishermen running before first light, a handheld thermal device adds a margin of safety that’s hard to put a price on. Our Pixfra devices work in both day and night conditions. The Volans series specifically features all-day vision capability with an adjustable aperture from F1.2 to F3.0, making it one of the few thermal devices that performs just as well in broad daylight as in total darkness.
There are several reasons why thermal imaging cameras are becoming indispensable for campers and outdoor enthusiasts. Wildlife detection: if you’re camping in areas with abundant wildlife, a thermal imaging camera can help you spot animals that are active at night or hidden in dense vegetation. The ability to see animals in complete darkness can enhance both the excitement and safety of your camping experience.

This goes beyond just “cool factor,” though it is pretty cool to see the world in thermal. A handheld thermal device solves real problems in the backcountry. Need to navigate back to camp after dark without blowing out your night vision with a headlamp? Thermal. Want to know if that rustling in the bushes is a raccoon or something bigger before you unzip your tent? Thermal. Trying to find your buddy who wandered off from the campfire? Thermal.
Camping security is a valuable aspect to consider, especially if you are in a remote area. These cameras can help detect potential threats such as animals approaching your camp or intruders in the vicinity. In bear country, knowing there’s a large animal 200 yards from your camp gives you time to react calmly instead of being startled. Our Pixfra devices range from approximately 4.5 hours to 15 hours of battery life depending on the model and conditions. Many models use standard 18650 batteries that you can swap in seconds — a deliberate design choice because proprietary internal batteries don’t help when you’re three days into a backcountry trip.
Your heating bill’s high, but you don’t know where the warmth’s escaping. A thermal monocular solves that problem in minutes. Walk around your house with a thermal device and you’ll instantly see cold spots where insulation’s missing or deteriorating. Windows and doors that aren’t properly sealed show up as temperature differences on the display. You can check wall cavities for gaps without tearing anything apart.
This is one of those uses that surprises people who think thermal devices are only for the outdoors. Energy auditing is the most common homeowner application. Thermal imagers reveal missing or compressed insulation in walls and ceilings, air leaks around windows and doors, and uninsulated areas behind switch plates or HVAC penetrations. You can also check for moisture intrusion, find hot spots in your electrical panel, and verify that your HVAC system is distributing air evenly.
One homeowner saved over $400 annually after finding and fixing insulation gaps they discovered with thermal imaging. The device pays for itself after just a few years of reduced energy costs. If you already own a thermal monocular for hunting or outdoor use, you’ve got a home energy audit tool sitting right in your gear closet. Just point it at your walls, windows, and attic and you’ll see exactly where your money is going.
For hunters and campers, a handheld thermal monocular is a convenience. For police officers and search-and-rescue crews, it is a safety-critical tool. Law enforcement officers, border patrol agents, security professionals, and private property managers all rely on handheld thermal devices for perimeter monitoring, suspect tracking, and evidence documentation.

Handheld thermal imagers work by creating a virtual display showing the heat signatures of objects in the field of view. These devices can provide responders with a covert method of surveillance, providing a tactical advantage at night.The beauty of thermal is that it’s passive — no light, no laser, no signal that gives away the operator’s position. You see them; they don’t see you.
For this kind of work, durability and ergonomics matter just as much as image quality. Cold, gloved hands at 2 AM don’t mix well with complicated menus or tiny buttons. Our Pixfra controls are designed for single-handed, intuitive operation — because if you can’t run your device in the dark with gloves on, it’s not built for real fieldwork. We also support all our current models through the Pixfra Outdoor App, including the Sirius, Arc LRF, Mile 2, Pegasus Pro, Chiron LRF, Taurus, and Taurus LRF series. Through the app, you can update firmware, adjust settings, stream live footage, and transfer images and video directly to your phone for evidence documentation or team coordination.
Not all handheld thermal devices are built the same, and the spec sheet doesn’t always tell you the full story. Here’s a quick reference that shows what numbers actually matter when you’re comparing devices:
| Spec | What It Means | What to Look For |
|---|---|---|
| NETD (thermal sensitivity) | Smallest temperature difference the sensor can pick up | ≤25mK for general use; ≤18mK for serious field work |
| Sensor resolution | Number of pixels on the thermal sensor | 256×192 for short range; 384×288 mid-range; 640×512 for long range |
| Detection range | How far the device can spot a heat signature | 500m entry-level to 3,600m premium |
| Refresh rate | How smooth the live image looks | 50Hz for smooth tracking; below 30Hz will stutter |
| IP rating | Dust and water resistance | IP67 minimum for outdoor use |
| Battery life | How long you can operate before recharging | 8-15 hours for all-night use; swappable 18650s preferred |
Our Pixfra devices hit ≤18mK NETD across the lineup, which puts them at the high end of sensitivity for outdoor-grade thermal optics. Paired with 12μm pixel pitch and IP67 construction, you’re getting a device that’s built for the conditions you’ll actually use it in — not just the ones that look good in a product video.
Can a handheld thermal device see through walls?
No. Thermal imagers can’t “see through” solid walls like X-rays do — this is a common misunderstanding. Their job is to detect the temperature on an object’s surface. A thermal imager can show the temperature pattern across a wall. If something behind the wall causes unusual temperatures on the wall’s surface, or if the wall has insulation gaps, moisture, or air leaks, the thermal imager will spot these hidden temperature differences on the wall itself. But they do not penetrate solid barriers.
Do handheld thermal devices work in rain, fog, and bad weather?
Yes, they still work — and usually far better than your eyes or night vision goggles. Thermal imagers can detect through a light amount of fog, rain, dust, smoke, and snow. However, as these conditions worsen, it lowers the visibility of the thermal camera. That’s one reason we build our Pixfra devices with IP67-rated housing — so the unit itself survives the weather, too.
How far can a handheld thermal device detect?
Many handheld thermals can detect heat signatures between 1,000 and 2,000 yards, with top-end 640 models reaching even farther. Real-world identification distances are usually shorter and depend on resolution, lens size, weather, and background conditions. At Pixfra, our detection ranges go from about 500 meters on entry-level models to 3,600 meters on the Sirius HD series.
What’s the difference between a thermal device and night vision?
Unlike traditional night vision that amplifies ambient light, thermal devices do not require any light at all — they rely solely on heat. This means you can get a clear picture in complete darkness as well as in daylight, since the technology is based on temperature contrast, not visible light. Night vision needs at least some ambient light to work. Thermal works anywhere, anytime.
Is a built-in laser rangefinder worth the extra cost?
If you’re hunting at distances beyond 150 yards or shooting at night, yes. A built-in LRF gives you instant distance data so you can adjust your shot. Our Pixfra Arc LRF, Chiron LRF, and Taurus LRF models all include integrated laser rangefinders with 1,000-meter range. Paired with built-in ballistic calculators, these models give you a complete targeting solution in one device. For close-range use in heavy timber, though, you might not need the extra feature.
Your thermal device is only half the equation. The apps and software you pair with it can turn a good field experience into a great one — or leave you fumbling in the dark with files you can’t use. Here at Pixfra, we’ve built our entire ecosystem around making sure the software side works just as hard as the hardware.
A thermal device captures heat data. But that raw data doesn’t do you much good sitting on the device itself. You need software to view it clearly, adjust it, share it, and sometimes analyze it later back at home. Whether you’re a hunter reviewing footage from last night’s sit, a wildlife observer documenting nocturnal animal behavior, or a property owner running security sweeps, the right app or software turns thermal captures into real, usable information.
Thermal imaging software helps make the most of the images collected from your camera. Without it, you’re stuck with a raw thermal feed and no way to fine-tune what you’re seeing. Think about it this way: you wouldn’t shoot photos on a DSLR and never edit or organize them. Thermal imaging works the same way. The software layer is where raw heat signatures become clear visuals you can act on, save, or share.

Thermal image analysis software is a cornerstone of modern infrared data utilization, enabling organizations to transform raw thermal imagery into actionable insights across engineering, maintenance, and research. And while that language sounds like it’s aimed at industrial users, the same principle applies to outdoor users like hunters and wildlife observers. Your thermal monocular or scope captures temperature differences — the software is what lets you see those differences clearly, switch color palettes, record video, and pull useful details from the image.
At Pixfra, we pair our thermal devices with the Pixfra Outdoor App specifically because we know that a companion app isn’t a bonus feature — it’s a core part of the experience. If you’re still shopping for the right thermal device to go with your software setup, our guide on the top 6 features needed in the best thermal device in 2026 breaks down what actually matters in the field.
Not all thermal imaging software does the same thing, and knowing the difference saves you time, money, and frustration. The thermal software landscape in 2026 broadly falls into a few categories: companion apps that pair directly with your thermal device, desktop analysis suites for post-processing, cloud-based platforms for team collaboration, and open-source tools for tinkerers who want full control.
Companion apps are the most relevant for hunters and outdoor users. These are the mobile apps — usually for iOS and Android — that connect to your thermal monocular, scope, or front attachment via Wi-Fi. In this setup, the app plays a role — it allows users to view thermal images in real time, switch color palettes, measure temperatures, record photos or videos, and sometimes generate inspection reports. The Pixfra Outdoor App falls squarely in this category. It supports all our current models, including the Sirius, Arc LRF, Mile 2, Pegasus Pro, Chiron LRF, Taurus, and Taurus LRF series. Through the app, you can update firmware, adjust device settings, and transfer images and video directly to your smartphone. That kind of connectivity means you’re not just looking through a thermal device — you’re managing a complete field toolkit from your phone.
Desktop analysis suites sit on the other end of the spectrum. Thermal image analysis software is a cornerstone of modern data-driven decision-making, enabling accurate interpretation of infrared data across sectors like engineering, construction, and research. With options ranging from professional tools for advanced batch processing to free essentials for basic analysis, choosing the right software is key to unlocking actionable insights. These desktop programs — things like radiometric analysis tools or batch processing platforms — are built for professionals who process large volumes of thermal data. They handle isotherms, delta temperature measurements, trend analysis, and customizable report generation. For most outdoor and hunting users, a strong companion app covers everything you need without the learning curve of industrial-grade software.
Open-source options also exist for users who want to dig deeper without paying for a license. There is free open-source software that provides much more functionality over that of the OEM supplied software. It runs on Linux, preferably Debian variants and recent RaspPi distros. It requires no privileges unlike the OEM smartphone apps and the source is free to inspect or modify as desired. These tools are great for hobbyists and DIY users, but they often lack the polish and direct hardware integration that branded companion apps offer. If you want a plug-and-play experience — where your app talks directly to your thermal device without setup headaches — a purpose-built companion app is the way to go.
When you’re evaluating thermal device apps and software, don’t just look at the marketing screenshots. Focus on the features that actually affect your experience in the field. Here’s what separates a solid thermal imaging app from one that’ll frustrate you on your third outing.

Real-time streaming and live view are baseline features in 2026. Your app should let you see what your thermal device sees, streamed directly to your phone screen over Wi-Fi. This is useful for showing hunting partners what you’re looking at, streaming footage for documentation, or simply getting a bigger screen view. The mobile app lets you stream live video to your mobile device from most thermal cameras with Wi-Fi capability, allowing you to monitor from a safe distance and show others what the camera is seeing as it happens. The Pixfra Outdoor App handles this seamlessly — you get a live feed from your device right on your phone, no cables, no fuss.
Color palette controls are another feature you’ll use constantly. Your thermal device probably offers multiple palette modes, and your app should let you switch between them on the fly. White Hot is the most common mode where heat sources show up as white — it’s the go-to for general detection in open fields. Black Hot, where heat sources appear dark against a lighter background, is popular with hunters who want better detail on an animal’s body shape. Red Hot highlights the hottest points in red and is great for picking out a target fast in a messy environment. Iron Bow and Rainbow use a full spectrum to show temperature gradients, which can help with everything from spotting game to identifying environmental features. There is no universally best thermal palette. Personal visual perception plays a role, and preferences vary from one hunter to another. The most effective approach is understanding the general characteristics of each palette and then selecting the one that matches your eyes, your environment, and your hunting objective.
Firmware updates over the air (OTA) are a feature that often gets overlooked until you need it. Your thermal device’s performance depends on up-to-date firmware, and the easiest way to keep it current is through your companion app. The Pixfra Outdoor App supports OTA firmware updates across our entire product lineup, so you never have to connect cables or visit a service center just to get the latest software version.
Image and video capture, transfer, and storage round out the must-haves. You should be able to record thermal video, snap still images, and transfer them to your phone for sharing or archiving. Whether you’re documenting a hunt, keeping records of wildlife activity on your land, or sharing scouting data with a partner, this feature turns your thermal device into more than just a viewing tool — it becomes a recording system.
The table below breaks down the key software features and how they map to different use cases:
| Feature | Hunting | Wildlife Observation | Property Security | Backcountry Exploration |
|---|---|---|---|---|
| Live Wi-Fi streaming | High value | High value | High value | Medium value |
| Color palette switching | High value | High value | Medium value | Medium value |
| OTA firmware updates | High value | High value | High value | High value |
| Video recording & transfer | High value | High value | High value | Medium value |
| Ballistic calculator integration | High value | Not needed | Not needed | Not needed |
| Image annotation & notes | Medium value | High value | High value | Medium value |
We built the Pixfra Outdoor App to be the control center for every thermal device in our lineup. It’s not an afterthought or a third-party bolt-on — it’s designed from the ground up to work with our hardware. The app connects to your Pixfra device via Wi-Fi and gives you full access to settings, firmware updates, image and video transfer, and live streaming, all from your smartphone.
One thing we hear from hunters and outdoor users over and over is that they want simplicity. Nobody wants to scroll through complicated menus at 2 AM in a hunting blind with cold hands. That’s why we keep the Pixfra Outdoor App’s interface clean and direct. You open it, connect to your device, and you’re ready to go. Adjust your color palette, start recording, transfer your files — all with a few taps.
The app also ties into the smart features built into our hardware. Models like the Chiron LRF, Taurus LRF, and Volans LRF include integrated ballistic calculators that compute bullet drop, wind correction, and adjusted aiming points. The app connects to this data and lets you review or adjust your settings without squinting at a small device screen. For hunters taking shots beyond 150 yards at night, that kind of integration between app and hardware means faster, more confident shot placement. Paired with our devices’ ≤18mK NETD thermal sensitivity, you get a system that not only sees targets with razor-sharp clarity but also gives you the software tools to act on what you see — all from a single ecosystem. Our Volans series takes this even further with all-day vision capability and an adjustable aperture from F1.2 to F3.0, meaning the app works alongside a device that performs just as well in broad daylight as it does in total darkness.
Here’s where a lot of people get tripped up. There’s a big difference between a thermal camera app and actual thermal imaging software that works with real thermal hardware.
Most thermal camera apps available today do not perform real thermal imaging. Instead, they apply visual effects or color filters to images captured by a phone’s standard camera. These filters change colors based on brightness, contrast, or pixel intensity, creating an image that looks similar to a thermal image. In other words, those free “thermal camera” apps on the app store? They’re just applying a color filter to your regular phone camera. They can’t detect heat, measure temperature, or show you anything a standard photo filter couldn’t. Most apps are not detecting heat at all — they are simply modifying visible-light images. Without access to real thermal data, these apps cannot measure temperature or detect heat patterns in a meaningful way.

Real thermal imaging requires real thermal hardware. Your phone doesn’t have an infrared sensor, so no app can magically turn it into a thermal camera. What a proper companion app does — like the Pixfra Outdoor App — is serve as the display, control, and data management platform for an actual thermal device that contains a real infrared sensor. The phone app is not acting as the thermal sensor. Instead, it functions as a display and control platform for the external thermal imaging camera.
This distinction matters because if you’re relying on a fake thermal app while hunting or observing wildlife, you’re getting zero useful data. No heat signatures, no temperature readings, no ability to distinguish a deer from a rock at 200 meters. Invest in a real thermal device with a proper companion app, and you get a system that actually works. At Pixfra, every device in our lineup — from the compact Arc LRF to the long-range Sirius HD series with its 3,600-meter detection range — pairs with the Pixfra Outdoor App for real thermal data, real-time streaming, and real results.
Even the best thermal imaging app won’t help if you’re not using it right. Here are some practical tips we’ve picked up from years of field testing our own devices and software.
First, always update your firmware before heading out. This sounds obvious, but a surprising number of users skip firmware updates and then wonder why a feature isn’t working or why the image looks off. Once per season, check for app updates and feature enhancements. The Pixfra Outdoor App makes this a one-tap process — connect your device, check for updates, and install. Do it at home over Wi-Fi before your hunt, not in the field where connectivity might be spotty.
Second, learn your color palettes before you need them. Don’t wait until you’re tracking a coyote through dense brush to figure out which palette works best. Skilled hunters treat palettes as tools, switching between them to match environmental and operational demands. Start with White Hot for broad-area scanning, transition to Black Hot for detailed confirmation and identification, and switch to Monochrome or Rainbow modes for specialized tasks. Spend time with each palette during daylight practice sessions so that switching becomes second nature in the dark.
Third, use the recording features to build a library. Thermal footage isn’t just for bragging rights on social media — it’s genuinely useful data. Record your hunts and observation sessions, transfer the files to your phone via the app, and review them later. You’ll start noticing patterns in animal movement, identifying hotspots on your property, and refining your strategies based on real evidence rather than guesswork. The Pixfra Outdoor App lets you transfer images and video directly to your smartphone, so building that library takes minimal effort.
Finally, keep your device’s battery situation in check. Your app can monitor battery status, but it can’t magically add more charge. Our Pixfra devices range from about 4.5 to 15 hours of battery life depending on the model, and many use swappable 18650 batteries. Always carry spares, especially in cold weather where battery performance can drop by 30 to 50 percent.
Can I use a free thermal camera app instead of a real thermal device?
No. Free thermal camera apps on your phone are just color filters applied to standard photos. Most thermal camera apps available today do not perform real thermal imaging. Instead, they apply visual effects or color filters to images captured by a phone’s standard camera. They can’t detect heat, measure temperatures, or identify targets in darkness. For real thermal imaging, you need a dedicated thermal device with an infrared sensor — and a proper companion app to control it.
What does a thermal imaging companion app actually do?
A good companion app connects to your thermal device via Wi-Fi and acts as a display, controller, and file manager. The app allows users to view thermal images in real time, switch color palettes, measure temperatures, record photos or videos, and sometimes generate inspection reports. The Pixfra Outdoor App also handles OTA firmware updates and supports all current Pixfra models.
Which thermal color palette is best for hunting at night?
There’s no single best palette — it depends on your environment and personal preference. White Hot and Black Hot are the most versatile and reliable for most conditions, but the optimal choice depends on environment, temperature, and observation goal. White Hot is great for general detection, Black Hot works well in hot environments or dense foliage, and Red Hot helps pick out targets quickly in cluttered scenes.
Do I need desktop software to analyze my thermal images?
For most hunters and outdoor users, a companion mobile app covers everything you need. Desktop analysis suites are built for professional thermographers who process thousands of images with tools like isotherms, batch processing, and detailed reporting. Robust desktop and mobile phone software is a key aspect of thermal inspection workflows. Thermography software can help enhance and clarify images, add analysis, and share professional-looking reports. If you’re using your thermal device for hunting, wildlife observation, or property security, a well-built mobile app like the Pixfra Outdoor App will handle your needs without the complexity of desktop software.
How often should I update the firmware on my thermal device?
At least once per season, or whenever your companion app notifies you of an available update. To ensure your thermal camera has the latest updates and operates at optimal performance, it is essential to ensure the product firmware is up to date. Product firmware and desktop software updates will include key features and applications, as well as bug fixes and feature improvements. The Pixfra Outdoor App makes firmware updates quick and painless — connect, tap update, and you’re done.
The thermal imaging space in 2026 is moving fast — faster than most people realize. The global thermal imaging market is projected to grow from about $4.6 billion in 2023 to $7.6 billion by 2030. If you’re a hunter, wildlife watcher, or someone who just wants to see more in the dark, these shifts hit close to home. We’re Pixfra, and we build thermal monoculars, scopes, front attachments, and multispectral binoculars for the real outdoors. In this post, we’re breaking down the seven new thermal device technologies you need to have on your radar right now — and what they mean for your next purchase.
Before you read on, it’s worth knowing what features actually make the best thermal device in 2026. That piece covers the hardware side. This one is all about where the tech is headed — and how it’s already changing what you get in the field.
If there’s one tech trend that’s reshaping thermal devices more than anything else in 2026, it’s artificial intelligence. The integration of artificial intelligence into thermal imaging systems represents perhaps the most significant shift in how organizations deploy and operate infrared technology. But what does that actually mean for you when you’re out in the field at 2 AM?

In plain terms, AI-enhanced image processing takes the raw heat data your sensor picks up and makes it sharper, cleaner, and easier to read — all in real time. SharpIR AI-enhanced imaging dynamically sharpens edges, improves contrast, and enhances target definition in real time. We’re not talking about a filter you apply after the fact. The device itself is constantly analyzing every frame and adjusting the picture. That means when you zoom in digitally on a target at 400 yards, the image doesn’t just get bigger and blurrier — AI algorithms work to maintain edge definition and reduce noise so you can still tell a coyote from a stump.
This tech also ties into smarter scene recognition. AI deep learning intelligently suppresses noise and interference. It analyzes each captured frame in real-time, adapting the optimal algorithm based on different scenarios to enhance the dynamic range of the image. This not only makes the image clearer and sharper but also highlights the targets more prominently. For hunters and outdoor users, that’s a real-world advantage — not a marketing bullet point. At Pixfra, our proprietary heat-detection technology already delivers ≤18mK NETD sensitivity across our device lineup. Pairing that level of sensor performance with AI-driven processing is where thermal imaging goes from good to game-changing.
And this isn’t a feature reserved for $5,000+ scopes anymore. AI-enhanced image processing and smartphone integration will expand capabilities while maintaining current price points. Across the industry, AI-powered thermal imaging is filtering down to mid-range models, which means more of you will get access to it without breaking the bank.
Sensor sensitivity has always been the backbone of a good thermal device. NETD — Noise Equivalent Temperature Difference — tells you the smallest temperature change a sensor can detect. The lower the number, the sharper the picture when conditions get tough: think heavy fog, rain, or a warm summer night where everything is radiating at similar temperatures.
In 2026, the bar has moved. The industry’s latest high-sensitivity thermal sensors offer performance down to sub-15 mK NETD, paired with high-transmission germanium optics that maximize light throughput and detection capability. Two years ago, ≤25mK was solid. Now the premium standard is pushing below 15mK, and what used to be high-end sensitivity — like the ≤18mK that our Pixfra devices deliver — sits comfortably in the sweet spot between performance and price.
Why does this matter to you? Because when you’re scanning a treeline in humid summer air, or trying to pick up a bedded deer at 300 yards in a light rain, those extra millikelvins of sensitivity are the difference between seeing a clear outline and squinting at a blob. A sub-20mK unit can detect temperature differences as small as 0.018°C, revealing animals through heavy brush that would be invisible to units with 50mK+ ratings. The difference between 18mK and 40mK sensitivity is dramatic when tracking wounded game or detecting partially concealed targets.
Across our Pixfra lineup — from the Mile 2 series to the Sirius HD — we pair ≤18mK sensors with 12μm pixel pitch for sharp, high-contrast images. That combination gives you crisp detail at every zoom level, even in challenging conditions that would wash out less sensitive devices.
Sensors are getting smaller — and that’s a good thing. Sensor miniaturization has driven pixel sizes from 35μm down to 10μm or smaller, enabling more compact form factors without sacrificing resolution. A smaller pixel pitch means you can pack more pixels onto the same sensor, which gives you higher resolution in a device that doesn’t weigh you down.

The 12μm pixel pitch has become the standard across serious thermal devices in 2026. It’s the sweet spot that lets manufacturers build compact, lightweight units with enough resolution to identify targets at real-world distances. Our Pixfra devices use 12μm pixel pitch technology across the board — from entry-level models to our pro-grade Sirius HD series — so you get sharp detail no matter which price tier you’re shopping in.
This miniaturization also feeds directly into lighter, more ergonomic designs. Our Draco series, for example, was built around a lightweight platform specifically for hunters who need multi-functional performance without the bulk. When you’re carrying a device for hours on a cold night, every gram counts. Shrinking the sensor means shrinking the optics housing, the battery requirements, and the overall weight — while actually improving image quality. That’s the kind of engineering trade-off that only happens when the underlying sensor tech takes a real step forward.
One of the most exciting thermal device technologies gaining traction in 2026 is multispectral imaging — combining thermal data with other sensor bands in a single unit. Multi-spectral fusion combines thermal with low-light or digital night vision for superior situational awareness. Instead of carrying two devices (a thermal monocular for night and a standard optic for day), you get one device that handles both.

Organizations with diverse operational requirements are increasingly turning to multi-sensor imaging platforms that combine different spectral capabilities. Rather than deploying separate systems for different scenarios, multi-band solutions provide flexibility to address varying target temperatures, atmospheric conditions, and mission profiles with a single platform.
We built our Pixfra Volans series around this exact concept. The Volans features all-day vision capability with an adjustable aperture from F1.2 to F3.0 to adapt to different lighting conditions, making it one of the few thermal devices on the market that performs just as well in broad daylight as it does in total darkness. You carry one device instead of two. That kind of versatility used to be restricted to military-grade gear. Now it’s in the hands of hunters and outdoor enthusiasts.
For hunters in states where thermal use is legal for predator control at night but who also want a capable optic for daytime scouting, this is a no-brainer. And for wildlife observers who track animal activity across dawn and dusk transition periods, a multispectral system means you never have to swap devices during the golden hour when animals are most active.
The trend toward all-in-one thermal systems keeps accelerating. Built-in laser rangefinders, onboard audio and video recording, Wi-Fi streaming, and companion app ecosystems are increasingly standard on serious devices rather than premium additions. The best thermal imaging monocular options in 2026 deliver an entire field toolkit in a single unit.
A built-in laser rangefinder (LRF) gives you exact distance to your target at the press of a button. No fumbling for a separate device in the dark. For hunters taking shots beyond 150 yards at night, an integrated LRF is the line between confidence and guesswork. Our Pixfra models with LRF capability — the Arc LRF, Chiron LRF, and Taurus LRF — all pack 1,000-meter range in a single unit. The Chiron LRF and Taurus LRF take it further with built-in ballistic calculators that compute bullet drop and give you an adjusted aiming point on the fly.
This technology trend speaks to something bigger: thermal devices are no longer just observation tools. They’re complete targeting systems. Next-generation thermal imaging riflescopes include precision laser ranging, AI ballistic calculation, and a true open display for situational awareness — day or night, without compromise.The devices shipping in 2026 replace what used to be three or four separate pieces of gear. And the data these integrated systems produce — from range readings to ballistic solutions — feeds directly into companion apps for documentation, sharing, and post-hunt analysis.
Here’s a quick look at how integrated features stack up across different use scenarios in 2026:
| Feature | Casual Use / Short Hunts | Serious Night Hunting | Professional / Law Enforcement |
|---|---|---|---|
| Laser Rangefinder | Nice to have | Must-have | Must-have |
| Ballistic Calculator | Not needed | Highly recommended | Must-have |
| Wi-Fi / App Connectivity | Nice to have | Recommended | Must-have |
| Onboard Video Recording | Nice to have | Recommended | Must-have |
| Picture-in-Picture | Not needed | Nice to have | Recommended |
Build quality isn’t a flashy spec, but it’s one of the technologies that’s quietly gotten a lot better in 2026. The combination of lightweight materials and high-grade environmental sealing means you don’t have to choose between a device that’s easy to carry and one that can survive real conditions.
IP67 is the gold standard right now. It means full dust sealing and protection against temporary water submersion — enough to handle rain, stream crossings, snow, and those “oops” drops into a puddle. Some cheaper devices still ship with IP54 ratings, which cover splashes but won’t survive a real dunking. If you hunt in any kind of weather (and let’s be honest — when do you not?), IP67 is non-negotiable.
At Pixfra, we build our devices for the same conditions we use them in. Our thermal scopes handle heavy recoil. Our monoculars survive drops. Our housing materials resist corrosion over years of use. Weight plays a role here too — a thermal device that’s too heavy will wear you out during long sessions, messing with your aim and your patience. That’s why models like our Draco series prioritize lightweight builds for multi-functional performance without the bulk.
Ergonomics tie into this as well. Cold, gloved hands at 2 AM in a hunting blind don’t mix well with complicated menus or finicky buttons. If you can’t operate your thermal device with one hand in the dark while wearing gloves, the design has failed. Simple, accessible controls across every device in a lineup is what separates field-tested gear from lab-tested gear.
The last technology on our list might surprise some people, but it’s one of the fastest-growing differentiators in thermal devices: software. The integration of thermal imaging systems with smart technologies and the Internet of Things (IoT) is emerging as a significant trend. This convergence allows for enhanced data collection and analysis, enabling real-time monitoring and decision-making.

The best thermal devices in 2026 don’t just show you a heat image — they connect to your phone, record video, stream live footage, and update their own firmware over the air. Our Pixfra Outdoor App supports all our current models, including the Sirius, Arc LRF, Mile 2, Pegasus Pro, Chiron LRF, Taurus, and Taurus LRF series. Through the app, you can update firmware, adjust settings, and transfer images and video directly to your smartphone. That kind of connectivity is more than a convenience — it’s a tool for documenting hunts, sharing scouting data with hunting partners, or keeping records of wildlife activity on your property.
Over-the-air firmware updates are especially big. Instead of your device being locked into the feature set it shipped with, OTA updates let manufacturers push improvements — better image processing, new color palettes, bug fixes, even new features — directly to your device. It’s how phones have worked for years, and it’s finally standard in thermal optics. When you buy a Pixfra device, you’re not just buying today’s feature set. You’re buying a platform that gets better over time.
Color palettes are another smart feature that experienced users swear by. White Hot, Black Hot, Red Hot, Iron Bow, and Rainbow modes each serve a specific purpose depending on terrain, weather, and personal preference. Multiple palette options let you adapt your display on the fly without changing the detection ability of the device itself.
How does AI improve thermal imaging devices in 2026?
AI processes each frame from the thermal sensor in real time, sharpening edges, reducing noise, and boosting contrast — especially at longer ranges or when you’re zoomed in digitally. The result is a clearer, more detailed picture that helps you identify targets faster and more accurately, even in bad weather or cluttered backgrounds.
What NETD should I look for in a thermal monocular?
For hunting, wildlife observation, and general outdoor use, look for an NETD of ≤25mK or lower. Devices with ≤18mK — like the Pixfra lineup — deliver crisp images even in challenging conditions like fog, rain, or total darkness. The lower the number, the better the sensor picks up small heat differences between a target and its background.
Is a built-in laser rangefinder worth it on a thermal scope?
Yes — especially if you’re hunting at distances beyond 150 yards or shooting at night. A built-in LRF gives you instant distance data without carrying a second device. When paired with a ballistic calculator (like in our Chiron LRF and Taurus LRF), you get a complete targeting solution that computes bullet drop and gives you an adjusted aiming point.
Can thermal devices be used during the day?
Thermal devices detect heat, not light, so they work around the clock. Some models, like our Pixfra Volans series, go even further with all-day vision capability and an adjustable aperture (F1.2–F3.0) that adapts to changing light conditions — making them a strong pick for 24-hour coverage from a single device.
What’s the difference between detection range and identification range?
Detection range tells you how far out a device can spot any heat signature. Identification range — where you can confirm what you’re seeing — is always shorter. A device might detect heat at 1,500 meters, but you might only be able to tell if it’s a deer or a stump at 600 meters. Always check both numbers before you buy.
Using thermal for data center uptime gives you a fast way to see heat problems before they turn into load loss: rack hot spots, weak PDU terminations, UPS battery heat, and cold-aisle air leaks. Use it as a scheduled inspection and a post-change check, because sensor dashboards often tell you a rack is warm after the airflow pattern has already changed.
Thermal for data center uptime means using a handheld thermal camera to trend rack inlets, server exhaust, PDUs, UPS cabinets, busway joints, panels, CRAC/CRAH supply paths, and return air. It catches abnormal heat before alarms trip: loose terminations, overloaded whips, blocked tiles, missing blanking panels, and recirculated hot air.

Walk into a data hall after a Friday change. Two 42U racks were re-cabled, one perforated tile moved 18 inches, and a blanking panel disappeared because someone needed “temporary” access. The BMS still looks fine. Server inlet sensors look acceptable too, mostly. But a thermal scan from the cold aisle shows one rack face with a warm vertical stripe on the right side. That stripe is hot-aisle air being pulled around a gap, and it’s the kind of thing you want to see before Monday’s batch jobs hit.
That’s where thermal imaging earns its place beside DCIM, branch-circuit monitoring, and inlet probes. The ASHRAE TC 9.9 data center resource page points operators toward data center standards and guidance on cooling, energy, humidity, and power equipment. Uptime Institute’s Annual Data Center Outages Analysis 2026 also frames outage prevention around higher system complexity, AI-driven workloads, power constraints, grid instability, and co-dependencies. Translation for the person carrying the pager: the room is getting harder to read by gauges alone.
| Scan Target | What Thermal Shows | First Response | Owner |
|---|---|---|---|
| Rack fronts | Inlet hot spots, side recirculation, blocked airflow | Add blanking panels, adjust tiles, check containment | Facilities + IT |
| Rack rears | PSU heat, cable congestion, exhaust imbalance | Clear cable mats, check fan status, compare load | IT operations |
| PDUs / UPS | Warm breakers, lugs, outlets, battery strings | Create electrical work order, verify load, inspect safely | Electrical |
| CRAC / CRAH paths | Supply variation, failed coils, bypass air | Check setpoints, valves, dampers, filters | Mechanical |
A thermal camera won’t replace alarms. It changes when you find the problem.
Rack hot spots usually start as shape problems, not temperature problems. A top-of-rack switch exhausts into a gap. A dense 2U GPU node sits above low-power storage. A brush grommet is missing behind the cabinet. The front of the rack doesn’t look “hot” to your eyes, but the thermal image shows a warm plume curling into the cold aisle like smoke.

Use the rack face as your first truth source. ASHRAE’s commonly used recommended inlet range for many IT equipment classes is 64.4°F to 80.6°F, but a single number can mislead you. A rack inlet at 76°F may be fine. A 76°F vertical stripe beside 66°F neighboring inlets tells you air is going somewhere it shouldn’t. For high-density rows with NVIDIA H100 or H200 servers, Dell PowerEdge XE9680 systems, Supermicro GPU servers, or HPE Cray XD nodes, compare by zone and workload. Thermal imaging sees surface patterns; it won’t measure GPU junction temperature inside the chassis.
Scan close enough to fill the frame with the target. Across-the-room scans look dramatic and often tell you very little. A good rack scan is boring: front face, rear face, cable openings, floor tiles, containment edges. The same temperature-pattern thinking that helps plumbers locate slab leaks & radiant heating pipes with thermal also helps data center teams read hidden air paths under raised floors and behind cabinets.
Rack scan pattern:
Don’t chase every warm patch. A rear exhaust plume is supposed to be warm. A warm patch on the cold side deserves attention when it differs from neighboring racks under similar load, appears after a change, or grows between scans.
Electrical hot spots deserve faster action than ordinary airflow issues. A rack inlet problem may give you hours or days. A loose termination inside a power path can become a burned connector, nuisance trip, or maintenance emergency. Thermal imaging is especially useful on repeatable components: Raritan PX3 rack PDUs, Schneider Electric NetShelter switched PDUs, APC Smart-UPS SRT units, Eaton 9PX systems, Vertiv Liebert GXT5 units, Starline busway tap boxes, and Square D panelboards.
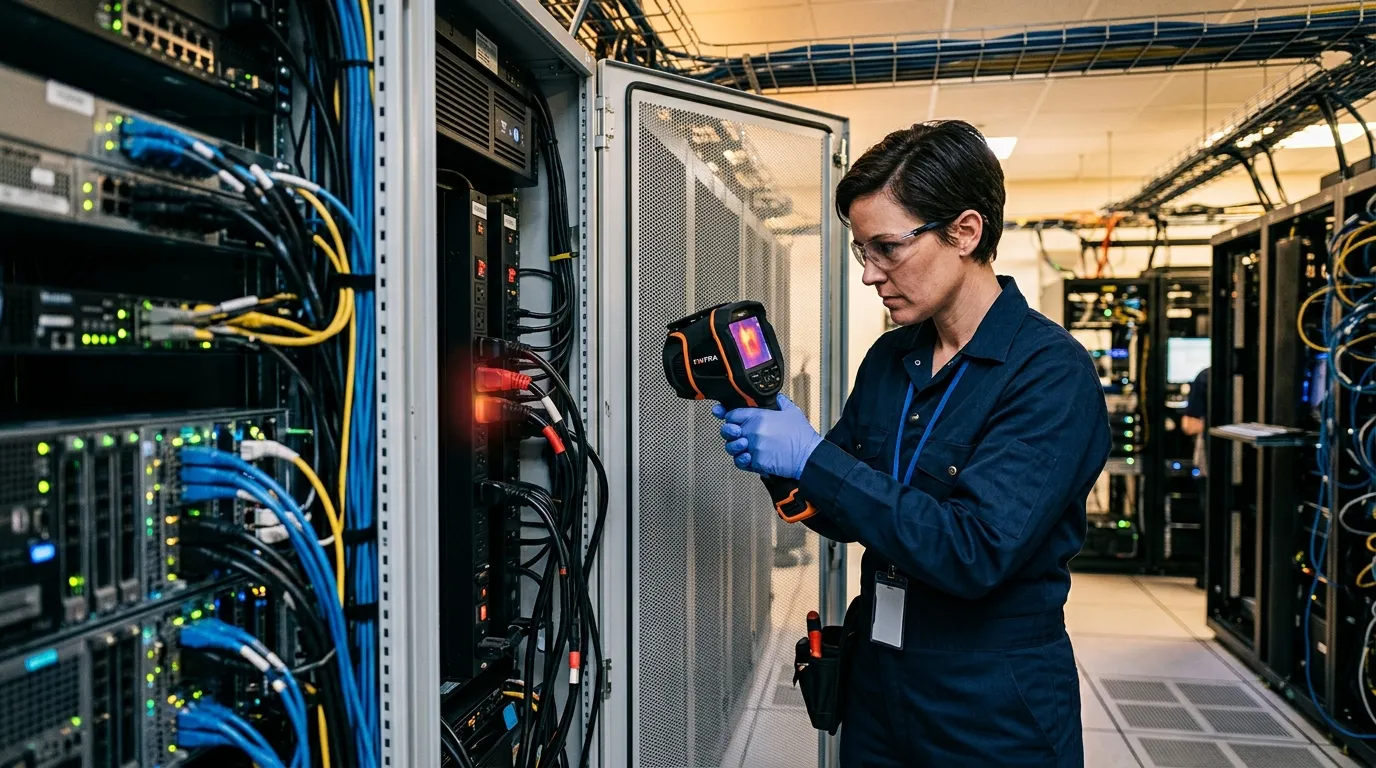
Compare like with like. One C19 outlet feeding a 2.8 kW server will run warmer than a lightly loaded outlet, so the useful question is whether that outlet is hotter than another outlet carrying a similar load. On three-phase gear, compare phase conductors, breaker bodies, whips, plugs, and lugs under normal load. If A-phase looks 18°F warmer than B and C on similar current, don’t shrug it off. Write it down, attach the thermal image, and give the electrician enough context to inspect the right point.
Safety comes first here. NFPA 70B covers electrical equipment maintenance, and NFPA 70E covers workplace electrical safety practices. A thermal camera is a diagnostic tool. It isn’t permission to open energized panels without a qualified person, PPE, arc-flash boundaries, and site procedure. If your facility uses IR windows on switchgear or UPS cabinets, use them. If it doesn’t, scan what you can see from a safe position and escalate when the pattern justifies it.
| Thermal Pattern | Likely Cause | Action Window | Field Note |
|---|---|---|---|
| One PDU outlet bank hotter than peers | Overload, weak plug contact, poor cable seating | Same shift | Verify amps before moving load |
| One breaker warmer than matching breakers | Loose termination or high load | Same day | Electrical review, no guessing |
| UPS battery block warmer than neighbors | Weak cell, charging issue, ventilation problem | Same day | Compare against UPS logs |
| Busway tap box hot at joint | Contact resistance, installation fault | Immediate review | Keep distance and document |
For colocation rooms, make the evidence tenant-neutral. “Cabinet B14 rear PDU outlet group, 14°F above adjacent group at 2:13 p.m., normal load per PDU display” gets a better response than “PDU looks hot.” Specific beats dramatic.
Airflow problems hide in averages. A cold aisle sensor at 72°F can sit in a perfectly acceptable pocket while a server at the top right of Rack C07 inhales 83°F air. Thermal imaging helps you see the pattern across the aisle, not just the sensor point. That matters when teams are trying to raise setpoints, add AI racks, or reduce fan energy without creating silent thermal debt.
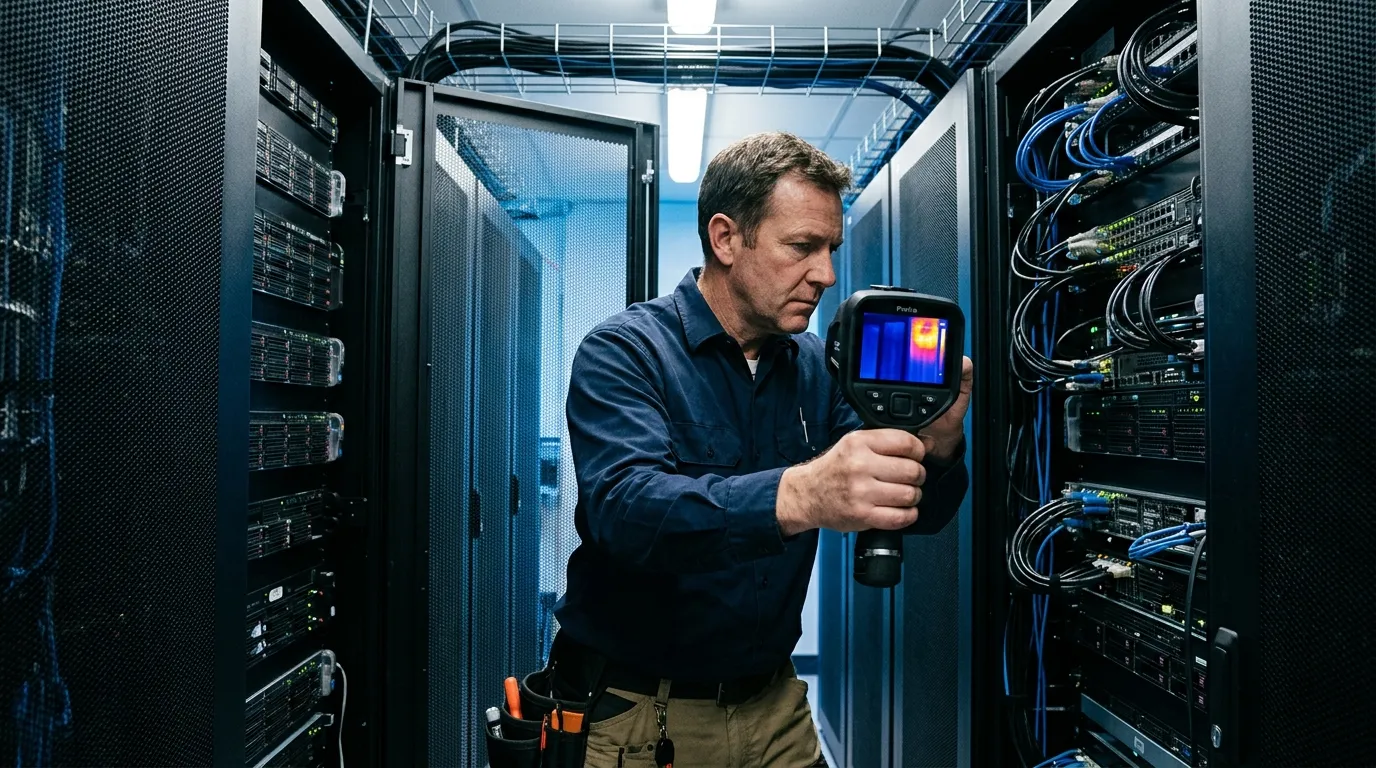
Start with cold-aisle symmetry. The rack faces should look even from bottom to top, with expected variation near high-density gear. If the top third of several racks reads warmer, you may have return-air spillover above containment. If every other rack face has a warmer bottom band, look at perforated tile placement, underfloor obstructions, or damper settings. If one rack edge glows warmer than its neighbor, check blanking panels, side gaps, cabinet alignment, and cable openings.
This is also where thermal scans help settle arguments. IT says the new servers are fine. Facilities says the row is at the edge. The thermal image shows one missing brush strip behind the exact rack that keeps alarming. Everyone can stop debating the average.
Cold-aisle checks after changes:
Use the thermal image with airflow readings when possible. A balometer or anemometer tells you how much air is coming through a tile. Thermal tells you where that air goes after it leaves the tile. Those are different questions. You need both when a high-density row is eating more power every quarter.
Build the scan route like a maintenance round, not a photo walk. Name the exact objects before you enter the room: UPS-1 front vents, UPS-1 battery cabinets, PDU-A panels, busway taps over Row 3, Rack C01 through C24 fronts, Rack C01 through C24 rears, CRAH-2 supply, CRAH-2 return. The operator should be able to repeat the route in the same order next month without asking what you meant.
Frequency depends on change rate. For a stable enterprise server room, quarterly scans are often enough. For colocation cages, high-density AI rows, or rooms with frequent tenant moves, monthly scans make more sense. Run an extra scan within 24 hours after adding a 30A or 60A whip, replacing a rack PDU, changing containment, moving perforated tiles, or bringing a new dense rack online. Thermal for data center uptime works best when you catch the first abnormal pattern, not the fifth alarm.
A practical route:
Reflections can fool you. Shiny busway covers, polished stainless, glass doors, and glossy cable labels may reflect your body heat or a hot aisle behind you. When a reading matters, change your angle and compare the shape. If the “hot spot” moves when you move, it may be reflection. If it stays locked to the lug, outlet, breaker, or cable bend, take it seriously.
Don’t treat one temperature as universal. A PDU plug, a UPS cabinet vent, a server exhaust, and a cold-aisle rack face all have different normal behavior. Trend and comparison beat isolated numbers. A 95°F server exhaust may be ordinary. A 95°F breaker next to matching 78°F breakers under similar load is a work order.

A simple triage model helps operators avoid both panic and apathy. Use it as a starting point, then tune it with your electrical contractor, OEM manuals, and site rules. In most facilities, temperature difference against similar components is more useful than absolute temperature because ambient room conditions and load change through the day.
| Difference From Similar Target | Meaning | Response |
|---|---|---|
| 0°F to 9°F | Usually normal variation | Log and compare next route |
| 10°F to 18°F | Watch item or early fault | Rescan under load, check amps |
| 19°F to 36°F | Likely abnormal condition | Create maintenance ticket |
| Over 36°F | High-risk pattern | Qualified review now |
Thermal imaging also has boundaries. It won’t see through metal cabinets, measure CPU die temperature, confirm liquid coolant flow inside a cold plate, or certify an electrical repair by itself. For liquid-cooled racks with CoolIT, Motivair, or Vertiv CDU systems, thermal scans are best for manifolds, hose connections, rear-door heat exchangers, pumps, and cabinet exterior patterns. Keep using flow, pressure, leak detection, and coolant temperature sensors.
Facilities teams can apply the same pattern discipline outside the data hall. Condensation near humidification lines, chilled-water pipe insulation gaps, and exterior wall temperature anomalies can affect reliability over time; for building-side checks, Pixfra’s guide to detecting hidden moisture & mold risk behind drywall with thermal covers a related inspection method without turning the data center route into a general building audit.
Before your next maintenance window, pick one row and create a baseline set: rack fronts, rack rears, PDUs, UPS, busway, tile pattern, containment edges. Then rescan the same row after the change. The difference between those two sets is where the useful work starts.
Thermal cameras can help prevent outages by finding abnormal heat before failure, especially at PDUs, UPS components, breakers, rack inlets, and airflow gaps. They work best with load readings, maintenance records, and repeat scans.
Run quarterly thermal scans for stable rooms and monthly scans for high-density or fast-changing rows. Always rescan after power changes, rack moves, containment work, tile changes, or new high-load servers.
Scan rack fronts, rack rears, rack PDUs, UPS cabinets, panels, busway taps, cable openings, CRAC/CRAH supply paths, return paths, and containment edges. Prioritize anything that carries load or shapes airflow.
No. Sensors measure specific points, while thermal cameras show patterns across equipment and airflow paths. Use both, especially when a rack alarm doesn’t explain where the heat is coming from.
If you’re building a repeatable route for racks, PDUs, UPS cabinets, and airflow checks, Pixfra can help you choose a handheld thermal camera that fits how your team actually inspects: fast sweeps, clear images, saved evidence, and practical field use during maintenance windows.
