Mounting a thermal scope on your AR-15 isn’t as hard as you think. With the right tools and a little patience, you can get it done at home — no gunsmith needed. We’ll walk you through every step, from picking the right mount to zeroing your optic. Let’s get into it.
At Pixfra, we build thermal devices for hunters, predator control shooters, and anyone who needs to see what’s out there after dark. Our thermal scopes, front attachments, and monoculars are built on proprietary heat-detection tech that picks up tiny temperature differences with sharp clarity — even in total darkness, fog, or heavy brush. Whether you’re chasing hogs, calling coyotes, or scanning your property line, our lineup (including the Pegasus 2 LRF, Chiron LRF, and Taurus LRF series) gives you the edge. And when it comes to getting these optics onto your AR-15 platform, the process is straightforward once you know what you’re doing.

Before you start bolting anything to your rifle, it helps to know why the AR-15 is one of the best platforms for running a thermal optic. It also helps to know exactly what tools you’ll need, and where most people mess up. We’ll cover all of that below, plus zeroing tips and the most common questions we hear from shooters new to thermal. If you’re also looking for gear to pair with your scope, check out our guide on the 5 best accessories to upgrade your thermal scope performance — it covers mounts, battery solutions, protective cases, and more.
On an AR-style rifle, thermal optics mount well because the stock aligns with the top rail. This makes the extra height of thermal mounts ideal for proper sight alignment. That straight-line design between the buffer tube and the Picatinny rail on your upper receiver means the added height of a thermal scope — which is taller than traditional glass — doesn’t mess up your cheek weld as badly as it would on a bolt-action with a lower comb. AR-15s are naturally more forgiving when it comes to optic height-over-bore, thanks to their straight-line recoil system and higher receiver. This gives you more freedom to run night-vision or thermal optics slightly higher without breaking your cheek weld. The flat-top design with its built-in Picatinny rail also means you skip the hassle of adding a separate rail or base. You go straight to mounting your scope or scope mount.
The AR-15 has been one of the most popular rifle platforms in the US for decades, and that’s not an accident. If there was a rifle built to allow you to easily add a scope mounting system, it has to be without question the modern flat top AR-15. This rifle uses a standard fixture, the Picatinny rail or a modern offshoot of this system, the Weaver rail. This reduces the workload by 75% when taking on the job of mounting glass optics on this rifle. For thermal users, the platform offers a balance of low recoil (in 5.56/.223), fast follow-up shots, and modular design. You can swap optics, run backup sights alongside your thermal, or even mount a clip-on thermal in front of your existing day scope without changing much of your rifle’s setup. Most models are designed to mount on standard Picatinny rails, making them compatible with the vast majority of AR-style rifles.
There’s also the recoil factor. Most units are fine on 5.56 and 300 BLK, but big boys need robust internals and honest zero retention. The mild recoil of typical AR-15 chamberings (5.56 NATO, .223 Remington, 300 Blackout) is very friendly to electronic optics like thermals. You won’t be hammering the internal electronics every time you pull the trigger, and zero retention stays reliable over time. That matters a lot when you’re making shots at night on hogs or coyotes and can’t afford a wandering point of impact.
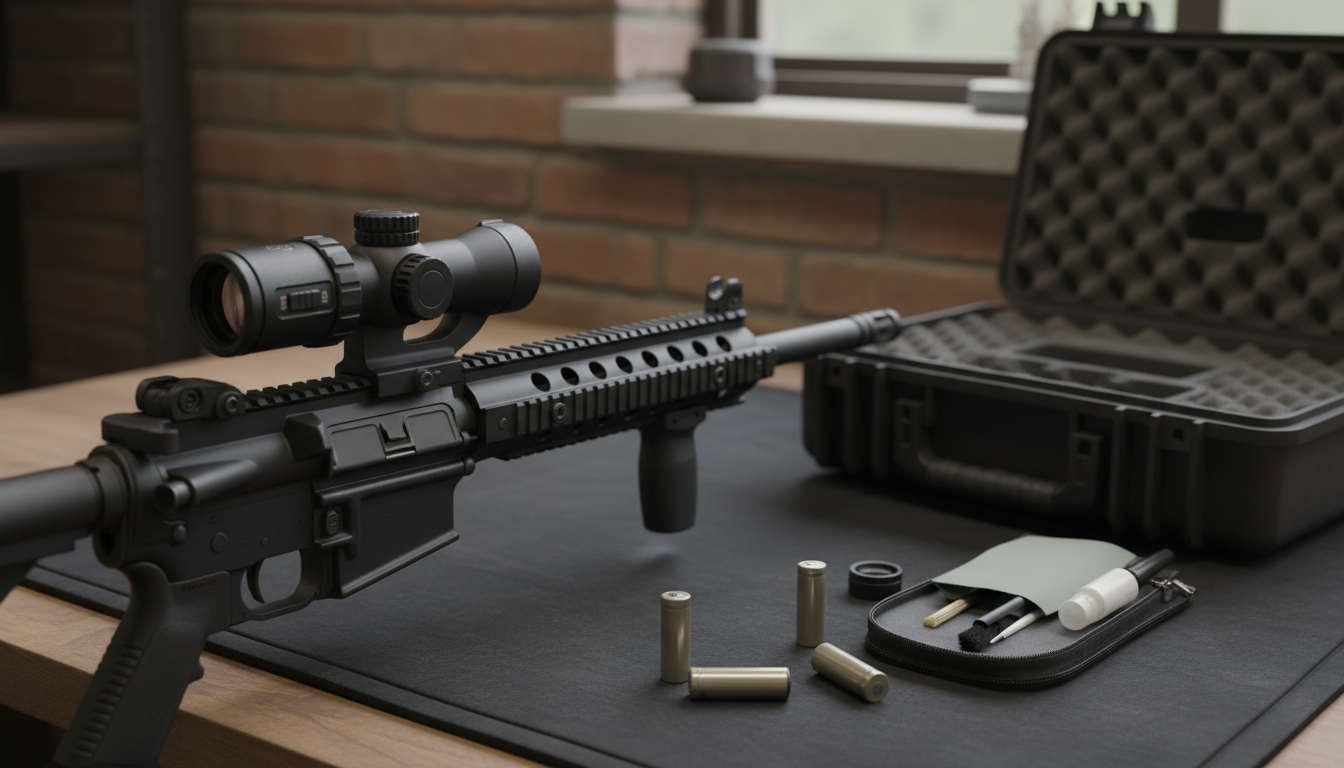
Before you touch your rifle, gather your tools. Trying to mount a scope halfway through and realizing you don’t have the right hex key is a waste of time. Here’s what you need on your workbench:
Regardless of if you’re working with one-piece or ring mounts, you’ll need a few tools to fit your scope to your AR-15. A torque wrench for attaching your mount to your rifle. A hex key (that came with your scope and mount) or precision screwdriver bits for attaching the base and rings. Small bubble level(s) to align the scope, ensuring its accuracy. A gun rest or workstation with plenty of space for using bubble levels to double-check your scope’s precision placement on your rifle. You’ll also want rubbing alcohol and some cleaning patches to wipe down the rail, mount, and screws before install. Any oil or grease left on those surfaces will cause your mount to shift under recoil.
| Tool | Purpose |
|---|---|
| Torque wrench | Tighten mount screws to the right spec — no guessing |
| Hex key / Allen wrench | Fit screws on your scope rings or one-piece mount |
| Bubble level | Keep your scope and reticle perfectly level |
| Gun vise or shooting rest | Hold your rifle steady and level during mounting |
| Rubbing alcohol + patches | Clean oil and grease off the rail, mount, and screws |
| Reticle leveling tool (optional) | Precisely align the reticle with the rifle’s vertical axis |
Most of these tools you probably already own. The torque wrench is the one a lot of people skip, but don’t. Over-tightening scope mount screws can strip threads, crack rings, or damage your rail. Under-tightening leads to the scope shifting under recoil — and that means a lost zero. Every scope mount has a recommended torque spec (usually listed in the instructions or on the manufacturer’s website). Follow it. A basic inch-pound torque wrench runs about $25–$40 and will last you years.
This is the meat of it. Whether you’re running a Pixfra Chiron LRF, Pegasus 2 LRF, or any other thermal riflescope, the steps below will get your optic securely mounted and ready to zero.

Step 1: Safety first. Remove the magazine. Lock the bolt back and verify the chamber is empty. Check it twice. Then place the rifle in your gun vise or shooting rest. Use a bubble level on the upper receiver to confirm it’s sitting flat and true. If your rifle isn’t level from the start, nothing else will line up right.
Step 2: Clean the rail and mount surfaces. Grab your cleaning patches and rubbing alcohol. Wipe down the Picatinny rail on your upper receiver — both the top surface and the slots. Wipe the bottom of your scope mount as well. You want bare metal contact with zero oil, dust, or residue. Use rubbing alcohol and gun cleaning patches to wipe oil and grease off the mount, rail, screws and other mounting components. This step takes 30 seconds but makes a real difference in how solidly your mount locks down.
Step 3: Position your mount on the upper receiver. Carefully set the mount atop the upper receiver. Some shooters will put as far front on the upper receiver rail as they can while others will drop it back a few slots. Do not place it on the free-floating rail. You want to avoid adding excess stress to the rifle’s tube. This is one of the biggest mistakes new shooters make — placing the mount so that it bridges the upper receiver and the handguard/free-float rail. That puts stress on the connection point and causes accuracy problems. Keep it entirely on the upper receiver. If you’re running a one-piece cantilever mount, the front ring will extend forward over the rail, but the mount base itself should be locked down on the receiver only. Hand-tighten first. Don’t torque anything down yet.
Step 4: Set the scope in the mount. For thermal scopes that use a 30mm tube (which is the most common tube diameter for thermal riflescopes today), seat the scope body into the lower ring halves. Place the top ring caps over the scope and snug down the screws in a cross pattern — but don’t fully tighten. Set the scope body onto the lower section of the rings then screw down the upper receiver. Only tighten enough to hold the scope in place. Do not screw down so tightly that the scope cannot be rotated. You should be able to slide the scope forward and backward and rotate it, but it shouldn’t flop around or fall when tilted. This gives you room to dial in eye relief and level the reticle.
Step 5: Adjust eye relief. Here’s where thermals differ from traditional glass scopes. Mounting a thermal optic requires a different approach compared to traditional rifle scopes. Because a thermal uses a screen instead of a glass optic, eye relief is less critical. The shooter needs to be closer to the optic, almost like looking at a small TV screen. You’re looking at a digital display, not a magnified glass lens. So instead of finding a specific “sweet spot” at a set distance behind the eyepiece, you just need to get close enough to see the entire screen without shadows or edges cutting off your image. Shoulder the rifle in your normal shooting position and slide the scope forward or backward until the full image fills your view comfortably. Once you’ve found the right spot, make a mental note or use a small piece of tape to mark the position.
Step 6: Level the reticle. With the rifle level in your vise, place a bubble level on top of your scope’s turret cap (or use a dedicated scope-leveling tool). Rotate the scope in the rings until the reticle is perfectly vertical and horizontal. One last time, check the levels and reticle alignment. If everything is still level and accurate, give yourself a big pat on the back — because you have successfully mounted a scope on an AR-15 rifle.[8] A canted reticle will throw off your windage adjustments, especially at longer distances. Take your time here.
Step 7: Torque it down. Once eye relief and reticle level are dialed in, tighten the ring cap screws in a cross pattern to the manufacturer’s recommended torque spec. Then tighten the mount base screws to the receiver’s rail. Check your levels one more time after torquing. Everything should stay put. If something shifted, loosen slightly and re-adjust before final torque.
Your scope is mounted. Now you need to zero it. This is where thermal optics work a little differently than traditional glass, and it’s where a lot of first-timers get tripped up.

Unlike traditional optics, thermal scopes detect heat signatures, which makes target setup and the zeroing process slightly different. To sight in a thermal scope, you need a target that produces or reflects heat differently than its background. A regular paper bullseye won’t show up on a thermal screen. You need a target that creates thermal contrast. Popular options include aluminum foil squares taped to a cardboard backer (angled slightly to reflect the cold sky), hand warmers or toe warmers, or dedicated thermal zeroing targets. For consistency, foil or other reflective materials are often the best choice. Hand warmers work, but they can create a bloomy, oversized heat signature that makes fine aiming harder — and if a bullet clips one, you lose the heat source.
Start your zero at a close distance. Start zeroing a thermal scope at 25 to 30 yards, then confirm your final zero at 50 to 100 yards based on how you actually hunt. This method helps you get on paper faster, make cleaner adjustments, and reduce practical holdover error across common thermal shooting distances. At 25 yards, you can see your impacts clearly and make big corrections without wasting ammo. Once you’re hitting near center at 25, move back to 50 or 100 yards for your final zero. For most hog and coyote hunting, a 100-yard zero is the standard. Our Pixfra Taurus and Taurus LRF series make this process even smoother with ultra-fine 0.9cm@100m click values, giving you precise control over your windage and elevation adjustments.
If you’re running a scope with a one-shot zero or freeze-frame feature, the process is even faster. Fire one well-aimed shot at your thermal target from a rock-solid rest. Without moving the rifle, enter the scope’s zeroing menu. After firing a shot at the target, the optic allows the shooter to move a secondary reticle to the actual point of impact while keeping the main reticle on the aiming point. Once confirmed, the optic digitally saves the adjustment, resulting in a new zero in as little as one shot. After saving the new zero, fire a confirmation group of 3–5 shots. If they cluster where you’re aiming, you’re done. If not, repeat the adjustment. Models like our Chiron LRF and Taurus LRF also feature built-in ballistic calculators, so once your zero is dialed in, the scope can compute holdovers for different distances on the fly — a real advantage when targets show up at varying ranges during a night hunt.
Pro Tip from the Field: Always zero with the same ammo you plan to hunt with. Cheap plinking rounds and premium hunting loads don’t hit the same spot at distance. You want your zero set for the exact bullet you’ll be sending downrange when it counts.
Even experienced shooters make mistakes when switching from traditional glass to thermal optics. Here are the ones we see most often — and how to dodge them.
Mounting on the handguard. We said it above, but it’s worth repeating. Your mount base needs to sit entirely on the upper receiver, not bridging onto a free-floating handguard. Handguards can flex, especially under the weight of a thermal scope plus any accessories. That flex translates directly to point-of-impact shift, and you’ll chase your zero all day. Some shooters also make the mistake of placing the entire mount too far forward on the rail. If the front ring extends past the receiver, that’s fine — but the base clamp or mounting plate must stay on the receiver.
Skipping the torque wrench. Hand-tightening screws “until they feel right” leads to inconsistent clamping force, stripped screws, and mounts that walk loose under recoil. Every scope and mount manufacturer publishes a torque spec — use it. Thermal optics do not suffer from parallax issues because users are viewing a flat screen rather than a magnified glass lens. This means that minor shifts in head position will not affect the point of impact, making thermals easier to use in dynamic shooting positions. That’s a nice advantage of thermal, but it only holds true if your mount is locked down tight.
Ignoring the reticle level. A scope that’s slightly canted (tilted left or right) will cause windage drift at distance. At 50 yards, it might not matter. At 200+ yards, a 2–3 degree cant can push your shot several inches to one side. Use a bubble level or reticle-leveling kit. It takes an extra minute and saves you frustration at the range.
Not cleaning the rail first. Factory oils, CLP residue, and even fingerprint oils reduce the friction between your mount and the rail. That means the mount is more likely to slide or shift under recoil. A quick alcohol wipe solves this entirely.
Using the wrong ring height. Thermal scopes often have larger objective housings or sensor modules than standard day scopes. If installing a scope with a large objective lens, check that your rig is tall enough to prevent the bell from resting or touching the barrel. Make sure your rings or one-piece mount provide enough clearance so the front of the scope doesn’t contact the barrel or handguard. For most AR-15 setups, medium or high rings, or a one-piece cantilever mount with built-in height, will do the job.
Will a thermal scope fit any AR-15?
Most models are designed to mount on standard Picatinny rails, making them compatible with the vast majority of AR-style rifles. If your AR has a flat-top upper receiver with a mil-spec Picatinny rail (which nearly all modern ARs do), you can mount a thermal scope on it. Just match the scope’s tube diameter to the right ring size — most thermal riflescopes use a 30mm tube. Older AR-15 models with carry handles will need a flat-top conversion or a carry-handle mount adapter, but those setups aren’t ideal for thermal due to height and stability concerns.
Can you sight in a thermal scope during the day?
Yes. Thermal scopes do not rely on visible light; they read temperature differentials. As long as your target is noticeably hotter or colder than the background, your scope will see it. Use a foil target angled to reflect the sky, a hand warmer, or a dedicated thermal zeroing target. Zeroing during the day is actually easier because you have better visibility to walk downrange, check impacts, and adjust your target. Just avoid pointing the scope directly at the sun, as that can damage the sensor.
Do I need a special mount for a thermal scope on an AR-15?
Not necessarily. Many thermals come with cantilever-style mounts to provide proper positioning on AR platforms or bolt-action rifles. Most thermal scopes with a 30mm tube will fit standard 30mm scope rings or a one-piece cantilever mount designed for Picatinny rails. Some thermal scopes come with their own proprietary mounting systems (using screw-hole patterns on the bottom of the scope body rather than a tube). In that case, you’ll need the mount that matches your specific scope. Check your scope’s manual or spec sheet before buying rings separately. Quick-detach (QD) mounts are also a great option if you plan to swap between thermal and day optics — they let you remove and reattach the scope while holding zero.
What’s the best zero distance for a thermal scope on an AR-15?
For most hunting applications (especially hogs and coyotes), a 50-yard or 100-yard zero is ideal. A 100-yard zero gives you a flat trajectory inside 150 yards and manageable holdovers out past 200 — perfect for most night-hunting scenarios. If you’re working tight cover or close-range setups, a 50-yard zero keeps things simple. Start at 25 yards to get on paper, then move back to your final zero distance.
Do thermal scopes have parallax issues?
No. Thermal optics do not suffer from parallax issues because users are viewing a flat screen rather than a magnified glass lens. This means that minor shifts in head position will not affect the point of impact, making thermals easier to use in dynamic shooting positions. This is actually one of the nicest things about running a thermal — you don’t have to worry about finding the perfect head position behind the scope. Small changes in eye placement don’t shift your point of aim. That makes thermals very forgiving for fast, off-angle shots or shooting from awkward positions in the field.
Buying your first thermal scope is one of the most exciting — and most confusing — gear decisions you’ll make as a hunter. The spec sheets are packed with numbers, the price tags are steep, and everybody online has a different opinion about what matters most. At Pixfra, we build thermal scopes and front attachments for night hunters and predator control teams across the country. We hear from first-time buyers every week, and the same mistakes keep popping up. This guide will walk you through the five biggest ones so you spend your money once and spend it right.
Before you even start shopping, do yourself a favor and bookmark our guide on zeroing your thermal scope — because the best scope in the world is useless if you can’t get it sighted in. And once you know what to look for, browse our full thermal scope lineup to see how Pixfra matches real specs to real hunting needs.
This is the number one mistake we see, and it costs hunters more money than any other. You jump online, read a few forum posts, and decide you need the highest resolution, the longest detection range, and the biggest objective lens you can find. Then you end up with a heavy, expensive scope that doesn’t match how you actually hunt.

The truth is that the best thermal scope for you is the one that fits your terrain, your typical shooting distance, and your style of hunting. If you’re set up over a feeder in thick East Texas brush, most of your shots happen inside 150 yards. You don’t need a 75mm objective lens and 4x base magnification for that. You need a wider field of view and a lower base magnification — something in the 1x to 2.5x range — so you can pick up hogs moving through timber fast. On the other hand, if you’re calling coyotes across open Kansas pasture and taking shots past 200 yards, a higher base magnification and larger lens start to earn their keep.
Here’s the question we always ask first-time buyers: What animals are you targeting, at what distance, and in what kind of terrain? Once you answer those three questions, half the models on the market get eliminated right away. A hog hunter working feeders at 80 yards and a coyote hunter shooting across open ground at 350 yards need very different scopes, even if both scopes carry the same price tag. Climate matters too. If you hunt in humid conditions, fog, or light rain, you’ll want a scope with better thermal sensitivity to cut through the atmospheric clutter. Start with your hunting scenario, not a spec sheet, and you’ll avoid the most expensive mistake on this list.
Most first-time buyers zero in on sensor resolution — 256×192, 384×288, or 640×512 — and stop there. Resolution matters, but it’s only one piece of the puzzle. Two other specs play a huge role in what you actually see through the eyepiece: NETD and pixel pitch. If you skip these, you might end up with a scope that looks great on paper but washes out on a foggy December night when you need it most.
NETD stands for Noise Equivalent Temperature Difference. It measures how sensitive the thermal sensor is to tiny differences in heat, and it’s listed in millikelvins (mK). A lower NETD number means the sensor picks up finer heat differences, which translates to sharper contrast between the animal and the background. Pixfra’s thermal devices achieve NETD values of ≤18mK, which puts them in the high-sensitivity category. For comparison, here’s a quick reference on what NETD numbers mean in the real world:
| NETD Rating | Performance Level | Best For |
|---|---|---|
| ≤20 mK | Elite sensitivity | Fog, rain, high humidity, low-contrast scenes |
| 21–30 mK | Excellent | Most hunting conditions, all-season use |
| 31–40 mK | Standard | Clear weather, moderate temps |
| >40 mK | Basic | Fair-weather, short-range only |
Pixel pitch is the physical distance between the center of one pixel and the next on the sensor, measured in microns (µm). The two most common options are 12µm and 17µm. Smaller pixel pitch (12µm) gives you a sharper image and better detail on small or distant targets. Larger pixel pitch (17µm) collects more infrared energy per pixel, which can mean better thermal sensitivity. It’s a trade-off, and neither option is automatically better. A well-designed 384×288 sensor at 17µm with NETD below 25 mK can actually outperform a 640×512 sensor at 12µm with NETD around 40 mK in low-contrast conditions like fog or rain. That seems backwards, but thermal imaging doesn’t work like a regular camera. The entire system — lens, sensor, processing algorithms, and display — has to work together.
The takeaway here is simple: don’t buy a thermal scope based on resolution alone. Check the NETD rating. Look at the pixel pitch. Ask yourself whether you’ll be hunting in fair weather or in conditions where sensitivity matters. If you hunt year-round or in the Southeast where humidity is always a factor, a scope with elite NETD performance will save you from a lot of frustrating nights.
This mistake trips up a lot of first-time buyers because it seems logical. You see a scope advertising 8x or 16x total magnification and assume you’ll be able to identify targets at extreme distance. But there’s a big difference between base (native) magnification and digital zoom, and confusing the two will leave you disappointed.

Every thermal scope has a fixed base magnification — that’s the true optical zoom level where you get full sensor resolution and the sharpest image. When you engage digital zoom, the scope crops a section of the image and stretches it to fill the display. The result is a bigger picture, but not a better one. Digital zoom reduces image clarity and can make it harder to identify what you’re looking at, especially at longer distances. Think of it like pinching to zoom on a phone photo — the image gets bigger, but the detail gets worse. A scope with 2x base magnification and 8x digital zoom doesn’t give you 8x worth of real detail. At 8x, you’re looking at a fraction of the sensor’s actual pixels blown up to fill the screen.
What actually drives your usable detection and identification range is the combination of sensor resolution, objective lens size, and NETD. A larger objective lens (measured in millimeters) gathers more infrared energy and gives you more range. A 50mm lens will detect heat signatures farther out than a 25mm lens, regardless of how much digital zoom either scope has. For mid-to-long range predator hunting where shots may stretch past 200 yards, prioritize a 35mm or larger objective lens. Our Pixfra Chiron LRF and Pegasus 2 LRF models pair larger optics with integrated laser rangefinders, so you get real distance data instead of guessing based on a zoomed-in image.
The bottom line: when you’re comparing scopes, look at the base magnification and objective lens diameter first. Digital zoom is nice to have for quick scanning, but it’s not a substitute for real optical performance. If a scope’s biggest selling point is its total digital zoom number, that’s a red flag.
Here’s a mistake that doesn’t show up until you’re four hours into a hog hunt and your scope dies, or your brand-new optic loses zero after 20 rounds. Too many first-time buyers focus on image quality specs and skip right past the practical stuff: battery life, weather resistance, and recoil tolerance. These things matter just as much as resolution when you’re actually out in the field.
Battery life varies a lot between models. Some scopes run 4–5 hours on a charge, while others go 10 hours or more. If you’re running short night hunts from a blind, 4 hours might be enough. But if you’re doing extended hog eradication or predator control sessions, you need a scope that can keep up. Just as valuable is the type of battery the scope uses. Scopes with removable 18650 batteries let you carry spares and swap them in the field — if your battery runs out at 2 AM, you pop in a fresh one and keep going. Scopes with built-in proprietary batteries leave you stuck if the charge runs out. Pixfra models offer battery life ranging from approximately 4.5 hours to 15 hours depending on the device, and many use standard 18650 batteries that are easy to find and replace.
Durability is another area where cutting corners will burn you. Your thermal scope is going to get rained on, bounced around in a truck, and exposed to dust, humidity, and temperature swings. Look for a scope with a solid IP (Ingress Protection) rating — IP67 or better means it’s sealed against dust and water. Recoil resistance is equally easy to overlook. Every thermal scope has a recoil rating that tells you the maximum caliber it can handle without losing zero or suffering internal damage. Most quality scopes are rated for recoil equivalent to a .375 H&H or 12-gauge shotgun. If you’re running a big-bore rifle, double-check that the scope can take the punishment. A scope that can’t handle your caliber will shift zero or, worse, break internally — and you won’t know until you miss an animal in the dark.
You’d be surprised how many first-time buyers spend weeks researching the perfect thermal scope, drop serious money on it, and then show up to the range with no idea how to zero it. Zeroing a thermal scope is not the same as zeroing a traditional daytime optic. The process is different, the targets are different, and even the direction you move the reticle can catch you off guard.

Most thermal scopes adjust by moving a digital reticle across the display rather than shifting internal erector tubes like a glass optic. That means when your shot hits low and left, you move the reticle down and left to meet the impact — the opposite of what most rifle shooters are trained to do. If you don’t understand that before you get to the range, you’ll burn through ammo chasing your shots in the wrong direction. We wrote a full breakdown of the 5 common zeroing mistakes that covers this in detail, along with target selection, proper bench setup, and confirming your zero with a shot group. Modern Pixfra scopes with one-shot zero and freeze-frame functions make the process faster — fire one shot, freeze the display, drag the reticle to the impact point, save, and confirm with 2–3 follow-up shots.
Beyond zeroing, think about the full setup before you buy. You’ll need quality rings or a mount, torqued to spec (typically 15–20 inch-pounds for most thermal scopes). You might need a Picatinny rail adapter. You may want an external battery pack for extended hunts, a carry case for transport, or a handheld thermal monocular for scanning before you shoulder the rifle. All of this factors into your total cost of ownership. If you spend your entire budget on the scope itself and have nothing left for a proper mount or accessories, you’re setting yourself up for frustration. Plan your total kit, not just the scope, and factor in a trip to the range before your first real hunt so you can zero with confidence and learn the scope’s menu system, color palettes, and recording features while there’s no pressure.
Here’s a summary table you can save to your phone and use when you’re comparing models:
| Factor | What to Look For | Why It Matters |
|---|---|---|
| Sensor Resolution | 384×288 minimum; 640×512 for long range | Higher pixel count = sharper image and better detail at distance |
| NETD | ≤25 mK for all-weather hunting | Lower NETD = better contrast in fog, rain, and humidity |
| Pixel Pitch | 12µm for distance; 17µm for sensitivity | Affects magnification, sensitivity, and image quality balance |
| Objective Lens | 35mm+ for mid-range; 50mm+ for long range | Larger lens = more infrared energy collected = more real range |
| Refresh Rate | 50 Hz minimum | Smooth tracking of moving targets, less lag and eye fatigue |
| Battery Type | Removable 18650 preferred | Swap batteries in the field; longer total hunt time |
| IP Rating | IP67 or better | Dust-proof, waterproof — built for real field conditions |
| Recoil Rating | Rated for your caliber | Prevents scope damage and zero loss from heavy recoil |
| LRF / Ballistics | Built-in rangefinder for 200+ yard hunting | Removes distance guessing; enables precise holdover |
| Zeroing System | One-shot zero / freeze-frame | Speeds up sighting process; saves ammo and range time |
What is the best sensor resolution for a first thermal scope?
We recommend starting with at least 384×288 resolution. At this level, you can detect and identify hog- or coyote-sized animals out to about 200–250 yards, which covers the majority of night hunting scenarios. Scopes with 256×192 sensors cost less but are really only practical for close-range work under 100 yards. If your budget allows it, 640×512 offers a clear step up in image detail and long-range performance. But 384×288 is a solid entry point that won’t leave you feeling limited on most hunts.
Do I need a laser rangefinder (LRF) on my thermal scope?
It depends on how far you’re shooting. For close-range setups — feeders, blinds, brush hunting inside 150 yards — you can estimate distance well enough without one. But for mid- to long-range predator hunting past 200 yards, knowing the exact distance changes everything. An integrated LRF takes the guesswork out of holdover and makes your first shot count. Pixfra models like the Chiron LRF and Taurus LRF pair the rangefinder with a built-in ballistic calculator, so the scope does the math for you.
How much should I spend on my first thermal scope?
Thermal scopes are a real investment. Entry-level models start around $1,000–$1,500 and can work fine for short-range hog hunting. Mid-range scopes in the $2,500–$4,000 bracket typically feature 384×288 sensors, solid NETD performance, and useful extras like recording and multiple reticle options. High-end models with 640×512 sensors, LRF, and ballistic calculators run $4,000–$6,000 or more. The best advice: set a realistic budget, buy the best scope you can within it, and don’t over-buy features you won’t use — but don’t under-buy on sensor quality either.
Can I use a thermal scope during the day?
Yes. Thermal scopes detect heat, not visible light, so they work 24/7. Many hunters actually prefer to zero their thermal scope during daylight hours because visibility, safety, and shooting conditions are better. Just make sure you use a thermal-contrast target (like a hand warmer behind a cardboard cutout), since standard paper bullseye targets won’t show up through a thermal display. And never point the thermal lens directly at the sun — direct sunlight can damage the sensor.
What’s the difference between a thermal scope and a thermal front attachment (clip-on)?
A dedicated thermal scope replaces your daytime optic entirely. It mounts directly to your rifle and handles everything — targeting, reticle, zoom, zeroing. A thermal front attachment, sometimes called a clip-on, mounts in front of your existing daytime scope and converts it into a thermal system. The advantage of a clip-on is that you keep your familiar daytime scope and reticle and only add the thermal layer when you need it. The trade-off is extra weight on the front of the rifle and a more complex setup. If you own multiple rifles and want to move one thermal device between them, a clip-on can be a smart choice. If you’re dedicating a rifle to night hunting, a standalone thermal scope is simpler and lighter.
Zeroing a thermal scope sounds simple enough — line up the reticle with where the bullet hits. But we’ve watched hunters blow through boxes of ammo and still walk away with a shaky zero. At Pixfra, we build thermal scopes and front attachments for night hunters and predator control, and we hear about zeroing headaches every single week. If you’re struggling to get your thermal optic dialed in, there’s a good chance you’re making one of these five mistakes. The good news? Every one of them is easy to fix once you know what to look for. And once your zero is locked, you’ll spend less time at the range and more time dropping hogs and coyotes in the field. Before you head out to the range, make sure you’ve also got the right gear backing up your setup — our guide on the best accessories to upgrade your thermal scope performance covers mounts, battery solutions, and protective cases that help you hold zero longer and hunt harder.
This is the number one mistake we see, and it trips up nearly every first-time thermal scope owner. You show up at the range with a standard paper bullseye target, look through your thermal optic, and see… almost nothing useful. Unlike traditional optics, thermal scopes detect heat instead of visible light. Because of that, targets appear as heat signatures rather than detailed shapes. A printed paper target that looks perfect through a daytime scope can be almost invisible through a thermal imager. If you can’t see a clear aiming point, you can’t zero. Period.

Thermal zeroing works best with a small heat source. A large warm target makes it difficult to identify the exact aiming point. Most shooters get better results using a 2–3 inch heat signature, such as a hand warmer or foil patch. This is a detail that matters more than people realize. A full-size hand warmer stuck flat on a piece of cardboard creates a big, fuzzy hot blob in your display. It’s hard to know exactly where the center of that glow is, so your aiming point becomes a guess. Cut a small window in a piece of cardboard and stick the hand warmer behind it so only a 2–3 inch patch of heat shows through. Or use a dedicated thermal zeroing target made for this exact purpose. Some hunters even use metallic repair tape strips stuck on a board — the different emissivity of the metal versus cardboard creates visible contrast without any heat source at all.
You can also zero during the day. Daylight zeroing often provides better visibility, contrast and safer conditions.Just avoid pointing your thermal optic toward the sun, as direct sunlight can seriously damage your sensor. If you’re zeroing on a warm afternoon, even a cold water bottle placed against a warm background can stand out as a dark spot on your display. The bottom line: don’t grab a paper target and expect it to work. Plan your thermal target before you leave the house, and you’ll save yourself a wasted trip to the range.
Here’s a mistake that isn’t unique to thermal scopes, but it hits harder with them. When you’re zeroing any rifle optic, you need to remove as much human error as possible from the equation. That means a solid bench rest, sandbags, or at least a good bipod. If you’re trying to zero from a standing position or with your elbows propped on a truck hood, you’re going to get scattered shots that tell you nothing about where your scope actually points.
Use a stable shooting rest to remove as much movement as possible. The more stable the rifle is, the easier it becomes to see true bullet impact instead of small shooter errors. This matters even more with thermal scopes because you’re often working with digital zoom, and even small rifle movements become exaggerated on the display. Heavy digital zoom reduces image clarity and exaggerates rifle movement. This often causes shooters to chase the reticle and overcorrect adjustments. Start with base magnification and only add a small amount of zoom if needed.
Set up on a proper bench with front and rear bags. Keep the rifle in the same position for every shot. If you’re at an outdoor range, pay attention to wind — even moderate gusts can push your shots off and trick you into making windage corrections your scope doesn’t actually need. The foundation of any good zero is consistency. Remove variables so the only thing you’re measuring is the relationship between your reticle and bullet impact. A Wheeler torque wrench, quality rings torqued to spec (typically 15–20 inch-pounds for most thermal scopes), and a rock-solid bench will do more for your zero than any software feature ever will.
This one gets impatient shooters every time. You mount a brand-new thermal scope, head to the range, set up a target at 100 yards, and fire your first shot. It misses the target entirely. You fire again. Miss. Three more rounds, and you still can’t see where you’re hitting. Now you’ve burned five rounds with nothing to show for it.

Start zeroing a thermal scope at 25 to 30 yards, then confirm your final zero at 50 to 100 yards based on how you actually hunt. This method helps you get on paper faster, make cleaner adjustments, and reduce practical holdover error across common thermal shooting distances. This two-step approach is the way to go, and most experienced thermal hunters follow it. Begin at 25 to 30 yards if you are mounting a new thermal scope or setting up a new rifle. This shorter distance makes it much easier to see your first impact and correct a scope that is several inches off. At this stage, the goal is not to finish your zero. The goal is to get the reticle and bullet impact close.
Once you’re hitting near center at 25–30 yards, move back to your actual hunting zero distance. A 50-yard zero often works well for hogs, brush, and tighter night setups. A 100-yard zero usually fits more open ground and longer coyote shots. For our Pixfra thermal scopes like the Chiron LRF and Taurus LRF with their built-in laser rangefinders and ballistic calculators, a 100-yard zero works well because the LRF gives you exact distance data for holdover at longer ranges. But if you mostly hunt thick brush or set up feeders at known distances under 150 yards, 50 yards is perfectly fine. Match the zero distance to your real hunting conditions, not to some arbitrary standard.
If you’ve zeroed traditional daytime scopes your whole life, this mistake is waiting to bite you. With a glass optic, you move the turrets to shift the bullet impact. If your shots hit low, you dial “up.” If shots hit left, you dial “right.” The reticle stays in the center of the display, and the internal erector tube moves to change where the bullet goes relative to the crosshair.
If you’re used to sighting in traditional daytime scopes, you’re familiar with dialing “up” or “right” to move the point of impact. With thermal optics, it’s almost the opposite. Most thermal sights adjust by moving the reticle itself, not the impact point. Think about that for a second. With a thermal scope, your bullet is going where it’s going — you’re moving the digital reticle overlay on the display to match. Think of it like sighting in a bow—you follow the arrow. If your shot lands low and left, you move the reticle down and left to meet the impact. It’s backwards from what most rifle shooters are trained to do, and it causes a lot of frustration at the range when people adjust the wrong way and watch their shots walk farther off target.
Zeroing a thermal scope still means aligning the point of aim (POA) with the point of impact (POI), but instead of mechanically adjusting reticle lenses in a glass optic, you’re digitally shifting a reticle across the sensor pixels. Because the reticle moves digitally, sloppy technique or poor contrast can create errors that aren’t obvious until you miss the animal in the field. Before you touch anything, read your scope manual and figure out which direction the reticle moves with each button press. Our Pixfra scopes have clear on-screen zeroing menus that show you the current reticle position with numerical coordinates. Write those numbers down once you’ve locked your zero — if a firmware update or accidental settings reset wipes your profile, you can punch those coordinates back in and get close without starting over from scratch. Modern thermal scopes with one-shot zero and freeze-frame functions make this whole process faster. You fire one shot, freeze the display, move the reticle to the bullet hole, and save. It takes 3–5 rounds total for most setups.
This is the mistake that quietly costs you animals. You fire one shot, make your adjustment, fire another shot that hits close to center, and call it done. You pack up, head to the field that night, and your first shot on a hog misses by 4 inches. What happened?

Some shooters stop after the first successful adjustment. However, one accurate shot does not confirm a stable zero. Always fire a 3-shot or 5-shot group to verify that the rifle, ammo, and optic are working together consistently. A single shot can be a flyer. Your ammo might have a round with slightly different velocity. You might have flinched. The only way to know your zero is solid is to fire a group and see where the center of that group lands. If you fire three rounds and they cluster within an inch or two of your aiming point, you’re good. If they scatter, something else is wrong — maybe a loose mount, inconsistent ammo, or a flinch you didn’t notice.
Verification shots also protect against mount issues that aren’t obvious during a single shot. Ring torque should be 15-20 in-lbs for most scopes. Overtightening them can crush the tube, and under-tightening will allow slippage. If your scope rings are slightly under-torqued, the scope might shift a hair during recoil but return to roughly the same position — you’d never notice it on one shot, but a 3-round group will show the spread. Spend the extra ammo on confirmation. It’s cheap insurance compared to missing a 300-pound boar at 2 AM.
Beyond the group itself, take the time to fire a final confirmation shot or two at the distance you actually hunt. If you zeroed at 100 yards from a bench, fire a couple from a position that mimics your field setup — maybe off shooting sticks or from a tripod. This gives you confidence that your zero translates to real-world shooting conditions, not just a controlled range setup.
We said five mistakes, but this one is too common to leave out. Common causes include temperature changes, scope mount movement, ammunition changes, or missed NUCs. If you zeroed your thermal scope in August when it was 90°F and head out for a December hog hunt at 35°F, your POI may have shifted. Make sure that the same cartridge type and load bullets are being used as when the scope was initially zeroed. If your riflescope was zeroed during the summer, and is now being used in the winter, or through extreme temperature changes, slight shifts in points of impact are possible. Double-checking your zero before hunting is recommended.
Temperature affects everything — the barrel harmonics of your rifle, the velocity of your ammunition, and even how the thermal sensor behaves. Many experienced hunters confirm zero at least twice per season, especially when ambient temperatures differ significantly from the original zeroing session, or before the hunting season starts. Make it a habit to verify your zero whenever the conditions change significantly from when you last sighted in. It takes five minutes and a few rounds, and it can be the difference between a clean kill and a frustrating miss.
Here’s a summary table to keep in your range bag:
| Mistake | What Goes Wrong | How to Fix It |
|---|---|---|
| Wrong target | Can’t see aiming point through thermal | Use hand warmers, foil, or dedicated thermal targets with a 2–3″ heat signature |
| No stable rest | Scattered shots, can’t isolate scope error | Bench rest with front/rear bags, zero at base magnification |
| Starting too far | Miss the target entirely, waste ammo | Start at 25–30 yards, then move to 50–100 yards |
| Wrong reticle direction | Adjustments walk shots farther off | Move reticle TO the bullet impact, not away from it |
| No confirmation group | False zero from a single lucky shot | Fire 3–5 shot group to verify consistency |
| Ignoring temp changes | POI drift between seasons | Re-confirm zero when temps shift 20°F+ from zeroing conditions |
Can you zero a thermal scope during the day?
Yes, and many shooters prefer it. The beauty of thermal optics is seeing in the dark—but that doesn’t mean you need to zero in the dark. In fact, we recommend zeroing during the day whenever possible. Daylight conditions allow for better visibility, increased safety, and more controlled shooting. Just make sure you use a target with good thermal contrast — hand warmers, foil tape, or contrast targets — since standard paper bullseyes won’t show up. Never point the thermal lens directly at the sun.
How many shots does it take to zero a thermal scope?
Most thermal scopes can be zeroed in about 3 to 5 shots when using the one-shot zero method. After the first shot, you move the reticle to the bullet impact using the scope’s zeroing function. The freeze-frame feature on modern thermal scopes like our Pixfra Taurus LRF and Pegasus 2 LRF makes this process fast. Fire one shot, freeze the display, drag the reticle to the impact point, save, and then fire 2–3 more rounds to confirm.
Why does my thermal scope keep losing zero?
Common troubleshooting steps for zeroing issues include verifying the consistency of your ammunition, ensuring the scope is securely mounted, and confirming that all mechanical components are functioning correctly. If you experience POI shifts, start by testing with a fresh lot of ammunition and confirming that the scope’s mounts are torqued to specifications. Furthermore, perform a non-uniformity correction (NUC) and check for any electronic anomalies that might affect performance. Temperature swings between sessions, under-torqued rings, and switching ammo brands are the most frequent culprits.
How often should you re-zero your thermal scope?
Re-zero a thermal scope whenever something in your setup changes. Common situations include mounting the scope on a different rifle, switching to a different type of ammunition, adjusting the scope mount, or taking a hard impact during transport. Many hunters also confirm their zero before the start of a new season to make sure the rifle still shoots accurately. A quick 3-round verification before a big hunt takes minutes and costs almost nothing compared to the price of a missed opportunity.
What is the best distance to zero a thermal scope?
There’s no single right answer — it depends on how you hunt. Start the process at 25–30 yards to get on paper, then finalize at your actual hunting distance. For close-range hog setups in brush, 50 yards works well. For open-ground predator hunting where shots stretch past 150 yards, a 100-yard zero gives you more flexibility. Models with integrated laser rangefinders and ballistic calculators, like several in our Pixfra lineup, let you dial precise holdovers at any range once your base zero is set.
Trying to decide between a clip-on thermal and a dedicated thermal scope? Both get you hunting after dark, but they work in very different ways. We’ve spent years testing thermal optics in the field, and here’s what actually matters when you’re picking between these two setups.
A clip-on thermal — also called a thermal front attachment — mounts directly in front of your existing daytime scope. It turns your day optic into a thermal rifle scope by projecting a thermal image through your regular reticle, with no need to re-zero. You don’t remove your daytime glass. The clip-on attaches to the objective end, typically with an adapter ring that clamps onto the scope’s objective bell or via a Picatinny rail mount positioned ahead of the day scope. Once you complete the initial alignment process (called collimation), the clip-on and your day scope work together as one system. The thermal unit shows you a heat map of the scene, and your day scope’s crosshairs tell you where the bullet goes.

A dedicated thermal scope replaces your day optic entirely. It has its own display, reticle, zoom system, and controls. It’s built specifically for thermal use, giving you a purpose-built setup for night shooting. Everything is engineered from the ground up for thermal imaging — the infrared sensor, the internal OLED microdisplay, the menu interface — all working together in a single, self-contained package. Think of it as a tool that does one thing and does it at the highest level.
Because the entire optical system is built for thermal, dedicated thermal scopes offer higher resolution options, often with larger lens sizes for better base magnification and clearer images at longer distances. Our Pixfra Pegasus 2 LRF and Chiron LRF series, for example, feature integrated laser rangefinders with 1000m range, multiple zeroing profiles, and built-in ballistic calculators — all inside the scope body. You mount it, zero it, and you’re hunting. The trade-off? Your rifle loses its daytime optic. If you want to hunt during the day with traditional glass, you’ll need to swap scopes — and that means either re-zeroing or running a solid quick-detach (QD) mount that holds zero between switches. Many dedicated thermal hunters solve this by keeping a second rifle set up just for night work, or by investing in the right accessories to upgrade their thermal scope performance, like QD mounts that maintain zero across rifle swaps.
Let’s lay it out. Clip-on thermals enable rapid switching between nighttime and daytime hunting without affecting the zero of the daytime optic. You keep the daytime glass you’ve already invested in, and the clip-on adds thermal detection when the light fades. You can transition from daylight hunting to nighttime predator work with the same gun, the same zero, and zero downtime. If you plan to stick with one dedicated daytime scope and rifle, a clip-on is a flexible and cost-effective choice. Clip-ons also work across multiple rifles if you have matching adapters, and as we mentioned, many models pull double duty as handheld thermal monoculars for scanning and scouting before you settle in to shoot.
But clip-ons have real trade-offs. The main disadvantage of a clip-on scope is that it doesn’t have the same optics resolution as a dedicated unit, so you might not be as precise or accurate with your shooting. Your day scope’s magnification directly affects the thermal picture — go past about 6x–8x, and you’re zooming into a digital display where pixels become obvious and detail gets soft. A clip-on is mounted in front of the daytime riflescope, using an interface fastened on the objective bell, and adds length and weight to the front, making the gun very muzzle-heavy and increasing its bulk. Mounting alignment has to be dead-on — if the clip-on isn’t perfectly centered over your day scope’s objective, your shots will drift. And while clip-ons market themselves as easy to move between rifles, the clip-on is nice to transfer to one gun to another, but when you do that, you may still have to re-collimate to align it to the new day scope.

Dedicated thermal scopes trade that flexibility for performance. You get crisp, clean images that don’t make you squint, built-in reticles and ballistic calculators, and a rugged, simple design with fewer moving parts. They’re easier to run — mount, zero, hunt — with no adapter alignment to fuss with in the dark. The downside: your rifle becomes a single-purpose night tool while the thermal is mounted. You’ll need to re-zero if you swap rifles without a quality QD mount, and they add weight — though lightweight models like our Pixfra Draco series are designed to minimize that issue.
Here’s a side-by-side comparison to make the differences clear:
| Feature | Clip-On Thermal | Dedicated Thermal Scope |
|---|---|---|
| Keeps your day scope | Yes | No — replaces it |
| Re-zeroing needed | No (after initial collimation) | No (but needed if swapping rifles without QD mount) |
| Image quality | Good, but reduced vs. dedicated | Best available |
| Built-in reticle | Uses your day scope’s reticle | Yes — multiple reticle options |
| Laser rangefinder | Some models | Common in mid- and high-end models |
| Ballistic calculator | Rare | Common in LRF models |
| Added rifle weight | Front-heavy | Replaces day scope weight |
| Doubles as monocular | Yes (with eyepiece) | No |
| Typical price range | $1,000 – $6,000+ | $1,000 – $5,000+ |
| Best for | Multi-purpose, flexible setups | Dedicated night-hunting rigs |
Image quality is the biggest debate in the clip-on vs. dedicated thermal argument, and it comes down to three specs working together: sensor resolution, NETD, and the optical system itself. If you ignore any one of these, you’ll end up disappointed — no matter which type of thermal you buy.
Sensor resolution tells you how many thermal pixels the detector provides. The two common tiers are 384×288 and 640×512. A 640×512 sensor packs nearly three times more pixels than a 384×288, and that extra pixel density makes a big difference when zooming through your day scope or trying to identify a target past 200 yards. Dedicated thermal scopes tend to pair higher-resolution sensors with larger objective lenses — 50mm or 75mm — which means better base magnification and sharper detail right from the start. Clip-ons are limited here because the thermal image travels through your day scope’s optics. Every bit of magnification you add on the day scope side just zooms into the clip-on’s display. With a 640×480 sensor and no optical magnification on the clip-on itself, zooming up to about 8x is the limit for best performance.
NETD — Noise Equivalent Temperature Difference — tells you how sensitive the thermal sensor is to small temperature changes. NETD is measured in millikelvins (mK), and the guiding principle is straightforward: the lower the NETD value, the higher the sensor sensitivity and the better the image quality. Most quality thermal optics are rated at less than 25 mK. At Pixfra, our devices achieve NETD values of ≤18mK, which places them at the high end of sensitivity for hunting-grade thermal optics. Low NETD matters most in warm conditions where background temperatures are close to your target’s body heat, or in fog, rain, and humidity where scene contrast drops. When NETD is weak, the system struggles to detect the remaining faint differences and the image degrades rapidly. In contrast, a low-NETD sensor holds its clarity under conditions that make weaker cameras practically blind. Whether you’re running a clip-on or dedicated scope, check the NETD spec — it’s one of the best real-world performance indicators.
In practice, a dedicated thermal scope is better than a clip-on in the vast majority of situations, according to experienced hunters who’ve run both setups. You’re looking through a purpose-built optical path with nothing between you and the thermal image — no extra glass, no adapter, no alignment variables. The result is faster target acquisition and more confident positive identification (PID), especially beyond 200 yards where detail separates clean kills from missed shots. Clip-ons, however, hold their own inside typical predator-hunting ranges under 300 yards. A clip-on works fine for coyote hunting, though a dedicated weapon sight is easier to use. Depending on what you are doing, the type of weapon, scopes on each weapon, and distance, one is a better option than another.[9] Your choice depends on how far you shoot and how much of your hunting happens after dark.
There’s no universal answer, but the decision narrows fast once you look at how you actually hunt.
Go with a clip-on thermal if you already own solid daytime glass and want to keep using it. If your hunts mix day and night conditions — evening sits that stretch into darkness, or morning predator sets that start before dawn — a clip-on lets you run one rifle for everything without sacrificing your daytime zero. It’s also the smarter pick if you’re budget-conscious and don’t want to invest in a whole separate night-hunting rig. A clip-on setup gives you one rifle, one optic, two modes — daylight clarity and thermal precision, and the cost-effective upgrade adds advanced thermal capability at a fraction of a full dedicated scope setup. Pair your clip-on with a quality QD mount and reliable spare batteries, and you’ve got a rig that covers most night-hunting scenarios without draining your account.

Dedicated thermal scopes are typically better suited for those who hunt frequently at night or in low-light conditions, as they are optimized for such environments. If you’re running all-night hog eradication, regular predator control, or active coyote management on your property, a dedicated thermal hands you better image quality, faster target acquisition, and integrated tools — rangefinders, ballistic solvers, video recording — in one package. If building a dedicated night-hunting setup is within the budget, many hunters who use the AR platform have an upper assembly set up for daytime use and a second upper set up for a thermal scope. Zero both independently, and swapping between them takes seconds. Our Pixfra Sirius HD series offers detection ranges up to 3600m, while the Taurus LRF features ultra-fine 0.9cm@100m click value for precision zeroing — the kind of specs that make dedicated setups worth the commitment for serious night hunters.
If budget allows and you want total coverage, run both. A dedicated thermal on your primary night-hunting rifle and a clip-on or thermal monocular for scouting and backup duty gives you the best of both worlds. You’ll pay more upfront, but the combination of dedicated performance and clip-on flexibility covers every scenario from quick evening hog hunts to multi-day predator operations. Many experienced thermal hunters end up at this point once they see the strengths of each system in the field, and it’s the setup we’d recommend for anyone who’s serious about thermal hunting long-term.
Does a clip-on thermal hurt your image quality?
It does reduce it, though how much depends on the quality of both the clip-on and your day scope. You’re stacking two optical systems, so some clarity and contrast loss is expected compared to a dedicated thermal. At reasonable magnification (under 6x–8x), a good clip-on delivers perfectly usable image quality for hog and coyote work inside 300 yards. Push the magnification higher, though, and the picture gets pixelated fast — you’re zooming into a small display, not getting real optical magnification. If image quality is your top concern, a dedicated thermal scope is the clear winner.
Can you swap a dedicated thermal scope between rifles?
Yes, with the right mount. With a good return-to-zero mount like ADM or LaRue and multiple zero profiles — available in most modern thermals — you can still swap from gun to gun. Most current thermal scopes let you store different zero settings for different rifles and toggle between them through the menu. The key is running the same mount height on each gun. Without a QD mount, expect to re-zero every time you swap, which costs ammo and daylight.
Does a clip-on shift your point of impact?
The problem with some clip-ons is that you might get POI shift depending on zoom and parallax. Inside 75 yards it might not be a big deal, but at 150 yards that shift might be enough to miss. A quality clip-on with a solid adapter or rail-mount system should hold consistent point of impact after proper collimation. But factors like your day scope’s magnification setting, parallax adjustment, and adapter seating can all introduce drift. Test yours at the range before trusting it in the field, and verify your zero any time you move it to a new scope.
Is a dedicated thermal scope worth it over a clip-on?
For regular night hunters, yes. Dedicated scopes deliver sharper images, more responsive performance, and a full suite of built-in tools — laser rangefinders, ballistic calculators, video recording, multiple reticle options — at comparable price points. For regular night hunting, a dedicated setup with a thermal scope offers superior performance and convenience. For the occasional night hunter who mostly shoots during daylight hours, a clip-on adds thermal capability to an existing setup without the commitment of a second rifle build.
What sensor resolution do you need for a thermal clip-on?
A 640×512 sensor is the top choice for clip-on thermals. It carries about three times the pixel count of a 384×288 sensor, which translates to sharper detail when you zoom through your day scope and better target identification past 200 yards. Clip-ons are available in three resolutions: 256, 384, and 640, and they offer a range of performance levels. If your hunting stays inside 200 yards — stand-hunting hogs, for instance — a 384-resolution clip-on works fine and costs less. For coyote hunting at range or any scenario where you need to tell a target from a bush at distance, spend the extra for 640 resolution. The difference in target identification is unmistakable.
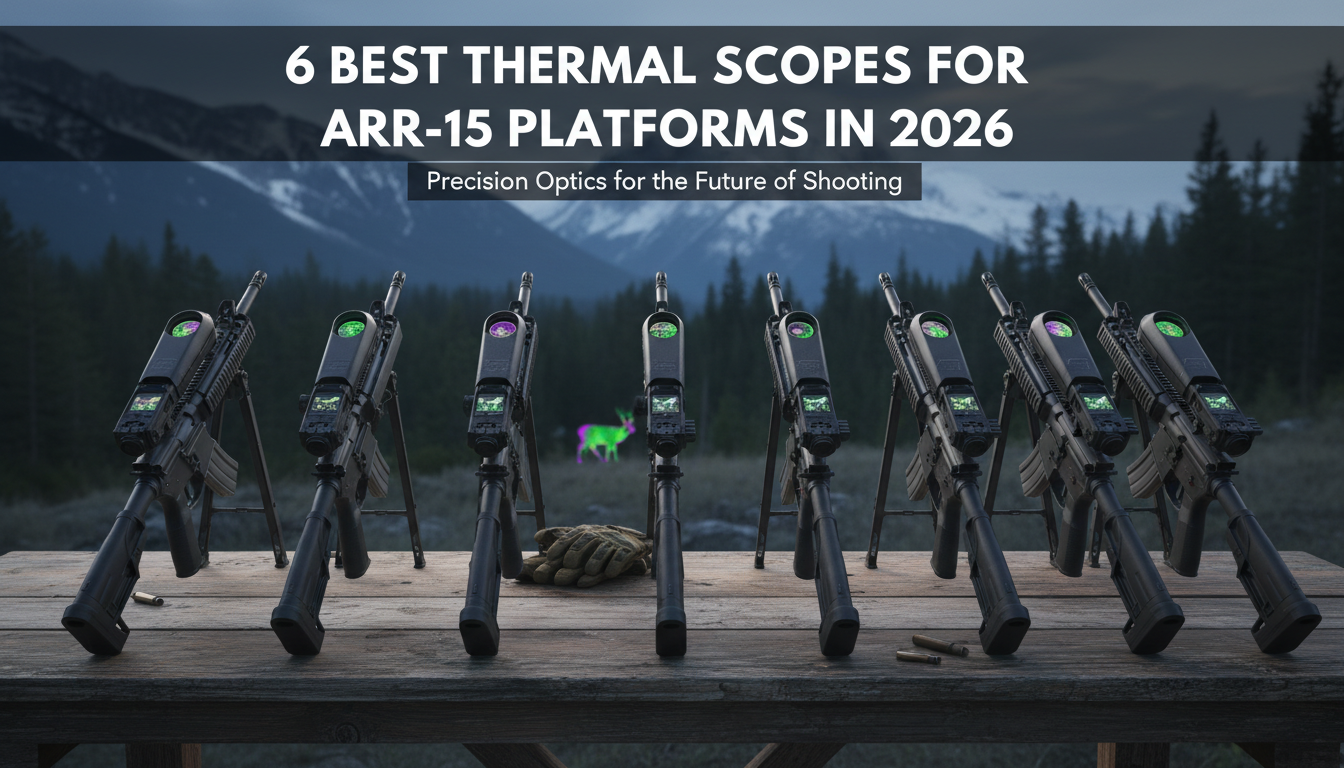
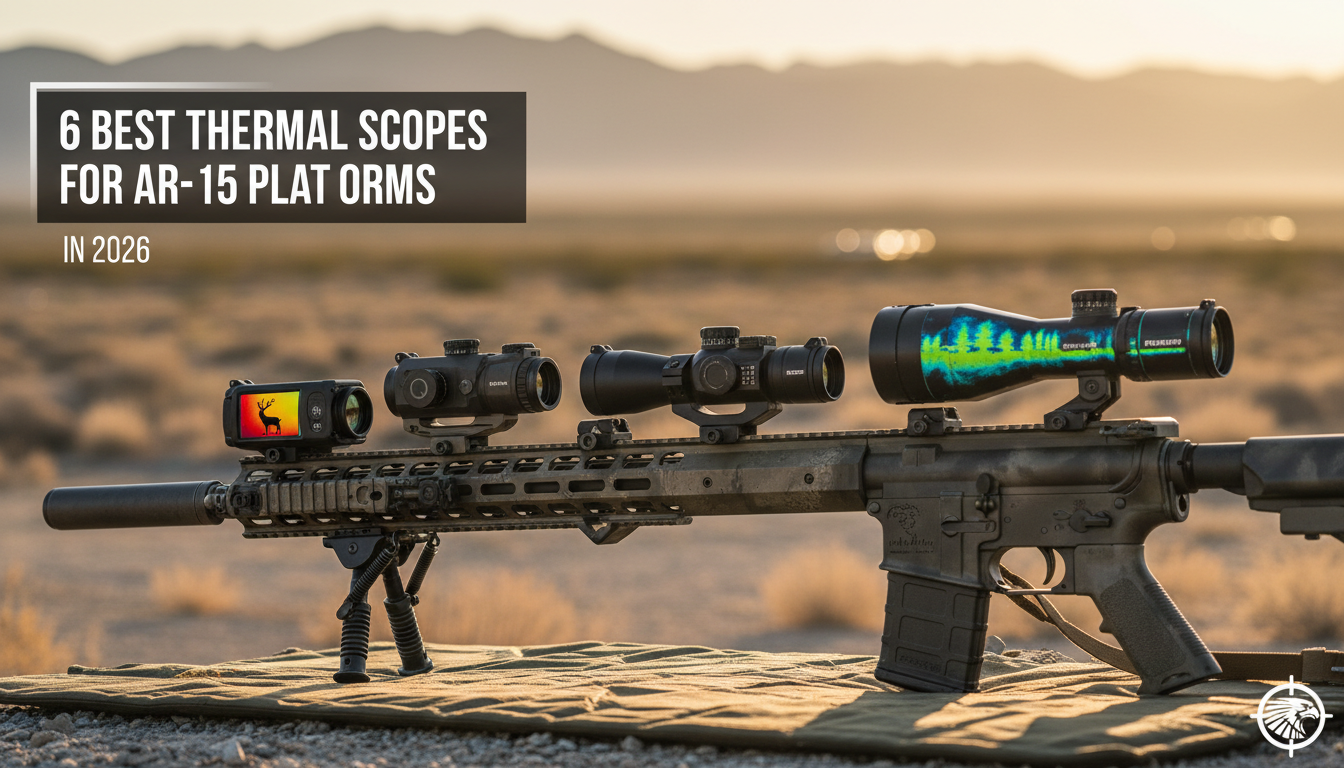
Your AR-15 deserves a thermal scope that actually works in the field. We’ve spent years testing thermal optics on AR platforms—budget picks, mid-range workhorses, and premium units. The market in 2026 is packed. Here are the six best thermal scopes for AR-15 that we’d put our own money on.
The AR-15’s lightweight aluminum construction and modular design make it adaptable for a wide range of purposes, from hunting to tactical applications.Its standard Picatinny rail gives you a plug-and-play platform for just about any optic, and thermal scopes are no exception. Whether you’re running predator control at night, wiping out feral hogs on your property, or scanning for coyotes across open fields, a thermal scope turns your AR into a true 24/7 hunting machine. And with the right thermal scope accessories like quick-detach mounts and extended battery solutions, you can squeeze even more performance out of your setup.
Thermal riflescopes detect heat differences, not light. That means they keep working in total darkness, fog, light rain, or smoke—conditions where traditional optics struggle or fail outright.Pair that with the AR-15’s semi-automatic action and fast follow-up shots, and you’ve got a night hunting rig that’s hard to beat. Thermal scopes are a must if you’re hunting nocturnal game like coyotes, hogs, and other varmints and predators during nighttime and low-light conditions.
We’ve tested thermal scopes across everything from 95°F Texas summer nights to freezing December hunts. The six picks below earned their spots through real field performance—not spec sheet hype. We also leaned on data from Pixfra’s thermal device lineup, which gave us a solid baseline for sensor sensitivity and detection range benchmarks across price tiers.
Not every thermal scope fits an AR-15 well. A few specs separate a good match from a bad one, and we want to save you from learning that the hard way.
Sensor resolution is the first thing to check. Resolution is a measure of how much detail your image will have, so the higher the resolution of your sensor, the more finely rendered your image will be.A 384×288 sensor works fine for close-to-mid range hog hunting inside 200 yards. If you’re pushing past 300 yards or targeting smaller game like coyotes, step up to a 640×480 or 640×512 sensor for cleaner target ID. NETD rating tells you how sensitive the thermal sensor is to small temperature differences—lower numbers mean better performance. Scopes under 20mK pick up faint heat signatures that cheaper units miss completely, especially on warm nights when background temps run close to your target’s body heat.
Refresh rate affects how smooth your image looks when you’re tracking a moving target. A 60Hz refresh rate ensures fast-moving objects appear clear on the HD display. Anything below 30Hz can look choppy, especially on running hogs. Magnification range should match your typical engagement distances. For AR-15 use, a 1x–8x or 2x–16x range covers most hunting scenarios without piling on extra weight. High magnification looks appealing on paper, but thermal image quality drops quickly if you over-zoom. Many hunters spend most of their time between 2x and 6x, even on scopes capable of much more.
Finally, make sure the scope is rated for semi-auto recoil and mounts cleanly to a Picatinny rail. Quality night vision and thermal scopes should hold zero on a semi-auto rifle. Problems usually arise from low-quality mounts, loose fasteners, or scopes intended only for low-recoil platforms.QD mounts are a bonus if you swap between day glass and thermal on the same rifle.
Here’s a quick comparison of the top thermal rifle scope tiers we recommend for AR-15 platforms this year. We’ve organized them by performance level so you can match your budget to your hunting style:
| Spec | Entry-Level | Mid-Range | Premium |
|---|---|---|---|
| Sensor Resolution | 256×192 | 384×288 | 640×480 / 640×512 |
| NETD | ≤25mK | ≤20mK | ≤18mK |
| Refresh Rate | 25–50Hz | 50–60Hz | 60Hz |
| Detection Range | ~800m | ~1,500m | ~2,500m+ |
| Battery Life | 4–6 hrs | 6–10 hrs | 8–15 hrs |
| Laser Rangefinder | Rare | Sometimes | Often Included |
| Ballistic Calculator | No | Sometimes | Yes |
| Typical Price | $1,000–$2,000 | $2,000–$4,000 | $4,000–$8,000+ |
Key stat: According to USDA estimates, feral hogs cause over $2.5 billion in damage annually across the U.S. That’s driven a surge in thermal scope demand, especially among AR-15 owners in Texas, Oklahoma, and the Southeast running nighttime eradication programs.
The sweet spot for most AR-15 owners in 2026 sits in that mid-range tier. A 384×288 sensor with a 50Hz or 60Hz refresh rate, 6+ hours of battery life, and a built-in ballistic calculator gives you solid image quality and reliable target ID without burning through $6,000. Thermal optics are usually mounted on AR-15, a bolt-action rifle, or rifles chambered in .300 Winchester Magnum, .308 Winchester, 6.5 Creedmoor, or the .243 Winchester for coyote.All of these calibers pair well with mid-range thermal scopes that handle the recoil without losing zero.
For those who want the absolute best, premium 640-class sensors with integrated laser rangefinders and onboard video recording deliver performance that was purely military-grade just a few years ago. We’ve seen NETD values as low as ≤18mK and detection ranges stretching past 3,600 meters on top-tier models—numbers that make positive target ID at 400+ yards a real possibility, not just a marketing claim.
Mounting a thermal scope on an AR-15 is straightforward, but a few details make a big difference. AR-15s are naturally more forgiving when it comes to optic height-over-bore, thanks to their straight-line recoil system and higher receiver. This gives you more freedom to run thermal optics slightly higher without breaking your cheek weld.A 1.54″–1.93″ mount height works well for most setups.
Use a quality mount—preferably a QD mount if you plan to swap between day and thermal optics. Torque your rings to spec and double-check that everything is level before zeroing. Most modern thermal scopes feature one-shot zero or digital zeroing, which speeds up the process. Fire a shot, move the digital reticle to your point of impact, confirm with a follow-up, and you’re done.
One thing to watch: short-barreled ARs with muzzle brakes can blast unburnt powder toward your scope’s sensor window. A suppressor or linear comp protects the sensor window from unburnt powder blast on short barrels.It also cuts down on heat mirage in your thermal image, which can mess with your sight picture at close range.
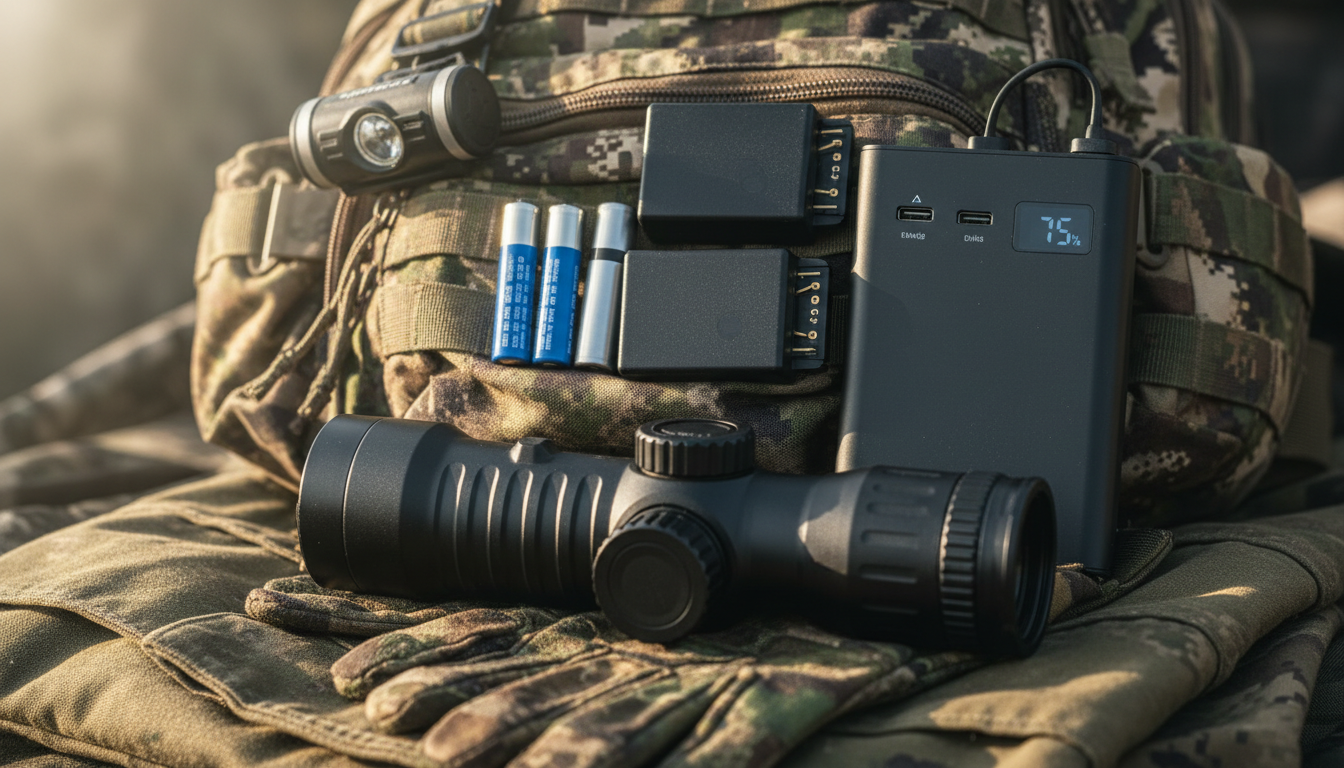
Battery life can end your hunt early if you don’t plan ahead. Digital thermal scopes typically have shorter battery life, averaging 4–8 hours. For all-night hog eradication or multi-stand predator sessions, carry at least two sets of spare 18650 batteries—they’re rechargeable, lightweight, and easy to find. An external power bank (10,000+ mAh) can also run many thermal scopes via USB-C for 10+ hours straight.
Cold weather kills battery performance faster than you’d expect. Keep your spares in an inside jacket pocket where body heat keeps them warm. And turn your scope off between stands when you’re not actively scanning—this alone can stretch your runtime by 30–40% on a long night.
Can you use a thermal scope on an AR-15 during the day?
Yes. Thermal scopes detect heat, not light, so they work in daylight, shade, and complete darkness. Some models include adjustable apertures to handle bright conditions without washing out the image.
Will a thermal scope hold zero on a semi-auto AR-15?
A quality thermal scope rated for semi-auto recoil holds zero without any issues. Make sure the mounting hardware is robust and recoil-resistant to handle the AR-15’s kick without loosening. Cheap mounts are usually the problem—not the scope itself.
What’s the best budget thermal scope for an AR-15?
In the $1,000–$2,000 range, scopes with 256×192 sensors deliver solid performance for close-range hog and varmint hunting. They won’t match premium units at distance, but they get the job done inside 200 yards.
Is thermal better than night vision for AR-15 hunting?
For most hunting—especially hog and predator control—thermal wins. Thermal and night vision solve different problems. Thermal excels at detection and tracking, while night vision can be better for navigation and detail in some environments. But thermal works through brush, fog, and pitch black conditions where night vision struggles.
Are thermal scopes legal for hunting in all 50 states?
Thermal optics are legal to own and use in all 50 states. However, some states restrict their use for hunting: California prohibits thermal for big game hunting, and several states ban nighttime hunting of certain species regardless of equipment. Always check your local regulations before heading out.
You’ve spent good money on your thermal scope. But here’s the thing—the scope itself is only part of the equation. The right accessories can turn a solid setup into a serious field advantage.
We’ve tested dozens of thermal scope add-ons over the years, from budget-friendly basics to premium upgrades. Some make a real difference. Others? Just add weight to your pack. We’re sharing the five accessories that actually matter when you’re hunting hogs at midnight or tracking predators across your property.

Let’s start with what holds everything together—your mount.
If you’re running multiple rifles or switching between thermal and day optics, a quick-detach mount saves you real time in the field. These mounts let you remove and reattach your thermal scope in seconds while maintaining your zero. No need to re-sight every time you make a switch.
Look for mounts made from aircraft-grade aluminum. They’re light enough not to weigh down your rifle but strong enough to handle recoil from magnum calibers. Height-adjustable options let you dial in the perfect eye relief and cheek weld for your specific rifle setup.
And here’s what most people overlook: cantilever mounts can be a game-changer if you’re working with limited rail space. They position your scope forward, giving you proper eye relief without running out of mounting real estate.
We’ve been using our Pixfra thermal scopes with quality QD mounts for years. The ability to move a thermal unit between rifles during a hunt is worth every penny.
Battery life can make or break your hunt. Period.
Most thermal scopes run 3-6 hours on internal batteries. That’s fine for a quick evening session, but what about all-night hog eradication or extended predator work? Running out of power when heat signatures start showing up is frustrating.
Carry at least two sets of spare batteries. Rechargeable 18650 lithium-ion batteries with 3000-3500mAh capacity work great as your primary power source. Keep CR123A lithium batteries as emergency backups—they’re lighter and have a longer shelf life.
External power banks changed how we hunt. A 10,000-20,000 mAh portable power bank can run your thermal scope for 10+ hours straight. Many modern scopes accept USB power input, making field charging dead simple. Mount the power bank to your rifle or toss it in your pack.
Fast chargers are handy between hunts. They’ll fully recharge batteries in 2-3 hours, perfect for back-to-back hunting days. Vehicle chargers let you top off batteries during long drives to hunting spots.
Pro tip: cold weather kills battery performance. Keep spares in an inside pocket where body heat maintains their temperature. We learned this the hard way during a December hog hunt.
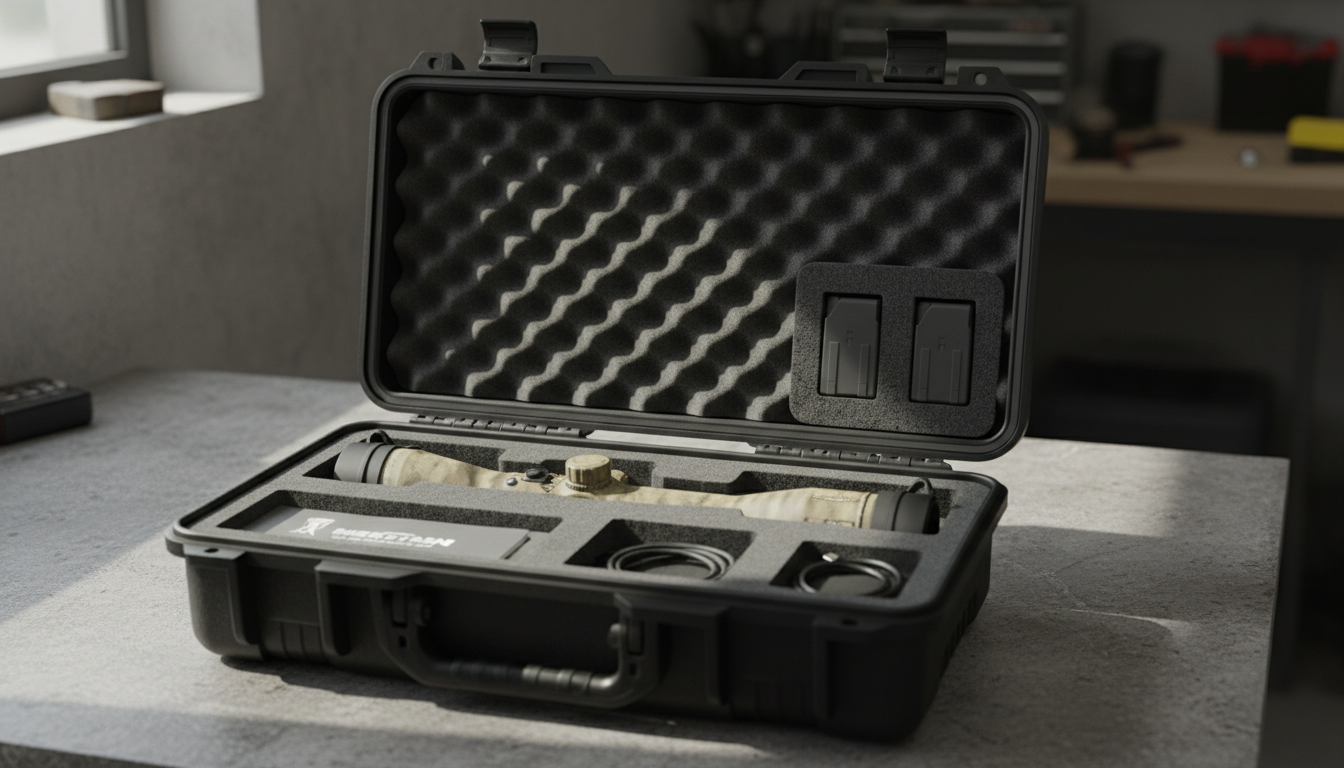
Thermal scopes aren’t cheap. Protect yours.
You need two types of cases—one for transport and one for field carry. Hard-shell cases with custom foam inserts protect your scope during vehicle transport or storage. Look for waterproof construction with pressure relief valves and lockable latches.
These cases should have enough space for your scope plus accessories like spare batteries, lens cleaning supplies, and charging cables. Adjustable foam dividers let you customize the layout for your specific gear.
For field work, tactical bags offer quick access with adequate protection. Good tactical bags feature padded compartments, MOLLE attachment points for adding gear, and weather-resistant materials. We prefer bags with adjustable dividers that can hold multiple items—your thermal scope, handheld monocular, batteries, and other essentials.
Quick-access holsters work well for active hunting situations. They attach to your belt or pack and provide immediate access while protecting the optics from bumps and weather. Choose holsters with secure retention systems so your scope doesn’t bounce around when moving through rough terrain.
The right case keeps dirt, moisture, and impacts from damaging sensitive thermal sensors and electronics. That’s money in your pocket long-term.
Here’s something many thermal scope users don’t realize—pairing your thermal with an infrared illuminator can improve target identification in certain situations.
While thermal scopes detect heat signatures and don’t need light, adding an IR illuminator creates better contrast in environments where background temperatures are similar to your target. Think warm summer nights when everything radiates heat at similar levels.
Our Pixfra IR Torch works seamlessly with thermal setups for exactly this reason. The extra illumination helps distinguish heat signatures that might otherwise blend together.
IR illuminators also help when you’re trying to positively identify targets before taking a shot. They fill in visual details that pure thermal imaging might miss, giving you confidence in target identification at 200+ yards.
Mount your IR illuminator offset from your scope to minimize shadowing. Most units run on rechargeable batteries and offer adjustable beam patterns—flood for close work, spot for distance.
Not everyone needs an IR illuminator. But if you hunt in warm climates or dense cover where temperature differences are minimal, it’s worth testing.
Video recording capability isn’t just about showing off your hunts—though that’s fun too.
Recording your thermal scope footage serves multiple practical purposes. You can review shot placement and animal behavior patterns. Study how targets move through your property. Share footage with hunting partners to plan better strategies.
Many modern thermal scopes like our Pixfra Sirius HD, Pegasus 2 LRF, and Draco models have built-in recording. But if yours doesn’t, external recording equipment connects via video output ports.
Look for recorders with adequate storage—32GB minimum, 64GB or more is better. Make sure the recording resolution matches your scope’s display output for best quality. Battery-powered units give you flexibility in the field without worrying about power cables.
Some hunters mount small action cameras to their scopes. This setup works but adds bulk. Integrated recording or direct-connect recorders keep your profile slimmer.
The real value shows up when you review footage. We’ve spotted patterns in hog movement we never noticed in real-time. That intel led to better stand placement and more successful hunts, as documented in our feral hog eradication case study.
Recording also provides evidence if you need to document property damage or predator activity for wildlife management purposes.
We said five accessories, but here’s a bonus that matters more than most people think.
Lens covers shield your expensive thermal optics from dust, moisture, scratches, and impacts. Flip-up covers work best for field use—they stay attached so you won’t lose them in the dark and open quickly when you need a shot.
Keep a basic cleaning kit handy. Thermal lenses require special care. Use microfiber cloths designed for optics and lens cleaning solution made for coated lenses. Never use paper towels or shirt sleeves—they’ll scratch coatings.
Carry lens cleaning supplies in your field bag. A dirty lens degrades thermal image quality fast. Quick wipe-downs between stands keep your view crisp.
Anti-fog treatments help in humid conditions. Some hunters skip this, then wonder why their view clouds up during temperature changes. Preventive maintenance beats dealing with problems in the field.
The right accessories multiply your thermal scope’s effectiveness without breaking the bank.
Start with the basics—a quality mount, spare batteries, and protective storage. Add IR illumination and recording capability as your needs and budget allow. Don’t skip lens protection and cleaning supplies.
Not every accessory works for every hunter. Match your accessories to how and where you hunt. Someone running predator control all night needs different gear than someone taking quick evening hog hunts.
We’ve found these five accessory categories make the biggest real-world difference. They protect your investment, extend your operating time, and help you make better shots. That’s what counts when you’re serious about thermal hunting.
