
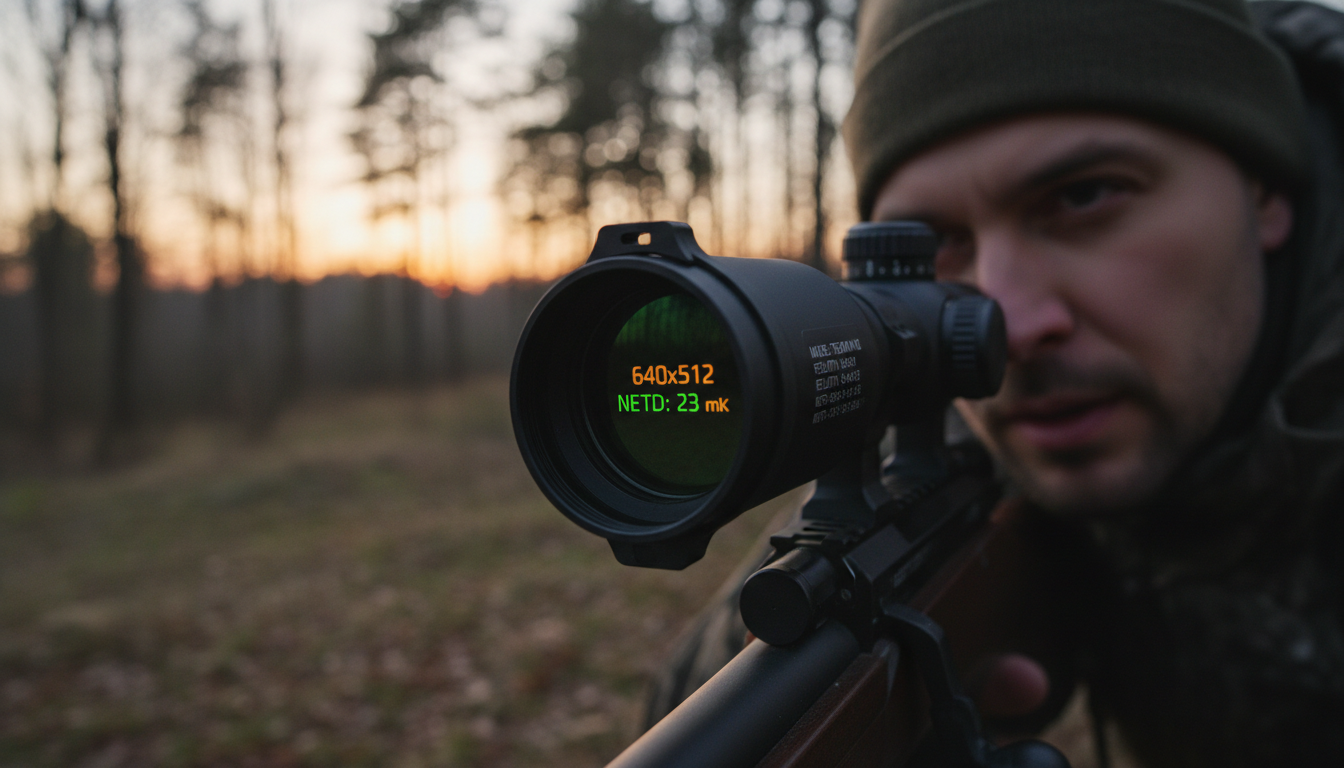
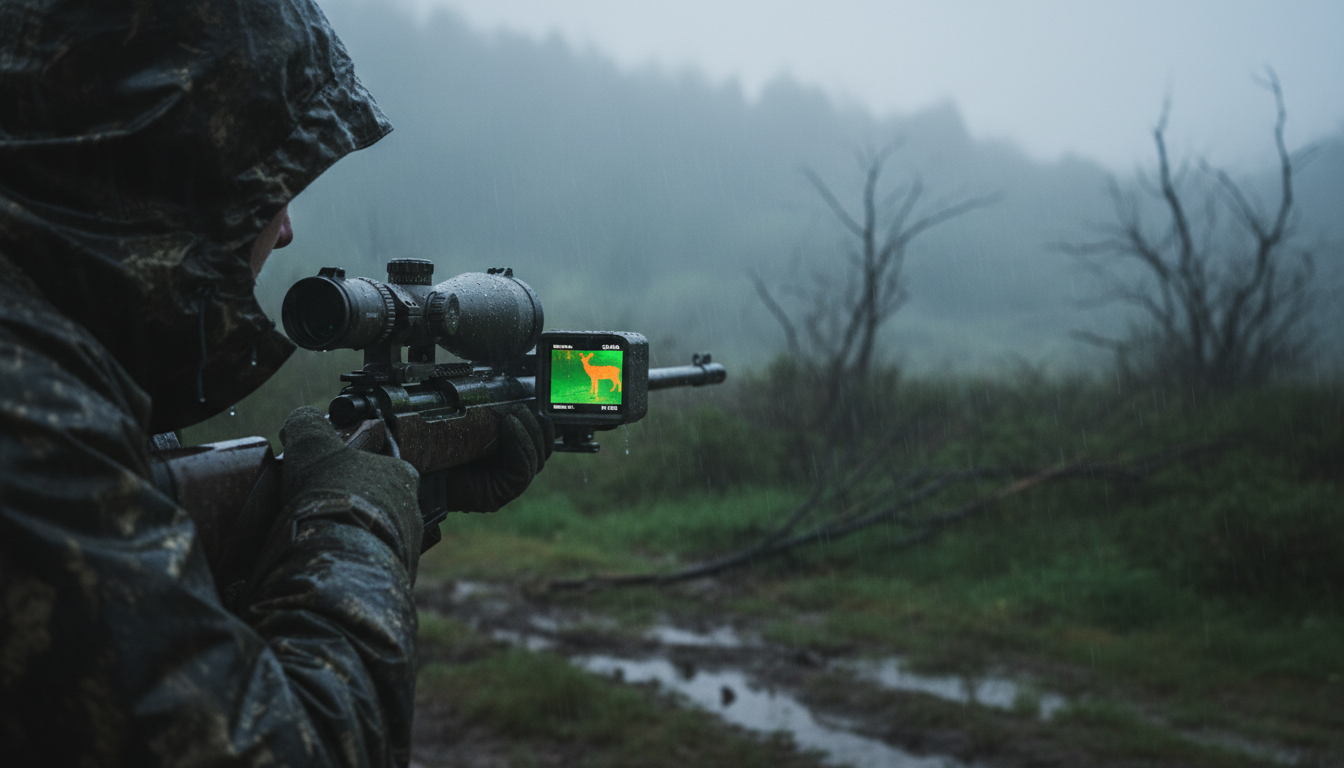
When you’re shopping for a thermal scope, the spec sheet can feel like alphabet soup. 640×512 resolution. 12µm pixel pitch. NETD values below 25mK. What do these numbers actually tell you about how the scope performs when you’re glassing for hogs at 300 yards or scanning timber for coyotes?
We’ve tested thermal optics in just about every condition you can imagine—from foggy mornings to bone-dry desert hunts. And here’s what we’ve learned: image quality isn’t defined by a single number but rather the result of how several specifications work together. You can’t just pick the highest resolution and call it done.
Let’s cut through the marketing speak and talk about what actually matters when you’re trying to spot game in the dark.

Thermal sensor resolution like 640×512 means the sensor captures 640 pixels horizontally and 512 pixels vertically—that’s 327,680 total pixels. Think of it like the megapixels on your phone’s camera. More pixels capture more thermal data points across the scene you’re viewing.
Common resolutions you’ll see include 384×288 (110,592 pixels), 640×512 (327,680 pixels), and high-end models at 1024×768 or even 1280×1024. A 640×512 sensor provides approximately 3 times more pixels than 384×288, but more pixels doesn’t automatically mean a proportionally better hunting experience.
Higher resolution, such as 1024×768, records more thermal data, resulting in sharper outlines, cleaner contours, and better object separation, especially when zooming in. But you’ll pay for those extra pixels—both in price and battery life. We’ve seen real results from thermal scopes in field conditions, and resolution is just one piece of the puzzle.
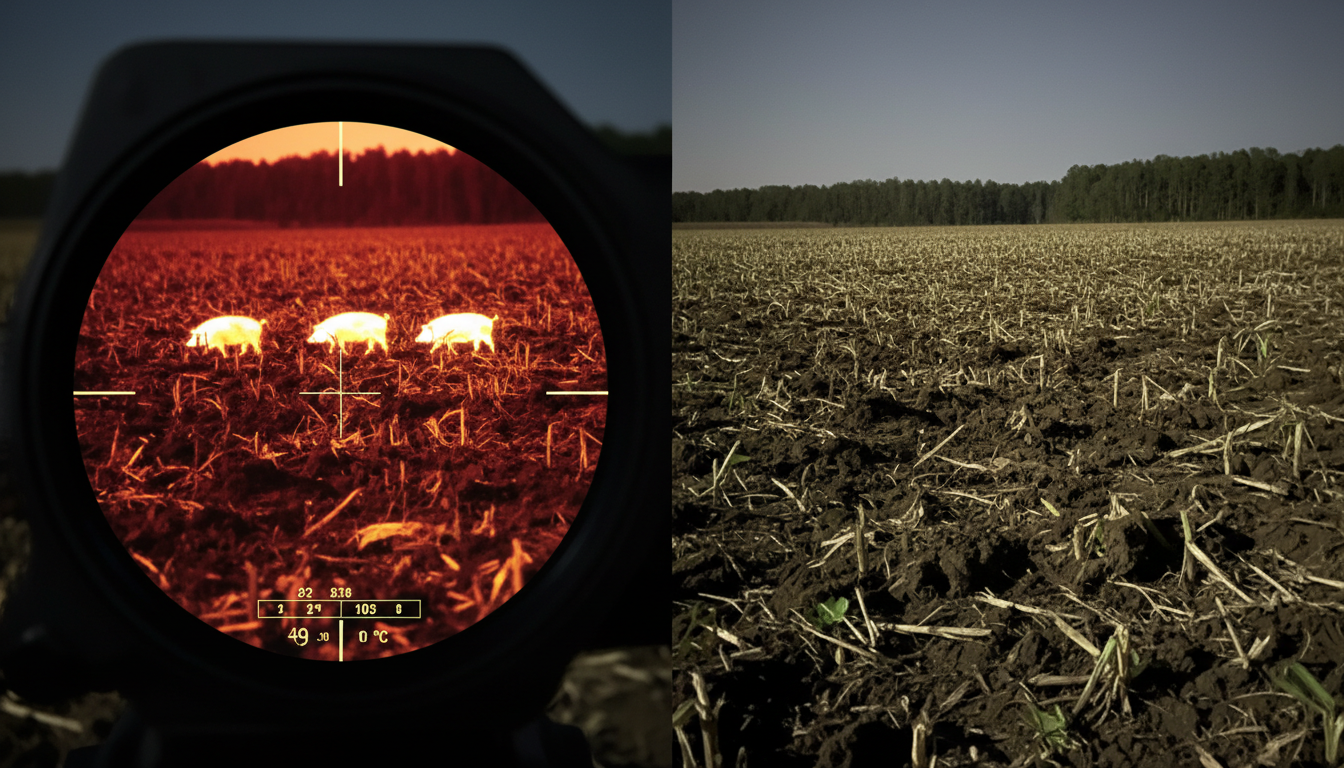
For most hunters, a 384×288 sensor handles close to mid-range work just fine. You’ll spot that coyote at 200 yards without issue. But for open country where you’re glassing at 850 yards, the 640×512 delivers crisp, well-defined images where you can clearly see the animal’s posture and movement.
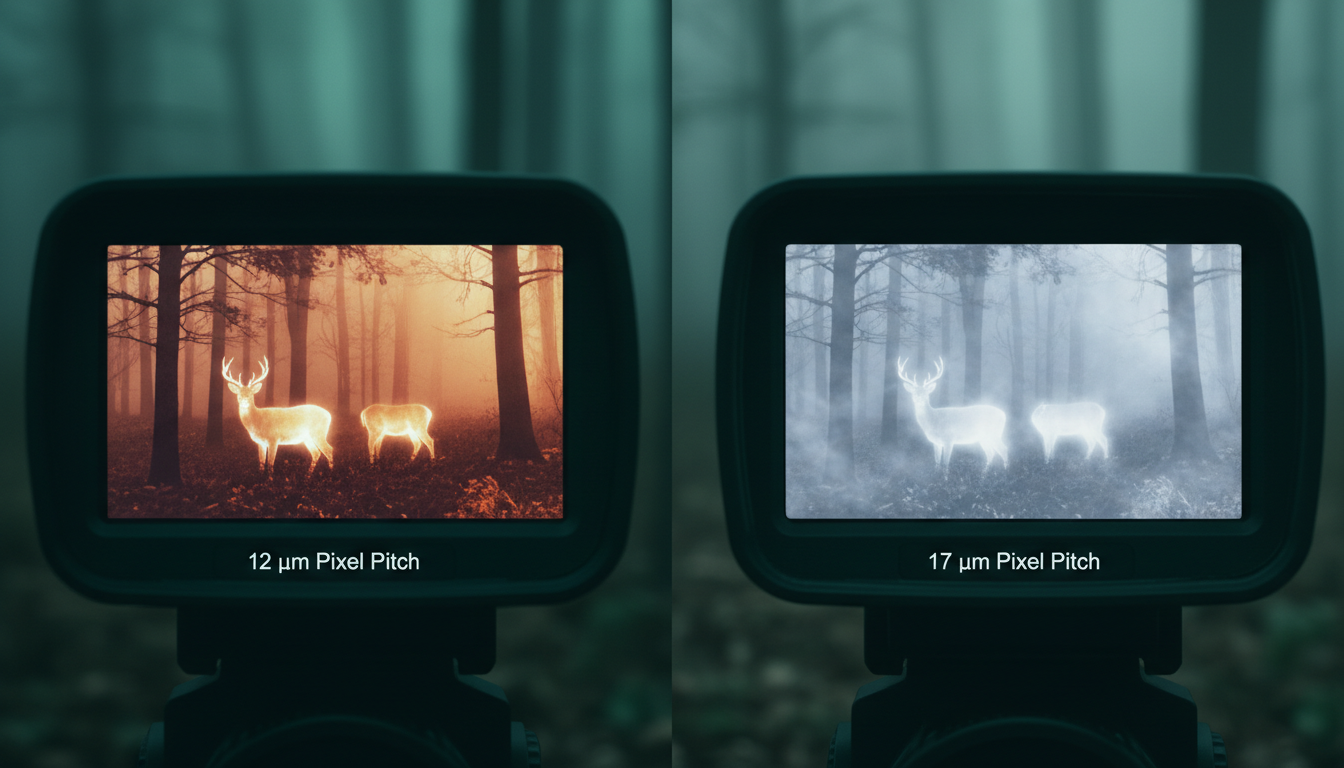
Pixel pitch refers to the size of each individual pixel on the sensor, measured in micrometers, typically 12µm or 17µm. It’s the distance between the centers of two pixels of a microbolometer, normally 12µm or 17µm in thermal imaging sensors.
And here’s where it gets interesting: smaller pixel pitch like 12µm means pixels are packed more closely together, allowing for higher resolution images and better detection of smaller objects, while larger pitch like 17µm means fewer pixels per unit area but potentially better sensitivity to thermal radiation.
Think of pixel pitch like bucket size. The larger the pixel and its area, the more Long Wavelength Infrared radiation it can receive and the higher the sensitivity of the entire thermal imaging sensor. A 17µm pixel collects more thermal energy than a 12µm pixel, which translates to better performance in challenging conditions.
Sensors with the same 640×480 resolution but different pixel sizes—17 microns versus 12 microns—result in better sensitivity for the larger pixel (NETD <25 mK vs. NETD <40 mK). That sensitivity difference shows up when you’re hunting in fog, rain, or high humidity—exactly when you need your scope to perform.
A 384×288 sensor at 17µm with NETD <25 mK can show low-contrast scenes in more detail than a 640×480 sensor at 12µm with NETD <40 mK. That seems backwards, right? More pixels should mean better images.
But thermal imaging doesn’t work like regular photography. Smaller 12µm pitch offers a sharper image at good distance when looking for small hot targets quite far from the observer, but for a more versatile device, 17µm will perform better.
We typically recommend our Sirius HD or Pegasus 2 LRF models for hunters who need that balance of resolution and real-world performance. These units consider the full system—not just one spec.
The pixel pitch affects more than just sensitivity. It also drives your base magnification and the physical size of the sensor. Pixel pitch directly influences base magnification, image quality and thermal imager sensitivity. You can’t optimize one factor without affecting the others.
You’ll see NETD (Noise Equivalent Temperature Difference) listed on every thermal scope spec sheet. NETD quantifies the sensitivity of a thermal sensor, measured in millikelvins (mK) with typical specifications like <25 mK or <20 mK—the lower the NETD value, the higher the sensor sensitivity and superior the image quality.
NETD measures how sensitive the sensor is to tiny differences in heat, and a lower number means the scope can see smaller temperature differences—like spotting a rabbit against warm ground.
In practical terms? Thermal scopes with higher NETD values tend to struggle in rain, fog, snow, and high humidity, producing noisy, low-contrast images, while a low-NETD thermal scope excels under these challenges. When you’re hunting at dawn and everything’s the same temperature, NETD makes the difference between detecting game and staring at thermal mush.
The best production batches of sensors with 17µm pixel pitch achieve NETD less than 25 mK, while 12µm sensors achieve less than 40 mK. That’s not marketing—it’s physics. Bigger pixels collect more thermal radiation, which means better sensitivity.
Let’s be honest about what these specs mean when you’re actually hunting. Resolution is just one piece of the puzzle—lens quality, sensor type, refresh rate, thermal sensitivity (NETD), and pixel pitch all matter significantly.
We’ve watched hunters obsess over getting a 640×512 scope only to be disappointed when a well-designed 384×288 unit outperforms it in fog. Two thermal devices can share identical specifications yet deliver noticeably different images because image quality depends on the entire imaging system—lens quality, display resolution, and image algorithms all influence the final result.
Battery life is another consideration nobody mentions in the marketing materials. 640×512 sensors consume more power than 384×288 units—maybe 20-30% faster battery drain—which matters on extended hunts. When you’re four hours into a hog eradication session, that extra battery capacity keeps you in the game.
Detection range matters more than pure resolution for long-distance work. Detection range is king for long distance—sensor doesn’t really matter that much for long range, but pixel pitch and focal length does. You need the right combination of optics, sensor size, and processing to spot game at distance.
Our Draco and Arc LRF models balance these factors for serious hunters who need dependable performance across varying conditions and ranges.
So what resolution and pixel pitch should you actually get? It depends on how and where you hunt.
For close to mid-range work (under 300 yards) in varied terrain, a 384×288 sensor with 17µm pitch gives you excellent versatility. You’ll spot game quickly, handle bad weather well, and save money for better optics or an IR torch to extend your effective range even further.
Quality 640×512 thermal scopes run $2,800-$5,500+, while 384×288 equivalents cost $1,200-$2,500—nearly double the investment, which is a deal-breaker for hobbyist hunters on a budget.
For open country hunting where you’re regularly engaging targets beyond 400 yards, the higher resolution pays off. The extra pixels mean finer detail—you can distinguish between a coyote and a fox at distance and read body language to determine if the animal is alert, feeding, or bedded. That information changes how you approach your stalk.
If you need a thermal unit able to properly work in different scenarios, with different weather conditions at different distances, go to 17µm with a low NETD and lens aperture of f1.0. That’s the all-around setup that handles whatever conditions you encounter.
A 640×480 sensor with 12µm pixels and NETD below 25 mK delivers both fine detail and strong contrast, but only when the optics and processing are equally well-tuned. You can’t just bolt a mediocre lens onto a great sensor and expect magic.
Display resolution matters too. Display resolution definitely should not be lower than sensor resolution—the display must not degrade the image produced by the sensor, and higher display resolution allows more quality and more complex overlay graphics. You need a screen that can actually show you the detail your sensor captures.
Refresh rate affects how smooth the image looks when tracking moving targets. Most thermal scopes run at 30Hz or 60Hz. The refresh rate tells you how many times per second the screen updates—most scopes are either 30Hz or 60Hz, with 60Hz giving you very smooth, fluid image especially helpful for tracking a running animal.
At Pixfra, we design every thermal scope as a complete imaging system. The sensor resolution and pixel pitch matter, but so do the germanium lens coatings, the signal processing algorithms, and how the whole package handles heat buildup during extended use. It all works together.
Sensor resolution and pixel pitch are just two pieces of what makes a thermal scope perform in the field. True thermal image quality is created through synergy between resolution, pixel pitch, and NETD, refined by proprietary image processing and system-level calibration.
You don’t need to be a thermal imaging engineer to make a smart choice. Focus on how you’ll actually use the scope. Close to mid-range hunting in varied weather? A 384×288 sensor with 17µm pitch and low NETD gives you versatility and value. Long-range work in open country? The extra pixels of a 640×512 sensor help you identify targets at distance.
And remember: the best thermal scope is the one that performs when you need it. Specs on paper don’t bag game—reliable performance in rain, fog, and darkness does. That’s what we build into every unit we design.
What’s more important: sensor resolution or pixel pitch?
Neither is “more important”—they work together. Higher resolution (like 640×512) gives you more detail and better zoom quality. Pixel pitch affects sensitivity and versatility. The main difference lies in resolution versus sensitivity, with 12µm sensors offering higher resolution and 17µm sensors potentially offering better sensitivity. Match the specs to your actual hunting conditions and distances.
Why do 17µm sensors perform better in fog and rain?
Larger pixels capture more Long Wavelength Infrared radiation, which increases the sensitivity of the entire thermal imaging sensor. When conditions are challenging and thermal contrast is low, that extra sensitivity lets you detect game that smaller pixels might miss. It’s the difference between seeing a heat signature and seeing nothing at all.
Is a 640×512 thermal scope worth the extra cost?
It depends on your hunting style. For long-range work at 850 yards, 640×512 provides crisp, well-defined images, while 384×288 shows the same target as visible but pixelated with fine details lost. For most hunters working under 300 yards, a quality 384×288 scope offers better value. Save the money for better glass or accessories.
What NETD should I look for in a thermal scope?
The ideal NETD range falls between <25mK and <40mK—a NETD below 25mK provides exceptional sensitivity suitable for highly detailed target detection at longer ranges, while values above 40mK may result in less precise thermal imagery. Lower is always better, but don’t sacrifice other features chasing the absolute lowest NETD number.
Can I get good performance from a budget thermal scope?
Yes, if you pick the right specs for your needs. Devices with 384×288px are the most popular in the market as they’re more affordable than top-line 640×512 thermal devices but still allow detection range out to 1800m depending on lens size. Focus on units that balance resolution, pixel pitch, and NETD rather than maxing out one spec at the expense of others.
Your thermal scope is a serious investment, and keeping that lens in top shape makes all the difference between spotting your target and missing out. We’ve seen too many hunters damage their optics by using the wrong cleaning methods, and honestly, it doesn’t have to be that complicated.
Think of your thermal lens like the windshield on your truck. A little dust won’t kill you, but grime and fingerprints? That’ll mess with your clarity fast. But here’s the thing—thermal scope lenses aren’t regular glass. They’re made from germanium or other specialized materials with delicate coatings that need careful handling.
We’ve put together this guide to show you exactly how we maintain our thermal optics at Pixfra. Whether you’re running our Sirius HD, the Pegasus 2 LRF, or another thermal scope, these methods will keep your glass clean and your images sharp.
Fingerprint marks, water splashes, dirt, and dust can significantly impair your scope’s functionality, leading to subpar results.And we’re not just talking about slightly fuzzy images—we’re talking about losing contrast, missing heat signatures, and potentially blowing a hunt you’ve been planning for weeks.
The germanium lenses in thermal scopes cost way more than regular optical glass. Clean your thermal camera lens only when strictly necessary, and only when there is visible dirt or fingerprints. Over-cleaning can actually wear down the anti-reflective coating faster than a little dust ever would.
Let’s start with what’ll wreck your optics. We’ve seen people make these mistakes, and they’re expensive ones.
Never use your shirt, paper towels, or handkerchiefs to wipe the lens, as they can scratch the surface.Seriously, resist the urge. Your cotton t-shirt feels soft, but it’s basically sandpaper compared to proper lens cleaning materials.
DO NOT clean with ammonia-based solutions—this will degrade the special coating on the lens.Skip the Windex and household glass cleaners. They’re designed for windows, not precision optics with specialized coatings.
Don’t wipe a dusty lens without removing loose particles first. Those tiny bits of sand or grit act like little knives when you drag them across the coating.
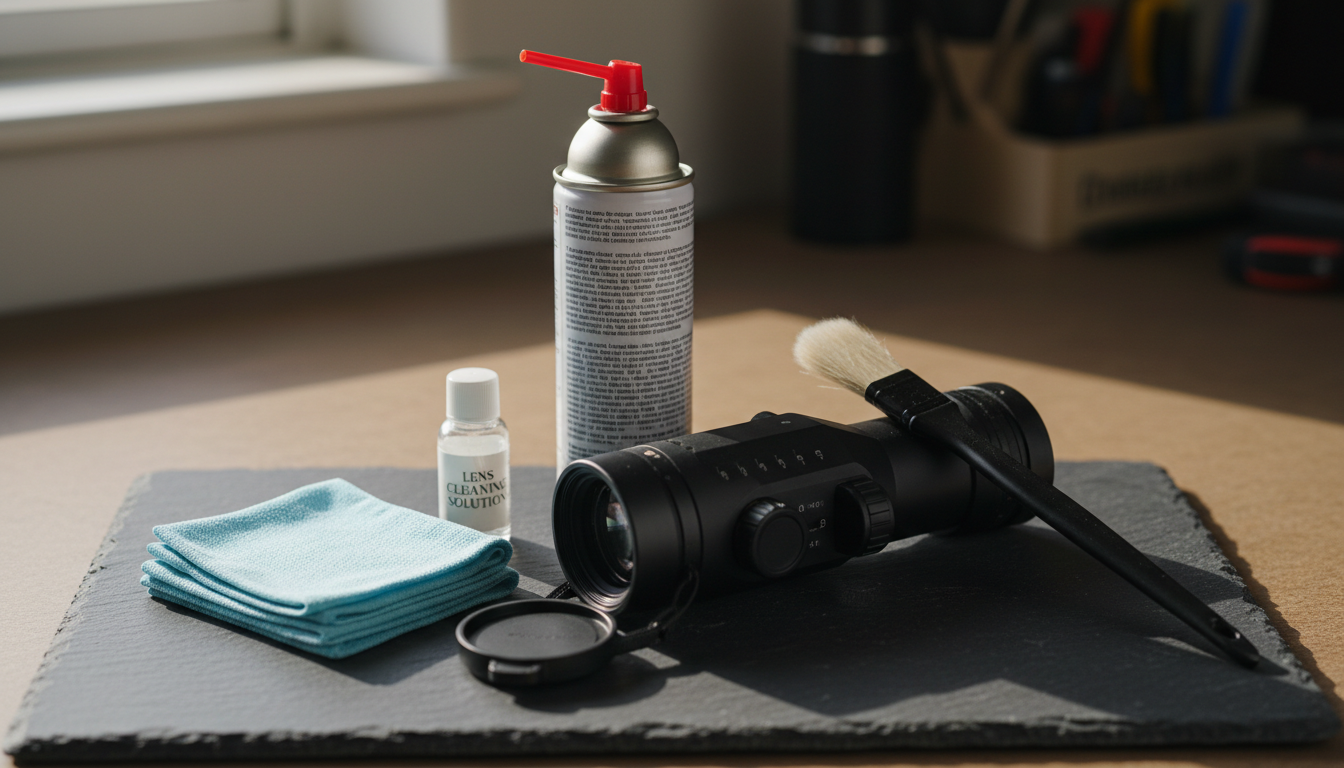
You don’t need a ton of gear, but you do need the right stuff. Here’s what should be in your cleaning kit:
Compressed air or rocket blower: Use compressed air aerosols to blow off loose dust.A rubber rocket blower works great too and won’t risk that cold blast that canned air sometimes gives.
Microfiber cloths: Not just any cloth—get optical-grade microfiber designed for camera lenses or precision optics. These won’t leave lint or scratch delicate coatings.
Lens cleaning solution: Use lens cleaner that is 96% isopropyl alcohol, or a commercial lens cleaner with at least 30% isopropyl alcohol.Stick to solutions made for coated optics.
Soft lens brush: A brush with ultra-fine bristles helps remove stubborn dust without touching the lens with your fingers.
Cotton swabs or lens tissue: For detailed work on stubborn spots, but use sparingly.
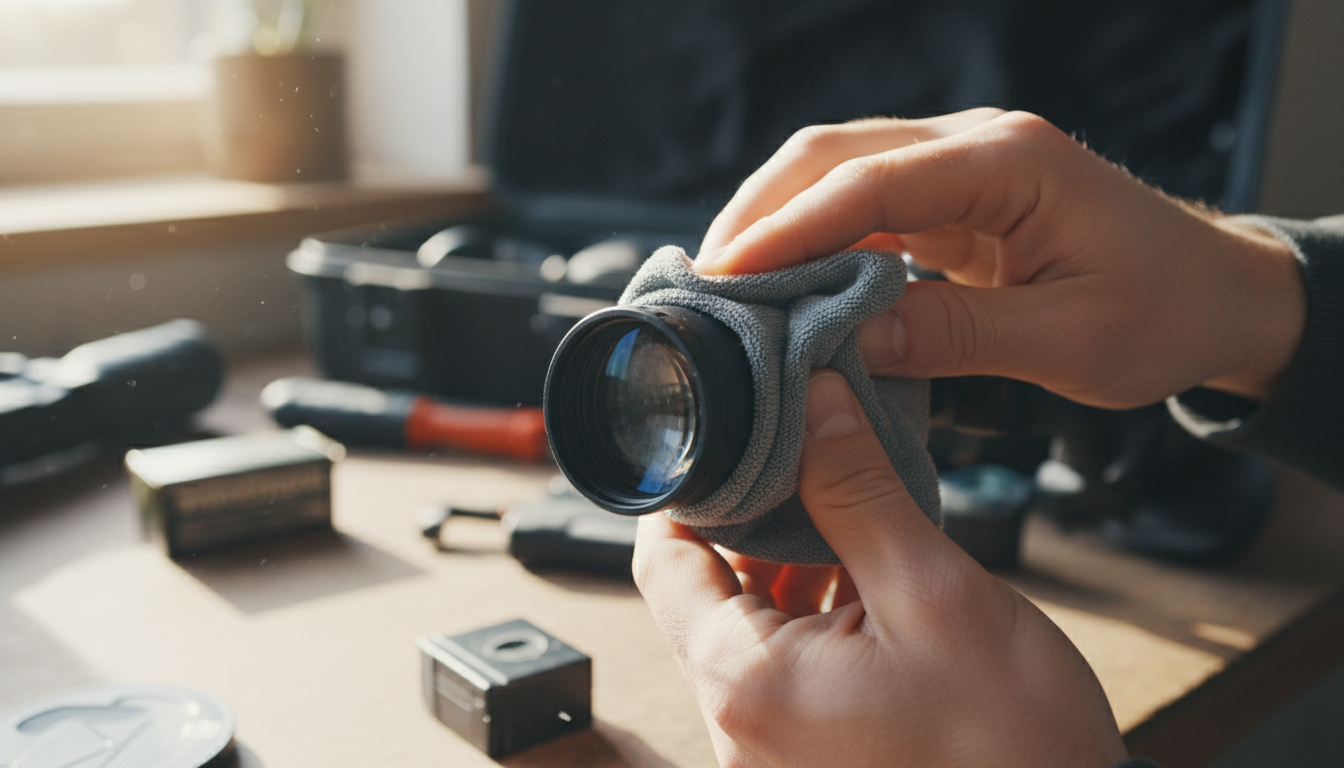
Here’s how we clean thermal scope lenses the right way. Follow this order—skipping steps is where people get into trouble.
Step 1: Remove loose debris
Never wipe a dusty lens directly. Loose particles of dust or sand can scratch the surface. Always start with a gentle air duster or a soft, optical brush to remove dirt without friction.
Point the lens downward so gravity works with you, not against you. Give it a few puffs with your air blower or compressed air from about 6 inches away. Watch those particles fall away.
Step 2: Brush away remaining dust
A soft brush removes dust before using a microfiber cloth or specialized wipes.Use gentle, sweeping motions from the center outward. Don’t press hard—let the brush do the work.
Step 3: Apply cleaning solution
If you still see smudges or fingerprints after steps 1 and 2, it’s time for liquid cleaner. Never spray directly on the lens. Instead, put a small amount of cleaning solution on your microfiber cloth.
Step 4: Wipe the lens
Wipe from center of lens to outer edges using a rolling motion that allows fresh cloth to contact the lens. Use gentle, circular motions and let the cloth glide across the surface. You’re not scrubbing a pan—you’re caressing precision optics.
Step 5: Final inspection
Hold the scope up to light and check for streaks or remaining spots. If you see any, repeat step 4 with a clean section of your cloth.
Cleaning is important, but prevention saves you way more time. Here’s what we do to keep our lenses cleaner longer.
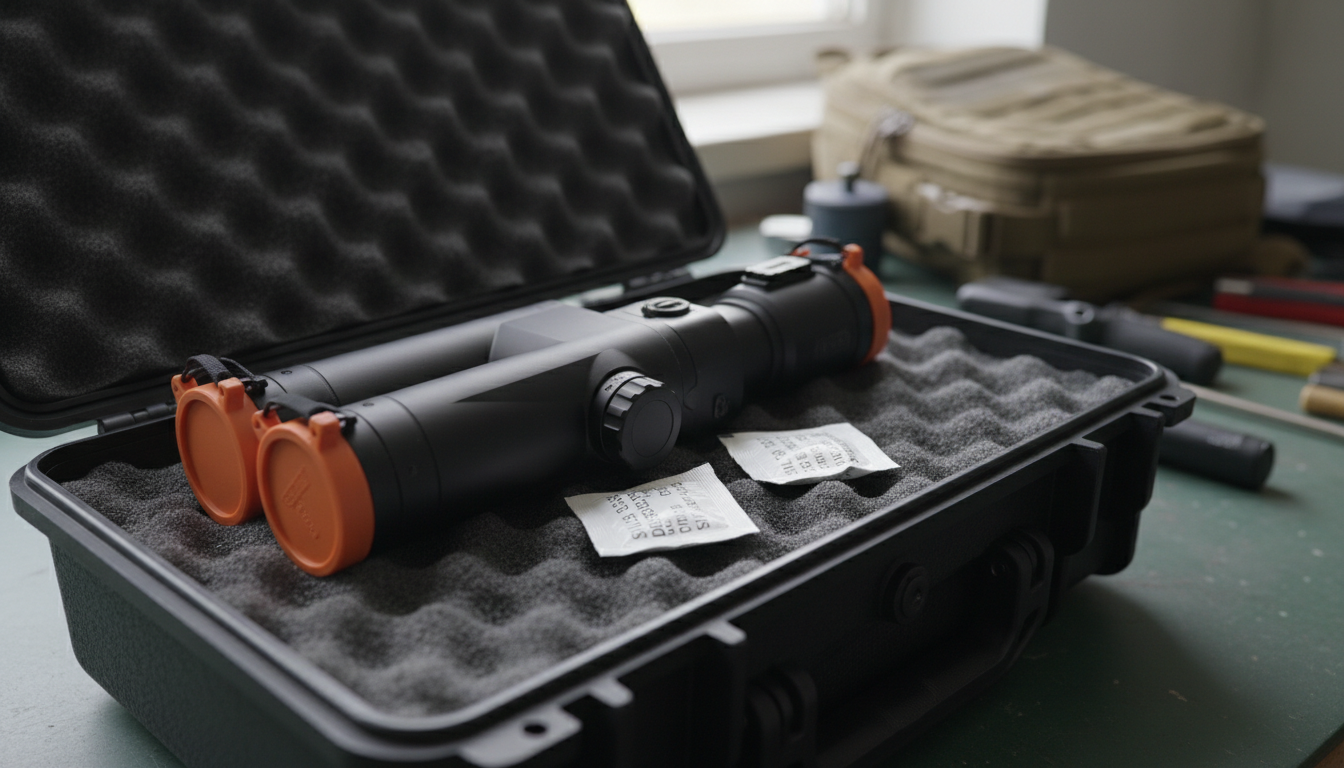
During usage, always keep the lens covers closed to shield against scratches, dust, and debris. Those flip-up lens caps exist for a reason. Use them whenever you’re moving through brush or not actively glassing.
Store your thermal scope in a dedicated case with fabric cases with foam inserts or plastic or metal cases equipped with soft elements. To combat dampness, add silica gel bags inside the case. Moisture is the enemy of electronics and optics. A few desiccant packs are cheap insurance.
Keep your scope away from extreme temperature swings when possible. Even waterproof scopes can suffer from internal condensation if exposed to rapid temperature changes. If you’re going from a warm truck to freezing temps, let your scope acclimate gradually.
Don’t forget about the rest of your thermal scope. Wipe the exterior surfaces of metal and plastic parts off dust and dirt with a cotton cloth. A slightly damp cloth works fine for the housing—just keep moisture away from ports and seals.
Check rubber eyecups and armor for cracks or wear. These protect the internal electronics from moisture and impacts. If you spot damage, address it before it becomes a bigger problem.
Clean around buttons, dials, and adjustment knobs with a soft brush or cotton swab. Dirt buildup in these areas can affect functionality over time.
Here’s where people often go wrong—they clean too much or not enough.
Clean your lens whenever you notice dirt or smudges affecting your visibility, but avoid excessive cleaning to prevent unnecessary wear. We typically give our scopes a light cleaning after every hunt and a more thorough cleaning monthly during heavy use.
Clean the lens lightly after every hunt and perform a deeper cleaning if exposed to mud, rain, or heavy dust.If you’ve been in nasty weather or dusty conditions, don’t wait—clean it when you get home.
Store in a dry, shaded, and stable-temperature environment.We keep our thermal scopes in climate-controlled areas, away from windows and heat sources.
Check and remove the battery if storing long-term (set to 40–60% charge).This prevents battery degradation and potential leakage that could damage your scope’s internals.
Before the hunting season starts, run a pre-season check. About one month before the season, run a pre-season checklist: fully charge and test batteries, inspect the housing and rubber seals, clean and examine the lens, update firmware, check sensor calibration and dead pixels, verify mounts/accessories, and do a real-world night field test.This ensures you’re ready when it counts.
We’ve seen these errors too many times:
Over-cleaning: Clean the lens gently – excessive cleaning may wear away the anti-reflective coating, causing more transmission loss than a little dust. A few dust specks won’t hurt image quality as much as worn coatings will.
Using rough materials: Avoid harsh chemicals that can damage sensitive coatings. Never wipe a dry, dusty lens, as this can scratch the surface.
Ignoring the eyepiece: Don’t forget to clean the eyepiece lens too. Smudges on the rear lens affect image quality just like dirt on the objective lens.
Rushing the process: Take your time. A rushed cleaning job risks scratching or streaking the lens.
Sometimes you need expert help. If you notice persistent image quality issues after cleaning, declining performance, or visible damage to lens coatings, it’s time to contact the manufacturer or an authorized service center.
Most quality thermal scopes come with multi-year warranties. Don’t try to disassemble or deep-clean internal components yourself—that’ll void your warranty faster than anything.
Taking care of your thermal scope lens doesn’t require special skills or expensive equipment. It just takes the right tools, proper technique, and a little patience. Start with air to remove loose debris, use appropriate cleaning solutions, and always work gently.
A few minutes of attention after each outing can add years to your device’s lifespan and keep your vision clear in every condition. We’ve seen thermal scopes last 10+ years with proper care and maintenance.
Whether you’re using Pixfra’s Arc LRF for long-range work or the Draco for close-in hunting, these cleaning methods will keep your optics performing at their best. Pair your thermal scope with our IR Torch for even better results in the field.
Remember, clean optics mean better detection, clearer images, and more successful hunts. Take care of your gear, and it’ll take care of you. For more real-world thermal scope performance data, check out our feral hog eradication case study showing how proper equipment maintenance contributed to successful results.
Can I use regular eyeglass cleaner on my thermal scope lens?
No, avoid regular eyeglass cleaners on thermal scopes. Thermal lenses use germanium or specialized materials with unique coatings that react differently than standard glass. Use lens cleaners specifically designed for optical instruments with at least 30% isopropyl alcohol, or 96% isopropyl alcohol solutions. Regular eyeglass cleaners may contain additives that damage thermal scope coatings and reduce image quality over time.
How do I remove fingerprints from my thermal scope lens without causing damage?
First, blow away any loose dust with compressed air or a rocket blower. Then apply a small amount of optical-grade lens cleaner to a microfiber cloth—never directly on the lens. Gently wipe from the center outward using circular motions with minimal pressure. The key is removing particles first before any wiping, which prevents scratching the delicate germanium surface.
Is it safe to clean my thermal scope in cold weather or should I wait?
You can clean your thermal scope in cold weather, but bring it inside first and let it acclimate to room temperature for 15-20 minutes. Rapid temperature changes can cause condensation inside the scope. Once acclimated, clean normally using your standard process. Never apply liquid cleaners to a frozen lens, as this can cause thermal shock and potentially crack coatings.
What should I do if moisture gets inside my thermal scope?
If you notice internal moisture or fogging, stop using the scope immediately. Place it in a warm, dry location with desiccant packs nearby, but don’t expose it to direct heat. Leave lens caps off to allow air circulation. If moisture persists after 48 hours, contact the manufacturer or an authorized service center—internal moisture often indicates seal failure that requires professional repair.
How can I tell if I’ve damaged the coating on my thermal lens?
Coating damage typically appears as permanent marks, scratches, or areas where the image looks degraded even after cleaning. You might notice reduced contrast, haziness, or rainbow-like patterns on the lens surface when viewed at an angle. If cleaning doesn’t improve image quality and you see visible marks on the lens, the coating may be compromised. Professional inspection can confirm coating damage and determine if repair or replacement is needed.

Walk into any hunting camp these days and you’ll hear someone talking about thermal scopes. But along with the growing popularity of these devices comes a whole lot of misinformation. We’ve heard it all—from claims that thermals can see through walls to the belief they only work at night.
Look, we get it. Thermal technology sounds like something straight out of a sci-fi movie. And honestly, that’s part of the problem. Hollywood has done a number on public perception, creating expectations that don’t match reality. After years of working with hunters and testing thermal devices like our Sirius HD and Pegasus 2 LRF, we’ve identified the most persistent myths that need debunking.
Here’s the thing—thermal scopes are amazing tools. But they work best when you actually understand what they can and can’t do. Let’s clear up the confusion.
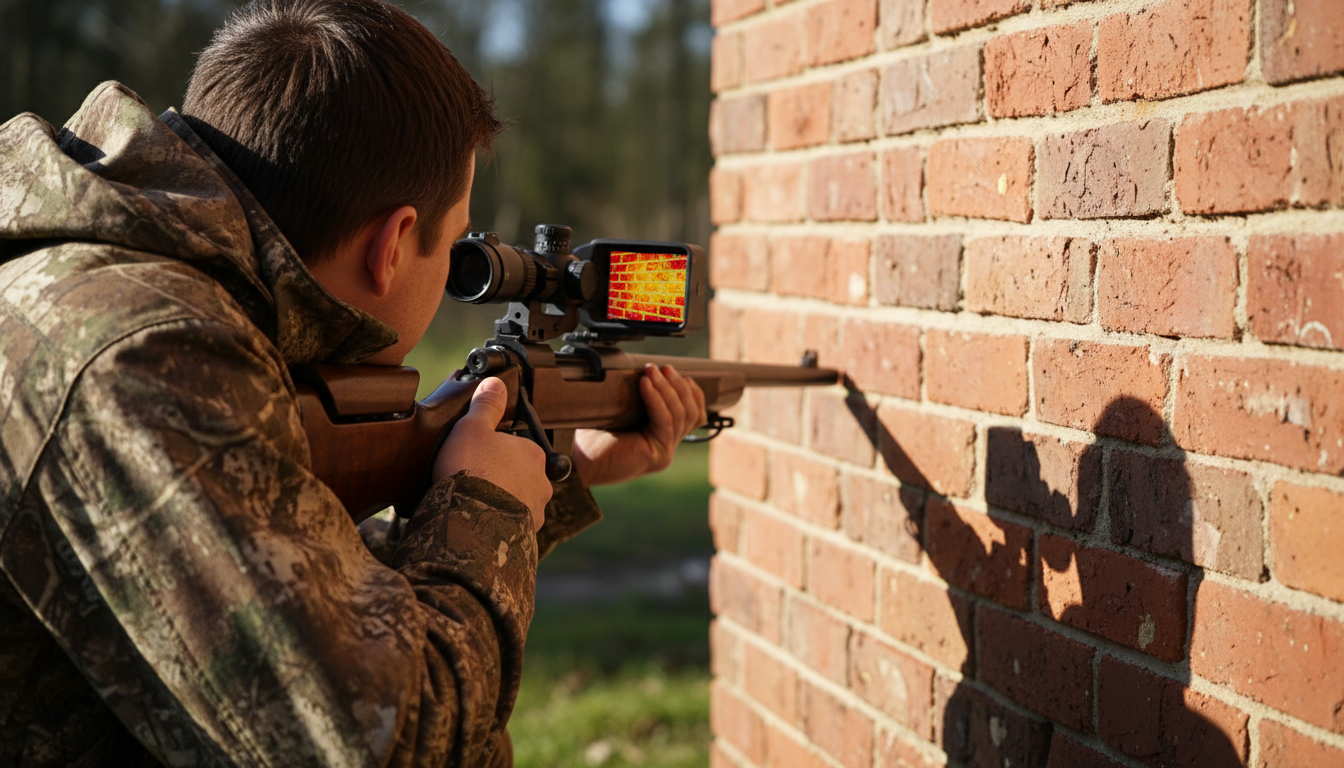
This one tops the list for a reason. It’s probably the most common misconception out there, and it’s completely false.
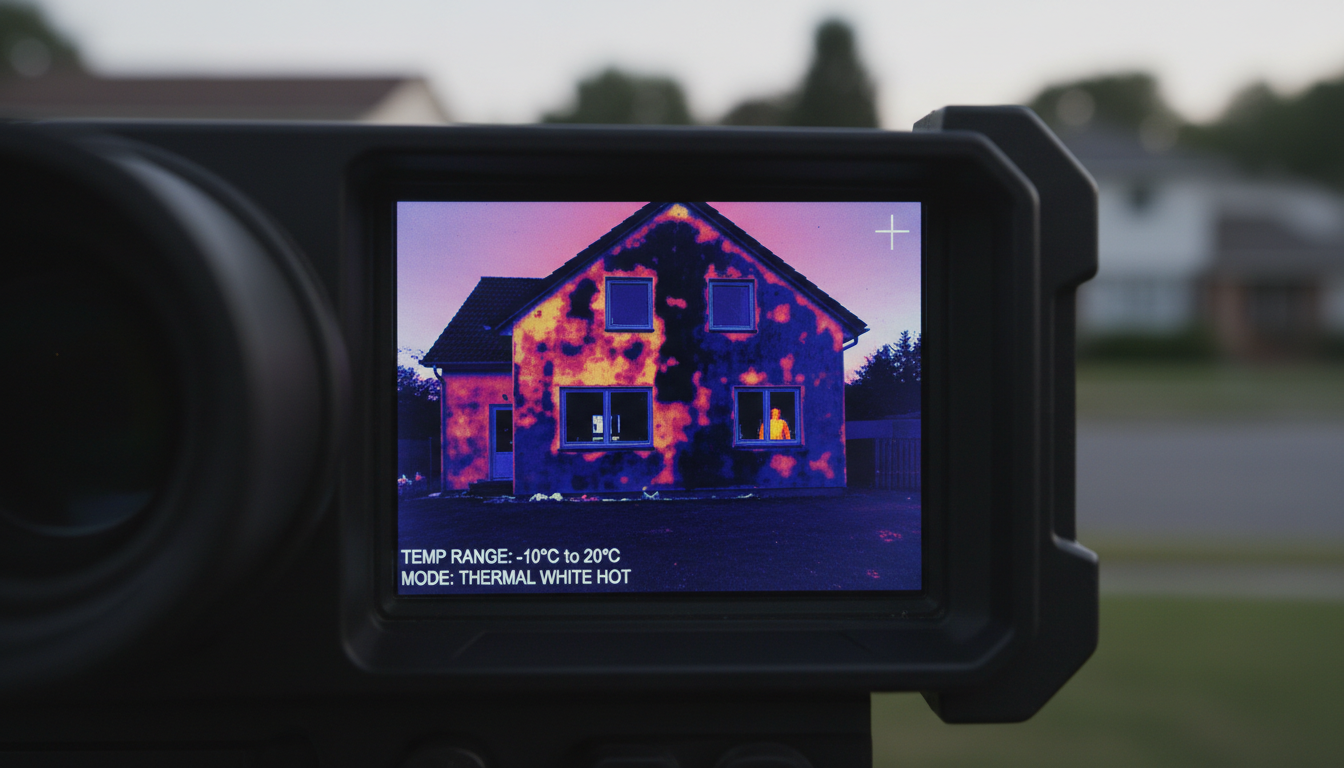
Thermal cameras detect infrared radiation—essentially heat energy—emitted from surfaces. They can’t penetrate solid materials like walls, doors, or concrete. When you point a thermal scope at a wall, you’re seeing the surface temperature of that wall, nothing more. A wall at uniform temperature will show up as a blank thermal image, even if there’s a person standing right behind it.
Think of it this way: thermal imaging detects surface heat, not X-rays. The infrared radiation that thermal sensors pick up doesn’t pass through most solid materials. In fact, some materials that are transparent to visible light—like glass and water—appear completely opaque when viewed through thermal imaging.
Now, there’s a tiny kernel of truth buried in this myth. If someone places their hand against a thin wall for an extended period, you might detect a slight temperature difference on the surface. But that’s just the wall warming up—you’re still not seeing through it. The same principle applies when we’re out in the field with our Draco thermal scope. It’ll spot a hog behind brush because the heat signature passes through vegetation gaps, not because it’s seeing through solid objects.
We hear this one constantly, and it drives us crazy because it limits how people use these tools.
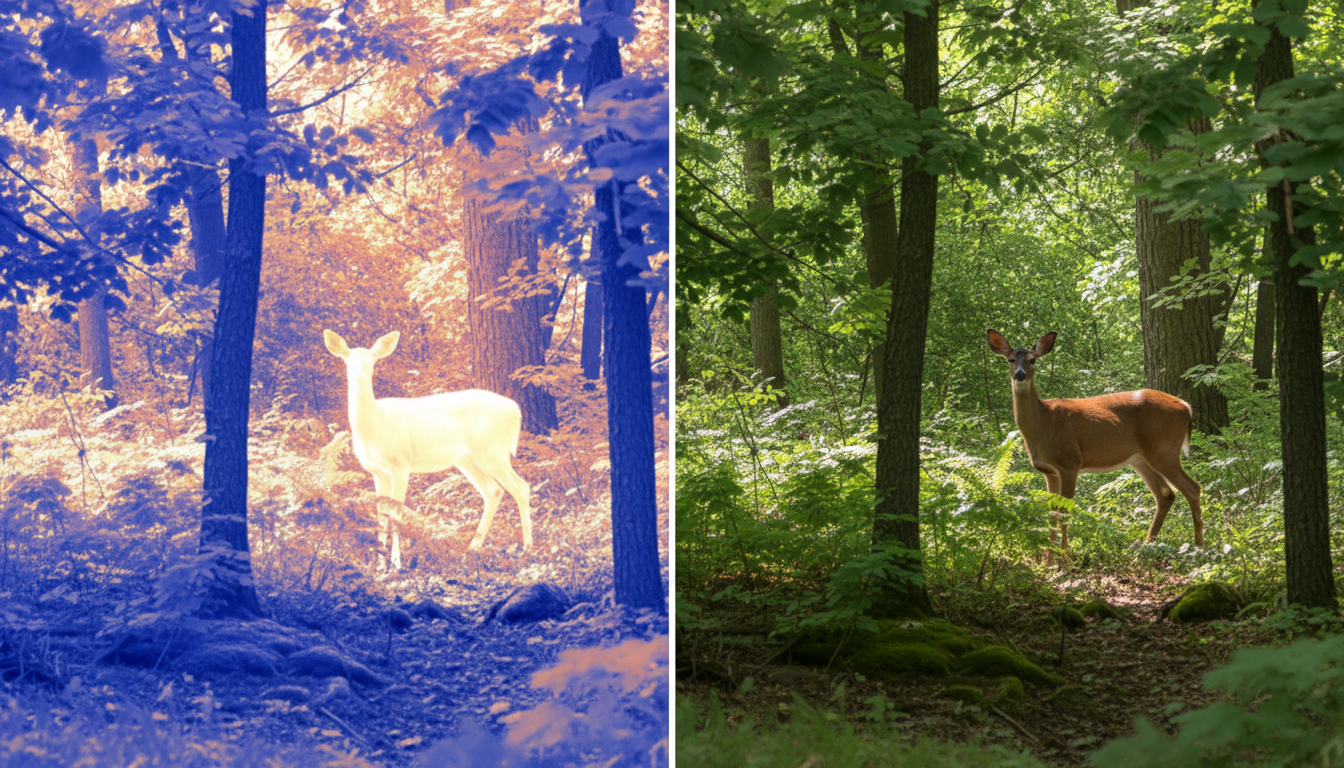
Thermal scopes work just as effectively during the day as they do at night. The reason is simple: thermal imaging doesn’t rely on visible light. It detects temperature differences, which exist 24/7. Whether it’s noon or midnight, warm-blooded animals still emit heat that contrasts with their surroundings.
During daylight hours, thermal scopes can actually give you advantages that traditional optics can’t match. Dense fog, heavy glare, or thick vegetation that would blind a regular scope? Not a problem. We’ve seen countless hunters use thermal devices to spot deer bedded in tall grass during midday scouting sessions—animals they would’ve walked right past with binoculars.
One real-world example really hammers this home. A group of hunters we know in Texas regularly use thermals during dawn and early morning hours to locate feral hogs in dense brush. The sun’s up, there’s plenty of light, but the vegetation is too thick for visual identification. Their thermal monocular picks up heat signatures in seconds that would take 10-15 minutes to spot with high-end glass.
Here’s what makes daytime thermal use so effective: while the ambient temperature rises, living creatures maintain their body temperature. That contrast is what thermal sensors pick up on. A deer at 98°F stands out whether the surrounding temperature is 40°F or 85°F.
This myth swings too far in the other direction. Yes, thermal scopes perform better than traditional optics in adverse weather, but they’re not magic.
Rain, fog, and heavy snow can reduce thermal imaging effectiveness. While thermals cut through light fog and mist far better than night vision or standard scopes, extremely dense fog can shorten detection range. Heavy rain can mask heat signatures or create thermal “noise” that makes targets harder to identify at distance.
That said, thermal scopes still outperform other technologies in bad weather. We’ve tested our devices in everything from light drizzle to heavy downpours. Detection capability does decrease in extreme conditions, but we’ve never encountered a scenario where a traditional scope worked better than thermal in adverse weather.
Temperature contrast matters more than most people realize. In environments where ambient temperature closely matches body temperature—like a humid 95°F summer afternoon—thermal imaging becomes less effective. The heat signature contrast that makes thermals so useful diminishes when everything is roughly the same temperature.
Does this mean thermals are useless in hot weather? Not at all. But it does mean you need to adjust expectations and understand the technology’s limitations. A quality thermal device with good sensitivity, like those equipped with modern sensors, will still detect temperature differences as small as a few degrees.
We’ve saved this one for last because it involves actual money, and nobody wants to overspend based on false assumptions.
Detection range isn’t just about price—it’s about the right combination of sensor resolution, lens size, and pixel pitch. Sure, more expensive models often include these features, but the relationship isn’t as straightforward as “spend more, see farther.”
Here’s what actually determines detection range: sensor resolution (like 384×288 vs 640×480), lens diameter and focal length, and the quality of the thermal detector itself. A scope with a 640×480 sensor and 50mm lens will generally detect targets farther than a 384×288 sensor with the same lens. But throw a larger 75mm lens on that 384 model, and suddenly the comparison changes.
We’ve seen hunters drop serious cash on high-end thermal scopes expecting to spot game at 1,000+ yards, only to discover that detection and identification are two very different things. You might detect a heat signature at 800 yards, but recognizing whether it’s a coyote or a deer requires much closer range or higher magnification.
The detection ranges listed in technical specifications typically refer to a human-sized heat signature under ideal conditions. A coyote or hog—smaller targets—will have shorter effective detection ranges. And those “ideal conditions” rarely exist in real hunting scenarios.
Smart money focuses on matching the thermal scope to your actual hunting style. Predator hunters working open terrain need different specs than hog hunters in thick South Texas brush. Before maxing out your budget, think about your typical shooting distances and environments. Our case study on feral hog eradication shows how proper thermal selection based on actual needs delivers better results than simply buying the most expensive option.
Thermal scopes represent serious technology that deserves serious understanding. The four myths we’ve covered—seeing through walls, night-only operation, perfect all-weather performance, and price-equals-range—all stem from the same problem: assumptions based on limited information or Hollywood fiction.
Reality is more nuanced. Thermal scopes detect surface heat, not X-ray visions of hidden objects. They work around the clock because temperature differences exist day and night. Weather affects them, just less than it affects other optics. And price reflects features and build quality, not just raw detection distance.
We’ve found that hunters who take time to learn how thermal imaging actually works get far more value from their investment. Understanding these tools’ real capabilities—and limitations—leads to smarter purchasing decisions and more effective use in the field. Whether you’re just starting to explore thermal technology or looking to upgrade your current setup, knowledge beats marketing hype every single time.
Can thermal scopes detect animals hiding in water?
No, thermal scopes cannot see fish or animals submerged in water. Water blocks infrared radiation, appearing opaque to thermal sensors. You’ll only see the water’s surface temperature. However, animals partially in water—like a deer crossing a stream—will show their exposed body parts clearly on thermal imaging.
Do thermal scopes work through glass windows?
Thermal scopes cannot see through glass because glass reflects infrared radiation rather than allowing it to pass through. When you point a thermal device at a window, you’ll see reflections of heat signatures in front of the glass, not what’s behind it. This is true for both standard window glass and eyeglasses.
How long can a thermal scope hold a zero?
Modern thermal scopes hold their zero just as reliably as traditional scopes when properly mounted. Digital reticles in thermal devices are electronically overlaid on the image and maintain zero through the device’s internal calibration. Quality mounts and proper installation matter more than the technology type. Most thermal scopes feature one-shot zeroing that remains stable through hundreds of rounds.
Can you use an IR laser with a thermal scope?
No, infrared lasers don’t work with thermal scopes. IR lasers emit light in the near-infrared spectrum (850-950nm), while thermal scopes detect heat in the mid-wave or long-wave infrared spectrum. The thermal sensor can’t see the IR laser’s beam. IR lasers work with night vision devices, not thermal imaging. For thermal scopes, use the built-in digital reticle for aiming.
Are thermal scopes legal for hunting deer in the United States?
Thermal scopes themselves are legal to own and use for hunting in most states, but regulations vary significantly by state and species. Many states prohibit night hunting of game animals like deer, regardless of optic type. However, using thermal scopes during legal daylight hunting hours is typically permitted. Always check your specific state’s hunting regulations before using thermal technology in the field, as laws differ for game animals versus predators and nuisance species.
爱永测试爱永测试爱永测试爱永测试爱永测试爱永测试爱永测试爱永测试爱永测试爱永测试爱永测试爱永测试爱永测试
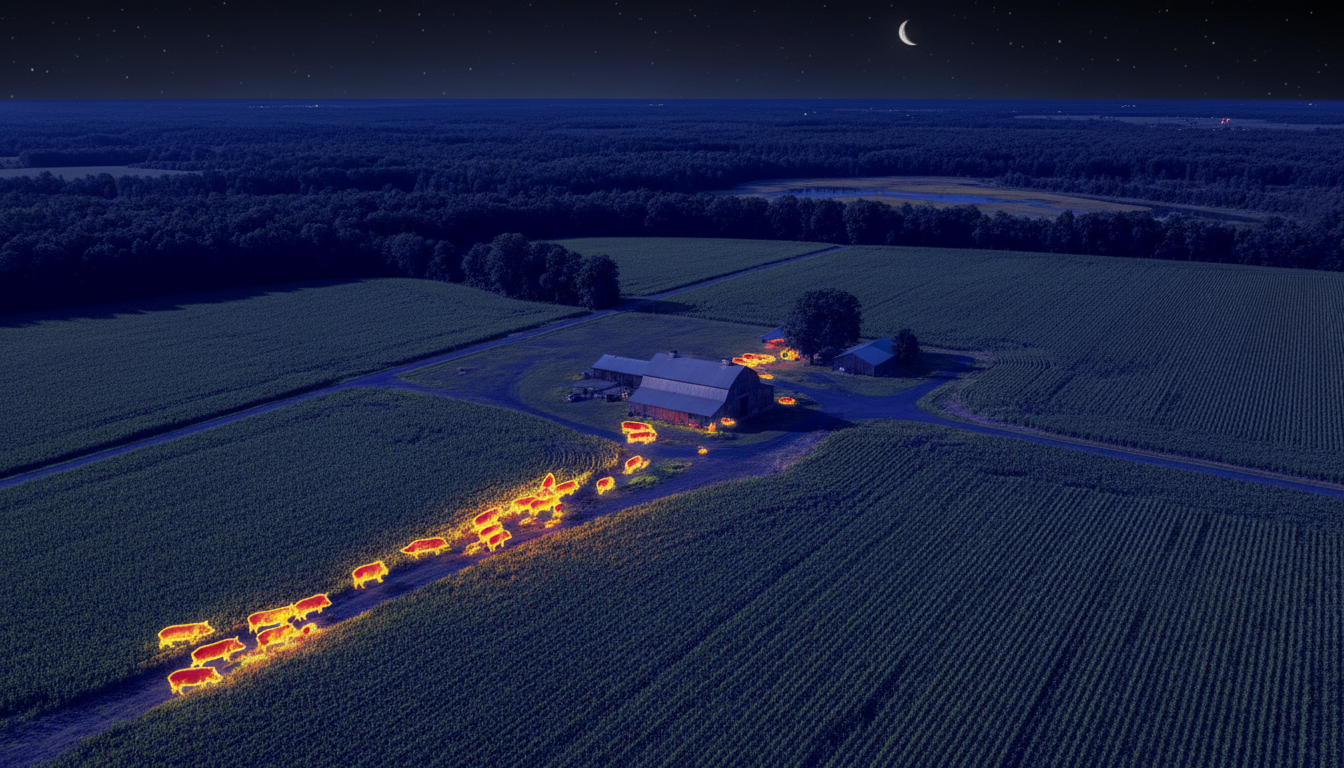
Feral hogs cause over $2.5 billion in agricultural damage across the United States each year. We’ve watched farmers struggle with this invasive species for decades, but traditional hunting methods barely made a dent in the problem. That changed when thermal scope technology became accessible to landowners and wildlife managers.
We’re diving into real-world data from operations using thermal optics for hog eradication. These aren’t theoretical numbers—they’re measurable results from ranches, farms, and commercial properties dealing with serious hog problems. The findings show success rates that traditional methods simply can’t match.
Before thermal technology, landowners tried everything. Daytime hunting reduced populations by maybe 5-10% annually. Hogs learned quickly, becoming strictly nocturnal and avoiding human activity during daylight hours. We’ve seen properties where farmers shot 50-100 hogs per year for a decade without any meaningful reduction in overall numbers.
Here’s the problem: feral hogs are primarily nocturnal feeders, with peak activity between sunset and sunrise. Their poor eyesight doesn’t matter in darkness when their sense of smell provides early warning of approaching humans. Traditional night hunting with spotlights educated survivors without eliminating sounders. Shooting one or two hogs from a group of 20 just made the remaining 18 smarter and more cautious.
The math didn’t work either. A single sow produces two litters per year with 4-8 piglets each. That’s 70% annual population growth. You’d need to remove more than 70% of the population just to maintain current numbers—an impossible target with conventional methods that averaged 15-30% removal rates.
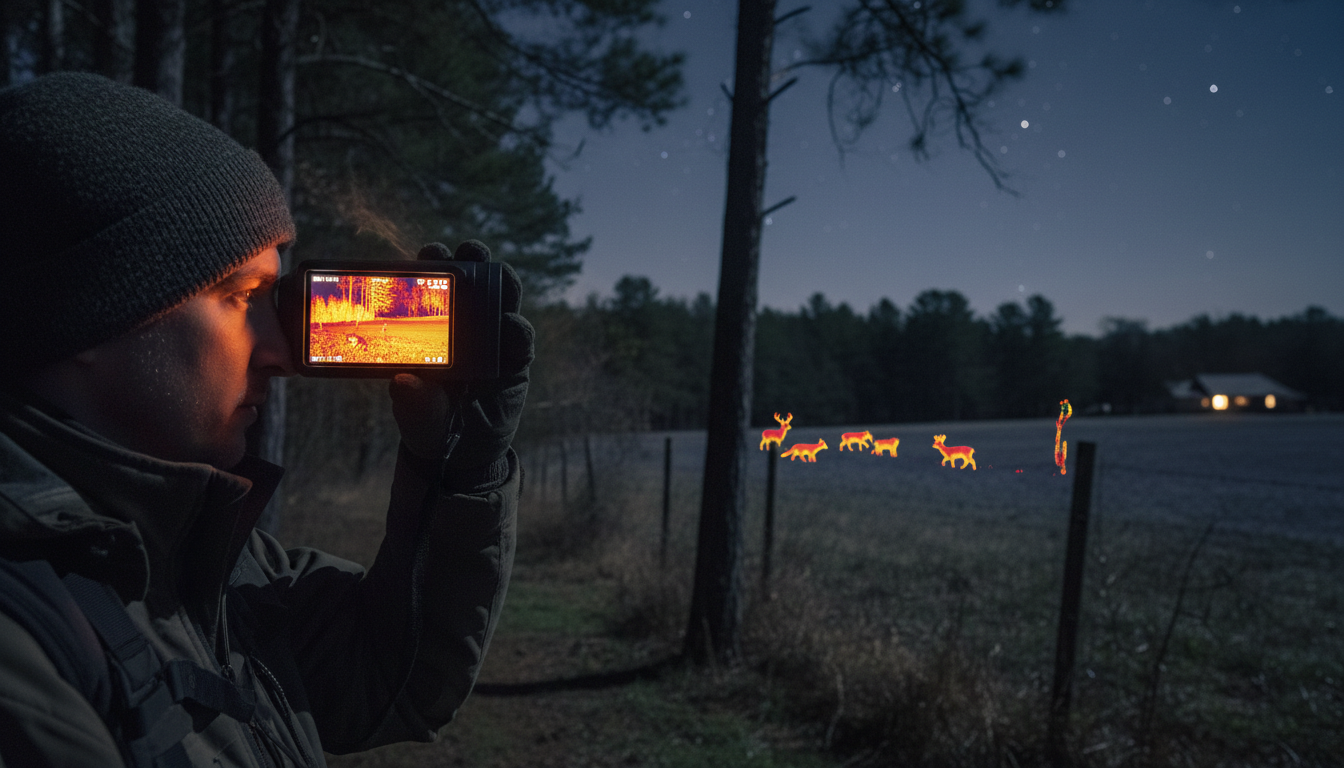
Thermal imaging detects heat signatures emitted by living creatures. Hogs maintain body temperatures around 101-103°F, creating distinct thermal signatures against cooler backgrounds. This technology works in complete darkness, through light fog, and partially through vegetation—conditions where traditional night vision fails completely.
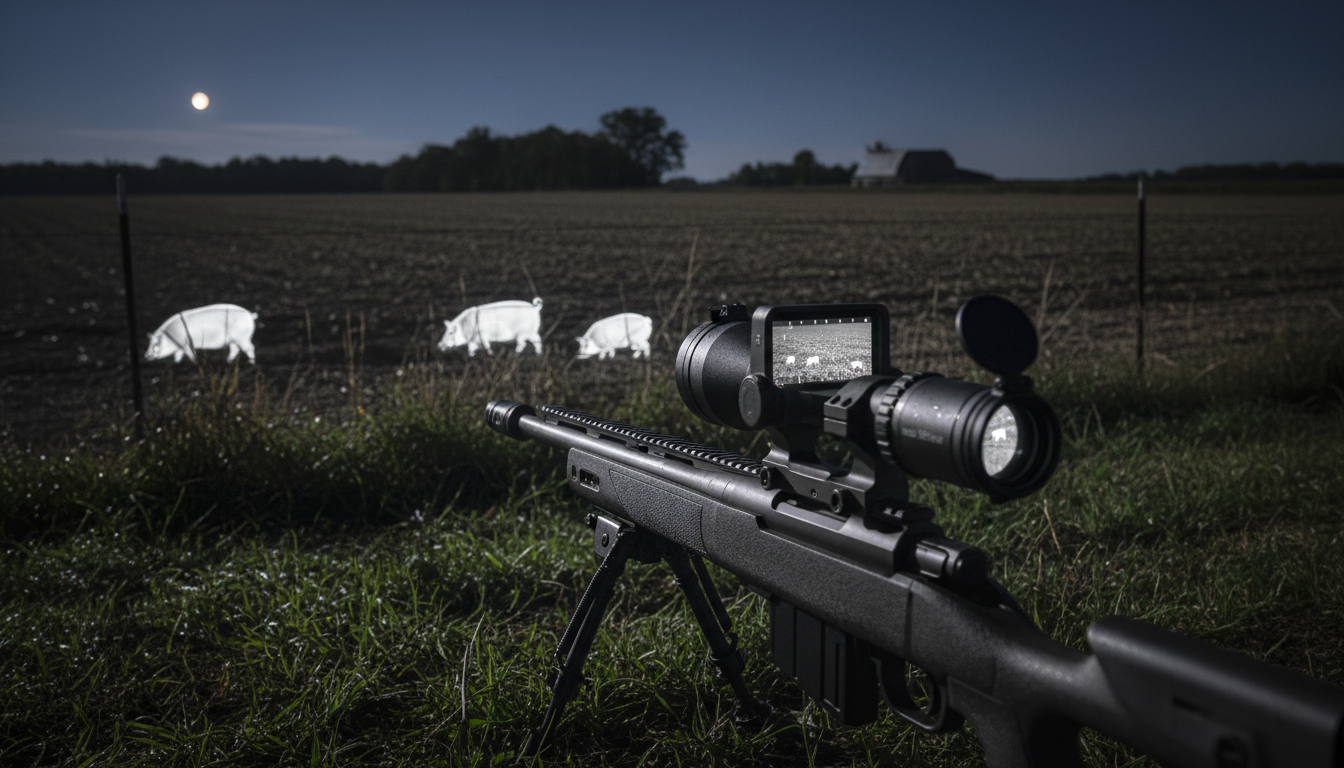
We’ve tested multiple thermal monocular systems alongside rifle-mounted thermal scopes. The combination allows operators to scan large areas quickly with handheld units like the Sirius HD, then switch to weapon-mounted optics for precision shooting. This two-device approach increased detection efficiency by roughly 60% compared to scope-only setups.
Detection ranges matter more than most people realize. Quality thermal scopes detect hogs at 500-800 yards, though identification ranges for ethical shot placement run closer to 200-300 yards. This extended detection gives operators time to assess sounder size, plan approaches, and position for maximum removal rates.
A 2,400-acre agricultural operation in South Texas provides our most detailed case study. The property runs cattle operations and grows hay, with documented crop damage exceeding $85,000 annually from feral hog activity. Previous control efforts using daytime hunting and spotlight operations removed approximately 60 hogs per year without reducing overall population or damage levels.
The operation implemented systematic thermal scope eradication in spring 2024. They equipped two operators with rifle-mounted thermal scopes featuring 640×512 resolution and integrated laser rangefinders. Supporting equipment included handheld thermal monoculars for scanning and suppressors to avoid educating survivors with gunfire.
Results from the first 8-month period:
The operation tracked sounder elimination specifically because removing entire family groups prevents method education. When operators killed one or two hogs from a group, survivors learned avoidance behaviors. Complete sounder removal eliminated this problem entirely. Of 38 sounder encounters, 32 resulted in complete elimination of all visible hogs.
We gathered data from 14 properties across Texas, Oklahoma, and Arkansas implementing thermal scope eradication programs between 2023-2025. Properties ranged from 800 to 5,200 acres with varying terrain types and initial hog population densities.
All operations used similar protocols:
Aggregate results across all 14 properties:
These numbers represent massive improvements over traditional methods. Properties that previously removed 40-80 hogs annually were now removing 150-300 hogs in similar timeframes. More importantly, they saw actual population reductions reflected in decreased field damage and fewer hog sightings during routine property inspections.
Not all thermal scopes performed equally. We tracked which technical specifications correlated with better field results. Resolution made the biggest difference—operators using 640×512 sensors consistently outperformed those with 384×288 units in both detection rates and ethical shot placement at distance.
Detection range specifications proved less reliable than manufacturers claimed. Advertised 1,800-yard detection ranges meant “detecting a heat signature exists” not “identifying it as a hog suitable for shooting.” Practical identification ranges for ethical shots maxed out around 250-350 yards even with premium optics.
Features that measurably improved results:
Operators using equipment like the Pegasus 2 LRF with built-in rangefinding reported 25% higher first-shot success rates compared to scopes requiring separate ranging tools. This translated directly to higher sounder elimination percentages because missed first shots scattered groups before follow-up engagement.
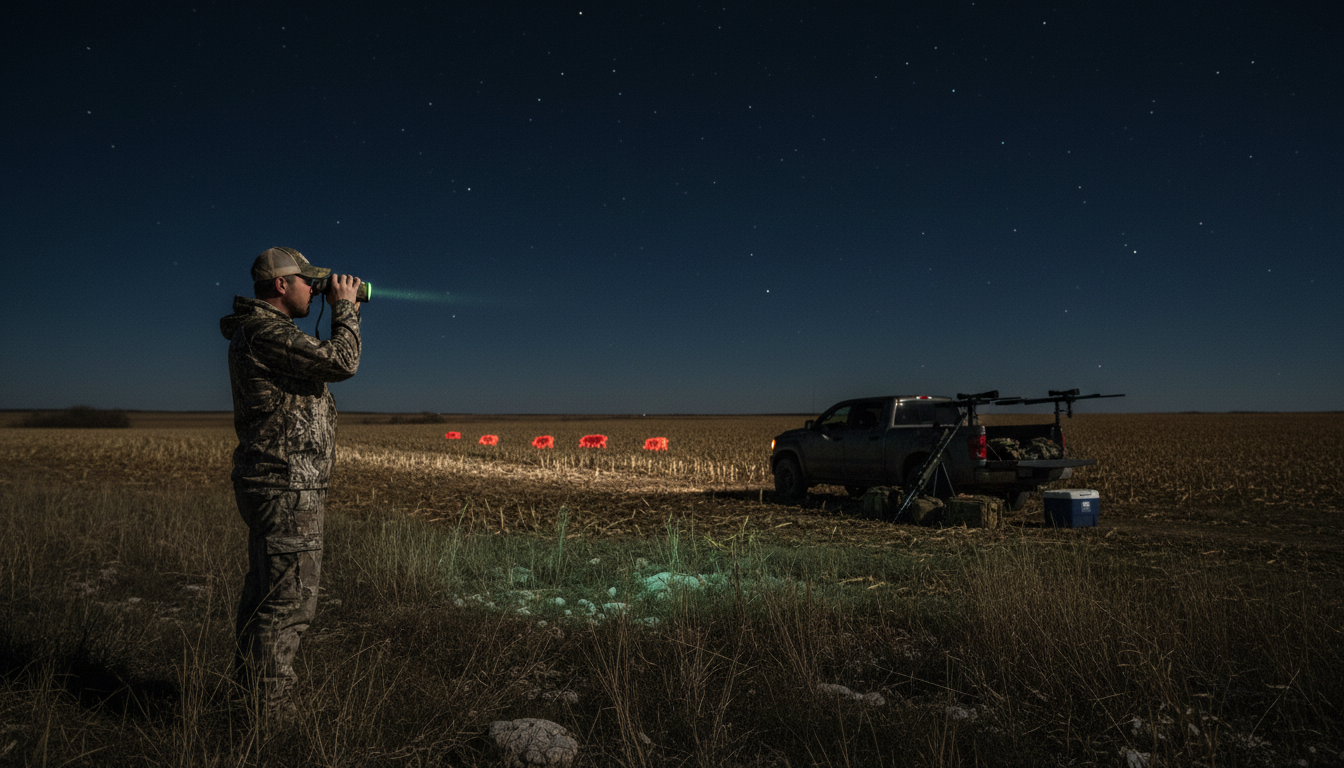
We documented three primary thermal hunting tactics across participating operations: vehicle-based patrol shooting, spot-and-stalk approaches, and stationary observation from elevated positions. Each showed different success rates and applications.
Vehicle-based operations produced highest overall numbers. Operators drove slowly (5-15 mph) along field edges and access roads while scanning with thermal monoculars or handheld units. Upon detecting hogs, they’d approach within 75-150 yards using vehicles, then shoot from stable positions using vehicle supports or shooting sticks. This method averaged 8-12 hogs per successful night.
Spot-and-stalk approaches worked better for cautious sounders or pressured areas. Operators detected hogs from distance, then stalked within shooting range on foot using terrain features and wind direction. This method took longer per engagement but achieved 92% sounder elimination rates when operators reached shooting positions—the highest of any tactical approach.
Stationary observation from towers or elevated stands proved least effective. While comfortable and allowing long observation periods, hogs’ unpredictable movement patterns meant operators spent significant time watching empty fields. This approach averaged just 2-4 hogs per night across properties that tested it.
Wind direction mattered more than expected. Hogs’ exceptional sense of smell detected human scent at 200+ yards with favorable wind conditions. Operations that religiously checked wind and approached from downwind positions averaged 40% higher sounder elimination rates than those that ignored wind considerations.
Thermal scopes represent significant upfront investment—quality units range from $2,500 to $6,000 for rifle-mounted systems. We calculated actual return on investment for agricultural operations based on prevented crop damage and reduced infrastructure costs.
A 1,200-acre hay and cattle operation in Oklahoma documented their costs and savings:
Initial Investment:
Documented Savings:
The operation recovered their entire thermal scope investment in under 3 months of use. Projected 5-year savings exceeded $120,000 if damage reduction rates held steady. Even accounting for equipment maintenance and ammunition costs, the ROI substantially exceeded alternative control methods including trapping or commercial helicopter operations.
Commercial hog control operators using thermal scopes reported even better economics. Their efficiency increased by 300-400%, allowing single operators to manage properties that previously required multiple hunters with conventional equipment.
Thermal scope effectiveness varied by season, though not as dramatically as we initially expected. Summer operations faced challenges when ambient temperatures approached hog body heat, reducing thermal contrast. Operators compensated by hunting during cooler hours after midnight when temperature differentials improved.
Winter provided optimal thermal conditions with maximum contrast between hogs and backgrounds. However, shorter nights and reduced hog activity during extreme cold snaps limited opportunities. Properties in southern climates maintained year-round operations, while northern locations saw 40-50% reduced winter activity.
Spring planting season produced highest return rates for agricultural operations. Hogs concentrated on freshly planted fields, making them predictable and accessible. Operations focused thermal scope efforts during 6-8 week spring windows removed 60-70% of annual totals during these concentrated periods.
Summer heat required equipment adaptations. Battery life decreased in high temperatures—operators carried 2-3 spare battery sets compared to one set during moderate weather. Some thermal scopes experienced performance degradation above 95°F ambient temperature, though premium units maintained functionality across all tested temperature ranges.
Thermal scopes aren’t silver bullets. We documented several limitations and challenges that affected real-world results. Target identification at extended distances remained problematic—thermal signatures show heat, not details. Operators needed closer approaches than detection ranges suggested to confirm targets as hogs rather than deer, cattle, or other animals.
Heavy vegetation reduced effectiveness significantly. While thermal imaging penetrates light brush better than night vision, dense forest canopy or thick undergrowth blocked heat signatures completely. Properties with 40%+ forest cover saw 35-50% lower hog removal rates than open terrain locations using identical equipment and tactics.
Legal restrictions limited applications in some states. While most southern states allow night hunting with thermal optics on private land for feral hogs, several jurisdictions restrict the technology or require special permits. Georgia, for example, permits night hog hunting but with specific regulatory restrictions on optic types depending on county regulations.
Weather affected operations more than anticipated. Heavy rain, dense fog, and high humidity reduced detection ranges by 30-40%. Operators in coastal regions or high-rainfall areas averaged fewer productive nights per month compared to drier inland locations. Wind speeds above 20 mph created enough vegetation movement to generate false signatures and complicate target identification.
Our case study data shows thermal scopes transformed feral hog eradication from a frustrating losing battle into a manageable program. Success rates exceeding 85% for sounder elimination represent massive improvements over traditional methods that struggled to reach 40%.
The numbers tell the story: properties using systematic thermal scope programs reduced hog populations by 70-90% within first seasons. Crop damage decreased proportionally, with documented savings often exceeding $20,000-$40,000 annually on mid-sized agricultural operations. First-year return on investment averaged 300-500% based on prevented damage alone.
But here’s the thing—thermal scopes aren’t magic. They’re tools that require skill, planning, and consistent application. The most successful operations we studied treated hog eradication as ongoing wildlife management rather than occasional hunting trips. They maintained detailed records, tracked results, and continuously refined tactics based on what worked.
For landowners dealing with serious hog problems, the data supports thermal scope investment. When you’re looking at $10,000-$50,000 in annual damage, spending $4,000-$6,000 on equipment that can reduce that damage by 70%+ isn’t a gamble—it’s smart business. The technology works. The results prove it.
What success rate can I realistically expect using thermal scopes for hog control?
Based on our case study data, trained operators using quality thermal equipment (640×512 resolution or better) averaged 85% sounder elimination rates when engaging entire groups. Properties implementing systematic programs removed 150-300 hogs in first-year efforts, representing 60-80% population reductions on most properties. Individual results vary based on terrain, hog population density, and operator skill level. Expect a learning curve for the first 3-5 outings as you develop effective tactics for your specific property.
How much does a complete thermal scope setup cost for hog eradication?
Quality thermal rifle scopes suitable for hog control range from $2,500 to $6,000. A complete setup including the scope, proper mounting system, handheld thermal monocular for scanning, shooting sticks or bipod, spare batteries, and ammunition runs $4,000-$8,000 depending on equipment choices. Mid-range setups around $4,500-$5,500 provide excellent results for most agricultural operations. Based on prevented crop damage, typical ROI occurs within 3-6 months on properties with active hog problems.
Can thermal scopes see hogs through thick forest and heavy brush?
Thermal imaging penetrates light brush and vegetation better than night vision, but heavy forest canopy and thick undergrowth significantly reduce effectiveness. Our case studies showed properties with 40% or more forest cover experienced 35-50% lower hog removal rates compared to open terrain locations. Thermal works best in agricultural fields, pastures, cleared areas, and light cover. Dense forests require different tactics including trail watching at transition zones between heavy cover and open feeding areas.
What’s the difference between 384×288 and 640×512 resolution thermal scopes?
Resolution directly impacts your ability to identify targets at distance and make ethical shots. In our field testing, operators using 640×512 resolution averaged 30% higher harvest rates than those with 384×288 units. The higher resolution provides clearer target identification at 200-300 yards, reducing misidentification risks and improving first-shot success rates. For serious hog eradication programs, 640×512 represents the minimum recommended resolution. Budget models with 384×288 work but limit effective range and target identification capabilities.
Are thermal scopes legal for night hunting feral hogs in my state?
Most southern states including Texas, Oklahoma, Arkansas, Louisiana, Mississippi, Alabama, and Florida allow thermal scope use for night hog hunting on private land without restrictions since feral hogs are classified as invasive pests. Georgia permits night hog hunting but with some county-level restrictions. Several northern states restrict night hunting regardless of equipment type. Always verify current regulations with your state wildlife agency before purchasing equipment or conducting night operations. Laws change frequently as thermal technology becomes more common.
Most people think thermal monoculars are just for hunters tracking game in the dark. But here’s the thing—these devices have dozens of practical applications that can make your life easier, safer, and more cost-effective. Whether you’re spotting water leaks in your home or checking on livestock at night, thermal imaging opens up possibilities that go way beyond the woods.
We’ll walk you through seven practical uses that show just how versatile these handheld devices really are. And if you’re curious about how thermal imaging actually works, thermal monoculars detect infrared radiation—basically heat—and convert it into visible images that your eyes can see.
Your heating bill’s high, but you don’t know where the warmth’s escaping. A thermal monocular solves that problem in minutes.
Walk around your house with a thermal device and you’ll instantly see cold spots where insulation’s missing or deteriorating. Windows and doors that aren’t properly sealed show up as temperature differences on the display. You can check wall cavities for gaps without tearing anything apart.
This works year-round, too. In summer, you’ll spot where cool air’s leaking out and hot air’s getting in. One homeowner saved over $400 annually after finding and fixing insulation gaps they discovered with thermal imaging. The device pays for itself after just a few years of reduced energy costs.
Nothing beats thermal imaging for keeping an eye on your property after dark. Traditional security cameras struggle in low light, but thermal monoculars work perfectly in total darkness.
You can scan your land without alerting anyone with visible lights. Heat signatures from people or animals stand out clearly against cooler backgrounds, so you’ll spot trespassers, wildlife near your home, or anything unusual happening on your property. We’ve found that models like the Pixfra Sirius HD or Pegasus 2 LRF offer excellent detection ranges for property monitoring.
Many property owners use thermal monoculars to check fence lines, outbuildings, and perimeters without walking the entire area. You can cover large spaces quickly from a single vantage point, making rounds faster and safer.
Whether you’re buying a house or renovating your current one, thermal monoculars reveal hidden problems before they become expensive disasters.
Water leaks behind walls show up as temperature anomalies. Electrical circuits that are overheating—a fire hazard—appear as hot spots. Moisture trapped in walls, which leads to mold, creates distinct thermal patterns. Professional home inspectors use thermal imaging regularly, but you don’t need to hire one for every check-up.
Thermal devices also help locate studs in walls without drilling test holes. They can identify poorly sealed ducts, roof leaks, and foundation issues. One contractor we know uses thermal imaging on every job site to verify insulation installation before closing up walls. It’s caught mistakes that would’ve cost thousands to fix later.
You can watch nocturnal animals without disturbing their natural behavior. Thermal monoculars let you observe wildlife that’s active when you’d normally be asleep—or just too dark to see anything.
Bats, foxes, raccoons, and other nocturnal creatures show up clearly on thermal displays. Researchers use this technology to study animal behavior, population counts, and movement patterns without interfering with the animals or their habitat. It’s also great for birdwatchers tracking owls or other night-active species.
If you’re into wildlife photography or nature documentation, thermal monoculars help you find subjects first, then switch to your camera once you’ve located them. The Pixfra Arc LRF offers excellent range for wildlife observation while remaining lightweight enough for extended field use.
When someone’s lost or injured, every minute counts. Thermal imaging dramatically improves search and rescue success rates by detecting body heat from distances that would be impossible with flashlights or night vision.
Search teams can scan large areas quickly, even through light brush or in complete darkness. A person’s heat signature stands out clearly against cooler surroundings, making them visible when they’d be invisible to the naked eye. This works in forests, mountains, urban areas—anywhere someone might need help.
Emergency responders use thermal monoculars to locate people trapped in collapsed buildings, lost hikers in wilderness areas, or individuals in smoke-filled environments. The technology’s saved countless lives by reducing search times from hours to minutes in many cases.
Farmers and ranchers have dozens of uses for thermal monoculars that save time and prevent losses.
Check on animals at night without disturbing the herd. Spot a cow that’s separated from the group or lying down when she shouldn’t be. Identify sick animals by detecting fever—elevated body temperature shows up instantly on thermal displays. You can cover large pastures quickly without driving out to every corner of your property.
Thermal imaging also helps with predator control. Coyotes, feral hogs, or other animals threatening livestock show up clearly, even from long distances. Some ranchers use thermal monoculars during calving season to check pregnant cows overnight without spooking them with lights or vehicle noise. The Pixfra Draco provides solid performance for farm applications at a reasonable price point.
Firefighters rely on thermal imaging to save lives and make safer decisions in dangerous situations. But the technology’s also useful for fire prevention and early detection.
Forest management personnel use thermal monoculars to spot fires early—sometimes detecting them before smoke’s even visible. Hot spots that might reignite after a fire’s been controlled show up clearly. You can scan large areas quickly to confirm a fire’s completely out.
In active firefighting situations, thermal devices help locate people trapped in smoke-filled buildings without entering dangerous areas. They identify the hottest parts of a structure, helping crews target their efforts more effectively. The technology works through smoke and darkness, two conditions that would blind regular vision completely.
Some rural property owners keep thermal monoculars specifically for wildfire awareness during dry seasons. Being able to spot a fire from a distance gives you critical extra minutes to evacuate or call emergency services.
Thermal monoculars offer way more value than just spotting game in the woods. From saving money on energy bills to potentially saving lives in emergency situations, these devices prove their worth across dozens of applications. Whether you’re a homeowner looking to cut heating costs, a farmer checking livestock, or someone who values property security, thermal imaging technology delivers practical benefits you’ll use regularly.
The versatility’s what really stands out. One device handles home inspections, wildlife observation, security monitoring, and more. As thermal technology becomes more affordable and accessible, we’re seeing more people discover just how useful these tools are in everyday life. If you’ve been thinking thermal monoculars are only for hunters, we hope these seven uses have shown you otherwise.
