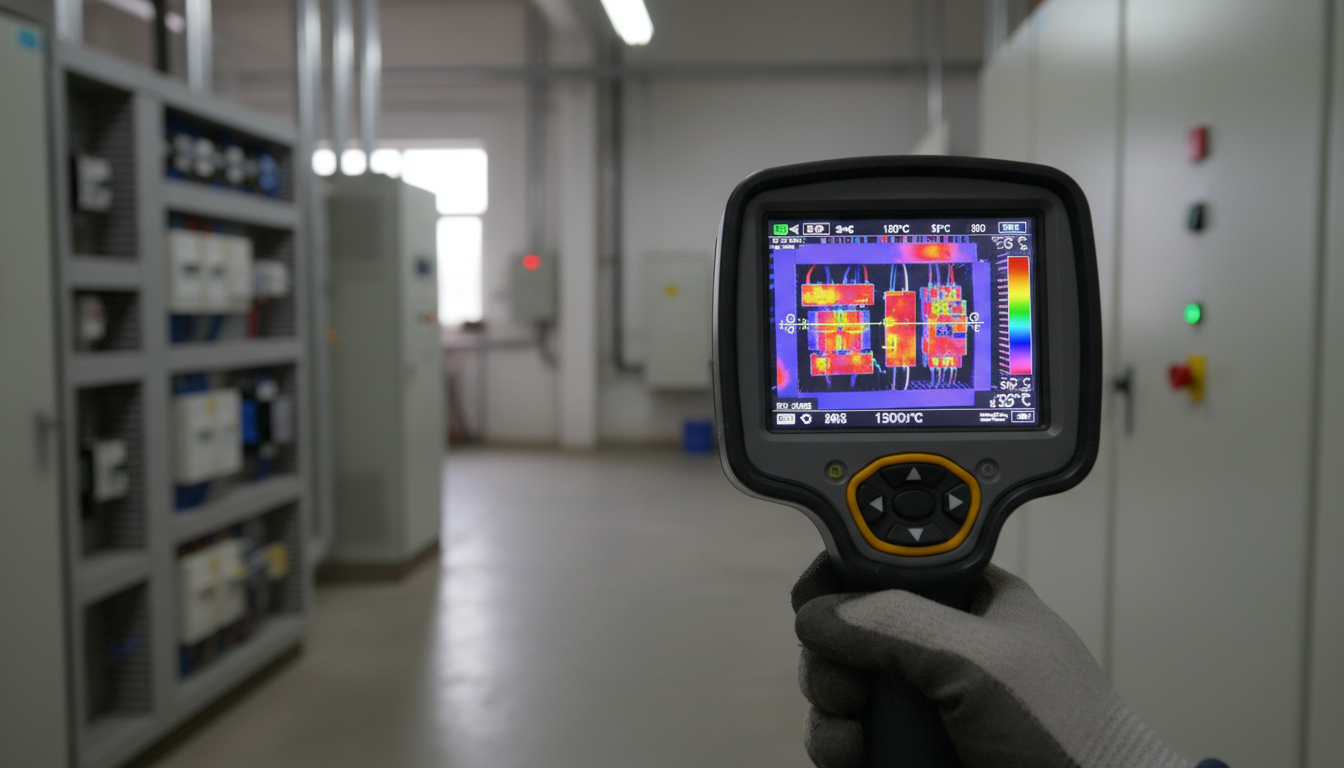
Remote visual inspection devices with thermal imaging have changed how we spot problems before they turn into expensive repairs. Instead of tearing down walls or shutting down equipment to check for issues, you can scan from a safe distance and get instant temperature readings. We’ve tested these tools in real-world conditions—from electrical panels to HVAC systems—and we’ll show you which ones actually deliver.
These devices capture infrared energy that objects naturally emit and convert it into visual images showing temperature differences. The heat signatures reveal hidden issues like electrical hotspots, insulation gaps, air leaks, and moisture intrusion. For facilities managers, electricians, and building inspectors, they’ve become less of a luxury and more of a daily necessity.
What Makes Thermal Imaging Work for Remote Inspections
Thermal cameras detect infrared radiation from surfaces and translate that data into color-coded images. Thermal imaging cameras capture infrared energy to create images, ideal for industrial inspections, maintenance, leak detection, and machine troubleshooting. The warmer something is, the more infrared energy it emits—so overheating components, thermal bridging, and temperature anomalies show up clearly on screen.
What separates remote inspection devices from standard thermal cameras is their ability to work at a distance while maintaining accuracy. Some thermal imaging cameras can see up to 1km and beyond, but most can’t see through thick solid surfaces like walls. You’ll get surface temperature readings, not what’s happening inside solid materials. That’s why timing matters—inspect when systems are under load and temperature differences are most visible.
Resolution and Sensitivity: The Specs That Actually Matter
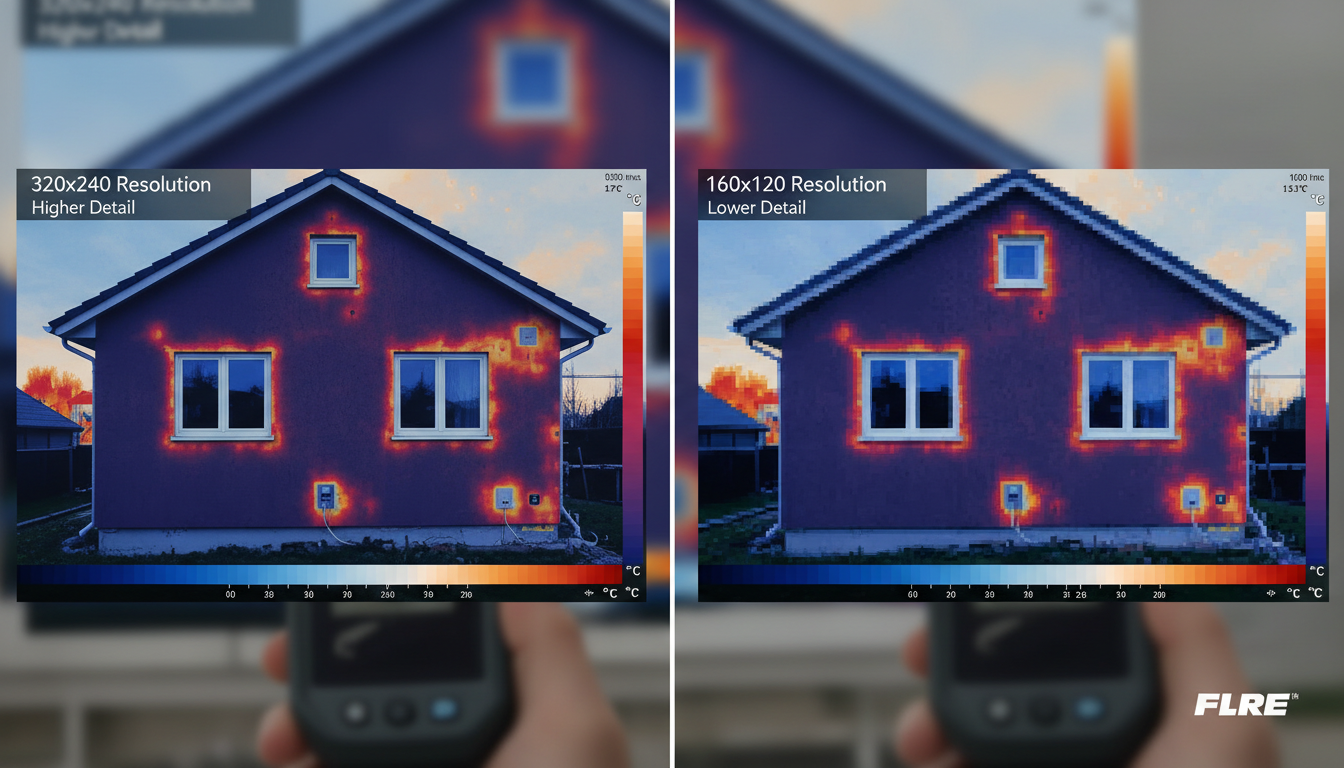
Two numbers define how well a thermal camera performs: resolution and thermal sensitivity. Resolution tells you how many pixels the sensor captures—higher resolution means sharper images and better detection of small temperature differences. Resolution determines the clarity and detail of the thermal image, with higher resolution producing sharper and more accurate results. A minimum of 60×60 pixels is required to obtain an acceptable image.
But resolution alone doesn’t tell the full story. Thermal sensitivity defines the smallest temperature difference a camera can detect. A thermal camera’s sensitivity will directly impact the image clarity and sharpness that the camera can produce. Look for devices with thermal sensitivity below 50 mK (milliKelvins)—the lower the number, the better it’ll spot subtle temperature changes. For electrical inspections and moisture detection, you’ll want something closer to 40 mK or better.
Top Features in Professional-Grade Inspection Devices
Professional thermal inspection devices pack features that make fieldwork faster and reports more detailed. Handheld thermal cameras are best for preventive maintenance, electrical inspections, and frontline troubleshooting. While articulating thermal cameras are best for when you need pinpoint accuracy from both near and far, from electrical utilities to research and development.
Image fusion technology ranks high on our must-have list. It overlays thermal data onto visible light images so you can see exactly where a hot spot sits in relation to physical components. Fluke thermal cameras include IR-Fusion technology that fuses a visual or visible light image with an infrared image for better identification, analysis, and image management. The dual images are accurately aligned at any distance, heightening details so problems are easier to spot.
Wireless connectivity has become standard on mid-range and premium models. You can upload images to cloud storage, share findings with your team instantly, and generate reports without heading back to the office. Battery life matters too—look for devices offering 4+ hours of continuous use, especially if you’re covering large facilities.
Choosing Between Handheld, Smartphone-Attached, and Mounted Systems
Handheld thermal cameras offer the most versatility. They’re ruggedized for job sites, have dedicated screens, and don’t drain your phone battery. Models in the 320×240 to 640×480 resolution range handle most industrial and commercial applications. Standalone handhelds (like the HIKMICRO B-Series or FLIR C5) are generally more rugged, have dedicated batteries that don’t drain your phone, and are “grab-and-go” ready for job sites where durability is a priority.
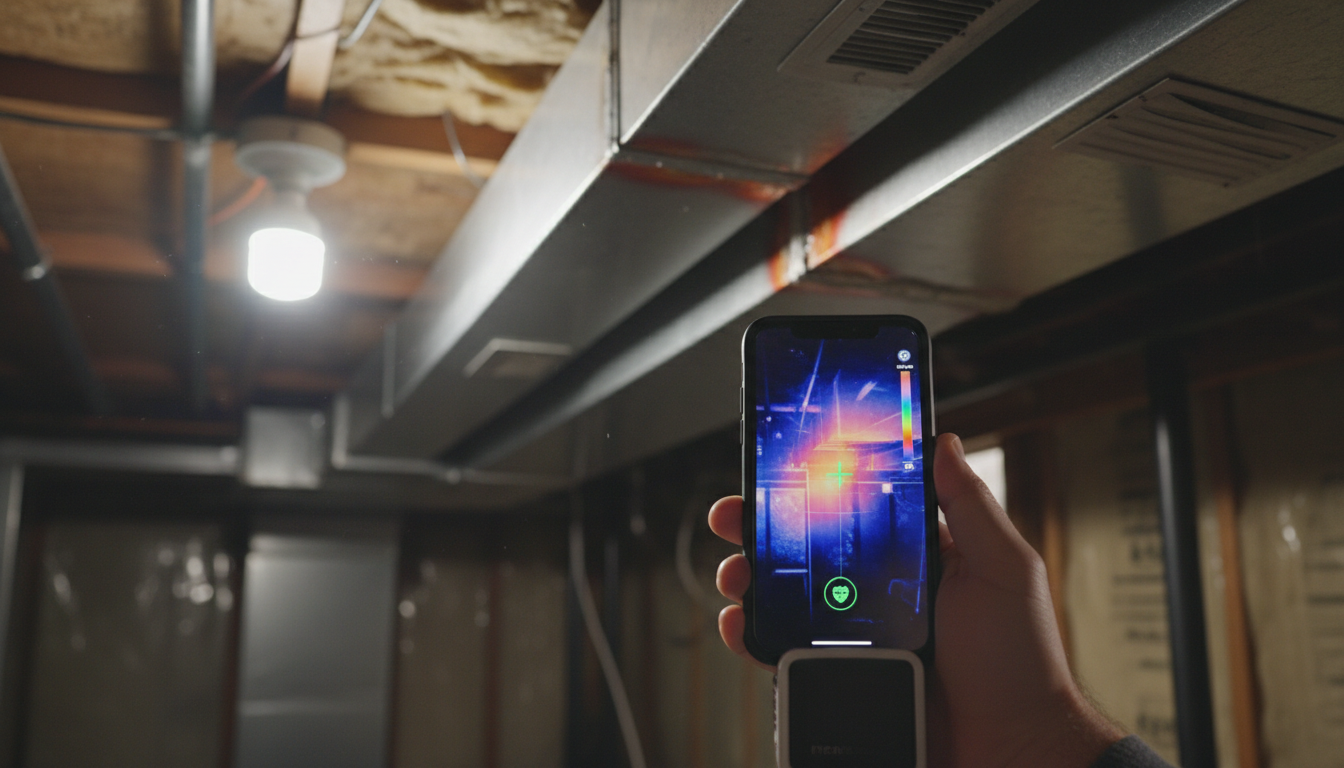
Smartphone attachments deliver surprising performance at a fraction of the cost. Smartphone cameras (like the FLIR One or Testo 860i) offer incredible value and portability, utilizing your phone’s screen and processing power for quick checks. They’re perfect for contractors who need occasional thermal checks but can’t justify spending $2,000+ on a dedicated device. Just know that resolution and temperature range will be more limited.
Mounted or fixed cameras work best for continuous monitoring. Mounted thermal cameras or infrared scanners are the strongest in the bunch, ideal for research, science and engineering applications allowing for continuous infrared data collection. Think electrical substations, critical equipment, or remote monitoring scenarios where 24/7 surveillance prevents downtime.
Real-World Applications: Electrical, HVAC, and Building Inspections
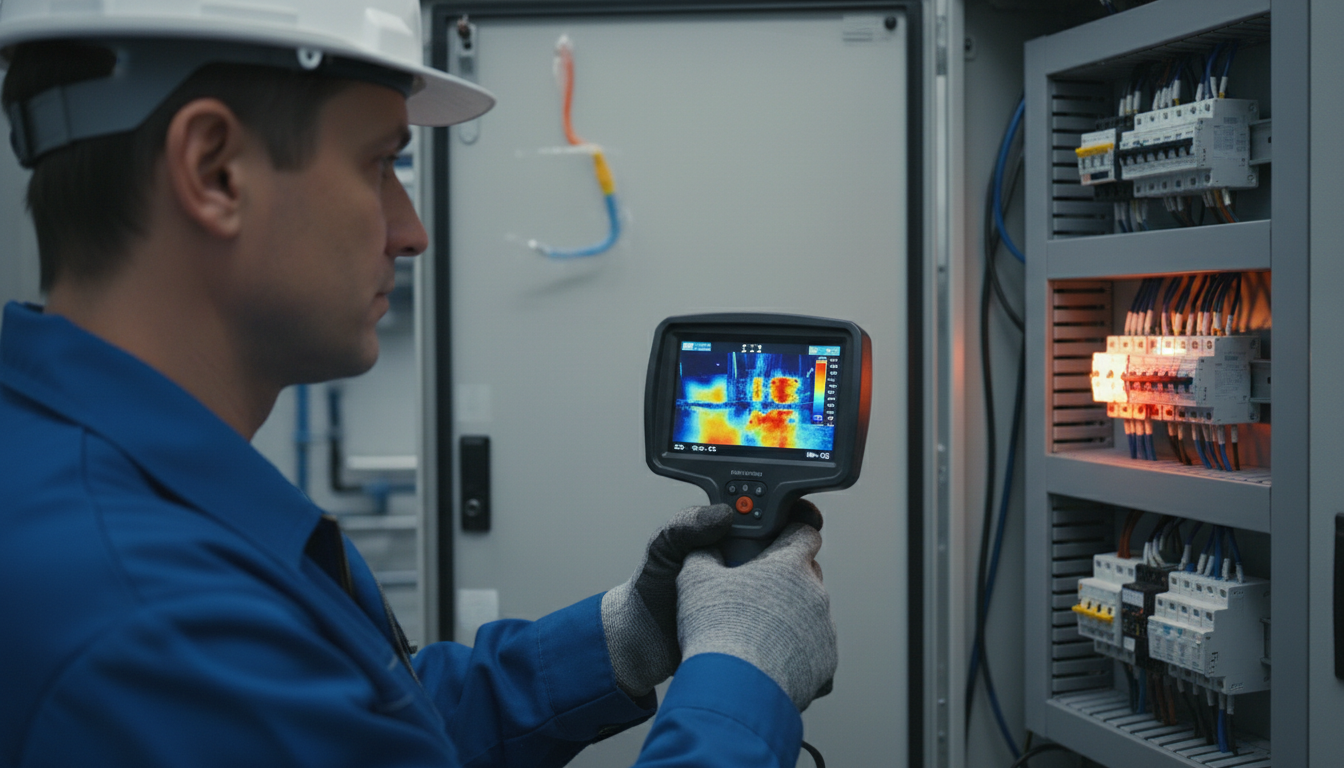
Electrical inspections benefit the most from thermal imaging. Thermal cameras enable us to see the heat signatures associated with high electrical resistance long before the circuit becomes hot enough to cause an outage or explosion. Loose connections, overloaded circuits, and failing components all generate excess heat—problems you’ll catch weeks or months before catastrophic failure.
When making an inspection it is important that the system is under load. Wait with the inspection for “worst case” or peak loads, or when the load is at least 40% (according to NFPA 70B). Heat generated by a loose connection rises as the square of the load; the higher the load, the easier it is to find problems.
For HVAC and building envelope work, thermal cameras reveal insulation defects, air leakage, and moisture problems that visual inspection misses. Common applications include: Building Envelope: Locating drafts around windows/doors and missing insulation. HVAC Systems: Verifying coil temperatures, detecting ductwork leaks, and checking radiator efficiency. We’ve used thermal imaging on commercial buildings to spot missing insulation, roof leaks, and HVAC distribution problems—often saving clients thousands in energy costs.
Understanding Temperature Range and Measurement Accuracy
Match your device’s temperature range to what you’ll actually measure. Entry-level models typically cover -20°C to 150°C (-4°F to 302°F), which handles most building inspection and HVAC work. For electrical panel inspections and industrial equipment, you’ll want a range extending to at least 400°C (752°F) or higher.
Accuracy specifications usually fall in the ±2°C or ±2% range. That’s acceptable for most preventive maintenance, but if you’re doing compliance work or precision measurements, look for devices offering ±1.5°C or better. Whether you’re checking HVAC units or doing motor diagnostics, you’ll get readings with a ±1.5°C accuracy across a range from -20°C up to 550°C. For daily use in an electrical inspection thermal imager workflow, that level of clarity and precision gives professionals the confidence to act fast.
Don’t forget about emissivity settings—different materials radiate heat differently. Good thermal cameras let you adjust emissivity values for accurate readings on metals, plastics, painted surfaces, and other materials you’ll encounter in the field.
Integration with Thermal Imaging Technology
Modern inspection devices connect to broader monitoring systems. Whether you’re documenting findings for insurance claims, building inspection reports, or compliance documentation, integration capabilities matter. Cloud-based platforms let you organize images by location, track temperature trends over time, and share findings with clients or team members instantly.
Some systems tie into predictive maintenance programs, flagging equipment when temperature readings exceed baseline values. This shifts maintenance from reactive to proactive—you’re fixing problems before they cause downtime.
For outdoor applications, devices like the Sirius HD, Pegasus 2 LRF, and Draco extend thermal imaging capabilities to longer-range detection scenarios. These specialized tools complement standard inspection cameras when you need to scan larger areas or work at greater distances.
Budget Considerations: What You Get at Each Price Point
Entry-level devices ($200-$500) work fine for homeowners and occasional users. You’ll get basic thermal imaging, limited resolution (usually 80×60 to 160×120), and fewer features. Smartphone attachments dominate this category.
Mid-range options ($500-$2,000) offer better resolution (256×192 to 384×288), improved sensitivity, image fusion, and wireless connectivity. Mid-range thermal cameras are usually priced between $500 and $2,000 and offer better resolution and additional features such as connectivity options, visual cameras, and image enhancement technologies. This sweet spot delivers professional performance without breaking the bank.
Premium models ($2,000+) feature high-resolution sensors (640×480 or higher), advanced analytics, interchangeable lenses, and ruggedized construction. Premium models are priced over $2,000 and provide the highest resolution images, advanced imaging features, and high durability, catering to professionals and industries with specific, high-demand needs. If thermal inspections are part of your daily workflow, the investment pays for itself quickly.
Conclusion
Remote visual inspection devices with thermal imaging have become indispensable tools for anyone responsible for maintaining buildings, electrical systems, or mechanical equipment. The ability to spot problems from a safe distance—before they escalate into emergencies—saves time, money, and potentially lives.
Start by matching the device specs to your actual needs. Resolution and sensitivity determine what you can see and how clearly you’ll see it. Consider whether a handheld, smartphone attachment, or mounted system best fits your workflow. Pay attention to temperature range, accuracy, and integration features that’ll make your job easier.
The technology keeps getting better while prices come down. What cost $10,000 a decade ago now delivers similar performance at $1,500. Whether you’re an electrician checking panels, an HVAC tech tracking down leaks, or a building inspector documenting envelope deficiencies, there’s a thermal imaging solution that fits your budget and requirements.
FAQs
What resolution do I need for electrical panel inspections?
For electrical panel work, aim for at least 320×240 resolution. This gives you enough detail to spot hot connections, overloaded breakers, and phase imbalances. If you’re working on densely packed panels or need to document findings for compliance, 384×288 or higher provides better clarity and makes it easier to pinpoint exact problem locations.
Can thermal cameras see through walls?
No, thermal cameras detect surface temperatures and can’t see through solid materials like drywall, concrete, or metal. What they can do is show temperature differences on wall surfaces that indicate problems behind them—like missing insulation, air leaks, or plumbing leaks that change the surface temperature. You’re reading heat signatures, not x-raying through materials.
How often should I perform thermal inspections on electrical equipment?
For commercial and industrial facilities, annual thermal inspections of electrical systems are standard. High-risk or critical equipment might need quarterly or semi-annual checks. The key is inspecting when systems are under at least 40% load so temperature differences show up clearly. Some facilities install continuous monitoring systems on critical equipment to catch problems between scheduled inspections.
Do I need training to use thermal imaging equipment?
Basic operation is straightforward—point and shoot. But interpreting thermal images accurately takes training and experience. You need to understand emissivity, reflections, ambient conditions, and what different thermal patterns mean. For professional work, especially electrical inspections, consider certification programs through organizations that teach thermography fundamentals and proper reporting procedures.
What’s the difference between thermal sensitivity and temperature accuracy?
Thermal sensitivity (measured in mK) tells you the smallest temperature difference the camera can detect—lower numbers mean it can spot subtle changes. Temperature accuracy (usually ±2°C or ±2%) tells you how precisely it measures actual temperatures. You want good sensitivity to see problems and good accuracy to know how serious they are. Both specs matter, but they measure different things.