
Thermal imaging technology has changed how we see the world around us. If you’ve ever wondered how firefighters find people in smoke-filled buildings or how electricians spot overheating wires without touching them, the answer is thermal cameras. These devices let us see heat instead of light, opening up a whole new way to detect problems, stay safe, and make smarter decisions across countless industries.
Whether you’re thinking about buying your first thermal camera, curious about how the technology works, or looking to expand your knowledge, this guide breaks down everything you need to know. We’ll walk through the science behind thermal imaging, the different types of cameras available, real-world uses, and practical tips for choosing the right equipment. If you’re interested in professional hunting applications, we’ve got you covered there too. Let’s get started and see what thermal imaging can do for you.
What Is Thermal Imaging?
Thermal imaging, also known as thermography, is the process of capturing and analyzing the heat emitted by objects. Think of it as a way to see temperature differences instead of colors or shapes. Every object with a temperature above absolute zero (-273.15°C or -459.67°F) emits infrared radiation, which is invisible to the human eye. That’s where thermal cameras come in.
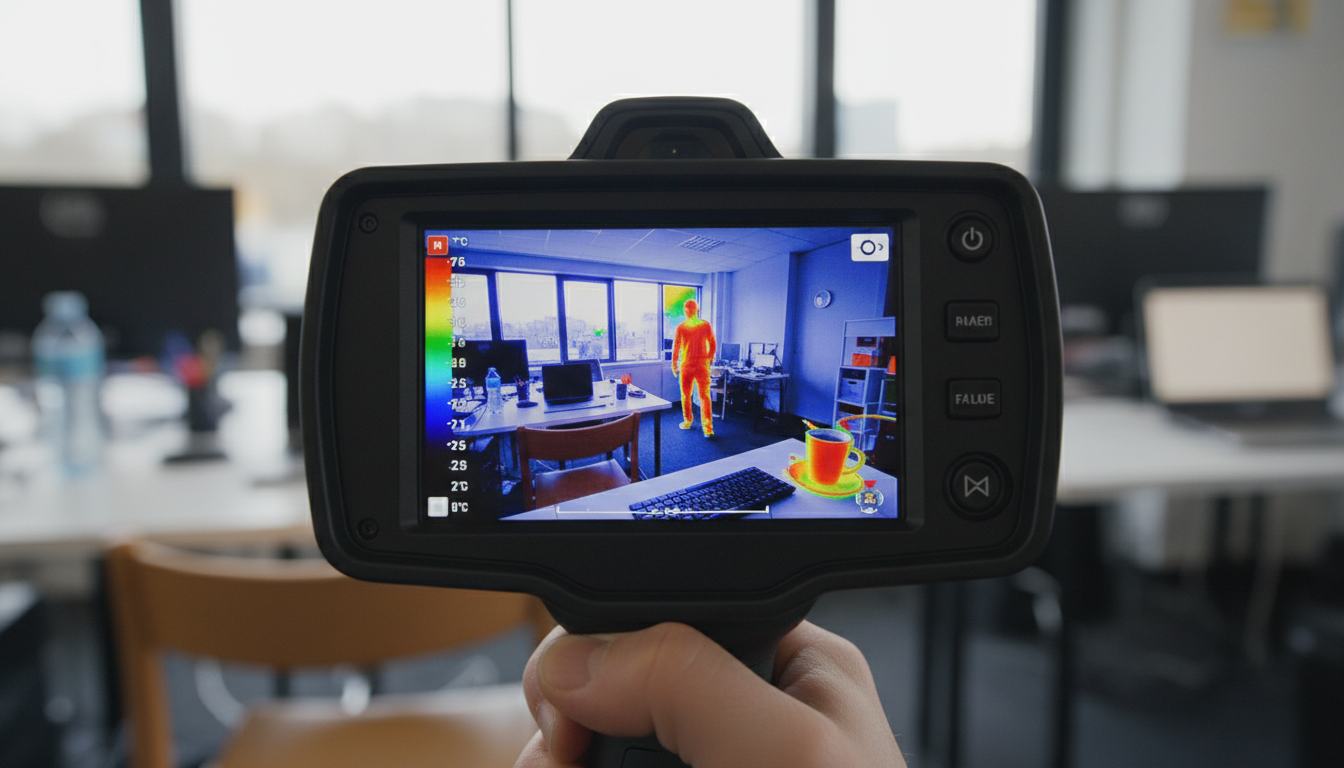
Thermal cameras detect this radiation and convert it into an image where different colors represent temperature variations. Typically, warmer areas show up in red or white, while cooler spots appear blue or purple. This color-coding makes it super easy to spot hot or cold areas at a glance. Unlike regular cameras that need light to work, thermal cameras can see in total darkness because they’re reading heat, not light. That’s why they’re so valuable for nighttime operations, search and rescue missions, and any situation where visibility is limited.
The key difference: Regular cameras capture visible light bouncing off objects. Thermal cameras capture infrared energy radiating from objects. This means a thermal camera can show you what’s hot or cold even when there’s no light at all.
How Thermal Cameras Work
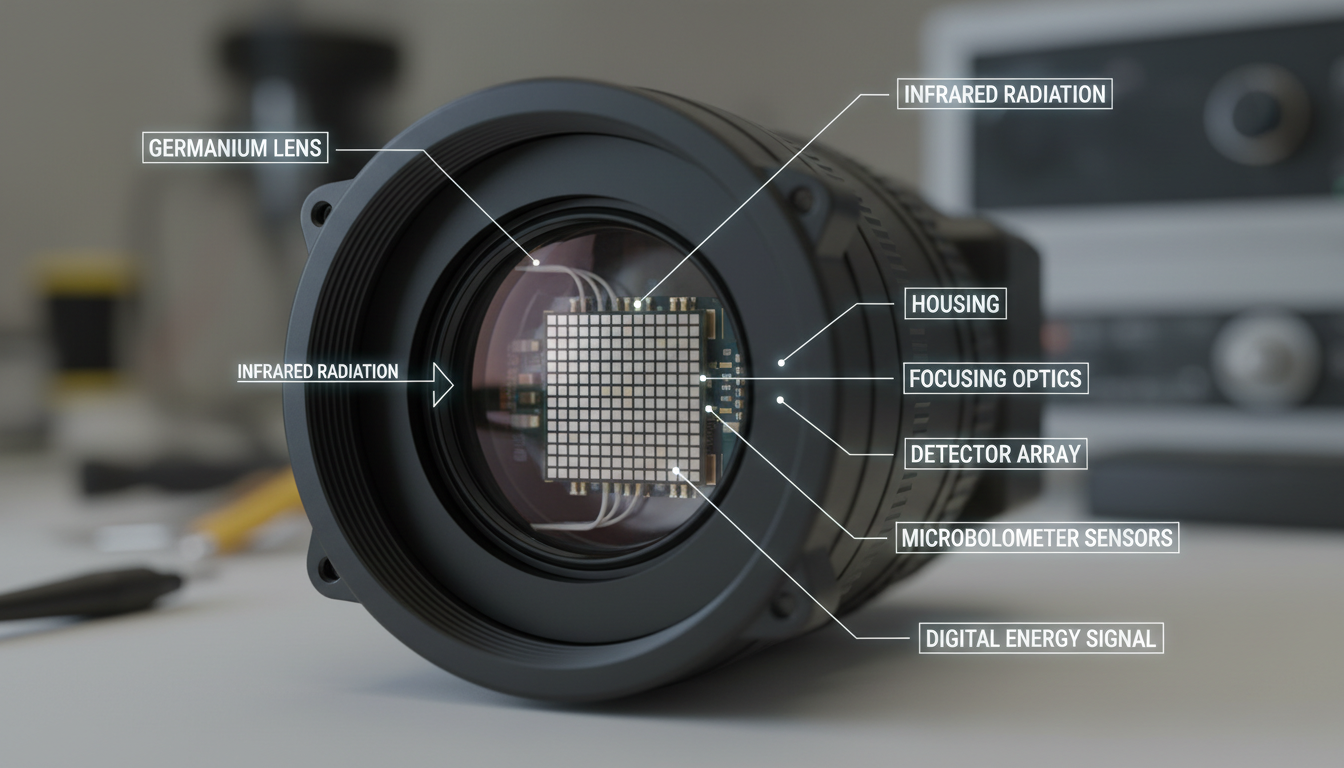
A thermal camera is made up of a lens, a thermal sensor, processing electronics, and a mechanical housing. Here’s how these parts work together to create those colorful heat maps you see:
The lens focuses infrared energy onto the sensor. This isn’t a regular glass lens like you’d find on a smartphone camera – it’s specially designed to let infrared wavelengths pass through. Once the heat hits the sensor, something interesting happens.
A bolometer is a simple sensor that absorbs thermal radiation and changes resistance as a result. This change in resistance can be electrically measured, and the incident radiation can be determined. Modern thermal cameras use thousands of these tiny sensors arranged in an array called a microbolometer. When infrared radiation reaches the microbolometer, each tiny sensor absorbs the energy and experiences a slight temperature increase.
The processing electronics then convert these resistance changes into electrical signals. These temperature readings are transformed into a colored image. A thermal camera typically displays warmer regions in tones such as red or yellow, while cooler surfaces take on colors like blue or green. All of this happens in real-time, so you’re seeing live heat patterns as they change.
The sensor can come in a variety of pixel configurations from 80 × 60 to 1280 × 1024 pixels or more. This is the resolution of the camera. These resolutions are low in comparison to visible light imagers because thermal detectors need to sense energy that has much larger wavelengths than visible light.
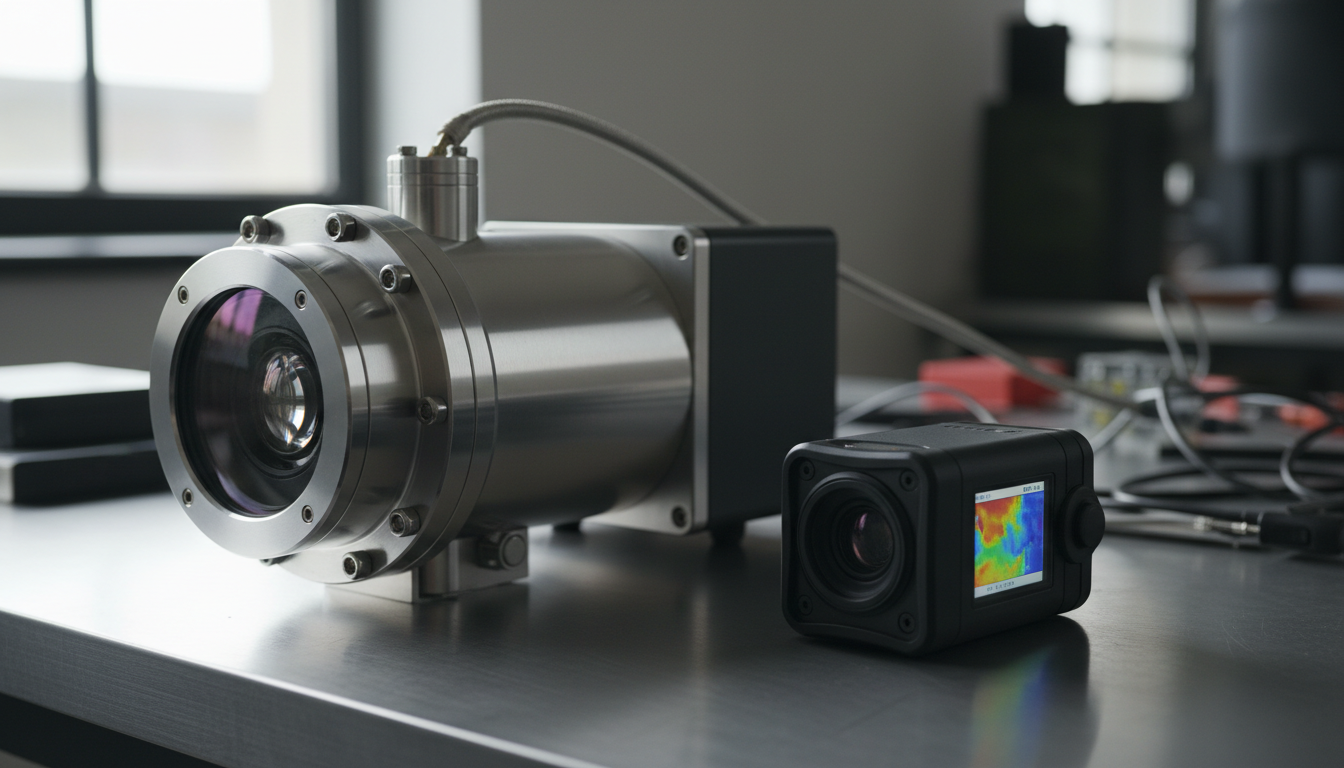
Types of Thermal Cameras
Not all thermal cameras are built the same. They fall into different categories based on how their sensors operate. Let’s break down the main types you’ll come across.
Cooled Thermal Cameras
Cooled cameras have a cooling mechanism within the sensor to improve sensitivity. They are typically more expensive and used in high-precision tasks like military surveillance or medical diagnostics. They operate with sensors that are cryogenically cooled, usually within a vacuum-sealed case. This cooling process improves their sensitivity, allowing them to detect even the tiniest temperature differences.
Cooled detectors can sense temperature variations as small as 0.02°C. This level of precision makes them perfect for scientific research, military operations, and other specialized applications where every degree matters. The downside? They’re pricey, complex, and need time to cool down before they’re ready to use.
Uncooled Thermal Cameras
Uncooled thermal cameras use uncooled infrared sensors. They are common, cost-effective, and suitable for many applications such as building inspections and preventive maintenance. These cameras operate at room temperature, so they don’t need bulky cooling systems.
Uncooled thermal imaging cameras are more common and affordable. They operate at ambient temperature, without the need for complex cooling systems. These cameras are designed to detect temperature differences as small as 0.2°C. While they’re not quite as sensitive as cooled cameras, they’re more than good enough for most everyday uses – from home inspections to industrial maintenance to security work.
The big advantage here is simplicity. Uncooled cameras are lighter, more reliable, and way more budget-friendly. They’re the go-to choice for most commercial and consumer applications. If you’re browsing options at Pixfra, you’ll find plenty of uncooled models that deliver excellent performance without breaking the bank.
Focal Plane Arrays (FPAs)
Focal plane arrays (FPAs) form the heart of both cooled and uncooled thermal cameras. Think of the FPA as the “film” in a thermal camera – it’s the grid of sensors that captures the heat image. Higher-quality FPAs have more pixels packed into the same space, which means sharper, more detailed images. Whether you’re looking at a cooled or uncooled camera, the FPA quality matters a lot for overall performance.
Key Specifications to Consider
When you’re shopping for a thermal camera, the spec sheet can look like alphabet soup. Here are the most important numbers to pay attention to:
Thermal Resolution
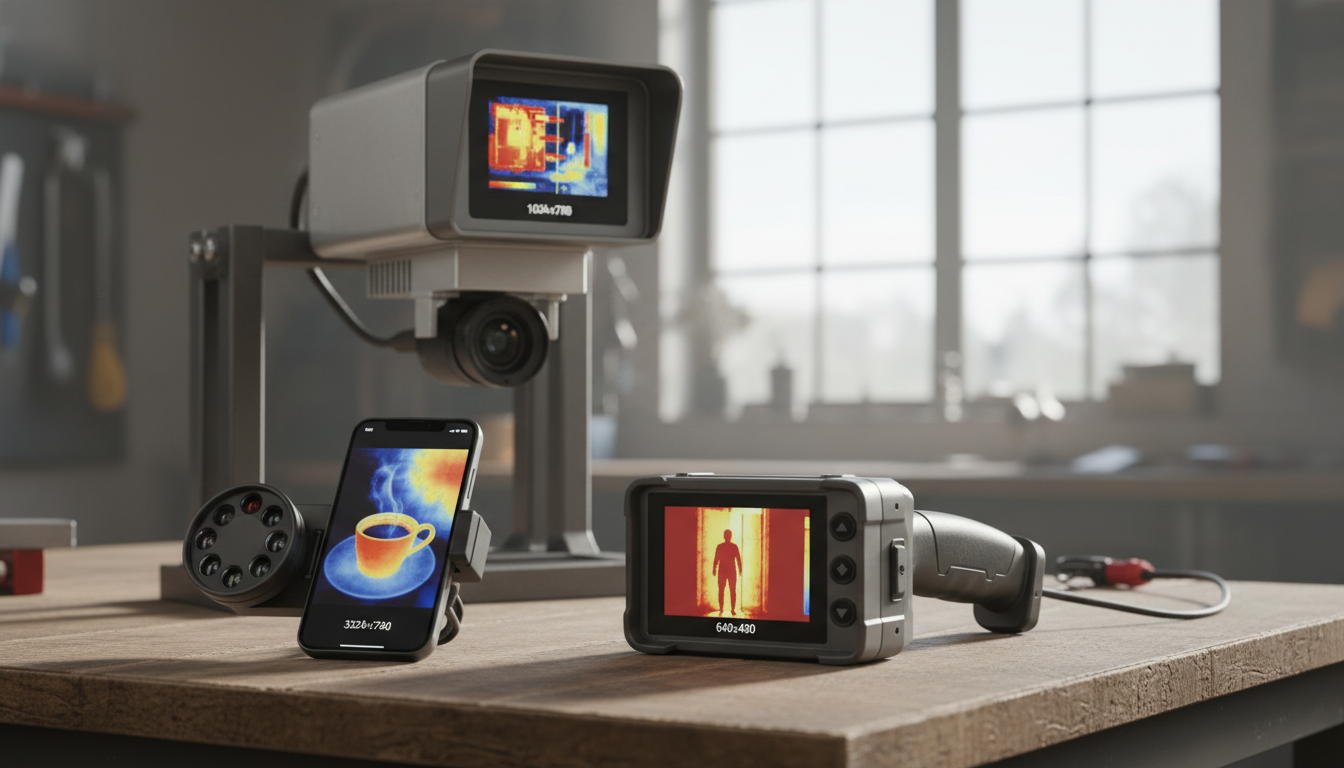
Thermal or infrared resolution indicates the detail captured by the thermal detector. For example, ‘160 x 120’ means the thermal camera has an array of 160 x 120 sensors or pixels that create its baseline thermal image. A higher thermal resolution provides more clarity, so more is better.
The standard resolutions are 160 x 120, 320 x 240 and 640 x 480 pixels. A 160 x 120 resolution will have 19,200 pixels while a 640 x 480 resolution will have 307,200 pixels. That’s a huge difference in image detail. Higher resolution lets you see smaller objects more clearly and work from farther away.
Thermal Sensitivity (NETD)
Thermal sensitivity defines the minimum temperature difference an infrared camera can detect. It is also called the Noise Equivalent Temperature Difference (NETD). The lower the number, the more sensitive the detector. Thermal sensitivity describes the smallest temperature difference observed when using a thermal device.
Most consumer cameras have NETD values around 40-100 mK (milliKelvins). High-performance models can go as low as 20 mK or even 10 mK. If you’re hunting for tiny temperature differences – like finding moisture behind walls or spotting early equipment failures – you’ll want a camera with better (lower) NETD.
Temperature Range
According to the temperature ranges we want to measure, the most commonly used industrial thermal cameras are of the following: LWIR for “low” temperature measurements between -50°C and 900°C, NIR-SWIR for high temperature measurements (450°C to 2450°C), and MWIR for measuring low and intermediate temperatures with high precision.
For most home and general industrial use, a range of -20°C to 400°C will cover your needs. Specialized applications might need cameras that can handle much higher (or lower) temperatures.
Field of View and Lens Options
The field of view (FOV) determines how wide an area your camera can see. A wider FOV is great for scanning large spaces, while a narrower FOV (telephoto lens) helps you zoom in on distant targets. Some advanced thermal cameras offer interchangeable lenses, giving you flexibility for different situations.
Common Applications of Thermal Cameras
Thermal imaging isn’t just for one industry – it’s everywhere. Here are some of the most popular ways people put thermal cameras to work:
Building Inspections and Energy Audits
In construction, thermal cameras detect heat loss, moisture issues, and insulation problems in buildings, promoting energy efficiency and safety. You can spot drafts around windows, missing insulation in walls, and even hidden water leaks before they cause serious damage. Home inspectors and energy auditors rely on thermal cameras to give homeowners a clear picture of where their heating and cooling dollars are escaping.
Electrical Maintenance
Thermal imaging identifies overheating circuits or equipment that could lead to failures, allowing for proactive maintenance. An overheating electrical connection shows up bright on a thermal camera, giving electricians an early warning before things catch fire or fail completely. This predictive maintenance approach saves companies tons of money and prevents dangerous situations.
Firefighting and Emergency Response
Thermal cameras aid firefighters and search & rescue teams in locating hotspots, victims, and hidden hazards in smoke-filled environments, enhancing safety and efficiency during emergency operations. When visibility drops to zero in a burning building, thermal cameras become a firefighter’s best friend. They can see through smoke to find people who need rescue and identify where the fire is burning hottest.
Security and Surveillance
Thermal cameras are integrated into security systems for perimeter monitoring, intruder detection, and surveillance in low-light or adverse weather conditions. Unlike regular security cameras that need light or infrared illuminators, thermal cameras work in complete darkness, through fog, and even light rain. They can spot intruders from far away based on their heat signature.
Industrial Process Monitoring
Industrial plants use thermal cameras to monitor machinery, inspect manufacturing processes, and catch overheating components before damage occurs. From production lines to power plants, thermal cameras help keep operations running smoothly by identifying problems early.
Hunting and Outdoor Activities
Thermal technology has become hugely popular among hunters and outdoor enthusiasts. Thermal monoculars and scopes let you spot game in total darkness or thick brush. For a deep dive into this application, check out our guide on thermal monoculars for hunting or explore the Sirius HD model.
Medical Diagnostics
In the medical field, thermal cameras are utilized for diagnostic purposes, detecting abnormalities in blood flow, inflammation, and tissue temperature. Doctors use thermal imaging to spot inflammation, monitor circulation, and even identify potential tumors based on temperature differences in body tissue.
How to Choose the Right Thermal Camera
Picking the right thermal camera depends on what you’re trying to do with it. Here’s a practical approach:
1. Define Your Use Case: Are you inspecting buildings? Monitoring electrical panels? Hunting? Each application has different requirements for resolution, temperature range, and features.
2. Set Your Budget: Thermal cameras range from a few hundred dollars for smartphone attachments to tens of thousands for high-end professional models. Know what you can spend before you start shopping.
3. Consider Resolution Needs: The higher the resolution of the detector, the sharper and more accurate each individual point in the image will be. Higher resolution infrared cameras can measure smaller targets at a greater distance. If you need to see fine details or work from a distance, invest in higher resolution.
4. Check Thermal Sensitivity: For applications that need to detect subtle temperature differences – like finding moisture or spotting early equipment wear – look for cameras with NETD values of 50 mK or better.
5. Verify Temperature Range: Make sure the camera can measure the temperatures you care about. Building inspections typically need -20°C to 150°C, while industrial monitoring might need much higher ranges.
6. Look for Useful Features: Modern thermal cameras often include extras like built-in digital cameras for context photos, WiFi connectivity for sharing images, picture-in-picture modes, and software for analysis. Decide which features actually add value for your work.
7. Think About Form Factor: Handheld cameras are great for walk-around inspections. Fixed-mount cameras work better for continuous monitoring. Smartphone attachments offer portability and affordability for casual use.
Tips for Getting the Best Results
Once you have a thermal camera, here are some tips to get accurate, useful images:
Understand Emissivity: Different materials emit infrared radiation differently. Most thermal cameras let you adjust the emissivity setting to match what you’re measuring. Shiny metal surfaces have low emissivity and can be tricky – they reflect heat from other sources rather than showing their true temperature.
Watch for Reflections: Shiny surfaces can reflect heat from other objects, giving false readings. Be aware of this when interpreting your images.
Consider Environmental Factors: Wind, rain, and ambient temperature can all affect your readings. Try to measure in stable conditions when possible.
Get the Right Distance: Each camera has an optimal distance range. Too close or too far, and you might not get accurate measurements.
Use Context Images: Many thermal cameras can capture both thermal and visible light photos. These context images make it much easier to understand what you’re looking at and to communicate findings to others.
Frequently Asked Questions
Can thermal cameras see through walls?
Contrary to popular belief, infrared cameras cannot see through walls or other solid objects. They can only measure the heat emitted by the scene being observed. A thermal image of a wall will show the flow of heat through the wall if there is a heat source behind it, but it cannot “see” the heat source itself. Thermal cameras detect surface temperatures, so they can reveal patterns that suggest what’s behind a wall (like a hot pipe), but they can’t actually see through solid objects.
What’s the difference between thermal imaging and night vision?
Regular cameras and the human eye both work on the same basic principle: visible light energy hits something, bounces off it, a detector receives the reflected light, and then turns it into an image. Thermal imagers make pictures from heat, not visible light. Heat and light are both parts of the electromagnetic spectrum, but a camera that can detect visible light won’t see thermal energy, and vice versa. Night vision amplifies available light to help you see in the dark. Thermal imaging detects heat and works even in total darkness.
How much does a good thermal camera cost?
Prices vary widely based on specifications and intended use. Entry-level smartphone attachments start around $200-400. Quality handheld cameras for home inspection and general use run $500-2,000. Professional-grade models for industrial or scientific applications can cost $5,000-$50,000 or more. For most DIY and professional trades applications, cameras in the $800-1,500 range offer excellent value.
Do thermal cameras work in daylight?
Yes! Because a thermal camera reads heat instead of visible light, it can reveal crucial information even in darkness or visually obstructed settings. Thermal cameras detect infrared radiation, which is always present regardless of lighting conditions. They work equally well day or night.
What resolution thermal camera do I need?
The two major factors that you should keep in mind when buying a thermal imager are Detector Resolution and Thermal Sensitivity. For basic home inspections and casual use, 160×120 resolution is adequate. For professional building inspection, electrical work, or industrial applications, 320×240 offers a good balance of detail and cost. High-end applications requiring precise measurements at distance should consider 640×480 or higher. Remember that more pixels mean more detail, which translates to better decisions and more accurate measurements.