

Your thermal scope is a serious investment, and keeping that lens in top shape makes all the difference between spotting your target and missing out. We’ve seen too many hunters damage their optics by using the wrong cleaning methods, and honestly, it doesn’t have to be that complicated.
Think of your thermal lens like the windshield on your truck. A little dust won’t kill you, but grime and fingerprints? That’ll mess with your clarity fast. But here’s the thing—thermal scope lenses aren’t regular glass. They’re made from germanium or other specialized materials with delicate coatings that need careful handling.
We’ve put together this guide to show you exactly how we maintain our thermal optics at Pixfra. Whether you’re running our Sirius HD, the Pegasus 2 LRF, or another thermal scope, these methods will keep your glass clean and your images sharp.
Why Thermal Scope Lens Care Matters
Fingerprint marks, water splashes, dirt, and dust can significantly impair your scope’s functionality, leading to subpar results.And we’re not just talking about slightly fuzzy images—we’re talking about losing contrast, missing heat signatures, and potentially blowing a hunt you’ve been planning for weeks.
The germanium lenses in thermal scopes cost way more than regular optical glass. Clean your thermal camera lens only when strictly necessary, and only when there is visible dirt or fingerprints. Over-cleaning can actually wear down the anti-reflective coating faster than a little dust ever would.
What Not to Use on Your Thermal Lens
Let’s start with what’ll wreck your optics. We’ve seen people make these mistakes, and they’re expensive ones.
Never use your shirt, paper towels, or handkerchiefs to wipe the lens, as they can scratch the surface.Seriously, resist the urge. Your cotton t-shirt feels soft, but it’s basically sandpaper compared to proper lens cleaning materials.
DO NOT clean with ammonia-based solutions—this will degrade the special coating on the lens.Skip the Windex and household glass cleaners. They’re designed for windows, not precision optics with specialized coatings.
Don’t wipe a dusty lens without removing loose particles first. Those tiny bits of sand or grit act like little knives when you drag them across the coating.
Tools You Actually Need
You don’t need a ton of gear, but you do need the right stuff. Here’s what should be in your cleaning kit:
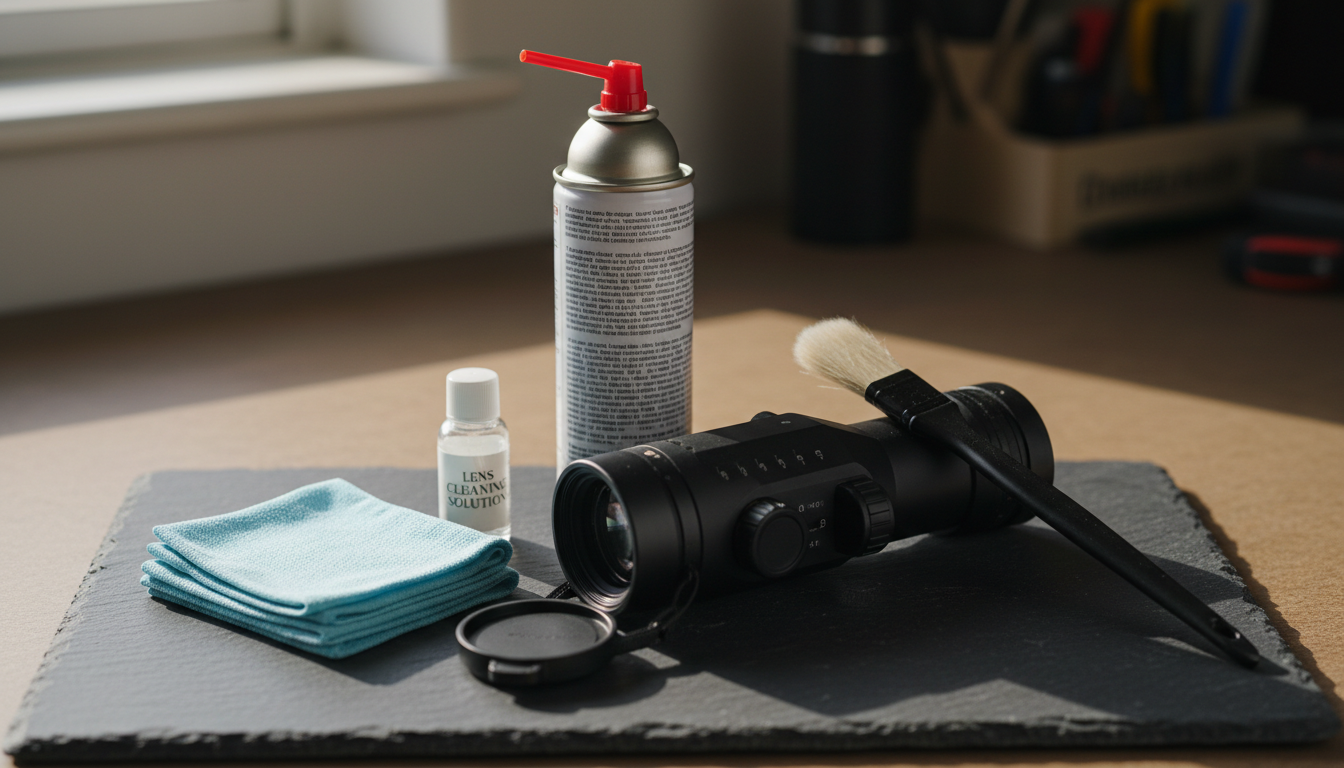
Compressed air or rocket blower: Use compressed air aerosols to blow off loose dust.A rubber rocket blower works great too and won’t risk that cold blast that canned air sometimes gives.
Microfiber cloths: Not just any cloth—get optical-grade microfiber designed for camera lenses or precision optics. These won’t leave lint or scratch delicate coatings.
Lens cleaning solution: Use lens cleaner that is 96% isopropyl alcohol, or a commercial lens cleaner with at least 30% isopropyl alcohol.Stick to solutions made for coated optics.
Soft lens brush: A brush with ultra-fine bristles helps remove stubborn dust without touching the lens with your fingers.
Cotton swabs or lens tissue: For detailed work on stubborn spots, but use sparingly.
Step-by-Step Lens Cleaning Process
Here’s how we clean thermal scope lenses the right way. Follow this order—skipping steps is where people get into trouble.
Step 1: Remove loose debris
Never wipe a dusty lens directly. Loose particles of dust or sand can scratch the surface. Always start with a gentle air duster or a soft, optical brush to remove dirt without friction.
Point the lens downward so gravity works with you, not against you. Give it a few puffs with your air blower or compressed air from about 6 inches away. Watch those particles fall away.
Step 2: Brush away remaining dust
A soft brush removes dust before using a microfiber cloth or specialized wipes.Use gentle, sweeping motions from the center outward. Don’t press hard—let the brush do the work.
Step 3: Apply cleaning solution
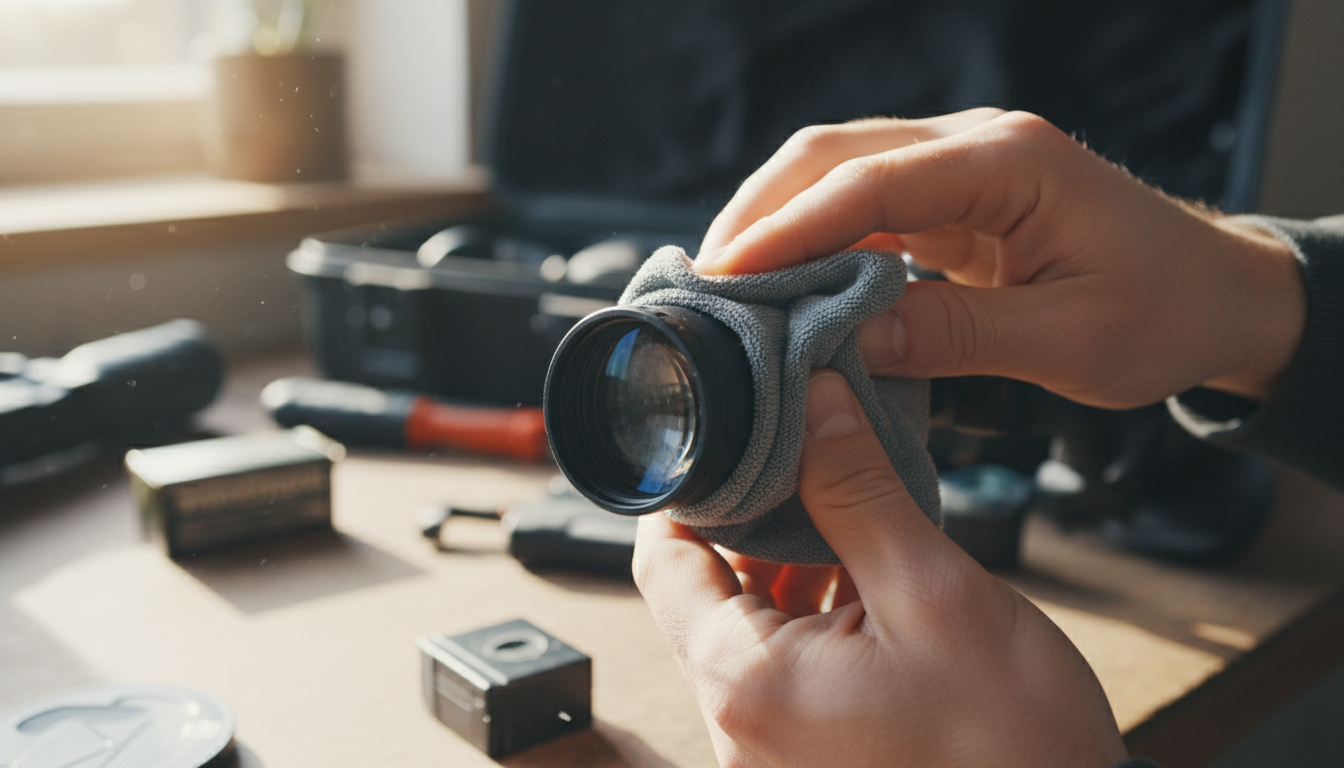
If you still see smudges or fingerprints after steps 1 and 2, it’s time for liquid cleaner. Never spray directly on the lens. Instead, put a small amount of cleaning solution on your microfiber cloth.
Step 4: Wipe the lens
Wipe from center of lens to outer edges using a rolling motion that allows fresh cloth to contact the lens. Use gentle, circular motions and let the cloth glide across the surface. You’re not scrubbing a pan—you’re caressing precision optics.
Step 5: Final inspection
Hold the scope up to light and check for streaks or remaining spots. If you see any, repeat step 4 with a clean section of your cloth.
Protecting Your Lens in the Field
Cleaning is important, but prevention saves you way more time. Here’s what we do to keep our lenses cleaner longer.
During usage, always keep the lens covers closed to shield against scratches, dust, and debris. Those flip-up lens caps exist for a reason. Use them whenever you’re moving through brush or not actively glassing.
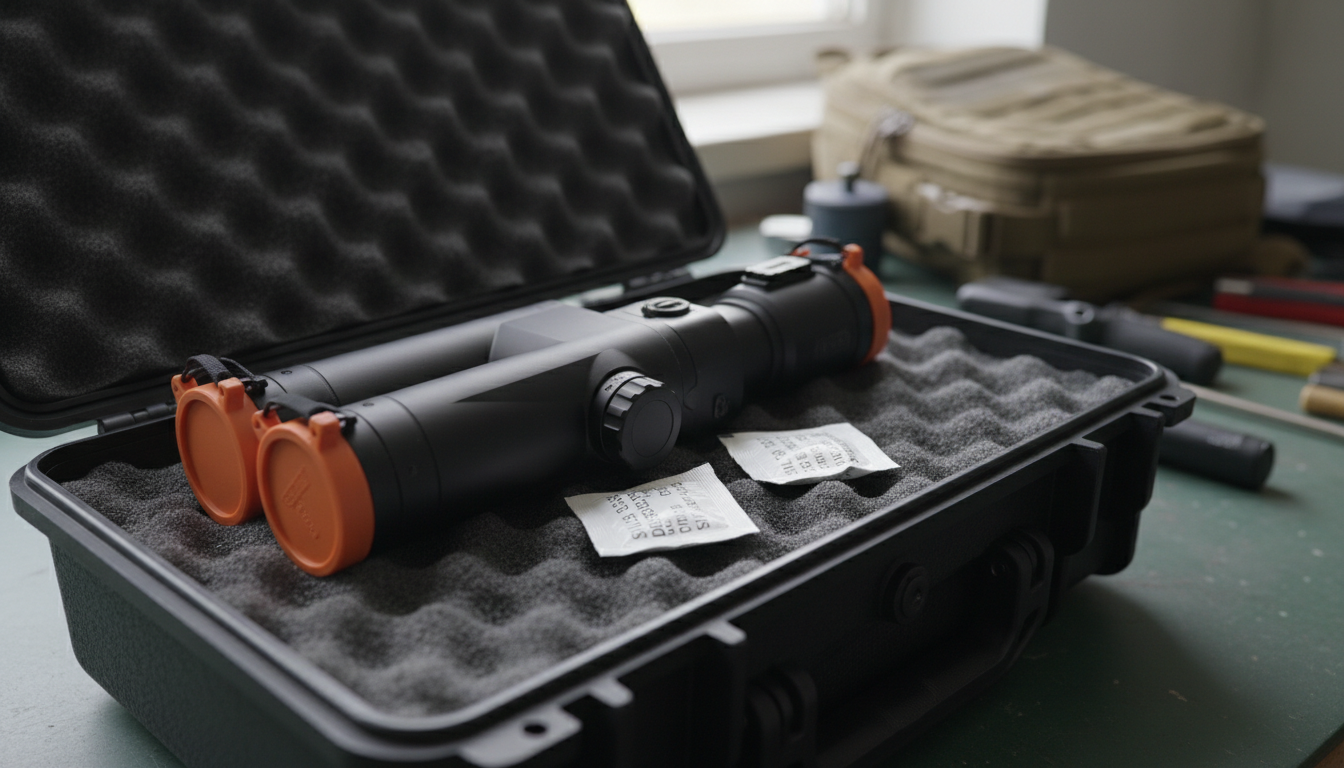
Store your thermal scope in a dedicated case with fabric cases with foam inserts or plastic or metal cases equipped with soft elements. To combat dampness, add silica gel bags inside the case. Moisture is the enemy of electronics and optics. A few desiccant packs are cheap insurance.
Keep your scope away from extreme temperature swings when possible. Even waterproof scopes can suffer from internal condensation if exposed to rapid temperature changes. If you’re going from a warm truck to freezing temps, let your scope acclimate gradually.
Cleaning the Scope Body and Housing
Don’t forget about the rest of your thermal scope. Wipe the exterior surfaces of metal and plastic parts off dust and dirt with a cotton cloth. A slightly damp cloth works fine for the housing—just keep moisture away from ports and seals.
Check rubber eyecups and armor for cracks or wear. These protect the internal electronics from moisture and impacts. If you spot damage, address it before it becomes a bigger problem.
Clean around buttons, dials, and adjustment knobs with a soft brush or cotton swab. Dirt buildup in these areas can affect functionality over time.
How Often Should You Clean Your Thermal Scope?
Here’s where people often go wrong—they clean too much or not enough.
Clean your lens whenever you notice dirt or smudges affecting your visibility, but avoid excessive cleaning to prevent unnecessary wear. We typically give our scopes a light cleaning after every hunt and a more thorough cleaning monthly during heavy use.
Clean the lens lightly after every hunt and perform a deeper cleaning if exposed to mud, rain, or heavy dust.If you’ve been in nasty weather or dusty conditions, don’t wait—clean it when you get home.
Storage Best Practices
Store in a dry, shaded, and stable-temperature environment.We keep our thermal scopes in climate-controlled areas, away from windows and heat sources.
Check and remove the battery if storing long-term (set to 40–60% charge).This prevents battery degradation and potential leakage that could damage your scope’s internals.
Before the hunting season starts, run a pre-season check. About one month before the season, run a pre-season checklist: fully charge and test batteries, inspect the housing and rubber seals, clean and examine the lens, update firmware, check sensor calibration and dead pixels, verify mounts/accessories, and do a real-world night field test.This ensures you’re ready when it counts.
Common Cleaning Mistakes to Avoid
We’ve seen these errors too many times:
Over-cleaning: Clean the lens gently – excessive cleaning may wear away the anti-reflective coating, causing more transmission loss than a little dust. A few dust specks won’t hurt image quality as much as worn coatings will.
Using rough materials: Avoid harsh chemicals that can damage sensitive coatings. Never wipe a dry, dusty lens, as this can scratch the surface.
Ignoring the eyepiece: Don’t forget to clean the eyepiece lens too. Smudges on the rear lens affect image quality just like dirt on the objective lens.
Rushing the process: Take your time. A rushed cleaning job risks scratching or streaking the lens.
When to Seek Professional Service
Sometimes you need expert help. If you notice persistent image quality issues after cleaning, declining performance, or visible damage to lens coatings, it’s time to contact the manufacturer or an authorized service center.
Most quality thermal scopes come with multi-year warranties. Don’t try to disassemble or deep-clean internal components yourself—that’ll void your warranty faster than anything.
Conclusion
Taking care of your thermal scope lens doesn’t require special skills or expensive equipment. It just takes the right tools, proper technique, and a little patience. Start with air to remove loose debris, use appropriate cleaning solutions, and always work gently.
A few minutes of attention after each outing can add years to your device’s lifespan and keep your vision clear in every condition. We’ve seen thermal scopes last 10+ years with proper care and maintenance.
Whether you’re using Pixfra’s Arc LRF for long-range work or the Draco for close-in hunting, these cleaning methods will keep your optics performing at their best. Pair your thermal scope with our IR Torch for even better results in the field.
Remember, clean optics mean better detection, clearer images, and more successful hunts. Take care of your gear, and it’ll take care of you. For more real-world thermal scope performance data, check out our feral hog eradication case study showing how proper equipment maintenance contributed to successful results.
FAQs
Can I use regular eyeglass cleaner on my thermal scope lens?
No, avoid regular eyeglass cleaners on thermal scopes. Thermal lenses use germanium or specialized materials with unique coatings that react differently than standard glass. Use lens cleaners specifically designed for optical instruments with at least 30% isopropyl alcohol, or 96% isopropyl alcohol solutions. Regular eyeglass cleaners may contain additives that damage thermal scope coatings and reduce image quality over time.
How do I remove fingerprints from my thermal scope lens without causing damage?
First, blow away any loose dust with compressed air or a rocket blower. Then apply a small amount of optical-grade lens cleaner to a microfiber cloth—never directly on the lens. Gently wipe from the center outward using circular motions with minimal pressure. The key is removing particles first before any wiping, which prevents scratching the delicate germanium surface.
Is it safe to clean my thermal scope in cold weather or should I wait?
You can clean your thermal scope in cold weather, but bring it inside first and let it acclimate to room temperature for 15-20 minutes. Rapid temperature changes can cause condensation inside the scope. Once acclimated, clean normally using your standard process. Never apply liquid cleaners to a frozen lens, as this can cause thermal shock and potentially crack coatings.
What should I do if moisture gets inside my thermal scope?
If you notice internal moisture or fogging, stop using the scope immediately. Place it in a warm, dry location with desiccant packs nearby, but don’t expose it to direct heat. Leave lens caps off to allow air circulation. If moisture persists after 48 hours, contact the manufacturer or an authorized service center—internal moisture often indicates seal failure that requires professional repair.
How can I tell if I’ve damaged the coating on my thermal lens?
Coating damage typically appears as permanent marks, scratches, or areas where the image looks degraded even after cleaning. You might notice reduced contrast, haziness, or rainbow-like patterns on the lens surface when viewed at an angle. If cleaning doesn’t improve image quality and you see visible marks on the lens, the coating may be compromised. Professional inspection can confirm coating damage and determine if repair or replacement is needed.