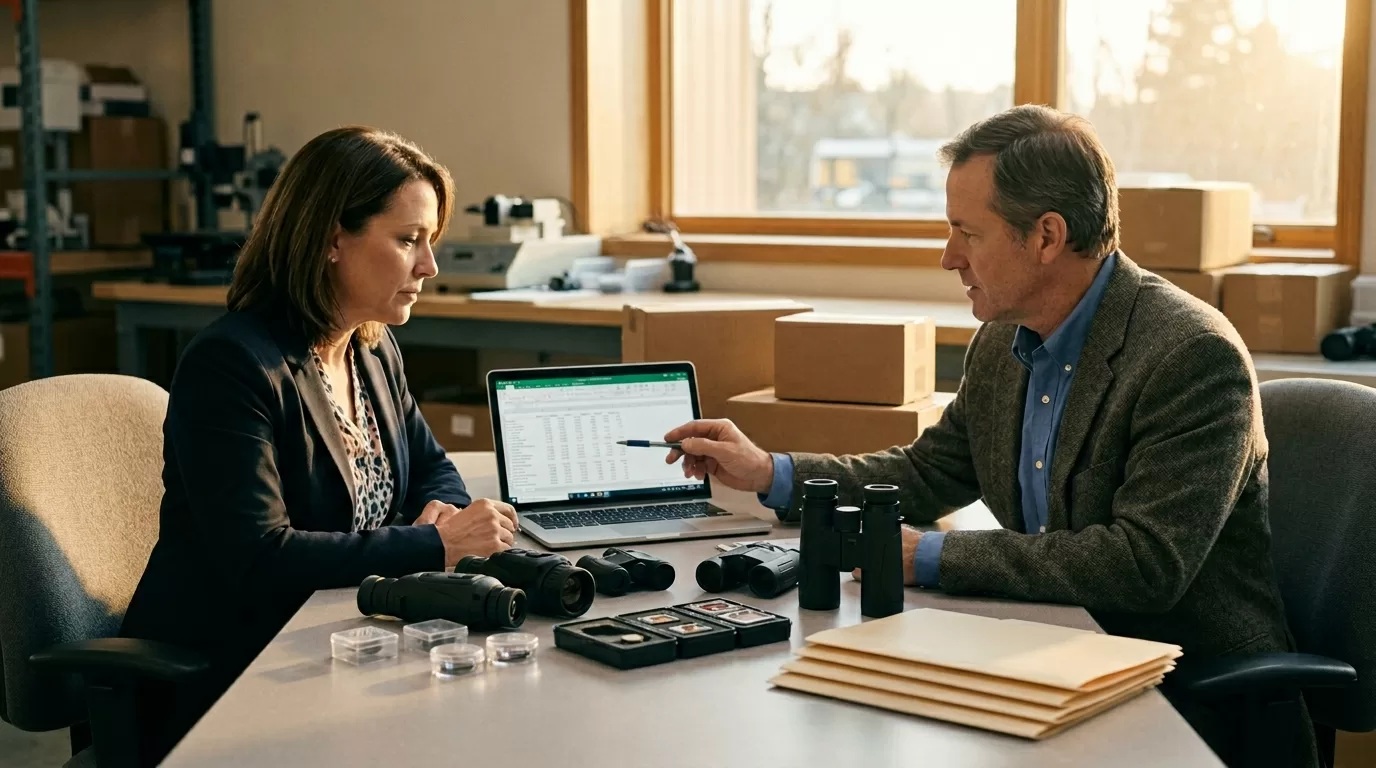
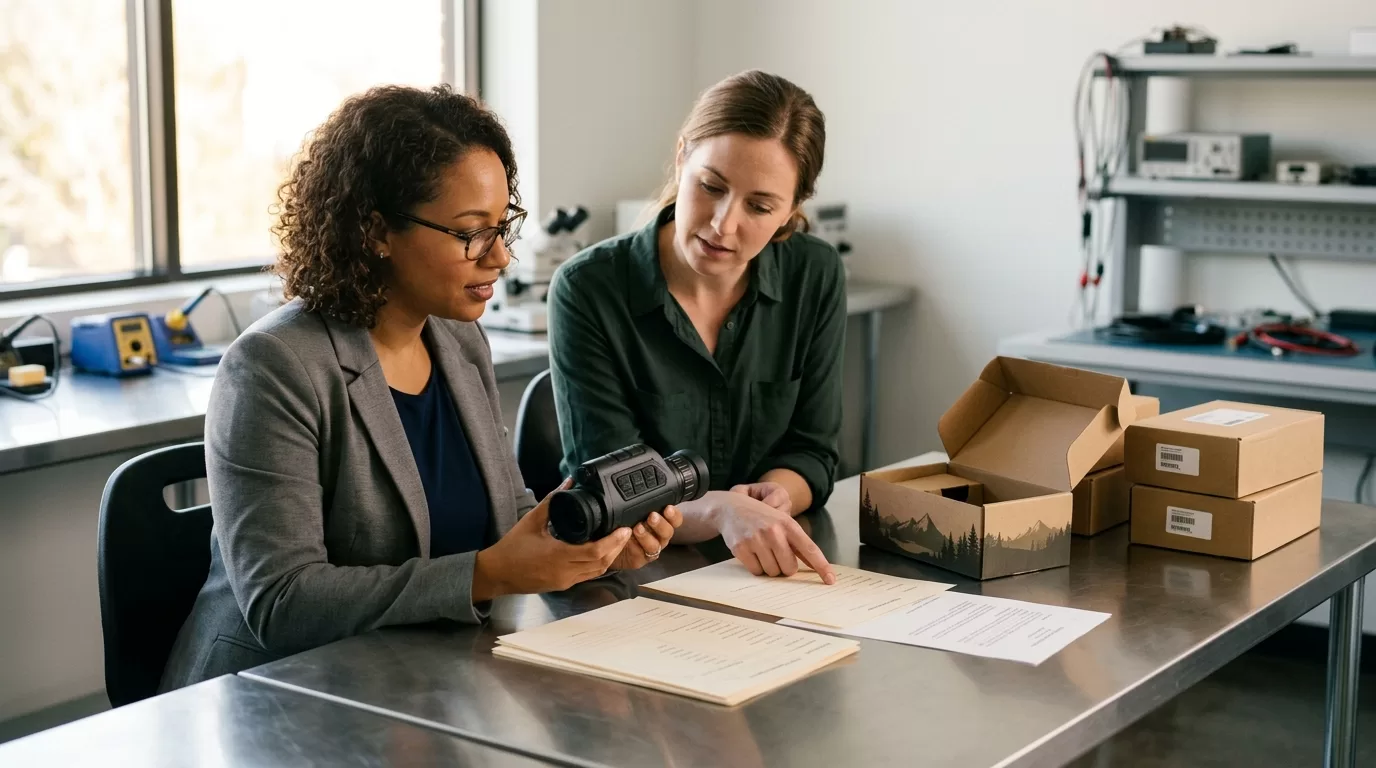
If you need to negotiate MOQ with a thermal optics manufacturer, start by reducing the manufacturer’s production risk, then trade something concrete: deposit, forecast, standard packaging, or a dated reorder. MOQ changes when you ask for a 640×512 detector, a 35 mm lens, app changes, reticle presets, private-label packaging, or compliance paperwork for a U.S. sales channel. The first job is to find which part of your request is setting the floor.
A new buyer often asks the wrong question: “Can you do 20 units?” A stronger question is: “Which requirement makes the MOQ 300, and what changes would make a 50-unit pilot workable?”
1. Ask which cost sets the MOQ: sensor, lens, tooling, packaging, or compliance.
2. Keep first order on standard hardware, firmware, and carton.
3. Pay for samples, engineering, and inspection instead of asking the factory to absorb them.
4. Split commitment into pilot order plus dated reorder.
5. Trade lower MOQ for deposit, shared packaging, simple SKU mix, and clear forecast.
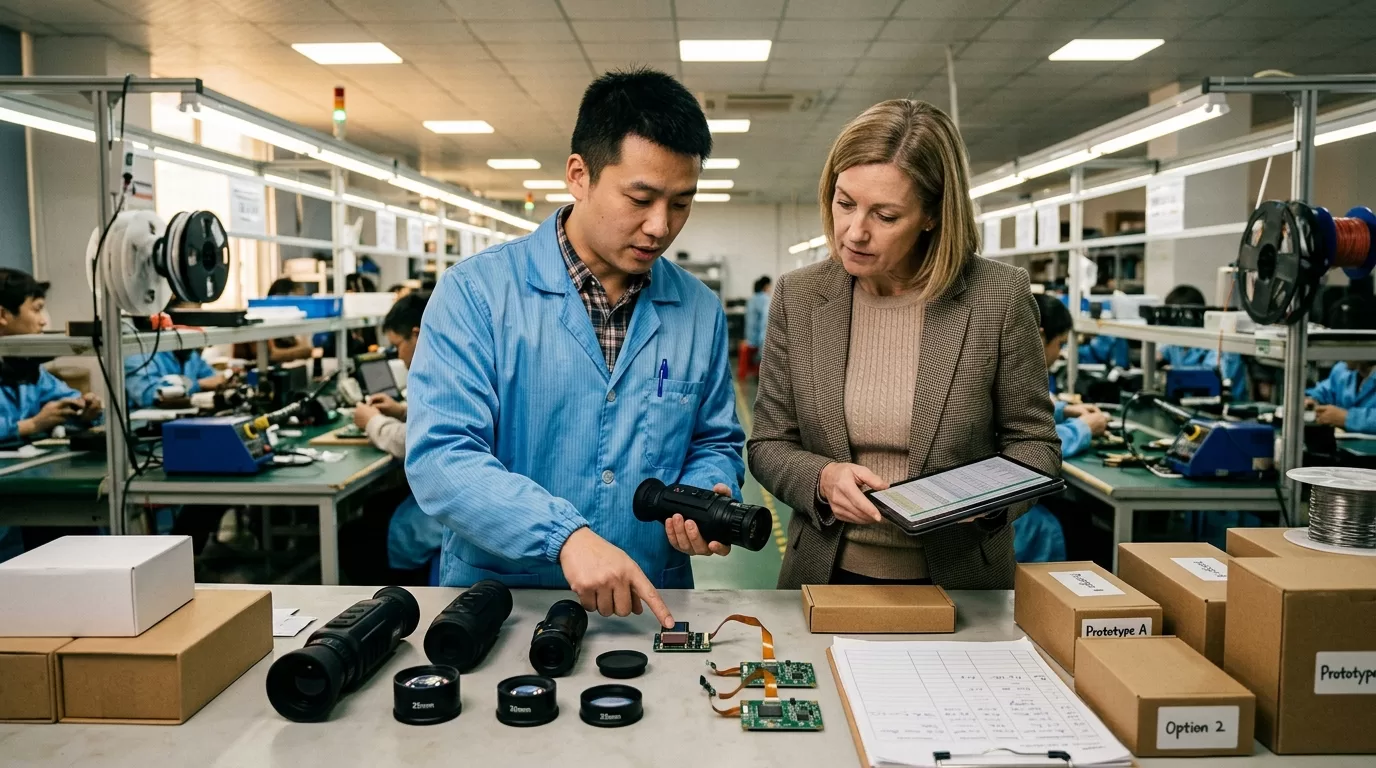
Thermal optics MOQs are built from setup costs. Detector purchasing, lens assembly, waterproof housing checks, firmware loading, image calibration, and packaging print runs all create small minimums inside the bigger MOQ. A 384×288 thermal monocular in a standard housing might hit one factory threshold; the same unit with a branded startup screen, U.S. carton, custom manual, and changed Wi-Fi app can hit four.
The best way to negotiate MOQ with a thermal optics manufacturer is to turn “small order” into a low-risk production plan. Say what you’ll keep standard. Say what you’ll pay for. Give the supplier a real reorder window, such as “80 units now, 220 units within 90 days if field testing passes.”
| Factory answer | Better buyer question | Possible path |
|---|---|---|
| MOQ is 300 units | Which part requires 300? | Reduce branding or split into pilot plus reorder |
| Custom carton needs MOQ | Can we use standard carton with a label? | Lower first order, brand later |
| 640 sensor supply is tight | Can we start with one 384 SKU? | Prove demand before higher trim |
| Firmware change adds MOQ | Can logo stay on packaging only? | Avoid engineering work |
| Tooling is required | Can we pay tooling separately? | Separate unit MOQ from tooling cost |
Don’t negotiate only on quantity. Negotiate the order shape.
An 80-unit order of one thermal monocular SKU is cleaner than 20 units each across four trims. The warehouse picks one carton. Production loads one firmware version. QC checks one optical setup. Your sales team also learns faster because every dealer demo, return, and customer question points to the same model.
A factory MOQ is rarely one fixed number. It moves with customization. For thermal optics, the biggest cost drivers are detector resolution, focal length, housing changes, firmware requests, app work, private-label packaging, accessories, and certifications. The low-friction items are usually labels, outer cartons, quick-start inserts, and batch timing. The hard items are sensor changes, new molds, new lens assemblies, and model-specific test reports.
Detector choices matter because a 256×192, 384×288, and 640×512 device may sit on different purchasing plans. Pixfra’s Mile 2 range, for example, includes 256×192, 384×288, and 640×512 options across different model trims. That doesn’t mean a buyer can freely mix all detector levels in one tiny pilot. From a production view, those are different builds with different cost stacks.
Before you trade MOQ for a private-label carton, confirm the compliance packet, because Pixfra’s guide to thermal optics certifications buyers should demand explains why CE, FCC, and RoHS paperwork has to match the actual model, charger, battery, wireless module, and sales market. A PDF from a similar model isn’t enough for a serious U.S. dealer program.
| Usually negotiable | Usually harder |
|---|---|
| Logo sticker on standard carton | New molded housing |
| Standard manual plus insert | Full manual rewrite in multiple languages |
| One SKU pilot | Mixed detector resolutions |
| Standard accessories | New mount, case, or battery pack |
| Paid sample order | Free engineering on first order |
Here’s the blunt version: custom branding is cheap until it touches production. A logo on a carton is simple. A logo molded into the housing means tooling, color matching, material testing, and a longer approval loop. That’s why “same product, just my brand” can still raise MOQ if the request reaches beyond packaging.
A one-SKU pilot works better than a mixed trial pack. If you’re entering the U.S. hunting, wildlife, farm security, or outdoor retail channel, pick the product level that matches your first customer. A store selling entry thermal monoculars may test a 256×192 or 384×288 unit first. A dealer selling long-range scanning may need a 640×512 model with a 25 mm or 35 mm lens. Mixing all of them in the first PO slows learning.
The strongest MOQ levers are the ones that remove doubt for the manufacturer. A signed forecast beats vague optimism. A 50% deposit beats a request for net 30. A standard carton beats a new print run. A dated reorder beats “we’ll buy more if it sells.” Suppliers hear that line every week.
| Buyer lever | Why it helps MOQ talks |
|---|---|
| 50% deposit | Reduces factory cash risk |
| Standard packaging | Avoids carton print minimums |
| One SKU | Cuts setup and QC changes |
| Paid sample fee | Covers engineering time |
| 90-day reorder plan | Gives production a reason to reserve parts |
| Third-party inspection | Reduces dispute risk before shipment |
Try this structure: “We can accept your standard packaging and standard firmware for the first 80 units. If the pilot passes U.S. dealer testing, we’ll place 220 units within 90 days with private-label carton artwork.” That’s a deal a production manager can discuss.
What doesn’t work? Asking for the lowest MOQ, lowest price, custom box, custom startup logo, free samples, net 60 payment, and DDP delivery to Ohio in the same email. That reads like risk from every angle. Pick your battle. For a first order, MOQ matters more than a perfect carton.
Payment terms can move MOQ because they change who carries the risk. The U.S. International Trade Administration says cash-in-advance reduces exporter credit risk because the seller receives payment before shipment, while full prepayment is less attractive for the buyer. That tension is useful. If you want a smaller first order, offer payment terms that make the smaller run easier to approve.

For a new buyer, asking for 30 units and open-account payment is a weak position. Asking for 50 or 80 units with 50% deposit and 50% before shipment is much stronger. If you need extra protection, add pre-shipment inspection instead of pushing the supplier to finance your inventory.
| Order type | Practical term |
|---|---|
| 2-5 samples | 100% prepaid |
| 50-unit pilot | 50% deposit, 50% before shipment |
| 100-200 units | 30/70 or 40/60 after relationship starts |
| 300+ units | Better unit price, stronger delivery slot |
| Annual forecast | Quarterly releases tied to reorder dates |
Incoterms also affect the conversation. EXW gives the buyer more logistics work. FOB gives a cleaner handoff at port. DDP to a U.S. warehouse may sound convenient, but it pushes customs, duties, delivery issues, and paperwork onto the seller. If MOQ is your main concern, keep logistics simple for the first order.
There’s a tradeoff. Better payment terms can lower MOQ, but they shift cash-flow pressure onto you. A 50% deposit on 80 units of thermal scopes is real money. Use that lever when you have dealer demand, not when you’re still guessing.
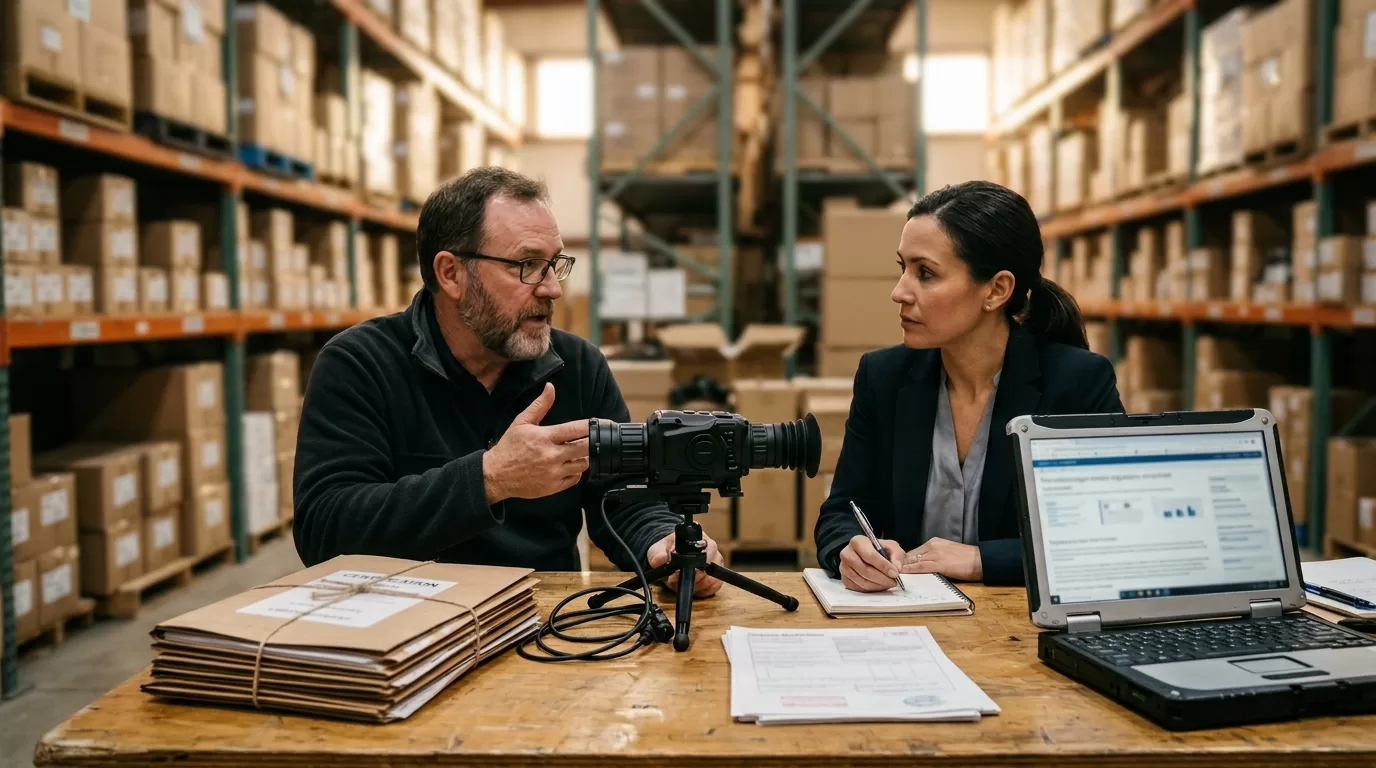
Some MOQ requests should be rejected, even if the supplier agrees. Thermal optics aren’t generic plastic accessories. Image quality depends on detector grade, lens focus, calibration, firmware behavior, screen quality, and waterproof assembly. A cheap 30-unit batch with inconsistent sensors can burn a new dealer faster than a higher MOQ with stable quality.
Compliance is another red line. The U.S. Bureau of Industry and Security’s Commerce Control List Category 6 includes controls for some thermal imaging cameras under ECCN 6A003, so classification and destination checks matter. This is especially sensitive if products include thermal imaging, laser rangefinding, wireless functions, or military-adjacent use cases.
Don’t negotiate these away:
The advice in this guide doesn’t apply to every purchase. If you’re buying closeout stock from an older batch, MOQ may be lower because the factory wants space back. That can be fine for a discount retailer, but check firmware age, battery condition, accessory completeness, and warranty path. A low price with dead batteries and no replacement parts isn’t a win.
Be careful with “same as branded model” claims too. Two thermal monoculars can share a detector resolution and still perform differently because of lens quality, NETD, image processing, display, housing seal, and calibration. A 640×512 badge alone doesn’t tell you enough.
Send the MOQ email after you know the product category, detector level, lens size, target price band, and sales channel. “Thermal monocular for hunting” is too broad. “384×288 thermal monocular, 19 mm lens, standard housing, U.S. dealer pilot, 80 units” gives the manufacturer something real to quote.

Use this version as a starting point:
> Subject: Pilot order request for standard thermal monocular SKU
>
> Hi [Name],
>
> We’re preparing a U.S. dealer pilot for one thermal monocular SKU: 384×288 detector, standard housing, standard firmware, and standard accessories.
>
> Your quoted MOQ is 300 units. For the first order, can you quote these two options?
>
> Option A: 80 units, standard packaging, 50% deposit, 50% before shipment.
> Option B: 80 units now plus 220 units within 90 days after field testing, same SKU.
>
> Please also tell us which requirement sets the 300-unit MOQ: detector purchase, lens setup, carton printing, firmware, certification, or another cost.
>
> We can delay private-label packaging until the second order if that helps.
That last sentence does a lot. It tells the supplier you’re serious about volume, but you’re also realistic about factory costs. It gives them room to say yes without eating setup expense.
If you’re comparing two manufacturers, send both the same format. Then compare answers, not only price. The better partner will explain the MOQ driver, offer a workable pilot structure, and flag any compliance limits early. The weaker partner will answer only with “MOQ 300, best price attached.”
Yes. MOQ is negotiable when your order reduces setup risk or pays for the setup cost directly. A buyer asking for 30 private-label 640×512 scopes with new firmware has little room; a buyer ordering 80 standard 384×288 monoculars has much more.
For standard thermal monoculars, a 50-100 unit pilot can be realistic when the model, carton, manual, and firmware stay standard. Custom housing, molded accessories, new app features, or special detector procurement can push the first order toward 300, 500, or more.
Yes, if private labeling includes custom cartons, manuals, molded logos, startup screens, or app changes. If branding stays on a removable label or carton sleeve, the first-order MOQ may stay closer to the standard product minimum.
Often, yes. A higher deposit, prepaid sample fee, or 50/50 payment split can make a smaller pilot easier for the manufacturer to approve. Don’t ask for low MOQ and buyer-friendly credit terms in the same first order.
Yes, if the SKU, firmware language, warranty path, and compliance files match your market. Avoid odd lots with missing accessories, old batteries, EU-only chargers, or unclear FCC files, because the savings disappear when returns start.
For a first U.S. dealer order, send Pixfra your target category, detector level, lens size, branding needs, forecast, and compliance market. We’ll help you separate the pieces worth negotiating from the pieces that protect image quality, safety, and after-sales support.
Thermal optics certifications buyers should demand are FCC for US radio-frequency compliance, CE for EEA market access, and RoHS for hazardous-substance control in electronic parts. Ask for model-specific certificates, declarations, test reports, label artwork, and manual text before you place an order, because a logo on a catalog page won’t protect a dealer when customs, Amazon, a distributor, or a retailer asks for evidence.
The thermal optics certifications buyers should demand are FCC authorization evidence for United States sales, a CE Declaration of Conformity for EEA sales, and RoHS substance-control evidence for electronic parts. Match every document to the exact SKU, firmware/radio configuration, label, and manual before deposit.
Start with the sales market, then work backward. A US dealer selling a Pixfra Mile 2 PFI-M625 to hunters needs FCC evidence. A German distributor will ask for CE and RoHS files. A marketplace seller may ask for both sets because one listing can end up serving buyers in several countries.
This is where low-price thermal optics get expensive. A $60 discount per unit looks good until 200 units sit in a warehouse because the FCC ID doesn’t match the product label, or the CE Declaration lists a generic “thermal camera” with no model codes. Buyers notice. Dealers notice faster.
| Evidence | Demand it when | Ask for | Red flag |
|---|---|---|---|
| FCC authorization | Selling or marketing in the United States | FCC ID or Supplier’s Declaration of Conformity, Part 15 report, manual statement | “FCC pending” or a report for another camera |
| CE Declaration | Selling in the European Economic Area | EU Declaration of Conformity, applicable directives, standards, model list | CE logo only, no signed declaration |
| RoHS evidence | Selling electronics into EU-linked channels | RoHS declaration, material evidence, accessory coverage | Report covers only one cable or old PCB |
| Label and manual package | Any B2B resale channel | Rating label, carton mark, manual compliance pages | Label says one model, invoice says another |
One file can cover several variants, but only when the report says so. Pixfra Mile 2 PFI-M619 and PFI-M625 are both 640 x 512 thermal monocular variants with different optics; if one compliance file covers both, the model list or technical rationale should make that clear. Silence is not proof.
A buying team should treat certification like payment terms. No matching file, no clean order.
FCC proof is the sales gate for the United States. The FCC doesn’t judge thermal image quality, NETD, detection range, or recoil resistance. It cares whether the product’s radio-frequency behavior fits US rules so the device doesn’t cause harmful interference.
The Federal Communications Commission equipment marketing rules state that radio-frequency devices must meet authorization, labeling, and technical requirements before they’re marketed in the United States, with the route depending on device type. For thermal optics, that usually means asking whether the product is an intentional radiator or an unintentional radiator.
A thermal monocular with Wi-Fi or Bluetooth app pairing usually needs FCC Certification and an FCC ID. A no-radio digital device may use Supplier’s Declaration of Conformity, often called SDoC. The difference matters because SDoC puts real responsibility on the US responsible party. “The lab passed FCC” is not enough by itself.
Ask the supplier for:
The variant list is where shortcuts show. If a Ranger thermal monocular has the same processor board but a different lens, the FCC file may still fit. If a new SKU adds Wi-Fi, changes the radio module, or ships with a different powered accessory, you need fresh evidence or a clear engineering justification.
For US dealers, FCC proof also builds buyer trust. A customer may never read the manual, but a retail platform can. So can a distributor’s compliance desk. If the FCC ID on the label doesn’t match the listing file, the conversation gets slow and awkward.
CE marking is easy to print and hard to defend without the file behind it. For the European Economic Area, CE is the manufacturer’s declaration that the product meets the applicable EU requirements. It is not an EU agency approval stamp.
The European Commission CE marking guidance explains that manufacturers must carry out conformity assessment, prepare technical documentation, issue an EU Declaration of Conformity, and affix the CE mark where CE legislation applies. For buyers, the practical move is simple: ask for the declaration and the evidence behind it.
Thermal optics can touch several EU rule sets. EMC is common for electronic emissions and immunity. RED applies when the optic includes wireless communication. RoHS applies to electrical and electronic equipment. Laser rangefinder models can require extra attention to laser-related standards. Battery, packaging, and local language duties may sit outside the CE file, depending on the channel.
| CE file item | What to check |
|---|---|
| EU Declaration of Conformity | Legal manufacturer name, address, model codes, directives, standards, signature, date |
| Test reports | EMC, RED if wireless, RoHS where listed, and any product-specific standards |
| Technical file index | Photos, circuit diagrams, risk assessment, labels, manual pages |
| Importer or EU contact | Needed when the channel requires an EU economic operator |
| Manual and label set | CE mark placement, warnings, language versions, model consistency |
This advice doesn’t apply the same way to a US-only resale plan. CE is useful as a quality screen, but it doesn’t replace FCC authorization for US marketing. Don’t pay extra for “CE certified” if the supplier can only send a logo screenshot. The document is the value.
A strong CE file should name the exact product family. “Thermal imaging device” is too broad for a distributor buying Arc LRF units with app connection and laser rangefinding. You want model codes, applicable standards, and a signed declaration from the real legal manufacturer.
RoHS is the quiet file that often gets checked late. Too late, usually. A distributor approves pricing, sales sends samples, the product page is ready, then someone asks whether the PCB solder, cable jacket, charger, and plastic components meet restricted-substance limits.

As of June 2026, the European Commission describes RoHS as EU rules restricting hazardous substances in electrical and electronic equipment. The restricted list includes lead, cadmium, mercury, hexavalent chromium, PBB, PBDE, DEHP, BBP, DBP, and DIBP. Those names are not decoration. They map to real materials in electronics.
For thermal optics, RoHS evidence should cover the device and the shipped bundle. A handheld thermal monocular may include a battery, USB-C cable, charger, wrist strap with metal parts, and packaging inserts. A front attachment or thermal scope may ship with mounts, caps, tools, and powered accessories. The buyer’s risk follows the box, not just the optic body.
Good RoHS evidence usually includes:
Don’t demand fresh chemical testing for every screw in every reorder. That burns time and money without improving the file much. For a stable bill of materials, annual declarations plus component-level evidence may be enough. For a new charger supplier, new cable jacket, new PCB finish, or new molded housing, ask again.
RoHS also matters outside Europe. US retailers, distributors, and government-adjacent buyers often use RoHS as a screen for electronics risk. It’s not the same as FCC. It’s not a performance badge. It answers a narrower question: does this electrical product avoid restricted hazardous substances at the levels the rule demands?
Ask for the file before the deposit. Once a factory has your money and production is moving, every missing document becomes a schedule problem, not a paperwork problem.

For the import side, especially HS codes, duties, customs broker files, and product descriptions, pair this certification review with our guide to importing thermal cameras from China so the PO, invoice, packing list, and compliance folder tell the same story. A broker reading “thermal camera” and a certificate reading “digital night vision device” will ask questions.
Use this pre-PO checklist:
The boring part saves the order. If the quote says Pixfra Mile 2 Series, the invoice says PFI-M625, the label says PFI-M619, and the FCC file says “Model A,” someone in the chain has to explain the mismatch. That person may be you.
A practical buyer also asks for sample photos. Get a photo of the rating label on the actual production sample, not a clean PDF label template. Get a photo of the manual compliance page. Get the carton mark. Small mismatches are easier to fix before 500 units are sealed.
Certifications reduce channel risk, but they don’t answer every legal question. FCC, CE, and RoHS don’t decide whether a thermal scope can be used for hunting in a specific US state. They don’t replace export-control review. They don’t prove a laser rangefinder is safe for every use case.
Channel risk changes by sales route. A field-service company buying five thermal monoculars for internal use has a different risk profile than a distributor listing 1,000 units across Amazon US, Amazon Germany, and a dealer portal. Same product. Different file pressure.
| Channel | Extra pressure point |
|---|---|
| Amazon or Walmart Marketplace | FCC ID, label photo, manual statement, invoice match |
| EU distributor | CE Declaration, RoHS evidence, local language manual, importer details |
| Government or utility buyer | Supplier traceability, warranty terms, data/security questions |
| Hunting or shooting dealer | Product classification, state rules, mounting use, return policy |
| OEM or private label buyer | Brand owner responsibility, label control, retesting after changes |
SDoC is cheaper and faster than FCC Certification for eligible no-radio devices, but it puts more burden on the responsible party. FCC Certification costs more, yet an FCC ID gives marketplace reviewers and distributors a cleaner lookup path. For a US reseller, that clarity is often worth the extra lab time.
CE has a similar tradeoff. A supplier may offer one global package with CE, RoHS, FCC, multilingual manuals, and stricter label control. The unit price may be higher. The cheaper package may work for a narrow domestic order, but it can trap you later when a dealer asks for EU files or a marketplace listing expands.
A clean buying file keeps thermal optics certifications buyers should demand from turning into a launch delay. Ask early, match every model, and write change control into the PO.
FCC authorization is usually needed before a radio-frequency device is marketed or imported for sale in the United States. Thermal optics with Wi-Fi or Bluetooth often need FCC Certification; no-radio digital models may use Supplier’s Declaration of Conformity.
CE marking can include RoHS when RoHS is one of the applicable EU requirements, but ask for RoHS evidence separately. A CE logo on the housing doesn’t prove the PCB, cable, battery accessory, and charger materials were reviewed.
Yes, if the variants are listed or the report explains why they are electrically identical. A different radio module, charging board, display driver, or wireless firmware version can force a new authorization or extra test evidence.
No. Amazon, Walmart, and EU marketplace teams may ask for the certificate, test report, label photo, manual statement, responsible party details, and invoice match. Keep the files ready before the listing goes live.
Demand CE if you sell into the EEA, support EU dealers, or use one global product file. For US-only resale, FCC evidence matters more, while RoHS still helps retail buyers screen electronics risk.
For distributor, OEM, or agency purchasing, ask Pixfra for model-level FCC, CE, and RoHS evidence before the PO locks. Send the target market, exact SKU, quantity, channel, and bundle contents; the Pixfra team can help match the right thermal optic to the file package your buyer will ask for later.
You’ve spent years dialing in your day scope. The last thing you want is to swap it out every time the sun goes down. A thermal clip-on fixes that — it mounts right in front of your existing optic and turns your rifle into a night-hunting machine without touching your zero. Here are the 6 best thermal devices to clip on your day scope this year.
A thermal clip-on — also called a thermal front attachment — is a compact device that mounts directly in front of your daytime riflescope. A clip-on thermal mounts directly in front of your existing daytime scope. It turns your day optic into a thermal rifle scope by projecting a thermal image through your regular reticle, with no need to re-zero. Unlike a dedicated thermal scope that replaces your existing optic entirely, a clip-on works with it. You don’t remove your daytime glass. The clip-on attaches to the objective end, typically with an adapter ring that clamps onto the scope’s objective bell or via a Picatinny rail mount positioned ahead of the day scope. No scope swaps. You go from daytime hunting to thermal detection in seconds. At Pixfra, we build thermal front attachments like our Taurus LRF series for exactly this — giving hunters a fast, reliable way to add thermal to the rifle they already trust.

The tech behind it is what makes it tick. A clip-on thermal uses a microbolometer sensor to detect infrared heat radiation from animals, people, and objects. That data gets processed and displayed on a tiny internal OLED screen, which your day scope then magnifies. The result? You see thermal imagery through the same glass you’ve been shooting with all day. A clip-on thermal is a specialized thermal imaging device designed to sit perfectly in line with a traditional daytime rifle scope. Unlike a dedicated thermal scope — which has its own reticle and must be independently zeroed to your rifle’s barrel — a clip-on simply gathers the thermal image and projects it backward into the objective lens of your day scope. The key advantage here is speed and versatility — you keep your premium daytime glass and add thermal whenever conditions call for it. If you want to learn more about the specs that separate a great thermal device from an average one, we’ve broken down the top 6 features every thermal device buyer needs in 2026.
With so many options flooding the market, picking the right clip-on thermal can feel like a chore. We’ve looked at what hunters across the U.S. are actually using in the field — from nighttime hog control in Texas to predator runs in the Midwest — and narrowed it down to six categories of thermal clip-on devices that deliver where it counts. Prioritize these factors when evaluating any clip-on thermal scope: sensor resolution (higher is better), NETD sensitivity (lower is better), refresh rate (50 Hz is the standard), scope compatibility, IP weather rating, battery life, and — in 2026 specifically — smart features like app connectivity, onboard recording, and AI-enhanced imaging. Here’s our breakdown.
1. Best Overall: High-Resolution Clip-On with Integrated LRF. For hunters who want the full package in a single unit, a 640×512 resolution clip-on with a built-in laser rangefinder is the gold standard right now. This setup gives you the sharpest thermal picture in the clip-on class, plus instant distance readings without fumbling for a separate device. Our Pixfra Taurus T650 LRF fits this category — it pairs a high-resolution sensor with ≤18mK NETD sensitivity, 12μm pixel pitch, and an integrated 1,000-meter laser rangefinder. When you’re scanning open pastures at 2 AM and a hog shows up at 300 yards, that built-in LRF saves time and makes your shot placement far more confident. The ultra-fine 0.9cm@100m click value gives you zeroing precision that matches dedicated thermal scopes.

2. Best for Mid-Range Predator Hunting: 384×288 Clip-On with LRF. Not everyone needs the highest resolution sensor on the market. If you’re hunting coyotes, wild hogs, or other predators at distances under 500 yards — which covers the vast majority of night hunting in the U.S. — a 384×288 sensor clip-on with a laser rangefinder gives you a clean, detailed picture without the price tag of a 640-class device. Our Taurus T450 LRF is built for exactly this kind of work. The sensor delivers strong contrast at typical hunting ranges, and the integrated LRF takes the guesswork out of distance estimation at night. Paired with ≤18mK NETD, it pulls clear images even when temperatures run close between the animal and background — like on warm summer nights when everything radiates heat at similar levels.
3. Best Value Thermal Front Attachment with Rangefinder. Budget matters, and a good clip-on thermal doesn’t need to drain your bank account. The sweet spot for most hunters eyeing their first thermal front attachment is a solid mid-resolution sensor paired with the features that make the biggest real-world difference: a laser rangefinder, multiple color palettes, and a durable, weatherproof housing. The Pixfra Taurus T425 LRF checks all those boxes. It gives you integrated LRF at a price point that makes thermal accessible without cutting corners on the stuff that matters in the field. Because it still runs 12μm pixel pitch and ≤18mK NETD, you’re getting image quality that punches well above its price class. For a first-time thermal clip-on buyer, this is the entry point we recommend.
4. Best Lightweight Clip-On for Extended Hunts. Weight is a real factor when you’re clipping a thermal device in front of your day scope. The clip-on adds extra mass to the front of your rifle, changing the balance slightly. A heavy unit makes your rifle muzzle-heavy, throws off your balance, and tires you out during long sessions. The best lightweight clip-on thermals keep their weight down while still delivering solid sensor performance and battery life. At Pixfra, we designed the Draco series with a lightweight build for hunters who need multi-functional performance without the bulk. When you’re deep into a multi-hour predator sit or walking miles of ranch fencing at night, every extra ounce adds up. Look for clip-ons that use aluminum alloy housings — they’re tough enough to handle recoil and drops but keep the overall package light and balanced on your rifle.
5. Best Clip-On for All-Night Battery Life. Battery life kills more hunts than bad weather. A device with incredible image quality and a two-hour battery is basically a very expensive paperweight by midnight. The best all-night clip-on thermals give you 8 or more hours of continuous runtime and use swappable batteries so you can pop in a fresh one mid-hunt. Standard 18650 batteries are the go-to — they’re cheap, widely available, and you can carry spares in your jacket pocket. Across the Pixfra lineup, battery life ranges from about 4.5 to 15 hours depending on the model and usage conditions. Many of our models use standard 18650 batteries that swap in seconds. That’s a deliberate design choice. Pro tip from our own field testing: cold weather can slash battery performance by 30–50%. Always carry extras in an inside pocket where your body heat keeps them warm.
6. Best Clip-On with Smart Features and Ballistic Calculator. In 2026, smart features have moved from luxury to legitimate field tools. The best thermal clip-on devices don’t just show you heat — they record video, connect to your phone via Wi-Fi, stream live footage, and update firmware over the air. Our Taurus LRF models go a step further with built-in ballistic calculators that compute bullet drop and give you an adjusted aiming point on the fly. Paired with the Pixfra Outdoor App — which supports all our current models including the Taurus and Taurus LRF series — you can adjust settings, transfer footage, and update your device right from your smartphone. Recording a clean shot and sharing it with your hunting partners the next morning, or logging wildlife activity for property management, is the kind of real-world value that sets a top-tier clip-on apart.
Here’s a quick-look comparison of what to target across different clip-on use cases:
| Use Case | Min. Sensor Resolution | NETD (mK) | LRF Needed? | Min. Battery Life |
|---|---|---|---|---|
| Short evening hunts (2–3 hrs) | 256×192 | ≤25 | Optional | 4–5 hours |
| All-night hog/predator control | 384×288 | ≤20 | Yes | 8–10 hours |
| Open-field long-range ID | 640×512 | ≤18 | Yes | 6–8 hours |
| Lightweight backcountry use | 384×288 | ≤20 | Optional | 10–15 hours |
| Property security/surveillance | 384×288 | ≤20 | Optional | 6–8 hours |
When you’re shopping for a thermal device to clip on your day scope, three specs deserve most of your attention: NETD, sensor resolution, and refresh rate. NETD — Noise Equivalent Temperature Difference — measures thermal sensitivity. The lower the number, the better the device picks up small temperature differences between your target and its background. In 2026, the best clip-on thermals sit at ≤18mK NETD or lower. In 2026, ≤20mK is a reasonable benchmark for a capable unit; ≤18mK represents the performance frontier in this price range. Our Pixfra devices achieve ≤18mK across the board, which means you see defined outlines rather than blurry blobs — even on humid summer nights when everything radiates heat at similar levels. Sensor resolution tells you how many thermal pixels the detector provides. The two common tiers are 384×288 and 640×512. A 640×512 sensor packs nearly three times more pixels than a 384×288, and that extra pixel density makes a big difference when zooming through your day scope or trying to identify a target past 200 yards.
Refresh rate is one of those specs that seems technical but has a huge impact in the real world. Thermal imaging sensors commonly operate at either 25 Hz or 50 Hz. At 50 Hz, the image updates smoothly with minimal lag — essential for tracking a coyote at speed or a hog moving through brush. All top picks in this guide operate at 50 Hz. Anything below 30Hz gives you a stuttering image that makes fast-moving targets hard to follow. And don’t overlook pixel pitch — smaller pixel pitch, like the 12μm technology we use across the Pixfra product line, packs more detail into every frame and delivers sharper images at all distances. A lower pixel pitch paired with a high-resolution sensor is what gives you that crisp, high-contrast picture that makes target ID fast and certain.

Beyond the sensor, your clip-on’s weather rating tells you how much abuse it can handle in the field. IP67 is the gold standard for thermal devices right now. That means the device is fully sealed against dust and can survive temporary submersion in water — which covers rain, stream crossings, snow, mud, and accidental drops into puddles. Unlike dedicated thermal scopes that replace your regular optic completely, clip-ons maintain your scope’s zero and familiar reticle, allowing quick transitions between day and night use without re-zeroing. Quality thermal clip-ons typically range from $2,000 to $7,000 depending on resolution and features. At Pixfra, we build our thermal front attachments for the same conditions we test them in. The Taurus LRF series handles heavy recoil, resists corrosion, and performs through rain and dust. If you’re serious about night hunting, don’t settle for anything less than an IP67-rated housing.
This is the debate that pops up in every hunting forum: should you buy a clip-on thermal or a dedicated thermal scope? The short answer is — it depends on your setup and how you hunt. Clip-ons enable rapid switching between nighttime and daytime hunting without affecting the zero of the daytime optic. There’s no scope swapping, no re-zeroing, and no need for a second rifle dedicated to night work. You can go from deer hunting at 5 PM to predator control at 9 PM with the same gun, the same glass, and zero downtime. Clip-ons also work across multiple rifles if you have matching adapters, and many models pull double duty as handheld thermal monoculars for scanning and scouting before you settle in to shoot.
Dedicated thermal scopes trade that flexibility for raw performance. Because the thermal sensor, display, and optics are all designed as one system, a dedicated scope usually delivers sharper images and more built-in features. Our Pixfra Pegasus 2 LRF and Chiron LRF series, for example, feature integrated laser rangefinders with 1,000m range, multiple zeroing profiles, and built-in ballistic calculators — all inside the scope body. But clip-ons have real trade-offs. The main disadvantage of a clip-on scope is that it doesn’t have the same optics resolution as a dedicated unit, so you might not be as precise or accurate with your shooting. Your day scope’s magnification directly affects the thermal picture — go past about 6x–8x, and you’re zooming into a digital display where pixels become obvious and detail gets soft. If you only have one rifle and need it for both day and night work, a clip-on is the smarter buy. If you’ve got a dedicated night-hunting rig and want the sharpest possible thermal picture, a dedicated scope wins.
Mounting a clip-on thermal is simpler than most people expect, but getting it right matters. Most clip-ons mount either to a Picatinny rail in front of the scope or directly to the scope’s front lens using an adapter. Before buying, verify that the unit’s mounting system is compatible with your day optic’s eyepiece diameter and your rifle’s rail setup. Rail-mounted clip-ons are more common on AR-platform rifles and tactical setups, while adapter-mounted systems work well with bolt-action hunters using traditional scopes. Whichever mounting method you choose, make sure the clip-on sits square and centered in front of your day optic. A crooked or loose mount will cause alignment issues that defeat the whole purpose of keeping your zero. Choose a sturdy, mid-weight optic to balance the added weight of the front-mounted module. High-recoil calibers require secure adapter locking for a consistent zero.
Before your first hunt, always test-fit and collimate your clip-on in daylight. Before your first hunt, test-fit your attachment in daylight. This ensures proper focus distance, stable alignment, and full reticle visibility before you ever power on the thermal unit. Collimation is the process of aligning the clip-on’s thermal image with your day scope’s reticle so they match up at your shooting distance. Most quality clip-ons make this a quick process, but skipping it will cost you accuracy. Also, watch your day scope’s magnification — the ideal range is 2x to 6x. Higher magnifications reduce image resolution and narrow your field of view. Crank your day scope past 8x and you’re just zooming into the clip-on’s internal display, which means visible pixels and soft detail. Keep your magnification reasonable, and the thermal picture stays clean and sharp.
Will a thermal clip-on change my day scope’s zero?
Most quality thermal clip-ons cause minimal to zero point of impact shift when properly mounted. Some models are specifically designed to maintain zero when attached. Some budget models may cause slight shifts, but generally less than 1 MOA. Always confirm zero after mounting any clip-on device, especially before hunting situations. That’s the whole point of a clip-on — your day scope stays zeroed and ready for daylight work, and the thermal adds night capability without messing up your point of impact.
What magnification works best with a clip-on thermal?
Stick to lower settings — between 2x and 6x for the cleanest results. A clip-on thermal displays its image on a tiny internal OLED screen, and your day scope magnifies that screen. If you crank the magnification too high, you’ll see individual pixels and the image gets soft. Lower magnification gives you a wider field of view and a much sharper thermal picture. Clip-ons usually work best with lower to mid-power variables (1–6x, 2–10x, 3–15x). Too much magnification kills image quality.
How far can a thermal clip-on detect targets?
Detection range depends on the clip-on’s sensor resolution, lens size, and NETD sensitivity. Entry-level clip-ons typically detect heat signatures out to around 500 meters, while premium models with 640×512 sensors can push well beyond 2,000 meters. Across the Pixfra lineup, detection ranges cover everything from 500m for entry-level models to 3,600m for our premium Sirius HD series. For most night hunting in the U.S., a clip-on with 1,000–1,500m detection range handles the vast majority of real-world scenarios.
Can I use a thermal clip-on as a handheld monocular?
Yes. Many thermal clip-ons double as standalone handheld thermal monoculars when you detach them from the rifle. Nothing prevents you from using the thermal clip-on scope like a regular monocular. It is still a reliable single-tube device. Therefore, it is lightweight and takes up little space. This dual-purpose design is one of the biggest practical advantages of a clip-on — you get two tools in one without buying separate devices.
Is a built-in laser rangefinder worth it on a clip-on thermal?
For any hunting beyond 150 yards at night, a built-in LRF is a real advantage. It gives you exact distance to your target with a single button press, so you can place your shot without carrying a separate ranging device. Our Pixfra Taurus LRF models include integrated laser rangefinders with 1,000-meter range. Paired with a ballistic calculator, these models compute bullet drop and give you an adjusted aiming point — the difference between a clean, ethical shot and a miss at distance.
Importing thermal cameras from China usually means classifying the finished camera under HTSUS 8525.89.50, preparing standard U.S. Customs and Border Protection entry paperwork, and checking dual-use specs before the supplier ships. The hard part is rarely the port form itself; it’s a 30 Hz or 640 × 512 model with vague end-use paperwork, a thermal scope treated like a basic camera, or a “free duty” code that still carries China tariff layers.
If you’re buying for a U.S. dealer catalog, security integrator, hunting retailer, inspection team, or government-adjacent customer, do the compliance work before the purchase order. A box sitting at Long Beach is an expensive place to discover that your invoice says “camera accessory” while the spec sheet says “thermal weapon sight with ballistic reticle.”
Most finished thermal imaging cameras imported into the United States are commonly reviewed under HTSUS 8525.89.50, but the correct HS code depends on the product’s actual function. A handheld inspection camera, outdoor thermal monocular, weapon-mounted sight, drone payload, and uncooled camera core can land in different classification conversations.
U.S. Customs and Border Protection moved the practical starting point for many finished thermal video cameras toward heading 8525 after the HS 2022 changes. In CBP Headquarters Ruling H331315, dated December 5, 2025, CBP classified the AXIS P1290-E Thermal Network Camera and AXIS Q1951-E Thermal Camera under HTSUS 8525.89.50 and stated that older thermal-camera rulings under heading 9013 were revoked by operation of law.
That ruling matters because importers still repeat old advice from forums, broker templates, and legacy supplier invoices. “Thermal camera equals Chapter 90” used to be a common shortcut. In 2026, it’s a bad shortcut for many finished video cameras.
| Product type | Common classification starting point | What to verify |
|---|---|---|
| Finished thermal network camera | 8525.89.50 | Video output, surveillance function, no sighting function |
| Handheld thermal imaging camera | 8525.89.50 | Finished camera vs measuring instrument |
| Thermal monocular | Often 8525.89.50 review | Civil outdoor use, no weapon mount, no ballistic features |
| Thermal weapon sight or scope | Don’t assume 8525.89.50 | Reticle, mounting system, sighting purpose |
| Thermal drone payload | Needs separate review | Gimbal, UAV integration, stabilizer, laser module |
| Thermal core or sensor module | Don’t use finished-camera logic | Detector-only vs camera output, part vs complete article |
When importing thermal cameras from China, ask the supplier for a spec sheet that names the detector resolution, frame rate, spectral band, output format, lens, mounting hardware, wireless functions, and intended use. “Infrared product” is not enough. Your customs broker can’t classify a product cleanly from a one-line Alibaba invoice.
A clean commercial invoice should say something like “finished handheld thermal imaging camera, uncooled LWIR, 384 × 288 detector, 50 Hz, no weapon mount, no laser rangefinder, country of origin China.” That’s boring. Boring is good at the port.
Customs clearance starts with the importer of record. If you’re the U.S. buyer, your company name, EIN, customs bond, broker power of attorney, and entry data need to line up. U.S. Customs and Border Protection uses CBP Form 7501 to record classification, value, origin, duty rate, and related entry data, so don’t treat the 7501 as broker back-office paperwork. Read it.

For ocean freight, your broker or forwarder will also need Importer Security Filing data before the container is loaded. For air freight, the timeline is shorter and the mistakes surface faster. A wrong model number on a carton label can still trigger questions, especially if the shipment contains lithium batteries, Wi-Fi models, or products described as “scope,” “sight,” “target,” or “payload.”
Use this file before shipment:
| Document | Who provides it | What must match |
|---|---|---|
| Commercial invoice | Supplier | Model, unit value, Incoterm, origin, buyer, seller |
| Packing list | Supplier | Carton count, gross weight, serial batches |
| Bill of lading or air waybill | Forwarder | Shipper, consignee, port, pieces |
| Spec sheet | Supplier or brand | Resolution, Hz, lens, battery, wireless functions |
| Country-of-origin marking proof | Supplier | Product label and retail packaging |
| FCC data, if wireless | Supplier | FCC ID, radio module, label location |
| Battery transport documents | Supplier | UN38.3 summary, MSDS, packing method |
DDP is tempting for first-time buyers because the supplier says, “We handle everything.” For thermal imaging products, DDP can hide the very data you’ll need later: HTSUS code, entry number, declared value, importer of record, and any Chapter 99 tariff line. If a marketplace freight agent clears the goods under its own importer number, your landed-cost history becomes foggy.
FOB Shenzhen, FOB Shanghai, or FCA factory usually works better for serious U.S. dealers because your broker controls the entry. EXW looks cheap on the quote sheet, but it pushes China export clearance and pickup risk onto the buyer. Most U.S. importers don’t want to manage a truck appointment in Dongguan just to save a few dollars on paper.
Thermal imaging is a civil technology with military applications. A camera used for hog hunting, electrical inspection, perimeter security, or search and rescue can share detector specs with equipment that export-control agencies care about.

For U.S. importers, the key point is timing. A normal U.S. import entry doesn’t become a BIS import license case just because the device is thermal. Export controls matter when the China supplier exports the goods, when U.S.-origin content or technology is involved, and when you later re-export, resell, or transfer the product outside the United States. If your customer is a defense contractor, police procurement office, drone integrator, or overseas distributor, the file needs more than a customs invoice.
The U.S. Bureau of Industry and Security treats many thermal imaging cameras under ECCN 6A003.b.4.b, with special attention to frame rate, focal plane array size, civil end users, and embedded uses. BIS §742.6 describes license requirements for certain thermal imaging cameras, including thresholds tied to more than 60 Hz and focal plane arrays above or below 111,000 elements. For a deeper split between defense controls and dual-use controls, read Pixfra’s guide to ITAR vs EAR for thermal imaging before you promise a shipment date to a reseller.
The number 111,000 is not abstract. A 384 × 288 detector has 110,592 elements, just under that line. A 640 × 512 detector has 327,680 elements, well above it. A 256 × 192 detector has 49,152 elements. Frame rate matters too: 9 Hz feels choppy when tracking a moving animal or vehicle, while 30 Hz, 50 Hz, or 60 Hz feels much smoother. Better viewing performance can mean more paperwork.
Watch these trigger points:
| Spec or feature | Why buyers should pause |
|---|---|
| 640 × 512 detector | Higher FPA element count raises export-control attention |
| More than 60 Hz | BIS rules call out frame-rate thresholds |
| 30 Hz or 50 Hz consumer models | Smooth image, but still needs classification support |
| Weapon mount or reticle | May change both classification and control analysis |
| Ballistic calculator | Strong sighting-use signal |
| Laser rangefinder | Adds another controlled component question |
| UAV gimbal integration | China export controls and U.S. end-use checks may apply |
| Military, police, border, or overseas buyer | End user screening becomes more serious |
China-side export controls can matter before the shipment leaves Shenzhen, Hangzhou, Wuhan, or Yantai. China has adjusted export controls for UAV-related components, including infrared thermal-imaging devices, and suppliers may ask for end-use statements when products are tied to drones, payloads, or higher-performance optics. If your supplier says “no license needed,” ask for that position in writing, tied to the exact model number.
HTSUS 8525.89.50 may show a general duty rate of free, but “free” doesn’t mean your landed cost is zero. China-origin goods can face separate Chapter 99 duties, Merchandise Processing Fee, Harbor Maintenance Fee for ocean freight, broker fees, bond costs, exam charges, and storage if anything goes wrong.

This is where importers get burned. They price a dealer program on the base HTSUS rate, then the broker adds a China tariff line at entry. The invoice margin shrinks overnight. If you quoted 200 thermal monoculars to a retailer at a fixed landed cost, that mistake comes straight out of your margin.
Ask your broker for a landed-cost worksheet before the first production deposit:
| Cost line | Where it comes from | Buyer note |
|---|---|---|
| Product value | Supplier invoice | Must reflect real transaction value |
| International freight | Forwarder | Depends on Incoterm |
| Insurance | Forwarder or buyer | Often small, still part of landed math |
| Base duty | HTSUS line | 8525.89.50 may show free for many entries |
| China tariff line | Chapter 99 review | Check current Section 301 status by entry date |
| MPF | CBP fee | Applies to formal entries |
| HMF | Ocean entries | Doesn’t apply to air freight |
| Broker and bond | Broker | Annual bond usually beats single bonds for repeat shipments |
Valuation is another quiet trap. If you supply free housings, tooling, firmware work, molds, engineering, labels, or packaging to the factory, tell your broker. Some assists and royalties may need to be added to customs value. A $180 camera can become a $194 customs value after additions, and duties follow the adjusted value.
Country-of-origin marking should be in English and visible enough for retail reality. “Made in China” on the master carton alone may not work if the product is repacked into dealer packaging after entry. If you sell through Amazon, Bass Pro-style retail, independent hunting shops, or security distributors, ask for photos of the unit label and retail box before the balance payment.
A customs broker doesn’t need to be a thermal engineer, but your broker does need product data. Send the spec sheet, product photos, user manual, battery details, and sales page before the shipment leaves China. If the broker only sees “thermal camera” after arrival, the broker is guessing under pressure.

The best question is plain: “Would you file this entry the same way if CBP opened the carton and read the manual?” If the answer is no, fix the paperwork. Manuals often reveal words that invoices hide: reticle, zeroing, ballistic profile, target tracking, gimbal, drone, law enforcement, weapon mount. Those words don’t always create a problem, but they change the review.
Ask these before the purchase order:
1. Which HTSUS code would you use for this exact model?
2. Do you see any reason to request a CBP binding ruling?
3. Does the product description need to mention “thermal imaging” rather than “digital camera”?
4. Are there any Chapter 99 China tariff lines on the entry date?
5. Does the product have Wi-Fi, Bluetooth, cellular, GPS, or a radio remote?
6. Does the FCC ID belong to the finished device or only to a module?
7. Is the lithium battery packed in equipment, with equipment, or alone?
8. Does the product include a laser rangefinder?
9. Does the model have a reticle, weapon mount, or ballistic calculator?
10. Will the supplier provide an export-control statement by model number?
Some products deserve a CBP binding ruling before volume import. Thermal scopes, clip-on weapon sights, drone payload cameras, fever-screening devices, and camera cores are the usual candidates. A ruling takes more time than a broker email, but it gives you a written position tied to the exact facts you submitted.
Medical claims change the lane. A thermal camera sold for fever screening or diagnosis can bring U.S. Food and Drug Administration medical-device questions into the import file. A thermal monocular sold for outdoor observation usually doesn’t belong in that same medical bucket. Claims on the website, box, manual, and Amazon listing matter.
For dealers, the practical goal is simple: build a model-level compliance packet once, then reuse it for every shipment until the model changes. Don’t rebuild the entry file from scratch for every carton. Keep the spec sheet, HS rationale, export-control statement, battery documents, FCC data, marking photos, and supplier declaration in a shared folder named by model and revision.
That revision detail matters. A supplier can change a 25 Hz model to 50 Hz, swap a 384 × 288 detector for 640 × 512, add Wi-Fi, or release a “Pro” trim with a laser rangefinder. The sales name may stay almost the same. Customs and export-control facts won’t.
Use this checklist for importing thermal cameras from China at dealer scale:
| Step | Action | Why it matters |
|---|---|---|
| 1 | Lock the exact model and trim | “T50” and “T50 Pro LRF” may not be the same product |
| 2 | Collect detector and frame-rate specs | 384 × 288, 640 × 512, 9 Hz, 50 Hz all matter |
| 3 | Identify the product function | Handheld camera, monocular, scope, payload, core |
| 4 | Get broker HS review in writing | Stops invoice-level guessing |
| 5 | Check Chapter 99 tariff exposure | Base duty isn’t the full landed cost |
| 6 | Confirm FCC status for wireless models | Wi-Fi and Bluetooth can hold up retail sale |
| 7 | Save battery transport documents | Airlines and couriers ask for them often |
| 8 | Screen end users for sensitive deals | Defense, UAV, and overseas resale raise the bar |
| 9 | Review labeling photos | Origin marking must survive repacking |
| 10 | Recheck after model changes | New specs can change the answer |
The biggest tradeoff is performance versus paperwork. A 9 Hz entry-level monocular may be easier to place in low-risk civil retail channels, but it won’t feel as natural when a hunter pans across a tree line or a security guard follows a moving vehicle. A 50 Hz 640 × 512 model gives a better field experience, but the compliance packet needs to be tighter.
If you sell to only U.S. civilian outdoor customers, your workflow can stay lean. If you sell to drone integrators, overseas dealers, public agencies, or defense-adjacent buyers, add end-use screening and export-control review before accepting the order. A fast sale to the wrong buyer is not worth the refund, seizure risk, or follow-up questions.
Many finished thermal imaging cameras are commonly reviewed under HTSUS 8525.89.50, especially after CBP’s 2025 ruling on thermal network cameras. Thermal scopes, drone payloads, cores, and sensor modules need separate review.
Yes. Thermal cameras have civil uses such as hunting, inspection, firefighting, and security, but some specs and end uses are controlled because the same technology can support military, UAV, or surveillance applications.
Not automatically for U.S. import, but 9 Hz doesn’t erase all export-control issues. End user, destination, model design, U.S.-origin content, and later re-export plans still matter.
DDP can work for samples, but it’s risky for repeat dealer imports because you may lose visibility into the entry, HTSUS code, declared value, and importer of record. Use your own broker for volume shipments.
Ask for detector resolution, frame rate, spectral range, lens, wireless functions, battery type, laser features, mounts, reticle status, country of origin, FCC data if wireless, and an export-control statement by model number.
Before you issue the first purchase order, ask Pixfra for the model spec sheet, marking details, wireless status, battery packing data, and export-control statement your broker needs. Send the same packet to your customs broker before the shipment leaves China; port problems are cheaper on a spreadsheet than at LAX, JFK, or Long Beach.
To become a thermal optics dealer, you need a real buyer base, clear resale terms, compliant sales processes, trained staff, and the right starter inventory. The fastest path is to prove you can sell thermal monoculars, thermal scopes, and multispectral optics to specific US buyers without treating every device like a generic outdoor gadget.
1. Define your buyer group.
2. Match Pixfra SKUs to that use.
3. Register business and resale tax paperwork.
4. Set export, age, and hunting-rule controls.
5. Build demo inventory.
6. Train staff on sensors and rangefinders.
7. Agree margin, MAP, warranty, and reorder terms.
8. Apply and report sell-through.
A thermal dealer isn’t just a store with a shelf. You’re the person a ranch owner calls before buying a handheld scanner for coyotes at 2 a.m. You’re also the person who explains why a 640×512 thermal scope costs more than a compact entry monocular, and why a built-in laser rangefinder matters when the customer can’t judge distance in a black field.
If your real aim is to become a thermal optics dealer, start by narrowing the buyer. Predator hunters, hog hunters, ranch security teams, outdoor retailers, tactical resellers, and property managers do not ask the same questions. A coyote hunter cares about field of view and fast target ID. A ranch manager cares about battery life, warranty handling, and whether an employee can learn the menu in ten minutes.
The mistake is ordering inventory first. Don’t. First, write down your top 25 likely buyers by name: local hunting clubs, firearm stores, feed stores, ranches, outfitters, security installers, and night-hunting guides. If you can’t name 25, your dealer application is still a theory.
Dealer readiness checklist
| Area | Minimum proof | Strong proof |
|---|---|---|
| Buyer access | 25 named prospects | 100+ opt-in buyers or retail foot traffic |
| Product knowledge | Basic thermal terms | Staff can compare NETD, resolution, FOV, LRF |
| Sales channel | Website or store | Store, e-commerce, demos, local events |
| Compliance | State hunting links | Written export and use-policy workflow |
| Service | Email support | Intake form, serial tracking, warranty process |
The best thermal dealers pick one primary customer first. “Outdoor people” is too broad. A store that already sells e-callers, tripods, gun safes, and predator hunting lights can add Pixfra outdoor thermal optics without teaching customers a new buying habit. A camera dealer or security installer may still sell thermal devices, but the sales motion is different: fewer impulse buys, more quote requests, more training.
For US outdoor optics, the strongest B2B fit usually comes from four buyer groups. Predator and hog hunters want fast detection. Ranch and farm users want perimeter awareness. Outdoor retailers want reliable turn. Security installers want repeatable specs and support. Pick one. Then build the offer around that buyer’s real night problem.
| Buyer type | What they ask first | Better starter product angle |
|---|---|---|
| Predator hunter | “How far can I detect?” | Thermal monocular plus thermal scope path |
| Hog hunter | “Can I identify before I shoot?” | Higher resolution, stable image, range help |
| Ranch owner | “Will my staff use it?” | Simple controls, warranty, rugged carry setup |
| Retail store | “Will it move?” | Demo unit, MAP clarity, staff training |
| Security installer | “Can we document specs?” | Data sheets, repeatable model naming |
Here’s a real scenario. A customer walks into a shop after watching five thermal videos online. He asks for “the long-range one.” If your staff only repeats detection range, he may leave with the wrong device. If your staff asks where he hunts, typical shot distance, terrain, target species, and whether he needs recording or a laser rangefinder, the sale changes. That’s dealer value.
This advice doesn’t apply if you’re only trying to flip a few units on a marketplace. Thermal optics customers ask expensive questions. They expect after-sale help. If you can’t support firmware questions, app connection issues, mount selection, or warranty routing, stay out of the category until you can.
A manufacturer or distributor will usually want proof that you’re a real business. Expect to provide legal business name, resale certificate, website or storefront details, contact person, shipping address, sales channels, and the product category you want to carry. Some brands may ask for projected monthly volume or current outdoor optics lines. That’s normal.

The money needs plain math. Suppose your wholesale cost on a thermal optic is $1,200 and the minimum advertised price is $1,599. Your gross margin is $399 before card fees, freight, staff time, demos, returns, and tax handling. That’s 24.9%. If you discount to $1,450 to win a quick order, the margin drops to $250, or 17.2%. One warranty-heavy return can erase that.
For a dealer, MAP discipline beats chasing every sale. A store that protects price, trains staff, and sells accessories often keeps healthier margin than a seller who cuts price online and ships boxes with no support. Thermal optics are explanation products. Explanation products reward dealers who can teach.
Dealer cost model
| Cost item | Why it matters | Practical target |
|---|---|---|
| Demo unit | Customers want to look through thermal | 1 unit per key product tier |
| Staff training | Bad explanations cause returns | 2 trained staff minimum |
| Freight and insurance | Higher-value devices need safer shipping | Price it before quoting |
| Card processing | 2.5% to 3.5% can hurt margin | Build it into price math |
| Warranty intake | Serial numbers and photos save time | Use a written form |
| Accessories | Mounts, cases, batteries, tripods | Attach rate above 20% |
Don’t promise what your policy can’t support. If you offer “free returns” on mounted thermal scopes after field use, you’ll pay for it. A tighter policy works better: demo before purchase, inspect on delivery, document serial numbers, and handle warranty claims through the approved process.
Starter inventory should cover use cases, not every SKU. A good first order might include one compact thermal monocular for entry buyers, one 640-class monocular for serious detection, one thermal scope line for hunters ready to mount, and one multispectral or rangefinder option for customers who want more than basic heat detection. That’s enough to teach, demo, and sell without tying up cash in slow-moving variants.
Pixfra gives dealers a useful spread. Sirius 640 is positioned as a long-range thermal monocular with up to 2600m detection, 18mK NETD, and an F0.9 lens. Arc LRF adds laser rangefinder use, with a 1000m rangefinder claim on Pixfra’s product page. Draco combines thermal imaging, 4K digital night vision, laser rangefinder, and infrared illumination. Mile 2 fits the compact buyer. Taurus fits thermal scope customers who ask for up to 640×512 detector resolution and 18mK NETD or lower.
| Starter role | Pixfra example | Best buyer match |
|---|---|---|
| Compact scanner | Mile 2 Series | First thermal buyer, backpack user |
| Long-range handheld | Sirius 640 | Ranch, predator, open-field scanning |
| Rangefinder handheld | Arc LRF | Hunters who need distance confidence |
| Multi-mode optic | Draco | Buyers comparing thermal and night vision |
| Thermal scope | Taurus Series | Mounted hunting setup |
A dealer should demo at dusk, not at noon in a parking lot. Thermal sells when a buyer sees heat contrast: tree lines, parked trucks, dogs at distance, warm rocks cooling after sunset. A daytime demo can still explain ergonomics, menus, and screen quality, but it won’t close as well.
If your team needs brand context before choosing models, the Pixfra thermal imaging optics site is a practical place to compare current outdoor lines before building a stocking plan. Keep the product story simple: what the customer sees, how far the customer can detect, how easy the device is to carry, and what problem the device solves at night.
Thermal optics sales touch export control, hunting law, platform rules, and customer safety. The Electronic Code of Federal Regulations, 2026, publishes the Export Administration Regulations Commerce Control List under 15 CFR Part 774, including Category 6 for sensors and lasers. The Bureau of Industry and Security regulations are the source dealers should check before export, reexport, or international shipment.
Domestic hunting use is a separate issue. Thermal devices may be legal for scouting, predator control, or certain night hunts in one state and restricted in another. The U.S. Fish and Wildlife Service says refuge hunting can be limited by federal, refuge-specific, and state law, according to its General Hunting Laws. Train staff to say, “Check your state wildlife agency before using thermal equipment to hunt.” That sentence prevents bad advice.
Dealer rule: sell the device, document the buyer, explain lawful-use limits, and avoid giving legal advice beyond official links.
Online sales need their own controls. If you sell through your website, block international checkout until export classification and destination rules are reviewed. If you sell through marketplaces, read the platform’s weapon accessory and optics policies before listing. If you sell in-store, keep a short written script near the counter. Staff turnover is real; the script keeps answers consistent.
This is where expert dealers separate themselves from box movers. A buyer may ask, “Can I take this to Mexico for a hunt?” The answer isn’t a shrug. It’s a process: identify the exact model, classify the item, check export rules, check destination rules, then decide whether the sale or shipment is allowed. Fast answers can be expensive.
Before you contact Pixfra or a distributor, build a one-page dealer profile. Keep it factual. Include your company name, state, business type, current product categories, website, monthly foot traffic or online traffic, target customer group, requested Pixfra product lines, and who will manage service. If you’re a new business, say that. A clear new dealer is better than a vague established one.

Add a 90-day launch plan. For example: two staff training sessions in week one, one evening demo event in week three, 20 outreach calls to ranches or hunting guides, five short product videos, and a reorder review after the first 10 units sold. You don’t need a giant plan. You need a believable one.
Dealer application packet
| Document | Why it helps |
|---|---|
| Business license or registration | Confirms legal business identity |
| Resale certificate | Supports wholesale purchasing |
| Website or storefront photos | Shows sales channel quality |
| Product-line list | Shows related category fit |
| Buyer segment plan | Proves you know who will buy |
| Service contact | Gives warranty and support ownership |
| Compliance workflow | Shows responsible thermal optics sales |
When you apply, ask direct commercial questions. What are the opening order requirements? Which SKUs are best for US outdoor dealers? Is MAP enforced? What is the warranty process? Are demo units available? Who handles replacement parts or firmware questions? How long do reorders take? What marketing assets can dealers use?
The strongest dealer applications sound like operators wrote them. “We sell to predator hunters in Texas and Oklahoma through a retail store and two night-hunting demo events per month” beats “we want to expand into thermal.” Specific wins.
Yes, thermal optics resale can be profitable when margin, MAP, freight, card fees, and warranty time are priced correctly. A dealer chasing discounts can lose money even on high-ticket products.
A normal US resale business may not need a special optics license for domestic sales, but export control and hunting-use rules still matter. Check BIS rules and state wildlife agency rules before shipping or advising buyers.
Compact monoculars often sell first because the price is easier for new thermal buyers. Serious hunters usually move toward Sirius, Arc LRF, Draco, or Taurus once they understand range, resolution, and use case.
Yes, dealers can sell thermal scopes online if manufacturer terms, platform rules, tax setup, shipping limits, and export controls are handled. Block international orders until classification and destination checks are complete.
Dealer approval time varies by brand, paperwork quality, and territory review. A complete application with resale documents, sales channels, buyer plan, and compliance workflow will usually move faster than a casual inquiry.
If you’re ready to build a serious thermal category, start with one demo kit for hunters, one kit for ranch or property use, and a written staff script for compliance questions. Pixfra can support dealers who treat thermal optics as a specialist category, not a side shelf.
Spec sheets tell you what a thermal device should do. The field tells you what it actually does. We took our Pixfra thermal devices — monoculars, scopes, and front attachments — into real hunting and observation conditions across varying terrain, weather, and lighting to see how they held up when it counted. Here’s what we found.
Too many thermal device reviews in 2026 rely on manufacturer claims, controlled lab numbers, and best-case scenarios. And while those specs give you a starting point, they don’t tell you how a device handles at 2 AM in a foggy tree line, or whether your battery dies before the hogs show up, or if you can actually tell a coyote from a stump at 400 meters in heavy humidity. That gap between on-paper performance and real-world results is exactly why we ran this field test. We wanted to push our own gear hard — not to prove that every number is perfect, but to show you what our thermal devices do when conditions get ugly. If you’re shopping for a thermal monocular, thermal scope, or thermal front attachment in 2026, this case study gives you field data, not marketing talk. And if you want a breakdown of the specs that matter most before you buy, our guide to the top 6 features needed in the best thermal device in 2026 is worth reading alongside this one.
There’s a reason experienced hunters and wildlife observers focus on field-tested results over spec sheets: the real world doesn’t cooperate with ideal testing conditions. A thermal monocular rated for 2,000-meter detection in a climate-controlled lab may perform very differently across a humid Southern pasture or a cold Rocky Mountain ridge. Temperature swings, fog, rain, ambient heat radiating off the ground — all of these mess with thermal imaging in ways that a product page never mentions.

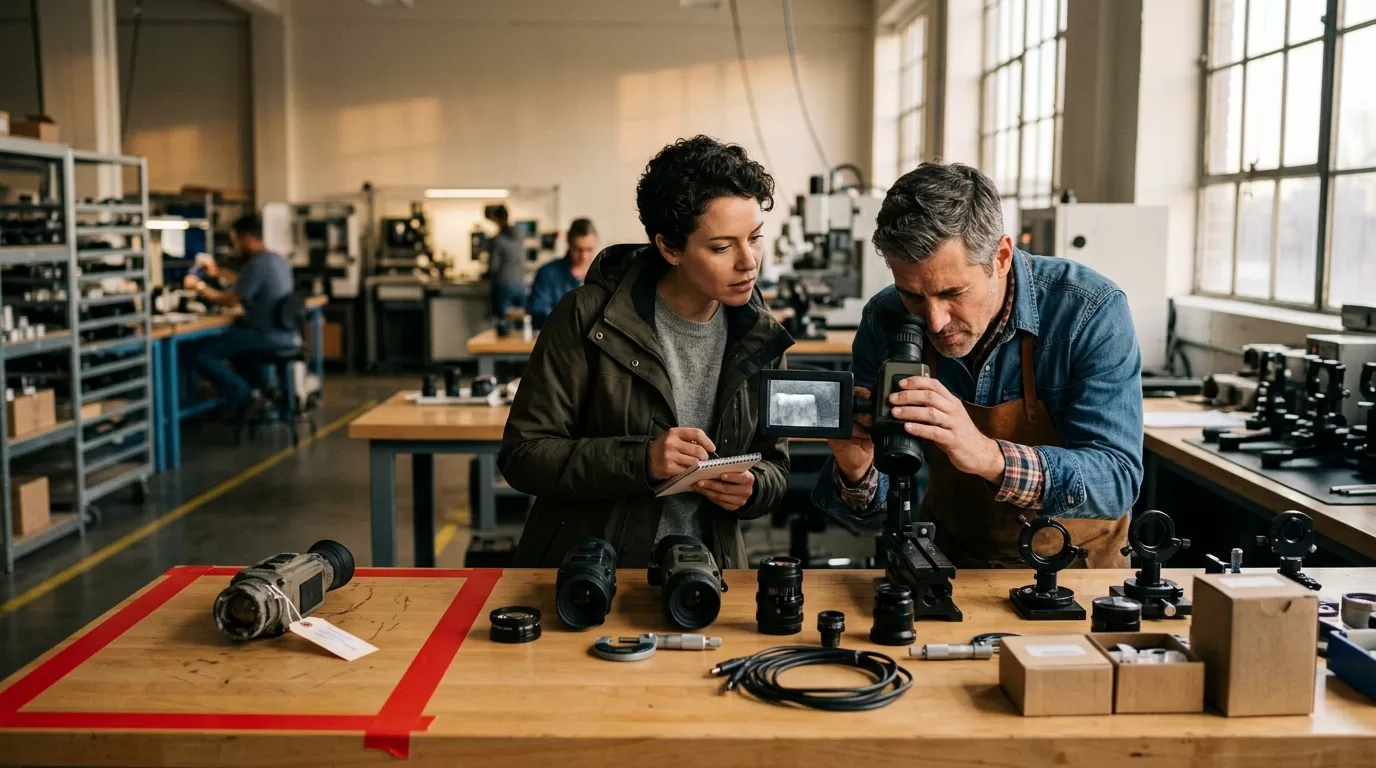
We built this case study around that reality. Instead of running bench tests in a controlled room, we took our Pixfra lineup — including models from the Sirius HD, Mile 2, Arc LRF, Chiron LRF, Taurus LRF, and Volans series — and used them in conditions that match how real buyers actually use them. Night hunts for hogs and predators. Pre-dawn wildlife observation in dense tree cover. Property scans in rain and fog. Extended sessions where battery life and ergonomics become the deciding factors. We logged detection distances, image clarity ratings, battery drain rates, and usability notes across every outing.
The approach mirrors what field testers across the thermal optics industry are doing in 2026. Hands-on testing under real conditions — not lab environments — is how you separate the thermal devices that work from the ones that frustrate you by the third outing. And that’s exactly where our Pixfra devices had to prove themselves.
We ran our tests over a three-week stretch across two distinct environments: open ranch land in the South (flat, warm, humid) and mixed woodland-field terrain in the mid-Atlantic (rolling hills, dense vegetation, cooler nights). This gave us a spread of conditions that cover most hunting and outdoor scenarios you’d run into across the U.S.

Each device went through a standardized set of evaluations: detection range at measured distances using human-sized and deer-sized heat targets, image clarity at various magnifications, battery life under continuous use, ergonomic handling with and without gloves, and performance under adverse weather including light rain, heavy fog, and temperature drops below 35°F. We tested during full darkness, twilight, and — for our Volans series — broad daylight to evaluate its all-day vision capability with the adjustable aperture (F1.2 to F3.0).
Here’s a snapshot of our testing conditions and protocols:
| Test Parameter | Conditions/Method |
|---|---|
| Detection range | Measured targets at 200m, 500m, 1,000m, 1,500m, and 2,500m+ |
| Image clarity | Rated 1–10 at each distance under clear, fog, and rain conditions |
| Battery life | Continuous use, screen brightness at 70%, Wi-Fi off, ambient 40–75°F |
| Cold weather battery drain | Same protocol at 28–35°F to measure cold-induced performance drop |
| Gloved operation | Full menu navigation with insulated hunting gloves |
| LRF accuracy | Verified rangefinder readings against known-distance markers |
| Durability | Exposure to rain, drops onto packed dirt, sustained use in dusty terrain |
| Startup time | Cold boot to usable thermal image |
Every Pixfra model we tested uses our proprietary heat-detection technology paired with 12μm pixel pitch sensors. NETD ratings across our lineup sit at ≤18mK, which places them at the high end of thermal sensitivity for hunting-grade optics. That sensitivity became a key differentiator in our fog and humidity tests, where devices with higher NETD values tend to wash out and lose contrast between targets and background heat.
This is where the rubber met the road. On clear nights with big temperature differentials between targets and the background, most thermal devices on the market look decent. The real test comes when conditions compress that temperature gap — warm summer nights, fog, rain, or when ground heat lingers after a hot day. That’s where NETD separates a sharp, usable image from a blurry mess.

Our Pixfra devices, with NETD values of ≤18mK, delivered defined target outlines even in the toughest sessions. During one fog-heavy evening on the ranch, we spotted a group of hogs at roughly 600 meters using the Sirius HD — not just as heat blobs, but with enough definition to count individual animals and see their direction of movement. The Sirius HD series pushes detection out to 3,600 meters under ideal conditions, and during our clear-night tests, we consistently picked up heat signatures beyond 2,500 meters. At that distance, identification wasn’t possible, but detection was reliable and repeatable.
The Mile 2 series, aimed at everyday hunters and outdoor enthusiasts, hit its sweet spot between 200 and 600 meters. Image quality at 3x and 4x base magnification stayed clean and high-contrast. Pushing the digital zoom past 8x softened the image, as expected, but targets remained usable for detection out to about 1,000 meters. For most recreational hunters working inside 300–600 meters — which covers the majority of whitetail, hog, and predator hunting in the U.S. — the Mile 2 delivered more than enough image quality to make clean target IDs.
One standout finding: sensor resolution alone doesn’t tell the full story. We paired our 384×288 and 640×512 sensor models against each other in identical conditions, and while the 640×512 models produced sharper images at distance, the 384×288 models with strong NETD and well-tuned image processing still gave usable identification at practical hunting ranges. The takeaway? Resolution matters, but thermal sensitivity and pixel pitch matter just as much — if not more — when conditions turn against you.
Battery life is the feature nobody talks about until it fails. And in our testing, it became one of the clearest performance separators between a device that lasts through a full hunt and one that leaves you in the dark — literally.
Our Pixfra devices range from approximately 4.5 hours to 15 hours of battery life depending on the model and usage. We tested each at 70% screen brightness with Wi-Fi off, which represents realistic hunting use. The models running standard 18650 batteries — including the Arc LRF, Mile 2, and Chiron LRF — gave us the most flexibility. When a battery started dipping toward the end of a session, we swapped in a fresh 18650 from a jacket pocket in under 10 seconds. That swap-and-go design is a deliberate choice on our part, and it proved its value on every all-night session we ran. Proprietary sealed batteries might shave a few grams off the weight, but when you’re deep in a hunt and the power drops, having a spare 18650 ready is worth every gram.
Cold weather tested our batteries hard. At temperatures around 30°F, we measured roughly a 30–40% drop in effective battery life compared to our warm-weather sessions. That tracks with industry-wide data on lithium battery performance in cold conditions. Our field tip: keep your spare batteries in an inside jacket pocket where body heat keeps them warm. We did this throughout testing and never ran out of power during a single outing.
On the build quality side, all of our tested models survived the full three-week test period without a single failure. We exposed every device to rain, dust, accidental drops onto packed dirt, and the kind of rough pack-and-carry treatment that comes with real fieldwork. Our IP67-rated housings handled full water exposure without issue — one unit took a direct dunk into a shallow creek crossing and came out working perfectly. The controls stayed responsive even when wet or operated with heavy insulated gloves, which matters a lot more than you’d think when you’re scanning a tree line at 3 AM in freezing drizzle.
The Draco series earned special mention for its lightweight design. During extended 4+ hour observation sessions, we noticed significantly less arm fatigue compared to heavier units. That weight difference sounds minor on paper, but after a few hours of repeated scanning, your muscles notice.
A thermal device in 2026 isn’t just a sensor with a screen — it’s a connected field tool. And during our testing, the smart features on our Pixfra lineup didn’t just check a box; they made real differences in how efficiently we worked in the field.

The integrated laser rangefinders on our LRF models — Arc LRF, Chiron LRF, and Taurus LRF — gave us instant, accurate distance readings out to 1,000 meters. We verified LRF accuracy against known-distance markers and found the readings consistently landed within ±1 meter. For hunters taking shots beyond 150 yards at night, that kind of precision removes guesswork and directly improves shot confidence. Paired with the built-in ballistic calculators on the Chiron LRF and Taurus LRF, we had computed bullet drop and adjusted aiming points available on-screen without switching devices or pulling out a separate rangefinder. That integration saved us time and kept our workflow smooth during fast-paced hog encounters.
The Pixfra Outdoor App, which supports all our current models including the Sirius, Arc LRF, Mile 2, Pegasus Pro, Chiron LRF, Taurus, and Taurus LRF series, handled firmware updates, settings adjustments, and image transfers without issues during our test period. We transferred hunt footage to smartphones for quick review between sessions and shared scouting data with other team members in real time. The color palette options — White Hot, Black Hot, Red Hot, Iron Bow, and Rainbow — let us adapt display modes to different conditions and personal preferences. Black Hot became our team favorite for predator hunts, giving us better body detail on animals against mixed-temperature backgrounds.
Our Volans series stood out with its all-day vision capability. We ran it in broad daylight, through twilight, and into total darkness, adjusting the aperture between F1.2 and F3.0 as lighting changed. The result was one device that handled every lighting condition we threw at it — no need to carry a separate optic for daytime use. The 50Hz refresh rate across our lineup also delivered the smooth, fluid imaging we needed to track fast-moving targets without the blur or stutter that lower refresh rates produce.
The Taurus and Taurus LRF thermal front attachments also proved their value as a flexible option for hunters who don’t want to replace their existing daylight scope. With ultra-fine 0.9cm@100m click value for zeroing, we achieved precise alignment that held through repeated sessions without drift. For hunters already running a quality daylight optic, the Taurus clips on and adds thermal capability without changing your primary setup — a practical approach that’s popular with European hunters and gaining ground fast in the U.S.
We didn’t run this test to claim perfection. We ran it to show you, with real data from real conditions, what our Pixfra thermal devices actually deliver in the field. The ≤18mK NETD sensitivity, 12μm pixel pitch sensors, swappable 18650 batteries, IP67-rated builds, integrated LRFs and ballistic calculators, companion app connectivity, and all-day vision on the Volans series — these aren’t just features on a spec sheet. They’re tools that performed when conditions got tough, sessions ran long, and weather turned ugly.
Whether you’re a hog hunter in Texas, a predator hunter in the Midwest, a wildlife observer on the East Coast, or a property owner keeping an eye on your land after dark, the results from this case study give you a clear picture of what you’re getting. Thermal imaging technology has reached a point in 2026 where mid-range devices deliver performance that was premium-only just two years ago. Our lineup at Pixfra reflects that shift — from the entry-accessible Mile 2 series all the way to the professional-grade Sirius HD.
If you want to dig deeper into the specific features that define a great thermal device this year, head over to our breakdown of the top 6 features needed in the best thermal device in 2026. And when you’re ready to choose the right model for how you hunt, explore, or observe, you’ll find every product in our lineup at Pixfra.com.
What is the real detection range vs. identification range on a thermal device?
Detection range tells you how far the sensor can pick up a heat signature. Identification range — where you can confirm what you’re looking at — is always shorter. In our field tests, real-world identification range typically ran about 30–40% of the stated detection range. Our Pixfra models range from around 500 meters for entry-level devices up to 3,600 meters for the Sirius HD series, but we always recommend checking identification range for your specific use case, not just the headline detection number.
How does cold weather affect thermal device battery life?
Cold temperatures hit lithium battery performance hard. During our testing at around 30°F, we saw a 30–40% drop in effective battery life compared to warm conditions. The solution: use models with swappable 18650 batteries and carry spares in an inside pocket where body heat keeps them warm. Many of our Pixfra models use 18650s specifically for this reason — you can swap a fresh battery in seconds without downtime.
Can you use a thermal device during the day?
Yes. Thermal devices detect heat, not visible light, so they work in full daylight just as well as total darkness. Our Pixfra Volans series goes a step further with an adjustable aperture (F1.2 to F3.0) designed for all-day vision, making it one of the few thermal devices that adapts smoothly across every lighting condition from noon sun to midnight.
Is a built-in laser rangefinder worth it on a thermal monocular or scope?
For hunters shooting beyond 150 yards at night, absolutely. A built-in LRF removes the need for a separate ranging device and gives you exact distance data with the press of a button. Our Pixfra Arc LRF, Chiron LRF, and Taurus LRF models all include integrated laser rangefinders with 1,000-meter range. Paired with onboard ballistic calculators, they deliver a complete targeting solution in one unit.
What IP rating do I need for a thermal device used outdoors?
For any real outdoor use — hunting, hiking, wildlife observation, property monitoring — you want at least an IP67 rating. IP67 means the device is fully sealed against dust and can handle temporary water submersion, covering rain, stream crossings, snow, and accidental drops into puddles. Our Pixfra devices are built to handle these conditions, and our IP67-rated models survived direct water exposure during our field tests without any issues.
