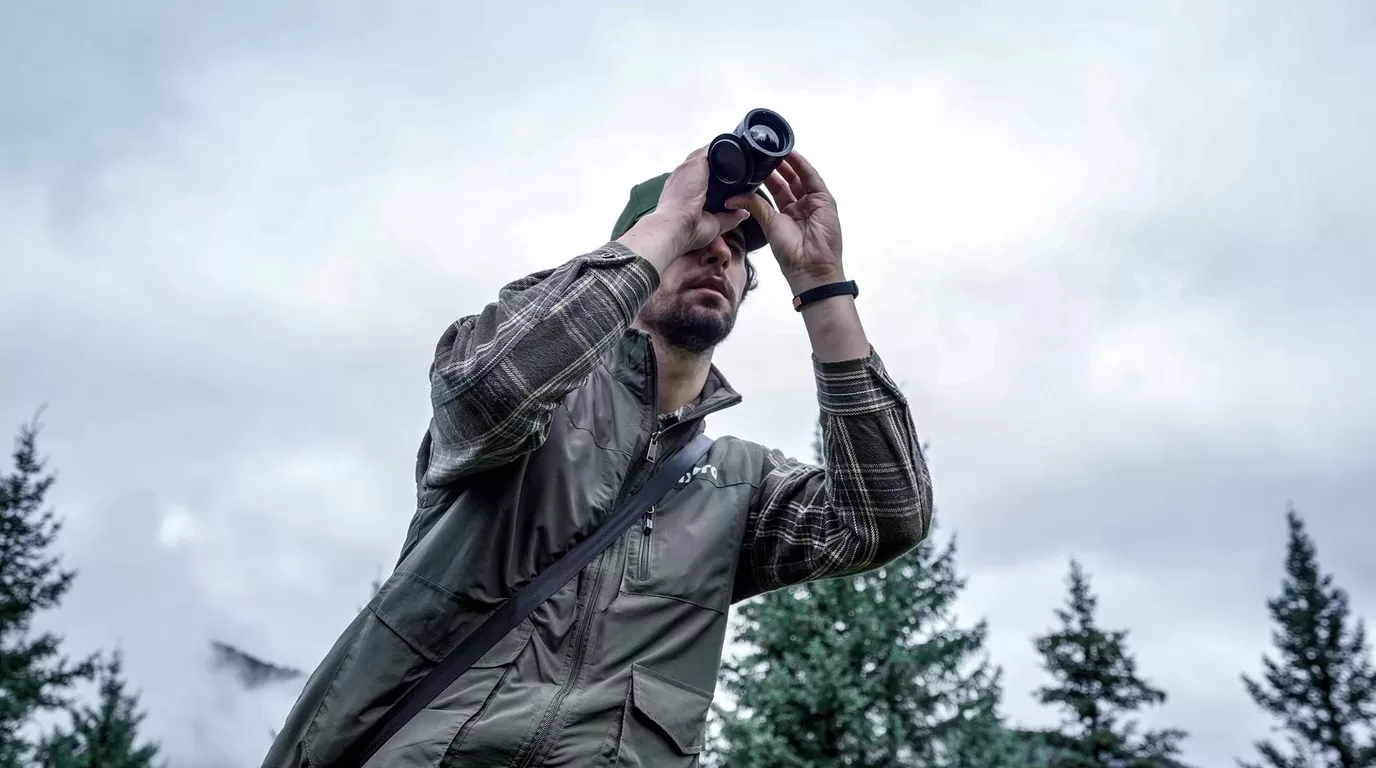
From nighttime patrols to perimeter sweeps, thermal devices give security teams and law enforcement a tactical edge that flashlights and standard cameras can’t touch. At Pixfra, we build thermal monoculars, scopes, and front attachments designed for real-world field conditions — and we’ve put together this list of the 8 best thermal devices for security and law enforcement in 2026.
Thermal imaging has gone from a niche military tool to a standard piece of gear for police departments, private security firms, and property patrol teams across the United States. Thermal imaging cameras detect heat, enabling law enforcement professionals to see in complete darkness. Unlike night vision cameras, thermal imaging cameras require no ambient light and retain their clarity in any lighting condition. If someone is hiding behind a bush, under a car, or crouching in a dark alley, their body heat shows up on a thermal display like a glowing outline. Handheld thermal imagers work by creating a virtual display showing the heat signatures of objects in the field of view, and these devices can provide responders with a covert method of surveillance, providing a tactical advantage at night. For law enforcement officers working the late shift or responding to a call in a wooded area, that’s not a nice-to-have — it’s a lifeline that keeps them safer and more effective on every shift.

The thermal device market in 2026 looks very different from a few years back. Sensor resolutions have climbed while prices have dropped. What used to be a premium 640×512 resolution is now a mid-range standard, and NETD sensitivity levels below 20mK are available outside of strictly military-grade equipment. These advances mean police departments, security agencies, and private property owners can now access thermal imaging that delivers clear, high-contrast imagery for a fraction of what it cost just three or four years ago. If you want a deeper look at what separates a great thermal device from a forgettable one, check out our breakdown of the top 6 features needed in the best thermal device in 2026.
Whether you’re a patrol officer scanning a parking lot, a SWAT team member clearing a building, a border security agent watching a fence line, or a private guard patrolling a warehouse district, the right thermal device changes how you operate at every level. You spot threats earlier. You make faster, better decisions. You stay safer while doing it. In today’s rapidly evolving security landscape, law enforcement thermal imaging technology has become an indispensable tool for police departments, SWAT teams, and security professionals worldwide. And with features like built-in laser rangefinders, Wi-Fi streaming to smartphones, onboard video recording, and rugged IP67 weatherproofing now standard on serious devices, today’s thermal imaging equipment is a complete field toolkit — not just a fancy scope.
We built this list based on what actually matters for security and law enforcement work: detection range, sensor sensitivity, durability, battery life, and the kind of smart connectivity features that keep you efficient during a 10-hour shift. Every device on this list comes from our Pixfra lineup, and each one is built for real outdoor conditions — from freezing winter nights to dusty summer patrols. Our proprietary heat-detection technology powers every model with NETD values of ≤18mK, placing them at the top end of thermal sensitivity for tactical-grade optics. Here’s how our 8 picks stack up side by side:
| # | Device | Type | Detection Range | LRF | Best For |
|---|---|---|---|---|---|
| 1 | Sirius HD | Thermal Monocular | Up to 3,600m | — | Long-range surveillance & border patrol |
| 2 | Arc LRF | Thermal Monocular | ~500m+ | Yes (1,000m) | Patrol & perimeter checks |
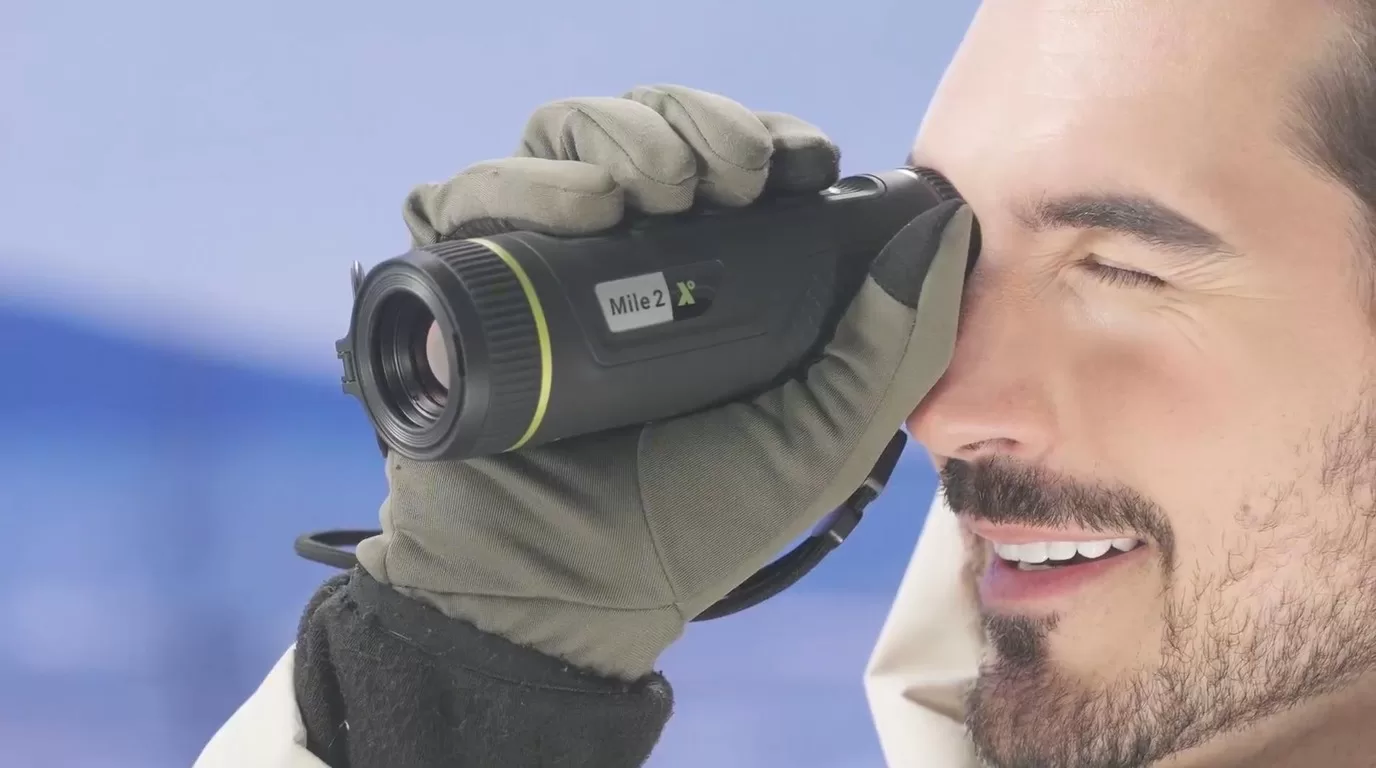
| 3 | Mile 2 | Thermal Monocular | ~500m+ | — | Everyday patrol & scouting |
| 4 | Chiron LRF | Thermal Scope | Mid-long range | Yes (1,000m) | Tactical ops & SWAT |
| 5 | Pegasus 2 LRF | Thermal Scope | Mid-long range | Yes | Precision target locking |
| 6 | Taurus LRF | Thermal Front Attachment | Mid-long range | Yes (1,000m) | Weapon-mounted thermal |
| 7 | Draco | Thermal Front Attachment | Mid range | — | Lightweight tactical use |
| 8 | Volans | Day & Night Vision Scope | Mid range | Available | 24-hour all-day operations |
The Sirius HD is our heavy hitter for agencies that need to cover massive areas. With a detection range stretching out to 3,600 meters, it’s built for border patrol operations, large property surveillance, and any scenario where you need to scan wide-open ground from a fixed position. At the other end of the spectrum, the Arc LRF and Mile 2 series are your best options if you need a compact, pocketable thermal monocular for nightly patrol. The Arc LRF packs an integrated laser rangefinder with 1,000-meter capability, so you can get instant distance-to-target data with a single button press — no fumbling for a separate device in the dark. The Mile 2 keeps things simple and reliable for officers who need thermal imaging every shift without extra complexity. Both models deliver ≤18mK NETD sensitivity, so you’ll see crisp outlines of people and objects even on warm nights when the temperature difference between a suspect and the background is small.

For tactical teams and officers who need thermal imaging mounted on their rifle, the Chiron LRF and Pegasus 2 LRF are our top thermal scopes. The Chiron LRF comes with an integrated laser rangefinder and a built-in ballistic calculator that computes bullet drop and adjusts your aiming point on the fly — a full targeting solution in one device for SWAT teams and tactical units operating in zero-visibility conditions. The Taurus LRF and Draco series work as thermal front attachments, mounting in front of your existing daytime scope to convert it into a thermal optic without changing your zero. The Taurus LRF features ultra-fine zeroing precision with a 0.9cm@100m click value, which matters when every shot counts. The Draco stands out for its lightweight design, built for officers who need multi-functional performance without adding weight to their gear. And if your team pulls shifts that span daylight and darkness, the Volans series delivers all-day vision with an adjustable aperture from F1.2 to F3.0, adapting to any lighting condition you’ll encounter — making it one of the few thermal devices that performs just as well at noon as it does at midnight.
Two specs will make or break your thermal device in the field: NETD and sensor resolution. NETD — Noise Equivalent Temperature Difference — measures how sensitive the thermal sensor is to small temperature changes. Lower numbers equal clearer, more detailed images. For law enforcement and security operations, you want ≤25mK at a bare minimum, and ≤18mK if you’re doing any serious nighttime or tactical work. All of our Pixfra devices hit ≤18mK, which means you’re seeing defined, high-contrast outlines of people and vehicles — not washed-out blobs. Pair that with 12μm pixel pitch technology and you get sharp imagery across sensor resolutions from 256×192 (good for close-range patrol) up to 640×512 (the go-to for professional security and law enforcement use). Resolution alone isn’t the whole story, though. A 50Hz refresh rate is the baseline for any thermal device worth carrying on duty in 2026 — it delivers smooth, fluid imaging that lets you track moving targets like fleeing suspects without blur or chop. Anything below 30Hz will give you stuttering video that makes fast-moving targets hard to follow.
According to a 2024 IACP survey, 78% of police departments using thermal cameras reported a 40% reduction in nighttime accidents, 35% faster suspect apprehension, and 60% improvement in search-and-rescue success. Numbers like that don’t come from spec sheets — they come from image quality, sensor sensitivity, battery reliability, and overall toughness. Our Pixfra devices range from approximately 4.5 to 15 hours of battery life depending on the model, and many use standard 18650 batteries that swap in seconds when power runs low. For durability, IP67 is the gold standard — fully sealed against dust and rated for temporary water submersion, which handles rain, stream crossings, snow, and accidental drops into puddles. Our Pixfra Outdoor App connects to every current model (Sirius, Arc LRF, Mile 2, Pegasus Pro, Chiron LRF, Taurus, and Taurus LRF) for firmware updates, settings control, and image transfer directly to your phone. Wi-Fi streaming, onboard video recording, and multiple color palettes — White Hot, Black Hot, Red Hot, Iron Bow — round out the feature set that field professionals rely on daily.
On a typical night patrol, a handheld thermal monocular turns a routine area scan into a real security sweep. Officers can use thermal imaging devices to spot a recently pursued car — a dark, parked car in a lot full of them, or alone in the middle of an open field, can be difficult to spot, but seen through an IR scope, the hot car stands out as if lit by a spotlight. Beyond vehicle pursuits, officers can detect people hiding in tree lines, spot discarded evidence like a warm firearm tossed into bushes, or sweep a wide perimeter from a single vantage point using a device with 500+ meter detection range. Thermal imagers have the capability to display the difference in temperature between objects, as well as an object’s heat signature and residual heat signature, and these devices are used by responders for search and rescue operations, for investigations, and to increase visibility through fog, smoke, dust, rain, and excessive glare. That kind of all-conditions performance means an officer with a thermal monocular like our Arc LRF or Mile 2 never has to rely on ambient light, street lamps, or a flashlight beam that gives away their position.

For SWAT and tactical teams, thermal scopes and front attachments allow target engagement in zero-visibility scenarios — smoke-filled buildings, blacked-out warehouses, or outdoor operations in dead-of-night conditions. SWAT thermal imaging gear provides specialized tactical teams with enhanced capabilities during high-risk operations, enabling teams to conduct reconnaissance, track suspects through complex environments, and maintain situational awareness during dynamic entries. Thermal front attachments like our Taurus LRF mount to existing optics, so officers don’t need to re-zero or retrain on a new sighting system — they just clip it on and gain full thermal capability. For search and rescue, a thermal monocular can locate a lost person in a wooded area in minutes instead of hours. And for covert surveillance, thermal imaging gives you a passive, no-light-required view that doesn’t reveal the observer’s position. Prosecutors increasingly use thermal imaging recordings to secure convictions, and onboard recording features in devices like our Chiron LRF make it simple to document everything in real time.
Private security firms are adopting thermal devices at a growing rate, too. Warehouse patrols, industrial facility sweeps, and residential estate monitoring all benefit from handheld thermal monoculars that can cover large areas fast. Handheld thermal cameras are increasingly used for personal security applications, and these portable devices allow security personnel to perform quick heat detection in any environment — whether you’re patrolling a large area, monitoring a crowd, or looking for intruders in a remote location. Our Volans series is especially practical for security teams pulling 12-hour shifts that span daylight and darkness. Instead of switching between daytime optics and night gear, your team carries one device that handles both — all-day vision through an adjustable aperture means no more mid-shift equipment swaps.
If you’re deciding between thermal imaging and traditional night vision for security or law enforcement work, here’s the straight answer: thermal wins in almost every real-world scenario. Thermal imaging in security uses cameras that detect infrared radiation — heat — rather than visible light, producing images based on temperature differences between objects and their surroundings. Unlike standard optical cameras, thermal cameras work in complete darkness, through light fog, and are unaffected by shadows, glare, or deliberate lighting changes. Night vision amplifies available light — moonlight, starlight, street lamps — and produces a visible image. It works OK in low-light conditions with some ambient illumination, but it goes blind in total darkness, heavy fog, or smoke. Thermal imaging detects heat, not light, so it performs in pitch-black environments, through fog, light rain, dust, and even partial foliage cover. For any security team or law enforcement agency operating at night, that gap is the difference between spotting a suspect and walking right past them.

The one area where night vision holds an edge is producing high-resolution, color-accurate images in very low light — useful for facial identification or reading license plates. But for detection, tracking, and situational awareness, thermal is the better tool. For security applications, thermal imaging excels at detection — confirming that something is there — while optical cameras and AI analytics handle classification. With devices like our Volans series offering all-day vision through an adjustable aperture (F1.2 to F3.0), you don’t even have to choose between day and night capability. You get both in one device — and one fewer piece of gear to carry, charge, or worry about breaking. For most security and law enforcement professionals, a quality thermal device will outperform night vision on every patrol, every shift, every time conditions get ugly.
Can police use thermal imaging without a warrant?
This is one of the most debated legal questions around thermal imaging in law enforcement. In the landmark Kyllo v. United States case, the Supreme Court held that thermal imaging of a home constitutes a “search” under the Fourth Amendment. That means using a thermal device to scan the inside of someone’s home from outside generally requires a warrant. However, using thermal imaging in open outdoor areas — during a foot pursuit, a perimeter search, or a patrol sweep of public spaces — is a different situation and is widely practiced by law enforcement agencies across the country. Officers should always check their department’s policies and consult legal counsel for specific scenarios.
How far can a thermal device detect a person?
Detection range depends on the device’s sensor resolution, lens size, and NETD sensitivity. Entry-level thermal monoculars typically detect human-sized heat signatures at around 300 to 500 meters. Mid-range models with 384×288 or 640×512 sensors push that out to 1,000–1,500 meters. Our Pixfra Sirius HD series reaches up to 3,600 meters, which covers wide-area surveillance and border patrol applications. Keep in mind that detection range — where you can tell “something is there” — is always longer than identification range, where you can confirm exactly what you’re looking at. For security work, always ask about both numbers before you buy.
Can thermal cameras see through walls?
No. Thermal cameras detect surface-level heat radiation — they don’t see through solid walls, glass, or metal. However, if someone is standing against a thin wall or door and transferring body heat to the surface, a thermal device can sometimes pick up that heat signature on the surface itself. This makes thermal imaging useful for detecting the presence of people near walls, doors, or windows, even though it can’t produce an image of what’s behind them. For law enforcement, this is a helpful detection tool during building searches, but it’s not X-ray vision.
What’s the best NETD for a law enforcement thermal device?
For most law enforcement, security, and outdoor patrol work, you want a thermal device with NETD of ≤25mK or lower. A device with ≤18mK — like every model in our Pixfra lineup — picks up extremely small temperature differences, producing sharp, detailed images even in challenging conditions like fog, humidity, or warm summer nights when everything radiates heat at similar levels. Lower NETD numbers translate directly to better image contrast, which means you can distinguish a person from their background faster and at greater distances.
Is thermal better than night vision for security?
For most security applications, yes. Thermal imaging works in total darkness, through fog, smoke, and light rain, and it detects heat signatures that are completely invisible to night vision. Night vision needs at least some ambient light to function and can be blinded by bright light sources like headlights or flashlights. Thermal devices are also passive — they don’t emit any light or signal, so they won’t reveal your position during covert operations. The only edge night vision holds is higher-resolution color imagery in low-light scenes with some available illumination, which helps with facial identification. For detection, tracking, and all-conditions awareness, thermal imaging is the stronger tool.
Whether you’re tracking hogs after dark, scanning backcountry trails, or watching wildlife without spooking it, a solid thermal device changes everything. At Pixfra, we build thermal monoculars, thermal scopes, thermal front attachments, and multispectral binoculars — all made for real outdoor conditions. Here are the 9 best thermal devices for survival and outdoor enthusiasts in 2026.
Thermal imaging technology has come a long way. What used to be a military-only tool is now something everyday hunters, hikers, campers, and survivalists can carry in their pockets. These devices detect infrared radiation — heat — instead of visible light. That means they work in complete darkness, through fog, in rain, and even when smoke fills the air. You’re not relying on moonlight or a flashlight to see what’s out there. You’re reading heat signatures, and heat doesn’t hide. A deer in a field, a person on a trail, a hot engine in a parking lot — all of it lights up on a thermal screen even when your eyes see nothing. For anyone who spends time outdoors, that kind of awareness isn’t just nice to have. It’s a game changer for safety, for success on a hunt, and for pure enjoyment of the wilderness.

The survival use case alone makes thermal devices worth it. If you’re lost, a thermal camera can help you spot warm structures, vehicles, or other people from a distance. If you’re camping, it lets you scan around your site for animals you’d rather not surprise in the dark. If you’re a search-and-rescue volunteer, thermal imaging cuts search time down drastically because you’re reading body heat through brush, foliage, and low-visibility conditions. Thermal monoculars are the most common entry point for outdoor users because they’re handheld, lightweight, and quick to deploy. You can sweep fields, tree lines, and brush edges to spot animals or people before deciding your next move. And since they don’t emit any visible light, you stay hidden while getting a full picture of your surroundings.
For hunters specifically, thermal devices have become a go-to tool for predator control, hog management, and scouting. Night hunting for coyotes and feral hogs is legal in many U.S. states — including Texas, Florida, Georgia, Louisiana, and Oklahoma — and thermal makes it safer and more effective. But even outside of night hunting, thermal monoculars are used for pre-dawn scouting, post-shot blood trailing, and property surveillance. If you’ve been curious about what features actually separate a great thermal device from a mediocre one, we wrote an in-depth guide on the top 6 features needed in the best thermal device in 2026 — it covers NETD, detection range, battery life, durability, and smart connectivity in detail.
We’ve picked nine devices from our Pixfra lineup that cover every use case, from everyday carry to long-range professional detection. Each one is built with our proprietary heat-detection technology, 12μm pixel pitch sensors, and rugged construction made for the field — not the shelf. Here’s the breakdown.
1. Sirius HD — The Long-Range Powerhouse. If you need to scan massive areas without moving a step, the Sirius HD is the device to reach for. It pushes out to a 3,600-meter detection range, making it the farthest-reaching thermal monocular in our lineup. It’s built for law enforcement, wildlife managers, and serious hunters who need to see what’s happening at distances most people can’t even imagine covering with a thermal device. The Sirius HD sits at the premium end, but the level of detail and reach it delivers is unmatched. This is the kind of device where every dollar goes straight into performance — high-resolution sensors, top-tier NETD sensitivity at ≤18mK, and rock-solid build quality.
2. Sirius Series — More Than the Perception of Sight. The standard Sirius Series delivers the same core imaging DNA as the HD version, with a focus on versatility. It’s a well-rounded thermal monocular that handles everything from nighttime wildlife observation to property security sweeps. The image quality is sharp enough to distinguish between targets at distance, and the ergonomics are designed so you can use it for hours without fatigue. For outdoor enthusiasts who want pro-level performance in a manageable package, the Sirius Series hits that sweet spot.
3. Mile 2 — New Miles to Go. The Mile 2 is our everyday thermal monocular — the one you toss in your pack and reach for first. It pairs a high-resolution sensor with 12μm pixel pitch technology for sharp, high-contrast images in any condition. It’s compact, straightforward to operate, and delivers the kind of thermal clarity that makes spotting animals or scanning trails easy even in complete darkness. For most recreational hunters and outdoor enthusiasts, the Mile 2 gives you everything you need without overcomplicating it. Think of this as your no-excuses field companion: reliable, clear, and always ready to go.
4. Arc LRF — Performance and Precision in Your Hand. Here’s where things get dialed in. The Arc LRF adds an integrated laser rangefinder with 1,000-meter range capability to the mix. You get exact distance to your target with the press of a button — no fumbling for a separate device. For hunters taking shots beyond 150 yards at night, a built-in LRF makes a real difference in shot placement confidence. The Arc LRF sits in our mid-range tier, meaning it balances detection performance with a price point that doesn’t make your wallet weep. If you want one device that covers scanning, detection, and ranging, this is the one.
5. Pegasus 2 LRF — Make Precision Target Locking Effortless. The Pegasus 2 LRF is a thermal scope designed for shooters who need to acquire targets fast and lock on with confidence. It combines our thermal imaging sensor with an integrated laser rangefinder so you’re getting distance data and a clear thermal image at the same time. This is a weapon-mounted optic built for hog and predator hunting where speed and precision both matter. It handles heavy recoil, rough handling, and the kind of weather that sends most gear running home.
6. Pegasus Pro Series — Shoot in a Pro Way. The Pegasus Pro takes our thermal scope platform and pushes it further for experienced shooters. It offers multiple reticle options, smooth thermal imaging at a 50Hz refresh rate, and the kind of sensor resolution that lets you tell the difference between a target and a stump at distance. The Pro series is made for hunters who already know what they’re doing and want a scope that keeps up with their skill level. If you’re running thermal hunts on a regular basis, this is the setup that stays locked in season after season.
7. Chiron LRF — Lock-On, Readiness, Fire. The Chiron LRF is our fully loaded thermal scope. It has an integrated laser rangefinder and a built-in ballistic calculator that computes bullet drop and gives you an adjusted aiming point in real time. That’s not a gimmick — it’s the difference between a clean shot and a miss. The Chiron LRF takes the guesswork out of night shooting, especially at extended distances where manual holdover gets dicey. For predator hunters working coyotes across open pasture or managing feral hogs on large properties, this scope does the math for you.
8. Taurus LRF — LRF Locked, Ballistics at the Trigger. The Taurus LRF is a thermal front attachment — meaning it clips onto your existing daytime optic and turns it into a thermal-capable system. It features high-definition zeroing with an ultra-fine 0.9cm@100m click value, a built-in laser rangefinder, and a ballistic calculator. The Taurus LRF comes in multiple configurations (T425 LRF, T450 LRF, T650 LRF), so you can match the model to your specific setup. If you’ve already invested in a quality daytime scope and don’t want to buy a whole separate thermal scope, the Taurus front attachment gives you the best of both worlds.
9. Volans Series — See Beyond Time. The Volans is different from everything else on this list. It’s a digital day-and-night vision scope with an adjustable aperture from F1.2 to F3.0 — one of the few devices on the market that works just as well in broad daylight as in total darkness. It also includes a built-in ballistic calculator for distance-adjusted shot placement. The Volans is the “carry one device instead of two” answer for hunters and wildlife observers who need all-day coverage. If you’re in the field from pre-dawn to well past midnight, this is the device that stays on the whole time.
With so many models and brands flooding the market, it’s easy to get distracted by flashy numbers that don’t mean much in real conditions. So let’s cut through the noise and talk about the specs that make or break your experience. NETD — Noise Equivalent Temperature Difference — is the single most telling spec on any thermal device. It measures how sensitive the sensor is to small changes in temperature. A lower number means better sensitivity. For context, our Pixfra devices achieve NETD values of ≤18mK, which places them at the high end of sensitivity for hunting-grade thermal optics. That kind of sensitivity means you’re not squinting at blurry blobs — you’re seeing defined outlines of animals even when the ground, air, and foliage are all radiating heat at similar levels. If the device you’re looking at has an NETD above 30mK, you’re going to notice the difference on warm nights.

Sensor resolution is the other half of image quality. The most common options are 256×192 (entry-level), 384×288 (mid-tier), and 640×512 (premium). Higher resolution means sharper images and better target identification at distance — but resolution alone isn’t the whole story. Pixel pitch matters too. A 12μm pixel pitch, which we use across our Pixfra product lines, gives you sharper thermal images because each pixel is smaller, resulting in finer detail. Pair that with a 50Hz refresh rate and you get smooth, fluid thermal imaging that lets you track moving targets — running coyotes, sprinting hogs — without blur or chop. Anything below 30Hz creates a stuttering image that makes fast-moving animals hard to follow.
Here’s a quick reference table to compare how these specs stack up for different use cases:
| Spec | Entry-Level | Mid-Range | Premium |
|---|---|---|---|
| Sensor Resolution | 256×192 | 384×288 | 640×512 |
| NETD (Thermal Sensitivity) | ≤40mK | ≤25mK | ≤18mK |
| Pixel Pitch | 17μm | 12μm | 12μm |
| Detection Range | ~500m | ~1,500m | ~3,600m |
| Refresh Rate | 30Hz | 50Hz | 50Hz |
| Laser Rangefinder | Rare | Common | Standard |
| Battery Life | 4–6 hrs | 6–10 hrs | 8–15 hrs |
| IP Rating | IP54 | IP67 | IP67/IP68 |
This table reflects the general landscape in 2026. Our Pixfra lineup covers every tier shown above — from the Mile 2 for everyday use to the Sirius HD for premium, long-range detection.
Having a great thermal device is one thing. Knowing how to use it well is another. One of the most overlooked factors is battery management. Our Pixfra devices range from about 4.5 to 15 hours of battery life depending on the model and settings. Many of our models use standard 18650 batteries that you can swap out in seconds — a design choice we made on purpose. When you’re deep in a hunt at 2 AM and the power dies, popping in a fresh battery from your pocket beats packing up and going home. Here’s a pro tip from our field experience: cold weather can slash battery performance by 30–50%. Always carry spares in an inside pocket where your body heat keeps them warm. If you’re planning an all-night predator hunt or a multi-day backcountry trip, pack at least two spare batteries and keep one warming against your body at all times.
Color palettes are another tool that experienced users rely on heavily. White Hot is the most common mode — heat sources show up white against a darker background — and it works great for general scanning. Black Hot, where heat sources appear black, is preferred by many professional hunters for reading animal body detail more clearly. Red Hot highlights the warmest areas in red and helps you pick out a target fast in busy environments. Iron Bow and Rainbow modes display a full spectrum of temperatures, which is helpful for reading environmental heat patterns. You can switch between these palettes on the fly without changing the device’s detection ability — it’s purely a display preference that helps you adapt to different terrain, weather, and lighting. Don’t just stick with the default. Experiment with palettes during different conditions and you’ll quickly find which ones click for you.
Your choice should start with one question: what will you use it for most? If you’re a recreational hunter who runs a few night hunts per season and wants to scan fields before dark, a monocular like the Mile 2 or Arc LRF is your best bet. These models deliver sharp thermal images, reliable detection range, and the portability to toss in a pack or jacket pocket. If you’re a dedicated predator or hog hunter who shoots at night, step up to a weapon-mounted thermal scope like the Pegasus 2 LRF or Chiron LRF — these are built to handle recoil, zero in tight, and give you distance data when it counts.

For those who already own a quality daytime scope and don’t want to replace it, our Taurus LRF thermal front attachments are the play. They clip onto your existing optic and add thermal capability without forcing you to swap out your whole setup. And if you need all-day coverage — dawn to midnight — the Volans series is the one device that does it all with its adjustable aperture system. Budget matters, obviously. But don’t just chase the cheapest price tag. A thermal device that looks great on paper but dies after two hours, fogs up in the rain, or gives you washed-out images on warm nights isn’t saving you money — it’s wasting your time. Match your expected use to the right device and you’ll end up with gear that pays for itself season after season. Firmware updates for all our Pixfra devices can be performed through the Pixfra Outdoor App, which supports the Sirius, Arc LRF, Mile 2, Pegasus Pro, Chiron LRF, Taurus, and Taurus LRF series — so your device keeps getting better even after you buy it.
Can you use a thermal device during the day?
Yes. Thermal devices detect heat, not light, so they work just as well in daylight as they do at night. Our Pixfra Volans series goes a step further with all-day vision capability and an adjustable aperture (F1.2–F3.0) that adapts to changing light conditions. That makes it one of the few thermal devices on the market that performs equally well in bright sun and total darkness.
What is the best thermal device for survival situations?
For general survival and outdoor use, a compact thermal monocular gives you the most versatility. It lets you scan for people, animals, and warm structures in any visibility condition — darkness, fog, smoke, or heavy rain. Our Mile 2 series is a great pick for this because it’s lightweight, easy to operate, and delivers clear thermal images with ≤18mK sensitivity. If you need more range for search-and-rescue-style scenarios, the Sirius HD pushes detection out to 3,600 meters.
How far can a thermal monocular detect an animal?
Detection range depends on the model. Entry-level devices detect heat signatures at around 500 meters, while premium models like our Sirius HD series reach up to 3,600 meters. Keep in mind that detection range and identification range are different — you can detect a heat source at one distance, but identifying what it is (deer vs. coyote vs. stump) happens at a shorter range. Always ask about both numbers before you buy.
Is a thermal monocular better than night vision for hunting?
For most hunting scenarios, yes. Night vision amplifies available light, which means it needs at least some ambient light (moonlight, starlight) to work. Thermal imaging reads heat signatures and works in absolute darkness — plus it sees through fog, light rain, and brush that blocks visible light. Thermal also makes animals stand out sharply against their backgrounds, even when they’re camouflaged in natural cover. That’s why thermal monoculars have become the go-to handheld optic for hog, predator, and nighttime wildlife work.
What IP rating do I need for an outdoor thermal device?
For any serious outdoor use — hunting, hiking, survival, property security — you want at least an IP67 rating. IP67 means the device is fully sealed against dust and can survive temporary water submersion, which covers rain, snow, stream crossings, and accidental drops into puddles. Devices with an IP54 rating handle light splashes but won’t hold up if you dunk them or use them in heavy downpours. All Pixfra thermal devices are built to handle real-world field conditions, including heavy recoil on our scopes and corrosion resistance over years of use.
A thermal device for hunting should match the way you hunt, not a number on a headline. Start with terrain, usual viewing distance, whether you need a handheld scanner or a mounted optic, and how long you stay out. Pixfra builds thermal monoculars, thermal scopes, thermal front attachments, and multispectral binoculars, so the right setup starts with the job in front of you.
That is the whole decision in plain English. Pick the device type first. Then compare sensor resolution, NETD, lens, refresh rate, runtime, controls, and after-sales support.
Most buying mistakes start when a hunter reads one impressive range number and stops thinking. Detection range only tells you that the device can notice a warm object at distance. It does not promise clean identification, and it does not tell you how the optic feels in cold hands at 2 a.m.
Ask a simpler question: what are you trying to do?
A hog hunter watching feeders and tree lines needs fast scanning, a wide enough field of view, steady battery life, and simple controls. A coyote hunter calling across open ground needs more detail at distance and may benefit from laser rangefinding. A deer manager checking fields before first light may want a handheld monocular for observation, not a mounted optic. A shooter who already has a dialed-in day scope may prefer a front attachment rather than rebuilding the rifle around a dedicated thermal scope.
This is where Pixfra’s product lines split neatly. Mile 2 and Arc cover handheld scanning. Arc LRF adds rangefinding in a compact monocular. Taurus keeps your day optic in the system as a front attachment. Chiron LRF and Pegasus lines move toward dedicated thermal scope use. Sirius and multispectral devices help when observation, detail, and mixed-light work matter more than a single shot window.
For many hunters, the first thermal device should be a handheld monocular. You can scan fields, check timber edges, follow heat signatures after a shot, and keep the rifle pointed in a safe direction until you have a reason to shoulder it.
Pixfra Mile 2 is the compact choice in this role. The Mile 2 page lists pocket-size portability, a P3 AMOLED display, electronic compass, and model options up to 640 x 512 resolution. It is a good fit when you want a device that lives in a jacket pocket instead of taking over your pack.
Arc and Arc LRF step into a more capable handheld role. Arc LRF combines thermal observation with an integrated laser rangefinder, magnesium alloy body, and replaceable battery setup. If you hunt broken ground, uneven fields, or unfamiliar farms, range data can prevent bad guesses.
The handheld rule is simple: if you spend more time searching than aiming, buy the scanner first.
Thermal images can flatten distance. A hog across a field, a coyote beyond a fence line, and a deer-shaped heat source near brush can look closer than they are. That is why LRF models matter for hunters who work open lanes or changing terrain.
Pixfra has LRF options across handheld and mounted categories, including Arc LRF, Chiron LRF, Taurus LRF, and Pegasus 2 LRF. The benefit is not just a number on the screen. It is a cleaner decision cycle: spot, range, judge, and act without switching devices or guessing from landmarks.
Choose LRF when you hunt fields, hills, power-line cuts, or large properties where visual reference points are weak at night. You may not need it for tight timber or short feeder lanes, but once distance starts changing fast, rangefinding earns its place.
This is the decision that deserves the most patience. A front attachment lets you keep a daytime optic and add thermal capability in front of it. A dedicated thermal scope gives you a purpose-built thermal aiming system.
| Your setup | Pixfra direction | Why it fits |
|---|---|---|
| You already trust your day scope and rifle zero | Taurus front attachment | Keep the day optic workflow and add thermal imaging when needed |
| You want an integrated thermal hunting optic | Chiron LRF or Pegasus series | Purpose-built controls, thermal display, and mounting setup |
| You scan more than you shoot | Mile 2, Arc, or Arc LRF | Handheld observation is faster and safer for searching |
| You need observation across changing light | Sirius or multispectral binocular | Better fit for longer watching sessions and mixed conditions |
Taurus is useful when the rifle is already set up well and you do not want to rebuild everything around a new optic. Chiron LRF and Pegasus models make more sense when thermal is the main aiming system. Neither path is automatically better. The right answer depends on how the rifle is used, who else uses it, and whether you switch between day and night work.
Sensor resolution affects how much detail the image can show. Pixfra product lines include 256 x 192, 384 x 288, 640 x 512, and higher-resolution options depending on category and model. More pixels help when you need detail at distance, but resolution is only one part of the image.
NETD tells you how well the device can separate small temperature differences. Lower NETD helps in humidity, fog, and low-contrast scenes where warm shapes do not stand out cleanly. Pixfra publishes NETD values by model, so check the exact SKU before ordering.
Lens and field of view decide how the device feels. A wider view helps scanning close cover. A narrower, longer lens helps when you need more reach. Hunters often overbuy reach and then feel slow in tight terrain. Match the lens to where you actually hunt.
Battery design matters more than it sounds. A device with replaceable 18650 batteries or a practical external power option is easier to manage on long nights. Runtime claims are usually measured under set conditions, so build a spare-power plan before the first trip.
Controls matter too. Gloves, rain, cold, and adrenaline expose bad ergonomics fast. Look for fast startup, a clean menu, easy palette changes, and buttons you can feel without staring at the housing.
For brush, feeders, and short lanes, start with a handheld thermal monocular. Mile 2 or Arc gives you quick scanning without adding weight to the rifle. If most opportunities happen close, field of view and comfort matter more than maximum reach.
For crop fields and rolling ground, move Arc LRF higher on the list. The rangefinder helps when distance is hard to judge in the dark, and the handheld format still keeps scanning simple.
For a rifle that needs thermal as the main sighting system, compare Chiron LRF and Pegasus options. Look closely at sensor resolution, lens, battery, mounting, and whether the controls feel natural from the shooting position.
For hunters who prefer their day optic, Taurus keeps the familiar glass in the system. That is useful when one rifle has to serve daytime and nighttime roles.
For observation, scouting, and long sits, Sirius or multispectral binocular products may fit better than a rifle-mounted thermal. Not every thermal job is a shooting job.
Do not choose a thermal device only by detection range. Detection is the easiest number to advertise and the easiest number to misunderstand.
Do not buy a mounted optic when you really need a scanner. If the first task is finding animals, a handheld monocular usually gets more use.
Do not ignore support. Thermal optics are electronics used outdoors. Firmware, batteries, seals, displays, buttons, and charging ports all matter after the sale. Buy through an approved channel and keep serial-number records.
Do not skip local regulations. Night hunting rules vary by region, species, season, and equipment type. Check the current wildlife agency rules where you hunt before using thermal equipment in the field.
For scanning, a thermal monocular is usually the better first device. For aiming, you need a thermal scope or a front attachment used with a suitable day optic. Many hunters eventually use both: a handheld monocular to find heat and a mounted solution for the shot.
Choose LRF if distance changes often or if you hunt open ground. It is less important for short, fixed lanes where you already know common distances. Pixfra offers LRF options in handheld, front attachment, and scope categories.
Match resolution to distance and detail needs. 256 x 192 can work for close scanning. 384 x 288 gives a stronger middle ground. 640 x 512 and above help when identification detail matters at longer distances. Always compare the exact model, lens, and NETD together.
Plan for the whole session, not the best-case runtime number. Check whether the device uses replaceable batteries, supports external power, and can be managed with gloves in cold weather. Carry spares when the device supports them.
If you are choosing a Pixfra thermal device for hunting, start with terrain and use case. Then shortlist the device type: handheld monocular, front attachment, dedicated thermal scope, or binocular. From there, compare exact model specs and ask Pixfra or an approved dealer to confirm the right fit for your rifle, distance, and support region.
A mid-size HVAC service team in the Southeast was bleeding time and money on missed faults and repeat service calls. They swapped their outdated spot thermometer for a real thermal imaging device — and the results flipped everything on its head. Here’s what happened, what they found, and what you can take from it when shopping for your next thermal device.
Thermal imaging for HVAC used to be a specialty luxury. You’d see one big-budget electrical contractor show up once a year with an expensive IR camera, scan a few breaker panels, and leave. That was it. The rest of the time, HVAC technicians were stuck with contact thermometers, pressure gauges, and a whole lot of guesswork. But the market has shifted hard. In 2025–2026, prices have fallen 40%. Entry-level cameras now deliver 160×120 resolution—perfectly adequate for professional work. For HVAC professionals, that means you can now afford a thermal device that would’ve cost three times as much just a couple of seasons ago. Thermal imaging for HVAC has transformed from an expensive specialty tool into an essential piece of equipment that every technician can afford and benefit from daily.

And the applications go way beyond scanning breaker panels. You can use thermal imaging to identify electrical hot spots, detect air infiltration, visualize airflow patterns, and verify system operation. A single thermal scan of an HVAC system can reveal what hours of manual point-by-point checking simply can’t. HVAC professionals rely on thermal imaging to identify insulation gaps, duct leaks, blocked coils, refrigerant issues, and energy losses. At Pixfra, we’ve been building thermal devices for real field conditions for years. We’ve watched firsthand how the right thermal device turns an average HVAC tech into a diagnostic powerhouse — and how the wrong one just gathers dust in a toolbox.
If you’re shopping for one right now, the feature set matters more than the brand name on the box. Specs like thermal sensitivity (NETD), sensor resolution, Wi-Fi connectivity, and build quality are what separate a thermal device that works in the field from one that lets you down on the job. We put together a full breakdown of the top 6 features you need in the best thermal device in 2026 — it covers everything from sensor tech to battery life to smart features. Read that if you want the full rundown. But for now, let’s walk through what happened when one real HVAC team made the upgrade.
The team in this case study is a 14-person HVAC service operation based in the southeastern United States — hot summers, brutal humidity, and a customer base that runs the air conditioning eight months out of the year. Their techs had been using basic single-point IR thermometers and traditional diagnostic methods for years. They’d check individual connections one at a time, take spot temperature readings at supply and return registers, and rely on pressure gauges and visual inspections to piece together what was going on with a system. It worked — kind of. But it was slow, it missed things, and the inefficiency was costing them money every single week.
Their biggest pain point was callbacks. Customers would call back within a week or two saying the system still wasn’t right. The techs would drive back out, spend another hour or more, and sometimes find something they missed the first visit — a partial duct leak hidden behind drywall, a loose electrical connection that hadn’t gotten hot enough to notice during the first call, or uneven airflow from a partially blocked evaporator coil. Customers want to avoid downtime and budget maintenance and repair expenses. They want to know in advance if something is going to fail, since the cost of downtime can be very high. Their callback rate was eating into profit margins, burning out their techs, and eroding customer trust. The turning point came when a senior tech borrowed a colleague’s thermal camera for a weekend energy audit on a friend’s house. He found three insulation gaps and a duct leak in under twenty minutes — problems a different contractor had missed entirely using traditional tools. That single demo was enough to convince the owner it was time to upgrade the whole fleet.
The company outfitted every truck with a thermal device featuring 384×288 sensor resolution, NETD sensitivity of ≤25mK, a 50Hz refresh rate for smooth panning, and Wi-Fi connectivity for instant image transfer. The temperature measurement range covered -4°F to 752°F (-20°C to 400°C) — wide enough to handle everything from frozen evaporator coils in winter to overheating compressors in the dead of a Florida summer. The cameras also carried IP54-rated housing, which held up against the dust, humidity, and surprise rain showers their techs dealt with daily. The team spent one afternoon on training — how to adjust emissivity settings for different surfaces, how to read a thermal image properly, and how to share images with homeowners on-site. That was all it took to get them rolling.

The results showed up fast. In the first 60 days after the upgrade, the team tracked their performance metrics against the previous quarter. Diagnostic time per service call dropped because techs could scan an entire HVAC system — ducts, registers, coils, electrical panels — in minutes instead of checking each point one at a time. Their callback rate fell hard because the thermal scans caught problems the old methods missed, like partial evaporator coil blockages that showed up only as slight temperature variations, or thermal bridging in walls that was killing system efficiency even though the equipment itself was running fine. Customer satisfaction scores climbed because techs could now pull up a clear, color-coded thermal image on the spot and show the homeowner exactly where the problem was — no more vague explanations about “possible duct issues.”
Here’s a snapshot of the numbers they tracked over those first 60 days:
| Metric | Before Upgrade | After Upgrade (60 Days) |
|---|---|---|
| Average diagnostic time per call | 48 minutes | 27 minutes |
| Callback rate (within 14 days) | 18% | 6% |
| Duct leaks detected per month | 4 | 14 |
| Electrical hot spots flagged | 1–2 per month | 8–10 per month |
| Customer satisfaction (survey) | 3.8 / 5 | 4.5 / 5 |
Those numbers tell you what a solid thermal device does for an HVAC operation. But the real story is what those numbers mean on the ground: techs finishing service calls faster, customers seeing hard visual proof of the problem on a screen instead of taking your word for it, and the company spending way less money sending people back to fix things they should’ve caught the first time. Studies by the Federal Energy Management Program (FEMP), estimate that a properly working preventive maintenance program can lead to savings, to the tune of 30 to 40%. When you pair a thermal device with a solid preventive maintenance routine, the savings multiply.
So what exactly can a thermal device catch that a standard IR thermometer or a pressure gauge can’t? A lot, it turns out. The biggest wins in HVAC diagnostics come from the ability to see the full thermal picture — not just one single data point. A thermal imaging camera can detect whether the evaporating units are working properly. For example, if the evaporator coil tubes are clogged, the camera can detect whether the flow is uniform, or whether only half the coil is working properly. A spot thermometer gives you one reading at one point. A thermal device gives you the entire coil, the entire panel, or the entire wall in one frame. That changes how you diagnose problems at a fundamental level — you go from checking blind to scanning smart.
Duct leaks are another area where thermal imaging pays for itself almost immediately. Having a leaky duct can cost home or building owner’s a lot of money as they can increase heating and cooling energy usage by up to 40%. And they’re one of the hardest problems to find with traditional tools. A thermal scan of exposed ductwork in an attic or crawl space lights up leaks like a neon sign — you’ll see a clear temperature difference where conditioned air is escaping into unconditioned space. The same goes for air infiltration at the building envelope. Gaps around windows, doors, and wall penetrations show up as cold streaks in winter or warm spots in summer. Simply sealing in gaps within common problem areas can save up to 20% annually on energy bills. A thermal device shows you exactly where those gaps are so you can fix them — or point your customer to someone who can.
Electrical troubleshooting is where thermal imaging gets really serious. Loose connections increase amp draw and generate excessive heat – issues that can cause premature equipment failure and emergency service calls. The traditional method required manually checking each connection point individually – a time-consuming and potentially dangerous process. Thermal cameras eliminate this tedious work by allowing you to scan an entire energized panel in seconds, instantly revealing hot spots that require attention. This is non-contact, non-invasive diagnostics at their best. You find the hot spot, power down, and fix the specific connection — no more checking every terminal with a wrench and hoping you get lucky. On top of all that, you can verify proper heat pump operation during seasonal changeovers, check for refrigerant flow restrictions, identify insulation gaps, and even detect moisture problems that could lead to mold growth. Thermal imaging identifies 70-80% of mechanical issues in HVAC systems. This success rate is much higher than manual checks. It’s one thermal device that covers a dozen different diagnostic jobs you used to need separate tools and a lot more time to handle.
If this case study has you thinking about making the same upgrade, here’s what to look at when shopping. The most important factor is resolution, measured in pixels. Higher resolution means you can see more detail and make better decisions. For HVAC work, 160×120 pixels is the bare minimum, but 256×192 or 384×288 will give you much better clarity — especially when you’re pinpointing a single hot breaker in a loaded panel or identifying a small duct leak from across an attic. Lower resolution works for “there’s a problem in this general area,” while higher resolution shows you “the problem is in this specific stud bay.” If you’re doing this work daily and putting thermal images into customer reports, the extra resolution makes a noticeable difference.
Thermal sensitivity, measured as NETD (Noise Equivalent Temperature Difference), tells you the smallest temperature difference a camera can detect. Lower numbers are better. A camera with NETD at or below 25mK will catch subtle problems like a slightly overheating wire connection or a minor insulation gap that a less sensitive device would miss entirely. Our Pixfra thermal devices hit NETD values of ≤18mK, which sits at the top end of sensitivity for field-grade thermal optics. That kind of sensitivity makes a real difference when you’re scanning on a mild spring day when indoor and outdoor temperatures are close together and the delta T between them is small. We pair that sensitivity with 12μm pixel pitch technology across our product lines, which means sharp, high-contrast images no matter which model you pick.
Don’t overlook the practical stuff, either. Temperature range should cover at least -4°F to 752°F (-20°C to 400°C) so you can handle everything from frozen coils to overheating compressors without maxing the sensor out. A 50Hz refresh rate keeps the thermal image smooth when you’re panning across ductwork or sweeping a panel. Wi-Fi connectivity lets you push images straight to your phone, build reports on the spot, and show customers exactly what you found. Build quality matters too — look for at least an IP54 rating, though IP67 is better if you work in dusty attics, wet crawl spaces, or rough outdoor conditions. At Pixfra, we build our devices to handle the same conditions our users face: heavy recoil on thermal scopes, drops on our monoculars, and corrosion resistance over years of hard use. For HVAC techs, that durability translates to a device that survives life on the truck and in the field without babying it. Battery life should get you through a full day of calls. And if the device uses swappable batteries — like the standard 18650 cells we use across many of our models — you can always carry a spare and never get caught dead on a job.
Can a Thermal Camera Detect HVAC Duct Leaks?
Yes — and this is one of the top uses for a thermal device in HVAC work. One of the primary roles of thermal cameras in HVAC systems is detecting air leaks. Air leakage can significantly impact a system’s efficiency by allowing conditioned air to escape and drawing in outside air. Thermal cameras can identify these leaks by revealing temperature differences along ducts and vents. It’s way faster than checking every joint by hand, and it catches leaks you’d never spot with a visual inspection alone.
What Resolution Thermal Camera Do I Need for HVAC Work?
For basic work like finding large air leaks and general hot spots, entry-level resolution (80×60 to 160×120) is great for finding large air leaks, missing insulation, or general hot spots close up. But if you want sharper images to identify specific faults — like a single overheating breaker or a small coil restriction — professional resolution (192×192 to 384×288) is required for crisp reporting, electrical panel inspections, and identifying subtle moisture intrusion or duct leakage from further away.
Is a Thermal Camera Worth It for HVAC Technicians?
Absolutely. The payoff is fast. A thermal device cuts diagnostic time, reduces callbacks, and lets you catch problems before they turn into expensive emergency repairs. As you integrate thermal imaging into your daily workflow, you’ll discover new applications that save time, improve diagnostic accuracy, and provide compelling visual evidence for customers. The investment in a quality thermal camera quickly pays for itself through reduced callbacks, faster troubleshooting, and enhanced professional credibility. Most techs say the camera pays for itself within the first few months of use.
Can Thermal Imaging Find Refrigerant Leaks?
Thermal cameras don’t detect refrigerant directly, but they show you temperature patterns that point to refrigerant problems. HVAC technicians use thermal cameras to verify system performance and find problems that don’t show up on a pressure gauge or manifold. Common applications include: Checking refrigerant distribution across evaporator coils. If one section of a coil is noticeably warmer or colder than the rest, that’s a strong indicator of a restriction or low charge. It’s a screening tool — you still confirm with gauges and leak detectors — but it speeds up the whole process.
Do Thermal Cameras Work Through Walls?
Not exactly. Thermal cameras see the surface temperature of a wall, not what’s behind it. What they can do is detect temperature differentials on the surface that are caused by conditions behind the wall, but only when there’s a sufficient temperature difference between inside and outside. Missing insulation, moisture intrusion, or a leaking hot water pipe inside a wall all change the surface temperature in ways a thermal camera picks up. The most accurate thermographic images usually occur when there is a large temperature difference (at least 20°F) between inside and outside air temperatures. And always confirm your findings with other tools like a moisture meter for the most reliable diagnosis.
The thermal device market in 2026 is loaded with more options and sharper tech at every price point than ever before. But figuring out how much to actually spend? That’s where most buyers get stuck. At Pixfra, we build thermal monoculars, scopes, front attachments, and multispectral binoculars — so we know where your money goes and where it gets wasted. This pricing guide breaks it all down so you spend smart and walk away with the right gear.
Before you set a budget, you need to know what you’re actually paying for. The price tag on a thermal imaging device isn’t random — it reflects a stack of components and engineering choices that directly affect what you see in the field. The biggest price driver is sensor resolution. A 256×192 sensor is the entry point for real thermal imaging. Step up to 384×288 and you get noticeably cleaner images with better edge definition, especially at distances past 200 yards. Go to 640×512 and you’re in professional territory. That price differential tells you all you need to know about thermal resolution in general — you can expect to pay approximately double for every doubling in the resolution of the thermal core. So when you see a $400 device next to a $1,500 device and wonder what changed, the sensor is usually the answer.

But resolution is only half the story. Thermal sensitivity, measured as NETD (Noise Equivalent Temperature Difference), decides how well the device picks up small heat differences. A lower NETD number means the device can separate a warm animal from a warm background on a humid summer night. For a deeper look at what separates a great thermal device from an average one, check out our breakdown of the top 6 features needed in the best thermal device in 2026. In short, NETD is the spec that cheap devices cut corners on first — and it’s the spec that matters most when the conditions get tough. Devices with NETD values of ≤18mK, like our Pixfra lineup, hold their image clarity in fog, rain, and heavy humidity when lesser devices wash out and give you nothing but flat, gray blobs.
Beyond the sensor, you’re paying for pixel pitch (12µm is the current standard, delivering sharper imagery than older 17µm designs), refresh rate (50Hz for smooth tracking versus choppy 25Hz), battery system, build quality, IP weatherproofing, and smart features like Wi-Fi connectivity, companion apps, and onboard recording. Laser rangefinders add cost too, but for anyone shooting past 150 yards at night, they pay for themselves in shot confidence. The thermal camera market is estimated to be valued at USD 6.15 Bn in 2026 and is expected to reach USD 11.92 Bn by 2033, growing at a compound annual growth rate (CAGR) of 9.9%. That growth means more competition, more innovation, and better value for buyers at every tier. The race to deliver more for less has never been hotter — and you benefit directly.
A few years ago, spending under $500 on a thermal device meant getting a toy. Not anymore. In 2026, the best budget thermal monocular options deliver genuine detection capability, smart features, and rugged construction — all without draining your bank account. At this price point, you’re typically looking at 256×192 resolution sensors with 12µm pixel pitch, NETD around ≤20-40mK, and detection ranges from 300 to 500 meters. These devices are real tools, not gimmicks. They’ll find deer in timber at 150 yards, track wounded game through thick cover, and give you solid heat detection on close-to-mid-range hunts.
What should you watch out for in this tier? Refresh rate, for one. Some budget devices drop to 25Hz to save cost, and that gives you stuttery, choppy imagery that makes tracking anything moving — a running hog, a coyote cutting across a field — genuinely frustrating. Hold out for 50Hz. Battery life is another place budget devices can sting you. A device with great image quality and a three-hour battery is basically a fancy paperweight by midnight. Look for devices with swappable batteries or at least USB-C power bank support for extended hunts. IP67 waterproofing should also be non-negotiable, even at this price. Rain, mud, and accidental drops happen — and if your device can’t handle a wet night, it doesn’t belong in your pack.
At Pixfra, our entry-level devices start at detection ranges around 500 meters and run NETD values of ≤18mK, which is better sensitivity than many competitors charge twice as much for. Our Mile 2 series and Draco series hit the sweet spot for anyone entering the thermal game without dropping a month’s rent. For first-time buyers, weekend hunters, property owners, and wildlife watchers who work inside 300 yards, the sub-$500 tier in 2026 is genuinely capable — just be picky about where the manufacturer cut costs.
This is where most serious hunters and outdoor enthusiasts should be shopping. For most users, this is the best thermal monocular for the money — where cost and capability finally align. At this price tier, expect 384×288 sensors as the standard. That resolution captures far more thermal detail than the 256×192 sensors in budget devices, giving you cleaner images, sharper edges, and more reliable target identification when you zoom in or scan at distance. The 640×512 resolution, while superior, typically enters the picture above $1,500–$2,000.

Detection range jumps significantly in this tier. Detection range in this category extends from 1,000 to 1,300 meters depending on lens configuration — a significant step up from the 345–460 meter range of entry-level units. That extra reach matters for open-terrain hunters, ranchers scanning big properties, and anyone who needs situational awareness beyond a few hundred yards. Refresh rates of 50Hz are standard here — you shouldn’t accept anything less. This is also the tier where integrated laser rangefinders start showing up. An LRF gives you exact distance to your target with the press of a button, which is a real advantage for ethical shot placement at night. Our Pixfra Arc LRF sits right in this range, pairing high thermal sensitivity with a built-in 1,000-meter laser rangefinder and a price that makes sense for dedicated hunters.
This is also where smart features stop being “nice to have” and become standard. Wi-Fi connectivity, companion app support, onboard video recording, multiple color palettes, and firmware updates over the air are all expected at this price. Our Pixfra Outdoor App connects to all our current models and lets you update firmware, adjust settings, and transfer images and video directly to your phone. At Pixfra, our mid-range lineup — the Arc LRF and Mile 2 series — delivers ≤18mK NETD sensitivity, 12µm pixel pitch, and IP67-rated builds at prices that won’t make your wallet cry. Consider total value: durability, battery life, software, warranty, and accuracy. Mid-range options often deliver 80–90% of high-end performance at half the cost. If you can only buy one thermal device and want it to cover most real-world use cases — night hunting, wildlife observation, property security, backcountry exploration — the $500-$2,000 range is your target.
When you step past $2,000, you’re shopping for the best thermal imaging the market can deliver — longer detection ranges, higher-resolution sensors, and integrated systems that combine ranging, ballistics, and recording into one package. Mid-high devices (384×288 or 640×512, 1,000–1,500m range) cover most professional hunting and security applications. Premium devices (1280×1024, 3,000+ meter detection) are for buyers who need maximum performance and are prepared to invest accordingly. At the top end, 640×512 and even 1280×1024 sensors give you identification-quality images at distances where lesser devices just show vague blobs. You’re not just detecting heat — you’re counting tines on a buck or telling a coyote from a dog at half a mile.

Our Pixfra Sirius HD series sits at the top of our lineup with detection ranges pushing out to 3,600 meters. For law enforcement, wildlife managers, outfitters running guided hunts, and serious predator hunters working open country, that kind of reach is not a luxury — it’s a tool you lean on every night. The Chiron LRF and Taurus LRF add integrated ballistic calculators that compute bullet drop and give you an adjusted aiming point on the fly. That turns a thermal scope into a complete targeting system — rangefinder, ballistic solver, and high-resolution thermal imager all in one unit. Our Volans series takes it another direction with all-day vision capability, featuring an adjustable aperture from F1.2 to F3.0 that adapts to any lighting condition, so you carry one device from sunup to sundown instead of juggling two.
Is premium worth it for everyone? No. The higher-end thermal viewers offer so much resolution and imaging talent that unless you’re using the devices frequently, you may be paying for more capability than you need. If you hunt a couple of weekends a year and work inside 200 yards, you don’t need a 640×512 sensor with 3,600-meter detection. But if you’re a professional, a guide, or someone who logs serious hours behind a thermal optic, the difference between a $1,500 device and a $3,000 device is immediately visible in image clarity, identification range, and the overall experience of spending long nights in the field.
The right thermal device isn’t the most expensive one you can afford — it’s the one that matches your actual use case without leaving performance on the table. When someone calls and asks what kind of money they should spend, it all comes down to what they want to do. Most often the big difference in prices is going to be based on the thermal sensor resolution and image quality of the scope. When we talk about the difference between a $3,000 and $6,000 scope, it is often going to come down to the identification range of the animal. So start with honest questions: What am I using this for? How far do I need to see? How often will I use it? How bad are the conditions I’ll face?
Here’s a quick reference table to help you match your use case to a price tier:
| Use Case | Recommended Tier | Price Range | Typical Sensor | Detection Range |
|---|---|---|---|---|
| First thermal / casual use | Budget | Under $500 | 256×192 | 300–500m |
| Weekend hunting / property security | Mid-range | $500–$1,200 | 384×288 | 800–1,300m |
| Dedicated night hunting / outfitter use | Upper mid-range | $1,200–$2,000 | 384×288 or 640×512 | 1,000–1,800m |
| Professional / law enforcement / long-range | Premium | $2,000–$3,500+ | 640×512 or 1280×1024 | 1,800–3,600m |
One thing to keep in mind: if you’re a first-time buyer, you’ll probably want a handheld thermal monocular for scanning before investing in a thermal scope. It’s often smarter to spend less on the scope and budget for a monocular too, rather than putting everything into one device and having no scanning tool. At Pixfra, we built our lineup to cover this exact reality. Our monoculars, scopes, front attachments, and multispectral binoculars all share the same ≤18mK sensitivity and 12µm pixel pitch technology, so you get consistent image quality whether you’re glassing a field or looking through a scope.
And don’t overlook the cost of ownership beyond the sticker price. Battery systems matter — our Pixfra devices use standard 18650 batteries across many models, which means cheap, available replacements instead of expensive proprietary cells. Build quality matters too — a device with IP67 waterproofing and MIL-STD-810G shock resistance lasts years longer than a cheaper device you’ll replace in two seasons. The cheapest thermal device is rarely the best value. The best value is the one that does what you need, survives how you use it, and keeps working season after season. And at Pixfra, every product in our lineup is built around that idea — real features for real conditions, at a price tier that makes sense for your specific goals.
How much does a good thermal monocular cost in 2026?
In 2026, a solid entry-level thermal monocular starts around $300-$500 with a 256×192 sensor. Mid-range models with 384×288 resolution and integrated features like laser rangefinders run $800-$1,500. Premium handheld thermals with 640×512 sensors and extended detection ranges typically cost $1,500-$3,500+. Our Pixfra lineup offers devices across all three tiers, with ≤18mK NETD sensitivity as a consistent baseline.
Is it worth spending over $1,000 on a thermal device?
For hunters and outdoor professionals who work at distances beyond 300 yards or hunt multiple nights a season, yes — stepping up past $1,000 gets you meaningfully better sensor resolution, detection range, and target identification. If you only hunt a few times a year at close range, a quality device under $500 can handle the job. The question isn’t just what you can afford, but how much performance your specific use case demands.
What’s the best thermal device for the money right now?
Value depends on your use case. For short-range woodland hunting and property monitoring, a budget thermal monocular under $500 with 256×192 resolution and 50Hz refresh rate is the best bang for the buck. For all-around hunting and outdoor use, mid-range models around $800-$1,500 deliver the biggest jump in real-world performance per dollar. At Pixfra, our Arc LRF and Mile 2 series consistently hit the sweet spot between performance and price for most hunters and outdoor enthusiasts.
Why are thermal scopes more expensive than thermal monoculars?
Thermal scopes carry higher prices because they need to withstand heavy recoil, require precision zeroing systems, and often include features like ballistic calculators and integrated laser rangefinders. A quality thermal scope starts around $1,800-$3,000, while a capable monocular starts well under $500. If budget is tight, many experienced hunters recommend starting with a monocular for scanning and saving for a scope later.
Do cheaper thermal devices work in rain and fog?
That depends entirely on two specs: NETD sensitivity and IP rating. A budget device with poor NETD (above 35mK) will struggle in fog, rain, or high humidity — the image goes flat and washed out. A device with ≤18mK NETD, like our Pixfra lineup, keeps showing clear heat contrasts even in bad conditions. For weather resistance, look for IP67 waterproofing at any price point. Anything less than IP67 puts your gear at risk during real field conditions.
Buying a thermal device online can feel overwhelming—spec sheets are dense, prices jump all over the map, and everyone seems to have a different opinion. We get it. At Pixfra, we hear from first-time buyers every week who almost made costly mistakes based on bad info floating around the internet. Let’s set the record straight.
The thermal imaging market has changed fast. Thermal imaging technology changes faster than just about anything else in the hunting world—faster than rifles, scopes, or even ammo trends. What was premium two years ago now sits squarely in the mid-range. That speed of change is both exciting and confusing, and it creates a fertile ground for myths that never seem to die.

Part of the problem is how buyers shop for thermal cameras and thermal monoculars online. Most thermal customers buy online and have to go on specs, YouTube videos, and the sometimes compromised impressions of social media influencers to make buying decisions. You scroll through product pages, read conflicting Reddit threads, watch YouTube “reviews” that are really just paid promotions, and walk away more confused than when you started. Between marketing fluff and real user experiences, it’s tough to know what’s legit and what’s noise.
The truth is, buying a thermal device online isn’t any riskier than buying one at a brick-and-mortar store—as long as you know what you’re looking at. And that’s where these three myths do the most damage. They steer you toward the wrong device, or worse, they scare you away from buying altogether. Whether you’re shopping for a handheld thermal monocular, a thermal scope for night hunting, or an infrared camera for property inspection, the same myths keep popping up. So we’re going to walk through each one, tell you exactly why it’s wrong, and show you what actually matters when you’re picking the best thermal device online. Before we jump in, check out our guide on the top 6 features needed in the best thermal device in 2026 so you’ve got a solid baseline of what to look for.
This is probably the most widespread myth in the thermal device world, and it catches first-time buyers more than anyone else. On paper, it sounds logical: more pixels, better image, right? Not necessarily. The entire system—lens, sensor, processing algorithms, and display—has to work together. The takeaway here is simple: don’t buy a thermal scope based on resolution alone.
Here’s what most people miss. Resolution is just one piece of the puzzle. A sensor with 640×512 pixels sounds a lot better than one with 384×288 pixels. But resolution alone doesn’t tell you about thermal sensitivity, lens quality, or how the device processes the image it captures. High pixel count alone won’t help unless the sensor is sensitive enough to deliver clear contrast in real-world conditions like fog, humidity, or low temperature differences. A 640×480 sensor sounds impressive, but if it has poor thermal sensitivity (measured in NETD), the resulting image may appear washed out. That’s the part no one puts in the Instagram post.
NETD, or Noise Equivalent Temperature Difference, is where the real magic happens. It’s measured in millikelvins (mK), and it tells you how well the sensor can pick up small differences in heat. NETD stands for Noise Equivalent Temperature Difference. It measures how sensitive the thermal sensor is to tiny differences in heat, and it’s listed in millikelvins (mK). A lower NETD number means the sensor picks up finer heat differences, which translates to sharper contrast between the animal and the background. Our thermal devices at Pixfra achieve NETD values of ≤18mK, which puts them in the high-sensitivity category. That means you’re picking up heat signatures that a lesser sensor would miss completely—especially in summer conditions when the ambient temperature and the target’s heat are close together.
So what does this mean for you when shopping online? Stop sorting by resolution first. Look at the full spec picture: sensor resolution, NETD rating, pixel pitch (12µm vs. 17µm), refresh rate, and objective lens size. A well-balanced 384×288 thermal camera with elite sensitivity and a quality lens will outperform a poorly designed 640×512 device on most nights. Match the specs to your actual use case—close-range hog hunting in timber doesn’t need the same sensor as scanning open fields at 600 meters.
This one hurts wallets everywhere. The idea that you have to spend $5,000 or more to get a “real” thermal device just isn’t true anymore. It’s a myth that benefits sellers of premium-only brands and leaves first-time buyers stuck on the sidelines.
Let’s look at the real numbers. The technology keeps getting better while prices come down. What cost $10,000 a decade ago now delivers similar performance at $1,500. That’s not an exaggeration—it’s a function of how thermal sensor manufacturing has scaled up and matured. Sensor prices have dropped, production quality has risen, and brands like ours at Pixfra have put a priority on making professional-grade thermal imaging available at price points that make sense for regular hunters, homeowners, and outdoor enthusiasts.
The thermal device market in 2026 breaks into pretty clear tiers. Here’s a realistic snapshot of what you can expect at each price level:
| Price Range | Sensor Resolution | Typical NETD | Best For |
|---|---|---|---|
| Under $500 | 256×192 | ≤40 mK | Close-range use, beginners, property monitoring |
| $500–$2,000 | 320×240 to 384×288 | ≤25 mK | Serious hunters, mid-range detection, all-weather use |
| $2,000–$4,000 | 640×480 to 640×512 | ≤20 mK | Long-range identification, predator control |
| $4,000+ | 1280×1024 | ≤15 mK | Professional and high-end specialty use |
Mid-range options often deliver 80–90% of high-end performance at half the cost. That’s an industry-wide reality, not just a marketing claim. You don’t need the $6,000 device to get a clear image of a hog at 200 yards. For most buyers, strong 384 and 640 options remain the smarter value.

Now, that doesn’t mean you should always go cheap, either. Value and cheap aren’t the same thing. A $250 thermal monocular with a sluggish 25 Hz refresh rate, mediocre NETD sensitivity, and no companion app isn’t a value pick—it’s a compromise that will frustrate you by the third use. The sweet spot is finding a device that gives you what you need, at a price that doesn’t gut your budget, from a brand that actually builds the technology themselves. Pixfra designs and manufactures its own thermal imaging cores and sensors—we’re not just slapping labels on someone else’s hardware. That vertical integration lets us deliver specs you’d normally only see in devices costing twice as much.
This myth pops up in every thermal forum, and we understand where it comes from. Thermal devices aren’t cheap, and dropping $1,000 or more on a product you’ve never held can feel like a gamble. But here’s the thing—buying online is how the vast majority of thermal buyers shop today, and there are solid reasons why it works.
First, think about the alternative. How many local stores near you stock more than one or two thermal monoculars, let alone a full range of thermal scopes, clip-ons, and handheld imagers? There’s no universal “best” thermal—only what’s best for your situation. If your local shop carries two or three brands, your “hands-on” experience is just a limited selection of what’s actually available. Shopping online gives you access to every model, every brand, every spec comparison you need—all in one session, from your couch.
Second, the buying experience has gotten a lot better. Reputable thermal brands now offer detailed spec sheets, real-world video demos, comparison charts, and responsive customer support. At Pixfra, we publish specs down to the click value of our thermal scopes (0.9cm@100m on our Taurus LRF series), and our Pixfra Outdoor App lets you connect to your device, stream live thermal video, and update firmware. That level of transparency didn’t exist five years ago.
Third, returns and warranties protect you. Investing in thermal gear without considering warranty coverage and support infrastructure can lead to expensive problems when repairs or service become necessary. Thermal imaging sensors and electronics require specialized expertise to repair, and devices from manufacturers without established service networks may become unusable after warranty expiration. Warranty terms vary significantly. Some manufacturers offer limited one-year coverage, while others provide extended warranties or explicitly support component upgrades and repairs. When you buy from a manufacturer that stands behind its products and has an established support network, the risk drops to nearly zero. You’re not rolling the dice—you’re making an informed purchase backed by real protection.
The real risk when buying online isn’t the channel itself. It’s buying from a brand you haven’t researched. That’s where the work goes: checking who makes the sensor, reading actual user reviews (not sponsored ones), comparing specs across models, and verifying that the company has a real support infrastructure. If a brand can’t tell you their NETD rating, their sensor origin, or their warranty terms, walk away—regardless of whether you’re shopping online or in person.
Now that we’ve killed the myths, let’s talk about what really matters when you’re shopping for a thermal device online. There are a handful of specs and features that separate a solid purchase from a regrettable one.

Sensor resolution still matters—it’s just not the only thing that matters. You’ll see specs like 256×192 or 384×288—these numbers tell you how many pixels detect heat. More pixels mean clearer images and better identification at distance. But pair resolution with NETD sensitivity, and you’ve got a much clearer picture of actual performance. Our Pixfra Sirius HD series, for example, combines 1280×1024 resolution with ≤18mK sensitivity—that’s not just a sharp image; it’s a sharp image in the worst conditions.
Refresh rate is another spec that gets overlooked. The difference between 25 Hz and 50 Hz is immediately apparent when scanning for moving targets. Don’t rationalize a 25 Hz device as “good enough”—you’ll notice the limitation every time you use it. If you’re scanning for predators, tracking hogs across a field, or monitoring your property perimeter, 50 Hz should be your floor.
Battery life is a deal-breaker for field use. Undervaluing battery life. An all-night predator hunt needs 8 hours minimum. Budget accordingly. Our Pixfra devices range from roughly 4.5 hours to 15 hours depending on the model, and many use standard 18650 batteries that you can swap in the field without going back to your truck.
Detection range vs. identification range—this is a big one. Manufacturers love huge detection numbers. Hunters need usable identification distance. Detection means you can tell something is there. Identification means you are confident what it is. A product page might say 2,000 meters of detection range, but if you can only positively identify your target at 400 meters, that’s the number that actually affects your experience. Always ask about both numbers before you buy.
And finally, don’t ignore build quality and weather resistance. Skipping the IP rating check. Field use means rain. IP54 is not IP67. An IP67 rating means your device can handle temporary submersion in water. If you hunt in the Southeast, run property security in the Pacific Northwest, or just don’t want to baby your gear, IP67 is the standard you should be targeting.
We built Pixfra around one idea: give everyone access to the thermal performance that used to be locked behind military budgets and five-figure price tags. Pixfra offers a wide range of products—from thermal imaging monoculars, add-ons, and riflescopes to thermal imaging and multispectral security cameras—and their mission is to provide professional grade thermal and multispectral optics at budget friendly price points.
Established in 2015, Pixfra has developed over two hundred patented technologies and thermal imaging products for industrial temperature measurement, biological temperature measurement, natural ecology, new energy, carbon neutrality, perimeter prevention, outdoor sports, and consumer electronics. We’re not a brand that repackages someone else’s sensors and charges a markup. We design our own thermal cores, build our own image processing algorithms, and test everything in real field conditions.
When you buy from us online, you’re buying directly from the people who designed and manufactured the technology. That cuts out middlemen, keeps prices honest, and means our support team can actually answer your questions about the product—not just read from a script. Whether you need a compact thermal monocular like the Mile 2 for close-range scouting or a 1280-class flagship like the Sirius HD for long-range observation, we’ve got options that match your actual needs—not just your budget or your ego.
Is it safe to buy a thermal imaging camera online?
Yes, absolutely. Buying a thermal imaging camera online is safe as long as you’re purchasing from a reputable manufacturer or authorized dealer. Look for brands that publish full spec sheets, offer warranty protection, and have responsive customer support. Buying from the manufacturer’s own website (like Pixfra.com) is often the best route because you get direct access to support, firmware updates, and product guarantees.
Does a higher resolution always mean better thermal image quality?
No. Resolution is one factor, but thermal sensitivity (NETD), lens quality, pixel pitch, and image processing all play a role. A 384×288 sensor with ≤20 mK NETD and a quality germanium lens can produce sharper, more usable images than a 640×512 sensor with poor sensitivity. Always look at the full spec picture, not just the pixel count.
What NETD value should I look for in a thermal device?
For most outdoor and hunting use, a NETD of ≤25 mK is solid. For demanding conditions like high humidity, fog, or summer heat where ambient and target temperatures are close, aim for ≤18 mK or lower. Pixfra’s lineup hits ≤18 mK across many of our models, putting them in the high-sensitivity category without the premium price tag.
How much should I spend on my first thermal monocular?
For most first-time buyers, the $500–$2,000 range offers the best balance of performance and value. You’ll get usable sensor resolution, decent NETD ratings, features like Wi-Fi and video recording, and enough battery life for a full night out. Going below $300 usually means real trade-offs in refresh rate, sensitivity, and build quality that you’ll notice quickly.
Can thermal devices work during the day?
Yes. Thermal imaging is unaffected by visible light, making it effective 24/7. Unlike night vision, which relies on amplifying ambient light, thermal cameras detect heat signatures. That means they work just as well at noon as they do at midnight—in darkness, fog, haze, or bright sunlight. Some Pixfra models, like the Volans Series, even feature adjustable apertures specifically designed to optimize daytime and nighttime performance.

