When someone goes missing in dense forest, heavy fog, or total darkness, every second counts. The best thermal devices for search and rescue operations give your team the ability to detect body heat through smoke, rain, foliage, and zero-light conditions — turning invisible heat signatures into clear, actionable images that save lives. At Pixfra, we build thermal monoculars, thermal scopes, thermal front attachments, and multispectral binoculars for exactly these kinds of high-stakes, real-world conditions.
Thermal imaging isn’t new to SAR teams, but the tech behind it has changed dramatically. Thermal imaging is deceptively simple yet profoundly effective. Unlike traditional cameras that capture visible light, thermal imagers detect infrared radiation — the heat emitted by all objects above absolute zero. An electronic sensor (thermal sensor, also known as a microbolometer) translates temperature differences between various surfaces into a visible image, displayed on a screen.

That means your thermal device doesn’t need moonlight, flashlights, or any ambient light to work. The most critical advantage of thermal imaging is its ability to penetrate smoke and darkness. Unlike night-vision cameras that require and amplify existing light, thermal imagers operate in zero-light and can cut through smoke, haze, and fog. For SAR teams working wildfire zones, collapsed buildings, or backcountry wilderness at 3 AM, that advantage is the difference between finding someone and walking right past them.
The use of thermal imaging cameras for search and rescue offers several real advantages: rapid identification of individuals (significantly reducing search times), enhanced situational awareness (helping teams assess surroundings and avoid hazards), non-intrusive searching (detecting heat without disturbing the environment), and increased success rates in locating missing persons. And this tech keeps getting more accessible. Handheld thermal imaging devices that can be purchased over the counter today make the early-2010s military equivalents look prehistoric in comparison. Image quality, detection range, and reliability have all improved massively — and the huge demand for thermal imaging from the outdoors and hunting market has partly driven that development.
At Pixfra, we’ve been part of that development. Our proprietary heat-detection technology is built into every device we ship. If you want to see what specs actually matter when you’re choosing a thermal device — whether for SAR, hunting, or outdoor use — check out our breakdown of the Le 6 caratteristiche principali che non possono mancare nel miglior dispositivo termico del 2026.
Not every thermal device on the market is built for the demands of search and rescue. Flashy spec sheets don’t always translate to real-world performance when you’re scanning a ridgeline in freezing rain at 2 AM. Here are the features that actually matter for SAR.
Thermal Sensitivity (NETD) is the single most telling spec on any thermal device used for SAR. It measures the smallest temperature difference the sensor can pick up, stated in millikelvins (mK). A lower NETD means your device can separate a person’s body heat from a warm background — like sun-heated rocks or pavement — with greater clarity. Our Pixfra devices hit NETD values of ≤18mK, which places them at the high end of thermal sensitivity for outdoor-grade optics. That kind of sensitivity means you’re not squinting at vague blobs — you’re seeing defined human outlines, even when fog, humidity, or rain flatten the thermal contrast around you.
Risoluzione del sensore is the other half of image quality. Resolution tells you how many pixels the thermal sensor uses to build the image you see. Common options run from 256×192 on entry-level devices to 384×288 and 640×512 on mid-range and premium models. For SAR, higher resolution means you can tell the difference between a person and a rock or stump at longer distances. We pair our sensors with 12μm pixel pitch technology across the Pixfra lineup — from the Mile 2 series for everyday fieldwork to the Sirius HD series for professional-grade long-range detection — so you get sharp, high-contrast images no matter which model you pick.
Portata di rilevamento matters a lot when you’re covering large search grids. Our Pixfra lineup covers a wide spectrum — entry-level devices start around 500 meters of detection range, while our premium Sirius HD series pushes out to 3,600 meters. But here’s something many first-time buyers miss: detection range and identification range are two different numbers. A device might detect a heat source at 1,500 meters, but you won’t be able to confirm whether it’s a person, an animal, or a warm rock until you’re much closer. For SAR, always ask about both figures before you commit.
There’s a reason experienced SAR operators obsess over battery life — because a dead device in the middle of a search is worse than no device at all. Thermal devices eat power, especially at higher refresh rates and brightness levels. If you’re running an all-night search or a multi-day backcountry mission, you need a device that keeps up with you.

Our Pixfra devices range from about 4.5 hours to 15 hours of battery life depending on the model and usage conditions. Many of our models run on standard 18650 batteries that you can swap in seconds. That’s a design choice we made on purpose. Proprietary internal batteries save a little weight, but when your power dies in the field, being able to pop in a fresh 18650 from your pocket is worth everything. And here’s a field tip from our own team: cold weather can cut battery performance by 30–50%. Always carry spares in an inside pocket where body heat keeps them ready.
Here’s a quick reference for how battery life should match your SAR scenario:
| SAR Use Case | Minimum Battery Life | Tipo di batteria consigliato |
|---|---|---|
| Short-duration urban search (2–3 hrs) | 4–5 hours | Ricaricabile internamente |
| All-night wilderness SAR | 8–10 hours | 18650 sostituibile |
| Multi-day backcountry operations | 10–15 hours | Intercambiabili + ricambi |
| Property/perimeter security patrols | 6–8 hours | Ricaricabile con ricarica rapida |
| Disaster response (flood, earthquake) | 8–12 hours | 18650 sostituibile |
Now let’s talk durability. Your SAR thermal device is going to get dropped, rained on, smashed into a pack, and dragged through mud. If it can’t take that kind of punishment, the image quality doesn’t matter. Look for an IP67 rating — that’s the standard in 2026 for any thermal device that sees real field use. IP67 means the device is fully sealed against dust and can survive being submerged in up to one meter of water for 30 minutes. Some budget devices carry only IP54, which handles splashes but won’t survive a real dunk. If your team works in rain, crosses streams, or operates in dusty post-disaster environments, IP67 is non-negotiable. At Pixfra, we build every device for the same conditions we test them in — heavy recoil on our scopes, drop resistance on our monoculars, and corrosion-resistant housings that hold up over years of hard use.
Weight plays a role here too. Fatigue is a silent enemy in rescue operations. Weighing less than 260g, a quality handheld thermal device allows officers to carry it on a lanyard or belt without adding significant bulk. Our Draco series, for example, was designed with a lightweight build specifically for users who need multi-functional performance without the extra weight slowing them down during long search operations.
The best thermal devices for search and rescue operations in 2026 don’t just show you a heat picture — they connect to your phone, record video, stream live footage to a command post, and update firmware over the air. These aren’t gimmicks. In SAR, the ability to share a live thermal feed with an incident commander can change how your entire team deploys in real time.
Our Pixfra Outdoor App supports all current models — Sirius, Arc LRF, Mile 2, Pegasus Pro, Chiron LRF, Taurus, and Taurus LRF. Through the app, you can update firmware, adjust device settings, transfer images and video directly to a smartphone, and share thermal data with your team. That kind of connectivity is a practical tool for documenting search areas, coordinating with other SAR units, or keeping records that help refine future operations.
Color palettes are another smart feature that experienced SAR operators rely on. White Hot is the most common mode and works well for general scanning — heat sources show up white against a darker background. Black Hot reverses that contrast and is often preferred for picking out body-level detail. Red Hot highlights the warmest areas in red, which is great for quickly picking out a human heat signature in a complex scene. Iron Bow and Rainbow use a color spectrum to show temperature gradients, which can help you read terrain or spot heat anomalies during disaster response. Being able to switch palettes on the fly means you can adapt your display to the terrain, weather, and lighting conditions you’re working in — without affecting the detection ability of the device itself.
Refresh rate matters too. A 50Hz refresh rate is the baseline for any SAR-grade thermal device in 2026. That rate gives you smooth, fluid imagery so you can track a moving person — someone stumbling through brush, wading through water, or signaling from a ridgeline — without blur or stutter. Anything below 30Hz will give you choppy, hard-to-read imagery that slows down your search. All Pixfra devices are built with high refresh rates across the board because in the field, smooth imaging isn’t optional.
Our Volans series also stands out for SAR teams that operate around the clock. It features an adjustable aperture from F1.2 to F3.0 that adapts to different lighting conditions, making it one of the few thermal devices on the market that works just as well in broad daylight as it does in pitch darkness. That kind of all-day capability means your team carries one device instead of juggling two.
We build thermal devices for real outdoor conditions — not spec-sheet competitions. Every Pixfra product is engineered around the six features that separate a great thermal device from one that’ll let you down when conditions get ugly: high thermal sensitivity (≤18mK NETD), resolution matched to your use case, reliable detection range with integrated laser rangefinder options, a battery system that outlasts your mission, rugged IP67 construction, and smart features that keep you connected and in control.

For SAR teams that need a laser rangefinder, our models with “LRF” in their names — like the Arc LRF, Chiron LRF, and Taurus LRF — feature integrated laser rangefinders with 1,000-meter range capability. Paired with the built-in ballistic calculators found in models like the Chiron LRF and Taurus LRF, these devices give you precise distance data with the press of a button. In a SAR context, that means you can pinpoint a heat signature across a valley and relay exact coordinates to your ground team without guessing.
According to the U.S. Coast Guard Search and Rescue Statistics, there are over 15,000 reported cases per year in the United States alone. Nearly 86% result in lives saved. The gear your team carries directly affects whether that number goes up or down. Whether you’re a volunteer SAR unit, a fire department running wilderness rescues, a law enforcement agency deploying search teams, or a property manager monitoring large tracts of rural land, having the right thermal device makes a measurable difference in outcomes.
The most critical factor is time sensitivity. In SAR, the “Golden Hour” is a harsh reality — the faster a team can locate a subject, the higher the chance of survival. Delays caused by poor visibility can have tragic consequences. A thermal device with strong NETD, solid detection range, reliable battery life, and rugged build quality is the single best tool you can put in the hands of a SAR responder to beat that clock.
Can you use thermal devices for search and rescue during the day?
Yes. Thermal devices detect heat, not light, so they work just as well during the day as they do at night. Our Pixfra Volans series takes this a step further with all-day vision capability and an adjustable aperture (F1.2–F3.0) that adapts to changing light conditions, making it a strong pick for SAR teams that need 24-hour coverage from a single device.
What NETD rating should a SAR thermal device have?
For search and rescue, you want an NETD of ≤25mK or lower. A device with ≤18mK — like our Pixfra thermal devices — can pick up tiny temperature differences, giving you a clear, detailed image even in heavy fog, rain, or complete darkness where the thermal contrast between a person and their surroundings gets razor-thin.
How does weather affect thermal imaging in SAR operations?
Weather conditions can impact thermal imaging devices. Rain, fog, and snow can reduce their effectiveness. High humidity and extreme temperatures can also interfere with heat detection. Wind can cool surfaces, making thermal signatures less distinct. That said, quality devices with low NETD and high-resolution sensors still perform well in most real-world SAR conditions where traditional visual methods completely fail.
What IP rating do I need for a SAR thermal device?
For any real SAR fieldwork, you need at least IP67. That means full dust sealing and protection against temporary water submersion — covering rain, stream crossings, snow, and accidental drops into puddles. Anything below IP67 puts your gear at risk when conditions get rough, which is basically every SAR mission.
How long does a thermal device battery need to last for SAR?
It depends on your mission type. For short urban searches, 4–5 hours works. For all-night wilderness SAR, target 8–10 hours minimum. Our Pixfra devices range from about 4.5 to 15 hours depending on the model. For extended missions, look for models with swappable 18650 batteries so you can carry spares and swap without downtime — because a dead device in the middle of a search is the last thing any team needs.
Se gestisci un’azienda agricola o un allevamento, sai già che la perdita anche solo di una manciata di vitelli o agnelli a causa dei predatori può azzerare i tuoi margini di profitto per la stagione. E la maggior parte di questi danni si verifica di notte, quando non te ne accorgi. Abbiamo realizzato questo caso di studio su Pixfra per mostrarvi — con cifre concrete — come un monoculare termico si ripaghi da solo in un’azienda agricola in attività, spesso nel giro di una sola stagione.
Un tempo i monoculari termici erano attrezzature che solo gli operatori militari e i cacciatori con grandi disponibilità economiche potevano permettersi. Oggi non è più così. Man mano che la tecnologia termica diventa più accessibile e conveniente, sempre più persone stanno scoprendo quanto questi strumenti siano utili nella vita di tutti i giorni. E le aziende agricole sono uno dei contesti in cui il loro impiego comporta i maggiori risparmi economici.

Gli agricoltori e gli allevatori trovano decine di impieghi per i monoculari termici, che consentono di risparmiare tempo e prevenire perdite. È possibile controllare gli animali di notte senza disturbare la mandria, individuare una mucca che si è allontanata dal gruppo o individuarne una sdraiata quando non dovrebbe esserlo. È possibile ispezionare le recinzioni alla ricerca di eventuali rotture, sorprendere gli intrusi prima che rubino le attrezzature e individuare i coyote che si aggirano nel pascolo dove partoriscono le vacche — il tutto senza una torcia che riveli la propria posizione. Gli agricoltori li utilizzano per monitorare il bestiame di notte o individuare i predatori nei pressi delle stalle e dei campi.
Se hai dato un'occhiata al Caratteristiche principali dei migliori dispositivi termici del 2026, sapete già quanto sia migliorata la tecnologia. La risoluzione dei sensori, che un tempo costava $5.000+, è ora disponibile nei dispositivi di fascia media. La sensibilità NETD è diventata così elevata da rilevare la febbre di un vitello malato dall’altra parte del pascolo. L’attrezzatura è ormai all’altezza delle reali esigenze degli agricoltori — e il ritorno sull’investimento non è mai stato così vantaggioso.
Parliamo dei soldi che state già perdendo non utilizzando la termografia nella vostra attività. I numeri sono davvero sorprendenti.
Le perdite di bestiame attribuite ai predatori costano agli allevatori e ai produttori statunitensi oltre $71 milioni all’anno, secondo le statistiche elaborate dal Servizio Nazionale di Statistica Agricola (NASS) del Dipartimento dell’Agricoltura degli Stati Uniti (USDA). E questi sono solo i casi segnalati e confermati di uccisioni da parte di predatori. Il numero reale è quasi certamente più elevato, poiché molte perdite non vengono rilevate o vengono registrate come “causa sconosciuta”. I coyote hanno rappresentato la percentuale più alta di decessi di bovini dovuti ai predatori (40,5%). I coyote hanno rappresentato la percentuale più alta di decessi di vitelli dovuti ai predatori (53,1%). Negli allevamenti di ovini e caprini, il quadro è ancora peggiore: secondo una recente indagine condotta nell’Idaho, le perdite dovute ai predatori hanno rappresentato il 31% di tutte le morti di pecore e agnelli.
È qui che un monoculare termico cambia le carte in tavola. I vantaggi economici derivanti dalla protezione del bestiame dagli attacchi dei coyote sono notevoli: con una termocamera non solo garantite la sicurezza dei vostri animali, ma risparmiate anche denaro nel lungo periodo. Quando riuscite a individuare un coyote o un cane randagio a una distanza compresa tra 500 e 1.000 metri nel buio più totale, potete impedire l’attacco prima ancora che avvenga. Non si trova un vitello morto al mattino: si previene del tutto la sua morte. E per ogni dollaro federale speso nella gestione dei predatori, si risparmiano $10,88 in bestiame. Questo rapporto la dice lunga sul valore del controllo proattivo dei predatori rispetto alla gestione reattiva delle conseguenze.
Il concetto è semplice. Se allevate bovini, ovini, caprini o pollame, la minaccia dei predatori rappresenta una spesa annuale certa. Un singolo monoculare termico dal costo compreso tra $500 e $2.000 può prevenire perdite pari a un multiplo di tale costo già nel primo anno. Di seguito illustreremo i calcoli esatti.
Proviamo a quantificare la situazione con dati concreti. Prenderemo come esempio un allevamento di 200 capi di vacche con vitelli nella regione collinare del Texas — un’attività di dimensioni comuni in una zona in cui la pressione esercitata da coyote e cinghiali selvatici è costante.

Il problema: Questo allevatore perdeva in media 6 vitelli all’anno a causa dei predatori, oltre a 2-3 vitelli a causa di malattie non individuate perché i controlli notturni erano troppo lenti o venivano saltati del tutto. Con un valore di mercato di circa $800-$1,200 per vitello, ciò significa che ogni anno dal cancello del pascolo se ne andavano $6,400-$10,800. Se a ciò si aggiungono i danni alle recinzioni causati dai cinghiali selvatici e le ore di lavoro dedicate alle pattuglie effettuate solo di giorno, il costo annuale totale superava facilmente $12.000.
L'investimento: Un monoculare termico Pixfra (il modello Arc LRF, con telemetro laser integrato e portata di 1.000 metri), più un set di batterie 18650 di ricambio. Costo totale: meno di $2.000. Nessun canone di abbonamento, nessun costo di servizio mensile, nessun intervento di installazione.
I risultati dopo un anno:
| Categoria | Prima di Thermal | Dopo il trattamento termico | Risparmio annuale |
|---|---|---|---|
| Vitelli uccisi dai predatori | 6 testine ($7.200) | 1 testa ($1.200) | $6,000 |
| Vitelli morti a causa di malattie non diagnosticate | 3 testine ($3.600) | 1 testa ($1.200) | $2,400 |
| Danni alle recinzioni e alle colture (maiali) | $2,500 | $800 | $1,700 |
| Ore di lavoro dedicate ai turni di pattugliamento notturno | 300 ore/anno | 120 ore/anno | 180 ore risparmiate |
| Risparmio totale | ~$10,100 |
Si tratta, all’incirca, di un ritorno sull’investimento di 5:1 su un acquisto una tantum nel primo anno. E poiché un monoculare termico di buona fattura dura anni, il ROI non fa che aumentare da quel momento in poi. Con costi di sistema che vanno da $500 per i dispositivi di base a $25.000+ per le configurazioni avanzate, secondo i dati del settore il ROI viene tipicamente raggiunto entro 12-18 mesi nelle applicazioni termiche agricole. In un allevamento sottoposto a forte pressione da parte dei predatori, il recupero dell’investimento può avvenire anche più rapidamente.
Grazie alle scansioni effettuate lungo il corridoio o nella sala di mungitura, è possibile identificare potenziali casi di febbre 24–48 ore prima della comparsa dei segni clinici — ed è proprio in questo lasso di tempo che si ottiene il risparmio: trattamento precoce, minor ricorso a protocolli a livello di stalla, minori perdite di produzione. Il ritorno sull’investimento non deriva da una singola funzionalità appariscente, ma si accumula con ogni utilizzo notturno: individuazione dei predatori, monitoraggio sanitario, controllo dei suini, ispezioni di sicurezza, controlli sul parto e altro ancora.
Ma com’è una notte in fattoria con un monoculare termico in mano? È più semplice di quanto si possa pensare e molto più veloce di un giro di pattuglia con torcia e furgone.

Controllo dei predatori e sicurezza del bestiame sono i principali casi d’uso. Per gli agricoltori, i monoculari termici sono lo strumento ideale per individuare coyote e cinghiali: basta uscire sulla veranda o raggiungere in auto un punto elevato della proprietà, accendere il monoculare e scrutare i pascoli. Ogni corpo caldo — bovini, cervi, coyote, cinghiali, intrusi — appare come una traccia termica luminosa sullo sfondo del terreno più freddo. È possibile distinguere in pochi secondi una mucca sdraiata da un predatore in movimento. È possibile verificare rapidamente la posizione e il numero dei propri bovini o ovini in vasti recinti anche nella notte più buia e individuare a distanza un potenziale problema come la mastite, la zoppia o la febbre in un animale.
Controlli sanitari notturni del bestiame rappresentano il secondo grande vantaggio. Anche le più lievi variazioni della temperatura corporea possono essere un’indicazione dell’insorgere di malattie e consentono un intervento immediato. Invece di recarsi nel pascolo di parto con un riflettore — cosa che stressa la mandria e richiede 45 minuti — è possibile effettuare una scansione dal furgone o dalla recinzione. Una vacca in travaglio attivo risulta chiaramente visibile. Un vitello a terra che si sta raffreddando appare in modo diverso da un vitello sano sdraiato accanto alla madre. Si individuano i problemi in anticipo, si interviene tempestivamente e si salvano animali che si sarebbero persi se si fosse aspettato fino all’alba.
Rilevamento dei cinghiali selvatici e sicurezza delle proprietà completano l'utilizzo quotidiano. I cinghiali causano la maggior parte dei danni tra le 22:00 e le 4:00 del mattino. Senza un visore termico, si può solo indovinare dove colpiscono. Con un visore termico, invece, è possibile osservarli in tempo reale e reagire di conseguenza: che si tratti di chiamare un cacciatore, prepararsi a sparare o semplicemente individuare quale pascolo stanno devastando per allontanare il bestiame dalla zona colpita. Molti proprietari utilizzano monoculari termici per controllare le recinzioni, gli annessi e i perimetri senza dover percorrere a piedi l’intera area: è possibile coprire rapidamente grandi spazi da un unico punto di osservazione, rendendo i giri di controllo più veloci e sicuri.
Non tutti i monoculari termici sono pensati per il lavoro agricolo. Alcuni sono troppo potenti, altri invece non lo sono abbastanza. Ecco cosa bisogna considerare quando se ne acquista uno specificamente per ottenere un ritorno sull’investimento in ambito agricolo.
Sensibilità termica (NETD) È la specifica che indica il livello di dettaglio che si potrà osservare. Un NETD più basso significa che il sensore rileva differenze di temperatura più piccole. I nostri dispositivi Pixfra raggiungono valori NETD pari o inferiori a 18 mK: una sensibilità sufficiente per individuare un animale malato con febbre bassa dall’altra parte di un pascolo, anche in una notte calda. Per gli agricoltori, il campo visivo e la nitidezza dell’immagine saranno probabilmente le caratteristiche più importanti per l’individuazione dei bersagli durante la notte.
Campo di rilevamento determina la distanza massima alla quale è possibile individuare una traccia termica. La nostra gamma Pixfra copre distanze di rilevamento che vanno da circa 500 metri per i dispositivi entry-level fino a 3.600 metri per i modelli premium come la serie Sirius HD. Per la maggior parte delle attività agricole, un modello di fascia media con una portata di rilevamento compresa tra 1.000 e 1.500 metri rappresenta la soluzione ideale. Ciò consente di scansionare un’intera sezione di pascolo da un unico punto elevato.
Durata della batteria è più importante di quanto la maggior parte degli agricoltori pensi. Potresti dover controllare i pascoli due volte a notte durante la stagione dei parti, oppure rimanere seduto per ore in un campo danneggiato dai maiali. I nostri dispositivi Pixfra hanno un'autonomia che va da circa 4,5 ore a 15 ore, a seconda del modello e delle condizioni d'uso. Molti dei nostri modelli utilizzano batterie standard 18650 che si possono sostituire in pochi secondi, così non rimarrete mai al buio con un dispositivo scarico.
Resistenza È un requisito imprescindibile in un’azienda agricola. Il tuo monoculare termico viaggerà su un camion, sarà esposto alla pioggia, subirà urti su un UTV e verrà utilizzato in qualsiasi condizione meteorologica, dal caldo di agosto al gelo di gennaio. Cerca almeno la resistenza alle intemperie IP67: ciò significa che il dispositivo è completamente a prova di polvere e può sopportare un'immersione temporanea in acqua. I nostri dispositivi Pixfra sono costruiti per resistere a forti rinculi, cadute e corrosione nel corso di anni di utilizzo. La serie Draco è caratterizzata da un design leggero, pensata specificamente per gli utenti che necessitano di prestazioni multifunzionali senza ingombro.
Funzionalità intelligenti e connettività mette tutto insieme. L’app Pixfra Outdoor supporta tutti i nostri modelli attuali: le serie Sirius, Arc LRF, Mile 2, Pegasus Pro, Chiron LRF, Taurus e Taurus LRF. Tramite l’app è possibile aggiornare il firmware, regolare le impostazioni, trasferire immagini e video sul proprio telefono e condividere i dati di monitoraggio. Per un gestore di un allevamento che desidera documentare l’attività dei predatori, registrare prove per i servizi di tutela della fauna selvatica o condividere i risultati delle scansioni notturne con un collaboratore, la connettività dell’app è un vero e proprio strumento di lavoro, non un semplice espediente.
Non tutte le attività richiedono lo stesso monoculare termico. Ecco una guida rapida per scegliere il dispositivo Pixfra più adatto alle dimensioni e al tipo della tua azienda agricola.
| Tipo di azienda agricola | Pixfra Fit ottimale | Perché funziona |
|---|---|---|
| Piccola proprietà agricola (meno di 100 acri) | Serie Mile 2 | Tascabile, facile da usare, ideale per i controlli del bestiame a breve distanza |
| Rancho di medie dimensioni (da 100 a 500 acri) | Arc LRF | Telemetro laser integrato, portata di 1.000 m, batterie sostituibili |
| Grande allevamento di bovini (oltre 500 acri) | Serie Sirius HD | Portata di rilevamento fino a 3.600 m, NETD di livello professionale ≤18 mK |
| Azienda agricola mista (allevamento e coltivazione) | Serie Volans | Visione per tutto il giorno con apertura regolabile (da F1,2 a F3,0) — funziona dall’alba fino al buio |
| Controllo attivo dei predatori | Chiron LRF + visore termico | Calcolatore balistico e telemetro ottico per un posizionamento preciso del colpo durante la notte |
L’Arc LRF è il cavallo di battaglia per la maggior parte delle operazioni di medie dimensioni. Offre misurazione della distanza tramite laser e rilevamento termico in un unico dispositivo portatile con batterie 18650 sostituibili: esattamente ciò di cui hai bisogno per i controlli notturni dei pascoli e le pattuglie anti-predatori. Per le operazioni in cui è necessaria anche la funzionalità termica diurna, la serie Volans si distingue per la visione disponibile tutto il giorno e l’apertura regolabile che si adatta alle mutevoli condizioni di luce, rendendola uno dei pochi dispositivi termici che offre prestazioni eccellenti sia in pieno giorno che nell’oscurità totale.

Se gestisci un allevamento su vaste estensioni e hai bisogno di scrutare il terreno da un miglio di distanza, la serie Sirius HD ti offre la portata di rilevamento necessaria per scrutare intere valli e crinali da un’unica posizione. E per il controllo attivo dei predatori — quando di notte si spara a distanze superiori a 150 iarde — i modelli Chiron LRF e Taurus LRF sono dotati di calcolatori balistici integrati che calcolano la caduta del proiettile e forniscono al volo un punto di mira corretto. È questa la differenza tra un colpo perfetto e un colpo mancato al buio.
In quanto tempo si ammortizza l'acquisto di un monoculare termico in un'azienda agricola?
Per la maggior parte delle aziende zootecniche soggette a una forte pressione da parte dei predatori, un monoculare termico si ripaga in una stagione o anche meno. Anche solo evitando la perdita di 2-3 vitelli, al costo di $800-$1.200 per capo, si copre il costo di un dispositivo di fascia media. Per un'azienda lattiero-casearia di medie dimensioni, l'implementazione di un sistema di fascia media consente spesso di ottenere un ritorno sull'investimento entro 12-18 mesi. Se si aggiungono i risparmi sulla manodopera derivanti da controlli notturni più rapidi e da un minor numero di chiamate di emergenza al veterinario, il tempo di ammortamento si riduce ulteriormente.
È davvero possibile che un monoculare termico riesca a individuare un animale malato prima che compaiano i sintomi?
Sì. Grazie a dati non invasivi e in tempo reale, gli allevatori possono individuare la febbre con 24–48 ore di anticipo. I sensori termici rilevano le variazioni della temperatura superficiale causate da febbre, infiammazioni, mastiti o zoppia, spesso prima ancora che l’animale mostri segni visibili. Soprattutto nel settore dell’allevamento, il monitoraggio dello stato di salute è fondamentale, poiché anche le più piccole variazioni della temperatura corporea possono essere indicative dell’insorgere di malattie e consentire un intervento immediato.
I monoculari termici funzionano in qualsiasi condizione meteorologica?
È vero. I dispositivi termici rilevano il calore, non la luce, quindi pioggia, nebbia, oscurità e polvere non ne ostacolano il funzionamento come invece accade con le normali telecamere o i dispositivi di visione notturna. Per l’uso agricolo, cercate un grado di protezione IP67: ciò significa tenuta completa alla polvere e protezione dall’immersione in acqua. Molti monoculari termici sono progettati per resistere alle intemperie, il che li rende adatti all’uso all’aperto in varie condizioni.
Qual è il miglior monoculare termico per gli agricoltori con un budget limitato?
Se il tuo budget è inferiore a $1.000, concentrati su un dispositivo con una risoluzione del sensore di almeno 256×192, un NETD ≤25 mK e un'autonomia della batteria di almeno 6 ore. La nostra serie Pixfra Mile 2 offre portabilità tascabile con modelli disponibili fino a una risoluzione di 640×512. Se il budget lo consente, l’Arc LRF aggiunge un telemetro laser, che rappresenta un vero vantaggio quando si cerca di misurare la distanza di un coyote in un pascolo buio.
È legale l'uso di un monoculare termico per il controllo dei predatori?
I monoculari termici sono legali per la caccia nella maggior parte degli Stati degli Stati Uniti, ma alcuni Stati ne limitano l’uso a specie specifiche o su terreni pubblici. Per il controllo dei predatori all’interno di proprietà private, l’uso della tecnologia termica è legale e ampiamente diffuso. Verificate sempre le normative specifiche del vostro stato, soprattutto se utilizzate un visore termico montato su arma anziché un monoculare portatile: alcune giurisdizioni operano una distinzione tra dispositivi termici portatili e ottiche termiche montate su arma, applicando regole diverse a ciascuna categoria.
Negli Stati Uniti le bollette energetiche stanno aumentando rapidamente e la maggior parte dei proprietari di case non ha idea di dove finiscano effettivamente i propri soldi. Noi siamo Pixfra — produciamo monoculari termici, cannocchiali termici e accessori termici frontali per uso professionale e all’aperto — e abbiamo constatato in prima persona come la termografia possa cambiare le carte in tavola quando viene puntata sul problema giusto.
Ecco un dato che coglie molti di sorpresa: una famiglia americana media spende oggi circa $163 al mese solo per l’elettricità. La bolletta elettrica media mensile negli Stati Uniti è pari a $163 a giugno 2026, sulla base di una tariffa media residenziale di 18,05¢/kWh e di un consumo medio mensile di 903 kWh. E questa cifra ha seguito una curva di crescita molto ripida. La bolletta elettrica media americana è aumentata del 26% in cinque anni — passando da $129 al mese nel 2022 a $163 al mese nel 2026. Se si aggiungono i costi del gas e dell’acqua, la bolletta media delle utenze domestiche negli Stati Uniti ammonta a $610 al mese. Queste cifre si traducono in migliaia di dollari ogni anno — e gran parte di questa somma è costituita da energia sprecata che non si vede nemmeno uscire di casa.

Ma dove finisce tutta quell’energia sprecata? Attraverso le pareti, le finestre, la soffitta e ogni minuscola fessura e crepa di cui non sapevi nemmeno l’esistenza. La dispersione termica può rappresentare fino al 50% del consumo energetico totale di un edificio, con cause che vanno dalle fughe d’aria attraverso camini, soffitte e prese d’aria nelle pareti, alle porte mal sigillate, alle finestre con gas argon difettose, fino alla mancanza di isolamento. Il fatto è che non è possibile percepire un punto freddo dietro una parete né vedere l’aria calda che fuoriesce da una fessura nel pavimento della soffitta. È qui che entra in gioco un dispositivo termico.
A Pixfra, abbiamo costruito la nostra reputazione grazie a una tecnologia proprietaria di rilevamento termico in grado di individuare minime differenze di temperatura con estrema precisione. E sebbene la maggior parte delle persone ci conosca per le attrezzature da caccia e per l’osservazione della fauna selvatica all’aperto, la stessa tecnologia a infrarossi che vi aiuta a individuare un cervo a 3.600 metri funziona altrettanto bene per individuare una perdita energetica di $5.000 nella vostra casa. I nostri dispositivi raggiungono valori NETD pari o inferiori a 18 mK, il che significa che sono in grado di rilevare variazioni di temperatura incredibilmente piccole — proprio quelle che rivelano dove vanno a finire i soldi spesi per il riscaldamento e il raffreddamento. Se vuoi approfondire cosa distingue un dispositivo termico di qualità da uno mediocre, dai un’occhiata al Le 6 caratteristiche principali che non possono mancare nel miglior dispositivo termico del 2026 — analizza ogni aspetto, dalla risoluzione dei sensori alla durata della batteria.
Passiamo ora a un caso reale. Il proprietario di un immobile nell’alto Midwest — chiamiamolo Dave — spendeva ogni inverno oltre $2.400 solo per il riscaldamento. Questo dato è in linea con le statistiche nazionali. Secondo la National Energy Assistance Directors Association (NEADA), quest’inverno i costi di riscaldamento domestico aumenteranno del 7,61%, con la bolletta stagionale media che passerà da $907 a $976. Ma le bollette di Dave erano quasi il triplo della media nazionale a causa dell’età e delle dimensioni della sua proprietà: una casa colonica a due piani costruita negli anni ’70 con un’officina annessa. Aveva provato le solite soluzioni: un nuovo termostato, sigillare le fessure evidenti intorno alle finestre e aveva persino sostituito la caldaia due anni prima. Le sue bollette non si sono quasi mai modificate.
Dave prese in prestito un monoculare termico Pixfra da un amico che lo utilizzava per la caccia. In una fredda notte di gennaio, con una differenza di temperatura di 25°F tra l’interno e l’esterno, percorse la casa sia all’interno che all’esterno, esaminando pareti, finestre, soffitti e porte. Ciò che vide sullo schermo rivelò una realtà che i suoi occhi non avrebbero mai potuto cogliere. Il dispositivo termico evidenziò vaste zone fredde lungo l’intera parete esposta a nord del secondo piano: un chiaro segno che l’isolamento della parete si era spostato, assestato o non era mai stato installato correttamente. La botola della soffitta mostrava un anello luminoso di calore che fuoriusciva attorno al telaio. Due sezioni delle travi perimetrali del seminterrato irradiavano calore come finestre aperte. E tre delle sue vecchie finestre a doppio battente presentavano significativi ponti termici a livello dei telai — non sul vetro, ma lungo i bordi dove le guarnizioni si erano deteriorate.
Qual è la perdita energetica annuale totale stimata derivante da tutti questi problemi? Poco più di $5.000 — calcolata in base al tempo di funzionamento dell’impianto di climatizzazione, al consumo di combustibile e alla superficie in piedi quadrati esposta, non isolata o mal sigillata. Dave ha stabilito le priorità degli interventi: isolamento a insufflaggio per la parete nord, copertura sigillata e isolata della botola della soffitta, schiuma spray sui travetti perimetrali e guarnizioni isolanti sulle tre finestre in condizioni peggiori. Il costo totale degli interventi è stato inferiore a $3.200. Nel giro di una sola stagione di riscaldamento, la sua bolletta mensile del gas è scesa di circa 30% e la sua spesa energetica annuale è diminuita di oltre $5.000 rispetto alla media biennale precedente alla scansione termica. Nella maggior parte dei casi documentati, le verifiche termiche portano a un risparmio energetico compreso tra il 10 e il 30%, a seconda dei livelli iniziali di inefficienza dell’edificio.
La maggior parte delle persone cerca di risolvere i problemi legati all’energia basandosi sull’istinto — letteralmente. Si avvicina la mano a una finestra, si avverte una corrente d’aria e si applica un po’ di sigillante. Non è sbagliato, ma è decisamente incompleto. Se fuori fa abbastanza freddo e la fessura vicino a una porta o a una finestra è abbastanza grande, è facile percepire la fuoriuscita d’aria con la mano; tuttavia, ciò non è fattibile con problemi nascosti all’interno di una parete o di un soffitto. I veri ladri di energia — l’isolamento mancante dietro il cartongesso, i ponti termici nei giunti della struttura, le guarnizioni difettose in punti che non verrebbe mai in mente di controllare — sono invisibili senza lo strumento giusto.

Un dispositivo termico funziona catturando la radiazione infrarossa emessa dalle superfici e trasformandola in un'immagine visiva codificata a colori. La termografia è una tecnologia non invasiva che utilizza telecamere a infrarossi per rilevare le differenze di temperatura tra oggetti e superfici. Queste telecamere catturano la radiazione infrarossa emessa da un oggetto, convertendola in un'immagine visiva chiamata termogramma. Le aree più calde appaiono in rosso e giallo, mentre quelle più fredde appaiono in blu e viola. Quando si esamina una parete dall’interno durante l’inverno e si nota una macchia blu fredda al centro di una superficie calda, si sa esattamente dove manca l’isolamento o dove è danneggiato. Nessuna congettura. Non è necessario smantellare le pareti per controllare.
Questo è ciò che distingue la termografia da una normale verifica energetica domestica. Le ispezioni tradizionali si basano in gran parte su controlli visivi e misurazioni generali del flusso d’aria. Le verifiche tradizionali possono solo ipotizzare dove si verifichino le perdite energetiche, mentre la termografia lo dimostra visivamente. Un dispositivo termografico fornisce in pochi minuti una mappa termica precisa e localizzata dell’intero immobile. Tale precisione si traduce direttamente in interventi di riparazione più intelligenti ed economici, poiché si interviene solo dove è effettivamente necessario, invece di isolare nuovamente l’intera casa basandosi su un’intuizione.
La ricerca conferma questi risultati. In uno studio, i proprietari di abitazioni che hanno ricevuto un’immagine termografica hanno ridotto il proprio consumo energetico al follow-up di un anno, mentre quelli che hanno ricevuto una verifica dell’impronta di carbonio e facevano parte di un gruppo di controllo senza intervento non hanno mostrato alcun cambiamento. In uno studio separato, i proprietari di abitazioni erano quasi 5 volte più propensi a installare misure di isolamento termico dopo aver visto un'immagine termografica. Vedere con i propri occhi la dispersione di calore cambia la rapidità con cui si interviene — e quanto denaro si risparmia.
Proviamo a quantificare la questione con alcuni dati concreti. La tabella sottostante mostra quanto possono costare ogni anno al proprietario medio di un’abitazione i diversi tipi di inefficienze termiche e quanto costa in genere risolverle una volta che un dispositivo di monitoraggio termico ha individuato il problema.
| Problema rilevato dal dispositivo termico | Costo energetico annuo stimato | Costo fisso tipico | Periodo di recupero dell'investimento |
|---|---|---|---|
| Mancanza di isolamento in soffitta | $600 – $1.200 | $1.000 – $2.500 | 1 – 2 anni |
| Guarnizioni delle finestre difettose / ponti termici | $300 – $800 | $150 – $600 | Meno di 1 anno |
| Travi perimetrali non sigillate | $400 – $900 | $200 – $500 | Meno di 1 anno |
| Perdite d'aria intorno alle porte e alle prese | $200 – $500 | $50 – $200 | Mesi |
| Perdite nella rete di condotti in locali non climatizzati | $500 – $1.100 | $300 – $1.000 | 1 – 2 anni |
| Vuoti o cedimenti nell'isolamento delle pareti | $500 – $1.500 | $800 – $3.000 | da 1 a 3 anni |
Quando si sommano alcuni di questi problemi — che sono assolutamente presenti nella maggior parte delle case più vecchie — è facile arrivare a $5.000 o più di energia sprecata ogni anno. Il semplice fatto di sigillare le fessure nelle aree più problematiche può far risparmiare fino a 20% all’anno sulla bolletta energetica. Il dispositivo termico è ciò che trasforma quella vaga possibilità in un piano d’azione concreto con un chiaro ritorno sull’investimento.
Ecco il problema delle case più vecchie: spesso presentano un isolamento scadente ed elettrodomestici inefficienti, il che fa lievitare le bollette del 20–40%. Se vivi in una casa costruita prima degli anni ’90, è quasi certo che in questo momento si stiano verificando perdite energetiche nascoste che un dispositivo termografico ti mostrerebbe in pochi secondi.
Non tutti i dispositivi termici sono uguali, e ciò che va bene per dare una rapida occhiata alla porta d’ingresso non è detto che sia adeguato per un’ispezione completa dell’immobile. Ecco cosa conta quando si sceglie un dispositivo affidabile per individuare le perdite energetiche.

La sensibilità termica — misurata come NETD — è il fattore più importante in assoluto. Un valore NETD più basso indica che il dispositivo è in grado di rilevare differenze di temperatura più piccole. I nostri dispositivi Pixfra raggiungono valori ≤18 mK, che si collocano nella fascia più alta per le ottiche da esterno. Questo livello di sensibilità consente di individuare i sottili gradienti di temperatura di 1–2 °F che rivelano le lacune nell’isolamento, non solo i punti freddi evidenti intorno a una finestra rotta. Per chiunque si occupi di efficienza energetica, un NETD inferiore a 25 mK è il minimo accettabile, mentre con valori inferiori a 18 mK si iniziano a rilevare dettagli che la maggior parte dei dispositivi non rileva affatto.
La risoluzione del sensore è l’altra metà dell’equazione. Una risoluzione più elevata garantisce immagini più nitide e la possibilità di individuare aree problematiche più piccole da distanze maggiori. Noi di Pixfra equipaggiamo tutti i nostri sensori con la tecnologia a pixel pitch da 12 μm su tutta la gamma, dai monoculari entry-level alla serie Sirius HD, in modo che la qualità dell’immagine rimanga nitida indipendentemente dal modello scelto. Diverse tavolozze di colori — come White Hot, Black Hot, Red Hot, Iron Bow e Rainbow — consentono di cambiare la modalità di visualizzazione per adattarla al meglio al tipo di scansione che si sta effettuando. White Hot è ideale per il rilevamento generale in spazi aperti, mentre Iron Bow e Rainbow utilizzano uno spettro cromatico completo per mostrare i gradienti di temperatura, che è esattamente ciò che serve per individuare perdite di calore su una parete.
Anche la durata della batteria è più importante di quanto si pensi. Se devi scansionare un’intera proprietà — sia all’interno che all’esterno — hai bisogno di un dispositivo che non si scarichi a metà dell’opera. I nostri dispositivi Pixfra offrono un'autonomia che varia da circa 4,5 ore a 15 ore a seconda del modello, e molti utilizzano batterie 18650 sostituibili, così potrai continuare a lavorare senza dover attendere la ricarica. Aggiungete a ciò la resistenza alle intemperie con grado di protezione IP67 e avrete uno strumento che funziona altrettanto bene durante un’ispezione piovosa a novembre quanto in una limpida notte di gennaio.
Non è necessario essere un auditor energetico certificato per ottenere risultati concreti con un dispositivo termico. Ecco la procedura semplice che chiunque può seguire.

Scegliete innanzitutto le condizioni giuste. Le immagini termografiche più accurate si ottengono solitamente quando c’è un’ampia differenza di temperatura (almeno 20°F [14°C]) tra la temperatura dell’aria interna e quella esterna. Le serate invernali sono l'ideale nella maggior parte degli Stati Uniti. Accendi il riscaldamento e lascia che la casa si riscaldi per almeno due ore prima di effettuare la scansione. Chiudi tutte le finestre e le porte esterne. Allontana i mobili dalle pareti esterne in modo che il dispositivo termografico abbia una linea di vista libera.
Inizia dall’interno. Esamina lentamente ogni parete esterna, prestando attenzione agli angoli, alle prese elettriche, ai telai delle finestre e ai punti in cui le pareti incontrano i soffitti o i pavimenti. Le termocamere eccellono nell’individuare le aree di dispersione energetica, come le fessure nell’isolamento o le guarnizioni difettose. Segna eventuali punti freddi di colore blu o viola che non dovrebbero essere presenti. Passate quindi alla soffitta: ispezionate il pavimento e la botola per individuare eventuali fughe di calore provenienti dal basso. Controllate il seminterrato, in particolare le travi perimetrali e le condutture che attraversano gli spazi non riscaldati. Uscite quindi all’esterno e ispezionate le pareti esterne e il tetto. I punti caldi sulla superficie esterna in inverno indicano che il calore sta fuoriuscendo.
Documenta tutto. Un dispositivo Pixfra abbinato all’app Pixfra Outdoor ti permette di acquisire immagini e video direttamente sul tuo smartphone, in modo da avere una documentazione visiva di ogni area problematica. Tale documentazione diventa la tua lista di controllo per le riparazioni e, in seguito, la prova “prima e dopo” che gli interventi hanno effettivamente funzionato. La termografia può essere utilizzata anche per verificare l’efficacia di riparazioni e interventi di miglioramento, quali la sigillatura, il riempimento di vuoti con schiuma spray e l’aggiunta di isolamento, effettuando un’ispezione a infrarossi di follow-up.
Una termocamera può davvero farti risparmiare sulla bolletta energetica?
Sì — e non si tratta di una cifra irrisoria. Le termocamere rivelano perdite di calore nascoste dovute a lacune nell’isolamento, infiltrazioni d’aria e guasti alle guarnizioni delle finestre che non si riuscirebbero mai a individuare con una semplice ispezione visiva. Una volta individuati con precisione i punti critici, è possibile effettuare interventi mirati che in genere si ripagano da soli nel giro di una o due stagioni di riscaldamento. La semplice sigillatura delle fessure in queste aree problematiche può far risparmiare al proprietario della casa fino a 20% all’anno sulle bollette energetiche. Per le abitazioni con più problemi non individuati, sono realistici risparmi annuali compresi tra $2.000 e $5.000 o più.
Quanto costa una verifica energetica domestica con termografia?
Gli audit energetici professionali che includono la termografia hanno solitamente un costo compreso tra $400 e $700. Gli audit a costo ridotto ($200–$400) sono in genere valutazioni di base che prevedono un’ispezione visiva e test limitati. Gli audit completi (da $400 a $700) includono test diagnostici approfonditi con prova di tenuta (blower door), termografia, test di sicurezza della combustione e rapporti scritti dettagliati con analisi costi-benefici. Ma possedere un proprio dispositivo termografico significa poter ispezionare la propria proprietà ogni volta che lo si desidera — prima e dopo le riparazioni, in tutte le stagioni e anno dopo anno — senza dover ricorrere ogni volta a un professionista.
Qual è il periodo migliore dell'anno per utilizzare un dispositivo termografico per un'ispezione energetica?
L’inverno è la stagione migliore nella maggior parte degli Stati Uniti perché l’ampio divario di temperatura tra gli interni riscaldati e il freddo esterno fa sì che i modelli di dispersione termica risultino chiaramente visibili nell’immagine termografica. Negli Stati del nord, le scansioni termografiche vengono generalmente effettuate in inverno. Negli Stati del sud, invece, le scansioni vengono solitamente condotte durante la stagione calda, con l’aria condizionata accesa. La sera e la mattina presto offrono le condizioni più stabili.
I dispositivi termici funzionano durante il giorno per le ispezioni edilizie?
Assolutamente sì. I dispositivi termici rilevano il calore, non la luce, quindi funzionano 24 ore su 24. La nostra serie Pixfra Volans fa un ulteriore passo avanti grazie alla capacità di visione per tutto il giorno e a un’apertura regolabile da F1.2 a F3.0 per adattarsi alle mutevoli condizioni di luce. Detto questo, per le analisi energetiche degli edifici, la notte o le prime ore del mattino tendono a fornire risultati più nitidi, poiché non vi è radiazione solare che riscalda le superfici esterne e maschera i reali modelli termici sottostanti.
Da dove fuoriesce la maggior parte del calore nelle abitazioni?
Le perdite d’aria rappresentano il 25–40% delle perdite energetiche legate al riscaldamento e al raffreddamento nelle abitazioni tipiche, rendendole il problema più comune e rilevante riscontrato durante gli audit energetici. Dopo le perdite d’aria, le principali cause di spreco sono le soffitte mal isolate, le pareti con isolamento mancante o ceduto, le guarnizioni delle finestre obsolete e i condotti che presentano perdite negli spazi non climatizzati. In una casa tipica, il 20–30% dell’aria che circola attraverso il sistema di condotti va persa a causa di perdite, fori e collegamenti difettosi. Un dispositivo termografico consente di individuare tutti questi problemi con una sola scansione.
Use invasive species control with thermal imaging when the target animal is active at night, hides in cover, or moves along water where a flashlight gives you away. Thermal helps teams find nutria, feral hogs, green iguanas, and other problem species faster, but it works best as a disciplined workflow: scan first, confirm second, document third, and act only when the species, method, and location are legal.
Thermal imaging helps invasive species teams find warm-bodied animals before visible-light optics can confirm them. For nutria control, the main gain is night scanning along levees, ditches, ponds, and marsh edges, where a heat signature can flag movement near burrows, slides, and feeding areas.
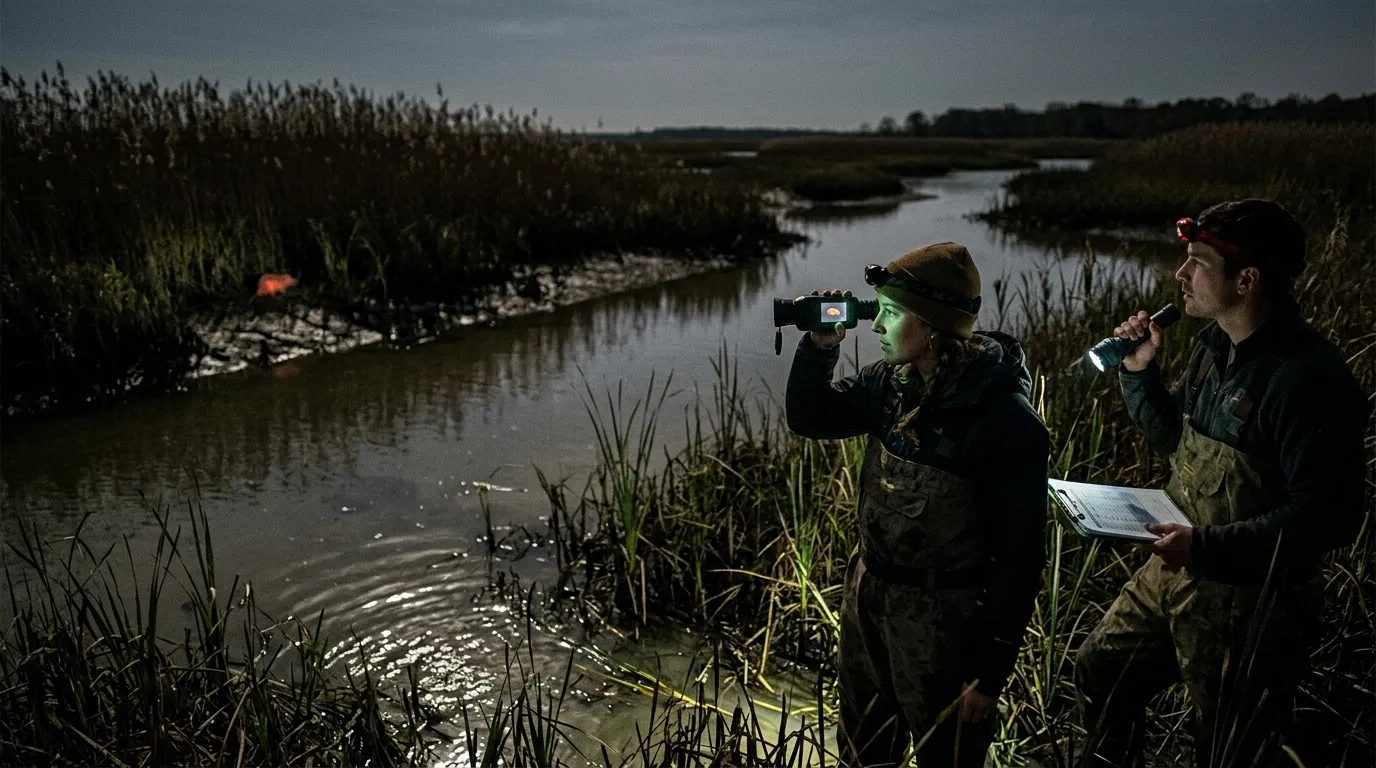
Nutria are a good test case because their damage is physical and easy to map. The problem isn’t just “there’s an animal in the marsh.” The problem is bank failure, crop loss, and wetland conversion. In its nutria management page, USDA APHIS, 2025 lists nutria as invasive in the United States and says their burrows can extend up to 150 feet, damaging stream banks, canals, levees, roadways, and structural foundations.
Thermal won’t show white whiskers or orange teeth. It gives you the first lead: a warm body in reeds, a head cutting across a ditch, or a cluster of heat signatures near a burrow entrance. Species confirmation still comes from body shape, travel route, sign, and local knowledge.
| Field situation | Thermal advantage | Watch-out |
|---|---|---|
| Marsh edges at dusk | Finds movement before glassing works | Reeds can hide body shape |
| Levee or canal banks | Spots animals near burrow systems | Muskrat and beaver confusion |
| Crop margins | Covers more ground quietly | Deer, livestock, and people |
| Cold mornings | Stronger heat contrast | Sun-warmed concrete can mislead |
For invasive species control with thermal imaging, the biggest mistake is treating every heat signature as a target. Treat every heat signature as a lead.
A nutria in thermal often looks lower and more stretched than a beaver, especially when it swims. The head and upper back may show as separate hot zones above the waterline. On land, look for a low, arched body moving from vegetation to water, not a tall silhouette crossing open ground.
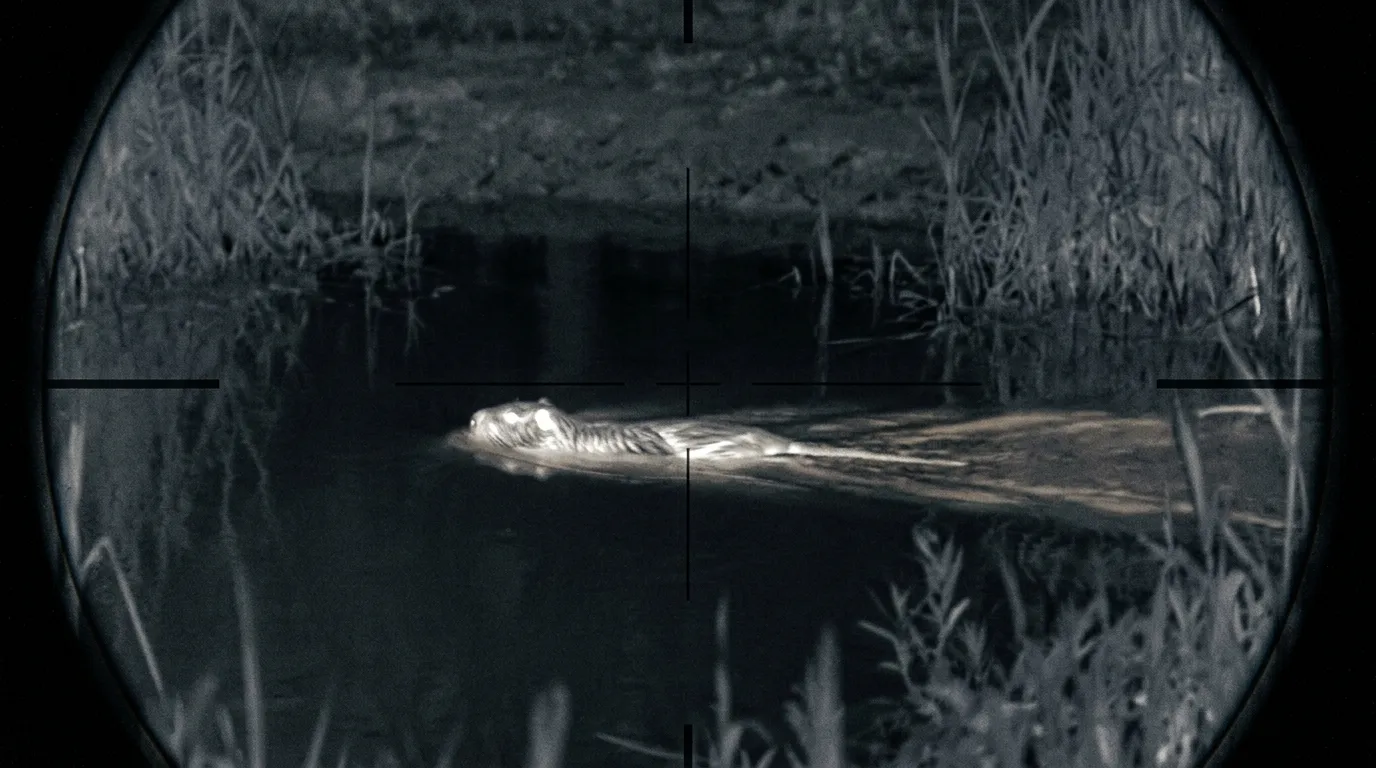
Then slow down.
Beaver, muskrat, otter, pets, livestock, and people can all show up hot. If the animal is moving along a bank with fresh slides, clipped vegetation, and burrow openings, you have a stronger case. If it’s only a blob in cattails at 90 yards, you have homework.
Good nutria confirmation usually combines:
Maryland gives the useful lesson here. The Chesapeake Bay Nutria Eradication Project didn’t rely on one tool. The U.S. Fish and Wildlife Service, 2022 reported that more than 14,000 nutria were removed over a 20-plus-year effort, with private landowners accounting for about half of those removals and over 250,000 acres of Delmarva marsh protected. The project used trapping, surveys, newer detection methods, and trained detector dogs.
Thermal fits that model. It helps you find and pattern the animal; it doesn’t replace the control plan.
Start in daylight. Walk the bank. Mark burrows, slides, damaged vegetation, trails, culverts, levee weak spots, and safe observation points. A thermal scan after dark is far more useful when you already know where animals should appear.
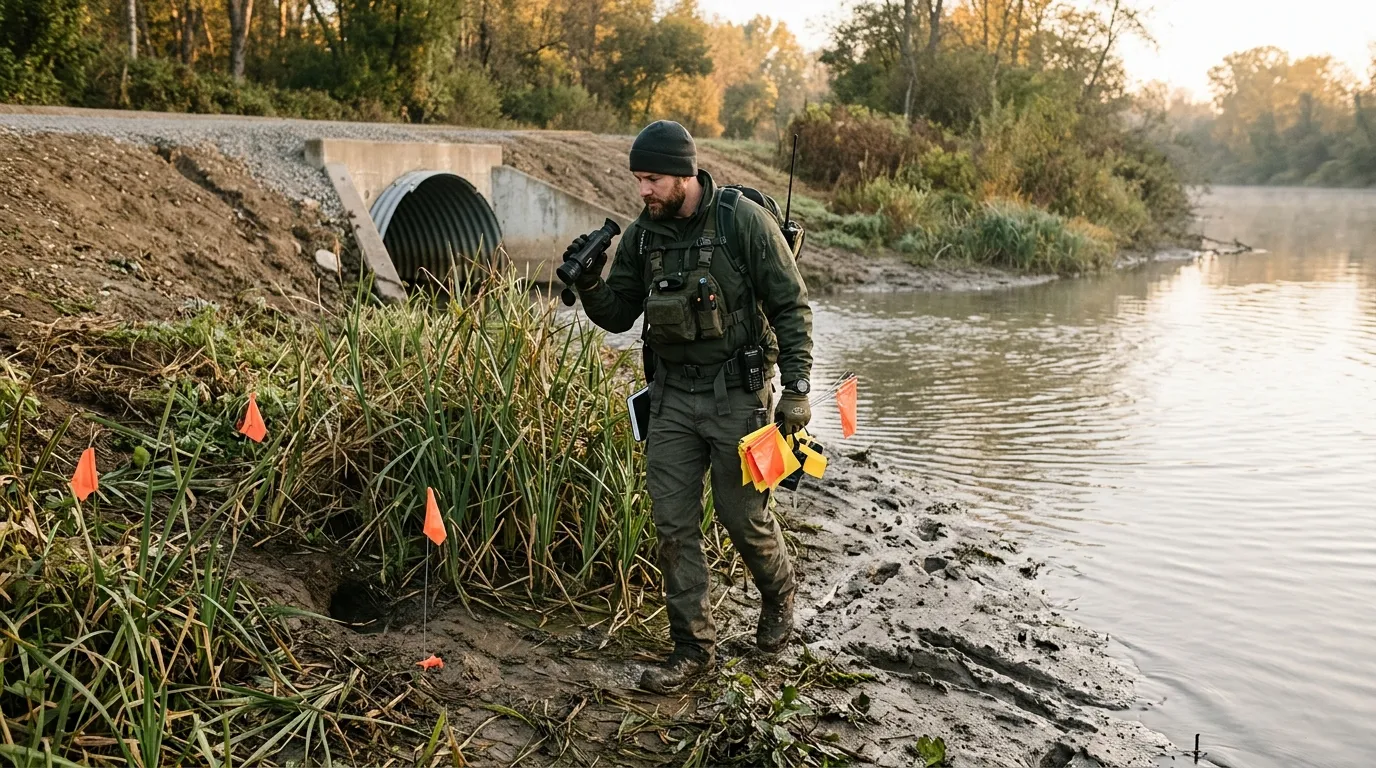
A practical sequence looks like this:
For nutria in wetlands, trapping may beat shooting because animals use repeat routes and burrow systems. Around homes, roads, livestock, or public trails, reporting and agency-led control may be the only responsible path. On large farms or private drainage systems, a trained team may combine thermal scanning, remote cameras, and scheduled removal over several nights.
A scanning monocular is the right first tool for most invasive-species work. It keeps the muzzle out of the scanning process, reduces fatigue, and lets one person search while another records or handles the follow-up. For canal banks and marsh edges, a handheld scanner from the Pixfra thermal monocular range makes more sense than swinging a rifle-mounted optic across every warm spot in the dark.
Pixfra model choice should follow the job. A compact Mile 2 monocular fits short patrols along ditches, small ponds, and narrow levee roads where portability matters. An Arc LRF or Ranger monocular is better for canal-bank scanning and wider farm fields where distance judgment helps you separate a near muskrat from a farther nutria-sized animal. For longer observation lanes, Sirius HD gives teams more image detail when body shape matters.
Rifle scopes have a narrower job: confirmed, safe, legal removal. If night shooting is allowed for the target species, a Pixfra Pegasus 2 LRF or Chiron LRF thermal scope can suit trained hog-control teams that need ranging and shooting-side workflow after the animal has already been confirmed. For predator-control users and farm teams, the Pixfra thermal rifle scope lineup covers that removal-side role rather than the survey role.
Front attachments sit between those two worlds. A Taurus LRF front attachment can help trained shooters keep a familiar day optic on a verified rifle system while adding thermal capability, but it still does not turn an unidentified heat source into a confirmed target.
Image quality matters more than people admit. Lower NETD helps in damp grass and mild weather. Higher resolution helps when you need to separate a nutria-sized animal from a muskrat or read body shape at longer range. Edge enhancement and noise reduction help when mud, water, and reeds clutter the view. Pixfra’s PIPS image-processing family is built around that practical need: make the heat signature readable enough for the next decision.
Thermal is strongest when the animal and background have a clear temperature gap. Cold nights, shaded banks, and wet animals moving against cooler vegetation can look sharp. Hot afternoons, sun-baked rocks, warm concrete, rain, fog thick enough to wet the lens, and dense reeds all reduce confidence.
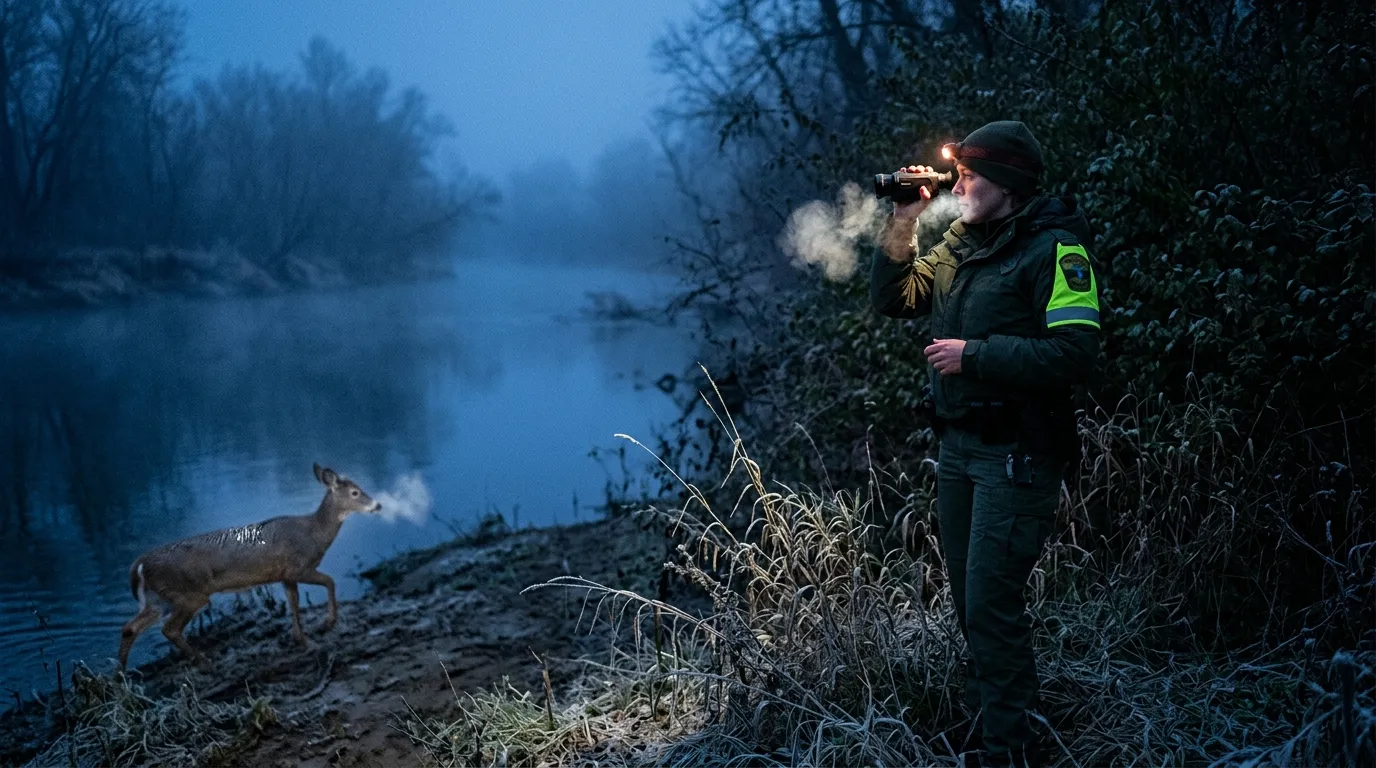
Dense cover is the hard limit. A nutria inside a burrow won’t appear just because the optic is good. A hog behind a berm may show as a partial heat smear. A green iguana on a sun-warmed wall can blend into the wall after several hours of heat soak. Thermal detects temperature differences; it doesn’t see through earth, water, or ethics.
Use this quick go/no-go check before any control action:
| Question | If the answer is no |
|---|---|
| Is the species confirmed? | Observe, record, or report |
| Is the method legal here tonight? | Stop and check regulations |
| Is the backstop safe? | Move or do nothing |
| Is there a record of damage or sign? | Build the case first |
| Is the landowner or agency aligned? | Get written permission |
Don’t chase one animal across a property line. Don’t shoot at a heat source behind grass. Don’t assume open season means every method is legal. Some states treat nutria as furbearers or regulate thermal optics, night shooting, trapping support, and nuisance control differently, so the state wildlife agency and landowner permission decide what tools are allowed.
This advice doesn’t apply to random public-land sightings, protected species, or areas where thermal optics are restricted. It also doesn’t apply when your only evidence is “something hot moved.” That’s useful for scouting. It isn’t enough for removal.
Nutria get the headline because wetland damage is so visible, but thermal also has a place in other invasive or nuisance-species programs. Feral hogs are the obvious example. They move at night, group in sounders, and damage crops, pasture, water sources, and native habitat. Thermal scanning from a fixed point can show where they enter a field before anyone starts guessing.
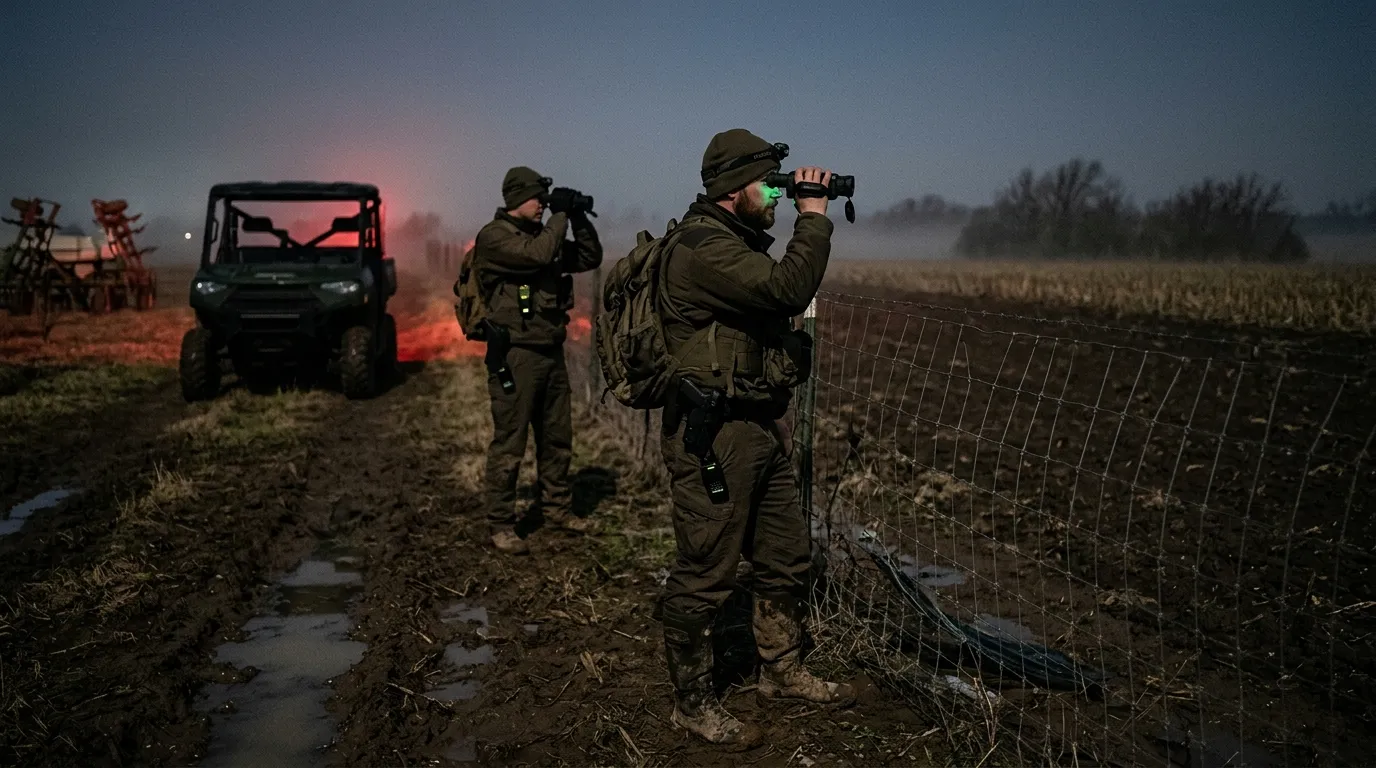
Green iguanas in Florida canal systems are another fit, especially on cool mornings when reptiles may contrast against concrete, trees, or seawalls. The tradeoff is identification distance. A thermal blob on a branch tells you “animal.” It doesn’t always tell you “legal target.”
Then there are regional cases: rabbits in agricultural control programs, invasive goats in island ecosystems, and predator-control work where coyotes or foxes are legal targets under local rules. A Pixfra monocular is usually the starting point for scanning and patterning; a scope or front attachment belongs later in the workflow, after the target species and removal method are confirmed.
Species status changes by country, state, and even property type, so the equipment choice is only half the answer. The rulebook and the biology drive the plan.
Thermal imaging can help locate likely nutria, but it can’t confirm color details such as white whiskers. Use thermal with body shape, swimming behavior, tracks, burrows, feeding sign, and local agency guidance.
Thermal rules vary by state, species, land type, season, and method of take. Check your state wildlife agency before using thermal for hunting, trapping support, night shooting, or nuisance control.
Warm-bodied animals in cool surroundings show up best. Nutria, feral hogs, foxes, coyotes, deer, pets, livestock, and people can all appear clearly, which is why species confirmation matters.
Often, yes. Traps can work better than shooting around burrows, urban water, levees, and repeated travel routes. Thermal helps you place and check the control plan more intelligently.
Pixfra builds thermal optics for the first hard step in invasive-species work: finding heat signatures when visible light isn’t enough. Start with a scanner that fits the field, document what you see, confirm local rules, and choose the removal method only after species ID, permission, and safety are clear.
Perimeter security for farms and ranches using thermal cameras starts with one practical goal: spotting heat before a problem reaches your animals, sheds, fuel tanks, or equipment yard. A good thermal setup helps you see people, coyotes, feral hogs, stray dogs, vehicles, and warm machinery in darkness, haze, glare, and light cover, where visible-light cameras usually give you a black frame or a floodlit guess.
Perimeter security for farms and ranches using thermal cameras works by placing handheld or fixed thermal imagers where animals, people, vehicles, and heat-producing equipment cross likely approach routes. Thermal cameras don’t need visible light, so they detect movement through darkness, haze, glare, and light cover before a barn camera or gate alarm confirms the event.
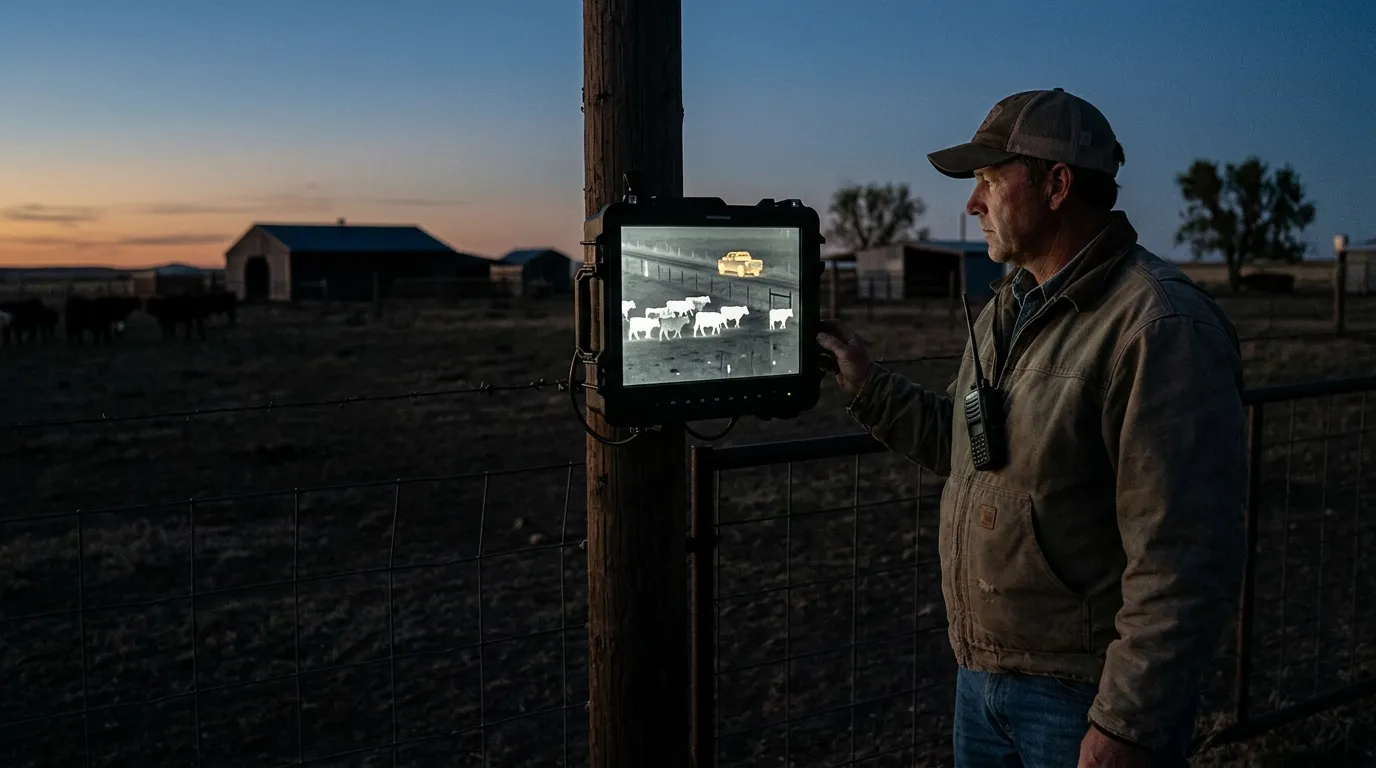
That early warning matters because rural security usually has a distance problem. A farmhouse may sit 300 yards from the calving lot. The machine shed may be near a county road. The back fence may run through brush where a standard camera sees branches and shadow. Thermal cuts through that first layer of confusion by showing temperature contrast, not color.
Use thermal for detection and assessment. Use fences, gates, locks, guard animals, lighting, visible-light cameras, and radios for delay and response. That’s the working setup. Thermal tells you where to look; the rest of the system gives you time to act.
USDA APHIS Wildlife Services states that wildlife damage management includes protecting livestock from predators and protecting property from wildlife damage. The USDA APHIS Wildlife Damage Operational Activities page is a useful reminder: farm security isn’t only a theft issue. Animal pressure belongs in the plan too.
Start with the places where heat signatures mean something. A warm shape in open pasture at 2:00 a.m. may be a deer. A warm shape slipping along a lambing pen fence is a different call.
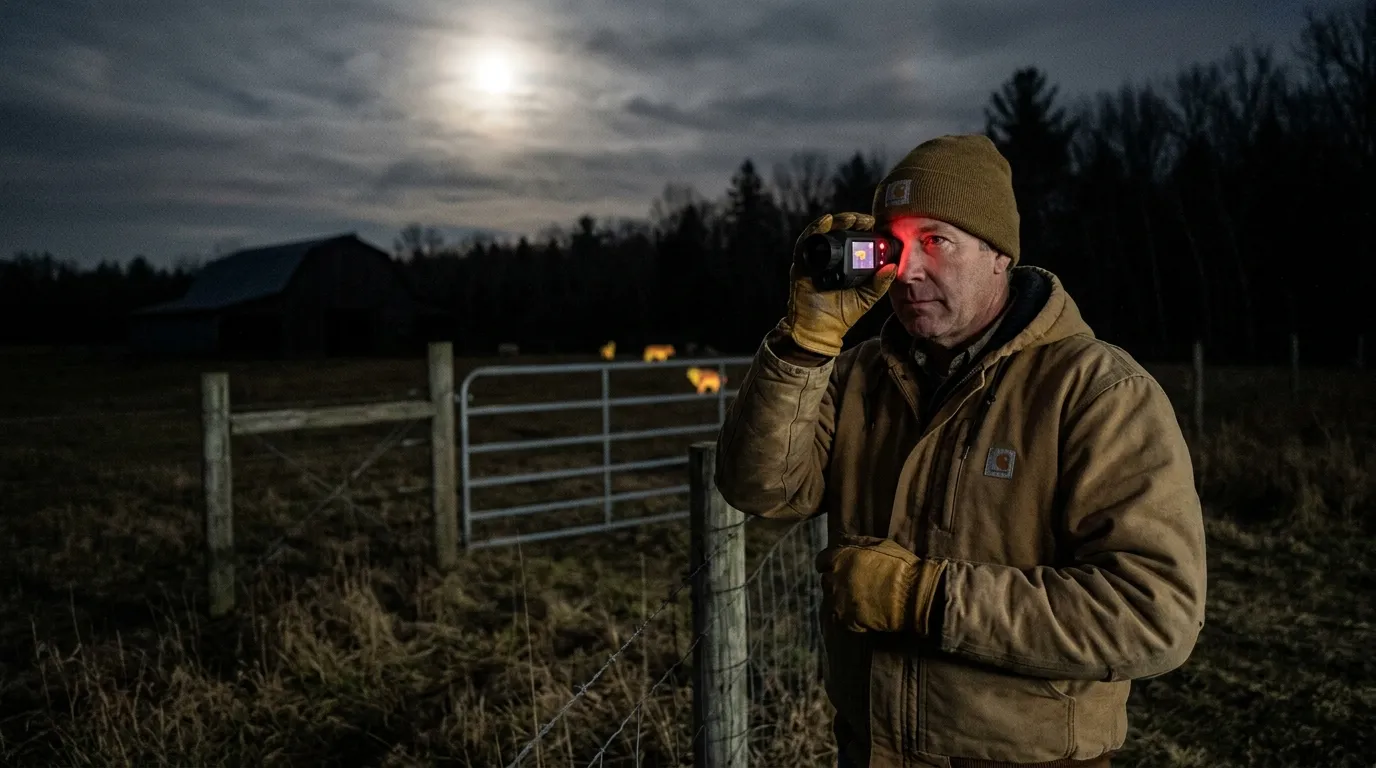
The highest-value zones are usually close to animals, equipment, feed, and access points:
| Zone | What thermal should catch | Best camera approach |
|---|---|---|
| Calving, lambing, kidding pens | Coyotes, dogs, people, downed animals | Fixed thermal plus handheld confirmation |
| Gates and farm lanes | Vehicles, trespassers, late-night entry | Thermal overview plus visible camera at plate height |
| Fuel tanks and tool sheds | People, warm engines, repeated movement | Fixed camera with alert zones |
| Woodlots and fence breaks | Predator travel, feral hogs, unknown movement | Handheld patrol or long-view fixed thermal |
Predator risk is measurable. In the USDA APHIS 2015 cattle and calves death loss report, coyotes accounted for 53.1% of predator-related calf deaths and 40.5% of predator-related adult cattle deaths. Those numbers don’t mean every ranch has the same problem. They do mean perimeter security has to account for animal movement, especially around young stock.
For theft and trespass, thermal has a different job: shorten the time between entry and awareness. A truck with headlights off, a person walking a fence line, or a warm engine behind a shed will stand out far earlier on thermal than on a standard camera waiting for visible detail.
Mounting height, angle, and lane choice beat raw specs more often than people expect.
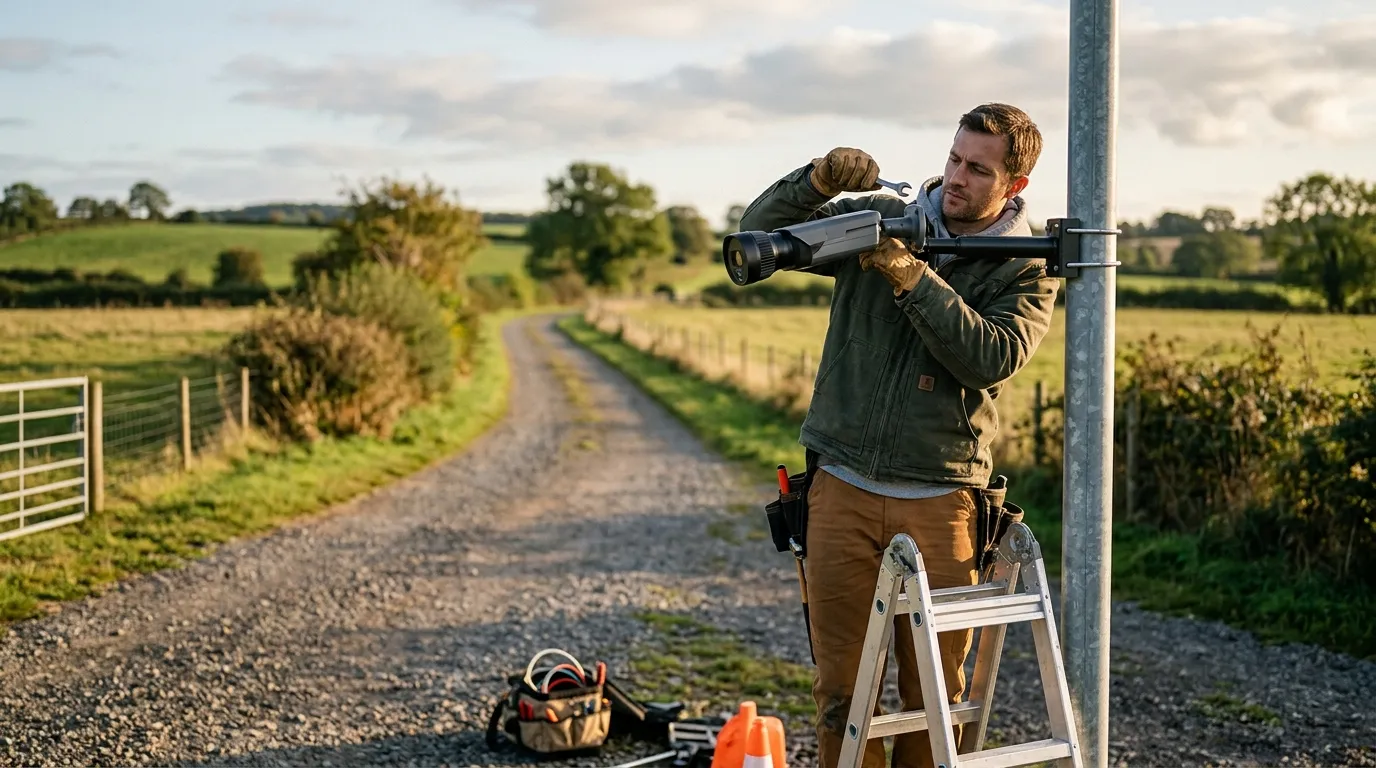
A fixed thermal camera should watch across an approach path instead of staring straight down it. Crossing movement is easier to verify, and the body profile is clearer. On a gate lane, angle the camera 15 to 45 degrees across the opening. Around a pen, aim along the outside fence, then set the alert area to ignore normal livestock movement inside the pen.
For most farm structures, start with a mounting height around 8 to 13 feet if you have a solid post, barn wall, or pole. Higher mounting reduces tampering and keeps the view above weeds. Too high, though, and small predators turn into small dots. There’s the tradeoff.
A simple layout:
Thermal works best when you give it clean contrast. Avoid aiming across hot metal roofs, exhaust vents, bonfire areas, or sun-baked rock if you can. After a 95 degrees F afternoon, a gravel lane may stay warm long after sunset. The camera still works, but the image takes more reading.
Pixfra covers handheld and mounted-style outdoor thermal use cases, so a farm buyer can start with Pixfra outdoor thermal devices before narrowing the setup by detection range, field of view, battery format, and whether the job is scouting or fixed observation.
Fixed thermal cameras are better for repeatable choke points. Handheld thermal is better for judgment.
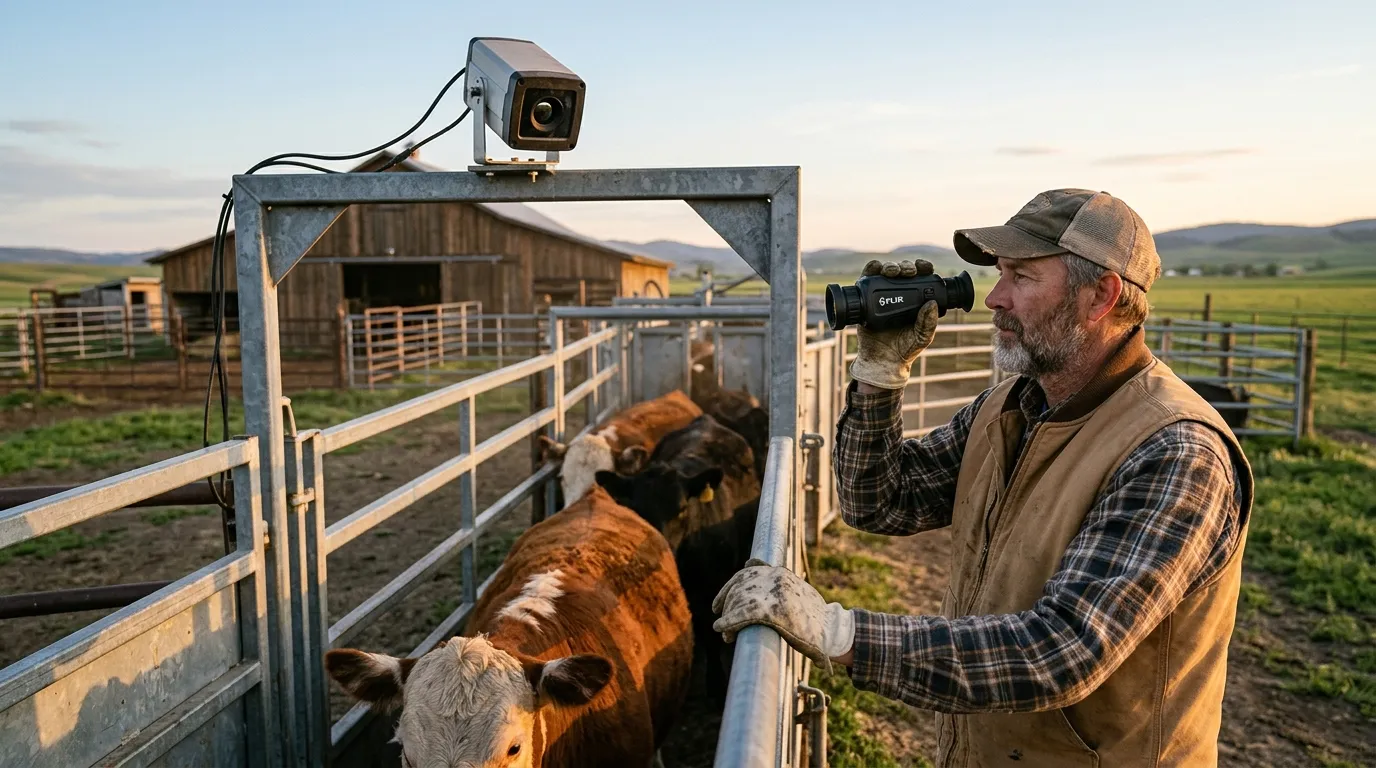
If you run cattle, sheep, goats, horses, poultry, or a mixed farm, don’t think of this as one device doing every job. The better plan is a small system where each device has a job you can explain in one sentence.
| Device type | Best farm use | Drawback |
|---|---|---|
| Fixed thermal camera | Gates, pens, sheds, lanes | Needs power, mounting, and alert tuning |
| Handheld thermal monocular | Patrol, predator check, downed animal search | Depends on someone being awake and looking |
| Multispectral binocular | Longer observation with thermal plus visual context | More cost and more gear to carry |
| Visible-light camera | Identification at doors, gates, and yards | Weak at night without lighting |
A handheld monocular is often the first purchase that makes sense. You can scan before walking into a field, check a tree line without turning on a spotlight, and confirm whether an alert is a deer, a dog, or a person. For farms with rotating risk zones (freshly moved calves this week, hay barn next week), handheld gear stays useful.
Fixed thermal starts paying off when the same spot creates the same problem. A back gate gets opened. A fuel tank is approached. Coyotes work the same draw during calving season. In those cases, a fixed thermal camera gives you a repeatable watch point, especially when paired with mobile alerts or a recorder.
For scouting and patrol, Pixfra thermal imaging monoculars are the category to compare first. Look at detector resolution, NETD rating, lens size, field of view, battery life, and weight. A wide field of view helps close-range pen work. A narrower, longer lens helps across pasture.
Thermal cameras are powerful, but they don’t perform magic.
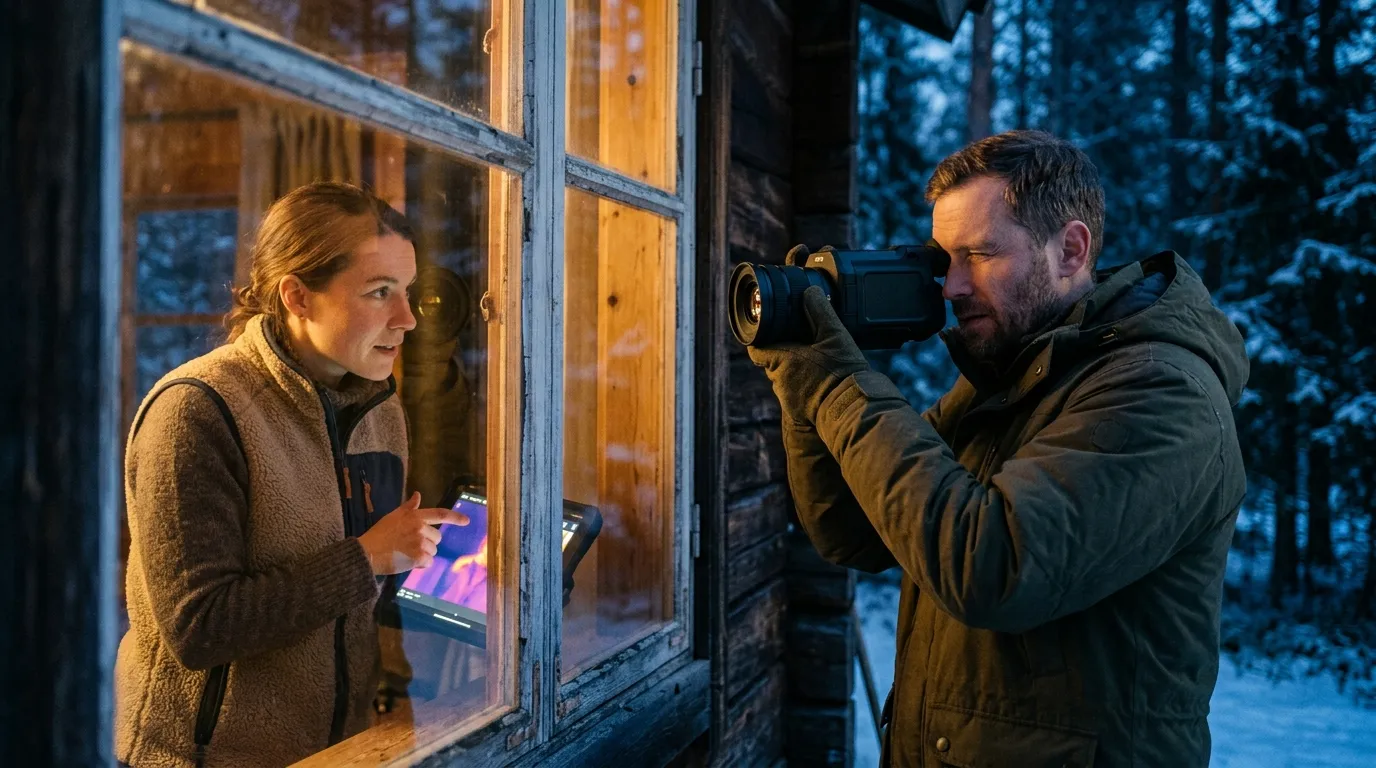
Glass blocks much of the long-wave infrared energy that most thermal imagers rely on, so a thermal camera usually can’t see through a house window or truck windshield. Heavy rain and dense fog can reduce range because water in the air weakens contrast. Wet brush can hide small animals. A coyote behind a thick cedar line may be partly hidden until it steps into a gap.
Then there’s identification. Thermal can show size, movement, body shape, and behavior. It may show a predator slipping low along a fence while cattle bunch up. It may show two people walking toward a shed. It won’t reliably give you a face or license plate. Put visible-light cameras at gates and doors for that.
Privacy and law matter too. Point cameras at your own property, livestock areas, lanes, and buildings. Avoid aiming into neighboring homes, public roads beyond your entrance, or employee housing. For shared ranch roads, post signage and keep access to recordings limited. Practical security gets easier when everyone knows what the system is for.
One more field note: alerts need discipline. If every deer triggers your phone, you’ll mute the system by Friday. Draw detection zones around the actual risk path, then test them with a person walking, a dog crossing, and a vehicle entering. Tune from real movement, not a desk guess.
A thermal alert is only useful if you know the next move.
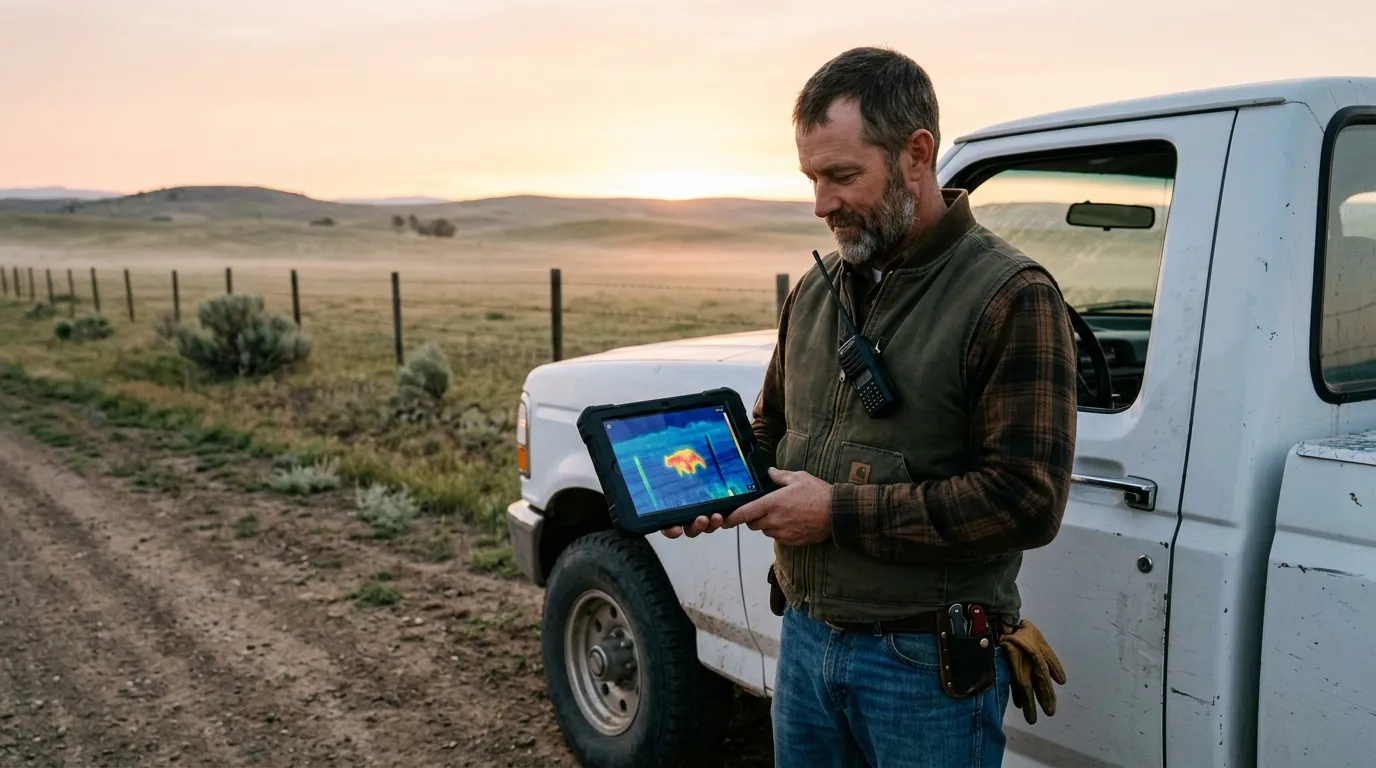
Set a response plan before the first night of monitoring. Who gets the alert? Who checks the handheld? Who calls law enforcement, a neighbor, or the ranch manager? What happens if the alert is near livestock instead of equipment? Write it down. Keep it boring.
Use this short checklist before buying or installing:
For dealers and ranch supply retailers, demo units should be tested on real farm distances. A 50-yard barnyard demo tells one story. A 250-yard pasture edge with wet grass tells another. Ask for footage at the distances your customers actually use.
Thermal cameras usually perform better than visible-light cameras in light fog, haze, smoke, and glare. Dense fog, heavy rain, and wet vegetation can reduce detection range because water weakens thermal contrast.
Use fixed thermal cameras for repeated risk zones such as gates, pens, fuel tanks, and machine sheds. Use handheld thermal for patrols, predator checks, and quick confirmation after an alert.
Thermal can help identify coyotes by size, gait, shape, and behavior, especially near livestock. Reliable identification depends on distance, lens, detector resolution, weather, and operator experience.
Point farm cameras at gates, fence gaps, calving or lambing pens, feed areas, fuel tanks, and equipment sheds. Aim across likely travel routes so people, animals, and vehicles cross the view.
For a Pixfra setup, start with one high-risk zone and one handheld thermal device. Test at night, record what you actually see, then add fixed coverage where the same problem repeats. That staged approach keeps the system practical, affordable, and matched to real farm work.
You’ve seen the price tags. A solid thermal monocular or scope can run you anywhere from a few hundred bucks to well over $5,000. And if you’re staring at those numbers wondering whether spending more actually gets you more, you’re not alone. We’re Pixfra, and we build thermal devices for hunters, wildlife watchers, and outdoor professionals — so we’ve got a front-row seat to this debate. Let’s break it all down.
Before we get into whether a premium thermal device is worth your money, it helps to understand why these things cost more than a standard optic in the first place. A thermal device isn’t just a camera with a fancy filter. A thermal imaging scope combines specialized infrared materials, expensive sensing hardware, real-time processing, strict calibration, and recoil-rated durability in one hunting optic. That’s a lot of tech packed into a single piece of gear.

At the core of every thermal device sits an infrared sensor — usually a microbolometer made from vanadium oxide or amorphous silicon. The heart of every thermal camera lies in its infrared sensor, and unlike a normal camera that depends on visible light, a thermal imager captures infrared radiation emitted by objects, requiring specialized materials and ultra-precise manufacturing. These sensors aren’t cheap to produce. The raw materials alone, like germanium used in high-quality thermal lenses, carry a steep cost. Germanium metal costs $1,500 per kg in its raw form, and when you add the price of refining and processing it into a high-performance lens, the total cost increases exponentially. Then add proprietary image processing algorithms, precision calibration for each individual unit, and housings built to handle drops, rain, dust, and recoil — and you start to see where the money goes.
The good news? Prices have come down a lot. In 2025–2026, prices have fallen 40%. What used to be premium-only tech is now showing up in mid-range and even some entry-level devices. At Pixfra, we’ve built our entire lineup around delivering real performance — from the Mile 2 series for everyday outdoor use to the Sirius HD for professionals who need maximum range and clarity — without charging you for stuff you don’t need. If you want a closer look at what separates a great thermal device from a frustrating one, check out our breakdown of the Le 6 caratteristiche principali che non possono mancare nel miglior dispositivo termico del 2026.
So what’s the real difference between a budget thermal and a premium one? It’s not just about bragging rights or a flashy spec sheet. The gap shows up the moment you’re in the field — especially when conditions get tough.
The first thing you’ll notice is image clarity. Pricing in the premium thermal category is driven by the quality of the thermal sensor. High-end scopes use ultra-sensitive thermal detectors with a sub-15mK NETD, meaning the scope can detect incredibly slight temperature differences, cutting through dense humidity, fog, and total darkness to give you a crisp image. Our Pixfra devices hit NETD values of ≤18mK, which places them at the high end of sensitivity for outdoor-grade thermal optics. That means you’re not squinting at washed-out blobs at 2 AM — you’re seeing defined outlines of animals against their background, even in rain or humidity.
Sensor resolution is the other half of the equation. Entry-level devices typically run 256×192 sensors, which work fine inside 100–150 yards. Step up to 384×288, and you’re getting solid performance out to 300–500 yards. Premium devices running 640×512 sensors give you positive identification at distances that budget models simply can’t match. At Pixfra, we pair our high-resolution sensors with 12μm pixel pitch technology across our product lines, giving you sharper, more detailed thermal images regardless of which model you choose. That 12μm pixel pitch — compared to older 17μm designs — produces noticeably sharper images that help you tell the difference between a coyote and a stump at real hunting distances.
Then there’s detection range. Our lineup covers everything from around 500 meters on entry-level models up to 3,600 meters on the Sirius HD series. But here’s something a lot of buyers miss: detection range and identification range are two different numbers. A device might detect a heat signature at 1,500 meters, but you won’t know what you’re looking at until much closer. Detection means you can tell something is there; identification means you are confident what it is. Premium devices close that gap by giving you the resolution, sensitivity, and processing power to confidently ID targets at longer distances. For hunters, that’s the difference between a clean shot and a pass.
Let’s be honest — not everyone needs a premium thermal device. If you’re setting up over a feeder and your shots are all inside 100 yards, a solid mid-range unit will do the job. But the performance gap between budget and premium gets real once you push past those comfortable distances or deal with difficult conditions.

The performance gap between budget ($1,500–$2,500) and premium ($4,000–$8,000) thermal scopes is substantial and immediately noticeable in actual hunting conditions. Premium models offer significantly better image clarity, longer detection ranges, smoother image processing, and more reliable performance in challenging environments. The difference becomes particularly apparent when hunting in difficult conditions — like spotting a partially obscured hog in thick brush at 300 yards, or quickly identifying a coyote moving through tall grass at dusk.
Here’s a quick breakdown of how the tiers stack up:
| Caratteristica | Budget ($500–$1,500) | Mid-Range ($1,500–$3,500) | Premium ($3,500+) |
|---|---|---|---|
| Risoluzione del sensore | 256×192 | 384×288 | 640×512 |
| NETD Sensitivity | 35–50 mK | 20–35 mK | ≤18 mK |
| Passo dei pixel | 17 µm | 12 µm | 12 µm |
| Portata di rilevamento | 300–800 m | 800–1,800 m | 1,800–3,600 m |
| Refresh Rate | 25–30 Hz | 50 Hz | 50–60 Hz |
| Durata della batteria | 4–6 hours | 6–10 hours | 8–15 hours |
| Integrated LRF | Rare | Common | Standard |
| Build Rating | IP54 | IP67 | IP67/IP68 |
The mid-range sweet spot is where a lot of hunters land — and for good reason. Models like our Pixfra Arc LRF and Mile 2 series hit that balance between performance and price. You get solid sensor resolution, ≤18mK sensitivity, integrated laser rangefinders with 1,000-meter capability, and swappable 18650 batteries that last through an all-night session. For most recreational hunters and outdoor enthusiasts working inside 300–600 meters, that’s more than enough.
But if you regularly scan wide open fields, need to ID targets past 500 yards, or use your device in professional roles like wildlife management or law enforcement, the premium tier earns its price. Models like our Sirius HD series push detection out to 3,600 meters and deliver the kind of image quality that lets you make confident decisions at distances budget devices simply can’t reach.
Not all premium features are gimmicks. Some of them genuinely change how you use your thermal device in the field. Here’s what actually matters when you’re spending more.
A built-in laser rangefinder (LRF) is one of the biggest value-adds on any thermal device. For hunters shooting beyond 150 yards at night, an integrated LRF removes the need for a separate ranging device and gives you exact distance to your target with one button press. Our Pixfra Arc LRF, Chiron LRF, and Taurus LRF models all come with integrated 1,000-meter rangefinders. When paired with the built-in ballistic calculators on models like the Chiron LRF and Taurus LRF, you get real-time bullet drop calculations and an adjusted aiming point on the fly. That’s not a luxury — that’s the difference between an ethical shot and a miss. The addition of a true laser rangefinder makes a thermal a much more useful device; on a sight, the LRF is generally tied to a ballistic calculator, so you can make distance-informed shots.
Durability is another area where premium devices pull ahead. A cheaper device might carry an IP54 rating, which handles splashes — but won’t survive a dunk. Look for IP67 or higher. IP67 means full dust sealing and protection against temporary water submersion, covering rain, stream crossings, snow, and accidental drops. At Pixfra, we build our devices for the same conditions we use them in. Our thermal scopes handle heavy recoil, our monoculars survive drops, and our housings resist corrosion over years of field use.
Smart features round out the premium experience. Wi-Fi connectivity, onboard video recording, multiple color palettes, companion app support, and over-the-air firmware updates are now standard on serious devices. Our Pixfra Outdoor App works with all current models — Sirius, Arc LRF, Mile 2, Pegasus Pro, Chiron LRF, Taurus, and Taurus LRF — letting you update firmware, adjust settings, and transfer images and video straight to your phone. The Volans series takes it even further with all-day vision capability and an adjustable aperture from F1.2 to F3.0, so you carry one device instead of two regardless of lighting conditions.
Here’s where we keep it real. A premium thermal device is not the right buy for everyone. For casual use, a handheld thermal or digital night vision device may be the better first move. The smartest buy is the one that matches your real hunting distance, terrain, and budget, not the one with the flashiest spec sheet.

If you hunt a few times a year, mostly over feeders at distances under 150 yards, and you’re not dealing with extreme weather, you don’t need a $5,000 scope. A reliable mid-range thermal monocular or scope will cover you just fine. For occasional hunters who might use thermal technology a few times annually, mid-range options likely provide the best value proposition. Our Mile 2 series, for example, gives you the core performance you need — strong NETD, clean image quality, 12μm pixel pitch — at a price point that doesn’t require a second mortgage.
The real question isn’t “Is premium worth it?” — it’s “Is premium worth it for me?” If you spend 30+ nights a year in the field, need to ID targets at long distances, manage property for predator control, or work in law enforcement or wildlife management, then yes — premium thermal devices pay for themselves through better performance, fewer missed targets, and gear that doesn’t fail when conditions turn ugly. If you hunt casually and keep your distances short, save the extra money for ammo and gas.
Are high-end thermal scopes really that much better than budget ones?
Yes, the difference is real and immediately noticeable. Budget scopes can get the job done in ideal conditions, but premium options dramatically expand your effective hunting window and target identification confidence. You’ll see sharper images, detect targets at longer distances, get smoother tracking on moving animals, and experience fewer washed-out images in humidity, fog, or low-contrast environments. The gap is most obvious when you push past 200 yards or hunt in tough conditions.
Why are thermal devices so expensive compared to regular optics?
Thermal scopes use different optics, different sensors, and more intensive image processing — they detect heat instead of amplifying light, which usually makes the hardware and calibration more expensive. The infrared sensors, germanium lenses, proprietary algorithms, and ruggedized housings all add up. That said, prices are dropping fast, and mid-range devices today deliver what only premium models could a couple of years ago.
What specs matter most when choosing between budget and premium?
Focus on NETD sensitivity, sensor resolution, pixel pitch, and real-world identification range — not just detection range. A device with ≤18mK NETD, a 12μm pixel pitch, and 384×288 or higher resolution will give you strong real-world performance. An integrated laser rangefinder is also a big plus for anyone shooting beyond 150 yards. Battery life, IP rating, and refresh rate are your next priorities.
Do I need a premium thermal monocular for wildlife observation?
Not always. For casual wildlife watching at shorter distances, a mid-range monocular with solid sensitivity and a comfortable battery life does the job well. But if you’re doing serious nocturnal wildlife research, covering large areas, or working in demanding weather, premium models give you the detection range, image clarity, and durability to make those sessions productive rather than frustrating.
Will thermal device prices keep dropping?
Thermal will probably keep getting more affordable at the entry and mid levels, but top-end scopes will still command premium prices because the best performance is expensive to build. Specialized infrared optics, image calibration, and recoil-rated engineering aren’t getting cheap anytime soon. The sweet spot for most buyers is the mid-range tier, which keeps getting better every year — and that’s exactly where we focus a lot of our effort at Pixfra.
















