Thermal for cold-storage & refrigerated logistics helps you find the warm air paths and insulation defects that make refrigeration systems work harder: torn gaskets, warped doors, wet panels, cracked foam, failed trailer seals, and dock gaps. Use it as a fast building-envelope check, then confirm food temperatures with probes, data loggers, and your normal HACCP or FSMA records.
Cold-Storage Thermal Checks
Thermal for cold-storage & refrigerated logistics is a surface-temperature inspection method for cold rooms, freezers, reefers, and loading docks. It doesn’t prove product safety by itself. It shows where heat is entering, where cold is escaping, and where insulation may be wet, crushed, detached, or bridged by metal.
A good scan starts with a temperature difference. If your cooler is at 38°F and the dock is at 72°F, leaks draw themselves on the screen. If the dock and room are both cold after a long winter night, thermal contrast drops and small defects disappear. Wait for a real load condition: doors cycling, evaporators running, forklifts moving, people rushing because the 6 a.m. route is already late.
Use thermal imaging for the shell. Use calibrated contact tools for the food. The FDA Food Code 2022 sets 41°F or less as the cold-holding benchmark for many time/temperature control for safety foods at retail and foodservice, but a thermal camera sees apparent surface temperature. A box of chicken under film wrap, a stainless table, and a shiny trailer liner can all mislead the image.
| Area | Thermal clue | Likely cause | Best follow-up |
|---|---|---|---|
| Door gasket | Thin warm line around edge | Torn vinyl, weak latch, ice buildup | Close on paper strip, adjust latch, replace gasket |
| Panel seam | Warm vertical or ceiling stripe | Failed sealant, foam gap, thermal bridge | Inspect joint, check fasteners, reseal |
| Floor-wall joint | Warm band near cove | Damaged curb, forklift impact, moisture | Probe for water, inspect kick plates |
| Trailer rear doors | Bright edge at hinge side | Worn compression seal, bent door | Check cam locks, hinge pins, gasket crush |
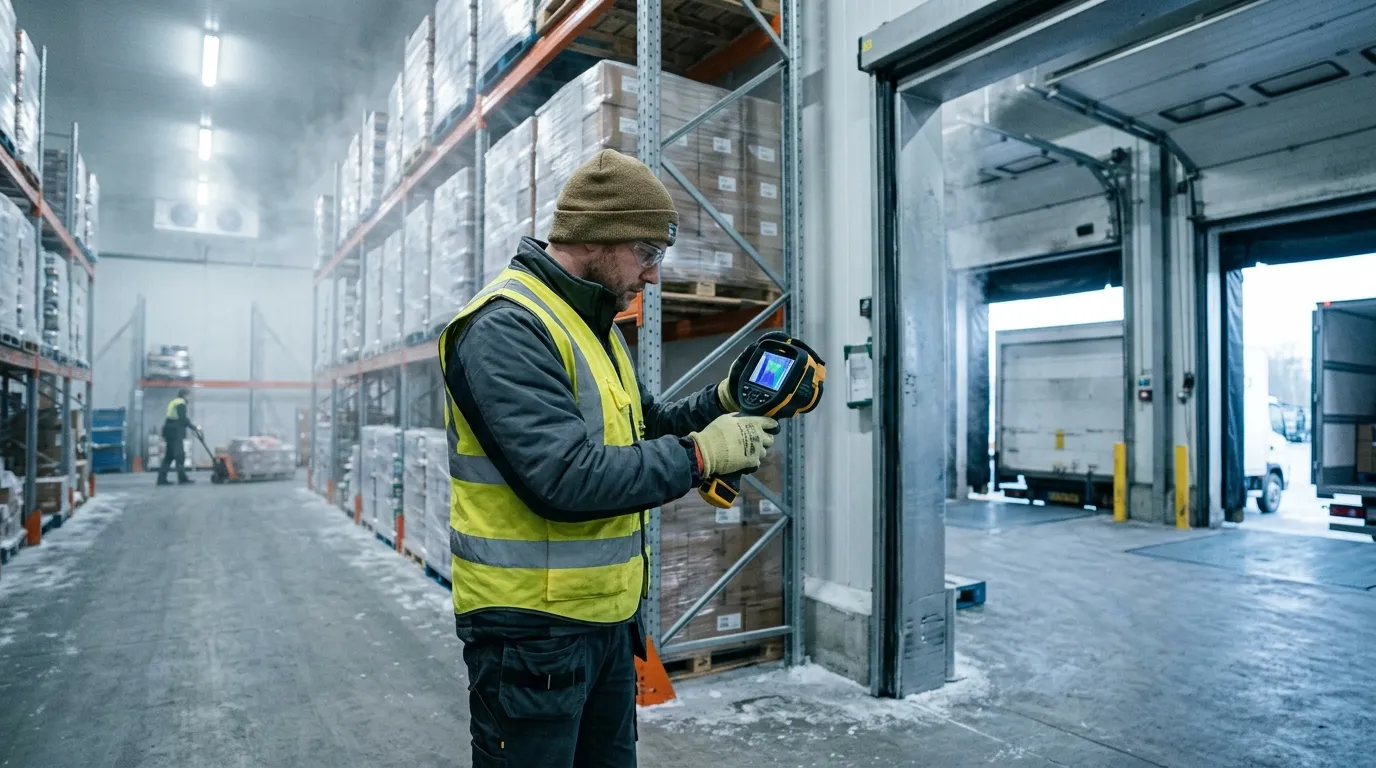
The best time to scan a walk-in freezer is after it has been under load for at least 20 to 30 minutes. You want the system working. A perfectly empty box that has sat closed all night can look clean even when the door sweep leaks during shift change. Scan from inside and outside when you can, because a warm streak visible from the inside may show as a cold plume outside the door.
One small trick helps in cold storage: carry matte tape. Stainless steel, aluminum tread plate, and glossy FRP panels reflect the worker holding the camera. A square of black electrical tape or painter’s tape gives the thermal device a more reliable reference spot. It feels low-tech. It works.
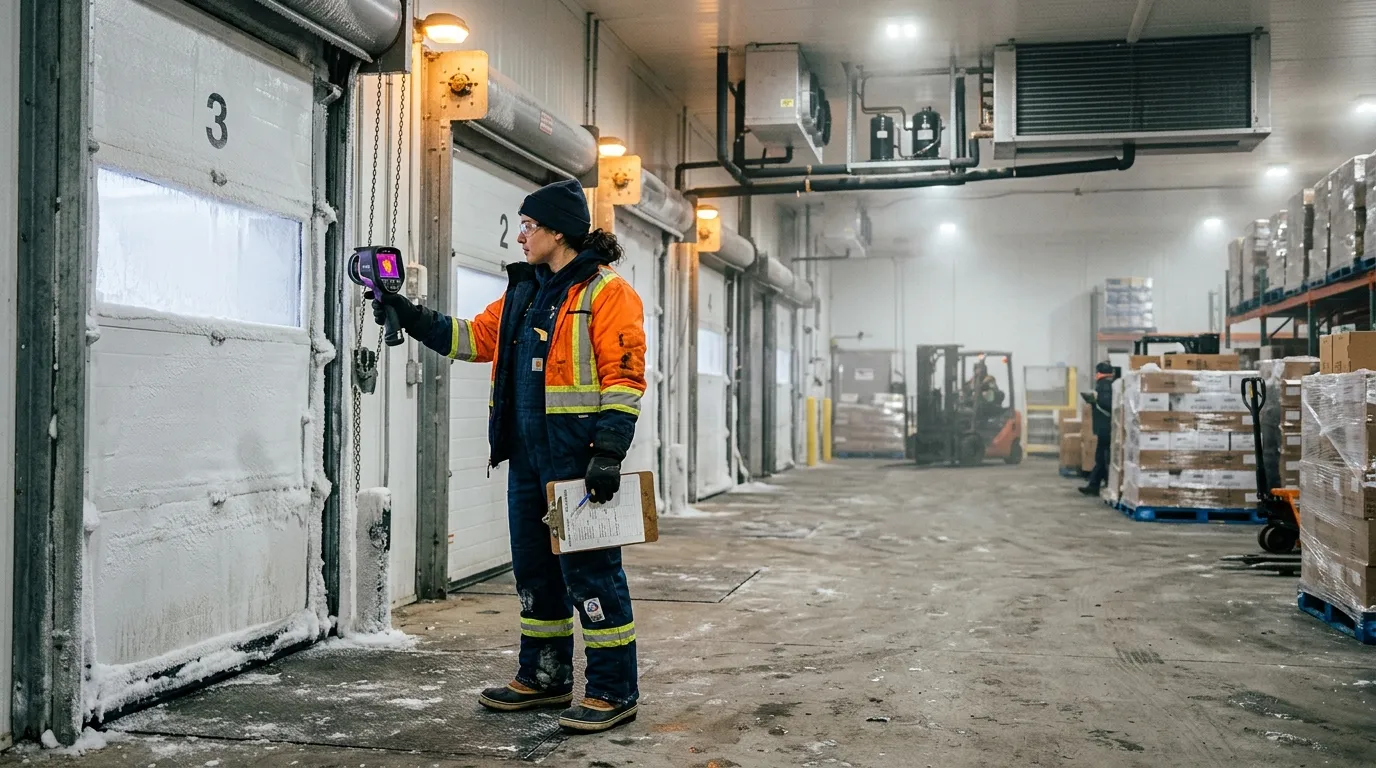
Door Seal Leak Patterns
Door problems are the first place to look because they happen every hour. A cold room door may cycle hundreds of times per day, and the gasket takes abuse from pallet jacks, washdown, ice, pressure changes, and impatient shoulders. On a thermal image, a healthy gasket usually shows a clean temperature boundary. A bad gasket shows a bright thread, a feathered plume, or a hot patch near the latch.
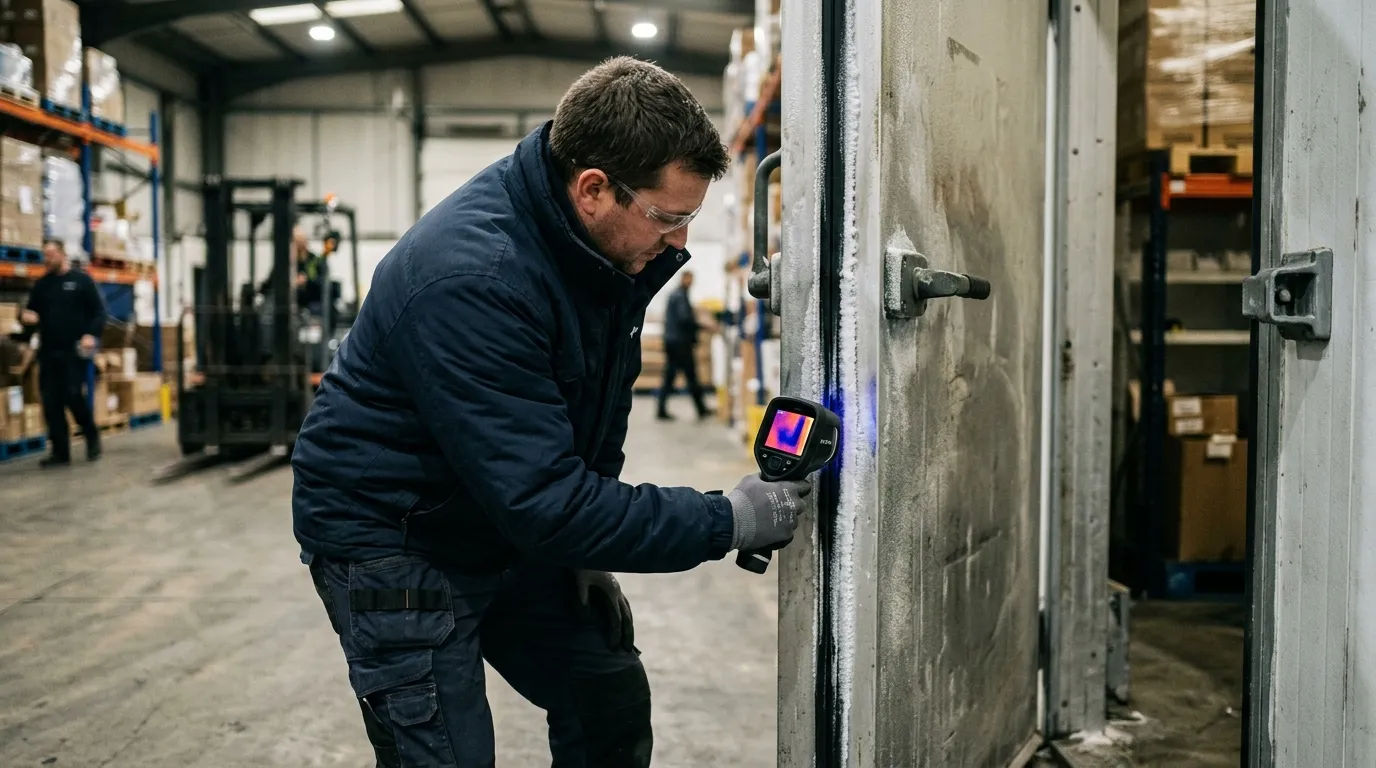
Don’t treat every warm edge the same. A straight warm line around the entire door often points to latch pressure or door alignment. A hot corner near the threshold often points to a torn sweep, floor heave, or ice that stops the gasket from seating. A warm oval at handle height can be nothing more than a handprint from ten seconds ago (annoying, but real).
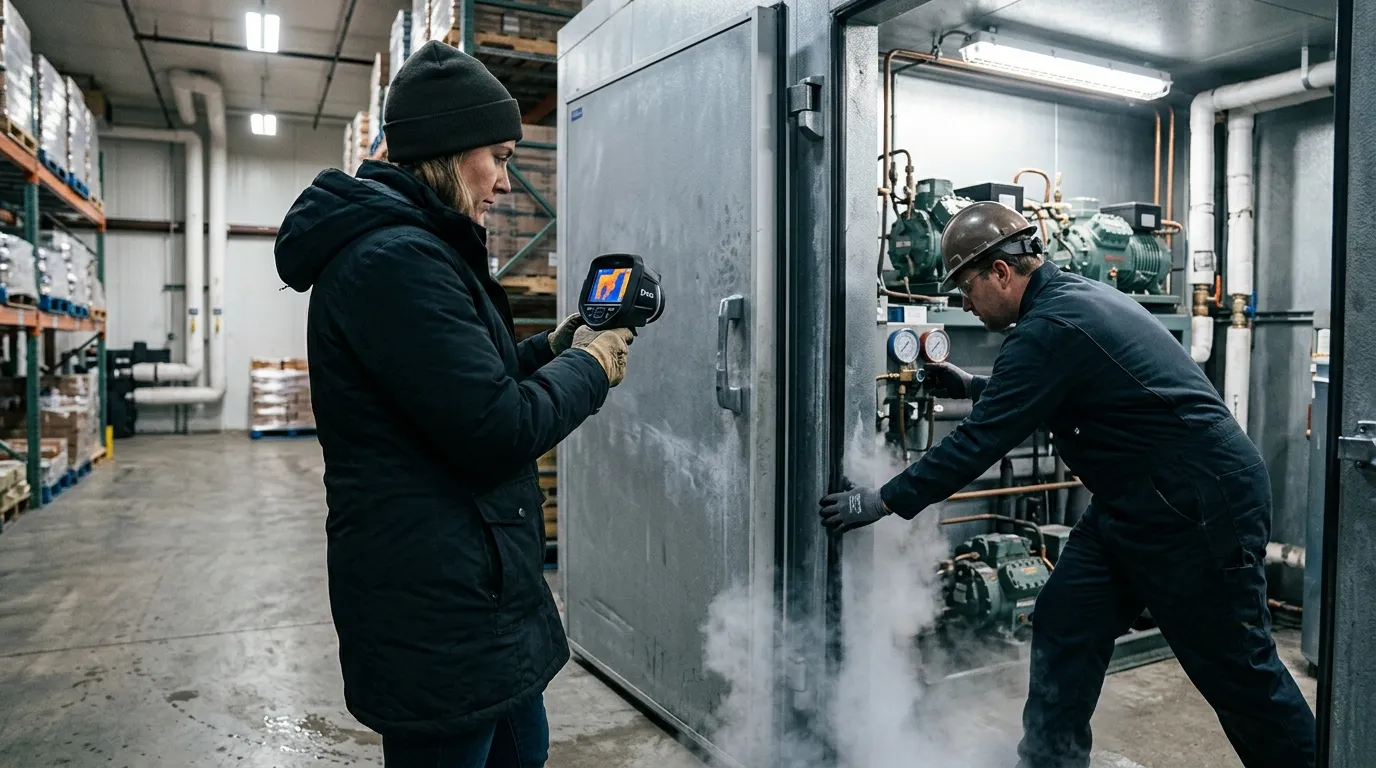
For refrigerated logistics, rear trailer doors deserve their own scan. A Thermo King Precedent S-750 or Carrier Transicold Vector 8500 can hold setpoint only if the box stops exchanging air with the yard. Scan Utility 3000R, Great Dane Everest, and Wabash refrigerated trailers at the rear frame, hinge side, lower sill, and vent door. The refrigeration unit may be fine; the leak may be a $90 gasket.
Run this quick door test before you blame the refrigeration unit:
- Close the door against a strip of paper at the top, latch side, hinge side, and bottom.
- Pull the paper. Loose pull means weak compression.
- Scan the same four points from inside the cold room.
- Mark the thermal image with the door ID, date, setpoint, and room temperature.
- Repeat after gasket cleaning or latch adjustment.
- Compare the new image with the old one before closing the work order.
A thermal image also helps stop guesswork between operations and maintenance. The operator says, “Freezer 2 won’t recover after lunch.” The technician sees a warm tongue under the roll-up door and a frost ridge on the threshold. Now the repair is specific: replace the bottom seal, inspect the heater wire, and retrain the team to clear ice before the dock rush.
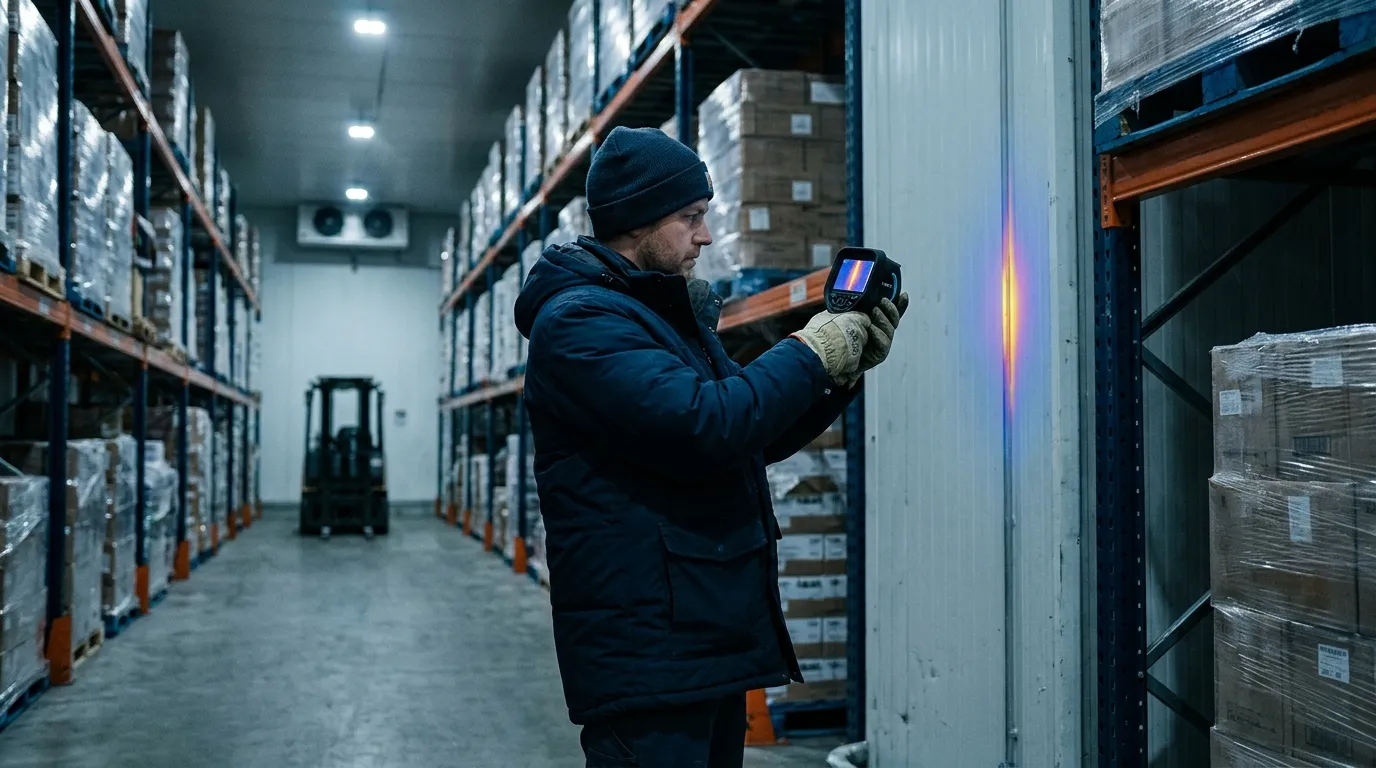
Insulated Panel Failures
Panel failures are quieter than door leaks. They don’t whistle. They don’t slam. They sit behind product racks and slowly turn electricity into waste. A failed insulated metal panel can show as a warm rectangle, a vertical stripe, or a blotchy area that doesn’t match the panel pattern beside it.
Wet insulation is the ugly version. Once moisture enters foam or mineral wool, the panel loses thermal resistance and can stay wet for months. A thermal scan won’t tell you the moisture percentage, but it can flag the suspect bay. After that, use a pinless moisture meter where the surface allows, inspect penetrations, and check roof drainage. If this is a freezer, look for frost on the warm side too. Frost outside a freezer wall is a bill with a delay.
The same discipline used when plumbers locate slab leaks & radiant heating pipes with thermal applies inside a cold room: you aren’t hunting for the pipe or leak directly every time; you’re reading the pattern left by heat moving through material. Straight lines often mean structure. Soft patches often mean moisture. Repeating marks often mean fasteners or panel geometry.
Panel seams need special attention near evaporators, door frames, pipe penetrations, and electrical conduit. A half-inch unsealed conduit gap can matter more than a scuffed wall panel because moving air carries heat and moisture. Warm air enters, moisture condenses, ice forms, the gap grows, and then the evaporator spends more time removing a problem the wall created.
| Thermal pattern | Common location | Maintenance read | Repair priority |
|---|---|---|---|
| Sharp vertical stripe | Panel joint | Sealant failure or metal bridge | High if near product zone |
| Blotchy warm patch | Wall or ceiling panel | Wet or damaged insulation | High if spreading |
| Warm halo | Pipe or conduit penetration | Air leak around sleeve | Medium to high |
| Repeating dots | Fasteners or clips | Thermal bridging | Low unless condensation appears |
Scan panel seams at a slight angle, then straight on. Move slowly. If the pattern follows your viewing angle, reflection may be fooling you. If the pattern stays fixed on the wall, you probably have a real thermal anomaly. This is where patience beats a dramatic color palette.
Refrigerated Trailer Scans
Trailers add motion, sunlight, and schedule pressure. A reefer trailer can look fine at the yard and fail on a route after four door openings, one long dwell at a grocery dock, and a driver who parks the rear doors facing afternoon sun. Thermal scanning gives you a pre-trip and post-trip way to catch weak points before they become rejected loads.
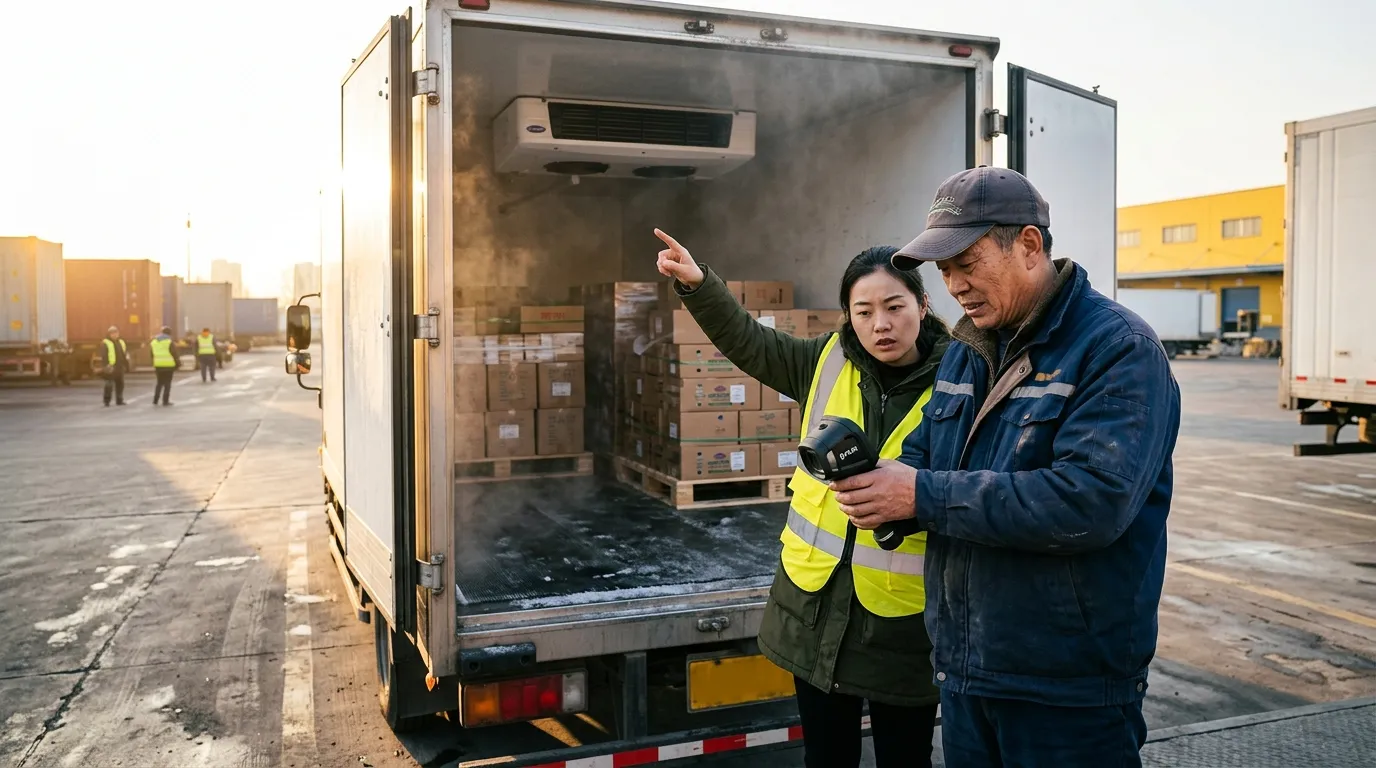
Scan before loading, not after product blocks the walls. A clean trailer inspection takes five to seven minutes: rear doors, sidewalls, ceiling, floor channels, bulkhead, drain openings, chute, and unit frame. For multi-temp trailers, scan the bulkhead and movable divider after it is locked. A divider that leaks between frozen and chilled zones can make one zone overwork while the other one drifts.
A practical trailer scan has four data points attached to every image:
| Field | Example entry | Why it matters | Mistake to avoid |
|---|---|---|---|
| Setpoint | 34°F fresh, -10°F frozen | Gives context for thermal contrast | Recording only air temp |
| Ambient | 88°F sunny yard | Explains solar load | Comparing to night scans |
| Trailer ID | Wabash RF-2048 | Ties defect to asset | Using route name only |
| Door state | Closed 10 minutes | Confirms stable condition | Scanning during open-door chaos |
Sidewalls need extra caution in direct sun. Solar gain can paint a warm rectangle that looks like insulation failure. If the sun is hitting the curb side, scan the road side too. Better yet, repeat the scan in shade or indoors. This works better than arguing over one image in a maintenance meeting.
For distribution centers with cold rooms next to offices or dry storage, moisture risk can move beyond the cold envelope. After a gasket leak or wet panel is repaired, the adjacent wall cavity may still need attention; the inspection logic behind detecting hidden moisture & mold risk behind drywall with thermal fits those mixed-use areas well. Cold-chain damage often shows up first as condensation where no one expected condensation.
Thermal imaging also helps during claims. If a receiver rejects a load, your records should include reefer download data, product probe checks, trailer pre-trip notes, and any thermal images from before dispatch. Thermal evidence won’t overrule a failed pulp temperature. It can show whether the box had visible envelope defects before the load left.
Energy And Compliance Records
Energy waste in cold storage is brutally direct. Heat leaks in. Compressors remove it. You pay twice when moisture rides with the heat, because latent load adds defrost cycles, ice, fan penalties, and labor. ENERGY STAR says certified commercial refrigerators and freezers are on average 20 percent more energy efficient than standard models, but even efficient equipment loses ground when the envelope leaks.
Compliance has a different language. The FDA FSMA Sanitary Transportation final rule, issued in 2016, requires covered shippers, loaders, carriers, and receivers to use practices that keep food safe during transport, including temperature controls when needed. A thermal image isn’t a regulatory temperature record. It is maintenance evidence that supports the control program.
Think of the record package as two folders. Folder one proves product control: calibrated probes, data logger files, reefer downloads, corrective actions, and receiving checks. Folder two proves asset condition: thermal images, gasket work orders, panel repairs, PM logs, and retest photos. Auditors and customers care about folder one first. Folder two explains why folder one stayed clean.
Use this naming format for thermal files:
2026-06-13_Freezer2_DoorA_Inside_0Fset_76Fambient_before.jpg2026-06-13_Freezer2_DoorA_Inside_0Fset_76Fambient_after.jpg2026-06-13_TrailerRF2048_RearDoor_34Fset_88Fambient_pretrip.jpg2026-06-13_Cooler5_CeilingSeam_38Fset_70Fambient_workorder8127.jpg
That level of detail feels fussy until six months later, when a customer asks why their berries warmed during a holiday weekend route. A dated image with setpoint, ambient temperature, trailer ID, and repair note is much easier to defend than “maintenance checked it.”
Don’t use thermal imaging where it doesn’t fit. If the room has no meaningful temperature difference, wait. If the target surface is mirror-like metal, add a matte reference or change your angle. If the question is “Is this pallet safe?”, use product temperature methods. If the question is “Where is heat entering this box?”, thermal earns its place.
Thermal Scan Workflow
Start with the asset list. Pick the rooms and trailers that hurt you most: high door counts, slow pull-down, repeated frost, unusual compressor runtime, rejected loads, or employee complaints about sweating walls. One freezer with a chronic ice ridge deserves attention before ten perfect coolers.
For each asset, scan the same path every time. Consistency beats drama. In a walk-in cooler, start at the main door, move clockwise around wall seams, check penetrations, scan ceiling joints, scan evaporator surrounds, then finish at the floor-wall joint. In a reefer trailer, start at rear doors, move forward along sidewalls, scan the ceiling, check the bulkhead, scan the floor channels, then finish at the unit end.
A good thermal route takes less than 15 minutes per room once the team knows it. The first pass takes longer because you are building the map and naming the assets. After that, the value comes from comparison: before repair, after repair, summer peak, winter baseline, pre-trip, post-trip.
Use a simple scoring method:
| Score | Condition | Action | Retest timing |
|---|---|---|---|
| 1 | Minor bridge, no condensation | Watch list | Next monthly scan |
| 2 | Small air leak or gasket wear | Schedule repair | Within 30 days |
| 3 | Warm seam near product or frost | Repair soon | Within 7 days |
| 4 | Major door leak, wet panel, load risk | Remove from service or restrict use | Same day |
Train two people per shift if possible. Cold-chain inspections fail when only one technician knows the camera and that person is off on inventory day. The scan path should be boring enough that a night-shift lead can repeat it without guessing.
Set the palette to something your team can read quickly. Iron and rainbow palettes make defects pop, but they can exaggerate small differences. Grayscale can be calmer for documentation. Temperature span matters more than palette choice: lock or narrow the span when comparing before-and-after images, or the camera may auto-adjust and make a repaired gasket look unchanged.
FAQ
Can thermal imaging prove food safety?
No. Thermal imaging shows surface-temperature patterns on doors, panels, floors, and trailer walls. Use calibrated probes, data loggers, and reefer downloads to document product temperature and food safety control.
What temperature difference is needed?
A 15°F to 25°F difference between the cold space and surrounding area usually gives useful contrast. Bigger differences help, especially around gaskets, panel seams, and trailer rear doors.
Can thermal scan moving trailers?
Scan parked trailers with doors closed and the reefer running at setpoint. Moving scans are poor for records because airflow, sunlight, vibration, and changing backgrounds can distort the image.
Do shiny panels affect readings?
Yes. Stainless steel and glossy liners reflect heat from people, forklifts, lights, and open dock doors. Change the angle or add a small matte tape reference spot before trusting the reading.
How often should teams scan?
Scan high-use doors weekly, refrigerated trailers before peak routes, and full cold rooms monthly. Also scan after gasket replacement, panel repair, forklift impact, water intrusion, or any unexplained pull-down problem.
Before the next dock rush, pick one cooler and run a 12-minute Pixfra scan: door gasket, lower sill, latch side, ceiling seams, pipe penetrations, and floor-wall joint. Save one before image, fix one visible defect, then rescan the same spot under the same setpoint. That single before-and-after pair is the fastest way to turn thermal inspection from a neat picture into a maintenance habit.