Yritätkö päättää, valitsetko kiinnitettävän lämpökameran vai erillisen lämpökameran? Molemmat mahdollistavat metsästyksen pimeän tultua, mutta ne toimivat hyvin eri tavoin. Olemme testanneet lämpökameroita maastossa vuosien ajan, ja tässä on se, mikä todella on tärkeää, kun valitset näiden kahden vaihtoehdon välillä.
Kiinnitettävä lämpökamera – jota kutsutaan myös lämpökameran etukiinnikkeeksi – asennetaan suoraan olemassa olevan päiväkiikarin eteen. Se muuttaa päiväkiikarin lämpökiväärikiikariksi heijastamalla lämpökuvan tavallisen ristikon läpi ilman, että nollaus on tehtävä uudelleen. Päiväkiikaria ei tarvitse irrottaa. Kiinnitettävä lämpökamera kiinnitetään objektiivin päähän, yleensä sovitinrenkaalla, joka kiinnitetään kiikarin objektiivin suuhun, tai päiväkiikarin eteen sijoitetulla Picatinny-kiskokiinnikkeellä. Kun olet suorittanut alkuperäisen kohdistusprosessin (ns. kollimaation), kiinnitettävä lämpökamera ja päiväkiikarisi toimivat yhdessä yhtenä järjestelmänä. Lämpökamera näyttää kohteen lämpökartan, ja päiväkiikarin ristikko kertoo, mihin luoti osuu.

Erillinen lämpökamera korvaa päiväoptiikan kokonaan. Siinä on oma näyttö, tähtäin, zoomausjärjestelmä ja säätimet. Se on suunniteltu nimenomaan lämpökuvaukseen, joten saat käyttöösi nimenomaan yöammuntaan tarkoitetun kokonaisuuden. Kaikki on suunniteltu alusta alkaen lämpökuvausta varten – infrapunasensori, sisäinen OLED-mikronäyttö, valikkokäyttöliittymä – ja ne kaikki toimivat yhdessä yhtenäisenä, itsenäisenä kokonaisuutena. Ajattele sitä työkaluna, joka tekee yhtä asiaa ja tekee sen huipputasolla.
Koska koko optinen järjestelmä on suunniteltu lämpökuvaukseen, erilliset lämpökamerat tarjoavat korkeamman resoluution vaihtoehtoja, joissa on usein suuremmat linssit, jotka mahdollistavat paremman perus suurennuksen ja selkeämmät kuvat pidemmillä etäisyyksillä. Esimerkiksi Pixfra Pegasus 2 LRF- ja Chiron LRF -sarjoissamme on integroidut laseretäisyysmittarit, joiden kantama on 1000 m, useita nollausprofiileja ja sisäänrakennetut ballistiset laskimet – kaikki kiikarin rungon sisällä. Kiinnität sen, nollaat sen, ja olet valmis metsästämään. Mitä siitä menetetään? Kiväärisi menettää päiväkäyttöön tarkoitetun optiikkansa. Jos haluat metsästää päivällä perinteisellä kiikarilla, joudut vaihtamaan kiikareita – ja se tarkoittaa joko uudelleennollausprosessia tai luotettavan pikakiinnityksen (QD) käyttöä, joka säilyttää nollauksen kiikareiden välillä. Monet innokkaat lämpökameraa käyttävät metsästäjät ratkaisevat tämän pitämällä toista kivääriä valmiina pelkästään yömetästystä varten tai investoimalla oikeaan lisävarusteita, joilla voidaan parantaa lämpökameran suorituskykyä, kuten QD-kiinnikkeet, joissa nollapiste säilyy kiväärin vaihdosta huolimatta.
Katsotaanpa asiaa tarkemmin. Kiinnitettävät lämpökamerat mahdollistavat nopean siirtymisen yö- ja päivämetsästyksen välillä vaikuttamatta päiväoptiikan nollapisteeseen. Voit pitää jo hankkimasi päiväkäyttöön tarkoitetun kiikarin, ja kiinnitettävä lämpökamera lisää lämpöhavainnointikyvyn, kun valo himmenee. Voit siirtyä päiväsaalistuksesta yölliseen saalistajien metsästykseen samalla aseella, samalla nollapisteellä ja ilman seisokkiaikaa. Jos aiot pysyä yhdessä päiväkäyttöön tarkoitetussa kiikarissa ja kiväärissä, kiinnitettävä lämpökamera on joustava ja kustannustehokas valinta. Kiinnitettävät lämpökamerat toimivat myös useiden kiväärien kanssa, jos sinulla on sopivat sovittimet, ja kuten mainitsimme, monet mallit toimivat myös kädessä pidettävinä lämpömonokulaareina, joilla voit tarkkailla ja tiedustella ennen kuin asettut ampumaan.
Kiinnitettävissä kiikareissa on kuitenkin selkeitä haittoja. Kiinnitettävän kiikarin suurin haittapuoli on, että sen optinen tarkkuus ei ole sama kuin erillisen laitteen, joten ammunta ei välttämättä ole yhtä tarkkaa tai täsmällistä. Päiväkiikarin suurennus vaikuttaa suoraan lämpökuvaan – jos suurennus ylittää noin 6x–8x, zoomaat digitaaliseen näyttöön, jossa pikselit tulevat selvästi esiin ja yksityiskohdat pehmenevät. Kiinnitettävä kaukoputki asennetaan päiväkäyttöisen kiväärikaukoputken eteen objektiivin suuttimeen kiinnitettävän liitännän avulla, mikä lisää etuosan pituutta ja painoa, jolloin aseesta tulee erittäin etupainoinen ja sen koko kasvaa. Kiinnityksen kohdistuksen on oltava täysin tarkka – jos kiinnitettävä lisälaite ei ole täydellisesti keskitetty päiväkiikarin objektiivin päälle, laukauksesi menevät ohi. Vaikka clip-on-kiikareita markkinoidaan helposti kivääreiden välillä siirrettäviksi, niiden siirtäminen aseesta toiseen on kyllä kätevää, mutta siirron yhteydessä joudutaan silti mahdollisesti suorittamaan uudelleenkolimointi, jotta se kohdistuu uuteen päiväkiikariin.

Erikoistuneet lämpökamerat vaihtavat tuon joustavuuden suorituskykyyn. Saat teräviä, selkeitä kuvia, joita katsellessa ei tarvitse siristää silmiä, sisäänrakennetut tähtäinristikot ja ballistiset laskimet sekä vankan, yksinkertaisen rakenteen, jossa on vähemmän liikkuvia osia. Niitä on helpompi käyttää – kiinnittää, nollata, metsästää – ilman, että pimeässä tarvitsee vaivautua sovittimen kohdistamiseen. Haittapuolena on, että kivääri muuttuu yksikäyttöiseksi yövälineeksi, kun lämpökamera on kiinnitettynä. Sinun on nollattava laite uudelleen, jos vaihdat kivääriä ilman laadukasta pikakiinnikettä, ja ne lisäävät painoa – vaikka kevyet mallit, kuten Pixfra Draco -sarjamme, onkin suunniteltu minimoimaan tämä ongelma.
Tässä on rinnakkaisvertailu, josta erot käyvät selvästi ilmi:
| Ominaisuus | Kiinnitettävä lämpövaate | Erillinen lämpökamera |
|---|---|---|
| Pitää päiväkiikarisi paikallaan | Kyllä | Ei — korvaa sen |
| Nollaus on tarpeen | Ei (alkukollimoinnin jälkeen) | Ei (mutta tarvitaan, jos vaihdetaan kivääreitä ilman pikakiinnitystä) |
| Kuvanlaatu | Hyvä, mutta rajoitetumpi kuin erillinen | Paras saatavilla oleva |
| Sisäänrakennettu tähtäinristikko | Käyttää päiväkiikarin ristikkoa | Kyllä — useita ristikkovaihtoehtoja |
| Laseretäisyysmittari | Joitakin malleja | Yleistä keski- ja huippuluokan malleissa |
| Ballistinen laskin | Harvinainen | Yleistä LRF-malleissa |
| Kiväärin painon lisäys | Etupainoinen | Korvaa päiväkiikarin painon |
| Toimii myös monokulaarina | Kyllä (okulaarin kanssa) | Ei |
| Tyypillinen hintaluokka | $1 000 – $6 000+ | $1 000 – $5 000+ |
| Sopii parhaiten | Monikäyttöiset, joustavat kokoonpanot | Erityisesti yömetsästykseen tarkoitetut varusteet |
Kuvanlaatu on suurin kiistanaihe keskustelussa, jossa verrataan kiinnitettäviä ja erillisiä lämpökameroita, ja se riippuu kolmen tekijän yhteisvaikutuksesta: anturin resoluutiosta, NETD-arvosta ja itse optisesta järjestelmästä. Jos jätät jonkin näistä huomiotta, tulet pettymään – riippumatta siitä, minkä tyyppisen lämpökameran ostat.
Anturin resoluutio kertoo, kuinka monta lämpöpikseliä ilmaisin tuottaa. Kaksi yleistä resoluutiotasoa ovat 384×288 ja 640×512. 640×512-anturissa on lähes kolme kertaa enemmän pikseleitä kuin 384×288-anturissa, ja tämä ylimääräinen pikselitiheys tekee suuren eron, kun zoomaat päiväkiikarilla tai yrität tunnistaa kohteen yli 200 jaardin päässä. Erillisissä lämpökameroissa yhdistetään yleensä korkeamman resoluution anturit suurempiin objektiivilinsseihin – 50 mm tai 75 mm – mikä tarkoittaa parempaa perus suurennosta ja terävämpiä yksityiskohtia heti alusta alkaen. Kiinnitettävät mallit ovat tässä suhteessa rajoittuneita, koska lämpökuva kulkee päiväkiikarin optiikan läpi. Jokainen päiväkiikarin puolelta lisätty suurennuskerroin vain suurentaa kiinnitettävän laitteen näyttöä. Kun kiinnitettävässä laitteessa on 640×480-anturi eikä siinä itsessään ole optista suurennusta, noin 8-kertainen suurennus on raja, jolla suorituskyky on paras.
NETD (Noise Equivalent Temperature Difference) kertoo, kuinka herkkä lämpöanturi on pienille lämpötilan muutoksille. NETD mitataan millikelvineinä (mK), ja periaate on yksinkertainen: mitä pienempi NETD-arvo on, sitä suurempi on anturin herkkyys ja sitä parempi kuvanlaatu. Useimpien laadukkaiden lämpökameroiden NETD-arvo on alle 25 mK. Pixfran laitteiden NETD-arvo on ≤18 mK, mikä sijoittaa ne metsästyskäyttöön tarkoitettujen lämpökameroiden herkkyysasteikon huippupäähän. Alhainen NETD-arvo on tärkeintä lämpimissä olosuhteissa, joissa taustalämpötilat ovat lähellä kohteen ruumiinlämpöä, tai sumussa, sateessa ja kosteissa olosuhteissa, joissa kuvan kontrasti heikkenee. Kun NETD-arvo on heikko, järjestelmällä on vaikeuksia havaita jäljellä olevia heikkoja eroja ja kuvanlaatu heikkenee nopeasti. Sen sijaan matalan NETD-arvon omaava anturi säilyttää kuvan selkeyden olosuhteissa, joissa heikommat kamerat ovat käytännössä sokeita. Käytitpä sitten kiinnitettävää tai erillistä kiikaria, tarkista NETD-arvo – se on yksi parhaista käytännön suorituskykyindikaattoreista.
Käytännössä erillinen lämpökamera on valtaosassa tilanteita parempi kuin kiinnitettävä malli, kertovat kokeneet metsästäjät, jotka ovat käyttäneet molempia ratkaisuja. Katsot erityisesti tätä tarkoitusta varten suunnitellun optisen reitin läpi, eikä sinun ja lämpökuvan välissä ole mitään – ei ylimääräistä lasia, ei sovitinta, ei kohdistusmuuttujia. Tuloksena on nopeampi kohteen paikantaminen ja varmempi tunnistaminen (PID), etenkin yli 200 jaardin etäisyydellä, jossa yksityiskohdat ratkaisevat, osuuko laukaus vai meneekö se ohi. Kiinnitettävät laitteet pärjäävät kuitenkin hyvin tyypillisillä petoeläinten metsästysetäisyyksillä, alle 300 jaardin päässä. Kiinnitettävä laite toimii hyvin kojootinmetsästyksessä, vaikka erillinen aseen tähtäin onkin helpompi käyttää. Riippuen siitä, mitä olet tekemässä, aseen tyypistä, kunkin aseen kiikareista ja etäisyydestä, toinen vaihtoehto voi olla parempi kuin toinen.[9] Valintasi riippuu siitä, kuinka kauas ammut ja kuinka suuri osa metsästyksestäsi tapahtuu pimeän tultua.
Yhtä yleispätevää vastausta ei ole, mutta valinta kaventuu nopeasti, kun tarkastelee omaa metsästystapaansa.
Valitse kiinnitettävä lämpökamera, jos sinulla on jo laadukkaat päiväkäyttöön tarkoitetut kiikarit ja haluat jatkaa niiden käyttöä. Jos metsästyksesi tapahtuu sekä päivällä että yöllä – esimerkiksi iltavartioinnit, jotka jatkuvat pimeän tultua, tai aamuiset petoeläinten väijytykset, jotka alkavat ennen aamunkoittoa – kiinnitettävän lämpökameran avulla voit käyttää yhtä kivääriä kaikkiin tilanteisiin menettämättä päiväkäyttöön säädettyä nollapistettä. Se on myös järkevämpi valinta, jos olet budjettitietoinen etkä halua investoida kokonaan erilliseen yömetsästysvarustukseen. Kiinnitettävän lämpökameran avulla saat yhden kiväärin, yhden optiikan ja kaksi tilaa – päivänvalon kirkkauden ja lämpökuvauksen tarkkuuden. Tämä kustannustehokas päivitys lisää edistyneitä lämpökuvausominaisuuksia murto-osalla siitä, mitä erillinen täysimittaisen kiikarin hankinta maksaisi. Yhdistä kiinnitettävä laite laadukkaaseen QD-kiinnikkeeseen ja luotettaviin varaparistoihin, niin saat varustuksen, joka kattaa useimmat yöjahdin tilanteet tyhjentämättä tiliäsi.

Erilliset lämpökamerat sopivat yleensä paremmin niille, jotka metsästävät usein yöllä tai hämärässä, sillä ne on optimoitu juuri tällaisiin olosuhteisiin. Jos harjoitat tilallasi koko yön kestäviä villisikojen hävittämisoperaatioita, säännöllistä saalistajien torjuntaa tai aktiivista kojoottien hallintaa, erillinen lämpökamera tarjoaa sinulle paremman kuvanlaadun, nopeamman kohteen paikantamisen sekä integroidut työkalut – etäisyysmittarit, ballistiset laskurit, videotallennus – yhdessä paketissa. Jos erillisen yömetsästysjärjestelmän rakentaminen mahtuu budjettiin, monilla AR-alustaa käyttävillä metsästäjillä on yksi yläosa päiväkäyttöön ja toinen yläosa lämpökameraa varten. Molemmat voidaan nollata erikseen, ja niiden vaihtaminen kestää vain muutaman sekunnin. Pixfra Sirius HD -sarjamme tarjoaa havaitsemisetäisyyksiä jopa 3600 metriin asti, kun taas Taurus LRF:ssä on erittäin tarkka 0,9 cm@100m-napsautusarvo tarkkaan nollaukseen – juuri tällaiset tekniset tiedot tekevät erikoistuneista varustuksista vakaville yömetsästäjille kannattavan investoinnin.
Jos budjetti sallii ja haluat kattavan suojan, käytä molempia. Erillinen lämpökamera pääasiallisessa yömetsästyskiväärissäsi sekä kiinnitettävä lämpökamera tai lämpömonokulaari tiedusteluun ja varalaitteeksi tarjoavat sinulle molempien maailmojen parhaat puolet. Alkuinvestointi on suurempi, mutta erillisen laitteen suorituskyvyn ja kiinnitettävän laitteen joustavuuden yhdistelmä kattaa kaikki tilanteet nopeista iltametsojen metsästyksistä monipäiväisiin saalistajien metsästysretkiin. Monet kokeneet lämpökamerametsästäjät päätyvät tähän ratkaisuun, kun he ovat nähneet kummankin järjestelmän vahvuudet kentällä, ja suosittelemme tätä kokoonpanoa kaikille, jotka suhtautuvat lämpökamerametsästykseen vakavasti pitkällä aikavälillä.
Heikentääkö kiinnitettävä lämpökamera kuvanlaatua?
Se kyllä heikentää kuvaa, mutta kuinka paljon, riippuu sekä kiinnitettävän laitteen että päiväkiikarin laadusta. Kyseessä on kahden optisen järjestelmän yhdistelmä, joten kuvan terävyydessä ja kontrastissa on odotettavissa jonkin verran heikkenemistä verrattuna erilliseen lämpökameraan. Kohtuullisella suurennuksella (alle 6x–8x) hyvä kiinnitettävä lämpökamera tarjoaa täysin käyttökelpoisen kuvanlaadun villisikojen ja kojoottien metsästykseen 300 jaardin säteellä. Jos kuitenkin nostat suurennusta, kuva pikselöityy nopeasti – zoomaat pienelle näytölle, etkä saa todellista optista suurennusta. Jos kuvanlaatu on sinulle tärkein asia, erillinen lämpökamera on selvä voittaja.
Voiko erillisen lämpökameran vaihtaa kivääristä toiseen?
Kyllä, kunhan kiinnike on oikeanlainen. Hyvän nollapisteen palautuskiinnikkeen, kuten ADM:n tai LaRuen, ja useiden nollapisteprofiilien avulla – joita löytyy useimmista nykyaikaisista lämpökameroista – voit silti vaihtaa kiikaria kivääristä toiseen. Useimmissa nykyisissä lämpökameroissa voit tallentaa eri kivääreille omat nollapisteasetuksensa ja vaihtaa niiden välillä valikon kautta. Tärkeintä on, että kiinnikkeen korkeus on sama jokaisessa aseessa. Ilman pikavapautuskiinnikettä joudut nollaamaan aseen uudelleen joka kerta, kun vaihdat asetta, mikä vie ammuksia ja aikaa.
Siirtääkö kiinnitettävä pidike iskukohdan?
Joidenkin kiinnitettävien kiikareiden ongelmana on, että osumapiste voi siirtyä zoomin ja parallaksin mukaan. Alle 75 jaardin etäisyydellä tämä ei ehkä ole suuri ongelma, mutta 150 jaardin etäisyydellä siirtymä voi riittää osuman menettämiseen. Laadukas kiinnitettävä tähtäin, jossa on vankka sovitin tai kiskokiinnitysjärjestelmä, pitäisi säilyttää tasaisen osumapisteen asianmukaisen suuntauksen jälkeen. Mutta tekijät kuten päiväkiikarin suurennusasetus, parallaksin säätö ja sovittimen istuvuus voivat kaikki aiheuttaa siirtymää. Testaa laitteesi ampumaradalla ennen kuin luotat siihen maastossa, ja tarkista nollapisteesi aina, kun siirrät sen uuteen kiikariin.
Kannattaako hankkia erillinen lämpökamera kiinnitettävän mallin sijaan?
Säännöllisesti yöllä metsästävien osalta kyllä. Erilliset kiikarit tarjoavat terävämpiä kuvia, reagoivamman suorituskyvyn ja kattavan valikoiman sisäänrakennettuja työkaluja – laseretäisyysmittarit, ballistiset laskimet, videotallennus, useita ristikkovaihtoehtoja – vertailukelpoisilla hinnoilla. Säännölliseen yömetsästykseen erikoistunut kokoonpano, jossa on lämpökamera, tarjoaa ylivoimaista suorituskykyä ja käyttömukavuutta. Satunnaiselle yömetsästäjälle, joka ampuu pääasiassa päivänvalossa, kiinnitettävä lisälaite tuo lämpökuvausominaisuuden olemassa olevaan varustukseen ilman, että tarvitsee hankkia toista kivääriä.
Minkälaista anturin tarkkuutta tarvitset kiinnitettävään lämpökameraan?
640×512-anturi on paras valinta kiinnitettäviin lämpökameroihin. Sen pikselimäärä on noin kolme kertaa suurempi kuin 384×288-anturilla, mikä tarkoittaa terävämpiä yksityiskohtia, kun zoomaat päiväkiikarillasi, sekä parempaa kohteen tunnistettavuutta yli 200 jaardin etäisyydellä. Kiinnitettäviä lämpökameroita on saatavana kolmella eri resoluutiolla: 256, 384 ja 640, ja ne tarjoavat erilaisia suorituskykytasoja. Jos metsästät alle 200 jaardin etäisyydellä – esimerkiksi metsästät villisikoja metsästyskojusta – 384-resoluutioinen kiinnitettävä lämpökamera toimii hyvin ja on edullisempi. Jos metsästät kojootteja kaukaa tai missä tahansa tilanteessa, jossa sinun on erotettava kohde etäisyydellä olevasta pensaasta, kannattaa panostaa 640-resoluutioon. Ero kohteen tunnistamisessa on ilmeinen.
Your AR-15 deserves a thermal scope that actually works in the field. We’ve spent years testing thermal optics on AR platforms—budget picks, mid-range workhorses, and premium units. The market in 2026 is packed. Here are the six best thermal scopes for AR-15 that we’d put our own money on.
The AR-15’s lightweight aluminum construction and modular design make it adaptable for a wide range of purposes, from hunting to tactical applications.Its standard Picatinny rail gives you a plug-and-play platform for just about any optic, and thermal scopes are no exception. Whether you’re running predator control at night, wiping out feral hogs on your property, or scanning for coyotes across open fields, a thermal scope turns your AR into a true 24/7 hunting machine. And with the right thermal scope accessories like quick-detach mounts and extended battery solutions, you can squeeze even more performance out of your setup.
Thermal riflescopes detect heat differences, not light. That means they keep working in total darkness, fog, light rain, or smoke—conditions where traditional optics struggle or fail outright.Pair that with the AR-15’s semi-automatic action and fast follow-up shots, and you’ve got a night hunting rig that’s hard to beat. Thermal scopes are a must if you’re hunting nocturnal game like coyotes, hogs, and other varmints and predators during nighttime and low-light conditions.
We’ve tested thermal scopes across everything from 95°F Texas summer nights to freezing December hunts. The six picks below earned their spots through real field performance—not spec sheet hype. We also leaned on data from Pixfra’s thermal device lineup, which gave us a solid baseline for sensor sensitivity and detection range benchmarks across price tiers.
Not every thermal scope fits an AR-15 well. A few specs separate a good match from a bad one, and we want to save you from learning that the hard way.
Anturin erottelukyky is the first thing to check. Resolution is a measure of how much detail your image will have, so the higher the resolution of your sensor, the more finely rendered your image will be.A 384×288 sensor works fine for close-to-mid range hog hunting inside 200 yards. If you’re pushing past 300 yards or targeting smaller game like coyotes, step up to a 640×480 or 640×512 sensor for cleaner target ID. NETD rating tells you how sensitive the thermal sensor is to small temperature differences—lower numbers mean better performance. Scopes under 20mK pick up faint heat signatures that cheaper units miss completely, especially on warm nights when background temps run close to your target’s body heat.
Päivittymisnopeus affects how smooth your image looks when you’re tracking a moving target. A 60Hz refresh rate ensures fast-moving objects appear clear on the HD display. Anything below 30Hz can look choppy, especially on running hogs. Magnification range should match your typical engagement distances. For AR-15 use, a 1x–8x or 2x–16x range covers most hunting scenarios without piling on extra weight. High magnification looks appealing on paper, but thermal image quality drops quickly if you over-zoom. Many hunters spend most of their time between 2x and 6x, even on scopes capable of much more.
Finally, make sure the scope is rated for semi-auto recoil and mounts cleanly to a Picatinny rail. Quality night vision and thermal scopes should hold zero on a semi-auto rifle. Problems usually arise from low-quality mounts, loose fasteners, or scopes intended only for low-recoil platforms.QD mounts are a bonus if you swap between day glass and thermal on the same rifle.
Here’s a quick comparison of the top thermal rifle scope tiers we recommend for AR-15 platforms this year. We’ve organized them by performance level so you can match your budget to your hunting style:
| Tekniset tiedot | Aloittelijataso | Keskitaso | Premium |
|---|---|---|---|
| Anturin tarkkuus | 256×192 | 384×288 | 640×480 / 640×512 |
| NETD | ≤25 mK | ≤20 mK | ≤18 mK |
| Päivitysnopeus | 25–50Hz | 50–60Hz | 60Hz |
| Havaitsemisalue | ~800m | ~1 500 m | ~2,500m+ |
| Akun kesto | 4–6 tuntia | 6–10 tuntia | 8–15 tuntia |
| Laseretäisyysmittari | Harvinainen | Sometimes | Often Included |
| Ballistic Calculator | Ei | Sometimes | Kyllä |
| Typical Price | $1 000 – $2 000 | $2 000–$4 000 | $4,000–$8,000+ |
Key stat: According to USDA estimates, feral hogs cause over $2.5 billion in damage annually across the U.S. That’s driven a surge in thermal scope demand, especially among AR-15 owners in Texas, Oklahoma, and the Southeast running nighttime eradication programs.
The sweet spot for most AR-15 owners in 2026 sits in that mid-range tier. A 384×288 sensor with a 50Hz or 60Hz refresh rate, 6+ hours of battery life, and a built-in ballistic calculator gives you solid image quality and reliable target ID without burning through $6,000. Thermal optics are usually mounted on AR-15, a bolt-action rifle, or rifles chambered in .300 Winchester Magnum, .308 Winchester, 6.5 Creedmoor, or the .243 Winchester for coyote.All of these calibers pair well with mid-range thermal scopes that handle the recoil without losing zero.
For those who want the absolute best, premium 640-class sensors with integrated laser rangefinders and onboard video recording deliver performance that was purely military-grade just a few years ago. We’ve seen NETD values as low as ≤18mK and detection ranges stretching past 3,600 meters on top-tier models—numbers that make positive target ID at 400+ yards a real possibility, not just a marketing claim.
Mounting a thermal scope on an AR-15 is straightforward, but a few details make a big difference. AR-15s are naturally more forgiving when it comes to optic height-over-bore, thanks to their straight-line recoil system and higher receiver. This gives you more freedom to run thermal optics slightly higher without breaking your cheek weld.A 1.54″–1.93″ mount height works well for most setups.
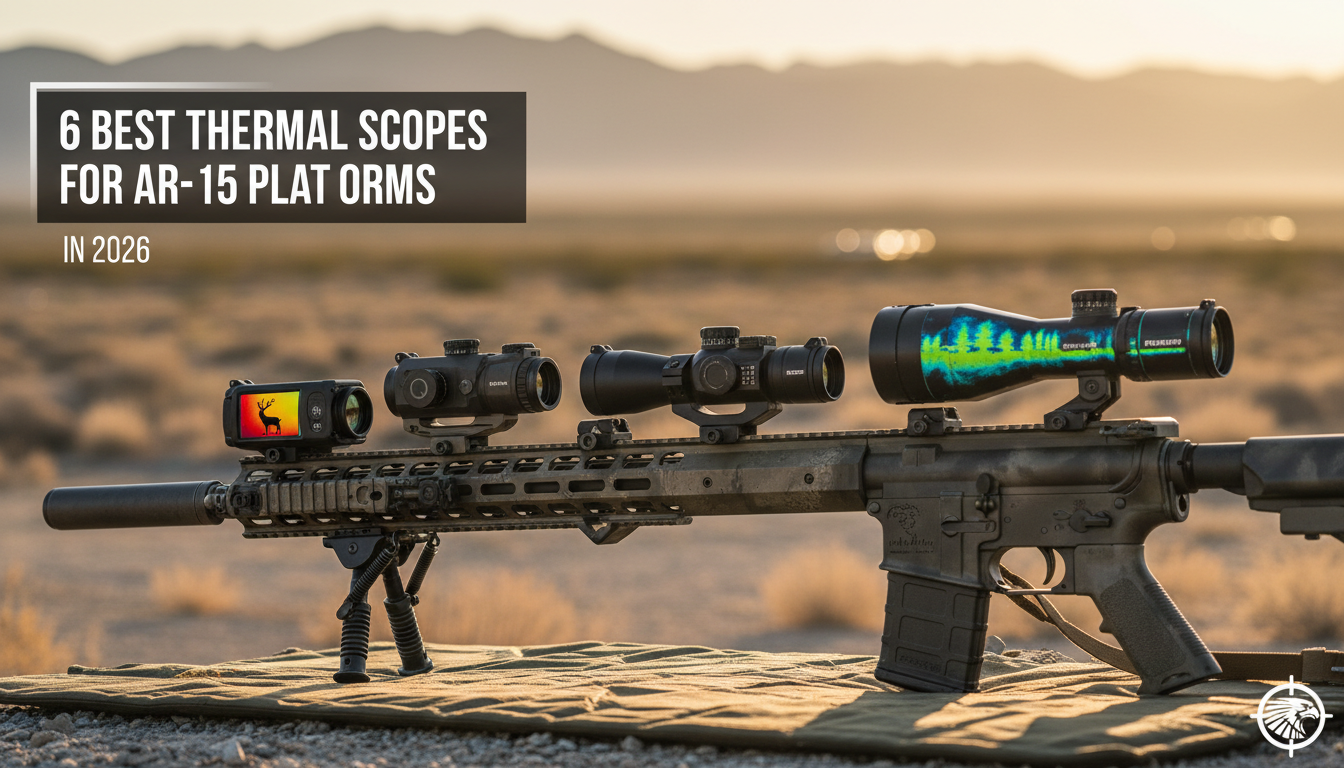
Use a quality mount—preferably a QD mount if you plan to swap between day and thermal optics. Torque your rings to spec and double-check that everything is level before zeroing. Most modern thermal scopes feature one-shot zero or digital zeroing, which speeds up the process. Fire a shot, move the digital reticle to your point of impact, confirm with a follow-up, and you’re done.
One thing to watch: short-barreled ARs with muzzle brakes can blast unburnt powder toward your scope’s sensor window. A suppressor or linear comp protects the sensor window from unburnt powder blast on short barrels.It also cuts down on heat mirage in your thermal image, which can mess with your sight picture at close range.
Battery life can end your hunt early if you don’t plan ahead. Digital thermal scopes typically have shorter battery life, averaging 4–8 hours. For all-night hog eradication or multi-stand predator sessions, carry at least two sets of spare 18650 batteries—they’re rechargeable, lightweight, and easy to find. An external power bank (10,000+ mAh) can also run many thermal scopes via USB-C for 10+ hours straight.
Cold weather kills battery performance faster than you’d expect. Keep your spares in an inside jacket pocket where body heat keeps them warm. And turn your scope off between stands when you’re not actively scanning—this alone can stretch your runtime by 30–40% on a long night.
Can you use a thermal scope on an AR-15 during the day?
Yes. Thermal scopes detect heat, not light, so they work in daylight, shade, and complete darkness. Some models include adjustable apertures to handle bright conditions without washing out the image.
Will a thermal scope hold zero on a semi-auto AR-15?
A quality thermal scope rated for semi-auto recoil holds zero without any issues. Make sure the mounting hardware is robust and recoil-resistant to handle the AR-15’s kick without loosening. Cheap mounts are usually the problem—not the scope itself.
What’s the best budget thermal scope for an AR-15?
In the $1,000–$2,000 range, scopes with 256×192 sensors deliver solid performance for close-range hog and varmint hunting. They won’t match premium units at distance, but they get the job done inside 200 yards.
Is thermal better than night vision for AR-15 hunting?
For most hunting—especially hog and predator control—thermal wins. Thermal and night vision solve different problems. Thermal excels at detection and tracking, while night vision can be better for navigation and detail in some environments. But thermal works through brush, fog, and pitch black conditions where night vision struggles.
Are thermal scopes legal for hunting in all 50 states?
Thermal optics are legal to own and use in all 50 states. However, some states restrict their use for hunting: California prohibits thermal for big game hunting, and several states ban nighttime hunting of certain species regardless of equipment. Always check your local regulations before heading out.
Olet käyttänyt paljon rahaa lämpökameraasi. Mutta asia on näin: kamera itsessään on vain osa kokonaisuutta. Oikeat lisävarusteet voivat muuttaa hyvän varustuksen merkittävään etuun maastossa.
Olemme testanneet vuosien varrella kymmeniä lämpökameran lisävarusteita, edullisista perusmalleista huippuluokan lisävarusteisiin. Jotkut niistä tuovat todellista lisäarvoa. Entä muut? Ne vain lisäävät reppusi painoa. Esittelemme viisi lisävarustetta, joilla on todellista merkitystä, kun metsästät villisikoja keskiyöllä tai jäljität saalistajia tilallasi.

Aloitetaan siitä, mikä pitää kaiken koossa – kiinnikkeestäsi.
Jos käytät useita kivääreitä tai vaihdat lämpökameran ja päiväoptiikan välillä, pikakiinnike säästää sinulle arvokasta aikaa maastossa. Näiden kiinnikkeiden avulla voit irrottaa ja kiinnittää lämpökameran uudelleen muutamassa sekunnissa säilyttäen samalla nollapisteen. Sinun ei tarvitse säätää tähtäintä uudelleen joka kerta, kun vaihdat laitteita.
Etsi kiinnikkeitä, jotka on valmistettu lentokonelaatuisesta alumiinista. Ne ovat riittävän kevyitä, jotta ne eivät rasita kivääriäsi, mutta riittävän vahvoja kestämään magnum-kaliiperien rekyylin. Korkeussäädettävien mallien avulla voit säätää silmäetäisyyden ja poskituen juuri sinun kiväärisi kokoonpanoon sopiviksi.
Ja tässä on se, mitä useimmat ihmiset jättävät huomiotta: ulokekiinnikkeet voivat olla käänteentekijä, jos käytettävissä on vain rajoitetusti tilaa kiskolla. Ne sijoittavat kiikarin eteenpäin, jolloin saat riittävän silmäetäisyyden ilman, että kiinnitystila loppuu kesken.
Olemme käyttäneet Pixfra-lämpökamerat jo vuosien ajan laadukkailla QD-kiinnikkeillä. Mahdollisuus siirtää lämpökameraa kivääristä toiseen metsästyksen aikana on joka pennin arvoista.
Akun kesto voi ratkaista metsästyksesi onnistumisen tai epäonnistumisen. Siinä kaikki.
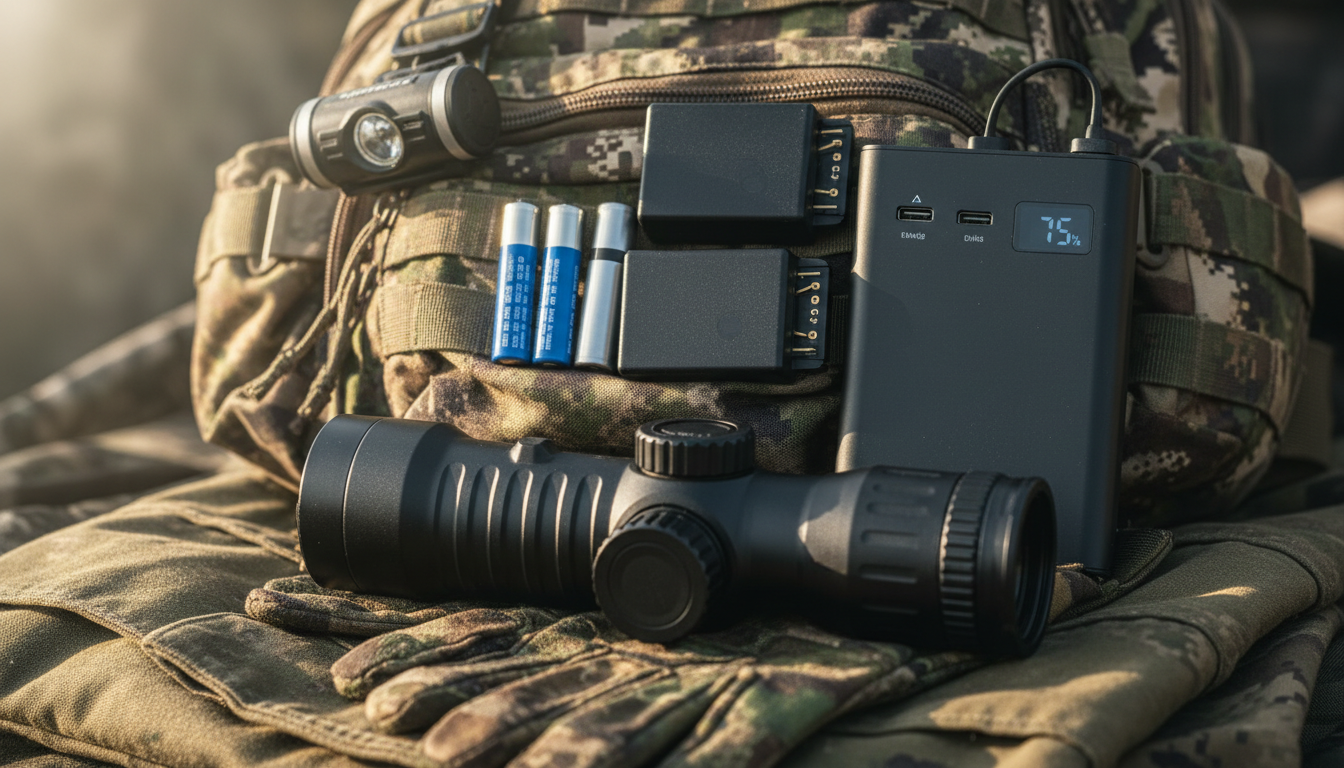
Useimmat lämpökamerat toimivat sisäisillä akuilla 3–6 tuntia. Se riittää hyvin lyhyelle iltaretkelle, mutta entä koko yön kestävä villisikojen hävittäminen tai pitkäkestoinen saalistajien torjunta? On turhauttavaa, kun akku loppuu juuri silloin, kun lämpöjäljet alkavat näkyä.
Ota mukaan vähintään kaksi sarjaa varaparistoja. Ladattavat 18650-malliset litiumioniakut, joiden kapasiteetti on 3000–3500 mAh, sopivat erinomaisesti päävirtalähteeksi. Pidä CR123A-litiumparistoja hätätilanteiden varalle – ne ovat kevyempiä ja niiden säilyvyysaika on pidempi.
Ulkoiset varavirtalähteet ovat mullistaneet metsästystapamme. 10 000–20 000 mAh:n kannettava varavirtalähde pystyy pitämään lämpökameran käynnissä yli 10 tuntia yhtäjaksoisesti. Monet nykyaikaiset kaukoputket tukevat USB-virransyöttöä, mikä tekee lataamisesta maastossa erittäin helppoa. Kiinnitä varavirtalähde kivääriisi tai laita se reppuusi.
Pikalaturit ovat käteviä metsästysretkien välissä. Ne lataavat akut täyteen 2–3 tunnissa, mikä sopii erinomaisesti peräkkäisiin metsästyspäiviin. Autolatureilla voit täydentää akkujen varausta pitkien ajomatkojen aikana metsästyspaikoille.
Ammattilaisen vinkki: kylmä sää heikentää paristojen suorituskykyä. Säilytä varaparistoja sisätaskussa, jossa kehon lämpö pitää ne lämpiminä. Opimme tämän kantapään kautta joulukuussa pidetyn villisikametsästyksen aikana.
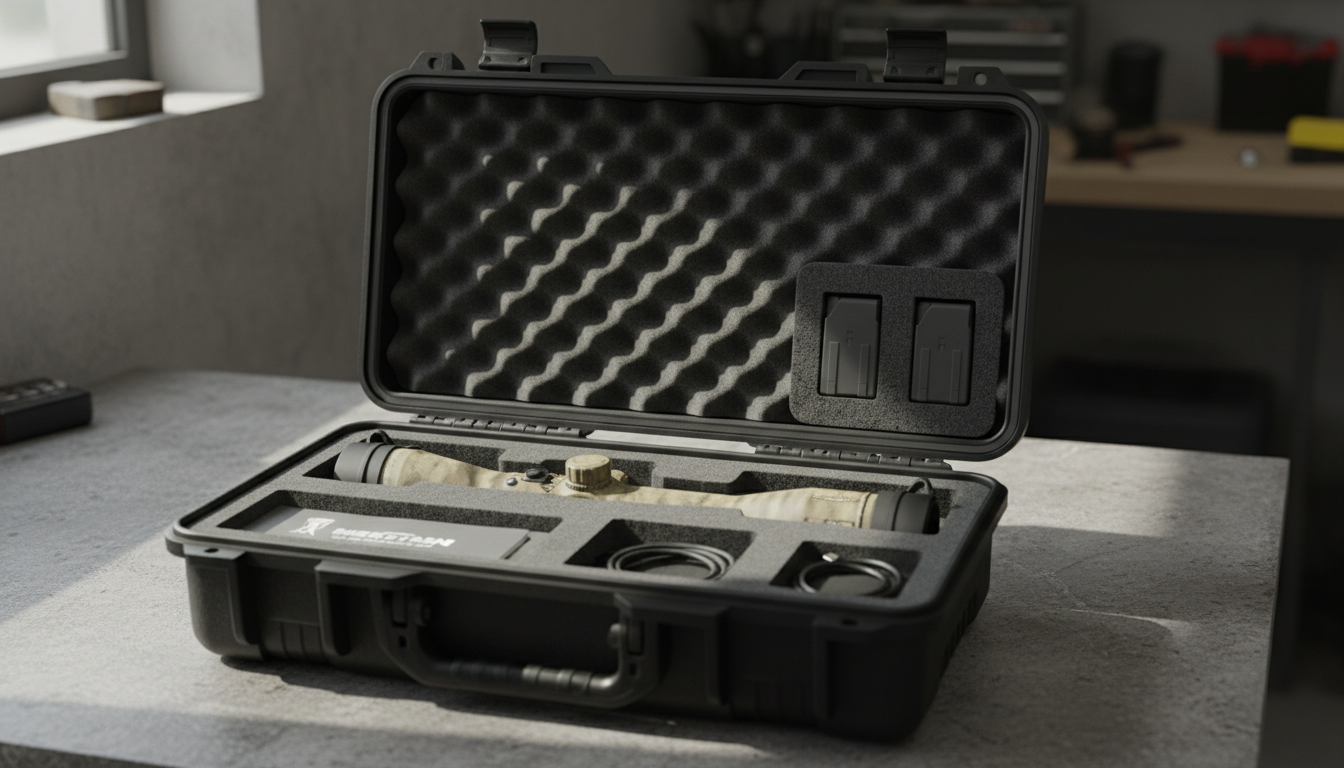
Lämpökamerat eivät ole halpoja. Suojaa omasi.
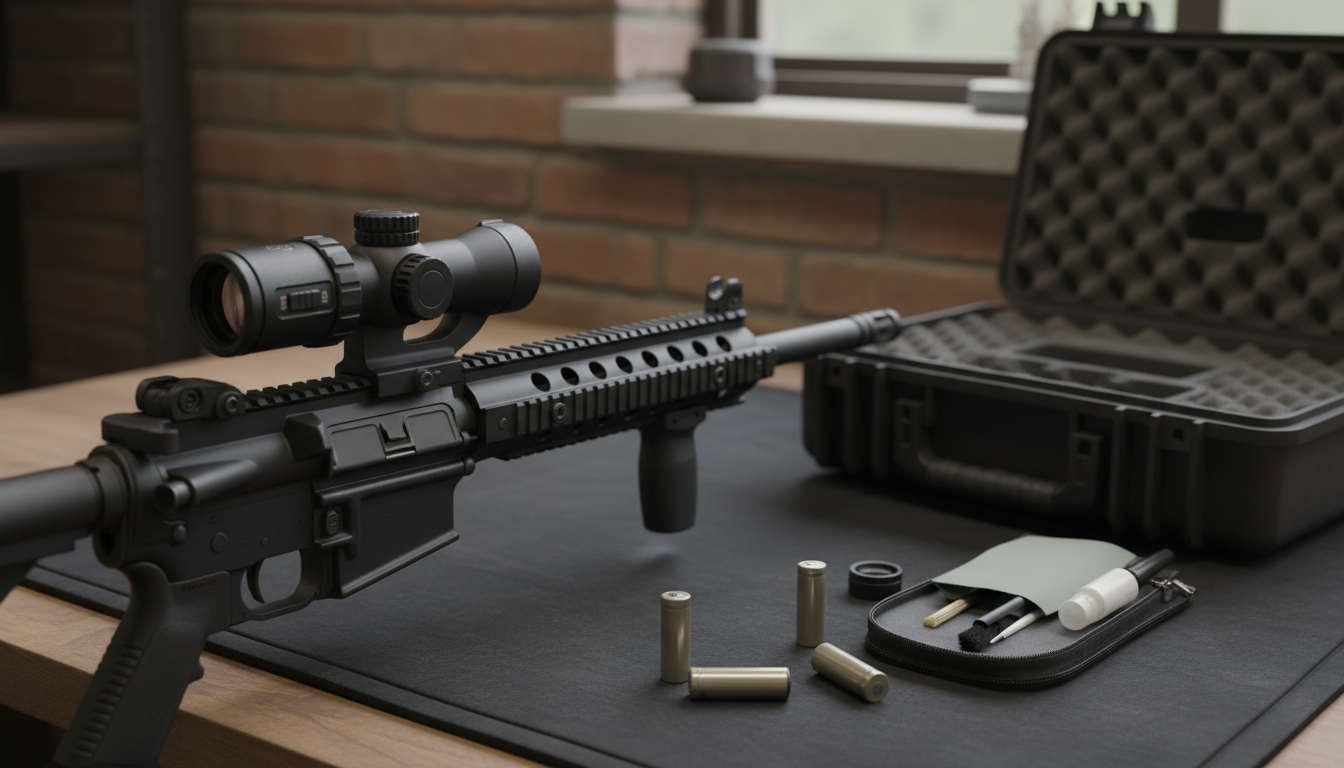
Tarvitset kahdenlaisia kantolaukkuja – yhden kuljetusta varten ja toisen kenttäkäyttöön. Kovat kantolaukut, joissa on mittatilaustyönä valmistetut vaahtomuovisisäkkeet, suojaavat kiikaritähtäintäsi ajoneuvokuljetuksen tai varastoinnin aikana. Valitse vedenpitävä malli, jossa on paineenpoistoventtiilit ja lukittavat salvat.
Näissä laukkuissa pitäisi olla tarpeeksi tilaa kiikarille sekä lisävarusteille, kuten varaparistoille, linssien puhdistustarvikkeille ja latauskaapeleille. Säädettävien vaahtomuoviväliseinien avulla voit mukauttaa laukun sisustuksen juuri omien varusteidesi mukaan.
Kenttäkäytössä taktiset laukut tarjoavat nopean pääsyn varusteisiin ja riittävän suojan. Hyvissä taktisissa laukkuissa on pehmustetut lokerot, MOLLE-kiinnityskohdat varusteiden lisäämistä varten sekä säänkestävät materiaalit. Suosittelemme laukkuja, joissa on säädettävät väliseinät ja joihin mahtuu useita esineitä – lämpökamera, kädessä pidettävä monokulaari, akut ja muut välttämättömät tarvikkeet.
Pikakäyttöiset kotelot sopivat hyvin aktiivisiin metsästystilanteisiin. Ne kiinnitetään vyöhön tai reppuun, ja ne mahdollistavat välittömän käytön samalla kun suojaavat optiikkaa kolhuilta ja sääolosuhteilta. Valitse kotelot, joissa on luotettavat kiinnitysjärjestelmät, jotta kiikarisi ei heilu liikkuessasi vaikeassa maastossa.
Oikeanlainen suojakotelo estää likaa, kosteutta ja iskuja vahingoittamasta herkkiä lämpöantureita ja elektroniikkaa. Se säästää rahaa pitkällä aikavälillä.
Tässä on asia, jota monet lämpökameran käyttäjät eivät tiedosta: lämpökameran yhdistäminen infrapunavalaisimeen voi parantaa kohteen tunnistamista tietyissä tilanteissa.
Vaikka lämpökamerat havaitsevat lämpösignaaleja eivätkä tarvitse valoa, infrapunavalon lisääminen parantaa kontrastia ympäristöissä, joissa taustan lämpötilat ovat samankaltaisia kuin kohteen. Ajattele esimerkiksi lämpimiä kesäöitä, jolloin kaikki säteilee lämpöä suunnilleen samalla tasolla.
Meidän Pixfra IR-taskulamppu toimii juuri tästä syystä saumattomasti lämpökuvauslaitteistojen kanssa. Lisävalaistus auttaa erottamaan lämpösignaalit, jotka muuten saattaisivat sekoittua toisiinsa.
Infrapunavalaisimet ovat avuksi myös silloin, kun yrität tunnistaa kohteet varmasti ennen laukaisua. Ne täydentävät visuaalisia yksityiskohtia, jotka pelkästä lämpökuvauksesta saattaisivat jäädä huomaamatta, ja antavat sinulle varmuutta kohteen tunnistamiseen yli 200 jaardin etäisyydeltä.
Asenna infrapunavalaisin hieman sivussa kiikarista, jotta varjot jäävät mahdollisimman pieniksi. Useimmat laitteet toimivat ladattavilla akuilla, ja niissä on säädettävät valokuvioinnit – laaja valokuvio lähietäisyyksille ja kapea valokuvio kaukoa varten.
Kaikki eivät tarvitse infrapunavaloa. Mutta jos metsästät lämpimässä ilmastossa tai tiheässä kasvillisuudessa, jossa lämpötilaerot ovat vähäisiä, kannattaa kokeilla sitä.
Videokuvausmahdollisuus ei tarkoita pelkästään metsästysretkiensä esittelyä – vaikka sekin on hauskaa.
Lämpökameralla kuvatun materiaalin tallentamisella on useita käytännön hyötyjä. Voit tarkastella laukaisujen osumapaikkoja ja eläinten käyttäytymismalleja. Tutki, miten kohteet liikkuvat tontillasi. Jaa materiaalia metsästyskumppaneiden kanssa parempien strategioiden suunnittelemiseksi.
Monet nykyaikaiset lämpökamerat, kuten meidän Pixfra Sirius HD, Pegasus 2 LRF, ja Draco Joissakin malleissa on sisäänrakennettu tallennustoiminto. Jos omassasi ei kuitenkaan ole tätä ominaisuutta, ulkoiset tallennuslaitteet voidaan kytkeä videolähtöliitäntöjen kautta.
Etsi tallentimia, joissa on riittävästi tallennustilaa – vähintään 32 GB, mieluiten 64 GB tai enemmän. Varmista, että tallennustarkkuus vastaa oskilloskoopin näyttöulostuloa, jotta saat parhaan laadun. Paristokäyttöiset laitteet tarjoavat joustavuutta kenttäkäytössä, eikä sinun tarvitse huolehtia virtajohdoista.
Jotkut metsästäjät kiinnittävät pieniä toimintakameroita kiikareihinsa. Tämä järjestely toimii, mutta lisää laitteiston kokoa. Integroitu tallennus tai suoraan liitettävät tallentimet pitävät laitteiston profiilin ohuempana.
Todellinen arvo tulee esiin, kun katsot kuvamateriaalia. Olemme havainneet villisikojen liikkumisessa malleja, joita emme ole koskaan huomanneet reaaliajassa. Nämä tiedot johtivat parempaan metsästyspaikan valintaan ja menestyksekkäämpiin metsästysretkiin, kuten on dokumentoitu tutkimusraportti villisikojen hävittämisestä.
Tallennus tarjoaa myös todistusaineistoa, jos sinun on dokumentoitava omaisuusvahinkoja tai saalistajien toimintaa luonnonvaraisten eläinten hoidon tarkoituksiin.
Sanoimme viisi lisävarustetta, mutta tässä on bonus, joka on tärkeämpi kuin useimmat luulevat.
Linssisuojat suojaavat kalliita lämpöoptiikkalaitteitasi pölyltä, kosteudelta, naarmuilta ja iskuilta. Ylös käännettävät suojat sopivat parhaiten kenttäkäyttöön – ne pysyvät kiinni, joten et menetä niitä pimeässä, ja ne avautuvat nopeasti, kun haluat ottaa kuvan.
Pidä peruspuhdistussetti käden ulottuvilla. Lämpökuvauslinssit vaativat erityistä hoitoa. Käytä optiikan puhdistukseen tarkoitettuja mikrokuituliinoja ja pinnoitetuille linsseille tarkoitettua puhdistusnestettä. Älä koskaan käytä paperipyyhkeitä tai paidan hihoja – ne naarmuttavat pinnoitteita.
Pidä objektiivin puhdistustarvikkeet mukana kenttälaukussasi. Likainen objektiivi heikentää lämpökuvan laatua nopeasti. Nopeat pyyhkäisyt kuvausasentojen välillä pitävät kuvan terävänä.
Huurtumisenestokäsittelyt auttavat kosteissa olosuhteissa. Jotkut metsästäjät jättävät tämän väliin ja ihmettelevät sitten, miksi näkökenttä sumenee lämpötilan vaihtuessa. Ennaltaehkäisevä huolto on parempi vaihtoehto kuin ongelmien ratkaiseminen maastossa.
Oikeat lisävarusteet parantavat lämpökameran tehokkuutta huomattavasti ilman, että se maksaa maltaita.
Aloita perusvarusteista – laadukkaasta kiinnikkeestä, varaparistoista ja suojakotelosta. Lisää infrapunavalaistus ja tallennusominaisuus tarpeidesi ja budjettisi mukaan. Älä unohda objektiivin suojusta ja puhdistusvälineitä.
Kaikki varusteet eivät sovi kaikille metsästäjille. Valitse varusteesi sen mukaan, miten ja missä metsästät. Koko yön saalistajien torjuntaan osallistuvalla tarvitaan erilaiset varusteet kuin iltaisin lyhyitä villisikametsästysretkiä tekevällä.
Olemme havainneet, että nämä viisi lisävarusteluokkaa tuovat suurimman käytännön hyödyn. Ne suojaavat laitteitasi, pidentävät käyttöaikaa ja auttavat sinua ottamaan parempia kuvia. Juuri sillä on merkitystä, kun harrastat lämpökamerametsästystä tosissasi.
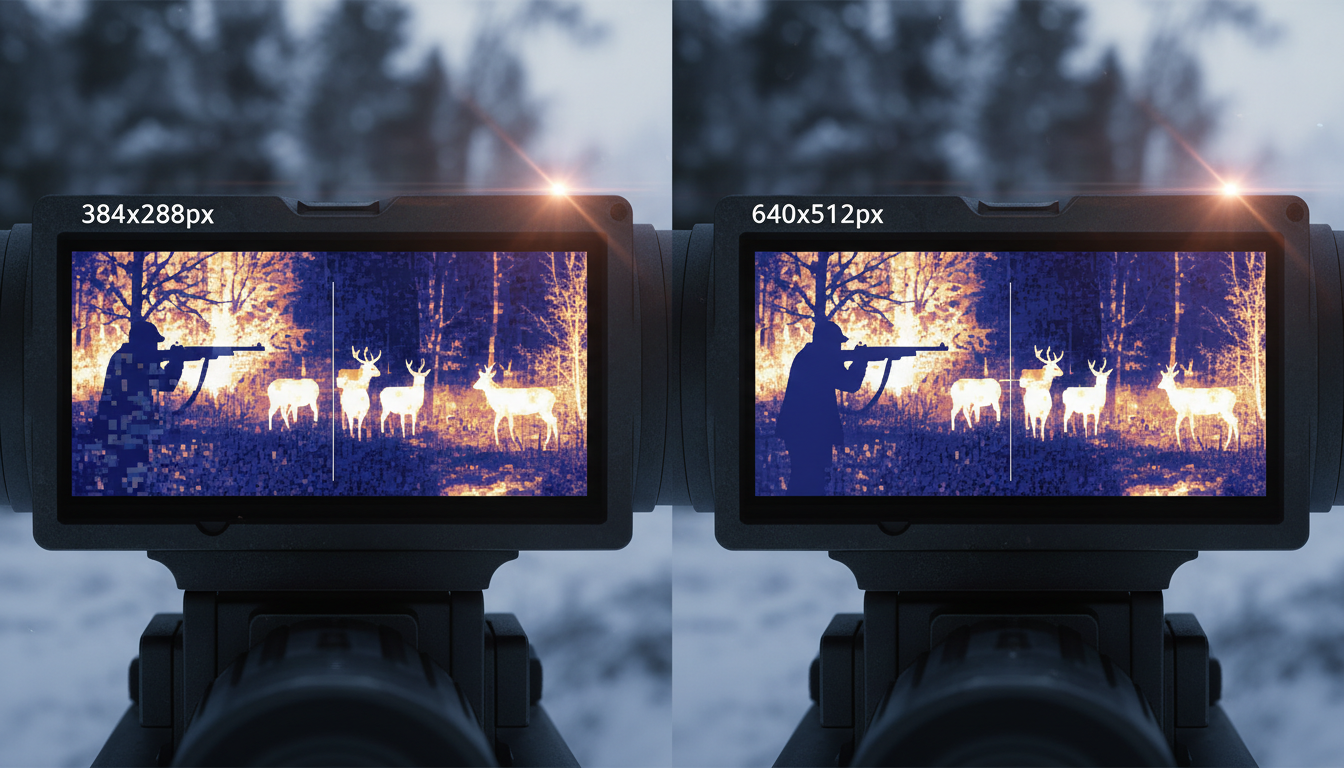
When you’re shopping for a thermal scope, the spec sheet can feel like alphabet soup. 640×512 resolution. 12µm pixel pitch. NETD values below 25mK. What do these numbers actually tell you about how the scope performs when you’re glassing for hogs at 300 yards or scanning timber for coyotes?
We’ve tested thermal optics in just about every condition you can imagine—from foggy mornings to bone-dry desert hunts. And here’s what we’ve learned: image quality isn’t defined by a single number but rather the result of how several specifications work together. You can’t just pick the highest resolution and call it done.
Let’s cut through the marketing speak and talk about what actually matters when you’re trying to spot game in the dark.
Thermal sensor resolution like 640×512 means the sensor captures 640 pixels horizontally and 512 pixels vertically—that’s 327,680 total pixels. Think of it like the megapixels on your phone’s camera. More pixels capture more thermal data points across the scene you’re viewing.
Common resolutions you’ll see include 384×288 (110,592 pixels), 640×512 (327,680 pixels), and high-end models at 1024×768 or even 1280×1024. A 640×512 sensor provides approximately 3 times more pixels than 384×288, but more pixels doesn’t automatically mean a proportionally better hunting experience.
Higher resolution, such as 1024×768, records more thermal data, resulting in sharper outlines, cleaner contours, and better object separation, especially when zooming in. But you’ll pay for those extra pixels—both in price and battery life. We’ve seen real results from thermal scopes in field conditions, and resolution is just one piece of the puzzle.
For most hunters, a 384×288 sensor handles close to mid-range work just fine. You’ll spot that coyote at 200 yards without issue. But for open country where you’re glassing at 850 yards, the 640×512 delivers crisp, well-defined images where you can clearly see the animal’s posture and movement.
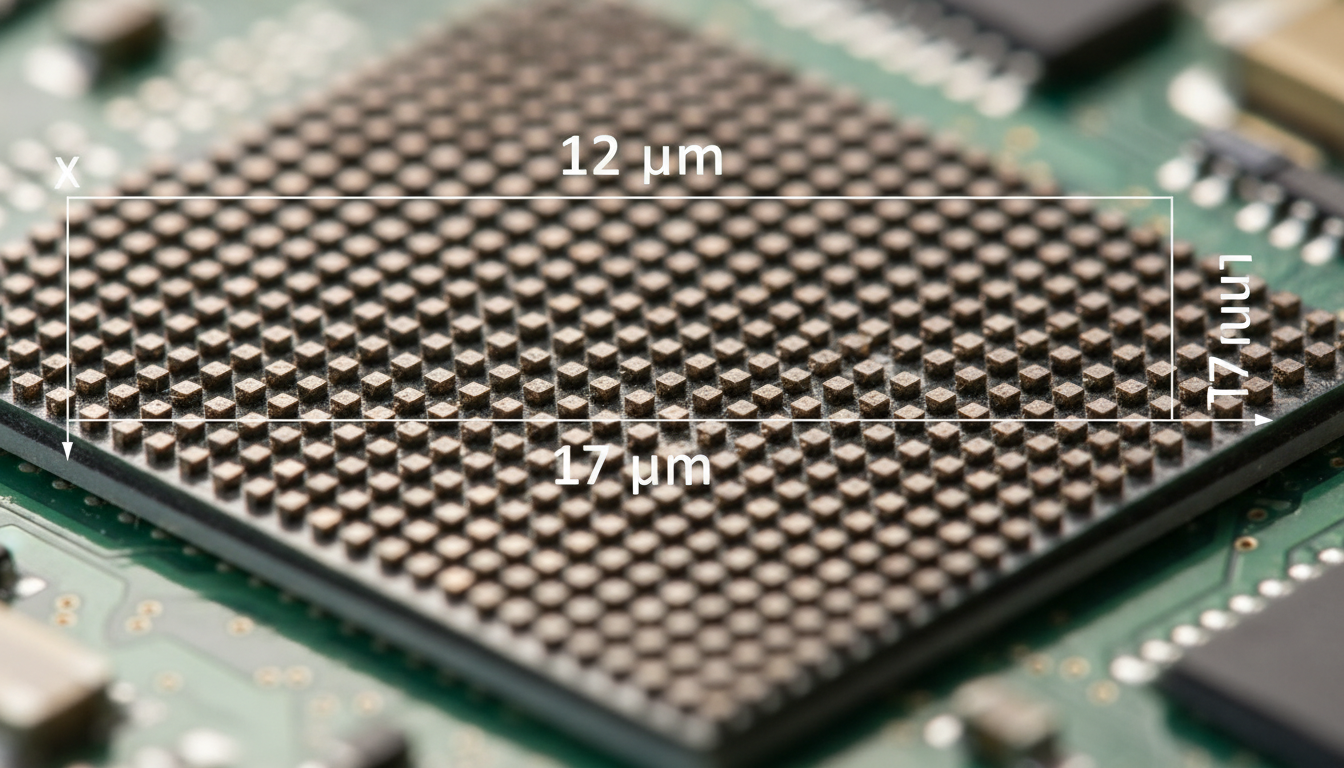
Pixel pitch refers to the size of each individual pixel on the sensor, measured in micrometers, typically 12µm or 17µm. It’s the distance between the centers of two pixels of a microbolometer, normally 12µm or 17µm in thermal imaging sensors.
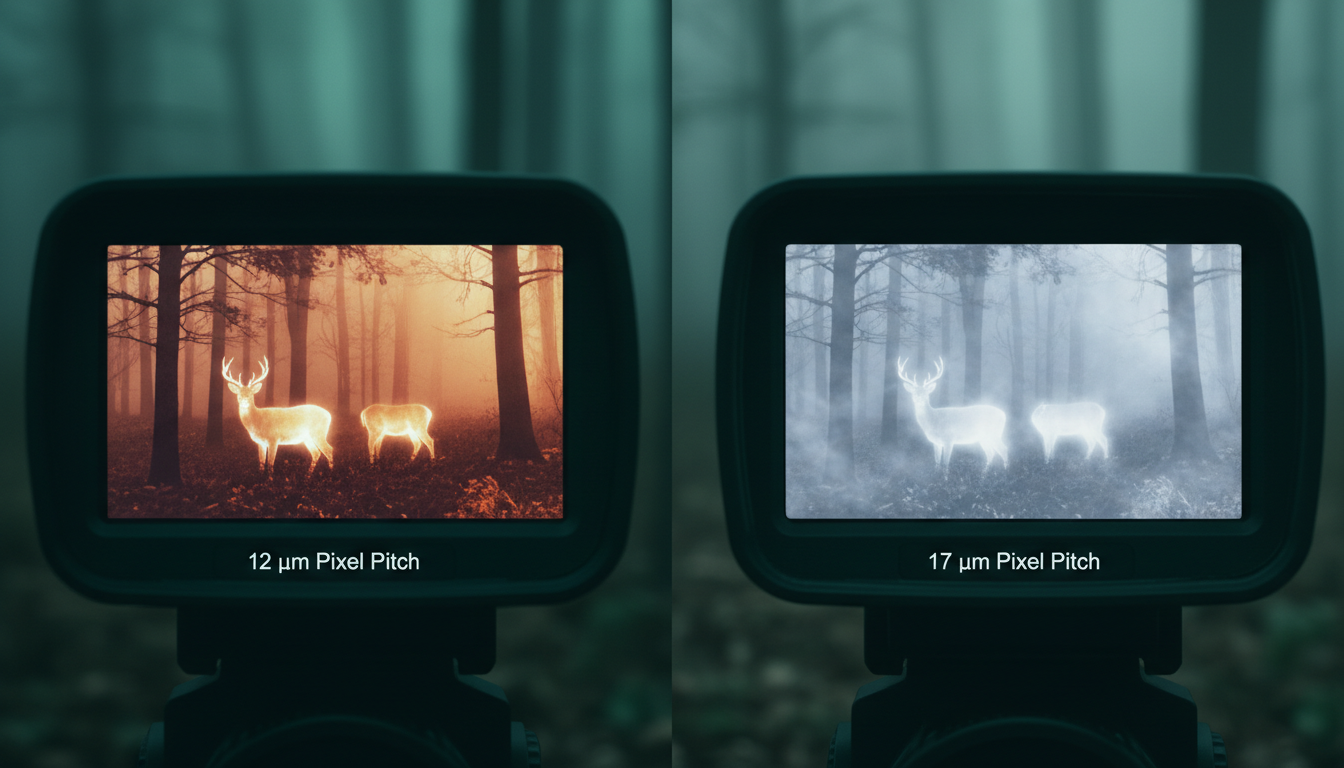
And here’s where it gets interesting: smaller pixel pitch like 12µm means pixels are packed more closely together, allowing for higher resolution images and better detection of smaller objects, while larger pitch like 17µm means fewer pixels per unit area but potentially better sensitivity to thermal radiation.
Think of pixel pitch like bucket size. The larger the pixel and its area, the more Long Wavelength Infrared radiation it can receive and the higher the sensitivity of the entire thermal imaging sensor. A 17µm pixel collects more thermal energy than a 12µm pixel, which translates to better performance in challenging conditions.
Sensors with the same 640×480 resolution but different pixel sizes—17 microns versus 12 microns—result in better sensitivity for the larger pixel (NETD <25 mK vs. NETD <40 mK). That sensitivity difference shows up when you’re hunting in fog, rain, or high humidity—exactly when you need your scope to perform.
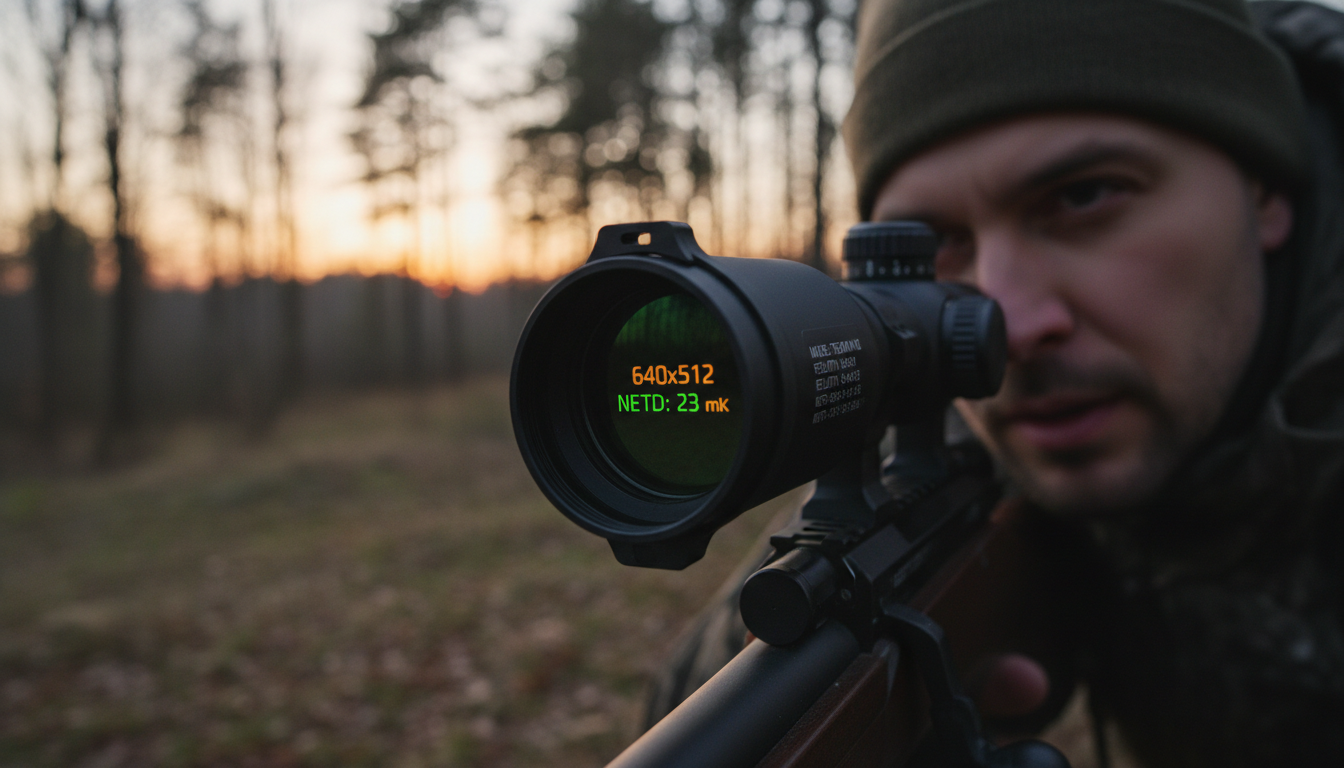
A 384×288 sensor at 17µm with NETD <25 mK can show low-contrast scenes in more detail than a 640×480 sensor at 12µm with NETD <40 mK. That seems backwards, right? More pixels should mean better images.
But thermal imaging doesn’t work like regular photography. Smaller 12µm pitch offers a sharper image at good distance when looking for small hot targets quite far from the observer, but for a more versatile device, 17µm will perform better.
We typically recommend our Sirius HD tai Pegasus 2 LRF models for hunters who need that balance of resolution and real-world performance. These units consider the full system—not just one spec.
The pixel pitch affects more than just sensitivity. It also drives your base magnification and the physical size of the sensor. Pixel pitch directly influences base magnification, image quality and thermal imager sensitivity. You can’t optimize one factor without affecting the others.
You’ll see NETD (Noise Equivalent Temperature Difference) listed on every thermal scope spec sheet. NETD quantifies the sensitivity of a thermal sensor, measured in millikelvins (mK) with typical specifications like <25 mK or <20 mK—the lower the NETD value, the higher the sensor sensitivity and superior the image quality.
NETD measures how sensitive the sensor is to tiny differences in heat, and a lower number means the scope can see smaller temperature differences—like spotting a rabbit against warm ground.
In practical terms? Thermal scopes with higher NETD values tend to struggle in rain, fog, snow, and high humidity, producing noisy, low-contrast images, while a low-NETD thermal scope excels under these challenges. When you’re hunting at dawn and everything’s the same temperature, NETD makes the difference between detecting game and staring at thermal mush.
The best production batches of sensors with 17µm pixel pitch achieve NETD less than 25 mK, while 12µm sensors achieve less than 40 mK. That’s not marketing—it’s physics. Bigger pixels collect more thermal radiation, which means better sensitivity.
Let’s be honest about what these specs mean when you’re actually hunting. Resolution is just one piece of the puzzle—lens quality, sensor type, refresh rate, thermal sensitivity (NETD), and pixel pitch all matter significantly.
We’ve watched hunters obsess over getting a 640×512 scope only to be disappointed when a well-designed 384×288 unit outperforms it in fog. Two thermal devices can share identical specifications yet deliver noticeably different images because image quality depends on the entire imaging system—lens quality, display resolution, and image algorithms all influence the final result.
Battery life is another consideration nobody mentions in the marketing materials. 640×512 sensors consume more power than 384×288 units—maybe 20-30% faster battery drain—which matters on extended hunts. When you’re four hours into a hog eradication session, that extra battery capacity keeps you in the game.
Detection range matters more than pure resolution for long-distance work. Detection range is king for long distance—sensor doesn’t really matter that much for long range, but pixel pitch and focal length does. You need the right combination of optics, sensor size, and processing to spot game at distance.
Meidän Draco ja Arc LRF models balance these factors for serious hunters who need dependable performance across varying conditions and ranges.
So what resolution and pixel pitch should you actually get? It depends on how and where you hunt.
For close to mid-range work (under 300 yards) in varied terrain, a 384×288 sensor with 17µm pitch gives you excellent versatility. You’ll spot game quickly, handle bad weather well, and save money for better optics or an IR torch to extend your effective range even further.
Quality 640×512 thermal scopes run $2,800-$5,500+, while 384×288 equivalents cost $1,200-$2,500—nearly double the investment, which is a deal-breaker for hobbyist hunters on a budget.
For open country hunting where you’re regularly engaging targets beyond 400 yards, the higher resolution pays off. The extra pixels mean finer detail—you can distinguish between a coyote and a fox at distance and read body language to determine if the animal is alert, feeding, or bedded. That information changes how you approach your stalk.
If you need a thermal unit able to properly work in different scenarios, with different weather conditions at different distances, go to 17µm with a low NETD and lens aperture of f1.0. That’s the all-around setup that handles whatever conditions you encounter.
A 640×480 sensor with 12µm pixels and NETD below 25 mK delivers both fine detail and strong contrast, but only when the optics and processing are equally well-tuned. You can’t just bolt a mediocre lens onto a great sensor and expect magic.
Display resolution matters too. Display resolution definitely should not be lower than sensor resolution—the display must not degrade the image produced by the sensor, and higher display resolution allows more quality and more complex overlay graphics. You need a screen that can actually show you the detail your sensor captures.
Refresh rate affects how smooth the image looks when tracking moving targets. Most thermal scopes run at 30Hz or 60Hz. The refresh rate tells you how many times per second the screen updates—most scopes are either 30Hz or 60Hz, with 60Hz giving you very smooth, fluid image especially helpful for tracking a running animal.
Klo Pixfra, we design every thermal scope as a complete imaging system. The sensor resolution and pixel pitch matter, but so do the germanium lens coatings, the signal processing algorithms, and how the whole package handles heat buildup during extended use. It all works together.
Sensor resolution and pixel pitch are just two pieces of what makes a thermal scope perform in the field. True thermal image quality is created through synergy between resolution, pixel pitch, and NETD, refined by proprietary image processing and system-level calibration.
You don’t need to be a thermal imaging engineer to make a smart choice. Focus on how you’ll actually use the scope. Close to mid-range hunting in varied weather? A 384×288 sensor with 17µm pitch and low NETD gives you versatility and value. Long-range work in open country? The extra pixels of a 640×512 sensor help you identify targets at distance.
And remember: the best thermal scope is the one that performs when you need it. Specs on paper don’t bag game—reliable performance in rain, fog, and darkness does. That’s what we build into every unit we design.
What’s more important: sensor resolution or pixel pitch?
Neither is “more important”—they work together. Higher resolution (like 640×512) gives you more detail and better zoom quality. Pixel pitch affects sensitivity and versatility. The main difference lies in resolution versus sensitivity, with 12µm sensors offering higher resolution and 17µm sensors potentially offering better sensitivity. Match the specs to your actual hunting conditions and distances.
Why do 17µm sensors perform better in fog and rain?
Larger pixels capture more Long Wavelength Infrared radiation, which increases the sensitivity of the entire thermal imaging sensor. When conditions are challenging and thermal contrast is low, that extra sensitivity lets you detect game that smaller pixels might miss. It’s the difference between seeing a heat signature and seeing nothing at all.
Is a 640×512 thermal scope worth the extra cost?
It depends on your hunting style. For long-range work at 850 yards, 640×512 provides crisp, well-defined images, while 384×288 shows the same target as visible but pixelated with fine details lost. For most hunters working under 300 yards, a quality 384×288 scope offers better value. Save the money for better glass or accessories.
What NETD should I look for in a thermal scope?
The ideal NETD range falls between <25mK and <40mK—a NETD below 25mK provides exceptional sensitivity suitable for highly detailed target detection at longer ranges, while values above 40mK may result in less precise thermal imagery. Lower is always better, but don’t sacrifice other features chasing the absolute lowest NETD number.
Can I get good performance from a budget thermal scope?
Yes, if you pick the right specs for your needs. Devices with 384×288px are the most popular in the market as they’re more affordable than top-line 640×512 thermal devices but still allow detection range out to 1800m depending on lens size. Focus on units that balance resolution, pixel pitch, and NETD rather than maxing out one spec at the expense of others.
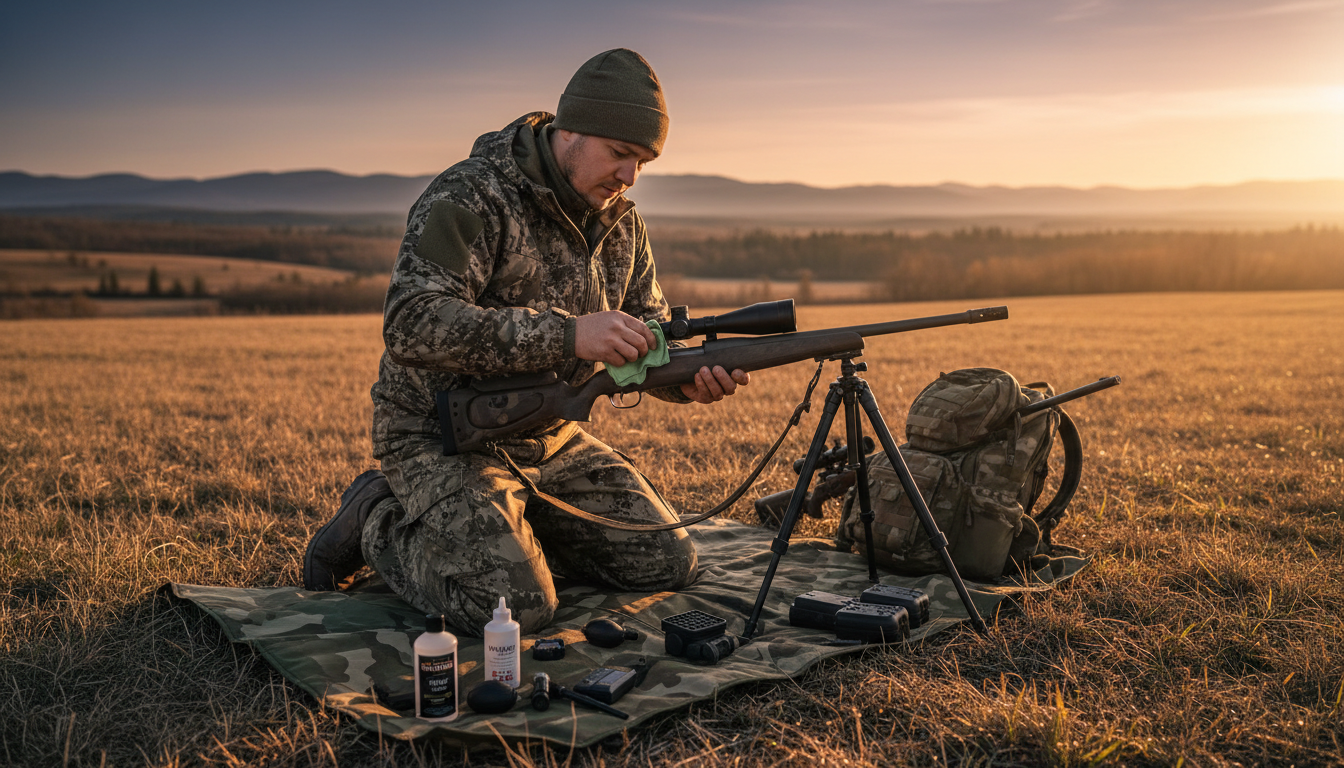
Your thermal scope is a serious investment, and keeping that lens in top shape makes all the difference between spotting your target and missing out. We’ve seen too many hunters damage their optics by using the wrong cleaning methods, and honestly, it doesn’t have to be that complicated.
Think of your thermal lens like the windshield on your truck. A little dust won’t kill you, but grime and fingerprints? That’ll mess with your clarity fast. But here’s the thing—thermal scope lenses aren’t regular glass. They’re made from germanium or other specialized materials with delicate coatings that need careful handling.
We’ve put together this guide to show you exactly how we maintain our thermal optics at Pixfra. Whether you’re running our Sirius HD, the Pegasus 2 LRF, or another thermal scope, these methods will keep your glass clean and your images sharp.
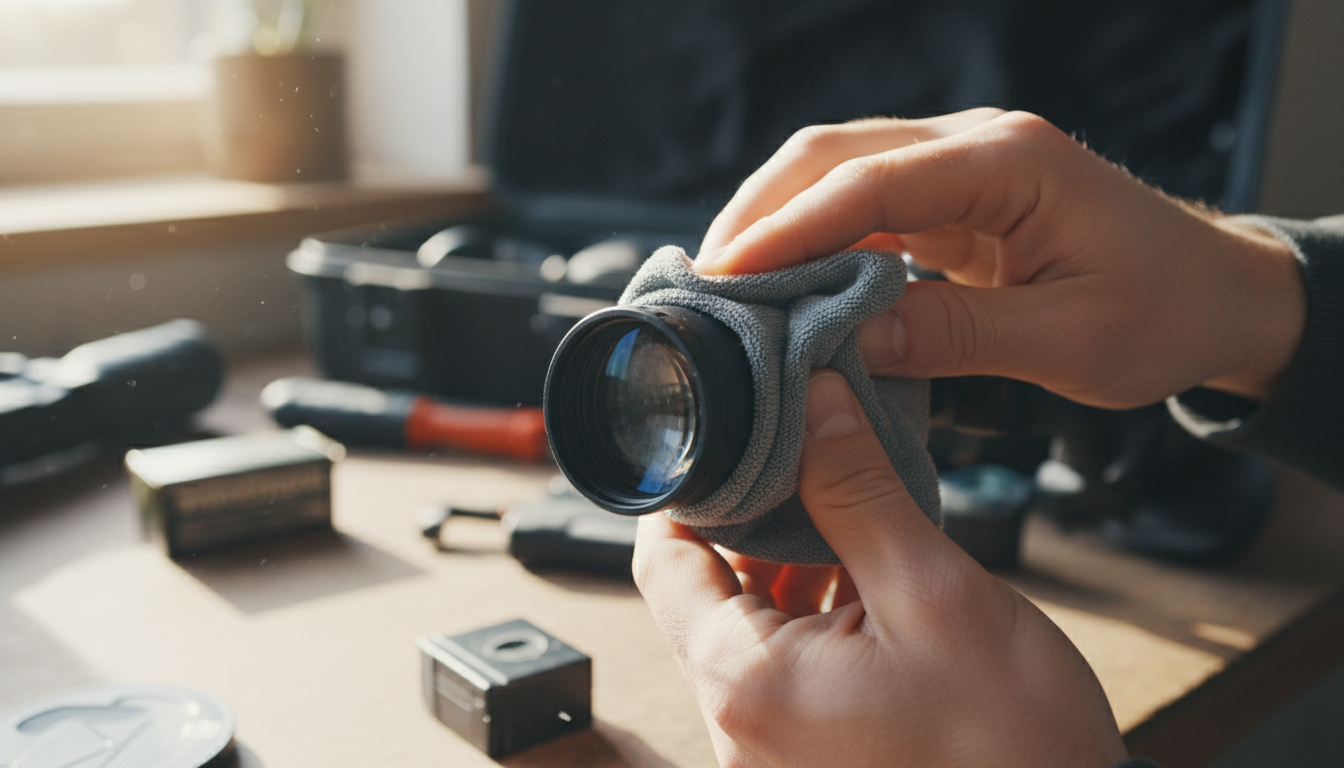
Fingerprint marks, water splashes, dirt, and dust can significantly impair your scope’s functionality, leading to subpar results.And we’re not just talking about slightly fuzzy images—we’re talking about losing contrast, missing heat signatures, and potentially blowing a hunt you’ve been planning for weeks.
The germanium lenses in thermal scopes cost way more than regular optical glass. Clean your thermal camera lens only when strictly necessary, and only when there is visible dirt or fingerprints. Over-cleaning can actually wear down the anti-reflective coating faster than a little dust ever would.
Let’s start with what’ll wreck your optics. We’ve seen people make these mistakes, and they’re expensive ones.
Never use your shirt, paper towels, or handkerchiefs to wipe the lens, as they can scratch the surface.Seriously, resist the urge. Your cotton t-shirt feels soft, but it’s basically sandpaper compared to proper lens cleaning materials.
DO NOT clean with ammonia-based solutions—this will degrade the special coating on the lens.Skip the Windex and household glass cleaners. They’re designed for windows, not precision optics with specialized coatings.
Don’t wipe a dusty lens without removing loose particles first. Those tiny bits of sand or grit act like little knives when you drag them across the coating.
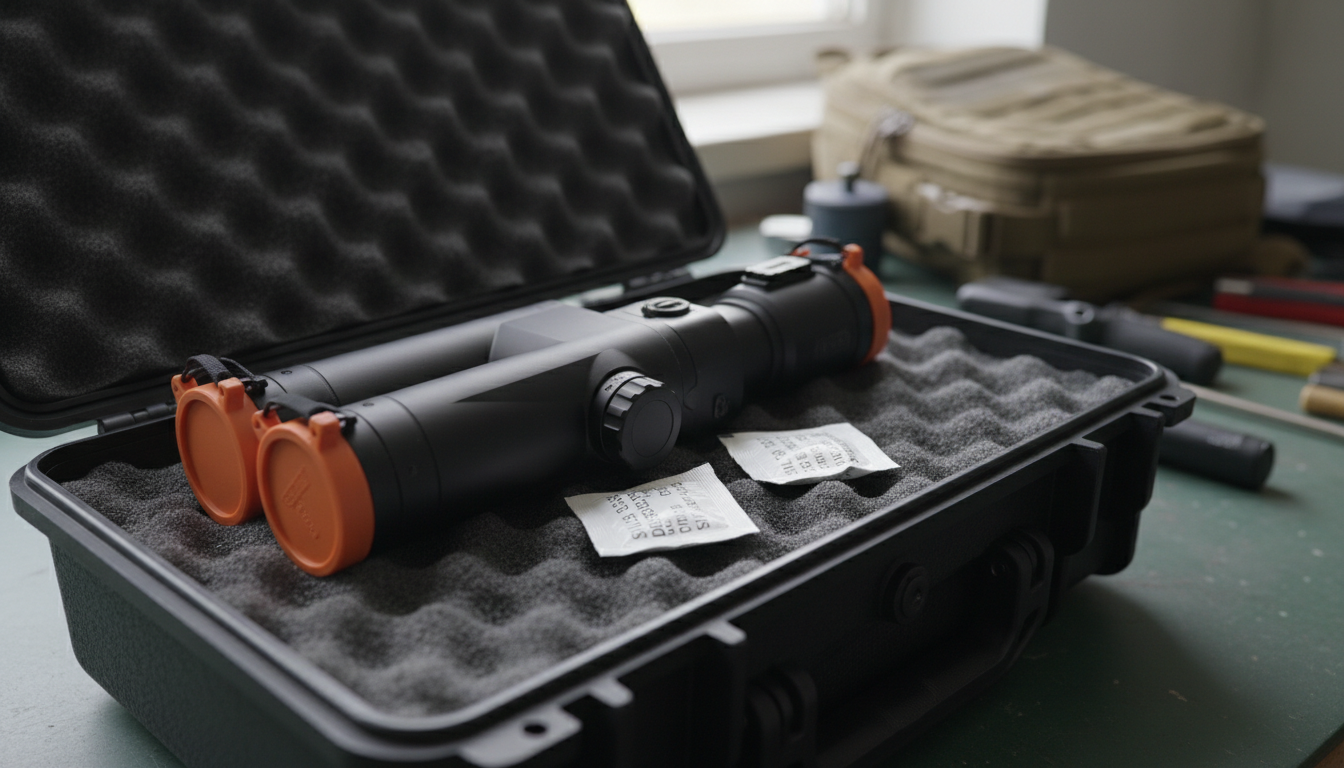
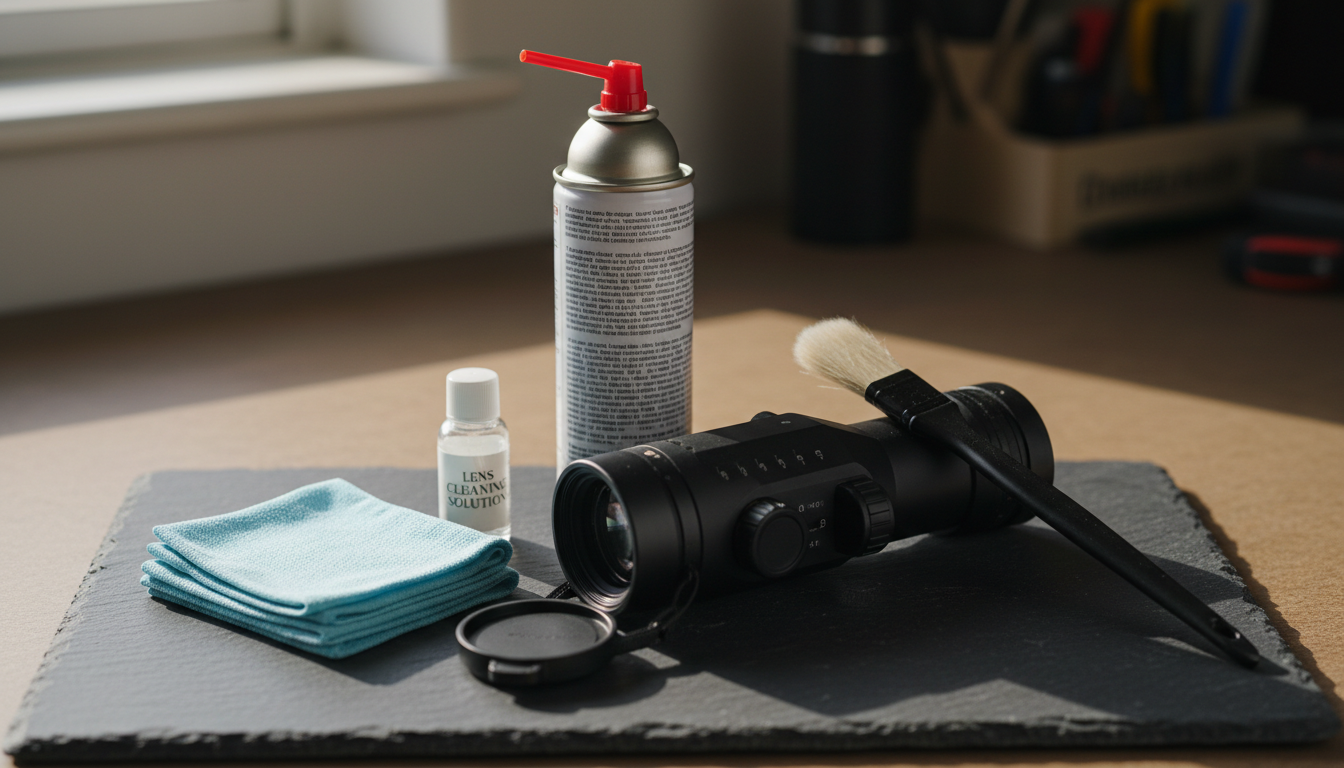
You don’t need a ton of gear, but you do need the right stuff. Here’s what should be in your cleaning kit:
Compressed air or rocket blower: Use compressed air aerosols to blow off loose dust.A rubber rocket blower works great too and won’t risk that cold blast that canned air sometimes gives.
Microfiber cloths: Not just any cloth—get optical-grade microfiber designed for camera lenses or precision optics. These won’t leave lint or scratch delicate coatings.
Lens cleaning solution: Use lens cleaner that is 96% isopropyl alcohol, or a commercial lens cleaner with at least 30% isopropyl alcohol.Stick to solutions made for coated optics.
Soft lens brush: A brush with ultra-fine bristles helps remove stubborn dust without touching the lens with your fingers.
Cotton swabs or lens tissue: For detailed work on stubborn spots, but use sparingly.
Here’s how we clean thermal scope lenses the right way. Follow this order—skipping steps is where people get into trouble.
Step 1: Remove loose debris
Never wipe a dusty lens directly. Loose particles of dust or sand can scratch the surface. Always start with a gentle air duster or a soft, optical brush to remove dirt without friction.
Point the lens downward so gravity works with you, not against you. Give it a few puffs with your air blower or compressed air from about 6 inches away. Watch those particles fall away.
Step 2: Brush away remaining dust
A soft brush removes dust before using a microfiber cloth or specialized wipes.Use gentle, sweeping motions from the center outward. Don’t press hard—let the brush do the work.
Step 3: Apply cleaning solution
If you still see smudges or fingerprints after steps 1 and 2, it’s time for liquid cleaner. Never spray directly on the lens. Instead, put a small amount of cleaning solution on your microfiber cloth.
Step 4: Wipe the lens
Wipe from center of lens to outer edges using a rolling motion that allows fresh cloth to contact the lens. Use gentle, circular motions and let the cloth glide across the surface. You’re not scrubbing a pan—you’re caressing precision optics.
Step 5: Final inspection
Hold the scope up to light and check for streaks or remaining spots. If you see any, repeat step 4 with a clean section of your cloth.
Cleaning is important, but prevention saves you way more time. Here’s what we do to keep our lenses cleaner longer.
During usage, always keep the lens covers closed to shield against scratches, dust, and debris. Those flip-up lens caps exist for a reason. Use them whenever you’re moving through brush or not actively glassing.
Store your thermal scope in a dedicated case with fabric cases with foam inserts or plastic or metal cases equipped with soft elements. To combat dampness, add silica gel bags inside the case. Moisture is the enemy of electronics and optics. A few desiccant packs are cheap insurance.
Keep your scope away from extreme temperature swings when possible. Even waterproof scopes can suffer from internal condensation if exposed to rapid temperature changes. If you’re going from a warm truck to freezing temps, let your scope acclimate gradually.
Don’t forget about the rest of your thermal scope. Wipe the exterior surfaces of metal and plastic parts off dust and dirt with a cotton cloth. A slightly damp cloth works fine for the housing—just keep moisture away from ports and seals.
Check rubber eyecups and armor for cracks or wear. These protect the internal electronics from moisture and impacts. If you spot damage, address it before it becomes a bigger problem.
Clean around buttons, dials, and adjustment knobs with a soft brush or cotton swab. Dirt buildup in these areas can affect functionality over time.
Here’s where people often go wrong—they clean too much or not enough.
Clean your lens whenever you notice dirt or smudges affecting your visibility, but avoid excessive cleaning to prevent unnecessary wear. We typically give our scopes a light cleaning after every hunt and a more thorough cleaning monthly during heavy use.
Clean the lens lightly after every hunt and perform a deeper cleaning if exposed to mud, rain, or heavy dust.If you’ve been in nasty weather or dusty conditions, don’t wait—clean it when you get home.
Store in a dry, shaded, and stable-temperature environment.We keep our thermal scopes in climate-controlled areas, away from windows and heat sources.
Check and remove the battery if storing long-term (set to 40–60% charge).This prevents battery degradation and potential leakage that could damage your scope’s internals.
Before the hunting season starts, run a pre-season check. About one month before the season, run a pre-season checklist: fully charge and test batteries, inspect the housing and rubber seals, clean and examine the lens, update firmware, check sensor calibration and dead pixels, verify mounts/accessories, and do a real-world night field test.This ensures you’re ready when it counts.
We’ve seen these errors too many times:
Over-cleaning: Clean the lens gently – excessive cleaning may wear away the anti-reflective coating, causing more transmission loss than a little dust. A few dust specks won’t hurt image quality as much as worn coatings will.
Using rough materials: Avoid harsh chemicals that can damage sensitive coatings. Never wipe a dry, dusty lens, as this can scratch the surface.
Ignoring the eyepiece: Don’t forget to clean the eyepiece lens too. Smudges on the rear lens affect image quality just like dirt on the objective lens.
Rushing the process: Take your time. A rushed cleaning job risks scratching or streaking the lens.
Sometimes you need expert help. If you notice persistent image quality issues after cleaning, declining performance, or visible damage to lens coatings, it’s time to contact the manufacturer or an authorized service center.
Most quality thermal scopes come with multi-year warranties. Don’t try to disassemble or deep-clean internal components yourself—that’ll void your warranty faster than anything.
Taking care of your thermal scope lens doesn’t require special skills or expensive equipment. It just takes the right tools, proper technique, and a little patience. Start with air to remove loose debris, use appropriate cleaning solutions, and always work gently.
A few minutes of attention after each outing can add years to your device’s lifespan and keep your vision clear in every condition. We’ve seen thermal scopes last 10+ years with proper care and maintenance.
Whether you’re using Pixfra’s Arc LRF for long-range work or the Draco for close-in hunting, these cleaning methods will keep your optics performing at their best. Pair your thermal scope with our IR-taskulamppu for even better results in the field.
Remember, clean optics mean better detection, clearer images, and more successful hunts. Take care of your gear, and it’ll take care of you. For more real-world thermal scope performance data, check out our tutkimusraportti villisikojen hävittämisestä showing how proper equipment maintenance contributed to successful results.
Can I use regular eyeglass cleaner on my thermal scope lens?
No, avoid regular eyeglass cleaners on thermal scopes. Thermal lenses use germanium or specialized materials with unique coatings that react differently than standard glass. Use lens cleaners specifically designed for optical instruments with at least 30% isopropyl alcohol, or 96% isopropyl alcohol solutions. Regular eyeglass cleaners may contain additives that damage thermal scope coatings and reduce image quality over time.
How do I remove fingerprints from my thermal scope lens without causing damage?
First, blow away any loose dust with compressed air or a rocket blower. Then apply a small amount of optical-grade lens cleaner to a microfiber cloth—never directly on the lens. Gently wipe from the center outward using circular motions with minimal pressure. The key is removing particles first before any wiping, which prevents scratching the delicate germanium surface.
Is it safe to clean my thermal scope in cold weather or should I wait?
You can clean your thermal scope in cold weather, but bring it inside first and let it acclimate to room temperature for 15-20 minutes. Rapid temperature changes can cause condensation inside the scope. Once acclimated, clean normally using your standard process. Never apply liquid cleaners to a frozen lens, as this can cause thermal shock and potentially crack coatings.
What should I do if moisture gets inside my thermal scope?
If you notice internal moisture or fogging, stop using the scope immediately. Place it in a warm, dry location with desiccant packs nearby, but don’t expose it to direct heat. Leave lens caps off to allow air circulation. If moisture persists after 48 hours, contact the manufacturer or an authorized service center—internal moisture often indicates seal failure that requires professional repair.
How can I tell if I’ve damaged the coating on my thermal lens?
Coating damage typically appears as permanent marks, scratches, or areas where the image looks degraded even after cleaning. You might notice reduced contrast, haziness, or rainbow-like patterns on the lens surface when viewed at an angle. If cleaning doesn’t improve image quality and you see visible marks on the lens, the coating may be compromised. Professional inspection can confirm coating damage and determine if repair or replacement is needed.
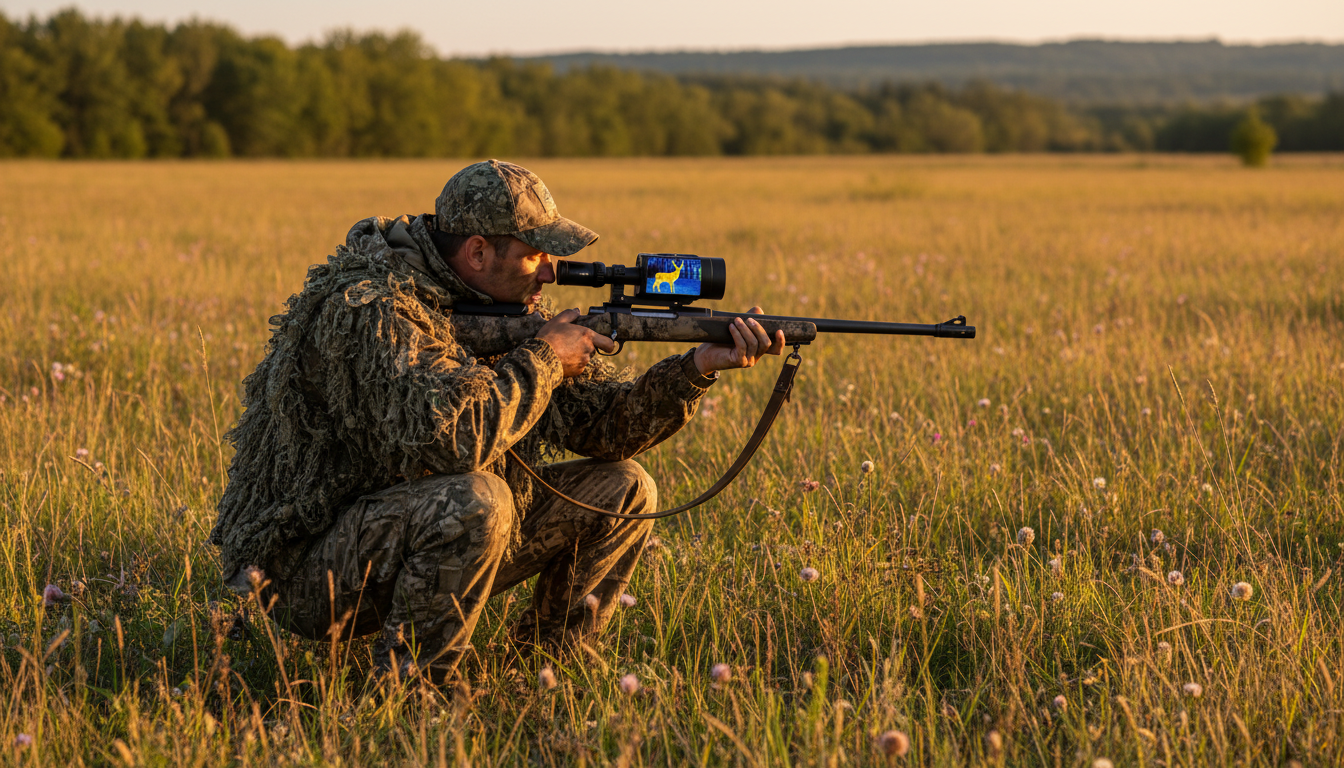
Walk into any hunting camp these days and you’ll hear someone talking about thermal scopes. But along with the growing popularity of these devices comes a whole lot of misinformation. We’ve heard it all—from claims that thermals can see through walls to the belief they only work at night.
Look, we get it. Thermal technology sounds like something straight out of a sci-fi movie. And honestly, that’s part of the problem. Hollywood has done a number on public perception, creating expectations that don’t match reality. After years of working with hunters and testing thermal devices like our Sirius HD ja Pegasus 2 LRF, we’ve identified the most persistent myths that need debunking.
Here’s the thing—thermal scopes are amazing tools. But they work best when you actually understand what they can and can’t do. Let’s clear up the confusion.
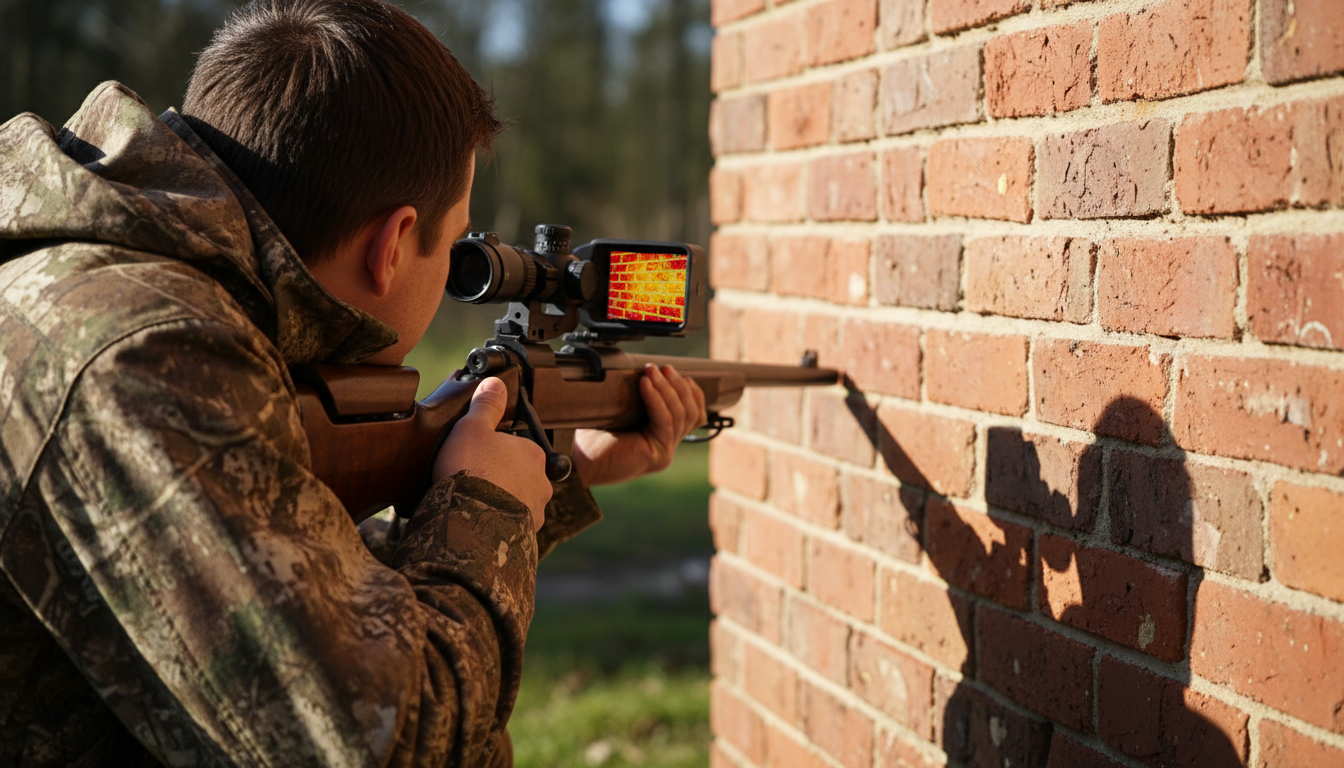
This one tops the list for a reason. It’s probably the most common misconception out there, and it’s completely false.
Thermal cameras detect infrared radiation—essentially heat energy—emitted from surfaces. They can’t penetrate solid materials like walls, doors, or concrete. When you point a thermal scope at a wall, you’re seeing the surface temperature of that wall, nothing more. A wall at uniform temperature will show up as a blank thermal image, even if there’s a person standing right behind it.
Think of it this way: thermal imaging detects surface heat, not X-rays. The infrared radiation that thermal sensors pick up doesn’t pass through most solid materials. In fact, some materials that are transparent to visible light—like glass and water—appear completely opaque when viewed through thermal imaging.
Now, there’s a tiny kernel of truth buried in this myth. If someone places their hand against a thin wall for an extended period, you might detect a slight temperature difference on the surface. But that’s just the wall warming up—you’re still not seeing through it. The same principle applies when we’re out in the field with our Draco thermal scope. It’ll spot a hog behind brush because the heat signature passes through vegetation gaps, not because it’s seeing through solid objects.
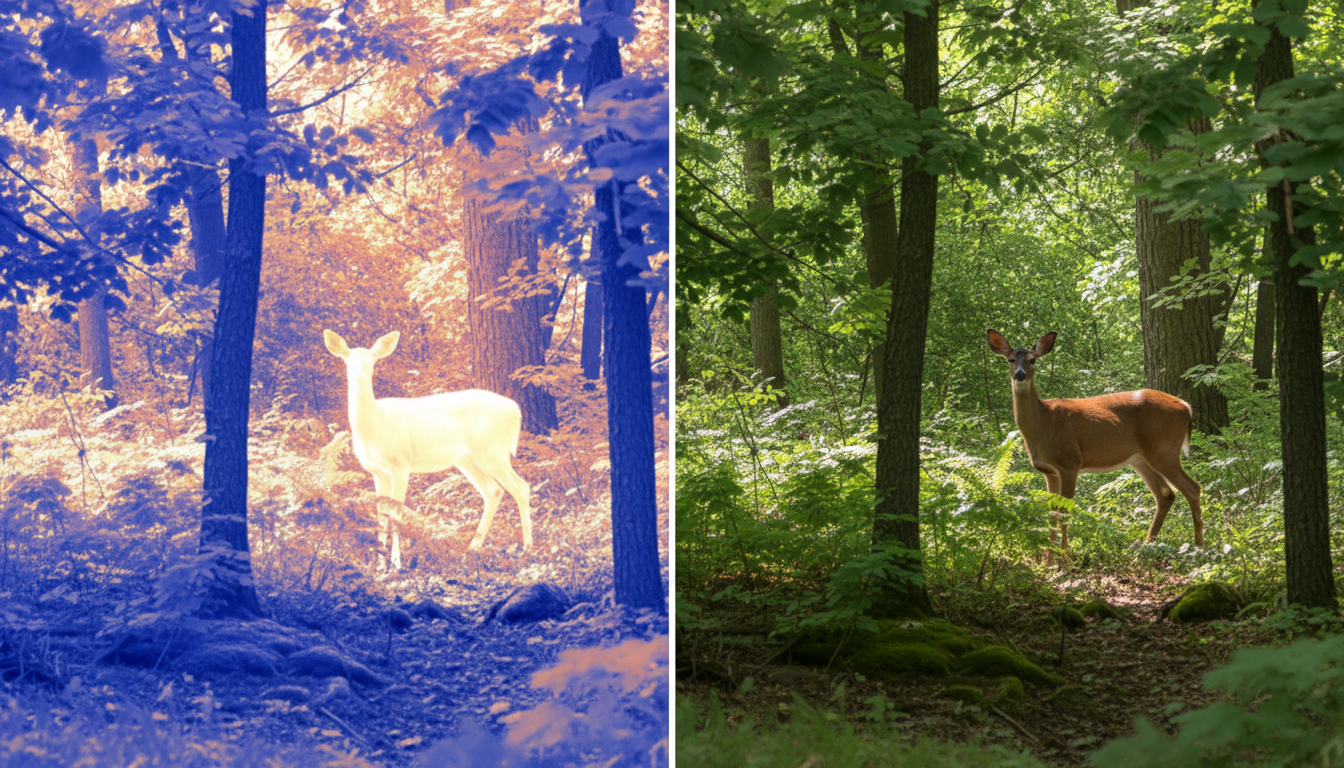
We hear this one constantly, and it drives us crazy because it limits how people use these tools.
Thermal scopes work just as effectively during the day as they do at night. The reason is simple: thermal imaging doesn’t rely on visible light. It detects temperature differences, which exist 24/7. Whether it’s noon or midnight, warm-blooded animals still emit heat that contrasts with their surroundings.
During daylight hours, thermal scopes can actually give you advantages that traditional optics can’t match. Dense fog, heavy glare, or thick vegetation that would blind a regular scope? Not a problem. We’ve seen countless hunters use thermal devices to spot deer bedded in tall grass during midday scouting sessions—animals they would’ve walked right past with binoculars.
One real-world example really hammers this home. A group of hunters we know in Texas regularly use thermals during dawn and early morning hours to locate feral hogs in dense brush. The sun’s up, there’s plenty of light, but the vegetation is too thick for visual identification. Their thermal monocular picks up heat signatures in seconds that would take 10-15 minutes to spot with high-end glass.
Here’s what makes daytime thermal use so effective: while the ambient temperature rises, living creatures maintain their body temperature. That contrast is what thermal sensors pick up on. A deer at 98°F stands out whether the surrounding temperature is 40°F or 85°F.
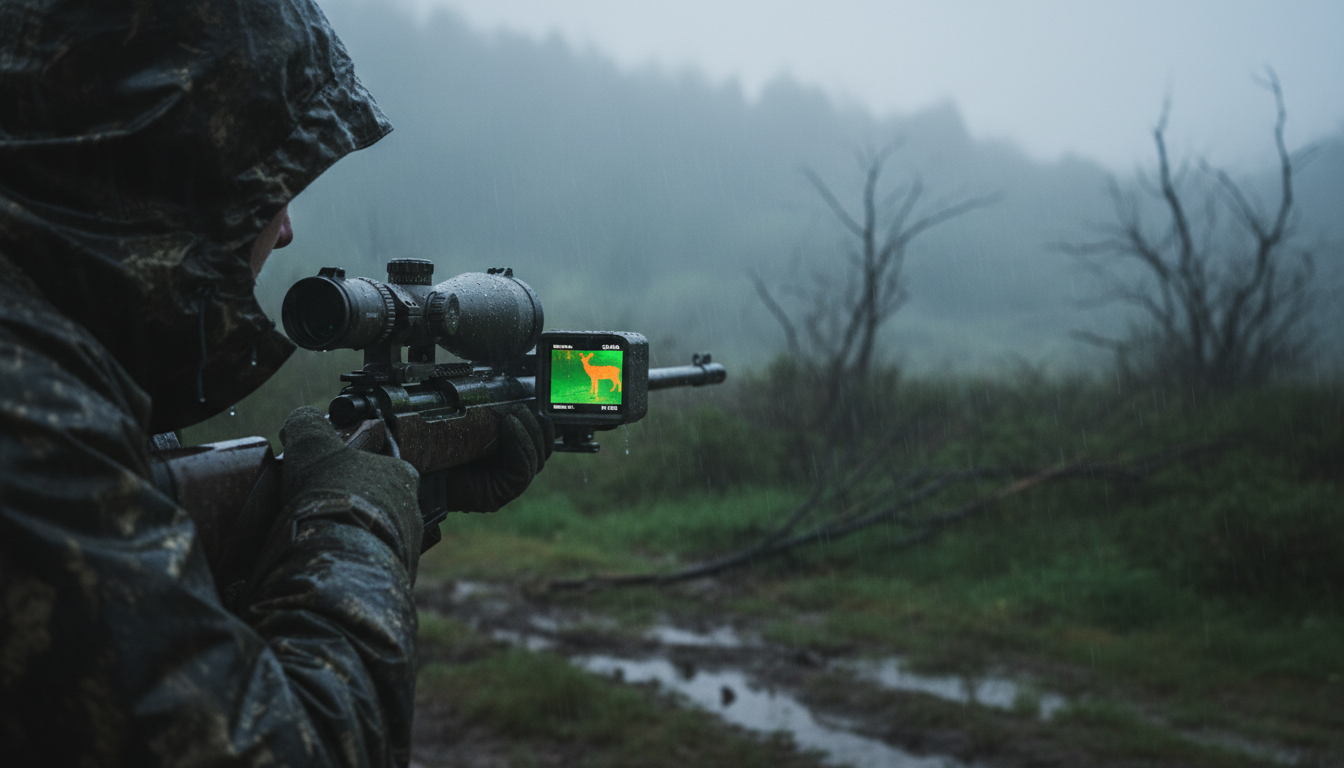
This myth swings too far in the other direction. Yes, thermal scopes perform better than traditional optics in adverse weather, but they’re not magic.
Rain, fog, and heavy snow can reduce thermal imaging effectiveness. While thermals cut through light fog and mist far better than night vision or standard scopes, extremely dense fog can shorten detection range. Heavy rain can mask heat signatures or create thermal “noise” that makes targets harder to identify at distance.
That said, thermal scopes still outperform other technologies in bad weather. We’ve tested our devices in everything from light drizzle to heavy downpours. Detection capability does decrease in extreme conditions, but we’ve never encountered a scenario where a traditional scope worked better than thermal in adverse weather.
Temperature contrast matters more than most people realize. In environments where ambient temperature closely matches body temperature—like a humid 95°F summer afternoon—thermal imaging becomes less effective. The heat signature contrast that makes thermals so useful diminishes when everything is roughly the same temperature.
Does this mean thermals are useless in hot weather? Not at all. But it does mean you need to adjust expectations and understand the technology’s limitations. A quality thermal device with good sensitivity, like those equipped with modern sensors, will still detect temperature differences as small as a few degrees.
We’ve saved this one for last because it involves actual money, and nobody wants to overspend based on false assumptions.
Detection range isn’t just about price—it’s about the right combination of sensor resolution, lens size, and pixel pitch. Sure, more expensive models often include these features, but the relationship isn’t as straightforward as “spend more, see farther.”
Here’s what actually determines detection range: sensor resolution (like 384×288 vs 640×480), lens diameter and focal length, and the quality of the thermal detector itself. A scope with a 640×480 sensor and 50mm lens will generally detect targets farther than a 384×288 sensor with the same lens. But throw a larger 75mm lens on that 384 model, and suddenly the comparison changes.
We’ve seen hunters drop serious cash on high-end thermal scopes expecting to spot game at 1,000+ yards, only to discover that detection and identification are two very different things. You might detect a heat signature at 800 yards, but recognizing whether it’s a coyote or a deer requires much closer range or higher magnification.
The detection ranges listed in technical specifications typically refer to a human-sized heat signature under ideal conditions. A coyote or hog—smaller targets—will have shorter effective detection ranges. And those “ideal conditions” rarely exist in real hunting scenarios.
Smart money focuses on matching the thermal scope to your actual hunting style. Predator hunters working open terrain need different specs than hog hunters in thick South Texas brush. Before maxing out your budget, think about your typical shooting distances and environments. Our case study on feral hog eradication shows how proper thermal selection based on actual needs delivers better results than simply buying the most expensive option.
Thermal scopes represent serious technology that deserves serious understanding. The four myths we’ve covered—seeing through walls, night-only operation, perfect all-weather performance, and price-equals-range—all stem from the same problem: assumptions based on limited information or Hollywood fiction.
Reality is more nuanced. Thermal scopes detect surface heat, not X-ray visions of hidden objects. They work around the clock because temperature differences exist day and night. Weather affects them, just less than it affects other optics. And price reflects features and build quality, not just raw detection distance.
We’ve found that hunters who take time to learn how thermal imaging actually works get far more value from their investment. Understanding these tools’ real capabilities—and limitations—leads to smarter purchasing decisions and more effective use in the field. Whether you’re just starting to explore thermal technology or looking to upgrade your current setup, knowledge beats marketing hype every single time.
Can thermal scopes detect animals hiding in water?
No, thermal scopes cannot see fish or animals submerged in water. Water blocks infrared radiation, appearing opaque to thermal sensors. You’ll only see the water’s surface temperature. However, animals partially in water—like a deer crossing a stream—will show their exposed body parts clearly on thermal imaging.
Do thermal scopes work through glass windows?
Thermal scopes cannot see through glass because glass reflects infrared radiation rather than allowing it to pass through. When you point a thermal device at a window, you’ll see reflections of heat signatures in front of the glass, not what’s behind it. This is true for both standard window glass and eyeglasses.
How long can a thermal scope hold a zero?
Modern thermal scopes hold their zero just as reliably as traditional scopes when properly mounted. Digital reticles in thermal devices are electronically overlaid on the image and maintain zero through the device’s internal calibration. Quality mounts and proper installation matter more than the technology type. Most thermal scopes feature one-shot zeroing that remains stable through hundreds of rounds.
Can you use an IR laser with a thermal scope?
No, infrared lasers don’t work with thermal scopes. IR lasers emit light in the near-infrared spectrum (850-950nm), while thermal scopes detect heat in the mid-wave or long-wave infrared spectrum. The thermal sensor can’t see the IR laser’s beam. IR lasers work with night vision devices, not thermal imaging. For thermal scopes, use the built-in digital reticle for aiming.
Are thermal scopes legal for hunting deer in the United States?
Thermal scopes themselves are legal to own and use for hunting in most states, but regulations vary significantly by state and species. Many states prohibit night hunting of game animals like deer, regardless of optic type. However, using thermal scopes during legal daylight hunting hours is typically permitted. Always check your specific state’s hunting regulations before using thermal technology in the field, as laws differ for game animals versus predators and nuisance species.
















