Trying to decide between a clip-on thermal and a dedicated thermal scope? Both get you hunting after dark, but they work in very different ways. We’ve spent years testing thermal optics in the field, and here’s what actually matters when you’re picking between these two setups.
A clip-on thermal — also called a thermal front attachment — mounts directly in front of your existing daytime scope. It turns your day optic into a thermal rifle scope by projecting a thermal image through your regular reticle, with no need to re-zero. You don’t remove your daytime glass. The clip-on attaches to the objective end, typically with an adapter ring that clamps onto the scope’s objective bell or via a Picatinny rail mount positioned ahead of the day scope. Once you complete the initial alignment process (called collimation), the clip-on and your day scope work together as one system. The thermal unit shows you a heat map of the scene, and your day scope’s crosshairs tell you where the bullet goes.

A dedicated thermal scope replaces your day optic entirely. It has its own display, reticle, zoom system, and controls. It’s built specifically for thermal use, giving you a purpose-built setup for night shooting. Everything is engineered from the ground up for thermal imaging — the infrared sensor, the internal OLED microdisplay, the menu interface — all working together in a single, self-contained package. Think of it as a tool that does one thing and does it at the highest level.
Because the entire optical system is built for thermal, dedicated thermal scopes offer higher resolution options, often with larger lens sizes for better base magnification and clearer images at longer distances. Our Pixfra Pegasus 2 LRF and Chiron LRF series, for example, feature integrated laser rangefinders with 1000m range, multiple zeroing profiles, and built-in ballistic calculators — all inside the scope body. You mount it, zero it, and you’re hunting. The trade-off? Your rifle loses its daytime optic. If you want to hunt during the day with traditional glass, you’ll need to swap scopes — and that means either re-zeroing or running a solid quick-detach (QD) mount that holds zero between switches. Many dedicated thermal hunters solve this by keeping a second rifle set up just for night work, or by investing in the right accessories to upgrade their thermal scope performance, like QD mounts that maintain zero across rifle swaps.
Let’s lay it out. Clip-on thermals enable rapid switching between nighttime and daytime hunting without affecting the zero of the daytime optic. You keep the daytime glass you’ve already invested in, and the clip-on adds thermal detection when the light fades. You can transition from daylight hunting to nighttime predator work with the same gun, the same zero, and zero downtime. If you plan to stick with one dedicated daytime scope and rifle, a clip-on is a flexible and cost-effective choice. Clip-ons also work across multiple rifles if you have matching adapters, and as we mentioned, many models pull double duty as handheld thermal monoculars for scanning and scouting before you settle in to shoot.
But clip-ons have real trade-offs. The main disadvantage of a clip-on scope is that it doesn’t have the same optics resolution as a dedicated unit, so you might not be as precise or accurate with your shooting. Your day scope’s magnification directly affects the thermal picture — go past about 6x–8x, and you’re zooming into a digital display where pixels become obvious and detail gets soft. A clip-on is mounted in front of the daytime riflescope, using an interface fastened on the objective bell, and adds length and weight to the front, making the gun very muzzle-heavy and increasing its bulk. Mounting alignment has to be dead-on — if the clip-on isn’t perfectly centered over your day scope’s objective, your shots will drift. And while clip-ons market themselves as easy to move between rifles, the clip-on is nice to transfer to one gun to another, but when you do that, you may still have to re-collimate to align it to the new day scope.

Dedicated thermal scopes trade that flexibility for performance. You get crisp, clean images that don’t make you squint, built-in reticles and ballistic calculators, and a rugged, simple design with fewer moving parts. They’re easier to run — mount, zero, hunt — with no adapter alignment to fuss with in the dark. The downside: your rifle becomes a single-purpose night tool while the thermal is mounted. You’ll need to re-zero if you swap rifles without a quality QD mount, and they add weight — though lightweight models like our Pixfra Draco series are designed to minimize that issue.
Here’s a side-by-side comparison to make the differences clear:
| Funkce | Clip-On Thermal | Dedicated Thermal Scope |
|---|---|---|
| Keeps your day scope | Ano | No — replaces it |
| Re-zeroing needed | No (after initial collimation) | No (but needed if swapping rifles without QD mount) |
| Image quality | Good, but reduced vs. dedicated | Best available |
| Built-in reticle | Uses your day scope’s reticle | Yes — multiple reticle options |
| Laser rangefinder | Some models | Common in mid- and high-end models |
| Ballistic calculator | Rare | Common in LRF models |
| Added rifle weight | Front-heavy | Replaces day scope weight |
| Doubles as monocular | Yes (with eyepiece) | No |
| Typical price range | $1,000 – $6,000+ | $1,000 – $5,000+ |
| Best for | Multi-purpose, flexible setups | Dedicated night-hunting rigs |
Image quality is the biggest debate in the clip-on vs. dedicated thermal argument, and it comes down to three specs working together: sensor resolution, NETD, and the optical system itself. If you ignore any one of these, you’ll end up disappointed — no matter which type of thermal you buy.
Sensor resolution tells you how many thermal pixels the detector provides. The two common tiers are 384×288 and 640×512. A 640×512 sensor packs nearly three times more pixels than a 384×288, and that extra pixel density makes a big difference when zooming through your day scope or trying to identify a target past 200 yards. Dedicated thermal scopes tend to pair higher-resolution sensors with larger objective lenses — 50mm or 75mm — which means better base magnification and sharper detail right from the start. Clip-ons are limited here because the thermal image travels through your day scope’s optics. Every bit of magnification you add on the day scope side just zooms into the clip-on’s display. With a 640×480 sensor and no optical magnification on the clip-on itself, zooming up to about 8x is the limit for best performance.
NETD — Noise Equivalent Temperature Difference — tells you how sensitive the thermal sensor is to small temperature changes. NETD is measured in millikelvins (mK), and the guiding principle is straightforward: the lower the NETD value, the higher the sensor sensitivity and the better the image quality. Most quality thermal optics are rated at less than 25 mK. At Pixfra, our devices achieve NETD values of ≤18mK, which places them at the high end of sensitivity for hunting-grade thermal optics. Low NETD matters most in warm conditions where background temperatures are close to your target’s body heat, or in fog, rain, and humidity where scene contrast drops. When NETD is weak, the system struggles to detect the remaining faint differences and the image degrades rapidly. In contrast, a low-NETD sensor holds its clarity under conditions that make weaker cameras practically blind. Whether you’re running a clip-on or dedicated scope, check the NETD spec — it’s one of the best real-world performance indicators.
In practice, a dedicated thermal scope is better than a clip-on in the vast majority of situations, according to experienced hunters who’ve run both setups. You’re looking through a purpose-built optical path with nothing between you and the thermal image — no extra glass, no adapter, no alignment variables. The result is faster target acquisition and more confident positive identification (PID), especially beyond 200 yards where detail separates clean kills from missed shots. Clip-ons, however, hold their own inside typical predator-hunting ranges under 300 yards. A clip-on works fine for coyote hunting, though a dedicated weapon sight is easier to use. Depending on what you are doing, the type of weapon, scopes on each weapon, and distance, one is a better option than another.[9] Your choice depends on how far you shoot and how much of your hunting happens after dark.
There’s no universal answer, but the decision narrows fast once you look at how you actually hunt.
Go with a clip-on thermal if you already own solid daytime glass and want to keep using it. If your hunts mix day and night conditions — evening sits that stretch into darkness, or morning predator sets that start before dawn — a clip-on lets you run one rifle for everything without sacrificing your daytime zero. It’s also the smarter pick if you’re budget-conscious and don’t want to invest in a whole separate night-hunting rig. A clip-on setup gives you one rifle, one optic, two modes — daylight clarity and thermal precision, and the cost-effective upgrade adds advanced thermal capability at a fraction of a full dedicated scope setup. Pair your clip-on with a quality QD mount and reliable spare batteries, and you’ve got a rig that covers most night-hunting scenarios without draining your account.

Dedicated thermal scopes are typically better suited for those who hunt frequently at night or in low-light conditions, as they are optimized for such environments. If you’re running all-night hog eradication, regular predator control, or active coyote management on your property, a dedicated thermal hands you better image quality, faster target acquisition, and integrated tools — rangefinders, ballistic solvers, video recording — in one package. If building a dedicated night-hunting setup is within the budget, many hunters who use the AR platform have an upper assembly set up for daytime use and a second upper set up for a thermal scope. Zero both independently, and swapping between them takes seconds. Our Pixfra Sirius HD series offers detection ranges up to 3600m, while the Taurus LRF features ultra-fine 0.9cm@100m click value for precision zeroing — the kind of specs that make dedicated setups worth the commitment for serious night hunters.
If budget allows and you want total coverage, run both. A dedicated thermal on your primary night-hunting rifle and a clip-on or thermal monocular for scouting and backup duty gives you the best of both worlds. You’ll pay more upfront, but the combination of dedicated performance and clip-on flexibility covers every scenario from quick evening hog hunts to multi-day predator operations. Many experienced thermal hunters end up at this point once they see the strengths of each system in the field, and it’s the setup we’d recommend for anyone who’s serious about thermal hunting long-term.
Does a clip-on thermal hurt your image quality?
It does reduce it, though how much depends on the quality of both the clip-on and your day scope. You’re stacking two optical systems, so some clarity and contrast loss is expected compared to a dedicated thermal. At reasonable magnification (under 6x–8x), a good clip-on delivers perfectly usable image quality for hog and coyote work inside 300 yards. Push the magnification higher, though, and the picture gets pixelated fast — you’re zooming into a small display, not getting real optical magnification. If image quality is your top concern, a dedicated thermal scope is the clear winner.
Can you swap a dedicated thermal scope between rifles?
Yes, with the right mount. With a good return-to-zero mount like ADM or LaRue and multiple zero profiles — available in most modern thermals — you can still swap from gun to gun. Most current thermal scopes let you store different zero settings for different rifles and toggle between them through the menu. The key is running the same mount height on each gun. Without a QD mount, expect to re-zero every time you swap, which costs ammo and daylight.
Does a clip-on shift your point of impact?
The problem with some clip-ons is that you might get POI shift depending on zoom and parallax. Inside 75 yards it might not be a big deal, but at 150 yards that shift might be enough to miss. A quality clip-on with a solid adapter or rail-mount system should hold consistent point of impact after proper collimation. But factors like your day scope’s magnification setting, parallax adjustment, and adapter seating can all introduce drift. Test yours at the range before trusting it in the field, and verify your zero any time you move it to a new scope.
Is a dedicated thermal scope worth it over a clip-on?
For regular night hunters, yes. Dedicated scopes deliver sharper images, more responsive performance, and a full suite of built-in tools — laser rangefinders, ballistic calculators, video recording, multiple reticle options — at comparable price points. For regular night hunting, a dedicated setup with a thermal scope offers superior performance and convenience. For the occasional night hunter who mostly shoots during daylight hours, a clip-on adds thermal capability to an existing setup without the commitment of a second rifle build.
What sensor resolution do you need for a thermal clip-on?
A 640×512 sensor is the top choice for clip-on thermals. It carries about three times the pixel count of a 384×288 sensor, which translates to sharper detail when you zoom through your day scope and better target identification past 200 yards. Clip-ons are available in three resolutions: 256, 384, and 640, and they offer a range of performance levels. If your hunting stays inside 200 yards — stand-hunting hogs, for instance — a 384-resolution clip-on works fine and costs less. For coyote hunting at range or any scenario where you need to tell a target from a bush at distance, spend the extra for 640 resolution. The difference in target identification is unmistakable.
Your AR-15 deserves a thermal scope that actually works in the field. We’ve spent years testing thermal optics on AR platforms—budget picks, mid-range workhorses, and premium units. The market in 2026 is packed. Here are the six best thermal scopes for AR-15 that we’d put our own money on.
The AR-15’s lightweight aluminum construction and modular design make it adaptable for a wide range of purposes, from hunting to tactical applications.Its standard Picatinny rail gives you a plug-and-play platform for just about any optic, and thermal scopes are no exception. Whether you’re running predator control at night, wiping out feral hogs on your property, or scanning for coyotes across open fields, a thermal scope turns your AR into a true 24/7 hunting machine. And with the right thermal scope accessories like quick-detach mounts and extended battery solutions, you can squeeze even more performance out of your setup.
Thermal riflescopes detect heat differences, not light. That means they keep working in total darkness, fog, light rain, or smoke—conditions where traditional optics struggle or fail outright.Pair that with the AR-15’s semi-automatic action and fast follow-up shots, and you’ve got a night hunting rig that’s hard to beat. Thermal scopes are a must if you’re hunting nocturnal game like coyotes, hogs, and other varmints and predators during nighttime and low-light conditions.
We’ve tested thermal scopes across everything from 95°F Texas summer nights to freezing December hunts. The six picks below earned their spots through real field performance—not spec sheet hype. We also leaned on data from Pixfra’s thermal device lineup, which gave us a solid baseline for sensor sensitivity and detection range benchmarks across price tiers.
Not every thermal scope fits an AR-15 well. A few specs separate a good match from a bad one, and we want to save you from learning that the hard way.
Sensor resolution is the first thing to check. Resolution is a measure of how much detail your image will have, so the higher the resolution of your sensor, the more finely rendered your image will be.A 384×288 sensor works fine for close-to-mid range hog hunting inside 200 yards. If you’re pushing past 300 yards or targeting smaller game like coyotes, step up to a 640×480 or 640×512 sensor for cleaner target ID. NETD rating tells you how sensitive the thermal sensor is to small temperature differences—lower numbers mean better performance. Scopes under 20mK pick up faint heat signatures that cheaper units miss completely, especially on warm nights when background temps run close to your target’s body heat.
Refresh rate affects how smooth your image looks when you’re tracking a moving target. A 60Hz refresh rate ensures fast-moving objects appear clear on the HD display. Anything below 30Hz can look choppy, especially on running hogs. Magnification range should match your typical engagement distances. For AR-15 use, a 1x–8x or 2x–16x range covers most hunting scenarios without piling on extra weight. High magnification looks appealing on paper, but thermal image quality drops quickly if you over-zoom. Many hunters spend most of their time between 2x and 6x, even on scopes capable of much more.
Finally, make sure the scope is rated for semi-auto recoil and mounts cleanly to a Picatinny rail. Quality night vision and thermal scopes should hold zero on a semi-auto rifle. Problems usually arise from low-quality mounts, loose fasteners, or scopes intended only for low-recoil platforms.QD mounts are a bonus if you swap between day glass and thermal on the same rifle.
Here’s a quick comparison of the top thermal rifle scope tiers we recommend for AR-15 platforms this year. We’ve organized them by performance level so you can match your budget to your hunting style:
| Spec | Entry-Level | Mid-Range | Premium |
|---|---|---|---|
| Sensor Resolution | 256×192 | 384×288 | 640×480 / 640×512 |
| NETD | ≤25mK | ≤20mK | ≤18mK |
| Refresh Rate | 25–50Hz | 50–60Hz | 60Hz |
| Detekční dosah | ~800m | ~1,500m | ~2,500m+ |
| Výdrž baterie | 4–6 hrs | 6–10 hrs | 8–15 hrs |
| Laserový dálkoměr | Rare | Sometimes | Often Included |
| Kalkulátor balistických parametrů | No | Sometimes | Ano |
| Typical Price | $1,000–$2,000 | $2,000–$4,000 | $4,000–$8,000+ |
Key stat: According to USDA estimates, feral hogs cause over $2.5 billion in damage annually across the U.S. That’s driven a surge in thermal scope demand, especially among AR-15 owners in Texas, Oklahoma, and the Southeast running nighttime eradication programs.
The sweet spot for most AR-15 owners in 2026 sits in that mid-range tier. A 384×288 sensor with a 50Hz or 60Hz refresh rate, 6+ hours of battery life, and a built-in ballistic calculator gives you solid image quality and reliable target ID without burning through $6,000. Thermal optics are usually mounted on AR-15, a bolt-action rifle, or rifles chambered in .300 Winchester Magnum, .308 Winchester, 6.5 Creedmoor, or the .243 Winchester for coyote.All of these calibers pair well with mid-range thermal scopes that handle the recoil without losing zero.
For those who want the absolute best, premium 640-class sensors with integrated laser rangefinders and onboard video recording deliver performance that was purely military-grade just a few years ago. We’ve seen NETD values as low as ≤18mK and detection ranges stretching past 3,600 meters on top-tier models—numbers that make positive target ID at 400+ yards a real possibility, not just a marketing claim.
Mounting a thermal scope on an AR-15 is straightforward, but a few details make a big difference. AR-15s are naturally more forgiving when it comes to optic height-over-bore, thanks to their straight-line recoil system and higher receiver. This gives you more freedom to run thermal optics slightly higher without breaking your cheek weld.A 1.54″–1.93″ mount height works well for most setups.
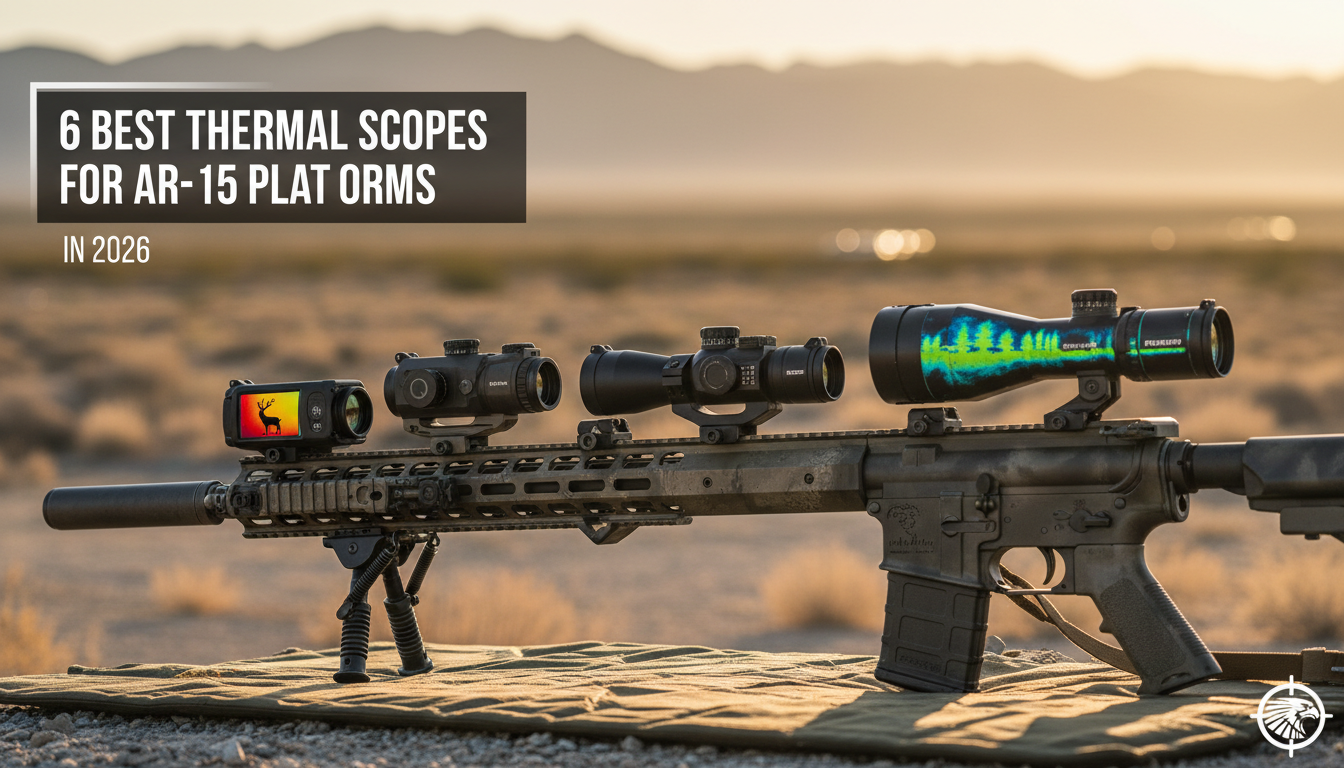
Use a quality mount—preferably a QD mount if you plan to swap between day and thermal optics. Torque your rings to spec and double-check that everything is level before zeroing. Most modern thermal scopes feature one-shot zero or digital zeroing, which speeds up the process. Fire a shot, move the digital reticle to your point of impact, confirm with a follow-up, and you’re done.
One thing to watch: short-barreled ARs with muzzle brakes can blast unburnt powder toward your scope’s sensor window. A suppressor or linear comp protects the sensor window from unburnt powder blast on short barrels.It also cuts down on heat mirage in your thermal image, which can mess with your sight picture at close range.
Battery life can end your hunt early if you don’t plan ahead. Digital thermal scopes typically have shorter battery life, averaging 4–8 hours. For all-night hog eradication or multi-stand predator sessions, carry at least two sets of spare 18650 batteries—they’re rechargeable, lightweight, and easy to find. An external power bank (10,000+ mAh) can also run many thermal scopes via USB-C for 10+ hours straight.
Cold weather kills battery performance faster than you’d expect. Keep your spares in an inside jacket pocket where body heat keeps them warm. And turn your scope off between stands when you’re not actively scanning—this alone can stretch your runtime by 30–40% on a long night.
Can you use a thermal scope on an AR-15 during the day?
Yes. Thermal scopes detect heat, not light, so they work in daylight, shade, and complete darkness. Some models include adjustable apertures to handle bright conditions without washing out the image.
Will a thermal scope hold zero on a semi-auto AR-15?
A quality thermal scope rated for semi-auto recoil holds zero without any issues. Make sure the mounting hardware is robust and recoil-resistant to handle the AR-15’s kick without loosening. Cheap mounts are usually the problem—not the scope itself.
What’s the best budget thermal scope for an AR-15?
In the $1,000–$2,000 range, scopes with 256×192 sensors deliver solid performance for close-range hog and varmint hunting. They won’t match premium units at distance, but they get the job done inside 200 yards.
Is thermal better than night vision for AR-15 hunting?
For most hunting—especially hog and predator control—thermal wins. Thermal and night vision solve different problems. Thermal excels at detection and tracking, while night vision can be better for navigation and detail in some environments. But thermal works through brush, fog, and pitch black conditions where night vision struggles.
Are thermal scopes legal for hunting in all 50 states?
Thermal optics are legal to own and use in all 50 states. However, some states restrict their use for hunting: California prohibits thermal for big game hunting, and several states ban nighttime hunting of certain species regardless of equipment. Always check your local regulations before heading out.
You’ve spent good money on your thermal scope. But here’s the thing—the scope itself is only part of the equation. The right accessories can turn a solid setup into a serious field advantage.
We’ve tested dozens of thermal scope add-ons over the years, from budget-friendly basics to premium upgrades. Some make a real difference. Others? Just add weight to your pack. We’re sharing the five accessories that actually matter when you’re hunting hogs at midnight or tracking predators across your property.
Let’s start with what holds everything together—your mount.
If you’re running multiple rifles or switching between thermal and day optics, a quick-detach mount saves you real time in the field. These mounts let you remove and reattach your thermal scope in seconds while maintaining your zero. No need to re-sight every time you make a switch.
Look for mounts made from aircraft-grade aluminum. They’re light enough not to weigh down your rifle but strong enough to handle recoil from magnum calibers. Height-adjustable options let you dial in the perfect eye relief and cheek weld for your specific rifle setup.
And here’s what most people overlook: cantilever mounts can be a game-changer if you’re working with limited rail space. They position your scope forward, giving you proper eye relief without running out of mounting real estate.
We’ve been using our Pixfra thermal scopes with quality QD mounts for years. The ability to move a thermal unit between rifles during a hunt is worth every penny.
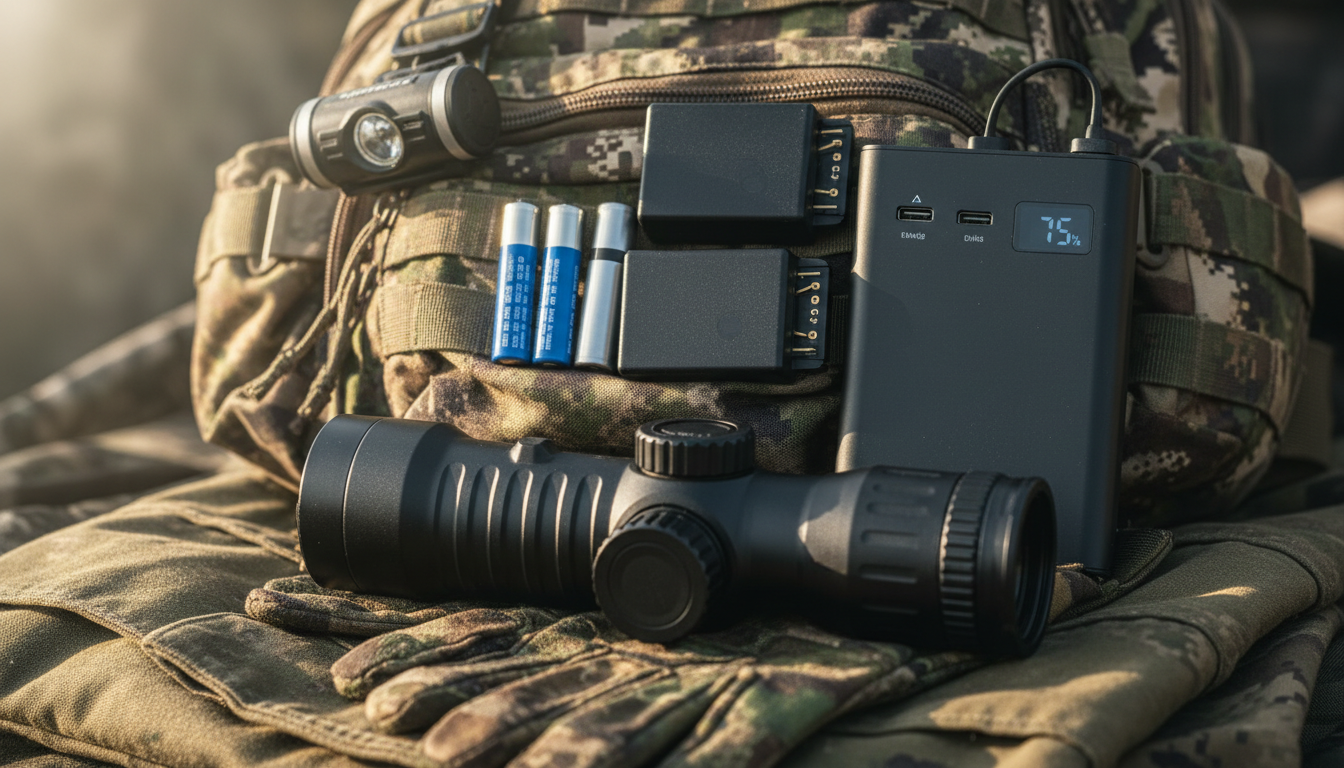
Battery life can make or break your hunt. Period.
Most thermal scopes run 3-6 hours on internal batteries. That’s fine for a quick evening session, but what about all-night hog eradication or extended predator work? Running out of power when heat signatures start showing up is frustrating.
Carry at least two sets of spare batteries. Rechargeable 18650 lithium-ion batteries with 3000-3500mAh capacity work great as your primary power source. Keep CR123A lithium batteries as emergency backups—they’re lighter and have a longer shelf life.
External power banks changed how we hunt. A 10,000-20,000 mAh portable power bank can run your thermal scope for 10+ hours straight. Many modern scopes accept USB power input, making field charging dead simple. Mount the power bank to your rifle or toss it in your pack.
Fast chargers are handy between hunts. They’ll fully recharge batteries in 2-3 hours, perfect for back-to-back hunting days. Vehicle chargers let you top off batteries during long drives to hunting spots.
Pro tip: cold weather kills battery performance. Keep spares in an inside pocket where body heat maintains their temperature. We learned this the hard way during a December hog hunt.
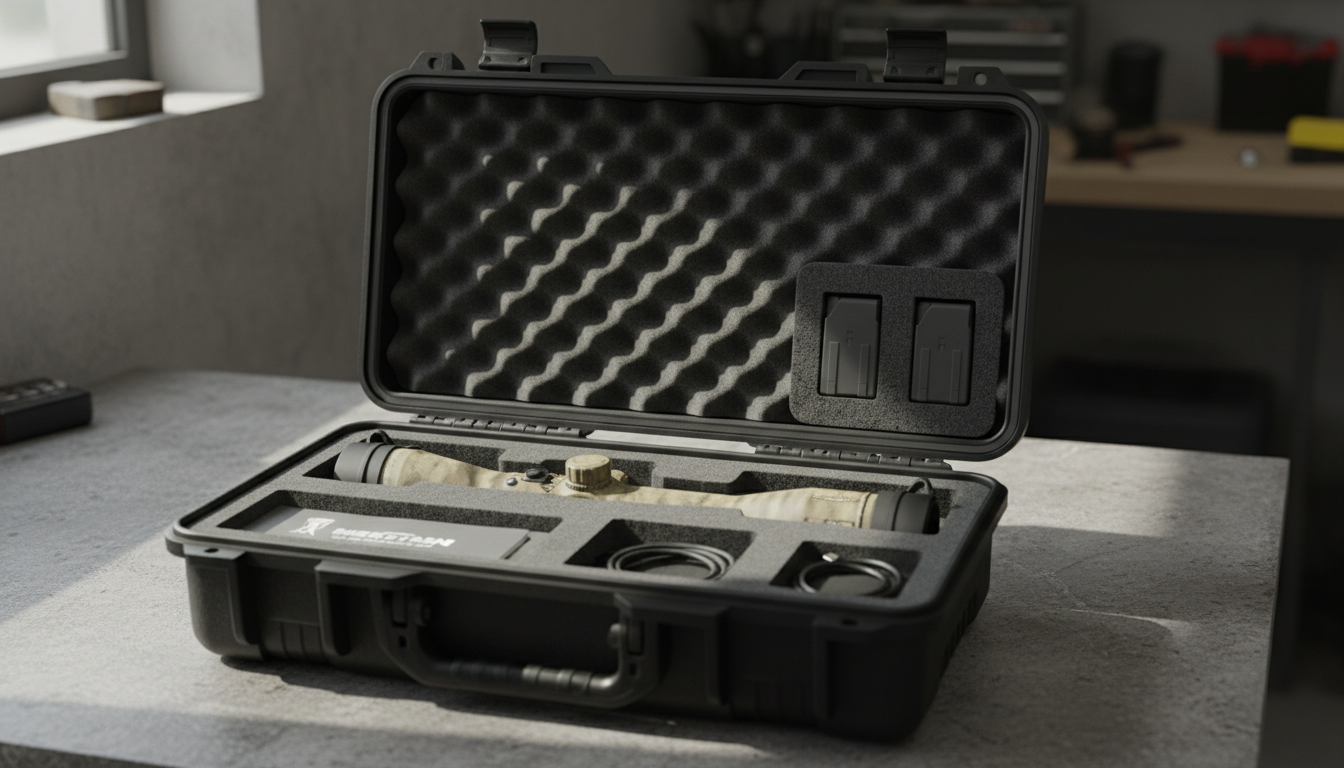
Thermal scopes aren’t cheap. Protect yours.
You need two types of cases—one for transport and one for field carry. Hard-shell cases with custom foam inserts protect your scope during vehicle transport or storage. Look for waterproof construction with pressure relief valves and lockable latches.
These cases should have enough space for your scope plus accessories like spare batteries, lens cleaning supplies, and charging cables. Adjustable foam dividers let you customize the layout for your specific gear.
For field work, tactical bags offer quick access with adequate protection. Good tactical bags feature padded compartments, MOLLE attachment points for adding gear, and weather-resistant materials. We prefer bags with adjustable dividers that can hold multiple items—your thermal scope, handheld monocular, batteries, and other essentials.
Quick-access holsters work well for active hunting situations. They attach to your belt or pack and provide immediate access while protecting the optics from bumps and weather. Choose holsters with secure retention systems so your scope doesn’t bounce around when moving through rough terrain.
The right case keeps dirt, moisture, and impacts from damaging sensitive thermal sensors and electronics. That’s money in your pocket long-term.
Here’s something many thermal scope users don’t realize—pairing your thermal with an infrared illuminator can improve target identification in certain situations.
While thermal scopes detect heat signatures and don’t need light, adding an IR illuminator creates better contrast in environments where background temperatures are similar to your target. Think warm summer nights when everything radiates heat at similar levels.
Naše Pixfra IR Torch works seamlessly with thermal setups for exactly this reason. The extra illumination helps distinguish heat signatures that might otherwise blend together.
IR illuminators also help when you’re trying to positively identify targets before taking a shot. They fill in visual details that pure thermal imaging might miss, giving you confidence in target identification at 200+ yards.
Mount your IR illuminator offset from your scope to minimize shadowing. Most units run on rechargeable batteries and offer adjustable beam patterns—flood for close work, spot for distance.
Not everyone needs an IR illuminator. But if you hunt in warm climates or dense cover where temperature differences are minimal, it’s worth testing.
Video recording capability isn’t just about showing off your hunts—though that’s fun too.
Recording your thermal scope footage serves multiple practical purposes. You can review shot placement and animal behavior patterns. Study how targets move through your property. Share footage with hunting partners to plan better strategies.
Many modern thermal scopes like our Pixfra Sirius HD, Pegasus 2 LRF, a Draco models have built-in recording. But if yours doesn’t, external recording equipment connects via video output ports.
Look for recorders with adequate storage—32GB minimum, 64GB or more is better. Make sure the recording resolution matches your scope’s display output for best quality. Battery-powered units give you flexibility in the field without worrying about power cables.
Some hunters mount small action cameras to their scopes. This setup works but adds bulk. Integrated recording or direct-connect recorders keep your profile slimmer.
The real value shows up when you review footage. We’ve spotted patterns in hog movement we never noticed in real-time. That intel led to better stand placement and more successful hunts, as documented in our Případová studie o eradikaci divokých prasat.
Recording also provides evidence if you need to document property damage or predator activity for wildlife management purposes.
We said five accessories, but here’s a bonus that matters more than most people think.
Lens covers shield your expensive thermal optics from dust, moisture, scratches, and impacts. Flip-up covers work best for field use—they stay attached so you won’t lose them in the dark and open quickly when you need a shot.
Keep a basic cleaning kit handy. Thermal lenses require special care. Use microfiber cloths designed for optics and lens cleaning solution made for coated lenses. Never use paper towels or shirt sleeves—they’ll scratch coatings.
Carry lens cleaning supplies in your field bag. A dirty lens degrades thermal image quality fast. Quick wipe-downs between stands keep your view crisp.
Anti-fog treatments help in humid conditions. Some hunters skip this, then wonder why their view clouds up during temperature changes. Preventive maintenance beats dealing with problems in the field.
The right accessories multiply your thermal scope’s effectiveness without breaking the bank.
Start with the basics—a quality mount, spare batteries, and protective storage. Add IR illumination and recording capability as your needs and budget allow. Don’t skip lens protection and cleaning supplies.
Ne každé příslušenství vyhovuje každému lovci. Přizpůsobte si příslušenství tomu, jak a kde lovíte. Ten, kdo se celou noc věnuje hubení dravců, potřebuje jiné vybavení než ten, kdo se vydává na krátké večerní lovy divokých prasat.
Zjistili jsme, že právě těchto pět kategorií příslušenství má v praxi největší význam. Chrání vaši investici, prodlužují dobu provozu a pomáhají vám pořizovat lepší snímky. A právě na tom záleží, pokud to s lovem s termovizí myslíte vážně.
When you’re shopping for a thermal scope, the spec sheet can feel like alphabet soup. 640×512 resolution. 12µm pixel pitch. NETD values below 25mK. What do these numbers actually tell you about how the scope performs when you’re glassing for hogs at 300 yards or scanning timber for coyotes?
We’ve tested thermal optics in just about every condition you can imagine—from foggy mornings to bone-dry desert hunts. And here’s what we’ve learned: image quality isn’t defined by a single number but rather the result of how several specifications work together. You can’t just pick the highest resolution and call it done.
Let’s cut through the marketing speak and talk about what actually matters when you’re trying to spot game in the dark.
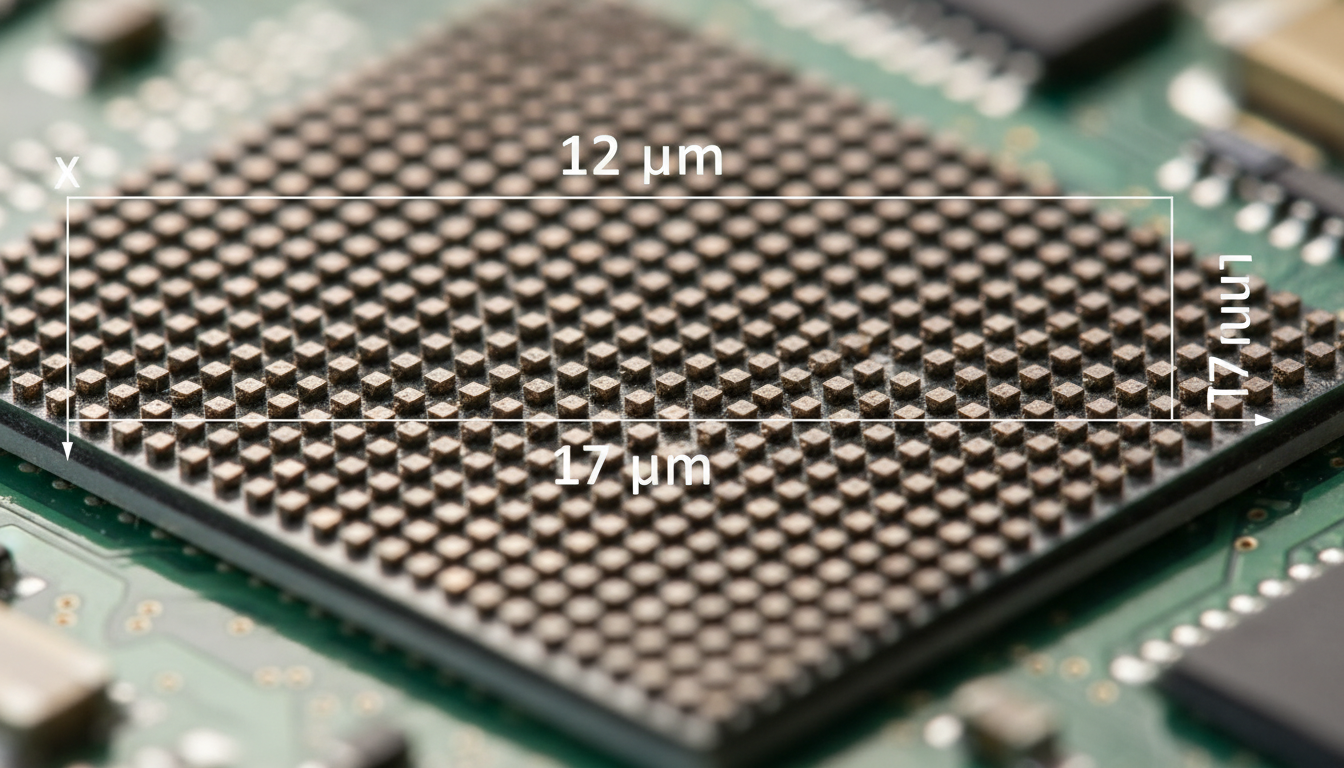
Thermal sensor resolution like 640×512 means the sensor captures 640 pixels horizontally and 512 pixels vertically—that’s 327,680 total pixels. Think of it like the megapixels on your phone’s camera. More pixels capture more thermal data points across the scene you’re viewing.
Common resolutions you’ll see include 384×288 (110,592 pixels), 640×512 (327,680 pixels), and high-end models at 1024×768 or even 1280×1024. A 640×512 sensor provides approximately 3 times more pixels than 384×288, but more pixels doesn’t automatically mean a proportionally better hunting experience.
Higher resolution, such as 1024×768, records more thermal data, resulting in sharper outlines, cleaner contours, and better object separation, especially when zooming in. But you’ll pay for those extra pixels—both in price and battery life. We’ve seen real results from thermal scopes in field conditions, and resolution is just one piece of the puzzle.
For most hunters, a 384×288 sensor handles close to mid-range work just fine. You’ll spot that coyote at 200 yards without issue. But for open country where you’re glassing at 850 yards, the 640×512 delivers crisp, well-defined images where you can clearly see the animal’s posture and movement.
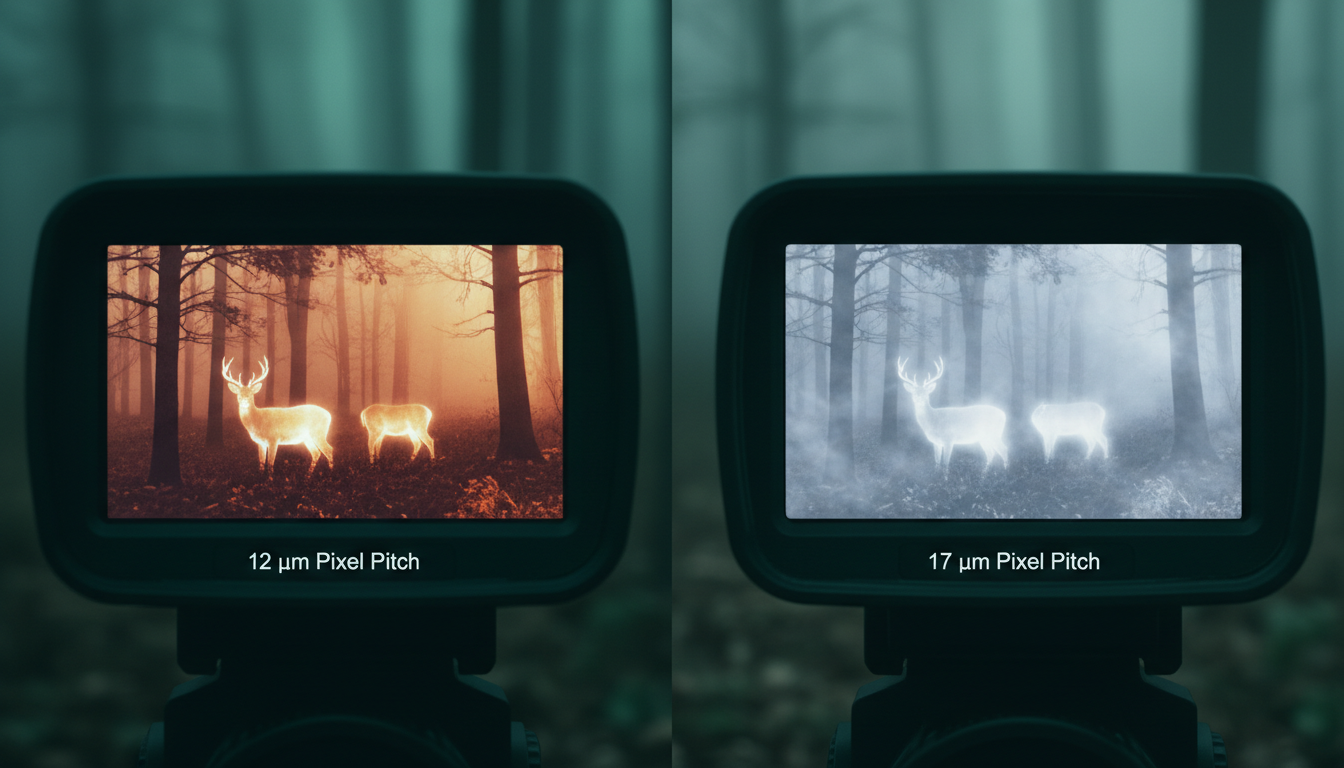
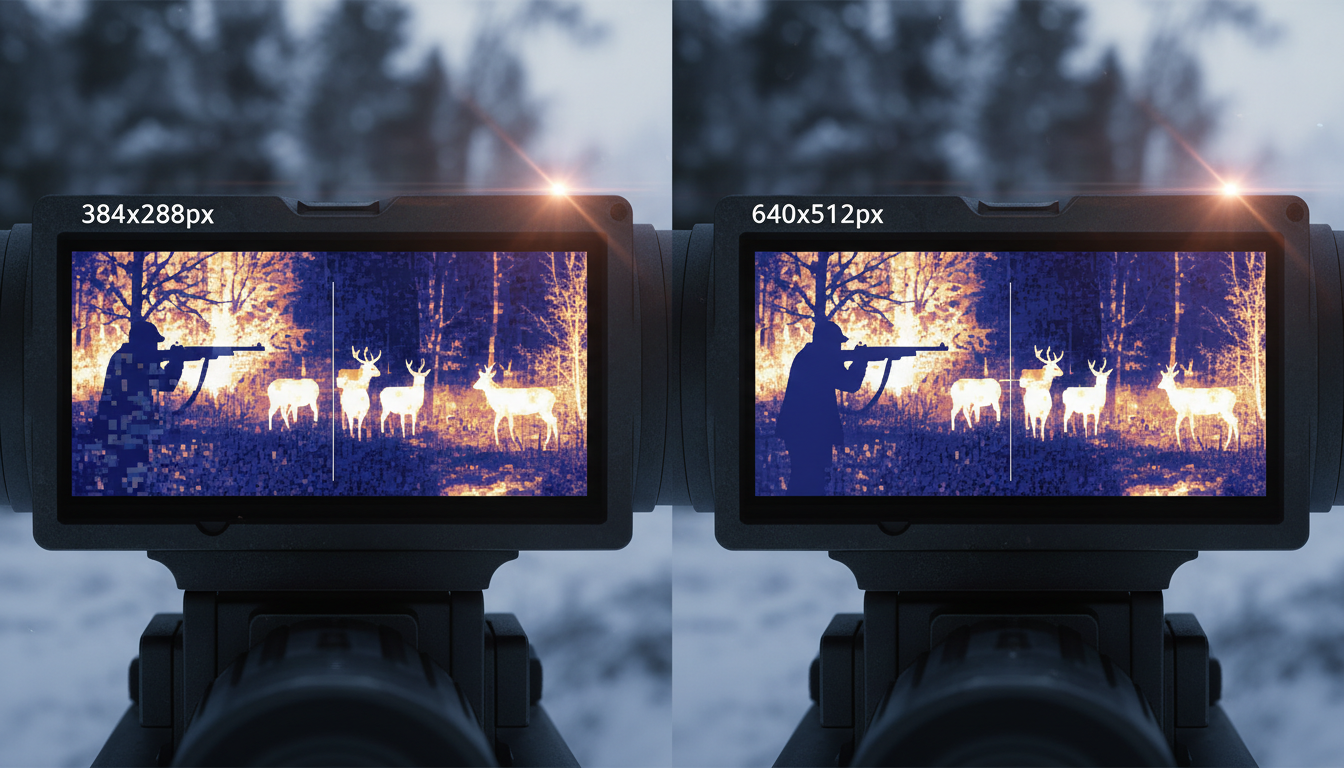
Pixel pitch refers to the size of each individual pixel on the sensor, measured in micrometers, typically 12µm or 17µm. It’s the distance between the centers of two pixels of a microbolometer, normally 12µm or 17µm in thermal imaging sensors.
And here’s where it gets interesting: smaller pixel pitch like 12µm means pixels are packed more closely together, allowing for higher resolution images and better detection of smaller objects, while larger pitch like 17µm means fewer pixels per unit area but potentially better sensitivity to thermal radiation.
Think of pixel pitch like bucket size. The larger the pixel and its area, the more Long Wavelength Infrared radiation it can receive and the higher the sensitivity of the entire thermal imaging sensor. A 17µm pixel collects more thermal energy than a 12µm pixel, which translates to better performance in challenging conditions.
Sensors with the same 640×480 resolution but different pixel sizes—17 microns versus 12 microns—result in better sensitivity for the larger pixel (NETD <25 mK vs. NETD <40 mK). That sensitivity difference shows up when you’re hunting in fog, rain, or high humidity—exactly when you need your scope to perform.
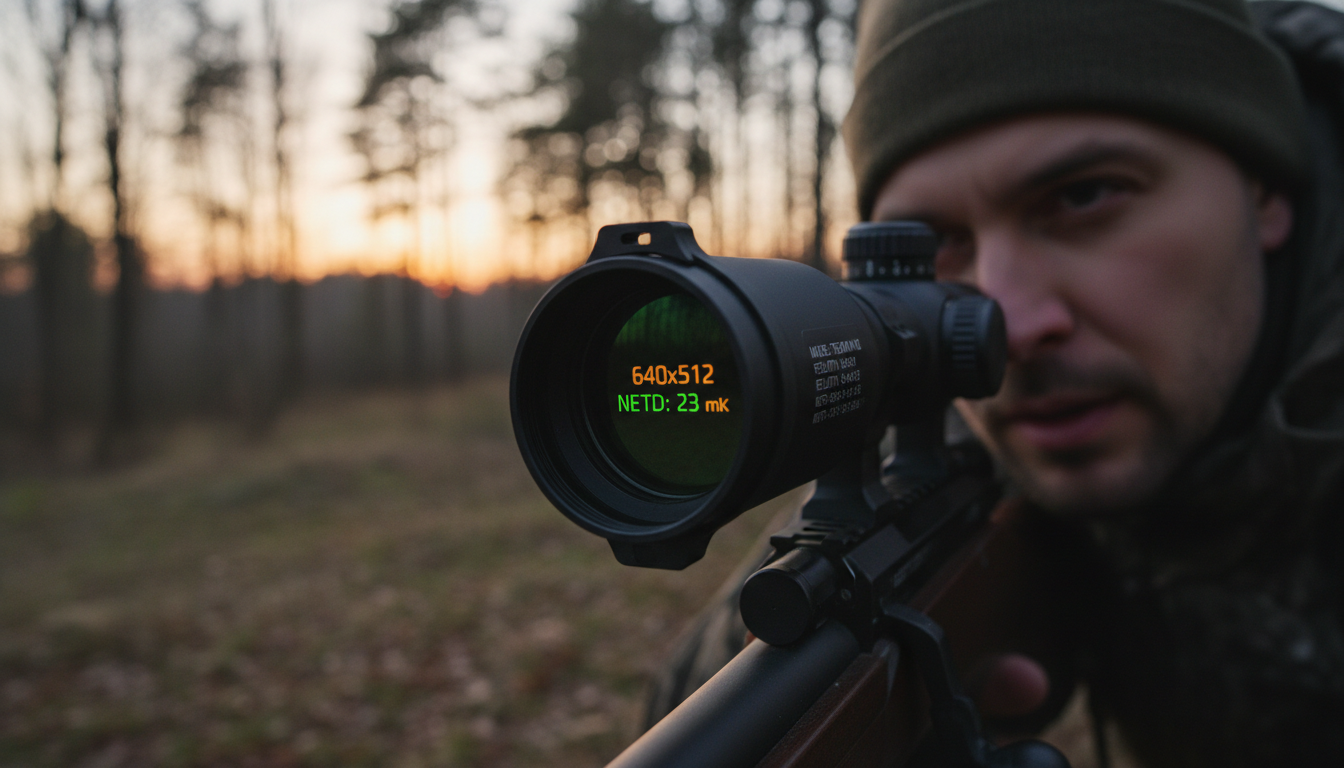
A 384×288 sensor at 17µm with NETD <25 mK can show low-contrast scenes in more detail than a 640×480 sensor at 12µm with NETD <40 mK. That seems backwards, right? More pixels should mean better images.
But thermal imaging doesn’t work like regular photography. Smaller 12µm pitch offers a sharper image at good distance when looking for small hot targets quite far from the observer, but for a more versatile device, 17µm will perform better.
We typically recommend our Sirius HD nebo Pegasus 2 LRF models for hunters who need that balance of resolution and real-world performance. These units consider the full system—not just one spec.
The pixel pitch affects more than just sensitivity. It also drives your base magnification and the physical size of the sensor. Pixel pitch directly influences base magnification, image quality and thermal imager sensitivity. You can’t optimize one factor without affecting the others.
You’ll see NETD (Noise Equivalent Temperature Difference) listed on every thermal scope spec sheet. NETD quantifies the sensitivity of a thermal sensor, measured in millikelvins (mK) with typical specifications like <25 mK or <20 mK—the lower the NETD value, the higher the sensor sensitivity and superior the image quality.
NETD measures how sensitive the sensor is to tiny differences in heat, and a lower number means the scope can see smaller temperature differences—like spotting a rabbit against warm ground.
In practical terms? Thermal scopes with higher NETD values tend to struggle in rain, fog, snow, and high humidity, producing noisy, low-contrast images, while a low-NETD thermal scope excels under these challenges. When you’re hunting at dawn and everything’s the same temperature, NETD makes the difference between detecting game and staring at thermal mush.
The best production batches of sensors with 17µm pixel pitch achieve NETD less than 25 mK, while 12µm sensors achieve less than 40 mK. That’s not marketing—it’s physics. Bigger pixels collect more thermal radiation, which means better sensitivity.
Let’s be honest about what these specs mean when you’re actually hunting. Resolution is just one piece of the puzzle—lens quality, sensor type, refresh rate, thermal sensitivity (NETD), and pixel pitch all matter significantly.
We’ve watched hunters obsess over getting a 640×512 scope only to be disappointed when a well-designed 384×288 unit outperforms it in fog. Two thermal devices can share identical specifications yet deliver noticeably different images because image quality depends on the entire imaging system—lens quality, display resolution, and image algorithms all influence the final result.
Battery life is another consideration nobody mentions in the marketing materials. 640×512 sensors consume more power than 384×288 units—maybe 20-30% faster battery drain—which matters on extended hunts. When you’re four hours into a hog eradication session, that extra battery capacity keeps you in the game.
Detection range matters more than pure resolution for long-distance work. Detection range is king for long distance—sensor doesn’t really matter that much for long range, but pixel pitch and focal length does. You need the right combination of optics, sensor size, and processing to spot game at distance.
Naše Draco a Arc LRF models balance these factors for serious hunters who need dependable performance across varying conditions and ranges.
So what resolution and pixel pitch should you actually get? It depends on how and where you hunt.
For close to mid-range work (under 300 yards) in varied terrain, a 384×288 sensor with 17µm pitch gives you excellent versatility. You’ll spot game quickly, handle bad weather well, and save money for better optics or an IR torch to extend your effective range even further.
Quality 640×512 thermal scopes run $2,800-$5,500+, while 384×288 equivalents cost $1,200-$2,500—nearly double the investment, which is a deal-breaker for hobbyist hunters on a budget.
For open country hunting where you’re regularly engaging targets beyond 400 yards, the higher resolution pays off. The extra pixels mean finer detail—you can distinguish between a coyote and a fox at distance and read body language to determine if the animal is alert, feeding, or bedded. That information changes how you approach your stalk.
If you need a thermal unit able to properly work in different scenarios, with different weather conditions at different distances, go to 17µm with a low NETD and lens aperture of f1.0. That’s the all-around setup that handles whatever conditions you encounter.
A 640×480 sensor with 12µm pixels and NETD below 25 mK delivers both fine detail and strong contrast, but only when the optics and processing are equally well-tuned. You can’t just bolt a mediocre lens onto a great sensor and expect magic.
Display resolution matters too. Display resolution definitely should not be lower than sensor resolution—the display must not degrade the image produced by the sensor, and higher display resolution allows more quality and more complex overlay graphics. You need a screen that can actually show you the detail your sensor captures.
Refresh rate affects how smooth the image looks when tracking moving targets. Most thermal scopes run at 30Hz or 60Hz. The refresh rate tells you how many times per second the screen updates—most scopes are either 30Hz or 60Hz, with 60Hz giving you very smooth, fluid image especially helpful for tracking a running animal.
V Pixfra, we design every thermal scope as a complete imaging system. The sensor resolution and pixel pitch matter, but so do the germanium lens coatings, the signal processing algorithms, and how the whole package handles heat buildup during extended use. It all works together.
Sensor resolution and pixel pitch are just two pieces of what makes a thermal scope perform in the field. True thermal image quality is created through synergy between resolution, pixel pitch, and NETD, refined by proprietary image processing and system-level calibration.
You don’t need to be a thermal imaging engineer to make a smart choice. Focus on how you’ll actually use the scope. Close to mid-range hunting in varied weather? A 384×288 sensor with 17µm pitch and low NETD gives you versatility and value. Long-range work in open country? The extra pixels of a 640×512 sensor help you identify targets at distance.
And remember: the best thermal scope is the one that performs when you need it. Specs on paper don’t bag game—reliable performance in rain, fog, and darkness does. That’s what we build into every unit we design.
What’s more important: sensor resolution or pixel pitch?
Neither is “more important”—they work together. Higher resolution (like 640×512) gives you more detail and better zoom quality. Pixel pitch affects sensitivity and versatility. The main difference lies in resolution versus sensitivity, with 12µm sensors offering higher resolution and 17µm sensors potentially offering better sensitivity. Match the specs to your actual hunting conditions and distances.
Why do 17µm sensors perform better in fog and rain?
Larger pixels capture more Long Wavelength Infrared radiation, which increases the sensitivity of the entire thermal imaging sensor. When conditions are challenging and thermal contrast is low, that extra sensitivity lets you detect game that smaller pixels might miss. It’s the difference between seeing a heat signature and seeing nothing at all.
Is a 640×512 thermal scope worth the extra cost?
It depends on your hunting style. For long-range work at 850 yards, 640×512 provides crisp, well-defined images, while 384×288 shows the same target as visible but pixelated with fine details lost. For most hunters working under 300 yards, a quality 384×288 scope offers better value. Save the money for better glass or accessories.
What NETD should I look for in a thermal scope?
The ideal NETD range falls between <25mK and <40mK—a NETD below 25mK provides exceptional sensitivity suitable for highly detailed target detection at longer ranges, while values above 40mK may result in less precise thermal imagery. Lower is always better, but don’t sacrifice other features chasing the absolute lowest NETD number.
Can I get good performance from a budget thermal scope?
Yes, if you pick the right specs for your needs. Devices with 384×288px are the most popular in the market as they’re more affordable than top-line 640×512 thermal devices but still allow detection range out to 1800m depending on lens size. Focus on units that balance resolution, pixel pitch, and NETD rather than maxing out one spec at the expense of others.
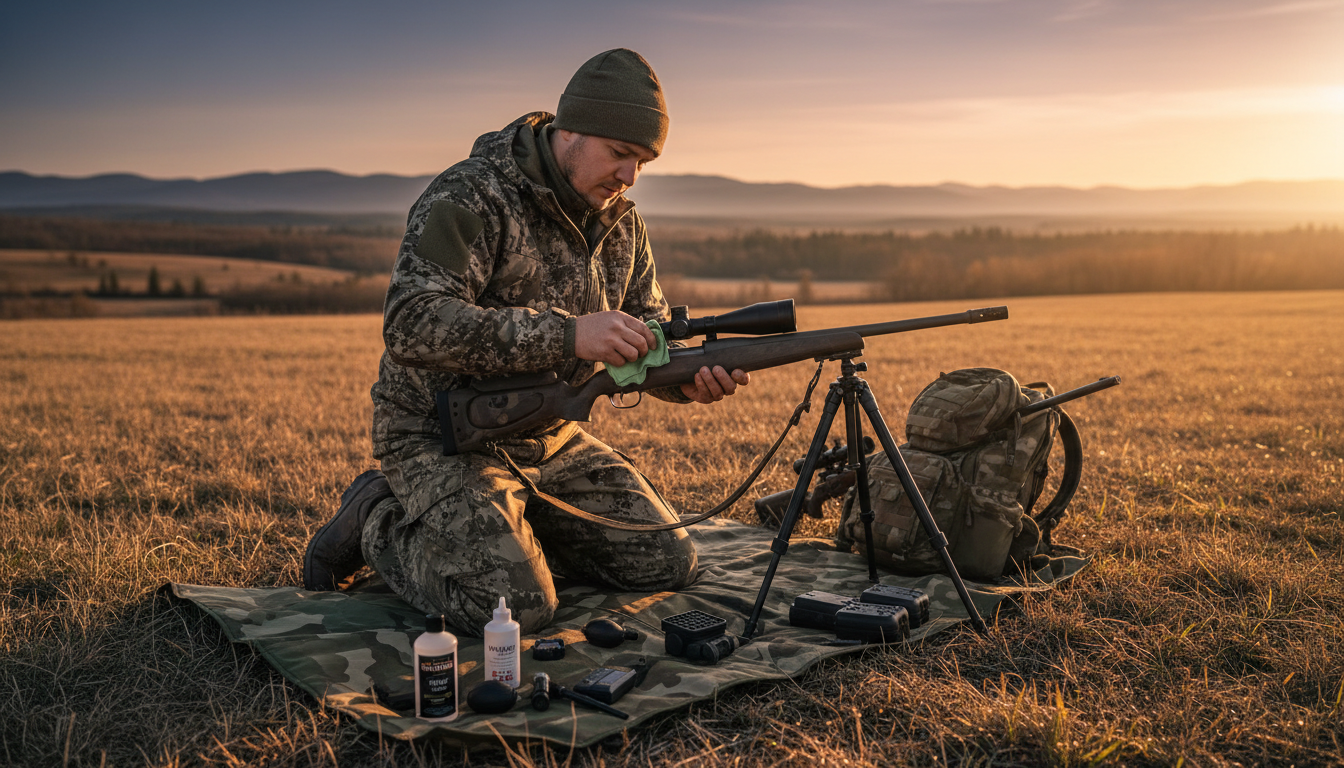
Termovizní dalekohled je významná investice a udržení objektivu v perfektním stavu rozhoduje o tom, zda cíl zahlédnete, nebo ho minete. Viděli jsme už příliš mnoho lovců, kteří si poškodili optiku nesprávnými způsoby čištění, a upřímně řečeno, nemusí to být vůbec tak složité.
Představte si objektiv termovizního dalekohledu jako čelní sklo vašeho nákladního auta. Trocha prachu vám sice neublíží, ale špína a otisky prstů? Ty vám rychle zhorší viditelnost. Ale je tu jeden háček – čočky termovizních dalekohledů nejsou z obyčejného skla. Jsou vyrobeny z germania nebo jiných speciálních materiálů s jemnými povlaky, které vyžadují opatrné zacházení.
Tento průvodce jsme sestavili, abychom vám přesně ukázali, jak provádíme údržbu naší termální optiky v Pixfra. Ať už používáte náš Sirius HD, ten Pegasus 2 LRF, nebo jakýkoli jiný termovizní dalekohled – díky těmto metodám zůstane váš dalekohled čistý a snímky ostré.
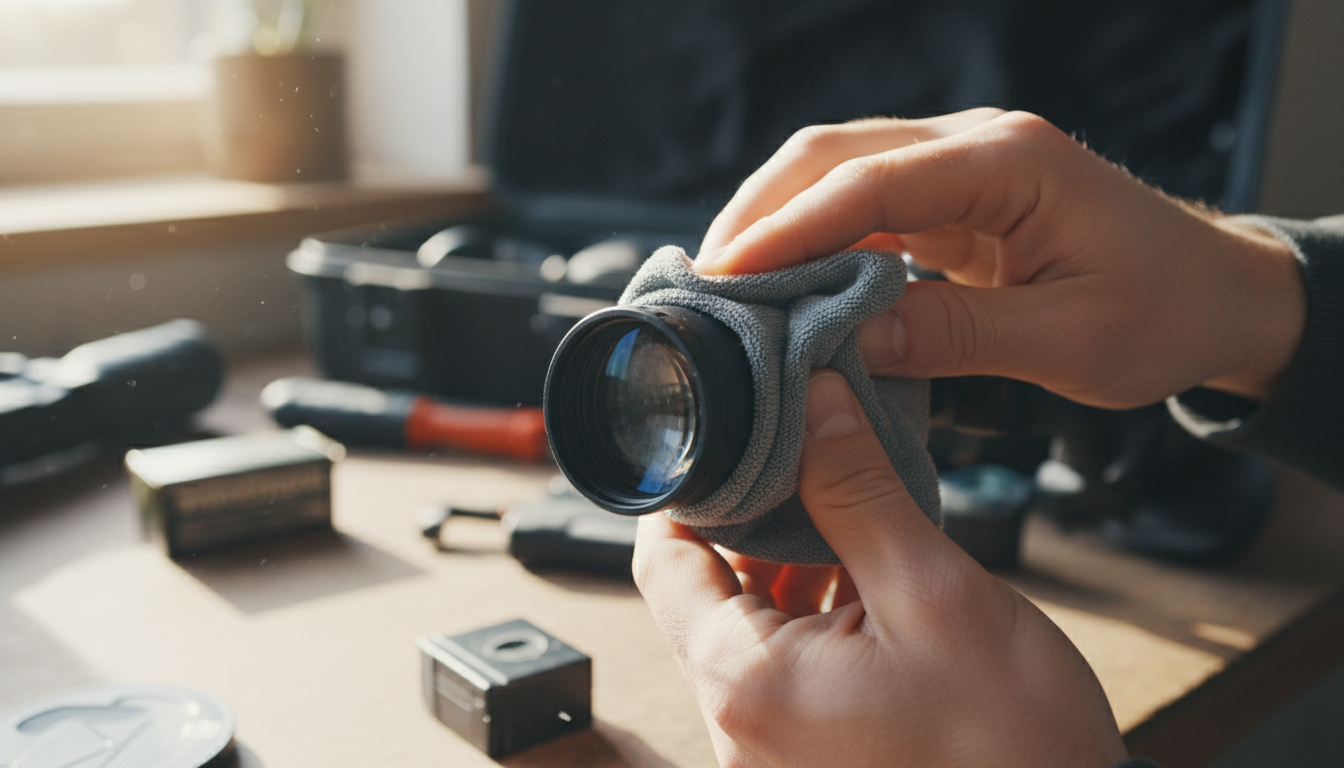
Otisky prstů, stříkance vody, nečistoty a prach mohou výrazně snížit funkčnost vašeho dalekohledu, což vede k neuspokojivým výsledkům. A nemluvíme tu jen o mírně rozmazaných obrazech – jde o ztrátu kontrastu, přehlédnutí tepelných stop a potenciální zmaření lovu, který jste plánovali celé týdny.
Germaniové čočky v termovizních dalekohledech jsou mnohem dražší než běžné optické sklo. Čočku termovizní kamery čistěte pouze v případě, že je to nezbytně nutné, a to pouze tehdy, pokud na ní jsou viditelné nečistoty nebo otisky prstů. Příliš časté čištění může ve skutečnosti způsobit rychlejší opotřebení antireflexní vrstvy, než by to kdy dokázal i ten nejmenší prach.
Začněme tím, co vám zkazí dojem. Viděli jsme, jak lidé tyto chyby dělají, a jsou to chyby, které vás draho vyjdou.
Nikdy k otření objektivu nepoužívejte tričko, papírové utěrky ani kapesníky, protože by mohly poškrábat povrch. Vážně, odolejte tomu pokušení. Vaše bavlněné tričko je sice měkké na dotek, ale ve srovnání se speciálními čisticími prostředky na objektivy je to v podstatě smirkový papír.
NEČISTĚTE roztoky na bázi amoniaku – došlo by k poškození speciálního povlaku na čočce. Nepoužívejte Windex ani běžné čisticí prostředky na sklo. Jsou určeny pro okna, nikoli pro přesnou optiku se speciálními povlaky.
Nečistěte zaprášenou čočku, aniž byste nejprve odstranili volné částice. Tyto drobné zrnka písku nebo prachu působí jako malé nožíky, když s nimi přejíždíte po povrchové vrstvě.
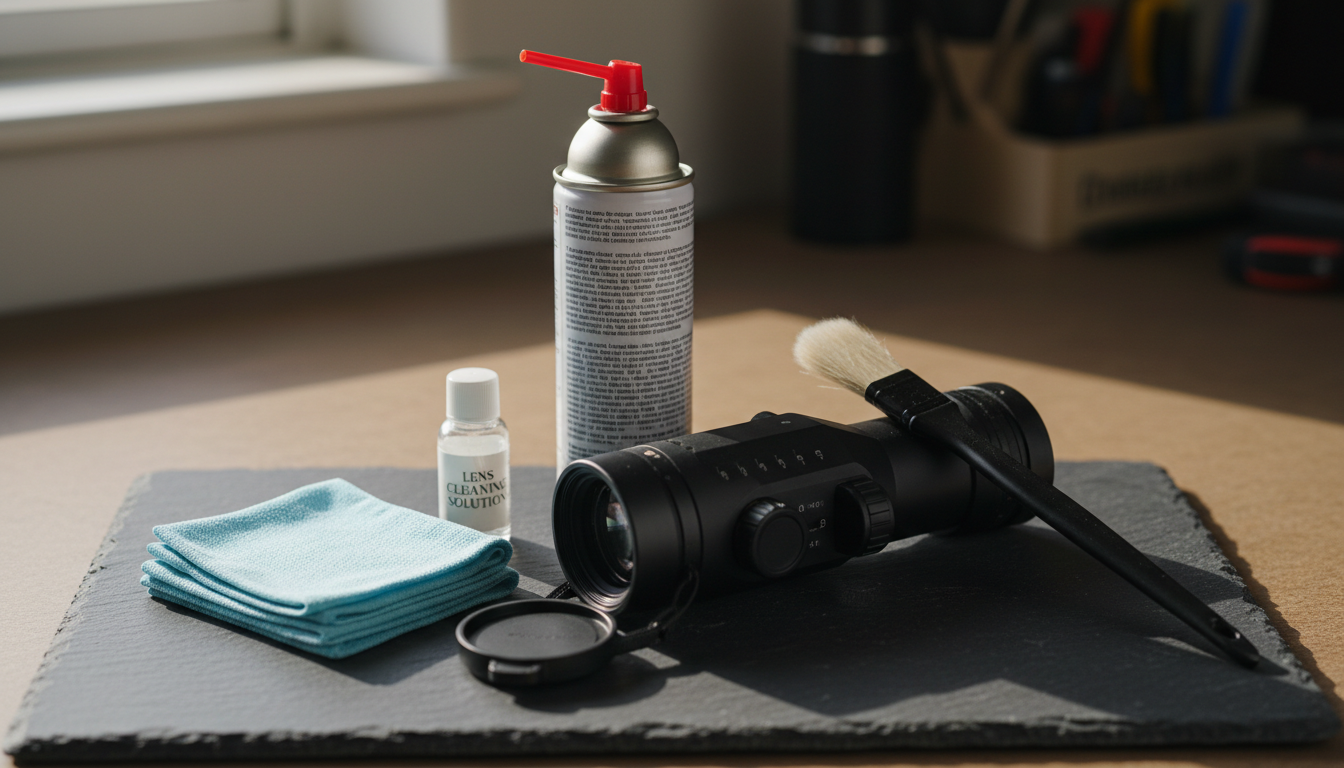
Nepotřebujete spoustu vybavení, ale potřebujete to správné. Tady je seznam věcí, které by neměly chybět ve vaší úklidové sadě:
Stlačený vzduch nebo raketové dmychadlo: K odstranění volného prachu použijte aerosoly se stlačeným vzduchem. Skvěle se osvědčí i gumová foukačka, u které nehrozí riziko studeného proudu vzduchu, jak tomu někdy bývá u stlačeného vzduchu v plechovkách.
Utěrky z mikrovlákna: Nejen tak ledajaký hadřík – pořiďte si mikrovlákno optické kvality určené pro objektivy fotoaparátů nebo přesnou optiku. Tyto hadříky nezanechávají vlákna a nepoškrábou citlivé povrchové úpravy.
Roztok na čištění čoček: Používejte čisticí prostředek na čočky obsahující 96% izopropylalkoholu nebo komerční čisticí prostředek na čočky s obsahem alespoň 30% izopropylalkoholu. Používejte výhradně roztoky určené pro optiku s povrchovou úpravou.
Kartáček na měkké čočky: Kartáček s ultrajemnými štětinami pomáhá odstranit i ten nejodolnější prach, aniž byste se museli dotýkat čočky prsty.
Vatové tyčinky nebo ubrousky na čištění čoček: Pro důkladné ošetření odolných skvrn, ale používejte s mírou.
Takto správně čistíme čočky termovizních dalekohledů. Postupujte v tomto pořadí – právě vynecháváním kroků si lidé způsobují potíže.
Krok 1: Odstraňte volné nečistoty
Nikdy neotírejte zaprášenou čočku přímo. Volné částečky prachu nebo písku mohou poškrábat povrch. Nejprve vždy použijte jemný stlačený vzduch nebo měkký kartáček na optiku, abyste nečistoty odstranili bez tření.
Nasměrujte objektiv dolů, aby vám gravitace pomáhala, a ne bránila. Několikrát na něj foukněte pomocí foukačky nebo stlačeného vzduchu ze vzdálenosti asi 6 palců. Sledujte, jak částice opadávají.
Krok 2: Zbývající prach odstraňte kartáčem
Před použitím utěrky z mikrovlákna nebo speciálních čisticích ubrousků nejprve odstraňte prach měkkým kartáčem. Používejte jemné, zametavé pohyby od středu směrem ven. Netlačte příliš silně – nechte práci na kartáči.
Krok 3: Naneste čisticí roztok
Pokud po provedení kroků 1 a 2 stále vidíte šmouhy nebo otisky prstů, je čas použít tekutý čisticí prostředek. Nikdy nestříkejte přímo na čočku. Místo toho naneste malé množství čisticího roztoku na hadřík z mikrovlákna.
Krok 4: Otřete objektiv
Otírejte od středu čočky směrem k vnějším okrajům valivým pohybem, při kterém se čočka dotýká vždy čisté části hadříku. Používejte jemné kruhové pohyby a nechte hadřík po povrchu klouzat. Nečistíte přece pánev – hladíte přesnou optiku.
Krok 5: Závěrečná kontrola
Držte dalekohled proti světlu a zkontrolujte, zda na něm nejsou šmouhy nebo zbytky skvrn. Pokud nějaké uvidíte, opakujte krok 4 s čistou částí hadříku.
Čištění je důležité, ale prevence vám ušetří mnohem více času. Tady je několik tipů, jak udržet naše čočky déle čisté.
Během používání mějte kryty objektivu vždy zavřené, aby byly chráněny před poškrábáním, prachem a nečistotami. Tyto odklápěcí kryty objektivu mají svůj důvod. Používejte je vždy, když se pohybujete v křoví nebo právě nedíváte dalekohledem.
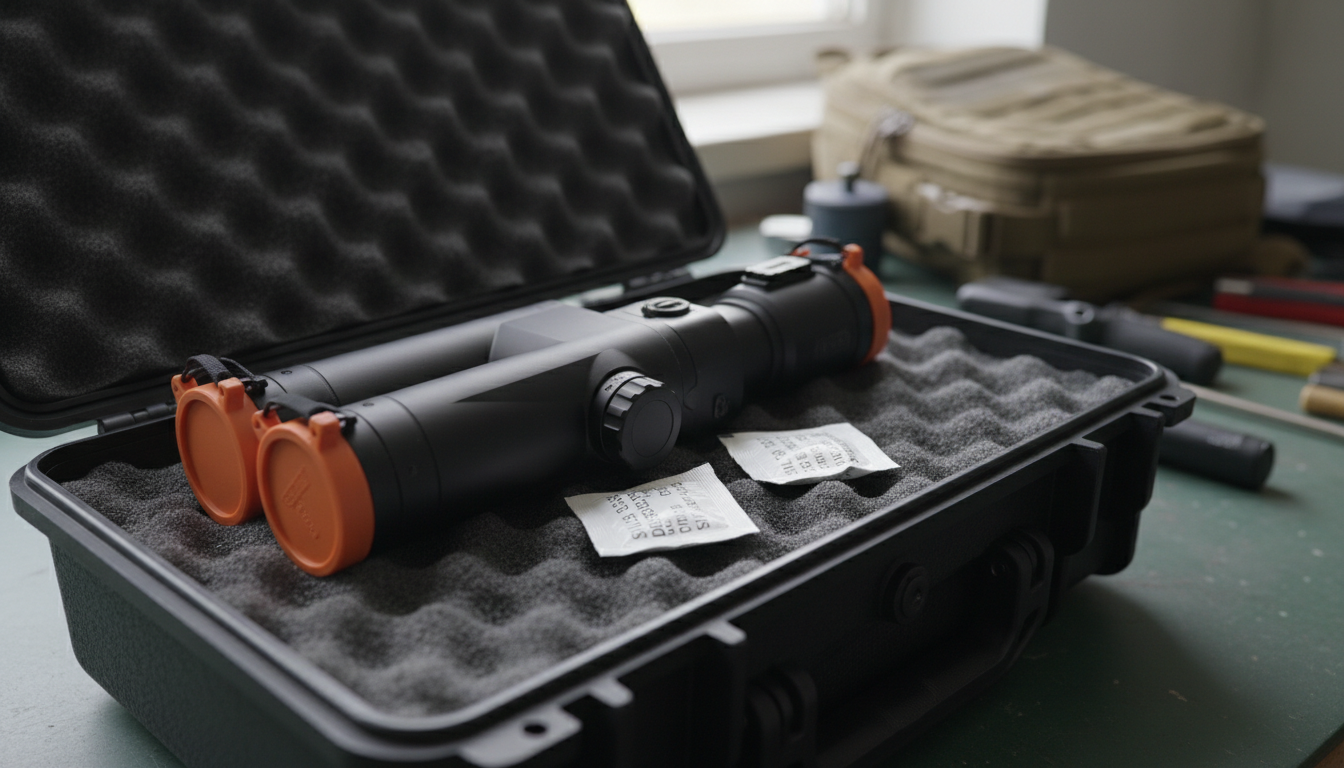
Termovizní dalekohled ukládejte do speciálního pouzdra – buď do látkového pouzdra s pěnovými vložkami, nebo do plastového či kovového pouzdra vybaveného měkkými výplněmi. Pro ochranu před vlhkostí vložte do pouzdra sáčky se silikagelem. Vlhkost je nepřítelem elektroniky i optiky. Několik sáčků s vysoušedlem představuje levné pojištění.
Pokud je to možné, chraňte dalekohled před extrémními teplotními výkyvy. I u vodotěsných dalekohledů může při vystavení náhlým změnám teploty docházet ke kondenzaci uvnitř přístroje. Pokud přecházíte z teplého nákladního vozu do mrazivého prostředí, nechte dalekohled postupně se přizpůsobit teplotě.
Nezapomeňte ani na ostatní části termovizního dalekohledu. Vnější povrchy kovových a plastových dílů otřete od prachu a nečistot bavlněným hadříkem. Na pouzdro stačí mírně navlhčený hadřík – jen dbejte na to, aby se vlhkost nedostala do otvorů a těsnění.
Zkontrolujte, zda gumové oční mušle a ochranný plášť nevykazují praskliny nebo opotřebení. Tyto součásti chrání vnitřní elektroniku před vlhkostí a nárazy. Pokud zjistíte poškození, vyřešte ho, než se z něj stane větší problém.
Oblast kolem tlačítek, otočných ovladačů a nastavovacích knoflíků očistěte měkkým kartáčkem nebo vatovou tyčinkou. Nahromaděné nečistoty v těchto místech mohou v průběhu času ovlivnit funkčnost přístroje.
Právě v tom lidé často dělají chybu – buď uklízejí příliš, nebo naopak málo.
Čistěte objektiv vždy, když si všimnete nečistot nebo šmouh, které zhoršují viditelnost, ale vyhněte se příliš častému čištění, abyste zabránili zbytečnému opotřebení. Naše dalekohledy obvykle po každém lovu lehce vyčistíme a při intenzivním používání provádíme důkladnější čištění jednou měsíčně.
Po každém lovu objektiv lehce očistěte a v případě, že byl vystaven blátu, dešti nebo silnému prachu, proveďte důkladnější čištění. Pokud jste byli vystaveni nepříznivému počasí nebo prašným podmínkám, nečekejte – vyčistěte jej hned, jak se vrátíte domů.
Skladujte v suchém, stinném prostředí s konstantní teplotou. Naše termovizní dalekohledy uchováváme v klimatizovaných prostorách, mimo dosah oken a zdrojů tepla.
V případě dlouhodobého skladování zkontrolujte baterii a vyjměte ji (nastavte na úroveň nabití 40–60%). Tím zabráníte zhoršení vlastností baterie a možnému úniku elektrolytu, který by mohl poškodit vnitřní součásti dalekohledu.
Ještě před začátkem lovecké sezóny proveďte předsezónní kontrolu. Přibližně měsíc před začátkem sezóny proveďte předsezónní kontrolu podle následujícího seznamu: plně nabijte a otestujte baterie, zkontrolujte kryt a gumová těsnění, vyčistěte a prohlédněte objektiv, aktualizujte firmware, zkontrolujte kalibraci snímače a vadné pixely, ověřte držáky a příslušenství a proveďte noční test v terénu za reálných podmínek. Tak budete mít jistotu, že budete připraveni, až na to bude záležet.
Tyto chyby jsme už viděli až příliš často:
Nadměrné úklidové činnosti: Čistěte čočku opatrně – příliš časté čištění může vést k opotřebení antireflexní vrstvy, což způsobí větší ztrátu propustnosti než pár prachových částeček. Několik prachových částeček neovlivní kvalitu obrazu tolik jako opotřebované vrstvy.
Použití hrubých materiálů: Vyhýbejte se agresivním chemikáliím, které mohou poškodit citlivé povrchové úpravy. Nikdy neotírejte suchý a zaprášený objektiv, protože by mohlo dojít k poškrábání povrchu.
Ignorování okuláru: Nezapomeňte vyčistit také okulárovou čočku. Šmouhy na zadní čočce ovlivňují kvalitu obrazu stejně jako nečistoty na objektivové čočce.
Urychlování procesu: Nespěchejte. Při spěšném čištění hrozí, že na čočce vzniknou škrábance nebo šmouhy.
Někdy je třeba vyhledat odbornou pomoc. Pokud po vyčištění zaznamenáte přetrvávající problémy s kvalitou obrazu, zhoršený výkon nebo viditelné poškození povrchových vrstev objektivu, je na čase obrátit se na výrobce nebo autorizované servisní středisko.
Většina kvalitních termovizních dalekohledů má víceletou záruku. Nepokoušejte se sami rozebírat ani důkladně čistit vnitřní součásti – tím si záruku zrušíte rychleji než čímkoli jiným.
Péče o objektiv termovizního dalekohledu nevyžaduje žádné speciální dovednosti ani drahé vybavení. Stačí mít správné nástroje, dodržovat správnou techniku a mít trochu trpělivosti. Nejprve odstraňte volné nečistoty stlačeným vzduchem, použijte vhodné čisticí roztoky a vždy postupujte opatrně.
Stačí věnovat zařízení po každém použití pár minut péče a můžete tak prodloužit jeho životnost o několik let a zajistit si jasný výhled za všech podmínek. Zjistili jsme, že při správné péči a údržbě vydrží termovizní dalekohledy více než 10 let.
Ať už používáte Pixfra… Arc LRF pro práci na velkou vzdálenost nebo pro Draco Při lovu zblízka zajistí tyto způsoby čištění, že vaše optika bude fungovat na maximum. Spárujte svůj termovizní dalekohled s naším Infračervená svítilna pro ještě lepší výsledky v terénu.
Nezapomeňte, že čistá optika znamená lepší detekci, ostřejší snímky a úspěšnější lov. Pečujte o své vybavení a ono se postará o vás. Další údaje o reálném výkonu termovizních dalekohledů najdete na našem Případová studie o eradikaci divokých prasat ukazuje, jak správná údržba vybavení přispěla k dosažení úspěšných výsledků.
Mohu na čočku termovizního dalekohledu použít běžný čisticí prostředek na brýle?
Ne, na termovizních dalekohledech nepoužívejte běžné čisticí prostředky na brýle. Čočky termovizních dalekohledů jsou vyrobeny z germania nebo speciálních materiálů s jedinečnými povrchovými úpravami, které reagují odlišně než běžné sklo. Používejte čisticí prostředky na čočky určené speciálně pro optické přístroje, které obsahují alespoň 30% izopropylalkoholu nebo 96% roztoky izopropylalkoholu. Běžné čisticí prostředky na brýle mohou obsahovat přísady, které poškozují povrchové úpravy termovizních dalekohledů a časem zhoršují kvalitu obrazu.
Jak mohu odstranit otisky prstů z objektivu termovizního dalekohledu, aniž bych jej poškodil?
Nejprve odstraňte veškerý volný prach stlačeným vzduchem nebo foukačem. Poté naneste malé množství čisticího prostředku na optické čočky určeného pro mikrovláknový hadřík – nikdy ne přímo na čočku. Jemně otírejte od středu směrem ven kruhovými pohyby s minimálním tlakem. Klíčem je nejprve odstranit nečistoty ještě před samotným otíráním, čímž se zabrání poškrábání citlivého germanového povrchu.
Je bezpečné čistit můj termovizní dalekohled v chladném počasí, nebo bych měl počkat?
Termovizní dalekohled můžete čistit i v chladném počasí, ale nejprve jej přeneste dovnitř a nechte jej 15–20 minut aklimatizovat na pokojovou teplotu. Náhlé změny teploty mohou způsobit kondenzaci uvnitř dalekohledu. Jakmile se dalekohled aklimatizuje, vyčistěte jej obvyklým způsobem. Nikdy nenanášejte tekuté čisticí prostředky na zamrzlou čočku, protože by to mohlo způsobit teplotní šok a případně prasknutí povrchových vrstev.
Co mám dělat, když se do mého termovizního dalekohledu dostane vlhkost?
Pokud zjistíte vlhkost uvnitř přístroje nebo zamlžení, okamžitě přestaňte dalekohled používat. Umístěte jej na teplé a suché místo s vysoušecími sáčky v blízkosti, ale nevystavujte jej přímému teplu. Nechte krytky objektivu sundané, aby mohl cirkulovat vzduch. Pokud vlhkost přetrvává i po 48 hodinách, obraťte se na výrobce nebo autorizované servisní středisko – vlhkost uvnitř dalekohledu často signalizuje poruchu těsnění, která vyžaduje odbornou opravu.
Jak poznám, že jsem poškodil povrchovou úpravu svého termálního objektivu?
Poškození povrchové úpravy se obvykle projevuje jako trvalé skvrny, škrábance nebo oblasti, kde je obraz i po vyčištění zhoršený. Při pohledu pod úhlem můžete na povrchu objektivu zaznamenat snížený kontrast, zamlžení nebo duhové vzory. Pokud čištění nezlepší kvalitu obrazu a na objektivu jsou viditelné skvrny, může být povrchová úprava poškozená. Odborná prohlídka může potvrdit poškození povrchové úpravy a určit, zda je nutná oprava nebo výměna.
Zajděte v těchto dnech do jakéhokoli loveckého tábora a určitě uslyšíte někoho mluvit o termovizních dalekohledech. S rostoucí popularitou těchto přístrojů se však šíří i spousta mylných informací. Slyšeli jsme už všechno – od tvrzení, že termovizní dalekohledy dokážou vidět skrz zdi, až po přesvědčení, že fungují pouze v noci.
Hele, chápeme to. Termální technologie zní jako něco přímo ze sci-fi filmu. A upřímně řečeno, právě v tom je část problému. Hollywood značně ovlivnil vnímání veřejnosti a vytvořil očekávání, která neodpovídají realitě. Po letech spolupráce s lovci a testování termálních zařízení, jako je naše Sirius HD a Pegasus 2 LRF, identifikovali jsme nejrozšířenější mýty, které je třeba vyvrátit.
Věc se má takhle – termovizní zaměřovače jsou úžasné přístroje. Nejlépe však fungují, když skutečně chápete, co dokážou a co ne. Pojďme si to ujasnit.
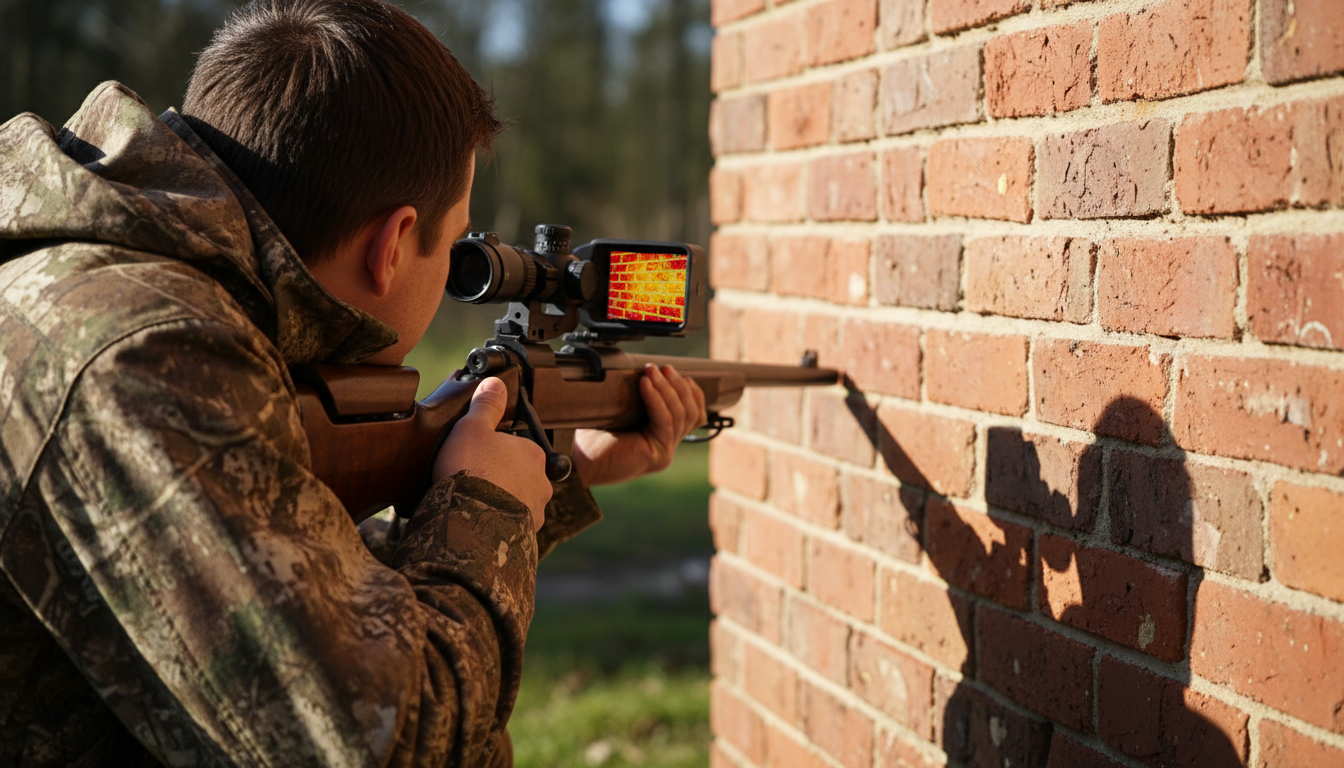
Tento mýtus je na prvním místě seznamu z dobrého důvodu. Je to pravděpodobně nejrozšířenější mylná představa a je zcela nepravdivá.
Termokamery detekují infračervené záření – v podstatě tepelnou energii – vyzařovanou z povrchů. Nedokážou proniknout pevnými materiály, jako jsou stěny, dveře nebo beton. Když namíříte termovizní přístroj na stěnu, vidíte pouze povrchovou teplotu této stěny, nic víc. Stěna s rovnoměrnou teplotou se na termovizním snímku zobrazí jako prázdná plocha, i když přímo za ní stojí člověk.
Podívejte se na to takto: termovize detekuje teplo na povrchu, nikoli rentgenové záření. Infračervené záření, které snímají termální senzory, neprochází většinou pevných materiálů. Některé materiály, které jsou průhledné pro viditelné světlo – jako sklo a voda –, se při pohledu prostřednictvím termovize jeví jako zcela neprůhledné.
V tomto mýtu se však skrývá malý zrnko pravdy. Pokud někdo přiloží ruku na tenkou zeď na delší dobu, můžete na jejím povrchu zaznamenat nepatrný teplotní rozdíl. Jde však pouze o to, že se zeď zahřívá – stále skrz ni nevidíte. Stejný princip platí i tehdy, když jsme venku v terénu s naším Draco termovizní dalekohled. Dokáže odhalit divočáka schovaného za křovím, protože tepelný signál prochází mezerami ve vegetaci, nikoli proto, že by viděl skrz pevné předměty.
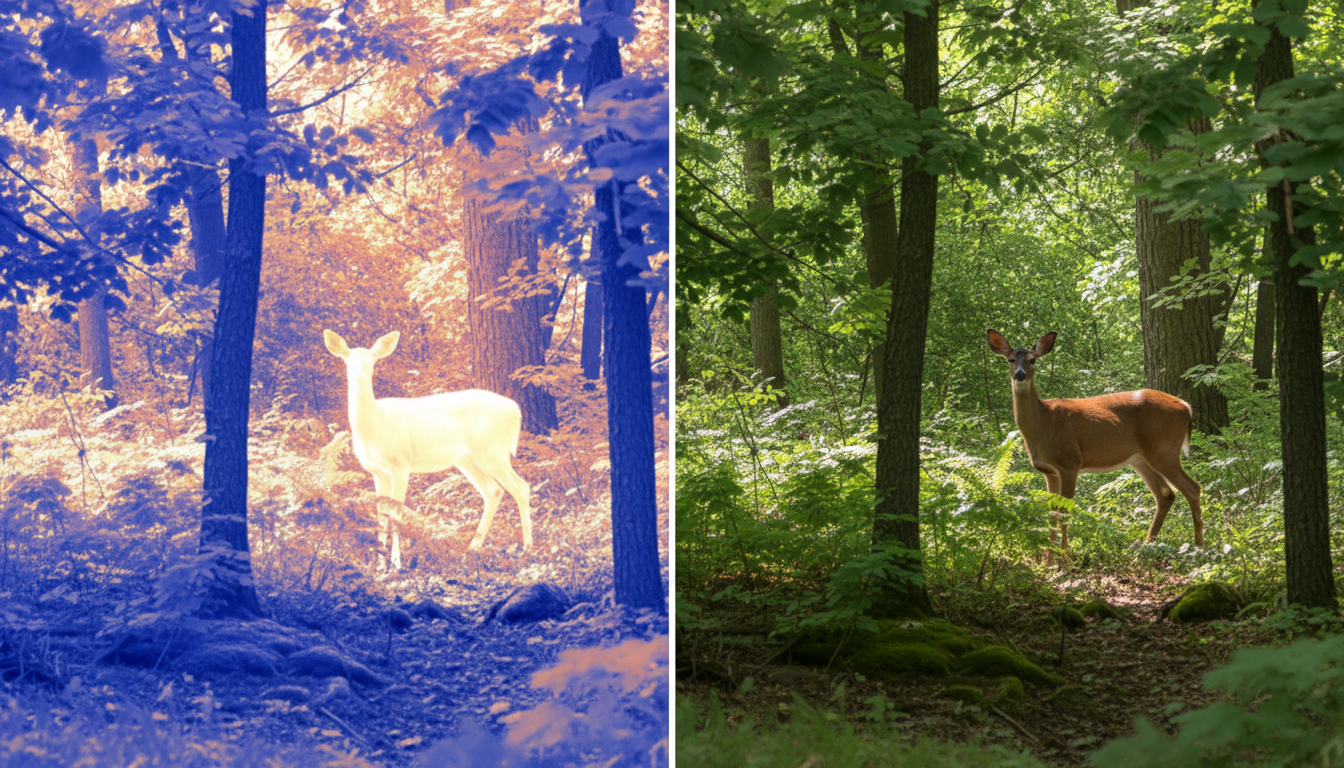
Tohle slýcháme neustále a přivádí nás to k šílenství, protože to omezuje, jak lidé tyto nástroje využívají.
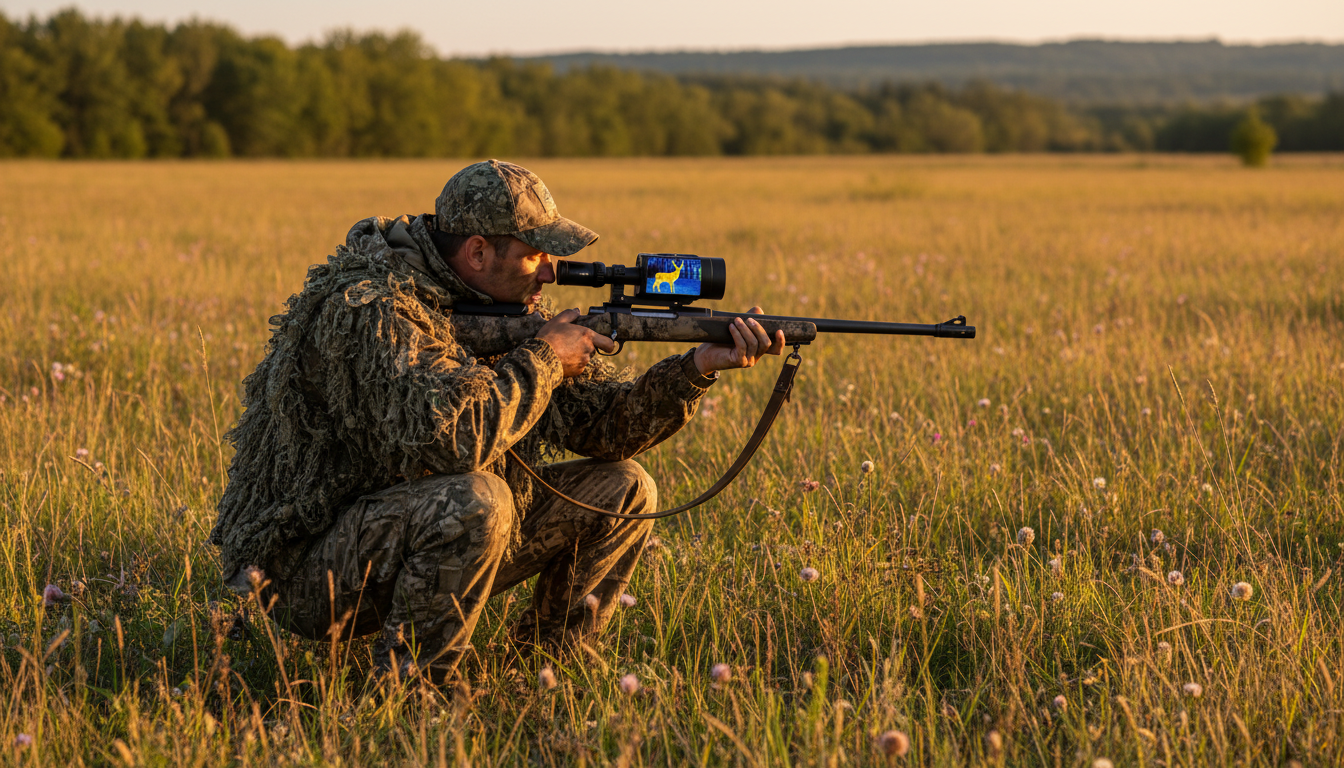
Termovizní dalekohledy fungují stejně účinně ve dne i v noci. Důvod je jednoduchý: termovize není závislá na viditelném světle. Detekuje teplotní rozdíly, které existují nepřetržitě. Ať už je poledne nebo půlnoc, teplokrevná zvířata stále vyzařují teplo, které se odlišuje od jejich okolí.
Během dne vám termovizní dalekohledy mohou skutečně nabídnout výhody, s nimiž se tradiční optika nemůže rovnat. Hustá mlha, silné oslnění nebo hustá vegetace, které by běžný dalekohled znemožnily? Žádný problém. Viděli jsme nespočet lovců, kteří pomocí termovizních přístrojů během poledního průzkumu lokalizovali jeleny odpočívající ve vysoké trávě – zvířata, kolem kterých by s dalekohledem jednoduše prošli.
Jeden příklad z praxe to opravdu jasně dokládá. Skupina lovců, kterou známe z Texasu, pravidelně využívá termovizi za úsvitu a v časných ranních hodinách k vyhledávání divokých prasat v hustém porostu. Slunce už vyšlo, světla je dostatek, ale vegetace je příliš hustá na to, aby bylo možné zvěř vizuálně identifikovat. Jejich termovizní monokulár zachytí tepelné stopy během několika sekund, zatímco s špičkovým dalekohledem by jejich zjištění trvalo 10–15 minut.
Toto je důvod, proč je využití termovize během dne tak účinné: zatímco okolní teplota stoupá, živé organismy si udržují svou tělesnou teplotu. Právě tento kontrast zachycují termální senzory. Jelen s teplotou 98°F vynikne bez ohledu na to, zda je okolní teplota 40°F nebo 85°F.
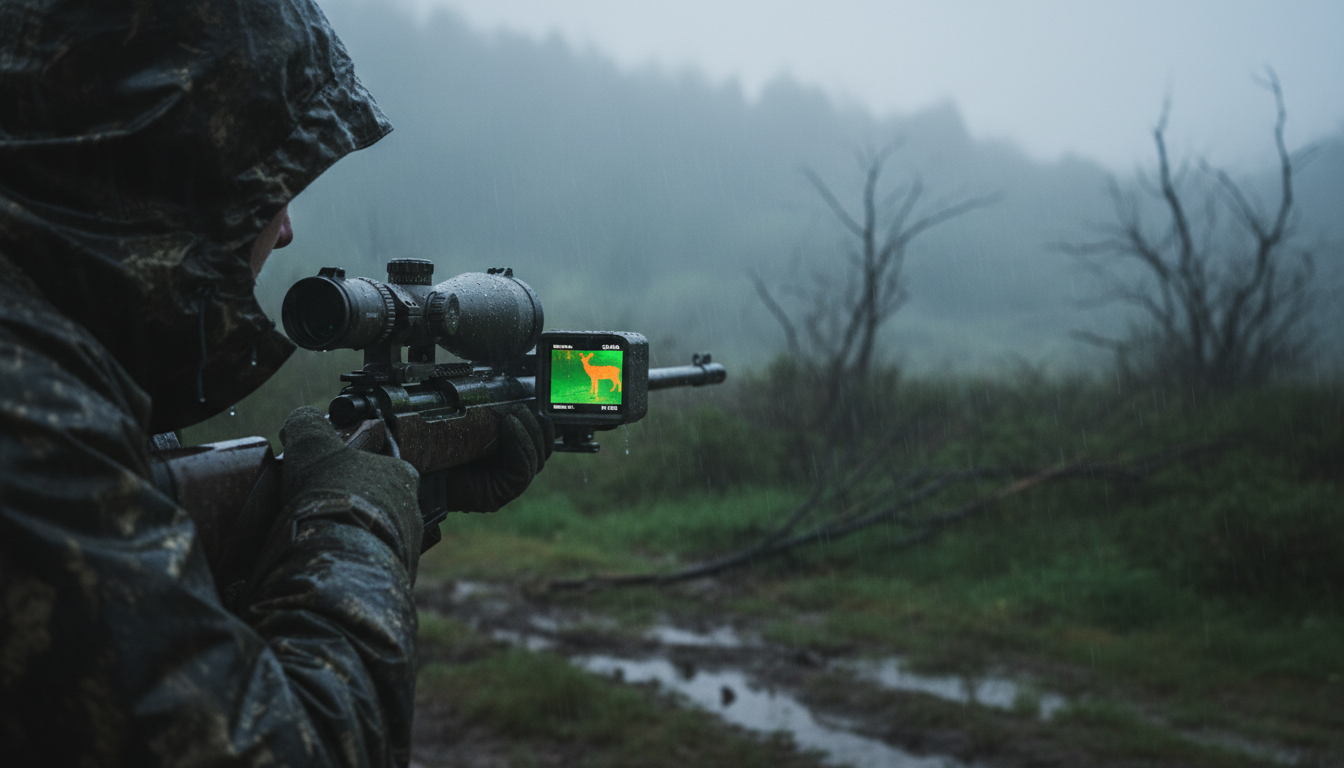
Tento mýtus zachází příliš daleko na druhou stranu. Ano, termovizní zaměřovače fungují za nepříznivého počasí lépe než tradiční optika, ale nejsou to žádné zázraky.
Déšť, mlha a husté sněžení mohou snížit účinnost termovize. Ačkoli termovize proniká lehkou mlhou a oparem mnohem lépe než přístroje pro noční vidění nebo standardní dalekohledy, extrémně hustá mlha může zkrátit dosah detekce. Silný déšť může zakrýt tepelné stopy nebo vyvolat tepelné “šumy”, které ztěžují identifikaci cílů na dálku.
Přesto však termovizní dalekohledy za špatného počasí stále předčí ostatní technologie. Naše přístroje jsme testovali za všech povětrnostních podmínek, od mírného mrholení až po silné lijáky. Schopnost detekce se sice v extrémních podmínkách snižuje, ale nikdy jsme se nesetkali se situací, kdy by za nepříznivého počasí fungoval tradiční dalekohled lépe než termovizní.
Teplotní kontrast hraje větší roli, než si většina lidí uvědomuje. V prostředích, kde se teplota okolí téměř shoduje s tělesnou teplotou – například během vlhkého letního odpoledne s teplotou 95°F – klesá účinnost termovize. Kontrast tepelného signálu, díky kterému jsou termovizní kamery tak užitečné, se snižuje, když mají všechny objekty přibližně stejnou teplotu.
Znamená to snad, že termovizní přístroje jsou v horkém počasí k ničemu? Vůbec ne. Znamená to však, že je třeba upravit svá očekávání a pochopit omezení této technologie. Kvalitní termovizní přístroj s dobrou citlivostí, jako jsou například modely vybavené moderními senzory, dokáže i nadále detekovat teplotní rozdíly v řádu pouhých několika stupňů.
Tento bod jsme si nechali na konec, protože se týká skutečných peněz a nikdo nechce utrácet zbytečně na základě mylných předpokladů.
Rozsah detekce není jen otázkou ceny – jde o správnou kombinaci rozlišení snímače, velikosti objektivu a rozteče pixelů. Je pravda, že dražší modely tyto vlastnosti často nabízejí, ale vztah mezi cenou a dosahem není tak přímočarý, jak by se mohlo zdát podle hesla “čím více utratíte, tím dále uvidíte”.”
O dosahu detekce ve skutečnosti rozhodují tyto faktory: rozlišení snímače (například 384×288 vs. 640×480), průměr objektivu a ohnisková vzdálenost, a také kvalita samotného termálního detektoru. Puškohled se snímačem 640×480 a objektivem o průměru 50 mm obecně detekuje cíle na větší vzdálenost než model se snímačem 384×288 a stejným objektivem. Pokud však na tento model se snímačem 384×288 nasadíte větší objektiv o průměru 75 mm, situace se rázem změní.
Viděli jsme lovce, kteří utratili pořádné peníze za špičkové termovizní puškohledy v naději, že zahlédnou zvěř na vzdálenost přes 1 000 yardů, jen aby nakonec zjistili, že detekce a identifikace jsou dvě zcela odlišné věci. Můžete sice zachytit tepelný signál na vzdálenost 800 yardů, ale rozpoznat, zda se jedná o kojota nebo jelena, vyžaduje mnohem menší vzdálenost nebo větší zvětšení.
Detekční dosahy uvedené v technických specifikacích se obvykle vztahují na tepelný signál o velikosti člověka za ideálních podmínek. U kojota nebo divočáka – tedy menších cílů – bude efektivní detekční dosah kratší. A tyto “ideální podmínky” se v reálných loveckých situacích vyskytují jen zřídka.
Chytrý přístup spočívá v tom, že si vyberete termovizní dalekohled, který odpovídá vašemu konkrétnímu stylu lovu. Lovci dravců v otevřeném terénu potřebují jiné parametry než lovci divokých prasat v hustém křoví jižního Texasu. Než vyčerpáte svůj rozpočet, zamyslete se nad typickými střeleckými vzdálenostmi a podmínkami, ve kterých lovíte. Naše případová studie o eradikaci divokých prasat ukazuje, jak správný výběr topného systému na základě skutečných potřeb přináší lepší výsledky než pouhý nákup nejdražší varianty.
Termovizní přístroje představují sofistikovanou technologii, která si zaslouží důkladné porozumění. Čtyři mýty, kterým jsme se věnovali – vidění skrz zdi, provoz pouze v noci, dokonalý výkon za každého počasí a vztah „cena = dosah“ – všechny pramení ze stejného problému: z předpokladů založených na omezených informacích nebo hollywoodské fikci.
Skutečnost je o něco složitější. Termovizní zaměřovače detekují teplo z povrchu, nejedná se o rentgenové zobrazení skrytých objektů. Fungují nepřetržitě, protože teplotní rozdíly existují ve dne i v noci. Ovlivňuje je počasí, avšak v menší míře než u jiných optických přístrojů. A cena odráží funkční vlastnosti a kvalitu zpracování, nikoli pouze čistý detekční dosah.
Zjistili jsme, že lovci, kteří si najdou čas na to, aby se seznámili s tím, jak termovize vlastně funguje, získají ze své investice mnohem větší užitek. Pochopení skutečných možností – i omezení – těchto nástrojů vede k promyšlenějším nákupním rozhodnutím a efektivnějšímu využití v terénu. Ať už se s termovizní technologií teprve seznamujete, nebo chcete vylepšit své stávající vybavení, znalosti vždy zvítězí nad marketingovými slogany.
Dokážou termovizní přístroje detekovat zvířata skrývající se ve vodě?
Ne, termovizní přístroje nedokážou zachytit ryby ani zvířata ponořená ve vodě. Voda blokuje infračervené záření, a proto se pro termovizní senzory jeví jako neprůhledná. Uvidíte pouze teplotu vodní hladiny. Zvířata, která jsou částečně ve vodě – například jelen přecházející potok – však budou na termovizním snímku jasně viditelná v místech, kde jsou jejich těla nad vodou.
Fungují termovizní přístroje přes skleněná okna?
Termovizní přístroje nedokážou vidět skrz sklo, protože sklo infračervené záření odráží, místo aby ho propouštělo. Když namíříte termovizní přístroj na okno, uvidíte odrazy tepelných stop před sklem, nikoli to, co se nachází za ním. To platí jak pro běžné okenní sklo, tak pro brýlové skla.
Jak dlouho vydrží termovizní zaměřovač nastavený na nulový bod?
Moderní termovizní zaměřovače si při správné montáži udržují nulový bod stejně spolehlivě jako tradiční zaměřovače. Digitální záměrné kříže v termovizních zařízeních se elektronicky promítají na obraz a udržují nulový bod díky vnitřní kalibraci zařízení. Kvalitní montážní systémy a správná instalace jsou důležitější než typ použité technologie. Většina termovizních zaměřovačů disponuje funkcí jednorázového nastavení nulového bodu, které zůstává stabilní i po stovkách výstřelů.
Lze s termovizním zaměřovačem používat infračervený laser?
Ne, infračervené lasery s termovizními zaměřovači nefungují. IR lasery vyzařují světlo v blízkém infračerveném spektru (850–950 nm), zatímco termovizní zaměřovače detekují teplo ve středovlnném nebo dlouhovlnném infračerveném spektru. Termální senzor nedokáže zachytit paprsek infračerveného laseru. Infračervené lasery fungují s přístroji pro noční vidění, nikoli s termovizí. U termovizních dalekohledů používejte k zamíření vestavěný digitální záměrný kříž.
Jsou termovizní dalekohledy při lovu jelenů ve Spojených státech legální?
Samotné termovizní dalekohledy je ve většině států legální vlastnit a používat k lovu, avšak předpisy se podle jednotlivých států a druhů zvířat výrazně liší. Mnoho států zakazuje noční lov lovné zvěře, jako jsou jeleni, a to bez ohledu na typ optiky. Používání termovizních dalekohledů během povolených denních loveckých hodin je však obvykle povoleno. Před použitím termovizní technologie v terénu si vždy zkontrolujte lovecké předpisy platné ve vašem konkrétním státě, protože zákony se liší v závislosti na tom, zda se jedná o lovnou zvěř, dravce nebo škodlivé druhy.
















