Kun je niet kiezen tussen een opzetbare warmtebeeldkijker en een speciale warmtebeeldkijker? Met beide kun je ’s nachts op jacht gaan, maar ze werken op heel verschillende manieren. We hebben jarenlang warmtebeeldkijkers in de praktijk getest, en dit is waar het echt op aankomt als je tussen deze twee opties moet kiezen.
Een clip-on warmtebeeldkijker — ook wel een warmtebeeldvoorzetstuk genoemd — wordt direct voor je bestaande dagkijker gemonteerd. Het verandert je dagkijker in een warmtebeeldkijker door een warmtebeeld door je gewone dradenkruis te projecteren, zonder dat je opnieuw hoeft in te stellen. U hoeft uw dagkijker niet te verwijderen. De clip-on wordt aan het objectief bevestigd, meestal met een adapterring die op de objectiefbehuizing van de richtkijker wordt geklemd of via een Picatinny-railbevestiging die vóór de dagkijker wordt geplaatst. Zodra je het eerste uitlijningsproces (collimatie genoemd) hebt voltooid, werken de clip-on en je dagkijker samen als één systeem. De thermische module toont je een warmtekaart van de omgeving, en het dradenkruis van je dagkijker geeft aan waar de kogel terechtkomt.

Een speciale warmtebeeldkijker vervangt je dagkijker volledig. Hij heeft een eigen scherm, dradenkruis, zoomsysteem en bedieningsknoppen. Hij is speciaal ontworpen voor warmtebeeldtoepassingen, waardoor je beschikt over een op maat gemaakte opstelling voor nachtelijke schietoefeningen. Alles is vanaf de basis ontworpen voor thermische beeldvorming – de infraroodsensor, het interne OLED-microdisplay, de menu-interface – en werkt naadloos samen in één zelfstandig geheel. Zie het als een gereedschap dat één ding doet, en dat op het hoogste niveau.
Omdat het gehele optische systeem is ontworpen voor thermische beeldvorming, bieden speciale thermische richtkijkers opties met een hogere resolutie, vaak met grotere lenzen voor een betere basisvergroting en scherpere beelden op grotere afstanden. Onze Pixfra Pegasus 2 LRF- en Chiron LRF-series beschikken bijvoorbeeld over geïntegreerde laserafstandsmeters met een bereik van 1000 m, meerdere nulstellingsprofielen en ingebouwde ballistische rekenmodules — allemaal in de behuizing van de richtkijker. Je monteert hem, stelt hem in en je bent klaar om te jagen. Het nadeel? Je geweer verliest zijn optiek voor overdag. Als je overdag met traditionele optiek wilt jagen, moet je de richtkijkers verwisselen — en dat betekent dat je ofwel opnieuw moet nulstellen, ofwel een degelijke snelkoppeling (QD) moet gebruiken die de nulstelling behoudt bij het wisselen. Veel enthousiaste jagers met thermische vizieren lossen dit op door een tweede geweer klaar te houden dat speciaal voor nachtelijke jacht is ingesteld, of door te investeren in de juiste accessoires om de prestaties van hun warmtebeeldkijker te verbeteren, zoals QD-bevestigingen die de nulstelling behouden bij het wisselen van geweer.
Laten we het eens op een rijtje zetten. Met opklikbare thermische lenzen kun je snel schakelen tussen jagen bij daglicht en ’s nachts, zonder dat dit invloed heeft op de nulstelling van de daglenzen. U behoudt de dagkijker waarin u al hebt geïnvesteerd, en de clip-on voegt thermische detectie toe wanneer het licht afneemt. U kunt met hetzelfde geweer, dezelfde nulstelling en zonder enige vertraging overschakelen van jagen bij daglicht naar het jagen op roofdieren ’s nachts. Als je van plan bent om bij één speciale overdag-richtkijker en één geweer te blijven, is een clip-on een flexibele en kosteneffectieve keuze. Clip-ons werken ook op meerdere geweren als je de juiste adapters hebt, en zoals we al zeiden, doen veel modellen dubbel dienst als draagbare thermische monoculairs voor het scannen en verkennen voordat je je positie inneemt om te schieten.
Maar clip-ons hebben wel degelijk nadelen. Het grootste nadeel van een clip-on-richtkijker is dat deze niet dezelfde optische resolutie heeft als een speciaal daarvoor ontworpen apparaat, waardoor je mogelijk minder nauwkeurig of trefzeker kunt schieten. De vergroting van je dagkijker heeft direct invloed op het warmtebeeld — ga je verder dan ongeveer 6x–8x, dan zoom je in op een digitaal scherm waar pixels zichtbaar worden en details vaag worden. Een clip-on wordt voor de dagkijker gemonteerd via een adapter die op de objectiefbehuizing wordt bevestigd, en voegt lengte en gewicht toe aan de voorkant, waardoor het wapen erg zwaar aan de loop wordt en omvangrijker wordt. De uitlijning bij de montage moet perfect zijn — als de clip-on niet precies gecentreerd is boven het objectief van je dagkijker, zullen je schoten afwijken. En hoewel clip-ons worden aangeprezen als gemakkelijk te verplaatsen tussen geweren, is het weliswaar prettig om de clip-on van het ene wapen naar het andere over te zetten, maar wanneer je dat doet, moet je mogelijk toch opnieuw collimeren om hem uit te lijnen met de nieuwe dagkijker.

Speciale warmtebeeldkijkers ruilen die flexibiliteit in voor prestaties. Je krijgt scherpe, heldere beelden waarvoor je niet met je ogen hoeft te knijpen, ingebouwde dradenkruizen en ballistische rekenmodules, en een robuust, eenvoudig ontwerp met minder bewegende onderdelen. Ze zijn gemakkelijker in gebruik — monteren, op nul stellen, jagen — zonder dat je in het donker hoeft te rommelen met het uitlijnen van een adapter. Het nadeel: je geweer wordt een nachtinstrument voor één enkel doel zolang de warmtebeeldkijker is gemonteerd. Je moet opnieuw inrichten als je van geweer wisselt zonder een hoogwaardige QD-montage, en ze voegen gewicht toe — hoewel lichtgewicht modellen zoals onze Pixfra Draco-serie zijn ontworpen om dat probleem tot een minimum te beperken.
Hier volgt een vergelijking naast elkaar om de verschillen duidelijk te maken:
| Functie | Thermische clip-on | Speciale warmtebeeldkijker |
|---|---|---|
| Houdt je dagkijker op zijn plaats | Ja | Nee — vervangt het |
| Opnieuw op nul zetten vereist | Nee (na de eerste collimatie) | Nee (maar wel nodig als je geweren verwisselt zonder QD-bevestiging) |
| Beeldkwaliteit | Goed, maar minder goed dan een speciaal daarvoor bestemd model | Het beste dat er te krijgen is |
| Ingebouwd dradenkruis | Maakt gebruik van het dradenkruis van je dagkijker | Ja — verschillende dradenkruisopties |
| Laserafstandsmeter | Enkele modellen | Veelvoorkomend bij modellen uit het midden- en topsegment |
| Ballistische calculator | Zeldzaam | Komt vaak voor in LRF-modellen |
| Extra gewicht van het geweer | Te zwaar aan de voorkant | Vervangt het gewicht van de dagkijker |
| Kan ook als monoculair worden gebruikt | Ja (met oculair) | Nee |
| Typische prijsklasse | $1.000 – $6.000+ | $1.000 – $5.000+ |
| Het meest geschikt voor | Veelzijdige, flexibele opstellingen | Speciale uitrustingen voor de nachtjacht |
De beeldkwaliteit is het belangrijkste discussiepunt in de discussie tussen ‘clip-on’- en ‘dedicated’ warmtebeeldcamera’s, en het komt neer op de combinatie van drie specificaties: de resolutie van de sensor, de NETD en het optische systeem zelf. Als je een van deze aspecten buiten beschouwing laat, zul je teleurgesteld raken — ongeacht welk type warmtebeeldcamera je koopt.
De resolutie van de sensor geeft aan hoeveel thermische pixels de detector biedt. De twee gangbare resoluties zijn 384×288 en 640×512. Een 640×512-sensor bevat bijna drie keer zoveel pixels als een 384×288-sensor, en die extra pixeldichtheid maakt een groot verschil wanneer u inzoomt via uw dagkijker of probeert een doelwit te identificeren op een afstand van meer dan 200 yards. Speciale warmtebeeldkijkers combineren doorgaans sensoren met een hogere resolutie met grotere objectieven — 50 mm of 75 mm — wat vanaf het begin een betere basisvergroting en scherpere details oplevert. Opzetmodules hebben hier beperkingen omdat het warmtebeeld door de optiek van je dagkijker gaat. Elke vergroting die je aan de kant van de dagkijker toevoegt, zoomt alleen maar in op het scherm van de clip-on. Met een 640×480-sensor en geen optische vergroting op de clip-on zelf, is inzoomen tot ongeveer 8x de limiet voor de beste prestaties.
NETD — Noise Equivalent Temperature Difference — geeft aan hoe gevoelig de thermische sensor is voor kleine temperatuurveranderingen. NETD wordt gemeten in millikelvin (mK), en het principe is eenvoudig: hoe lager de NETD-waarde, hoe hoger de gevoeligheid van de sensor en hoe beter de beeldkwaliteit. De meeste hoogwaardige warmtebeeldapparatuur heeft een NETD-waarde van minder dan 25 mK. Bij Pixfra bereiken onze apparaten NETD-waarden van ≤18 mK, waarmee ze tot de top behoren wat betreft gevoeligheid voor warmtebeeldapparatuur voor de jacht. Een lage NETD is vooral belangrijk bij warme omstandigheden, waarbij de achtergrondtemperatuur dicht bij de lichaamswarmte van je doelwit ligt, of bij mist, regen en vochtigheid, waarbij het contrast in het beeld afneemt. Wanneer de NETD laag is, heeft het systeem moeite om de resterende subtiele verschillen waar te nemen en gaat de beeldkwaliteit snel achteruit. Een sensor met een lage NETD behoudt daarentegen zijn helderheid onder omstandigheden waarin zwakkere camera’s praktisch blind zijn. Of u nu een opzetmodel of een speciale kijker gebruikt, controleer de NETD-specificatie — het is een van de beste indicatoren voor prestaties in de praktijk.
Volgens ervaren jagers die beide opstellingen hebben gebruikt, is een speciale warmtebeeldkijker in de overgrote meerderheid van de situaties in de praktijk beter dan een opzetmodel. Je kijkt door een speciaal ontworpen optische baan zonder dat er iets tussen jou en het warmtebeeld zit — geen extra glas, geen adapter, geen uitlijningsproblemen. Het resultaat is een snellere doelwitdetectie en een betrouwbaardere positieve identificatie (PID), vooral op afstanden van meer dan 200 yards, waar details het verschil maken tussen een zuivere treffer en een gemiste schot. Opzetkijkers doen het echter prima binnen de typische jachtafstanden voor roofdieren van minder dan 300 yards. Een opzetkijker werkt prima voor de jacht op coyotes, hoewel een speciale wapenrichtkijker gebruiksvriendelijker is. Afhankelijk van wat je doet, het type wapen, de richtkijkers op elk wapen en de afstand, is de ene optie beter dan de andere.[9] Je keuze hangt af van de afstand waarop je schiet en in hoeverre je na zonsondergang jaagt.
Er is geen eenduidig antwoord, maar de keuze wordt al snel duidelijker als je kijkt naar hoe je daadwerkelijk jaagt.
Kies voor een clip-on-richtkijker als je al een goede richtkijker voor overdag hebt en die wilt blijven gebruiken. Als je tijdens je jacht zowel overdag als ’s nachts jaagt — bijvoorbeeld ’s avonds tot het donker wordt, of ’s ochtends op roofdieren jaagt voordat de dageraad aanbreekt — kun je met een clip-on één geweer voor alles gebruiken zonder je instelling voor overdag te verliezen. Het is ook de slimmere keuze als je op je budget let en niet wilt investeren in een geheel aparte uitrusting voor de nachtjacht. Met een clip-on-opstelling heb je één geweer, één optiek en twee modi: helderheid bij daglicht en thermische precisie. Deze kosteneffectieve upgrade voegt geavanceerde thermische mogelijkheden toe voor een fractie van de prijs van een volledig speciale richtkijkeropstelling. Combineer je clip-on met een hoogwaardige QD-montage en betrouwbare reservebatterijen, en je hebt een uitrusting die geschikt is voor de meeste scenario’s bij de nachtjacht, zonder dat je bankrekening leegloopt.

Speciale warmtebeeldkijkers zijn doorgaans beter geschikt voor jagers die vaak ’s nachts of bij weinig licht jagen, aangezien ze voor dergelijke omstandigheden zijn geoptimaliseerd. Als u op uw terrein de hele nacht door werkt aan de uitroeiing van wilde zwijnen, de reguliere bestrijding van roofdieren of het actieve beheer van coyotes, biedt een speciale warmtebeeldkijker u een betere beeldkwaliteit, snellere doelwitdetectie en geïntegreerde functies — afstandsmeters, ballistische berekeningen, video-opnames — in één pakket. Als het samenstellen van een speciale uitrusting voor de nachtjacht binnen het budget past, hebben veel jagers die het AR-platform gebruiken een bovenste wapenonderdeel voor gebruik overdag en een tweede bovenste wapenonderdeel voor een warmtebeeldkijker. Stel beide onafhankelijk van elkaar in, en het wisselen tussen beide kost slechts enkele seconden. Onze Pixfra Sirius HD-serie biedt een detectiebereik tot 3600 m, terwijl de Taurus LRF beschikt over een ultrafijne klikwaarde van 0,9 cm op 100 m voor nauwkeurige instelling — het soort specificaties dat gespecialiseerde opstellingen de moeite waard maakt voor serieuze nachtjagers.
Als je budget het toelaat en je volledige dekking wilt, gebruik ze dan allebei. Een speciale warmtebeeldkijker op je belangrijkste jachtgeweer voor ’s nachts en een opklikbare of monoculaire warmtebeeldkijker voor verkenning en als reserve bieden je het beste van twee werelden. Je betaalt in eerste instantie wel meer, maar de combinatie van de specifieke prestaties van het vaste systeem en de flexibiliteit van de opzetbare camera dekt elk scenario, van snelle avondjachten op wilde zwijnen tot meerdaagse jachtacties op roofdieren. Veel ervaren jagers die met warmtebeeldapparatuur werken, komen uiteindelijk tot deze conclusie zodra ze de sterke punten van elk systeem in de praktijk hebben gezien, en het is de opstelling die wij zouden aanbevelen aan iedereen die op lange termijn serieus bezig is met jagen met warmtebeeldapparatuur.
Heeft een opzetbare warmtefilter een negatieve invloed op de beeldkwaliteit?
Het vermindert het wel, maar in hoeverre hangt af van de kwaliteit van zowel de clip-on als je dagkijker. Je stapelt twee optische systemen op elkaar, dus een zeker verlies aan scherpte en contrast is te verwachten in vergelijking met een speciale warmtebeeldkijker. Bij een redelijke vergroting (minder dan 6x–8x) levert een goede clip-on een prima bruikbare beeldkwaliteit voor het jagen op wilde zwijnen en coyotes binnen een afstand van 300 yards. Zet de vergroting echter hoger en het beeld wordt al snel korrelig — je zoomt in op een klein scherm, je krijgt geen echte optische vergroting. Als beeldkwaliteit je belangrijkste zorg is, is een speciale warmtebeeldkijker de duidelijke winnaar.
Kun je een speciale warmtebeeldkijker tussen verschillende geweren uitwisselen?
Ja, met de juiste montage. Met een goede ‘return-to-zero’-montage zoals ADM of LaRue en meerdere nulprofielen — beschikbaar bij de meeste moderne warmtebeeldkijkers — kun je nog steeds van wapen naar wapen wisselen. Bij de meeste huidige warmtebeeldkijkers kun je verschillende nulinstellingen voor verschillende geweren opslaan en via het menu tussen deze instellingen schakelen. Het belangrijkste is dat je op elk wapen dezelfde montagehoogte gebruikt. Zonder een QD-montage moet je er rekening mee houden dat je elke keer dat je van wapen wisselt opnieuw moet nulstellen, wat munitie en tijd kost.
Verandert een clip-on de plaats waar de klap terechtkomt?
Het probleem met sommige clip-ons is dat het trefpunt kan verschuiven, afhankelijk van de zoomfactor en de parallax. Binnen 75 yards is dat misschien niet zo erg, maar op 150 yards kan die verschuiving net genoeg zijn om te missen. Een clip-on van goede kwaliteit met een stevige adapter of railbevestigingssysteem zou na een juiste afstelling een consistent trefpunt moeten behouden. Maar factoren zoals de vergrotingsinstelling van je dagkijker, de parallaxafstelling en de bevestiging van de adapter kunnen allemaal voor afwijkingen zorgen. Test je clip-on op de schietbaan voordat je er in het veld op vertrouwt, en controleer je nulstelling telkens wanneer je hem op een nieuwe richtkijker monteert.
Is een speciale warmtebeeldkijker de moeite waard ten opzichte van een opzetmodel?
Voor regelmatige nachtjagers: ja. Speciale richtkijkers bieden scherpere beelden, een snellere reactietijd en een volledige reeks ingebouwde functies — laserafstandsmeters, ballistische rekenmachines, video-opname, diverse dradenkruisopties — tegen vergelijkbare prijzen. Voor regelmatige nachtjacht biedt een speciale opstelling met een warmtebeeldkijker superieure prestaties en gebruiksgemak. Voor de incidentele nachtjager die voornamelijk overdag jaagt, voegt een opzetkijker warmtebeeldfunctionaliteit toe aan een bestaande opstelling, zonder dat er een tweede geweer hoeft te worden aangeschaft.
Welke sensorresolutie heb je nodig voor een thermische clip-on?
Een 640×512-sensor is de beste keuze voor opzetbare warmtebeeldcamera’s. Deze heeft ongeveer drie keer zoveel pixels als een 384×288-sensor, wat zich vertaalt in scherpere details wanneer je inzoomt via je dagkijker en een betere doelidentificatie op afstanden van meer dan 200 yards. Opzetbare warmtebeeldcamera’s zijn verkrijgbaar in drie resoluties: 256, 384 en 640, en ze bieden verschillende prestatieniveaus. Als je op minder dan 200 yards jaagt – bijvoorbeeld vanaf een jachtpost op wilde zwijnen – volstaat een opzetbare camera met een resolutie van 384 en kost deze minder. Voor de jacht op coyotes op grotere afstand of in elke situatie waarin je op afstand een doelwit van een struik moet kunnen onderscheiden, loont het de moeite om wat extra te betalen voor een resolutie van 640. Het verschil in doelidentificatie is onmiskenbaar.
Your AR-15 deserves a thermal scope that actually works in the field. We’ve spent years testing thermal optics on AR platforms—budget picks, mid-range workhorses, and premium units. The market in 2026 is packed. Here are the six best thermal scopes for AR-15 that we’d put our own money on.
The AR-15’s lightweight aluminum construction and modular design make it adaptable for a wide range of purposes, from hunting to tactical applications.Its standard Picatinny rail gives you a plug-and-play platform for just about any optic, and thermal scopes are no exception. Whether you’re running predator control at night, wiping out feral hogs on your property, or scanning for coyotes across open fields, a thermal scope turns your AR into a true 24/7 hunting machine. And with the right thermal scope accessories like quick-detach mounts and extended battery solutions, you can squeeze even more performance out of your setup.
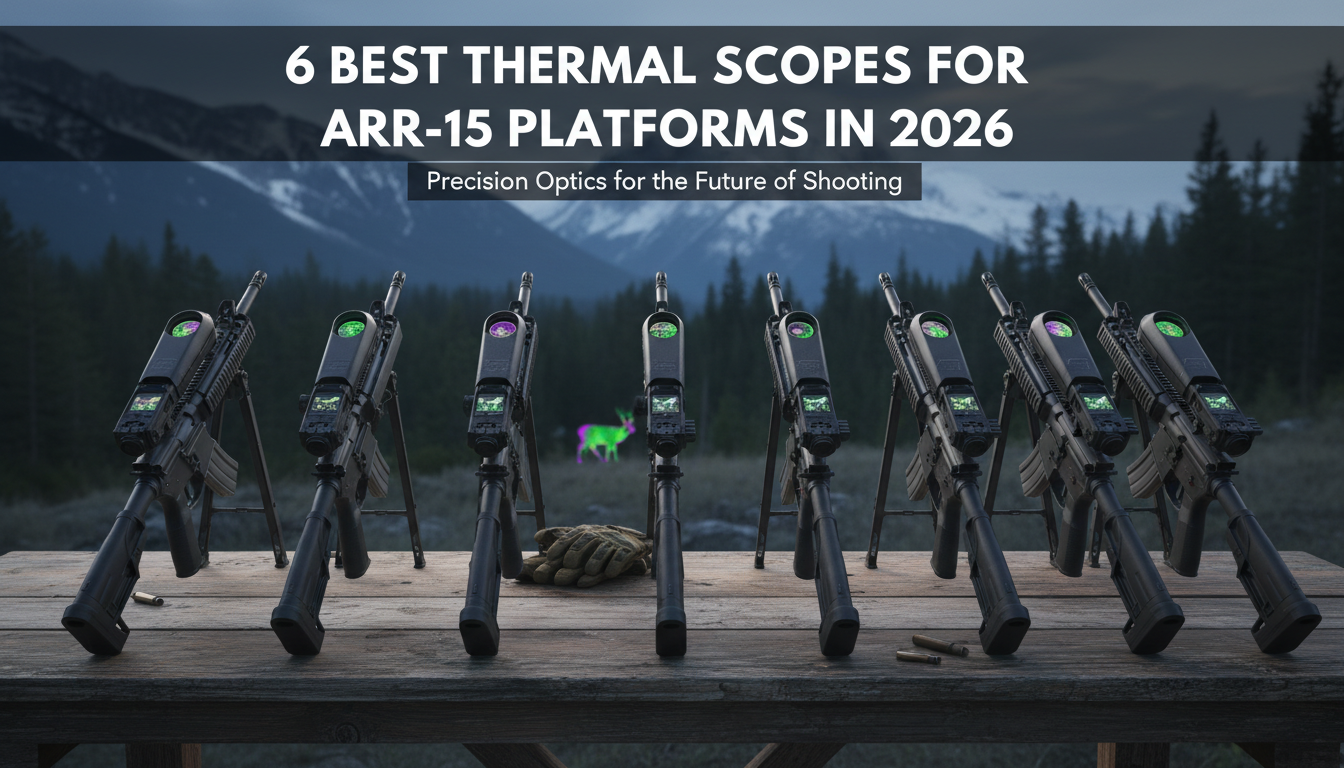
Thermal riflescopes detect heat differences, not light. That means they keep working in total darkness, fog, light rain, or smoke—conditions where traditional optics struggle or fail outright.Pair that with the AR-15’s semi-automatic action and fast follow-up shots, and you’ve got a night hunting rig that’s hard to beat. Thermal scopes are a must if you’re hunting nocturnal game like coyotes, hogs, and other varmints and predators during nighttime and low-light conditions.
We’ve tested thermal scopes across everything from 95°F Texas summer nights to freezing December hunts. The six picks below earned their spots through real field performance—not spec sheet hype. We also leaned on data from Pixfra’s thermal device lineup, which gave us a solid baseline for sensor sensitivity and detection range benchmarks across price tiers.
Not every thermal scope fits an AR-15 well. A few specs separate a good match from a bad one, and we want to save you from learning that the hard way.
Resolutie van de sensor is the first thing to check. Resolution is a measure of how much detail your image will have, so the higher the resolution of your sensor, the more finely rendered your image will be.A 384×288 sensor works fine for close-to-mid range hog hunting inside 200 yards. If you’re pushing past 300 yards or targeting smaller game like coyotes, step up to a 640×480 or 640×512 sensor for cleaner target ID. NETD rating tells you how sensitive the thermal sensor is to small temperature differences—lower numbers mean better performance. Scopes under 20mK pick up faint heat signatures that cheaper units miss completely, especially on warm nights when background temps run close to your target’s body heat.
Vernieuwingsfrequentie affects how smooth your image looks when you’re tracking a moving target. A 60Hz refresh rate ensures fast-moving objects appear clear on the HD display. Anything below 30Hz can look choppy, especially on running hogs. Magnification range should match your typical engagement distances. For AR-15 use, a 1x–8x or 2x–16x range covers most hunting scenarios without piling on extra weight. High magnification looks appealing on paper, but thermal image quality drops quickly if you over-zoom. Many hunters spend most of their time between 2x and 6x, even on scopes capable of much more.
Finally, make sure the scope is rated for semi-auto recoil and mounts cleanly to a Picatinny rail. Quality night vision and thermal scopes should hold zero on a semi-auto rifle. Problems usually arise from low-quality mounts, loose fasteners, or scopes intended only for low-recoil platforms.QD mounts are a bonus if you swap between day glass and thermal on the same rifle.
Here’s a quick comparison of the top thermal rifle scope tiers we recommend for AR-15 platforms this year. We’ve organized them by performance level so you can match your budget to your hunting style:
| Specificaties | Entry-Level | Mid-Range | Premium |
|---|---|---|---|
| Resolutie van de sensor | 256×192 | 384×288 | 640×480 / 640×512 |
| NETD | ≤25mK | ≤20mK | ≤18mK |
| Refresh Rate | 25–50Hz | 50–60Hz | 60Hz |
| Detectiebereik | ~800m | ~1,500m | ~2,500m+ |
| Levensduur van de batterij | 4–6 hrs | 6–10 hrs | 8–15 hrs |
| Laser Rangefinder | Zeldzaam | Sometimes | Often Included |
| Ballistic Calculator | Nee | Sometimes | Ja |
| Typical Price | $1,000–$2,000 | $2,000–$4,000 | $4,000–$8,000+ |
Key stat: According to USDA estimates, feral hogs cause over $2.5 billion in damage annually across the U.S. That’s driven a surge in thermal scope demand, especially among AR-15 owners in Texas, Oklahoma, and the Southeast running nighttime eradication programs.
The sweet spot for most AR-15 owners in 2026 sits in that mid-range tier. A 384×288 sensor with a 50Hz or 60Hz refresh rate, 6+ hours of battery life, and a built-in ballistic calculator gives you solid image quality and reliable target ID without burning through $6,000. Thermal optics are usually mounted on AR-15, a bolt-action rifle, or rifles chambered in .300 Winchester Magnum, .308 Winchester, 6.5 Creedmoor, or the .243 Winchester for coyote.All of these calibers pair well with mid-range thermal scopes that handle the recoil without losing zero.
For those who want the absolute best, premium 640-class sensors with integrated laser rangefinders and onboard video recording deliver performance that was purely military-grade just a few years ago. We’ve seen NETD values as low as ≤18mK and detection ranges stretching past 3,600 meters on top-tier models—numbers that make positive target ID at 400+ yards a real possibility, not just a marketing claim.
Mounting a thermal scope on an AR-15 is straightforward, but a few details make a big difference. AR-15s are naturally more forgiving when it comes to optic height-over-bore, thanks to their straight-line recoil system and higher receiver. This gives you more freedom to run thermal optics slightly higher without breaking your cheek weld.A 1.54″–1.93″ mount height works well for most setups.
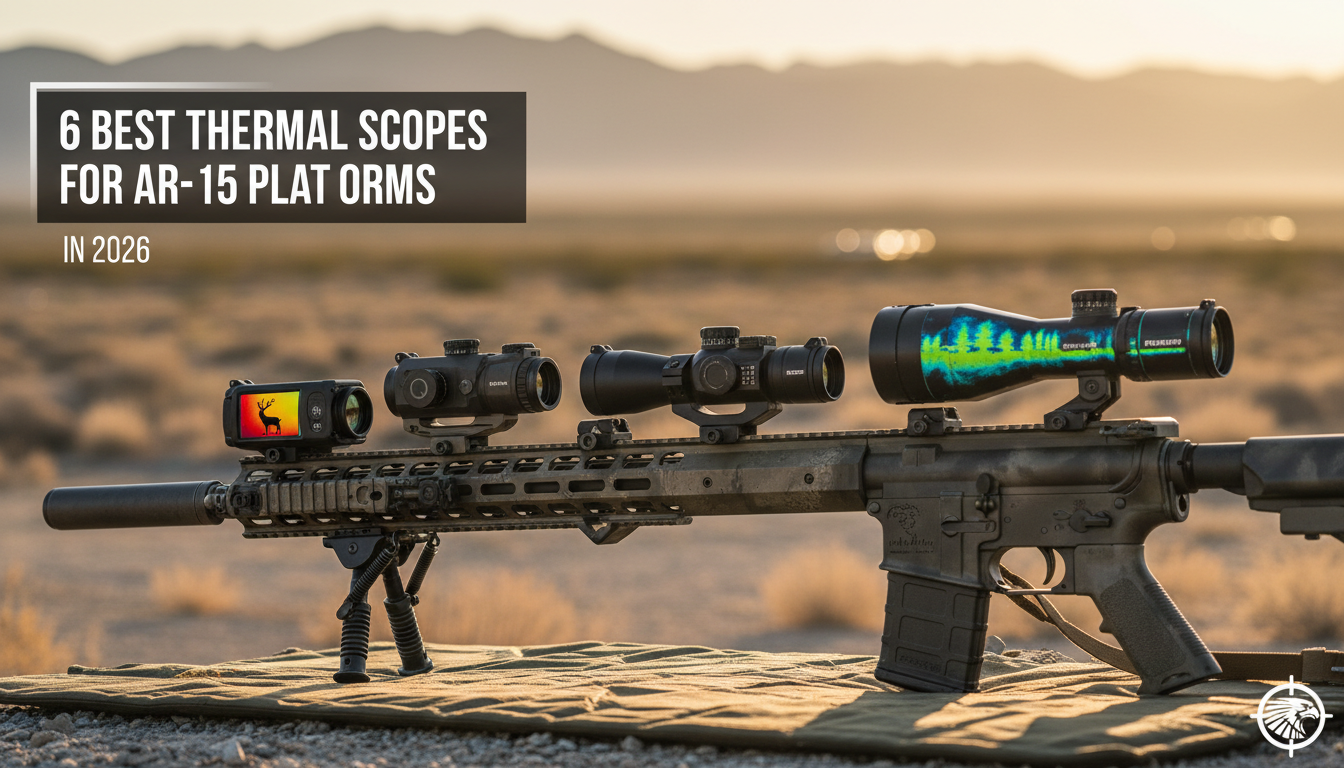
Use a quality mount—preferably a QD mount if you plan to swap between day and thermal optics. Torque your rings to spec and double-check that everything is level before zeroing. Most modern thermal scopes feature one-shot zero or digital zeroing, which speeds up the process. Fire a shot, move the digital reticle to your point of impact, confirm with a follow-up, and you’re done.
One thing to watch: short-barreled ARs with muzzle brakes can blast unburnt powder toward your scope’s sensor window. A suppressor or linear comp protects the sensor window from unburnt powder blast on short barrels.It also cuts down on heat mirage in your thermal image, which can mess with your sight picture at close range.
Battery life can end your hunt early if you don’t plan ahead. Digital thermal scopes typically have shorter battery life, averaging 4–8 hours. For all-night hog eradication or multi-stand predator sessions, carry at least two sets of spare 18650 batteries—they’re rechargeable, lightweight, and easy to find. An external power bank (10,000+ mAh) can also run many thermal scopes via USB-C for 10+ hours straight.
Cold weather kills battery performance faster than you’d expect. Keep your spares in an inside jacket pocket where body heat keeps them warm. And turn your scope off between stands when you’re not actively scanning—this alone can stretch your runtime by 30–40% on a long night.
Can you use a thermal scope on an AR-15 during the day?
Yes. Thermal scopes detect heat, not light, so they work in daylight, shade, and complete darkness. Some models include adjustable apertures to handle bright conditions without washing out the image.
Will a thermal scope hold zero on a semi-auto AR-15?
A quality thermal scope rated for semi-auto recoil holds zero without any issues. Make sure the mounting hardware is robust and recoil-resistant to handle the AR-15’s kick without loosening. Cheap mounts are usually the problem—not the scope itself.
What’s the best budget thermal scope for an AR-15?
In the $1,000–$2,000 range, scopes with 256×192 sensors deliver solid performance for close-range hog and varmint hunting. They won’t match premium units at distance, but they get the job done inside 200 yards.
Is thermal better than night vision for AR-15 hunting?
For most hunting—especially hog and predator control—thermal wins. Thermal and night vision solve different problems. Thermal excels at detection and tracking, while night vision can be better for navigation and detail in some environments. But thermal works through brush, fog, and pitch black conditions where night vision struggles.
Are thermal scopes legal for hunting in all 50 states?
Thermal optics are legal to own and use in all 50 states. However, some states restrict their use for hunting: California prohibits thermal for big game hunting, and several states ban nighttime hunting of certain species regardless of equipment. Always check your local regulations before heading out.
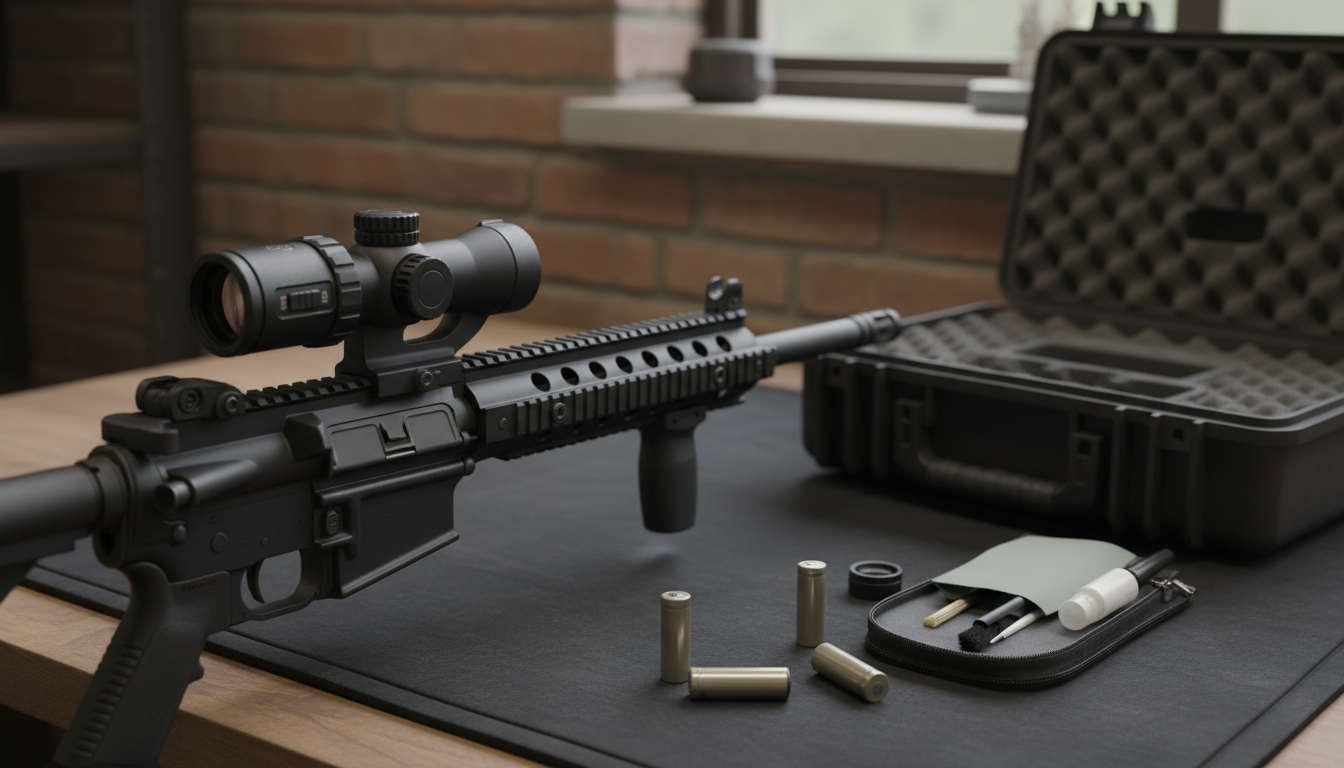
You’ve spent good money on your thermal scope. But here’s the thing—the scope itself is only part of the equation. The right accessories can turn a solid setup into a serious field advantage.
We’ve tested dozens of thermal scope add-ons over the years, from budget-friendly basics to premium upgrades. Some make a real difference. Others? Just add weight to your pack. We’re sharing the five accessories that actually matter when you’re hunting hogs at midnight or tracking predators across your property.
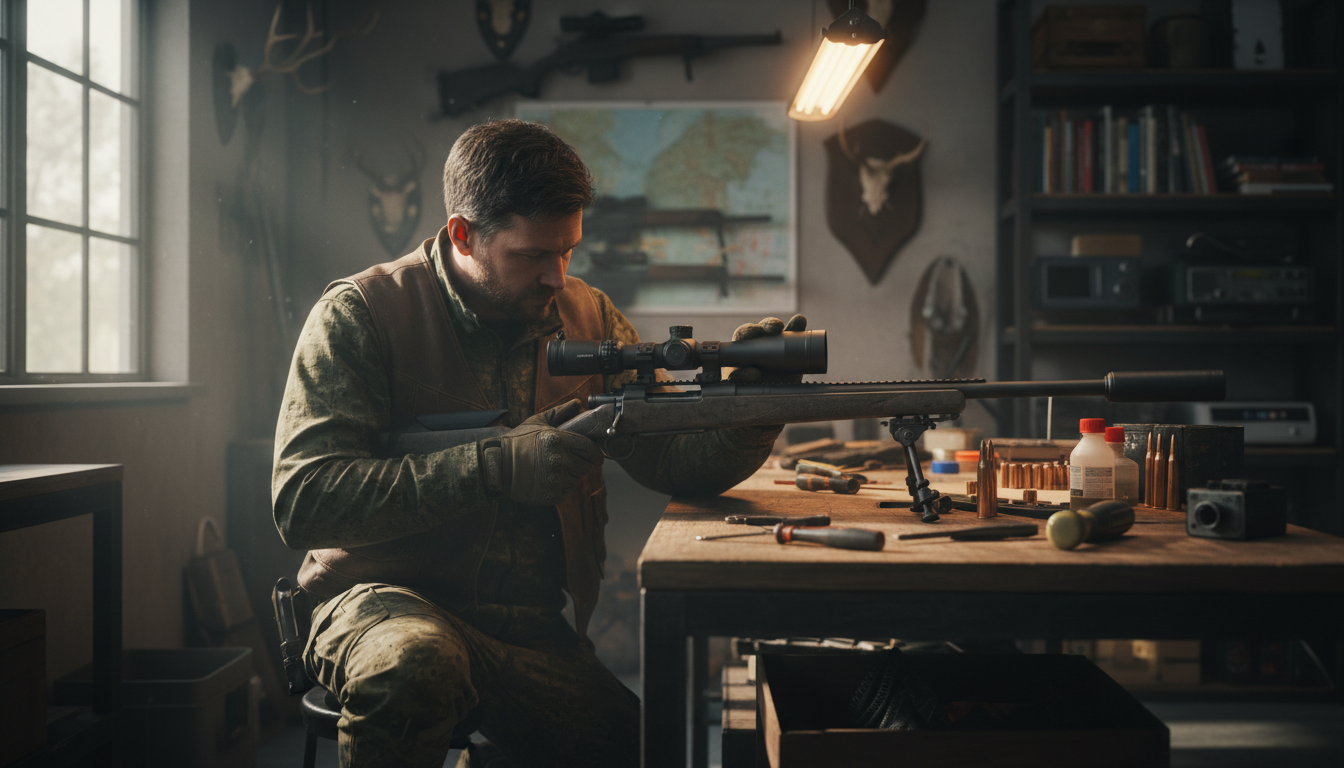
Let’s start with what holds everything together—your mount.
If you’re running multiple rifles or switching between thermal and day optics, a quick-detach mount saves you real time in the field. These mounts let you remove and reattach your thermal scope in seconds while maintaining your zero. No need to re-sight every time you make a switch.
Look for mounts made from aircraft-grade aluminum. They’re light enough not to weigh down your rifle but strong enough to handle recoil from magnum calibers. Height-adjustable options let you dial in the perfect eye relief and cheek weld for your specific rifle setup.
And here’s what most people overlook: cantilever mounts can be a game-changer if you’re working with limited rail space. They position your scope forward, giving you proper eye relief without running out of mounting real estate.
We’ve been using our Pixfra thermal scopes with quality QD mounts for years. The ability to move a thermal unit between rifles during a hunt is worth every penny.
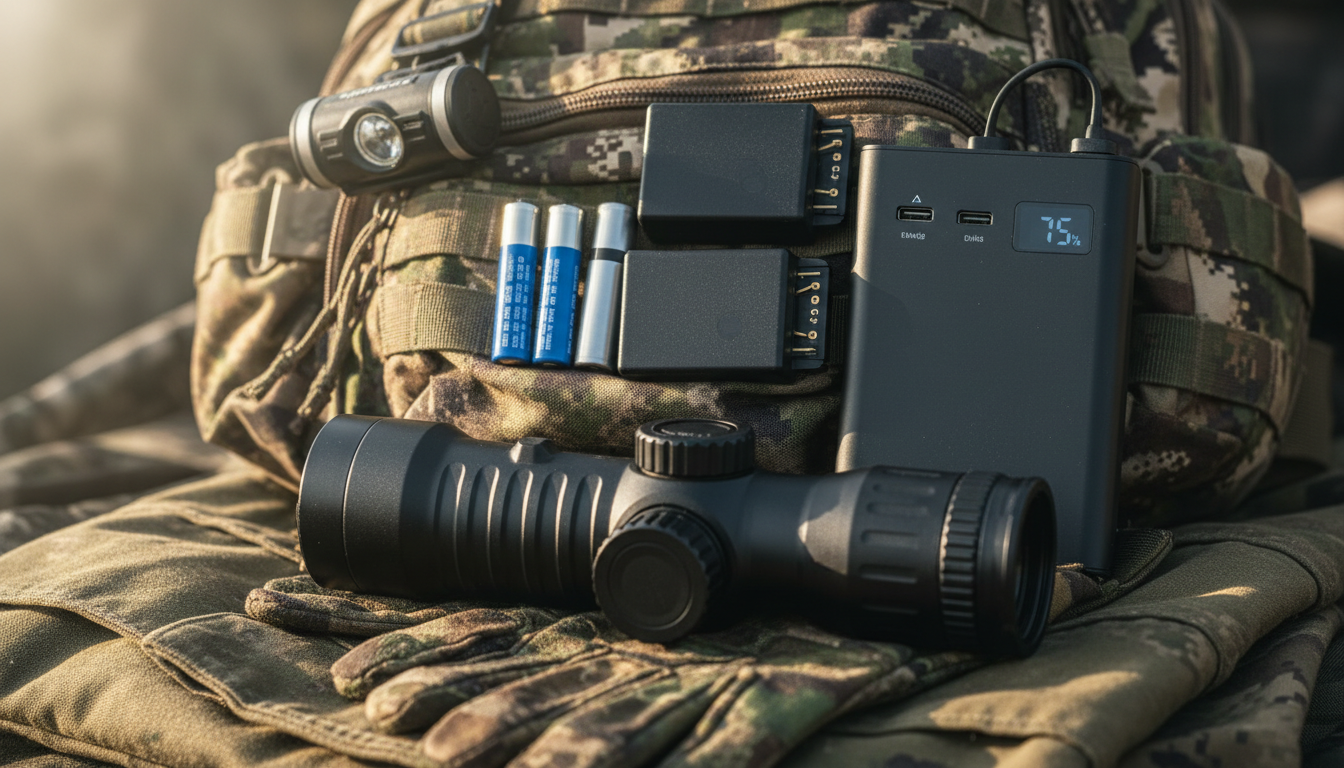
Battery life can make or break your hunt. Period.
Most thermal scopes run 3-6 hours on internal batteries. That’s fine for a quick evening session, but what about all-night hog eradication or extended predator work? Running out of power when heat signatures start showing up is frustrating.
Carry at least two sets of spare batteries. Rechargeable 18650 lithium-ion batteries with 3000-3500mAh capacity work great as your primary power source. Keep CR123A lithium batteries as emergency backups—they’re lighter and have a longer shelf life.
External power banks changed how we hunt. A 10,000-20,000 mAh portable power bank can run your thermal scope for 10+ hours straight. Many modern scopes accept USB power input, making field charging dead simple. Mount the power bank to your rifle or toss it in your pack.
Fast chargers are handy between hunts. They’ll fully recharge batteries in 2-3 hours, perfect for back-to-back hunting days. Vehicle chargers let you top off batteries during long drives to hunting spots.
Pro tip: cold weather kills battery performance. Keep spares in an inside pocket where body heat maintains their temperature. We learned this the hard way during a December hog hunt.
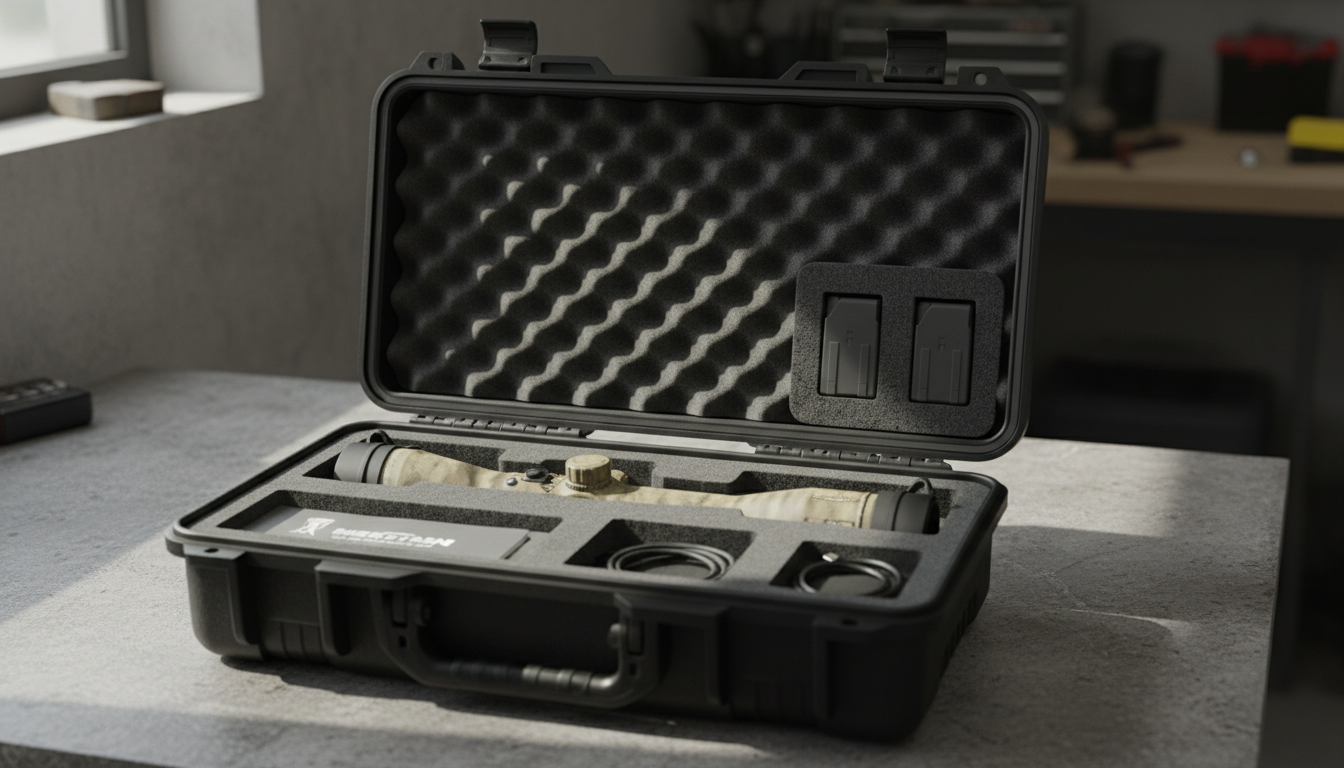
Thermal scopes aren’t cheap. Protect yours.
You need two types of cases—one for transport and one for field carry. Hard-shell cases with custom foam inserts protect your scope during vehicle transport or storage. Look for waterproof construction with pressure relief valves and lockable latches.
These cases should have enough space for your scope plus accessories like spare batteries, lens cleaning supplies, and charging cables. Adjustable foam dividers let you customize the layout for your specific gear.
For field work, tactical bags offer quick access with adequate protection. Good tactical bags feature padded compartments, MOLLE attachment points for adding gear, and weather-resistant materials. We prefer bags with adjustable dividers that can hold multiple items—your thermal scope, handheld monocular, batteries, and other essentials.
Quick-access holsters work well for active hunting situations. They attach to your belt or pack and provide immediate access while protecting the optics from bumps and weather. Choose holsters with secure retention systems so your scope doesn’t bounce around when moving through rough terrain.
The right case keeps dirt, moisture, and impacts from damaging sensitive thermal sensors and electronics. That’s money in your pocket long-term.
Here’s something many thermal scope users don’t realize—pairing your thermal with an infrared illuminator can improve target identification in certain situations.
While thermal scopes detect heat signatures and don’t need light, adding an IR illuminator creates better contrast in environments where background temperatures are similar to your target. Think warm summer nights when everything radiates heat at similar levels.
Our Pixfra IR Torch works seamlessly with thermal setups for exactly this reason. The extra illumination helps distinguish heat signatures that might otherwise blend together.
IR illuminators also help when you’re trying to positively identify targets before taking a shot. They fill in visual details that pure thermal imaging might miss, giving you confidence in target identification at 200+ yards.
Mount your IR illuminator offset from your scope to minimize shadowing. Most units run on rechargeable batteries and offer adjustable beam patterns—flood for close work, spot for distance.
Not everyone needs an IR illuminator. But if you hunt in warm climates or dense cover where temperature differences are minimal, it’s worth testing.
Video recording capability isn’t just about showing off your hunts—though that’s fun too.
Recording your thermal scope footage serves multiple practical purposes. You can review shot placement and animal behavior patterns. Study how targets move through your property. Share footage with hunting partners to plan better strategies.
Many modern thermal scopes like our Pixfra Sirius HD, Pegasus 2 LRF, and Draco models have built-in recording. But if yours doesn’t, external recording equipment connects via video output ports.
Look for recorders with adequate storage—32GB minimum, 64GB or more is better. Make sure the recording resolution matches your scope’s display output for best quality. Battery-powered units give you flexibility in the field without worrying about power cables.
Some hunters mount small action cameras to their scopes. This setup works but adds bulk. Integrated recording or direct-connect recorders keep your profile slimmer.
The real value shows up when you review footage. We’ve spotted patterns in hog movement we never noticed in real-time. That intel led to better stand placement and more successful hunts, as documented in our feral hog eradication case study.
Recording also provides evidence if you need to document property damage or predator activity for wildlife management purposes.
We said five accessories, but here’s a bonus that matters more than most people think.
Lens covers shield your expensive thermal optics from dust, moisture, scratches, and impacts. Flip-up covers work best for field use—they stay attached so you won’t lose them in the dark and open quickly when you need a shot.
Keep a basic cleaning kit handy. Thermal lenses require special care. Use microfiber cloths designed for optics and lens cleaning solution made for coated lenses. Never use paper towels or shirt sleeves—they’ll scratch coatings.
Carry lens cleaning supplies in your field bag. A dirty lens degrades thermal image quality fast. Quick wipe-downs between stands keep your view crisp.
Anti-fog treatments help in humid conditions. Some hunters skip this, then wonder why their view clouds up during temperature changes. Preventive maintenance beats dealing with problems in the field.
The right accessories multiply your thermal scope’s effectiveness without breaking the bank.
Start with the basics—a quality mount, spare batteries, and protective storage. Add IR illumination and recording capability as your needs and budget allow. Don’t skip lens protection and cleaning supplies.
Not every accessory works for every hunter. Match your accessories to how and where you hunt. Someone running predator control all night needs different gear than someone taking quick evening hog hunts.
We’ve found these five accessory categories make the biggest real-world difference. They protect your investment, extend your operating time, and help you make better shots. That’s what counts when you’re serious about thermal hunting.
When you’re shopping for a thermal scope, the spec sheet can feel like alphabet soup. 640×512 resolution. 12µm pixel pitch. NETD values below 25mK. What do these numbers actually tell you about how the scope performs when you’re glassing for hogs at 300 yards or scanning timber for coyotes?
We’ve tested thermal optics in just about every condition you can imagine—from foggy mornings to bone-dry desert hunts. And here’s what we’ve learned: image quality isn’t defined by a single number but rather the result of how several specifications work together. You can’t just pick the highest resolution and call it done.
Let’s cut through the marketing speak and talk about what actually matters when you’re trying to spot game in the dark.
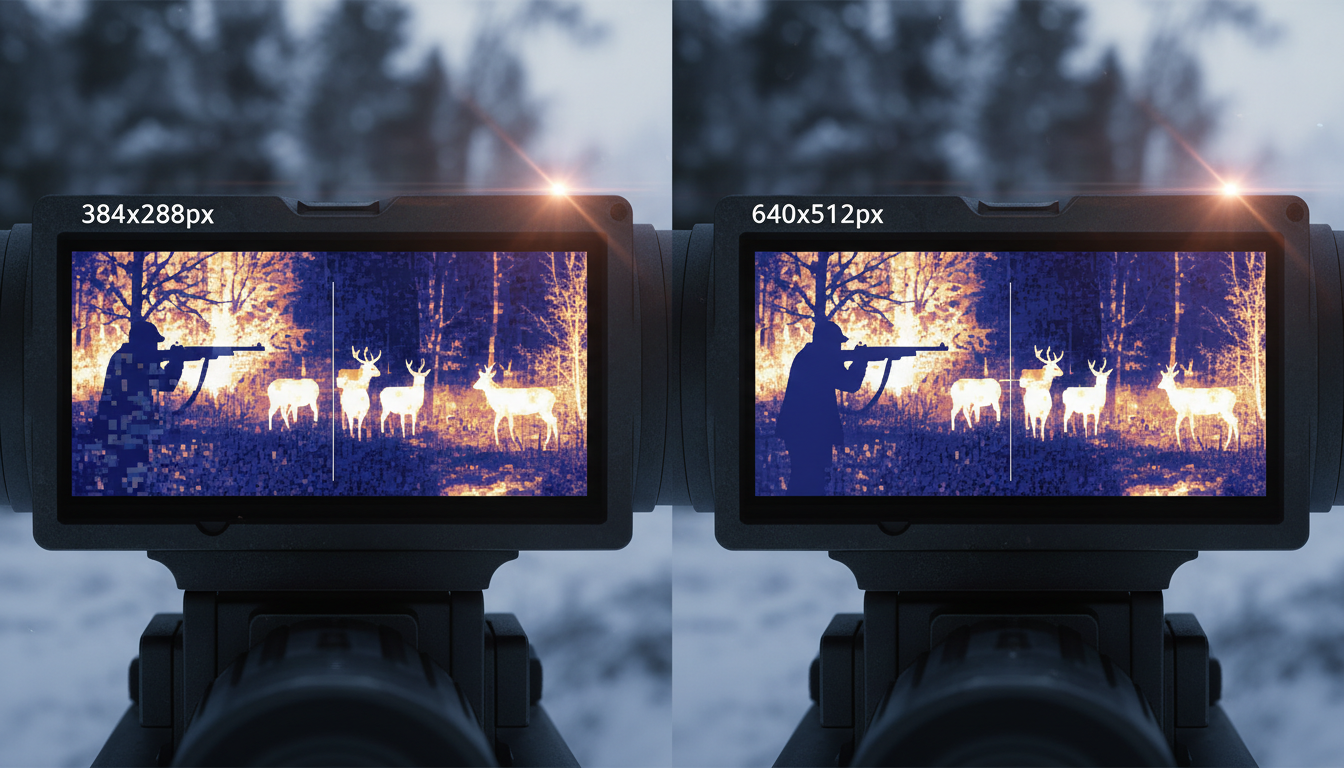
Thermal sensor resolution like 640×512 means the sensor captures 640 pixels horizontally and 512 pixels vertically—that’s 327,680 total pixels. Think of it like the megapixels on your phone’s camera. More pixels capture more thermal data points across the scene you’re viewing.
Common resolutions you’ll see include 384×288 (110,592 pixels), 640×512 (327,680 pixels), and high-end models at 1024×768 or even 1280×1024. A 640×512 sensor provides approximately 3 times more pixels than 384×288, but more pixels doesn’t automatically mean a proportionally better hunting experience.
Higher resolution, such as 1024×768, records more thermal data, resulting in sharper outlines, cleaner contours, and better object separation, especially when zooming in. But you’ll pay for those extra pixels—both in price and battery life. We’ve seen real results from thermal scopes in field conditions, and resolution is just one piece of the puzzle.
For most hunters, a 384×288 sensor handles close to mid-range work just fine. You’ll spot that coyote at 200 yards without issue. But for open country where you’re glassing at 850 yards, the 640×512 delivers crisp, well-defined images where you can clearly see the animal’s posture and movement.
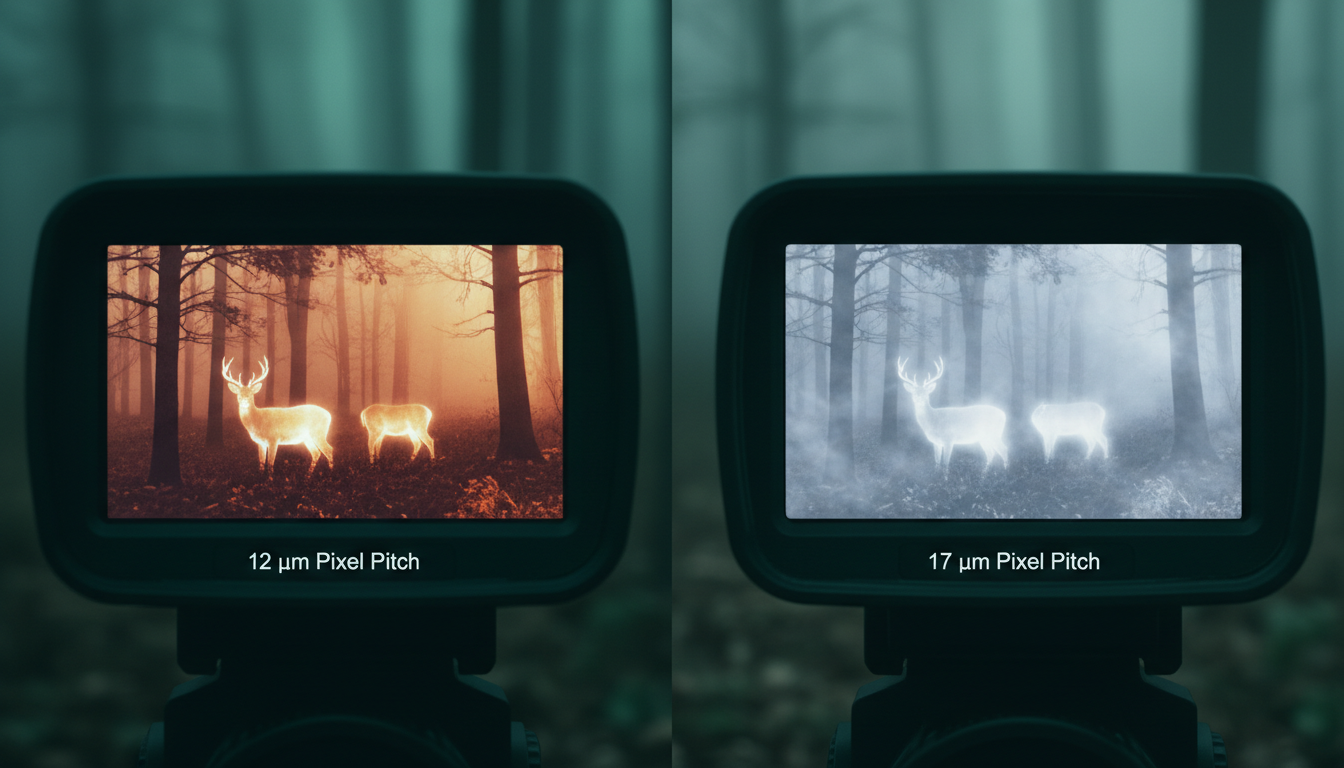
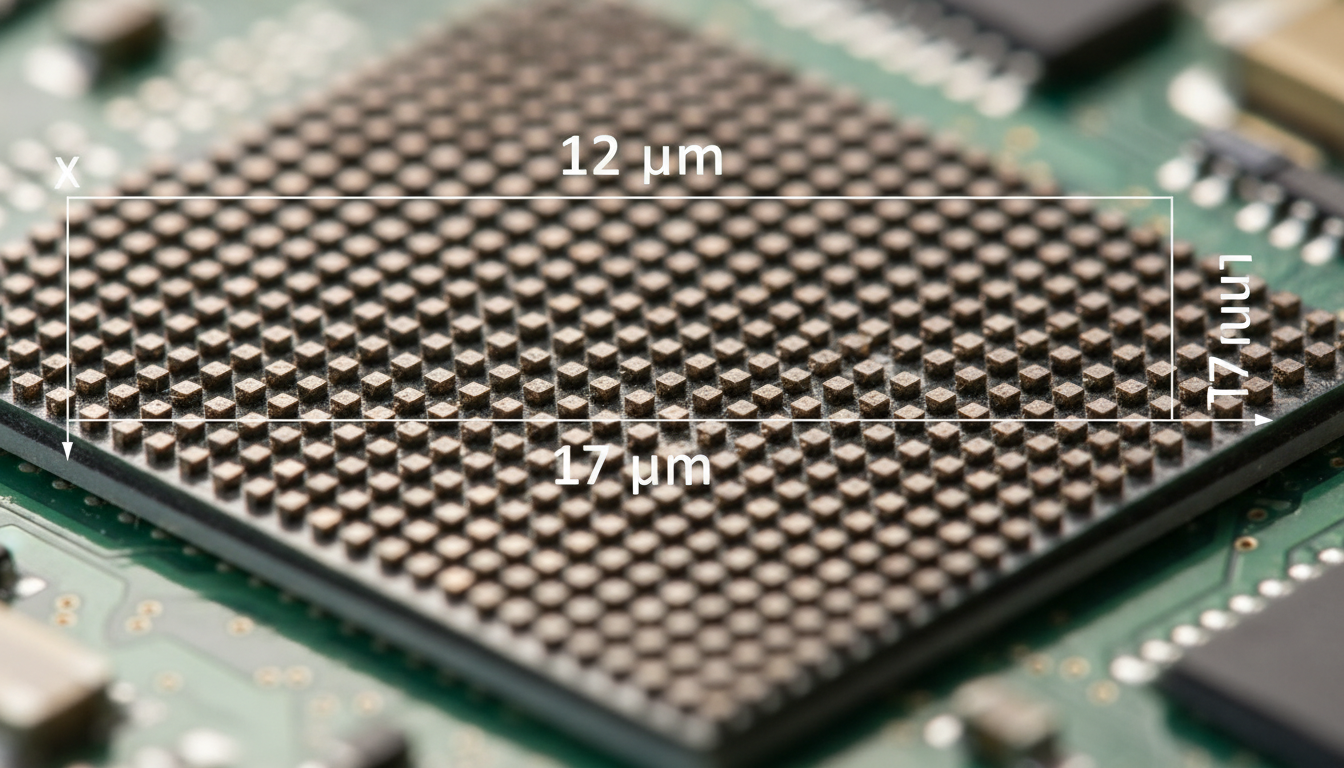
Pixel pitch refers to the size of each individual pixel on the sensor, measured in micrometers, typically 12µm or 17µm. It’s the distance between the centers of two pixels of a microbolometer, normally 12µm or 17µm in thermal imaging sensors.
And here’s where it gets interesting: smaller pixel pitch like 12µm means pixels are packed more closely together, allowing for higher resolution images and better detection of smaller objects, while larger pitch like 17µm means fewer pixels per unit area but potentially better sensitivity to thermal radiation.
Think of pixel pitch like bucket size. The larger the pixel and its area, the more Long Wavelength Infrared radiation it can receive and the higher the sensitivity of the entire thermal imaging sensor. A 17µm pixel collects more thermal energy than a 12µm pixel, which translates to better performance in challenging conditions.
Sensors with the same 640×480 resolution but different pixel sizes—17 microns versus 12 microns—result in better sensitivity for the larger pixel (NETD <25 mK vs. NETD <40 mK). That sensitivity difference shows up when you’re hunting in fog, rain, or high humidity—exactly when you need your scope to perform.
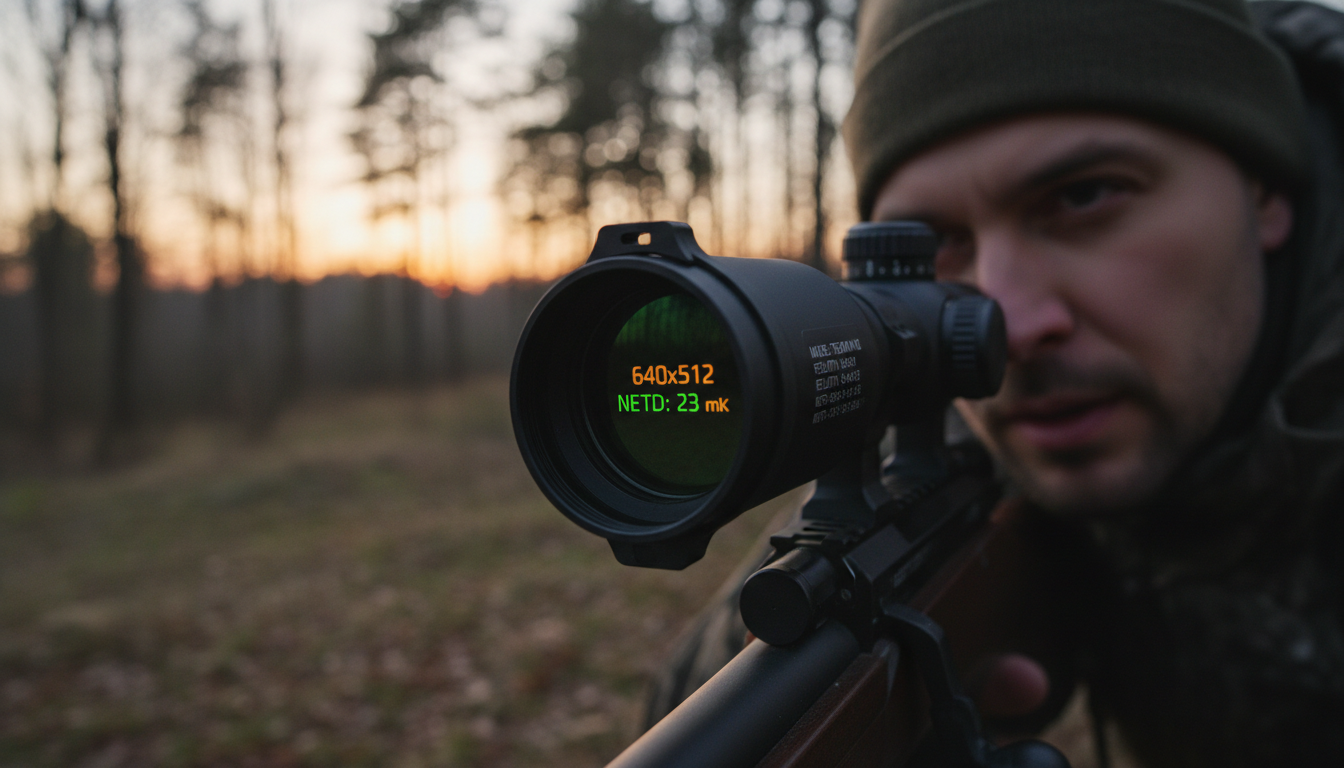
A 384×288 sensor at 17µm with NETD <25 mK can show low-contrast scenes in more detail than a 640×480 sensor at 12µm with NETD <40 mK. That seems backwards, right? More pixels should mean better images.
But thermal imaging doesn’t work like regular photography. Smaller 12µm pitch offers a sharper image at good distance when looking for small hot targets quite far from the observer, but for a more versatile device, 17µm will perform better.
We typically recommend our Sirius HD of Pegasus 2 LRF models for hunters who need that balance of resolution and real-world performance. These units consider the full system—not just one spec.
The pixel pitch affects more than just sensitivity. It also drives your base magnification and the physical size of the sensor. Pixel pitch directly influences base magnification, image quality and thermal imager sensitivity. You can’t optimize one factor without affecting the others.
You’ll see NETD (Noise Equivalent Temperature Difference) listed on every thermal scope spec sheet. NETD quantifies the sensitivity of a thermal sensor, measured in millikelvins (mK) with typical specifications like <25 mK or <20 mK—the lower the NETD value, the higher the sensor sensitivity and superior the image quality.
NETD measures how sensitive the sensor is to tiny differences in heat, and a lower number means the scope can see smaller temperature differences—like spotting a rabbit against warm ground.
In practical terms? Thermal scopes with higher NETD values tend to struggle in rain, fog, snow, and high humidity, producing noisy, low-contrast images, while a low-NETD thermal scope excels under these challenges. When you’re hunting at dawn and everything’s the same temperature, NETD makes the difference between detecting game and staring at thermal mush.
The best production batches of sensors with 17µm pixel pitch achieve NETD less than 25 mK, while 12µm sensors achieve less than 40 mK. That’s not marketing—it’s physics. Bigger pixels collect more thermal radiation, which means better sensitivity.
Let’s be honest about what these specs mean when you’re actually hunting. Resolution is just one piece of the puzzle—lens quality, sensor type, refresh rate, thermal sensitivity (NETD), and pixel pitch all matter significantly.
We’ve watched hunters obsess over getting a 640×512 scope only to be disappointed when a well-designed 384×288 unit outperforms it in fog. Two thermal devices can share identical specifications yet deliver noticeably different images because image quality depends on the entire imaging system—lens quality, display resolution, and image algorithms all influence the final result.
Battery life is another consideration nobody mentions in the marketing materials. 640×512 sensors consume more power than 384×288 units—maybe 20-30% faster battery drain—which matters on extended hunts. When you’re four hours into a hog eradication session, that extra battery capacity keeps you in the game.
Detection range matters more than pure resolution for long-distance work. Detection range is king for long distance—sensor doesn’t really matter that much for long range, but pixel pitch and focal length does. You need the right combination of optics, sensor size, and processing to spot game at distance.
Our Draco en Arc LRF models balance these factors for serious hunters who need dependable performance across varying conditions and ranges.
So what resolution and pixel pitch should you actually get? It depends on how and where you hunt.
For close to mid-range work (under 300 yards) in varied terrain, a 384×288 sensor with 17µm pitch gives you excellent versatility. You’ll spot game quickly, handle bad weather well, and save money for better optics or an IR torch to extend your effective range even further.
Quality 640×512 thermal scopes run $2,800-$5,500+, while 384×288 equivalents cost $1,200-$2,500—nearly double the investment, which is a deal-breaker for hobbyist hunters on a budget.
For open country hunting where you’re regularly engaging targets beyond 400 yards, the higher resolution pays off. The extra pixels mean finer detail—you can distinguish between a coyote and a fox at distance and read body language to determine if the animal is alert, feeding, or bedded. That information changes how you approach your stalk.
If you need a thermal unit able to properly work in different scenarios, with different weather conditions at different distances, go to 17µm with a low NETD and lens aperture of f1.0. That’s the all-around setup that handles whatever conditions you encounter.
A 640×480 sensor with 12µm pixels and NETD below 25 mK delivers both fine detail and strong contrast, but only when the optics and processing are equally well-tuned. You can’t just bolt a mediocre lens onto a great sensor and expect magic.
Display resolution matters too. Display resolution definitely should not be lower than sensor resolution—the display must not degrade the image produced by the sensor, and higher display resolution allows more quality and more complex overlay graphics. You need a screen that can actually show you the detail your sensor captures.
Refresh rate affects how smooth the image looks when tracking moving targets. Most thermal scopes run at 30Hz or 60Hz. The refresh rate tells you how many times per second the screen updates—most scopes are either 30Hz or 60Hz, with 60Hz giving you very smooth, fluid image especially helpful for tracking a running animal.
At Pixfra, we design every thermal scope as a complete imaging system. The sensor resolution and pixel pitch matter, but so do the germanium lens coatings, the signal processing algorithms, and how the whole package handles heat buildup during extended use. It all works together.
Sensor resolution and pixel pitch are just two pieces of what makes a thermal scope perform in the field. True thermal image quality is created through synergy between resolution, pixel pitch, and NETD, refined by proprietary image processing and system-level calibration.
You don’t need to be a thermal imaging engineer to make a smart choice. Focus on how you’ll actually use the scope. Close to mid-range hunting in varied weather? A 384×288 sensor with 17µm pitch and low NETD gives you versatility and value. Long-range work in open country? The extra pixels of a 640×512 sensor help you identify targets at distance.
And remember: the best thermal scope is the one that performs when you need it. Specs on paper don’t bag game—reliable performance in rain, fog, and darkness does. That’s what we build into every unit we design.
What’s more important: sensor resolution or pixel pitch?
Neither is “more important”—they work together. Higher resolution (like 640×512) gives you more detail and better zoom quality. Pixel pitch affects sensitivity and versatility. The main difference lies in resolution versus sensitivity, with 12µm sensors offering higher resolution and 17µm sensors potentially offering better sensitivity. Match the specs to your actual hunting conditions and distances.
Why do 17µm sensors perform better in fog and rain?
Larger pixels capture more Long Wavelength Infrared radiation, which increases the sensitivity of the entire thermal imaging sensor. When conditions are challenging and thermal contrast is low, that extra sensitivity lets you detect game that smaller pixels might miss. It’s the difference between seeing a heat signature and seeing nothing at all.
Is a 640×512 thermal scope worth the extra cost?
It depends on your hunting style. For long-range work at 850 yards, 640×512 provides crisp, well-defined images, while 384×288 shows the same target as visible but pixelated with fine details lost. For most hunters working under 300 yards, a quality 384×288 scope offers better value. Save the money for better glass or accessories.
What NETD should I look for in a thermal scope?
The ideal NETD range falls between <25mK and <40mK—a NETD below 25mK provides exceptional sensitivity suitable for highly detailed target detection at longer ranges, while values above 40mK may result in less precise thermal imagery. Lower is always better, but don’t sacrifice other features chasing the absolute lowest NETD number.
Can I get good performance from a budget thermal scope?
Yes, if you pick the right specs for your needs. Devices with 384×288px are the most popular in the market as they’re more affordable than top-line 640×512 thermal devices but still allow detection range out to 1800m depending on lens size. Focus on units that balance resolution, pixel pitch, and NETD rather than maxing out one spec at the expense of others.
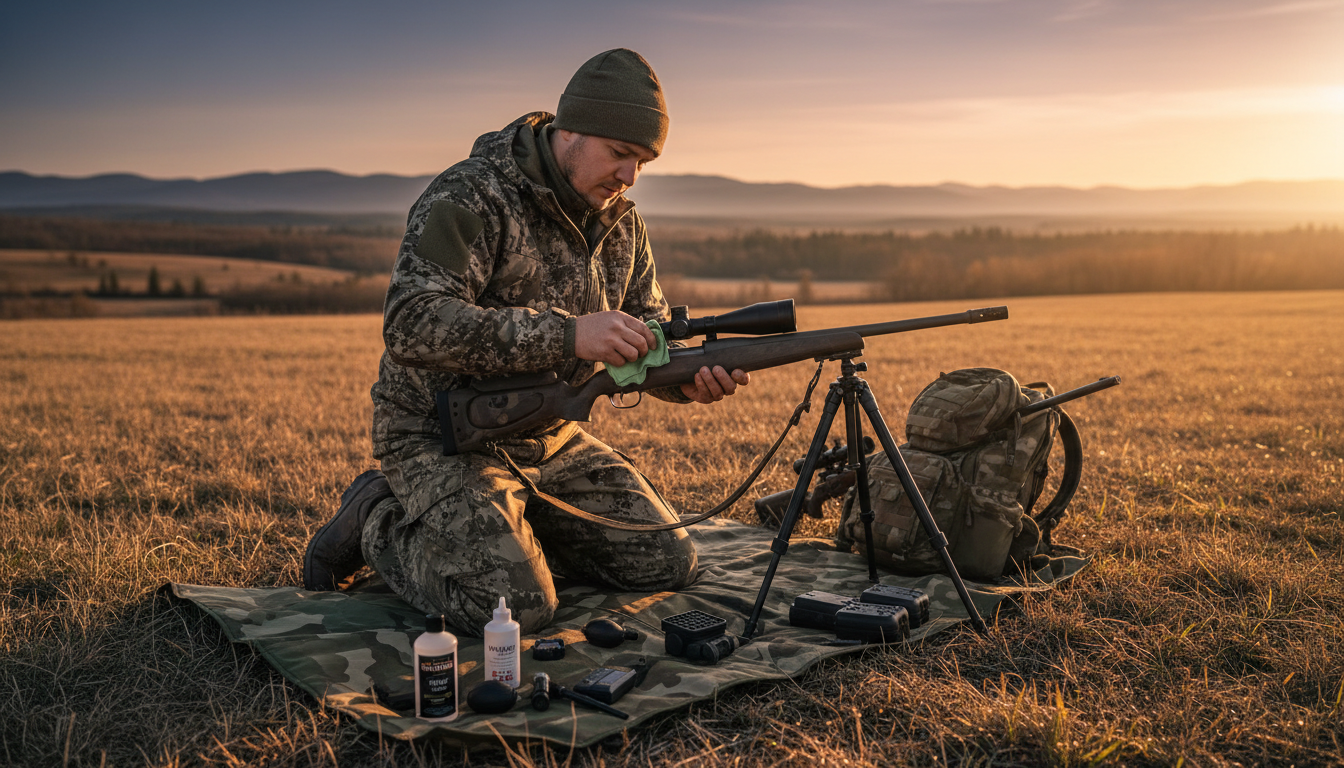
Your thermal scope is a serious investment, and keeping that lens in top shape makes all the difference between spotting your target and missing out. We’ve seen too many hunters damage their optics by using the wrong cleaning methods, and honestly, it doesn’t have to be that complicated.
Think of your thermal lens like the windshield on your truck. A little dust won’t kill you, but grime and fingerprints? That’ll mess with your clarity fast. But here’s the thing—thermal scope lenses aren’t regular glass. They’re made from germanium or other specialized materials with delicate coatings that need careful handling.
We’ve put together this guide to show you exactly how we maintain our thermal optics at Pixfra. Whether you’re running our Sirius HD, the Pegasus 2 LRF, or another thermal scope, these methods will keep your glass clean and your images sharp.
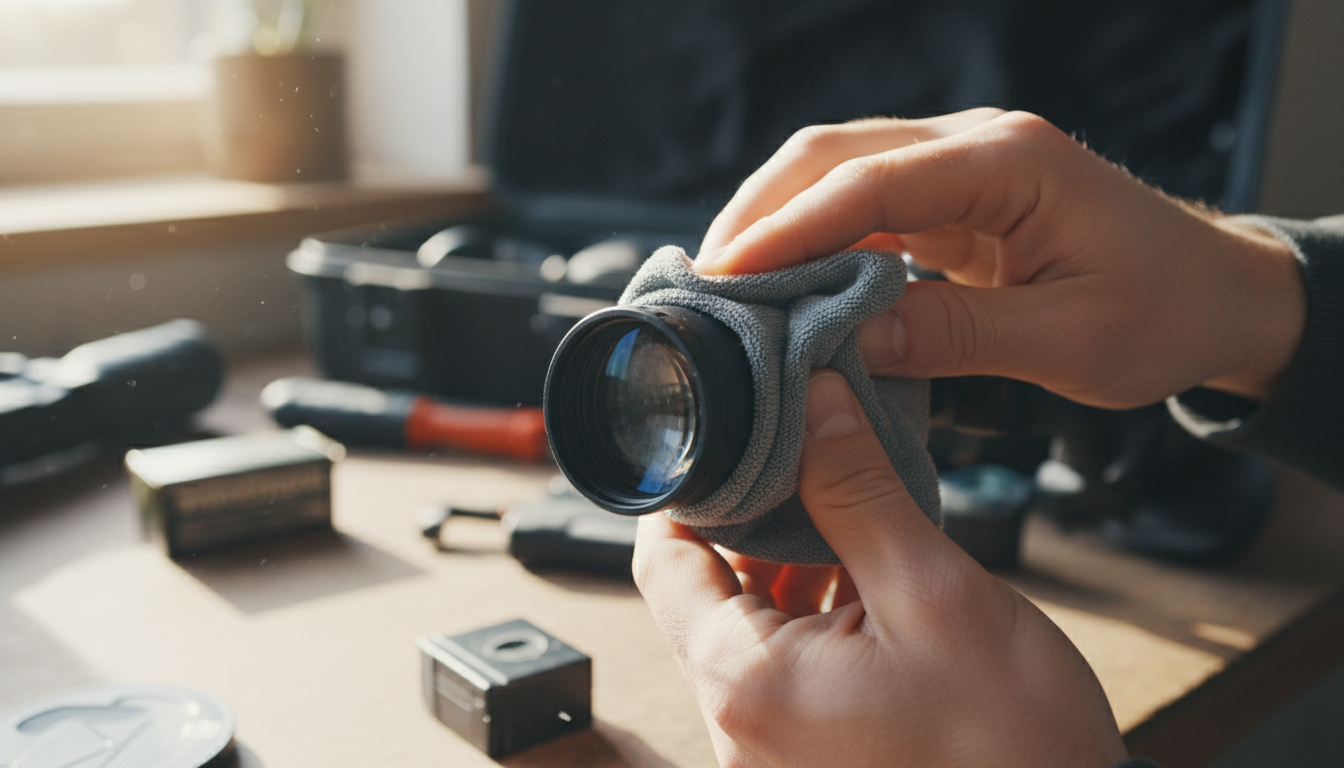
Fingerprint marks, water splashes, dirt, and dust can significantly impair your scope’s functionality, leading to subpar results.And we’re not just talking about slightly fuzzy images—we’re talking about losing contrast, missing heat signatures, and potentially blowing a hunt you’ve been planning for weeks.
The germanium lenses in thermal scopes cost way more than regular optical glass. Clean your thermal camera lens only when strictly necessary, and only when there is visible dirt or fingerprints. Over-cleaning can actually wear down the anti-reflective coating faster than a little dust ever would.
Let’s start with what’ll wreck your optics. We’ve seen people make these mistakes, and they’re expensive ones.
Never use your shirt, paper towels, or handkerchiefs to wipe the lens, as they can scratch the surface.Seriously, resist the urge. Your cotton t-shirt feels soft, but it’s basically sandpaper compared to proper lens cleaning materials.
DO NOT clean with ammonia-based solutions—this will degrade the special coating on the lens.Skip the Windex and household glass cleaners. They’re designed for windows, not precision optics with specialized coatings.
Don’t wipe a dusty lens without removing loose particles first. Those tiny bits of sand or grit act like little knives when you drag them across the coating.
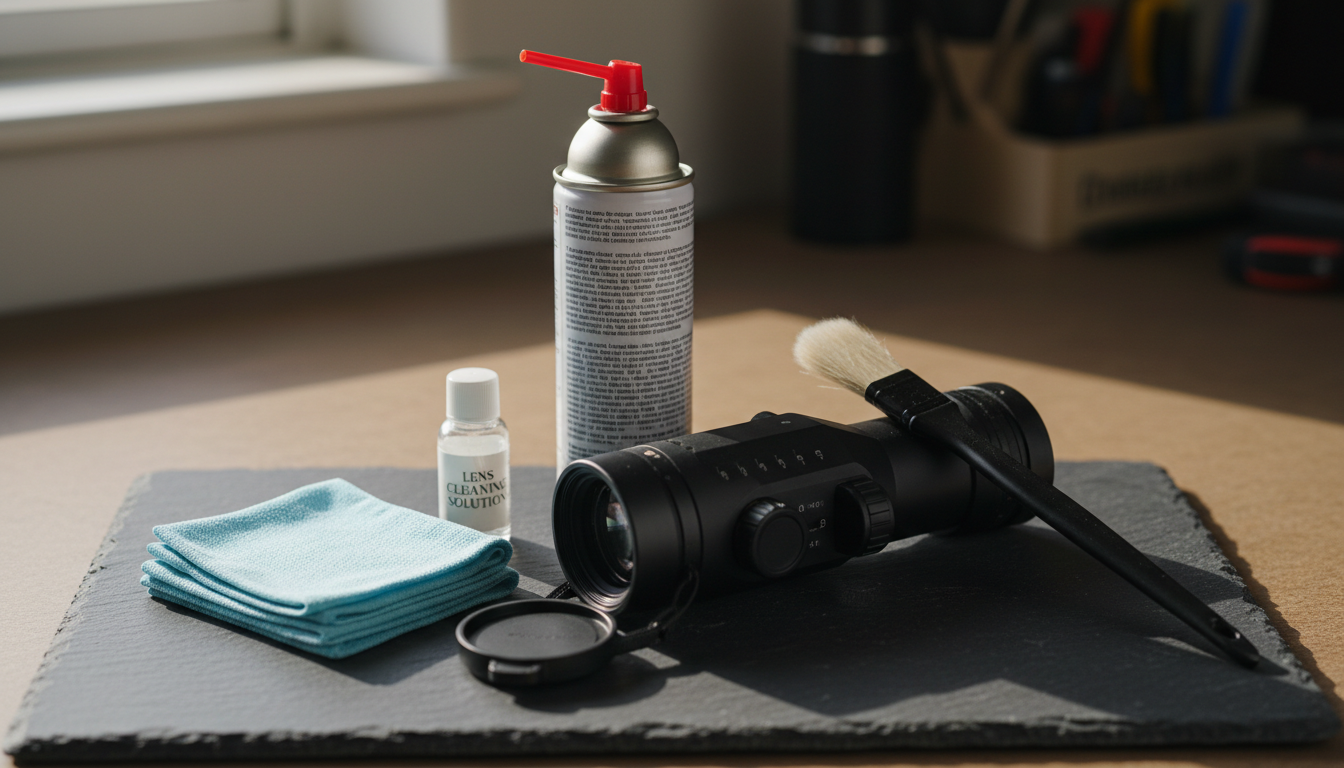
You don’t need a ton of gear, but you do need the right stuff. Here’s what should be in your cleaning kit:
Compressed air or rocket blower: Use compressed air aerosols to blow off loose dust.A rubber rocket blower works great too and won’t risk that cold blast that canned air sometimes gives.
Microfiber cloths: Not just any cloth—get optical-grade microfiber designed for camera lenses or precision optics. These won’t leave lint or scratch delicate coatings.
Lens cleaning solution: Use lens cleaner that is 96% isopropyl alcohol, or a commercial lens cleaner with at least 30% isopropyl alcohol.Stick to solutions made for coated optics.
Soft lens brush: A brush with ultra-fine bristles helps remove stubborn dust without touching the lens with your fingers.
Cotton swabs or lens tissue: For detailed work on stubborn spots, but use sparingly.
Here’s how we clean thermal scope lenses the right way. Follow this order—skipping steps is where people get into trouble.
Step 1: Remove loose debris
Never wipe a dusty lens directly. Loose particles of dust or sand can scratch the surface. Always start with a gentle air duster or a soft, optical brush to remove dirt without friction.
Point the lens downward so gravity works with you, not against you. Give it a few puffs with your air blower or compressed air from about 6 inches away. Watch those particles fall away.
Step 2: Brush away remaining dust
A soft brush removes dust before using a microfiber cloth or specialized wipes.Use gentle, sweeping motions from the center outward. Don’t press hard—let the brush do the work.
Step 3: Apply cleaning solution
If you still see smudges or fingerprints after steps 1 and 2, it’s time for liquid cleaner. Never spray directly on the lens. Instead, put a small amount of cleaning solution on your microfiber cloth.
Step 4: Wipe the lens
Wipe from center of lens to outer edges using a rolling motion that allows fresh cloth to contact the lens. Use gentle, circular motions and let the cloth glide across the surface. You’re not scrubbing a pan—you’re caressing precision optics.
Step 5: Final inspection
Hold the scope up to light and check for streaks or remaining spots. If you see any, repeat step 4 with a clean section of your cloth.
Cleaning is important, but prevention saves you way more time. Here’s what we do to keep our lenses cleaner longer.
During usage, always keep the lens covers closed to shield against scratches, dust, and debris. Those flip-up lens caps exist for a reason. Use them whenever you’re moving through brush or not actively glassing.
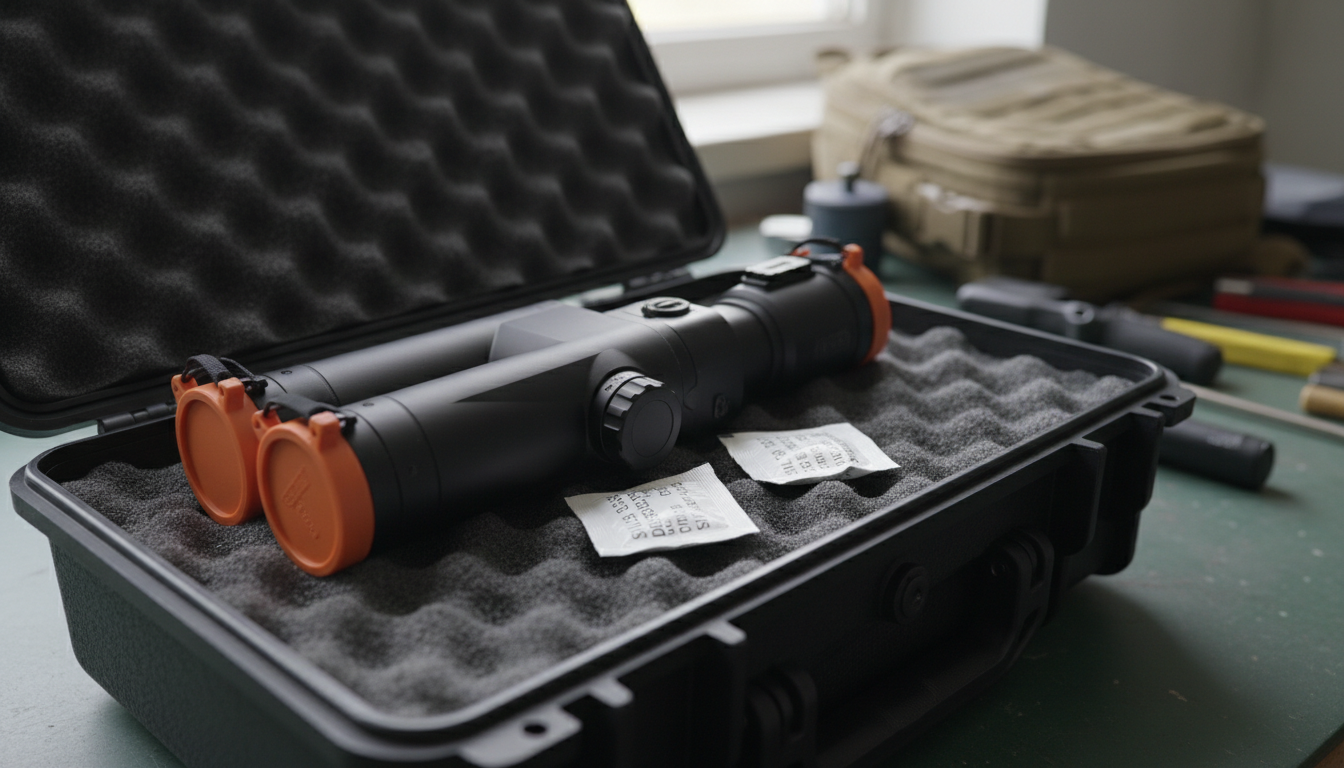
Store your thermal scope in a dedicated case with fabric cases with foam inserts or plastic or metal cases equipped with soft elements. To combat dampness, add silica gel bags inside the case. Moisture is the enemy of electronics and optics. A few desiccant packs are cheap insurance.
Keep your scope away from extreme temperature swings when possible. Even waterproof scopes can suffer from internal condensation if exposed to rapid temperature changes. If you’re going from a warm truck to freezing temps, let your scope acclimate gradually.
Don’t forget about the rest of your thermal scope. Wipe the exterior surfaces of metal and plastic parts off dust and dirt with a cotton cloth. A slightly damp cloth works fine for the housing—just keep moisture away from ports and seals.
Check rubber eyecups and armor for cracks or wear. These protect the internal electronics from moisture and impacts. If you spot damage, address it before it becomes a bigger problem.
Clean around buttons, dials, and adjustment knobs with a soft brush or cotton swab. Dirt buildup in these areas can affect functionality over time.
Here’s where people often go wrong—they clean too much or not enough.
Clean your lens whenever you notice dirt or smudges affecting your visibility, but avoid excessive cleaning to prevent unnecessary wear. We typically give our scopes a light cleaning after every hunt and a more thorough cleaning monthly during heavy use.
Clean the lens lightly after every hunt and perform a deeper cleaning if exposed to mud, rain, or heavy dust.If you’ve been in nasty weather or dusty conditions, don’t wait—clean it when you get home.
Store in a dry, shaded, and stable-temperature environment.We keep our thermal scopes in climate-controlled areas, away from windows and heat sources.
Check and remove the battery if storing long-term (set to 40–60% charge).This prevents battery degradation and potential leakage that could damage your scope’s internals.
Before the hunting season starts, run a pre-season check. About one month before the season, run a pre-season checklist: fully charge and test batteries, inspect the housing and rubber seals, clean and examine the lens, update firmware, check sensor calibration and dead pixels, verify mounts/accessories, and do a real-world night field test.This ensures you’re ready when it counts.
We’ve seen these errors too many times:
Over-cleaning: Clean the lens gently – excessive cleaning may wear away the anti-reflective coating, causing more transmission loss than a little dust. A few dust specks won’t hurt image quality as much as worn coatings will.
Using rough materials: Avoid harsh chemicals that can damage sensitive coatings. Never wipe a dry, dusty lens, as this can scratch the surface.
Ignoring the eyepiece: Don’t forget to clean the eyepiece lens too. Smudges on the rear lens affect image quality just like dirt on the objective lens.
Rushing the process: Take your time. A rushed cleaning job risks scratching or streaking the lens.
Sometimes you need expert help. If you notice persistent image quality issues after cleaning, declining performance, or visible damage to lens coatings, it’s time to contact the manufacturer or an authorized service center.
Most quality thermal scopes come with multi-year warranties. Don’t try to disassemble or deep-clean internal components yourself—that’ll void your warranty faster than anything.
Taking care of your thermal scope lens doesn’t require special skills or expensive equipment. It just takes the right tools, proper technique, and a little patience. Start with air to remove loose debris, use appropriate cleaning solutions, and always work gently.
A few minutes of attention after each outing can add years to your device’s lifespan and keep your vision clear in every condition. We’ve seen thermal scopes last 10+ years with proper care and maintenance.
Whether you’re using Pixfra’s Arc LRF for long-range work or the Draco for close-in hunting, these cleaning methods will keep your optics performing at their best. Pair your thermal scope with our IR-brander for even better results in the field.
Remember, clean optics mean better detection, clearer images, and more successful hunts. Take care of your gear, and it’ll take care of you. For more real-world thermal scope performance data, check out our feral hog eradication case study showing how proper equipment maintenance contributed to successful results.
Can I use regular eyeglass cleaner on my thermal scope lens?
No, avoid regular eyeglass cleaners on thermal scopes. Thermal lenses use germanium or specialized materials with unique coatings that react differently than standard glass. Use lens cleaners specifically designed for optical instruments with at least 30% isopropyl alcohol, or 96% isopropyl alcohol solutions. Regular eyeglass cleaners may contain additives that damage thermal scope coatings and reduce image quality over time.
How do I remove fingerprints from my thermal scope lens without causing damage?
First, blow away any loose dust with compressed air or a rocket blower. Then apply a small amount of optical-grade lens cleaner to a microfiber cloth—never directly on the lens. Gently wipe from the center outward using circular motions with minimal pressure. The key is removing particles first before any wiping, which prevents scratching the delicate germanium surface.
Is it safe to clean my thermal scope in cold weather or should I wait?
You can clean your thermal scope in cold weather, but bring it inside first and let it acclimate to room temperature for 15-20 minutes. Rapid temperature changes can cause condensation inside the scope. Once acclimated, clean normally using your standard process. Never apply liquid cleaners to a frozen lens, as this can cause thermal shock and potentially crack coatings.
What should I do if moisture gets inside my thermal scope?
If you notice internal moisture or fogging, stop using the scope immediately. Place it in a warm, dry location with desiccant packs nearby, but don’t expose it to direct heat. Leave lens caps off to allow air circulation. If moisture persists after 48 hours, contact the manufacturer or an authorized service center—internal moisture often indicates seal failure that requires professional repair.
How can I tell if I’ve damaged the coating on my thermal lens?
Coating damage typically appears as permanent marks, scratches, or areas where the image looks degraded even after cleaning. You might notice reduced contrast, haziness, or rainbow-like patterns on the lens surface when viewed at an angle. If cleaning doesn’t improve image quality and you see visible marks on the lens, the coating may be compromised. Professional inspection can confirm coating damage and determine if repair or replacement is needed.
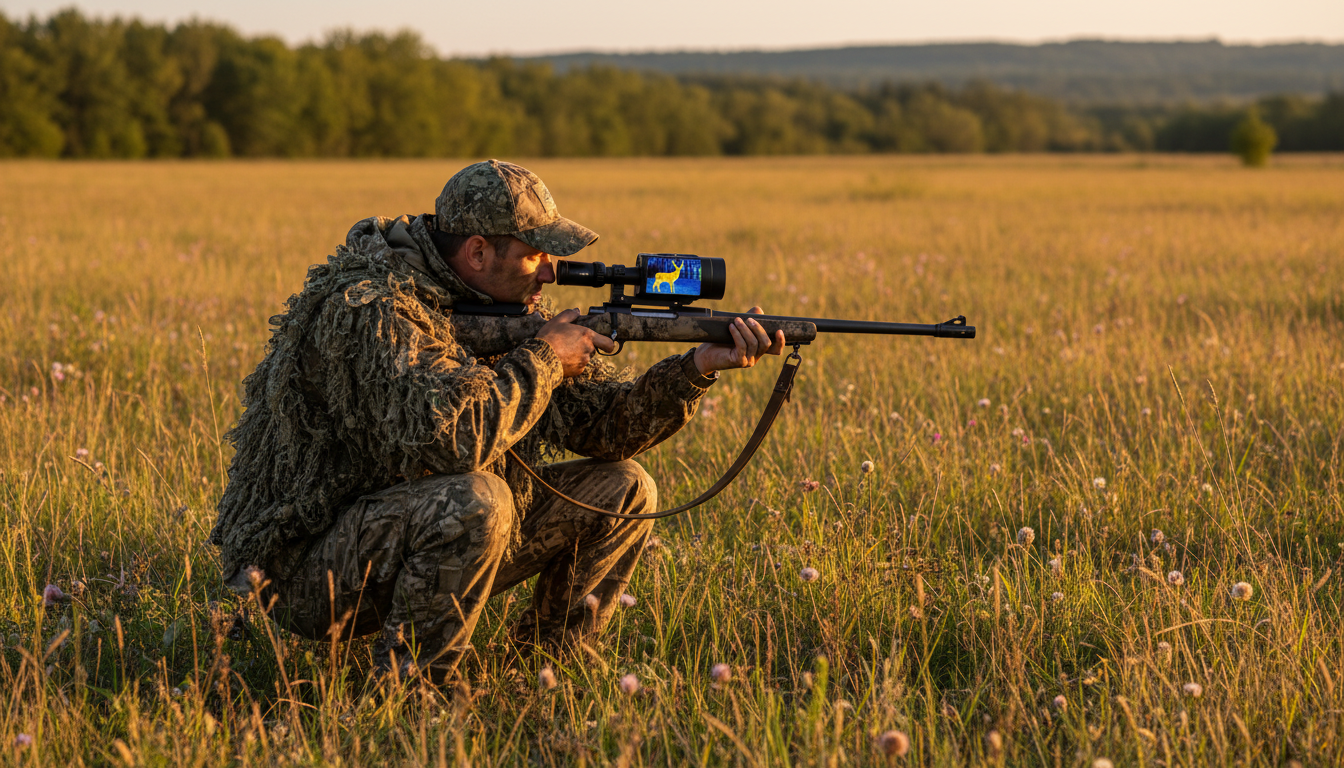
Als je tegenwoordig een willekeurig jachtkamp binnenloopt, hoor je ongetwijfeld iemand praten over warmtebeeldkijkers. Maar de groeiende populariteit van deze apparaten gaat gepaard met een heleboel onjuiste informatie. We hebben het allemaal al gehoord – van beweringen dat warmtebeeldkijkers door muren heen kunnen kijken tot de overtuiging dat ze alleen ’s nachts werken.
Kijk, we snappen het wel. Thermische technologie klinkt als iets dat rechtstreeks uit een sciencefictionfilm komt. En eerlijk gezegd is dat juist een deel van het probleem. Hollywood heeft de publieke perceptie flink beïnvloed en verwachtingen gewekt die niet overeenkomen met de werkelijkheid. Na jarenlang samen te hebben gewerkt met jagers en thermische apparaten te hebben getest, zoals onze Sirius HD en Pegasus 2 LRF, hebben we de hardnekkigste mythes in kaart gebracht die ontkracht moeten worden.
Het zit namelijk zo: warmtebeeldkijkers zijn geweldige hulpmiddelen. Maar ze werken het beste als je echt begrijpt wat ze wel en niet kunnen. Laten we even duidelijkheid scheppen.
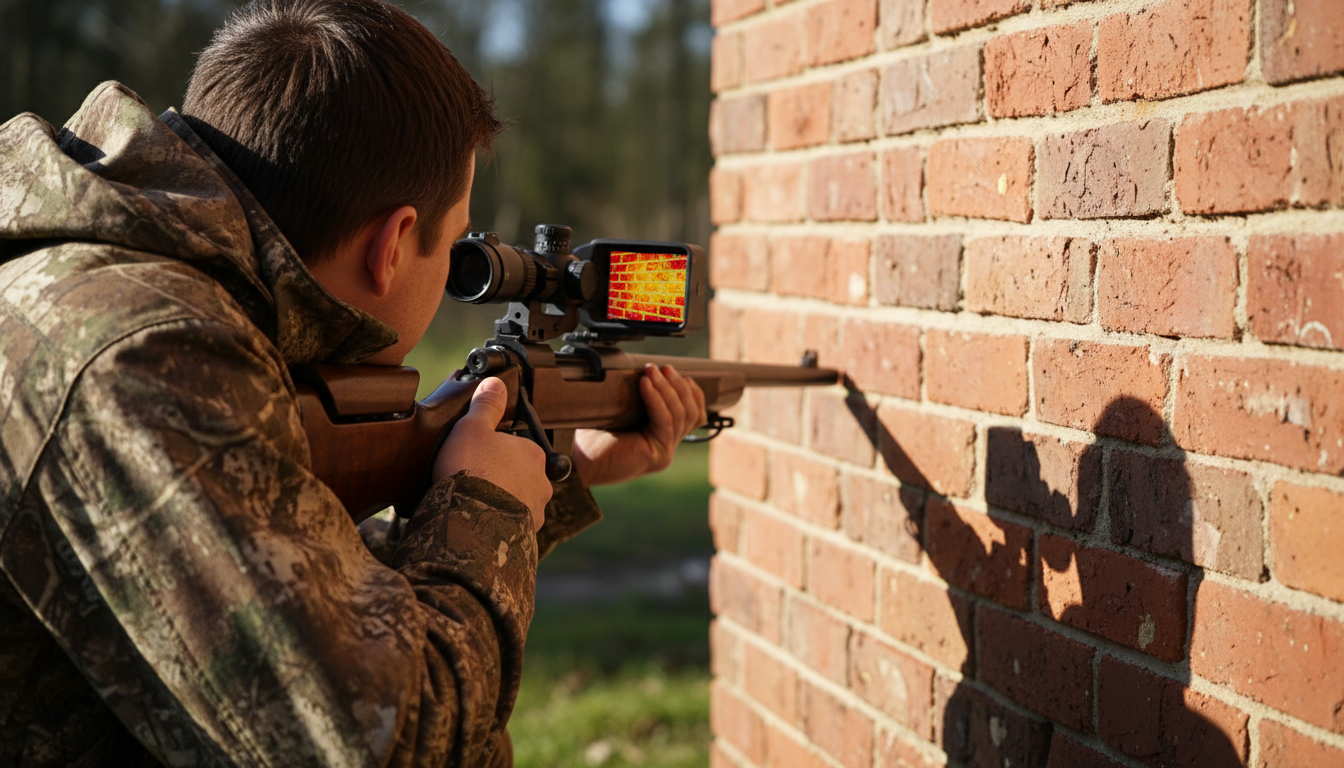
Deze staat niet voor niets bovenaan de lijst. Het is waarschijnlijk de meest voorkomende misvatting die er bestaat, en hij is volkomen onjuist.
Warmtebeeldcamera’s detecteren infraroodstraling – in feite warmte-energie – die door oppervlakken wordt uitgestraald. Ze kunnen geen vaste materialen zoals muren, deuren of beton doordringen. Wanneer je een warmtebeeldcamera op een muur richt, zie je alleen de oppervlaktetemperatuur van die muur, meer niet. Een muur met een gelijkmatige temperatuur wordt weergegeven als een leeg warmtebeeld, zelfs als er een persoon vlak achter staat.
Bekijk het eens zo: bij warmtebeeldtechniek wordt oppervlaktewarmte gedetecteerd, geen röntgenstraling. De infraroodstraling die warmtesensoren oppikken, dringt niet door de meeste vaste materialen heen. Sterker nog: sommige materialen die doorzichtig zijn voor zichtbaar licht – zoals glas en water – lijken volkomen ondoorzichtig wanneer ze via warmtebeeldtechniek worden bekeken.
Nu zit er wel een klein kernje waarheid verborgen in deze mythe. Als iemand zijn hand langere tijd tegen een dunne muur houdt, kun je misschien een klein temperatuurverschil aan het oppervlak waarnemen. Maar dat komt alleen doordat de muur opwarmt – je kunt er nog steeds niet doorheen kijken. Hetzelfde principe geldt wanneer we in het veld zijn met onze Draco warmtebeeldkijker. Het apparaat detecteert een wildzwijn achter struikgewas omdat de warmteafgifte door openingen in de begroeiing heen dringt, niet omdat het door vaste objecten heen kijkt.
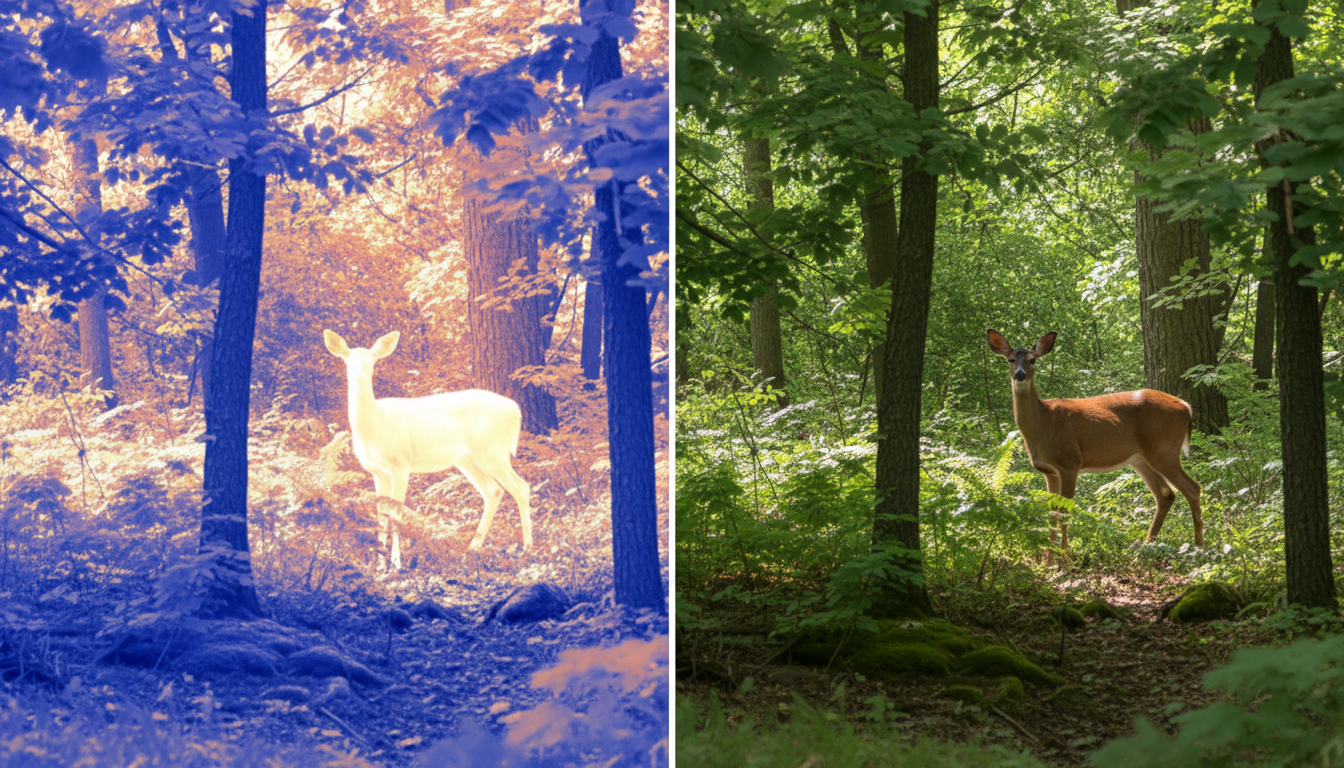
Dit horen we voortdurend, en het maakt ons gek omdat het de manier waarop mensen deze tools gebruiken beperkt.
Warmtebeeldkijkers werken overdag net zo goed als ’s nachts. De reden hiervoor is simpel: warmtebeeldtechnologie is niet afhankelijk van zichtbaar licht. Het detecteert temperatuurverschillen, die 24 uur per dag en 7 dagen per week aanwezig zijn. Of het nu middag of middernacht is, warmbloedige dieren stralen altijd warmte uit die afsteekt tegen hun omgeving.
Overdag kunnen warmtebeeldkijkers je zelfs voordelen bieden die traditionele optiek niet kan evenaren. Dichte mist, felle schittering of dichte begroeiing die een gewone kijker zou verblinden? Geen probleem. We hebben talloze jagers gezien die tijdens verkenningsrondes rond het middaguur warmtebeeldapparatuur gebruikten om herten te spotten die in hoog gras lagen – dieren waar ze met een verrekijker zo aan voorbij zouden zijn gelopen.
Een praktijkvoorbeeld maakt dit heel duidelijk. Een groep jagers die we kennen in Texas gebruikt regelmatig warmtebeeldapparatuur bij zonsopgang en in de vroege ochtenduren om wilde zwijnen in dicht struikgewas op te sporen. De zon is al op, er is voldoende licht, maar de begroeiing is te dicht om de dieren met het blote oog te kunnen herkennen. Hun warmtebeeldmonoculair detecteert binnen enkele seconden warmtesignaturen die met een hoogwaardige verrekijker pas na 10 tot 15 minuten zouden worden opgemerkt.
Dit is waarom het gebruik van warmtesensoren overdag zo effectief is: terwijl de omgevingstemperatuur stijgt, houden levende wezens hun lichaamstemperatuur op peil. Dat contrast is precies wat warmtesensoren waarnemen. Een hert met een temperatuur van 98°F valt op, of de omgevingstemperatuur nu 40°F of 85°F is.
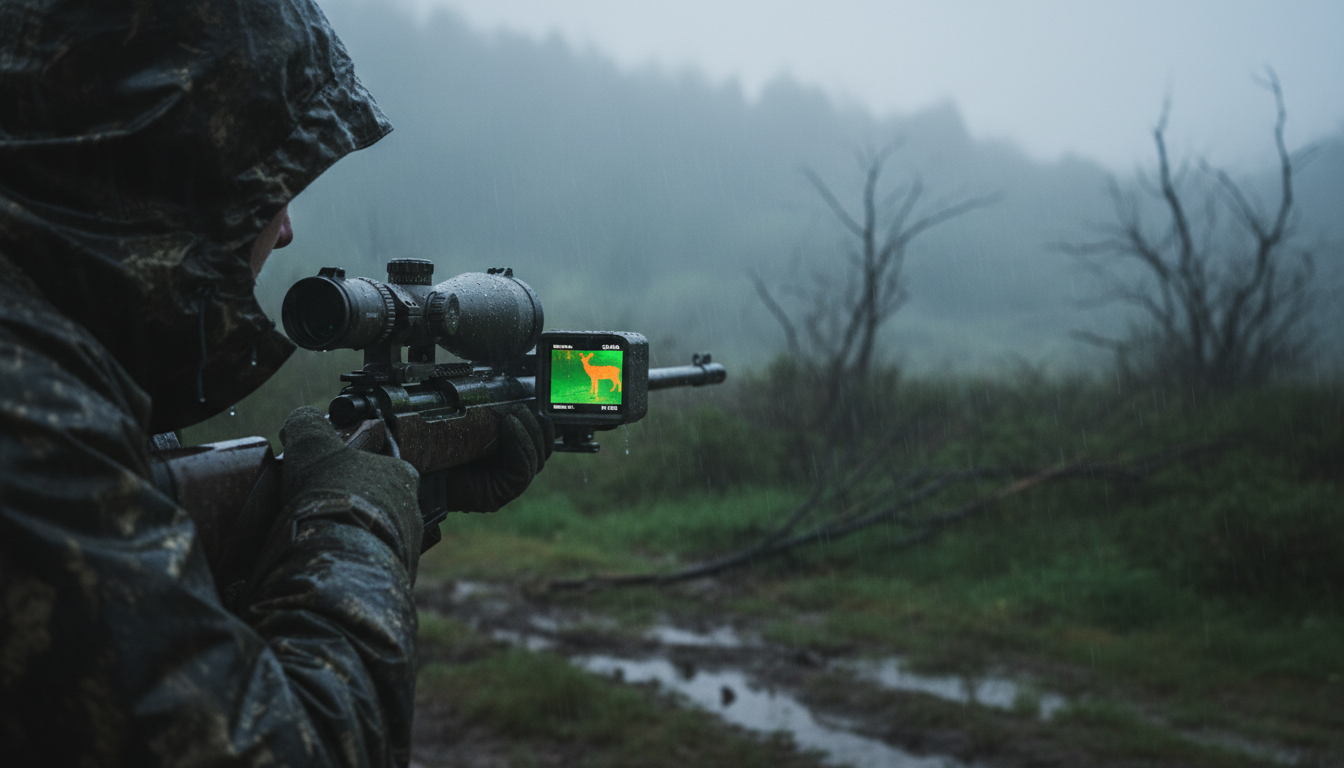
Deze mythe gaat juist te ver in de andere richting. Ja, warmtebeeldkijkers presteren beter dan traditionele optische apparatuur bij slecht weer, maar ze zijn geen wondermiddel.
Regen, mist en hevige sneeuwval kunnen de effectiviteit van warmtebeeldcamera’s verminderen. Hoewel warmtebeeldcamera’s veel beter door lichte mist en nevel heen kijken dan nachtzichtapparatuur of standaardrichtkijkers, kan extreem dichte mist het detectiebereik verkleinen. Hevige regen kan warmtesignaturen maskeren of thermische “ruis” veroorzaken, waardoor doelen op afstand moeilijker te identificeren zijn.
Dat gezegd hebbende, presteren warmtebeeldkijkers bij slecht weer nog steeds beter dan andere technologieën. We hebben onze apparaten getest in alle weersomstandigheden, van lichte motregen tot zware regenbuien. Het detectievermogen neemt weliswaar af onder extreme omstandigheden, maar we zijn nog nooit een situatie tegengekomen waarin een traditionele kijker bij slecht weer beter presteerde dan een warmtebeeldkijker.
Het temperatuurcontrast is belangrijker dan de meeste mensen beseffen. In omgevingen waar de omgevingstemperatuur vrijwel gelijk is aan de lichaamstemperatuur – zoals op een vochtige zomermiddag bij 95°F – is warmtebeeldtechniek minder effectief. Het contrast in het warmtebeeld dat warmtebeeldcamera’s zo nuttig maakt, neemt af wanneer alles ongeveer dezelfde temperatuur heeft.
Betekent dit dat thermische apparaten bij warm weer nutteloos zijn? Helemaal niet. Maar het betekent wel dat je je verwachtingen moet bijstellen en de beperkingen van de technologie moet begrijpen. Een kwalitatief hoogstaand thermisch apparaat met een goede gevoeligheid, zoals apparaten die zijn uitgerust met moderne sensoren, zal nog steeds temperatuurverschillen van slechts enkele graden detecteren.
We hebben dit punt voor het laatst bewaard omdat het om echt geld gaat, en niemand wil te veel uitgeven op basis van verkeerde aannames.
Het detectiebereik hangt niet alleen af van de prijs, maar ook van de juiste combinatie van sensorresolutie, lensgrootte en pixelafstand. Natuurlijk beschikken duurdere modellen vaak over deze kenmerken, maar het verband is niet zo eenvoudig als “hoe meer je uitgeeft, hoe verder je kunt zien”.”
Dit zijn de factoren die het detectiebereik daadwerkelijk bepalen: de resolutie van de sensor (bijvoorbeeld 384×288 versus 640×480), de lensdiameter en brandpuntsafstand, en de kwaliteit van de warmtedetector zelf. Een warmtebeeldkijker met een 640×480-sensor en een 50 mm-lens detecteert doelen doorgaans op grotere afstand dan een 384×288-sensor met dezelfde lens. Maar als je een grotere 75 mm-lens op dat 384-model monteert, verandert de vergelijking plotseling.
We hebben gezien dat jagers flink wat geld uitgeven aan hoogwaardige warmtebeeldkijkers in de hoop wild op meer dan 1.000 yards te kunnen spotten, om vervolgens te ontdekken dat het detecteren en identificeren van wild twee heel verschillende dingen zijn. Je kunt misschien wel een warmtesignaal detecteren op 800 yards, maar om te herkennen of het een coyote of een hert is, heb je een veel kortere afstand of een hogere vergroting nodig.
De detectiebereiken die in de technische specificaties worden vermeld, hebben doorgaans betrekking op een warmteafdruk ter grootte van een mens onder ideale omstandigheden. Bij een coyote of een wild zwijn – kleinere doelen – zullen de effectieve detectiebereiken kleiner zijn. En die “ideale omstandigheden” komen in echte jachtsituaties zelden voor.
Het is verstandig om de warmtebeeldkijker af te stemmen op je eigen jachtstijl. Jagers op roofdieren die in open terrein jagen, hebben andere specificaties nodig dan jagers op wilde zwijnen in het dichte struikgewas van Zuid-Texas. Denk, voordat je je budget volledig opmaakt, na over de afstanden en omgevingen waarin je doorgaans jaagt. Onze casestudie over de uitroeiing van wilde zwijnen laat zien dat een doordachte keuze van verwarmingssystemen op basis van de werkelijke behoeften tot betere resultaten leidt dan het simpelweg aanschaffen van de duurste optie.
Warmtebeeldkijkers zijn geavanceerde technologie die een grondige kennis vereist. De vier mythes die we hebben besproken – door muren heen kijken, uitsluitend 's nachts bruikbaar zijn, perfecte prestaties onder alle weersomstandigheden en de stelling dat de prijs gelijk staat aan het bereik – vloeien allemaal voort uit hetzelfde probleem: aannames die zijn gebaseerd op beperkte informatie of Hollywood-fictie.
De werkelijkheid ligt genuanceerder. Warmtebeeldkijkers detecteren oppervlaktewarmte, het zijn geen röntgenkijkers die verborgen voorwerpen zichtbaar maken. Ze werken de klok rond, omdat er zowel overdag als ’s nachts temperatuurverschillen bestaan. Het weer heeft wel invloed op ze, maar in mindere mate dan op andere optische apparaten. En de prijs weerspiegelt de functies en de bouwkwaliteit, niet alleen de ruwe detectieafstand.
We hebben gemerkt dat jagers die de tijd nemen om te leren hoe warmtebeeldtechnologie precies werkt, veel meer waar voor hun geld krijgen. Inzicht in de werkelijke mogelijkheden – en beperkingen – van deze apparatuur leidt tot slimmere aankoopbeslissingen en een effectiever gebruik in het veld. Of je nu net begint met het verkennen van warmtebeeldtechnologie of je huidige uitrusting wilt upgraden: kennis wint het altijd van marketingpraatjes.
Kunnen warmtebeeldkijkers dieren detecteren die zich in het water verschuilen?
Nee, warmtebeeldkijkers kunnen geen vissen of dieren zien die onder water liggen. Water blokkeert infraroodstraling en is daardoor ondoorzichtig voor warmtesensoren. Je ziet alleen de temperatuur van het wateroppervlak. Dieren die gedeeltelijk in het water liggen – zoals een hert dat een beekje oversteekt – zullen hun blootgestelde lichaamsdelen echter duidelijk zichtbaar maken op het warmtebeeld.
Werken warmtebeeldkijkers door glazen ramen heen?
Warmtebeeldkijkers kunnen niet door glas heen kijken, omdat glas infraroodstraling weerkaatst in plaats van door te laten. Als je een warmtebeeldapparaat op een raam richt, zie je weerspiegelingen van warmtesignaturen vóór het glas, en niet wat erachter zit. Dit geldt zowel voor gewoon vensterglas als voor brillenglazen.
Hoe lang blijft de nulstelling van een warmtebeeldkijker behouden?
Moderne warmtebeeldkijkers behouden hun nulstelling net zo betrouwbaar als traditionele kijkers, mits ze correct zijn gemonteerd. Digitale dradenkruizen in warmtebeeldapparatuur worden elektronisch over het beeld gelegd en behouden hun nulstelling dankzij de interne kalibratie van het apparaat. Kwalitatief hoogwaardige montages en een correcte installatie zijn belangrijker dan het type technologie. De meeste warmtebeeldkijkers beschikken over een „one-shot“-nulstelling die stabiel blijft gedurende honderden schoten.
Kun je een IR-laser gebruiken in combinatie met een warmtebeeldkijker?
Nee, infraroodlasers werken niet met warmtebeeldkijkers. IR-lasers zenden licht uit in het nabij-infraroodspectrum (850-950 nm), terwijl warmtebeeldkijkers warmte detecteren in het midden- of langegolf-infraroodspectrum. De warmtesensor kan de straal van de IR-laser niet waarnemen. IR-lasers werken met nachtzichtapparatuur, niet met warmtebeeldcamera’s. Gebruik bij warmtebeeldkijkers het ingebouwde digitale dradenkruis om te richten.
Zijn warmtebeeldkijkers toegestaan bij de jacht op herten in de Verenigde Staten?
Het bezit en gebruik van warmtebeeldkijkers voor de jacht is in de meeste staten toegestaan, maar de voorschriften verschillen aanzienlijk per staat en per diersoort. Veel staten verbieden de nachtjacht op wild, zoals herten, ongeacht het type optiek. Het gebruik van warmtebeeldkijkers tijdens de toegestane jachttijden bij daglicht is echter doorgaans wel toegestaan. Controleer altijd de jachtvoorschriften van uw specifieke staat voordat u warmtebeeldtechnologie in het veld gebruikt, aangezien de wetgeving verschilt voor wild, roofdieren en schadelijke diersoorten.
















