Trying to decide between a clip-on thermal and a dedicated thermal scope? Both get you hunting after dark, but they work in very different ways. We’ve spent years testing thermal optics in the field, and here’s what actually matters when you’re picking between these two setups.
A clip-on thermal — also called a thermal front attachment — mounts directly in front of your existing daytime scope. It turns your day optic into a thermal rifle scope by projecting a thermal image through your regular reticle, with no need to re-zero. You don’t remove your daytime glass. The clip-on attaches to the objective end, typically with an adapter ring that clamps onto the scope’s objective bell or via a Picatinny rail mount positioned ahead of the day scope. Once you complete the initial alignment process (called collimation), the clip-on and your day scope work together as one system. The thermal unit shows you a heat map of the scene, and your day scope’s crosshairs tell you where the bullet goes.

A dedicated thermal scope replaces your day optic entirely. It has its own display, reticle, zoom system, and controls. It’s built specifically for thermal use, giving you a purpose-built setup for night shooting. Everything is engineered from the ground up for thermal imaging — the infrared sensor, the internal OLED microdisplay, the menu interface — all working together in a single, self-contained package. Think of it as a tool that does one thing and does it at the highest level.
Because the entire optical system is built for thermal, dedicated thermal scopes offer higher resolution options, often with larger lens sizes for better base magnification and clearer images at longer distances. Our Pixfra Pegasus 2 LRF and Chiron LRF series, for example, feature integrated laser rangefinders with 1000m range, multiple zeroing profiles, and built-in ballistic calculators — all inside the scope body. You mount it, zero it, and you’re hunting. The trade-off? Your rifle loses its daytime optic. If you want to hunt during the day with traditional glass, you’ll need to swap scopes — and that means either re-zeroing or running a solid quick-detach (QD) mount that holds zero between switches. Many dedicated thermal hunters solve this by keeping a second rifle set up just for night work, or by investing in the right accessories to upgrade their thermal scope performance, like QD mounts that maintain zero across rifle swaps.
Let’s lay it out. Clip-on thermals enable rapid switching between nighttime and daytime hunting without affecting the zero of the daytime optic. You keep the daytime glass you’ve already invested in, and the clip-on adds thermal detection when the light fades. You can transition from daylight hunting to nighttime predator work with the same gun, the same zero, and zero downtime. If you plan to stick with one dedicated daytime scope and rifle, a clip-on is a flexible and cost-effective choice. Clip-ons also work across multiple rifles if you have matching adapters, and as we mentioned, many models pull double duty as handheld thermal monoculars for scanning and scouting before you settle in to shoot.
But clip-ons have real trade-offs. The main disadvantage of a clip-on scope is that it doesn’t have the same optics resolution as a dedicated unit, so you might not be as precise or accurate with your shooting. Your day scope’s magnification directly affects the thermal picture — go past about 6x–8x, and you’re zooming into a digital display where pixels become obvious and detail gets soft. A clip-on is mounted in front of the daytime riflescope, using an interface fastened on the objective bell, and adds length and weight to the front, making the gun very muzzle-heavy and increasing its bulk. Mounting alignment has to be dead-on — if the clip-on isn’t perfectly centered over your day scope’s objective, your shots will drift. And while clip-ons market themselves as easy to move between rifles, the clip-on is nice to transfer to one gun to another, but when you do that, you may still have to re-collimate to align it to the new day scope.

Dedicated thermal scopes trade that flexibility for performance. You get crisp, clean images that don’t make you squint, built-in reticles and ballistic calculators, and a rugged, simple design with fewer moving parts. They’re easier to run — mount, zero, hunt — with no adapter alignment to fuss with in the dark. The downside: your rifle becomes a single-purpose night tool while the thermal is mounted. You’ll need to re-zero if you swap rifles without a quality QD mount, and they add weight — though lightweight models like our Pixfra Draco series are designed to minimize that issue.
Here’s a side-by-side comparison to make the differences clear:
| Caratteristica | Clip-On Thermal | Dedicated Thermal Scope |
|---|---|---|
| Keeps your day scope | Sì | No — replaces it |
| Re-zeroing needed | No (after initial collimation) | No (but needed if swapping rifles without QD mount) |
| Image quality | Good, but reduced vs. dedicated | Best available |
| Built-in reticle | Uses your day scope’s reticle | Yes — multiple reticle options |
| Laser rangefinder | Some models | Common in mid- and high-end models |
| Ballistic calculator | Rare | Common in LRF models |
| Added rifle weight | Front-heavy | Replaces day scope weight |
| Doubles as monocular | Yes (with eyepiece) | No |
| Typical price range | $1,000 – $6,000+ | $1,000 – $5,000+ |
| Best for | Multi-purpose, flexible setups | Dedicated night-hunting rigs |
Image quality is the biggest debate in the clip-on vs. dedicated thermal argument, and it comes down to three specs working together: sensor resolution, NETD, and the optical system itself. If you ignore any one of these, you’ll end up disappointed — no matter which type of thermal you buy.
Sensor resolution tells you how many thermal pixels the detector provides. The two common tiers are 384×288 and 640×512. A 640×512 sensor packs nearly three times more pixels than a 384×288, and that extra pixel density makes a big difference when zooming through your day scope or trying to identify a target past 200 yards. Dedicated thermal scopes tend to pair higher-resolution sensors with larger objective lenses — 50mm or 75mm — which means better base magnification and sharper detail right from the start. Clip-ons are limited here because the thermal image travels through your day scope’s optics. Every bit of magnification you add on the day scope side just zooms into the clip-on’s display. With a 640×480 sensor and no optical magnification on the clip-on itself, zooming up to about 8x is the limit for best performance.
NETD — Noise Equivalent Temperature Difference — tells you how sensitive the thermal sensor is to small temperature changes. NETD is measured in millikelvins (mK), and the guiding principle is straightforward: the lower the NETD value, the higher the sensor sensitivity and the better the image quality. Most quality thermal optics are rated at less than 25 mK. At Pixfra, our devices achieve NETD values of ≤18mK, which places them at the high end of sensitivity for hunting-grade thermal optics. Low NETD matters most in warm conditions where background temperatures are close to your target’s body heat, or in fog, rain, and humidity where scene contrast drops. When NETD is weak, the system struggles to detect the remaining faint differences and the image degrades rapidly. In contrast, a low-NETD sensor holds its clarity under conditions that make weaker cameras practically blind. Whether you’re running a clip-on or dedicated scope, check the NETD spec — it’s one of the best real-world performance indicators.
In practice, a dedicated thermal scope is better than a clip-on in the vast majority of situations, according to experienced hunters who’ve run both setups. You’re looking through a purpose-built optical path with nothing between you and the thermal image — no extra glass, no adapter, no alignment variables. The result is faster target acquisition and more confident positive identification (PID), especially beyond 200 yards where detail separates clean kills from missed shots. Clip-ons, however, hold their own inside typical predator-hunting ranges under 300 yards. A clip-on works fine for coyote hunting, though a dedicated weapon sight is easier to use. Depending on what you are doing, the type of weapon, scopes on each weapon, and distance, one is a better option than another.[9] Your choice depends on how far you shoot and how much of your hunting happens after dark.
There’s no universal answer, but the decision narrows fast once you look at how you actually hunt.
Go with a clip-on thermal if you already own solid daytime glass and want to keep using it. If your hunts mix day and night conditions — evening sits that stretch into darkness, or morning predator sets that start before dawn — a clip-on lets you run one rifle for everything without sacrificing your daytime zero. It’s also the smarter pick if you’re budget-conscious and don’t want to invest in a whole separate night-hunting rig. A clip-on setup gives you one rifle, one optic, two modes — daylight clarity and thermal precision, and the cost-effective upgrade adds advanced thermal capability at a fraction of a full dedicated scope setup. Pair your clip-on with a quality QD mount and reliable spare batteries, and you’ve got a rig that covers most night-hunting scenarios without draining your account.

Dedicated thermal scopes are typically better suited for those who hunt frequently at night or in low-light conditions, as they are optimized for such environments. If you’re running all-night hog eradication, regular predator control, or active coyote management on your property, a dedicated thermal hands you better image quality, faster target acquisition, and integrated tools — rangefinders, ballistic solvers, video recording — in one package. If building a dedicated night-hunting setup is within the budget, many hunters who use the AR platform have an upper assembly set up for daytime use and a second upper set up for a thermal scope. Zero both independently, and swapping between them takes seconds. Our Pixfra Sirius HD series offers detection ranges up to 3600m, while the Taurus LRF features ultra-fine 0.9cm@100m click value for precision zeroing — the kind of specs that make dedicated setups worth the commitment for serious night hunters.
If budget allows and you want total coverage, run both. A dedicated thermal on your primary night-hunting rifle and a clip-on or thermal monocular for scouting and backup duty gives you the best of both worlds. You’ll pay more upfront, but the combination of dedicated performance and clip-on flexibility covers every scenario from quick evening hog hunts to multi-day predator operations. Many experienced thermal hunters end up at this point once they see the strengths of each system in the field, and it’s the setup we’d recommend for anyone who’s serious about thermal hunting long-term.
Does a clip-on thermal hurt your image quality?
It does reduce it, though how much depends on the quality of both the clip-on and your day scope. You’re stacking two optical systems, so some clarity and contrast loss is expected compared to a dedicated thermal. At reasonable magnification (under 6x–8x), a good clip-on delivers perfectly usable image quality for hog and coyote work inside 300 yards. Push the magnification higher, though, and the picture gets pixelated fast — you’re zooming into a small display, not getting real optical magnification. If image quality is your top concern, a dedicated thermal scope is the clear winner.
Can you swap a dedicated thermal scope between rifles?
Yes, with the right mount. With a good return-to-zero mount like ADM or LaRue and multiple zero profiles — available in most modern thermals — you can still swap from gun to gun. Most current thermal scopes let you store different zero settings for different rifles and toggle between them through the menu. The key is running the same mount height on each gun. Without a QD mount, expect to re-zero every time you swap, which costs ammo and daylight.
Does a clip-on shift your point of impact?
The problem with some clip-ons is that you might get POI shift depending on zoom and parallax. Inside 75 yards it might not be a big deal, but at 150 yards that shift might be enough to miss. A quality clip-on with a solid adapter or rail-mount system should hold consistent point of impact after proper collimation. But factors like your day scope’s magnification setting, parallax adjustment, and adapter seating can all introduce drift. Test yours at the range before trusting it in the field, and verify your zero any time you move it to a new scope.
Is a dedicated thermal scope worth it over a clip-on?
For regular night hunters, yes. Dedicated scopes deliver sharper images, more responsive performance, and a full suite of built-in tools — laser rangefinders, ballistic calculators, video recording, multiple reticle options — at comparable price points. For regular night hunting, a dedicated setup with a thermal scope offers superior performance and convenience. For the occasional night hunter who mostly shoots during daylight hours, a clip-on adds thermal capability to an existing setup without the commitment of a second rifle build.
What sensor resolution do you need for a thermal clip-on?
A 640×512 sensor is the top choice for clip-on thermals. It carries about three times the pixel count of a 384×288 sensor, which translates to sharper detail when you zoom through your day scope and better target identification past 200 yards. Clip-ons are available in three resolutions: 256, 384, and 640, and they offer a range of performance levels. If your hunting stays inside 200 yards — stand-hunting hogs, for instance — a 384-resolution clip-on works fine and costs less. For coyote hunting at range or any scenario where you need to tell a target from a bush at distance, spend the extra for 640 resolution. The difference in target identification is unmistakable.
Your AR-15 deserves a thermal scope that actually works in the field. We’ve spent years testing thermal optics on AR platforms—budget picks, mid-range workhorses, and premium units. The market in 2026 is packed. Here are the six best thermal scopes for AR-15 that we’d put our own money on.
The AR-15’s lightweight aluminum construction and modular design make it adaptable for a wide range of purposes, from hunting to tactical applications.Its standard Picatinny rail gives you a plug-and-play platform for just about any optic, and thermal scopes are no exception. Whether you’re running predator control at night, wiping out feral hogs on your property, or scanning for coyotes across open fields, a thermal scope turns your AR into a true 24/7 hunting machine. And with the right thermal scope accessories like quick-detach mounts and extended battery solutions, you can squeeze even more performance out of your setup.
Thermal riflescopes detect heat differences, not light. That means they keep working in total darkness, fog, light rain, or smoke—conditions where traditional optics struggle or fail outright.Pair that with the AR-15’s semi-automatic action and fast follow-up shots, and you’ve got a night hunting rig that’s hard to beat. Thermal scopes are a must if you’re hunting nocturnal game like coyotes, hogs, and other varmints and predators during nighttime and low-light conditions.
We’ve tested thermal scopes across everything from 95°F Texas summer nights to freezing December hunts. The six picks below earned their spots through real field performance—not spec sheet hype. We also leaned on data from Pixfra’s thermal device lineup, which gave us a solid baseline for sensor sensitivity and detection range benchmarks across price tiers.
Not every thermal scope fits an AR-15 well. A few specs separate a good match from a bad one, and we want to save you from learning that the hard way.
Sensor resolution is the first thing to check. Resolution is a measure of how much detail your image will have, so the higher the resolution of your sensor, the more finely rendered your image will be.A 384×288 sensor works fine for close-to-mid range hog hunting inside 200 yards. If you’re pushing past 300 yards or targeting smaller game like coyotes, step up to a 640×480 or 640×512 sensor for cleaner target ID. NETD rating tells you how sensitive the thermal sensor is to small temperature differences—lower numbers mean better performance. Scopes under 20mK pick up faint heat signatures that cheaper units miss completely, especially on warm nights when background temps run close to your target’s body heat.
Refresh rate affects how smooth your image looks when you’re tracking a moving target. A 60Hz refresh rate ensures fast-moving objects appear clear on the HD display. Anything below 30Hz can look choppy, especially on running hogs. Magnification range should match your typical engagement distances. For AR-15 use, a 1x–8x or 2x–16x range covers most hunting scenarios without piling on extra weight. High magnification looks appealing on paper, but thermal image quality drops quickly if you over-zoom. Many hunters spend most of their time between 2x and 6x, even on scopes capable of much more.
Finally, make sure the scope is rated for semi-auto recoil and mounts cleanly to a Picatinny rail. Quality night vision and thermal scopes should hold zero on a semi-auto rifle. Problems usually arise from low-quality mounts, loose fasteners, or scopes intended only for low-recoil platforms.QD mounts are a bonus if you swap between day glass and thermal on the same rifle.
Here’s a quick comparison of the top thermal rifle scope tiers we recommend for AR-15 platforms this year. We’ve organized them by performance level so you can match your budget to your hunting style:
| Spec | Entry-Level | Mid-Range | Premium |
|---|---|---|---|
| Risoluzione del sensore | 256×192 | 384×288 | 640×480 / 640×512 |
| NETD | ≤25mK | ≤20mK | ≤18mK |
| Refresh Rate | 25–50Hz | 50–60Hz | 60Hz |
| Portata di rilevamento | ~800m | ~1,500m | ~2,500m+ |
| Durata della batteria | 4–6 hrs | 6–10 hrs | 8–15 hrs |
| Laser Rangefinder | Rare | Sometimes | Often Included |
| Ballistic Calculator | No | Sometimes | Sì |
| Typical Price | $1,000–$2,000 | da $2.000 a $4.000 | $4,000–$8,000+ |
Key stat: According to USDA estimates, feral hogs cause over $2.5 billion in damage annually across the U.S. That’s driven a surge in thermal scope demand, especially among AR-15 owners in Texas, Oklahoma, and the Southeast running nighttime eradication programs.
The sweet spot for most AR-15 owners in 2026 sits in that mid-range tier. A 384×288 sensor with a 50Hz or 60Hz refresh rate, 6+ hours of battery life, and a built-in ballistic calculator gives you solid image quality and reliable target ID without burning through $6,000. Thermal optics are usually mounted on AR-15, a bolt-action rifle, or rifles chambered in .300 Winchester Magnum, .308 Winchester, 6.5 Creedmoor, or the .243 Winchester for coyote.All of these calibers pair well with mid-range thermal scopes that handle the recoil without losing zero.
For those who want the absolute best, premium 640-class sensors with integrated laser rangefinders and onboard video recording deliver performance that was purely military-grade just a few years ago. We’ve seen NETD values as low as ≤18mK and detection ranges stretching past 3,600 meters on top-tier models—numbers that make positive target ID at 400+ yards a real possibility, not just a marketing claim.
Mounting a thermal scope on an AR-15 is straightforward, but a few details make a big difference. AR-15s are naturally more forgiving when it comes to optic height-over-bore, thanks to their straight-line recoil system and higher receiver. This gives you more freedom to run thermal optics slightly higher without breaking your cheek weld.A 1.54″–1.93″ mount height works well for most setups.
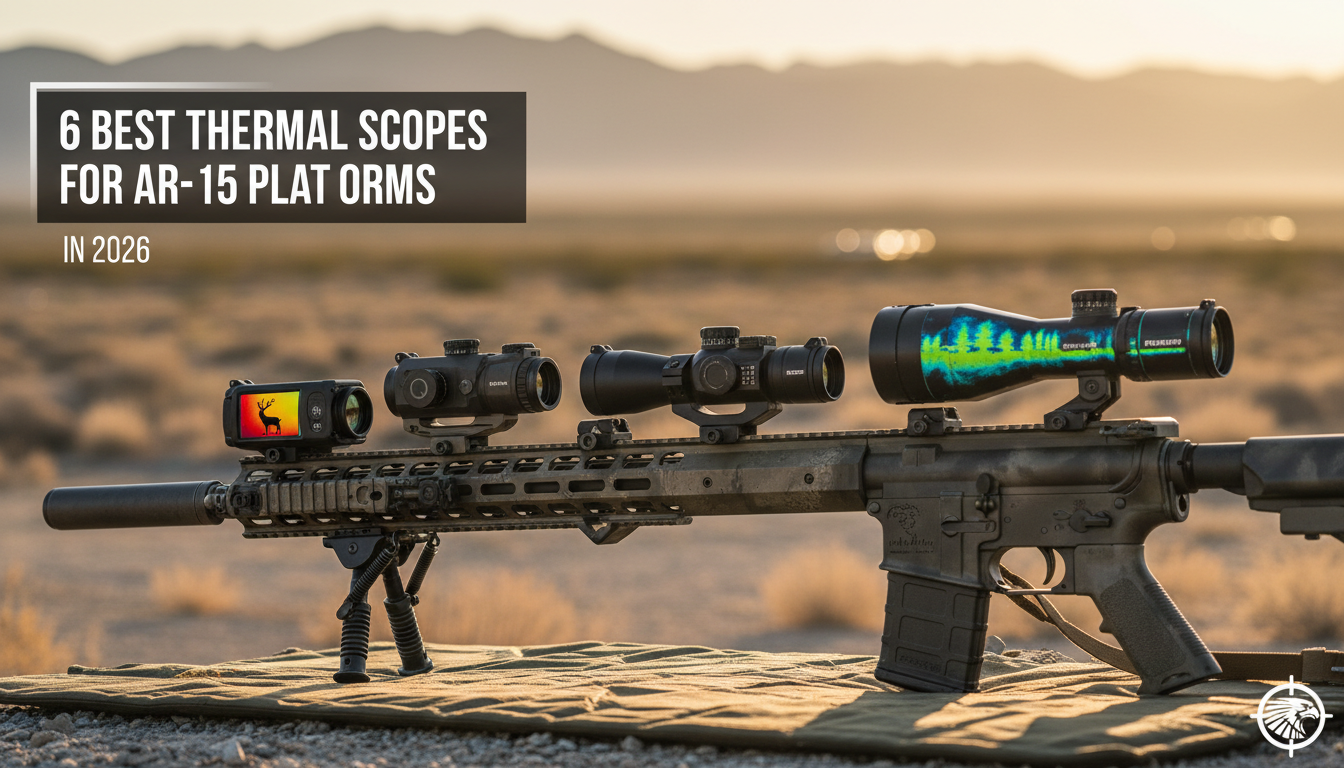
Use a quality mount—preferably a QD mount if you plan to swap between day and thermal optics. Torque your rings to spec and double-check that everything is level before zeroing. Most modern thermal scopes feature one-shot zero or digital zeroing, which speeds up the process. Fire a shot, move the digital reticle to your point of impact, confirm with a follow-up, and you’re done.
One thing to watch: short-barreled ARs with muzzle brakes can blast unburnt powder toward your scope’s sensor window. A suppressor or linear comp protects the sensor window from unburnt powder blast on short barrels.It also cuts down on heat mirage in your thermal image, which can mess with your sight picture at close range.
Battery life can end your hunt early if you don’t plan ahead. Digital thermal scopes typically have shorter battery life, averaging 4–8 hours. For all-night hog eradication or multi-stand predator sessions, carry at least two sets of spare 18650 batteries—they’re rechargeable, lightweight, and easy to find. An external power bank (10,000+ mAh) can also run many thermal scopes via USB-C for 10+ hours straight.
Cold weather kills battery performance faster than you’d expect. Keep your spares in an inside jacket pocket where body heat keeps them warm. And turn your scope off between stands when you’re not actively scanning—this alone can stretch your runtime by 30–40% on a long night.
Can you use a thermal scope on an AR-15 during the day?
Yes. Thermal scopes detect heat, not light, so they work in daylight, shade, and complete darkness. Some models include adjustable apertures to handle bright conditions without washing out the image.
Will a thermal scope hold zero on a semi-auto AR-15?
A quality thermal scope rated for semi-auto recoil holds zero without any issues. Make sure the mounting hardware is robust and recoil-resistant to handle the AR-15’s kick without loosening. Cheap mounts are usually the problem—not the scope itself.
What’s the best budget thermal scope for an AR-15?
In the $1,000–$2,000 range, scopes with 256×192 sensors deliver solid performance for close-range hog and varmint hunting. They won’t match premium units at distance, but they get the job done inside 200 yards.
Is thermal better than night vision for AR-15 hunting?
For most hunting—especially hog and predator control—thermal wins. Thermal and night vision solve different problems. Thermal excels at detection and tracking, while night vision can be better for navigation and detail in some environments. But thermal works through brush, fog, and pitch black conditions where night vision struggles.
Are thermal scopes legal for hunting in all 50 states?
Thermal optics are legal to own and use in all 50 states. However, some states restrict their use for hunting: California prohibits thermal for big game hunting, and several states ban nighttime hunting of certain species regardless of equipment. Always check your local regulations before heading out.
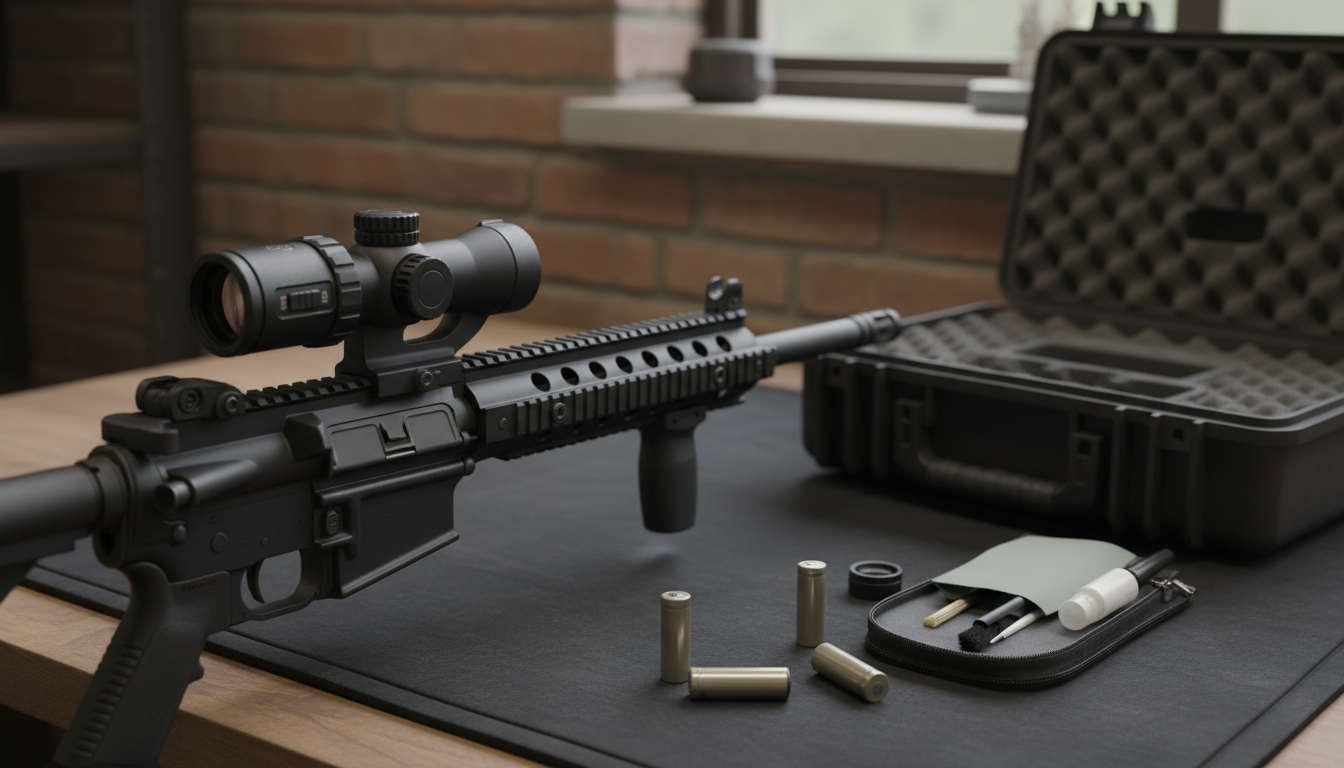
You’ve spent good money on your thermal scope. But here’s the thing—the scope itself is only part of the equation. The right accessories can turn a solid setup into a serious field advantage.
We’ve tested dozens of thermal scope add-ons over the years, from budget-friendly basics to premium upgrades. Some make a real difference. Others? Just add weight to your pack. We’re sharing the five accessories that actually matter when you’re hunting hogs at midnight or tracking predators across your property.

Let’s start with what holds everything together—your mount.
If you’re running multiple rifles or switching between thermal and day optics, a quick-detach mount saves you real time in the field. These mounts let you remove and reattach your thermal scope in seconds while maintaining your zero. No need to re-sight every time you make a switch.
Look for mounts made from aircraft-grade aluminum. They’re light enough not to weigh down your rifle but strong enough to handle recoil from magnum calibers. Height-adjustable options let you dial in the perfect eye relief and cheek weld for your specific rifle setup.
And here’s what most people overlook: cantilever mounts can be a game-changer if you’re working with limited rail space. They position your scope forward, giving you proper eye relief without running out of mounting real estate.
We’ve been using our Pixfra thermal scopes with quality QD mounts for years. The ability to move a thermal unit between rifles during a hunt is worth every penny.
Battery life can make or break your hunt. Period.
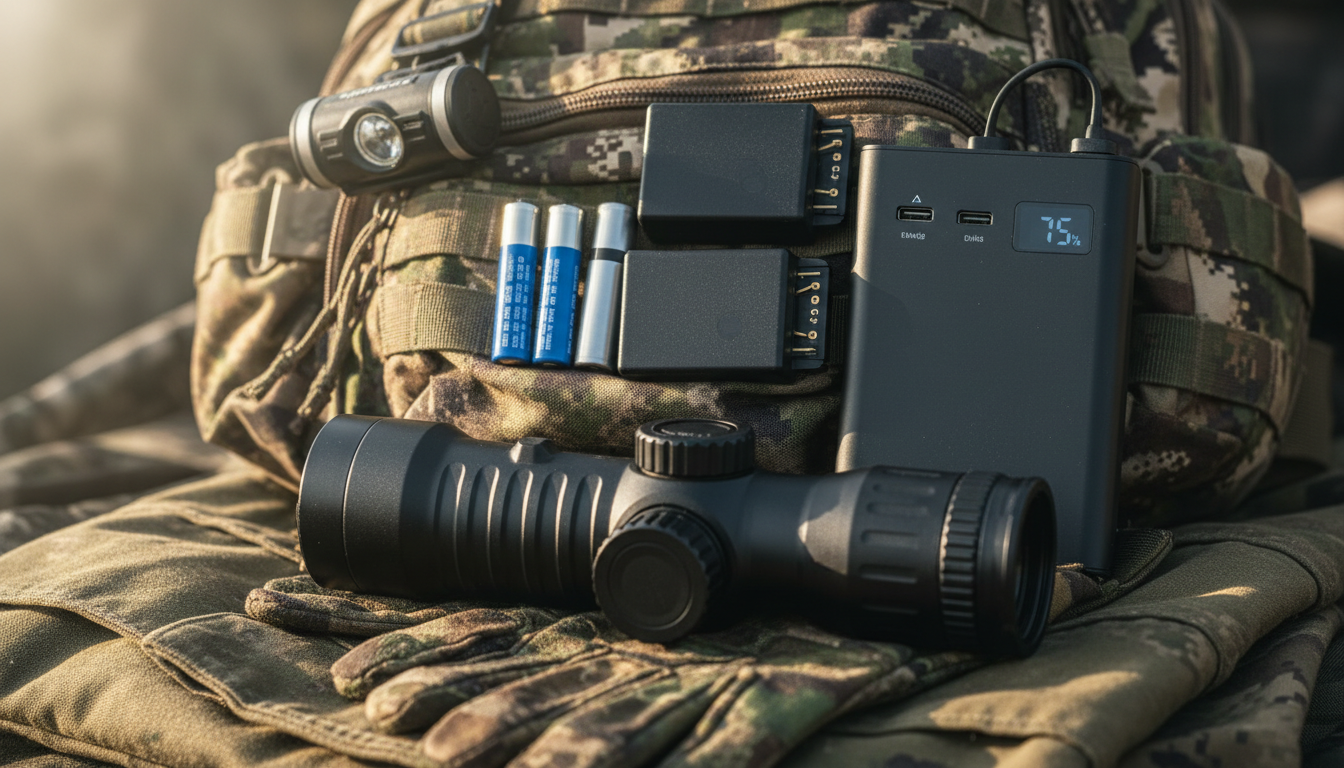
Most thermal scopes run 3-6 hours on internal batteries. That’s fine for a quick evening session, but what about all-night hog eradication or extended predator work? Running out of power when heat signatures start showing up is frustrating.
Carry at least two sets of spare batteries. Rechargeable 18650 lithium-ion batteries with 3000-3500mAh capacity work great as your primary power source. Keep CR123A lithium batteries as emergency backups—they’re lighter and have a longer shelf life.
External power banks changed how we hunt. A 10,000-20,000 mAh portable power bank can run your thermal scope for 10+ hours straight. Many modern scopes accept USB power input, making field charging dead simple. Mount the power bank to your rifle or toss it in your pack.
Fast chargers are handy between hunts. They’ll fully recharge batteries in 2-3 hours, perfect for back-to-back hunting days. Vehicle chargers let you top off batteries during long drives to hunting spots.
Pro tip: cold weather kills battery performance. Keep spares in an inside pocket where body heat maintains their temperature. We learned this the hard way during a December hog hunt.
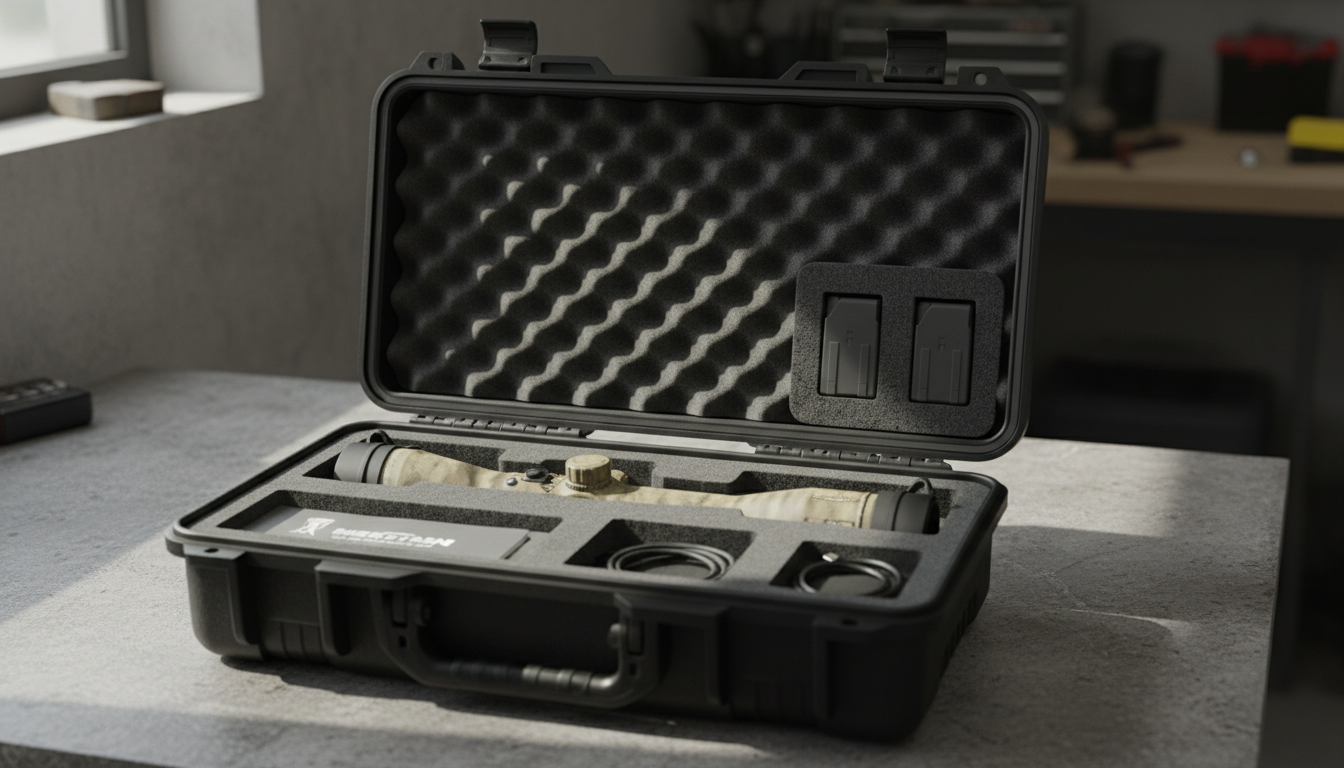
Thermal scopes aren’t cheap. Protect yours.
You need two types of cases—one for transport and one for field carry. Hard-shell cases with custom foam inserts protect your scope during vehicle transport or storage. Look for waterproof construction with pressure relief valves and lockable latches.
These cases should have enough space for your scope plus accessories like spare batteries, lens cleaning supplies, and charging cables. Adjustable foam dividers let you customize the layout for your specific gear.
For field work, tactical bags offer quick access with adequate protection. Good tactical bags feature padded compartments, MOLLE attachment points for adding gear, and weather-resistant materials. We prefer bags with adjustable dividers that can hold multiple items—your thermal scope, handheld monocular, batteries, and other essentials.
Quick-access holsters work well for active hunting situations. They attach to your belt or pack and provide immediate access while protecting the optics from bumps and weather. Choose holsters with secure retention systems so your scope doesn’t bounce around when moving through rough terrain.
The right case keeps dirt, moisture, and impacts from damaging sensitive thermal sensors and electronics. That’s money in your pocket long-term.
Here’s something many thermal scope users don’t realize—pairing your thermal with an infrared illuminator can improve target identification in certain situations.
While thermal scopes detect heat signatures and don’t need light, adding an IR illuminator creates better contrast in environments where background temperatures are similar to your target. Think warm summer nights when everything radiates heat at similar levels.
Our Pixfra IR Torch works seamlessly with thermal setups for exactly this reason. The extra illumination helps distinguish heat signatures that might otherwise blend together.
IR illuminators also help when you’re trying to positively identify targets before taking a shot. They fill in visual details that pure thermal imaging might miss, giving you confidence in target identification at 200+ yards.
Mount your IR illuminator offset from your scope to minimize shadowing. Most units run on rechargeable batteries and offer adjustable beam patterns—flood for close work, spot for distance.
Not everyone needs an IR illuminator. But if you hunt in warm climates or dense cover where temperature differences are minimal, it’s worth testing.
Video recording capability isn’t just about showing off your hunts—though that’s fun too.
Recording your thermal scope footage serves multiple practical purposes. You can review shot placement and animal behavior patterns. Study how targets move through your property. Share footage with hunting partners to plan better strategies.
Many modern thermal scopes like our Pixfra Sirius HD, Pegasus 2 LRF, and Draco models have built-in recording. But if yours doesn’t, external recording equipment connects via video output ports.
Look for recorders with adequate storage—32GB minimum, 64GB or more is better. Make sure the recording resolution matches your scope’s display output for best quality. Battery-powered units give you flexibility in the field without worrying about power cables.
Some hunters mount small action cameras to their scopes. This setup works but adds bulk. Integrated recording or direct-connect recorders keep your profile slimmer.
The real value shows up when you review footage. We’ve spotted patterns in hog movement we never noticed in real-time. That intel led to better stand placement and more successful hunts, as documented in our feral hog eradication case study.
Recording also provides evidence if you need to document property damage or predator activity for wildlife management purposes.
We said five accessories, but here’s a bonus that matters more than most people think.
Lens covers shield your expensive thermal optics from dust, moisture, scratches, and impacts. Flip-up covers work best for field use—they stay attached so you won’t lose them in the dark and open quickly when you need a shot.
Keep a basic cleaning kit handy. Thermal lenses require special care. Use microfiber cloths designed for optics and lens cleaning solution made for coated lenses. Never use paper towels or shirt sleeves—they’ll scratch coatings.
Carry lens cleaning supplies in your field bag. A dirty lens degrades thermal image quality fast. Quick wipe-downs between stands keep your view crisp.
Anti-fog treatments help in humid conditions. Some hunters skip this, then wonder why their view clouds up during temperature changes. Preventive maintenance beats dealing with problems in the field.
The right accessories multiply your thermal scope’s effectiveness without breaking the bank.
Start with the basics—a quality mount, spare batteries, and protective storage. Add IR illumination and recording capability as your needs and budget allow. Don’t skip lens protection and cleaning supplies.
Not every accessory works for every hunter. Match your accessories to how and where you hunt. Someone running predator control all night needs different gear than someone taking quick evening hog hunts.
We’ve found these five accessory categories make the biggest real-world difference. They protect your investment, extend your operating time, and help you make better shots. That’s what counts when you’re serious about thermal hunting.
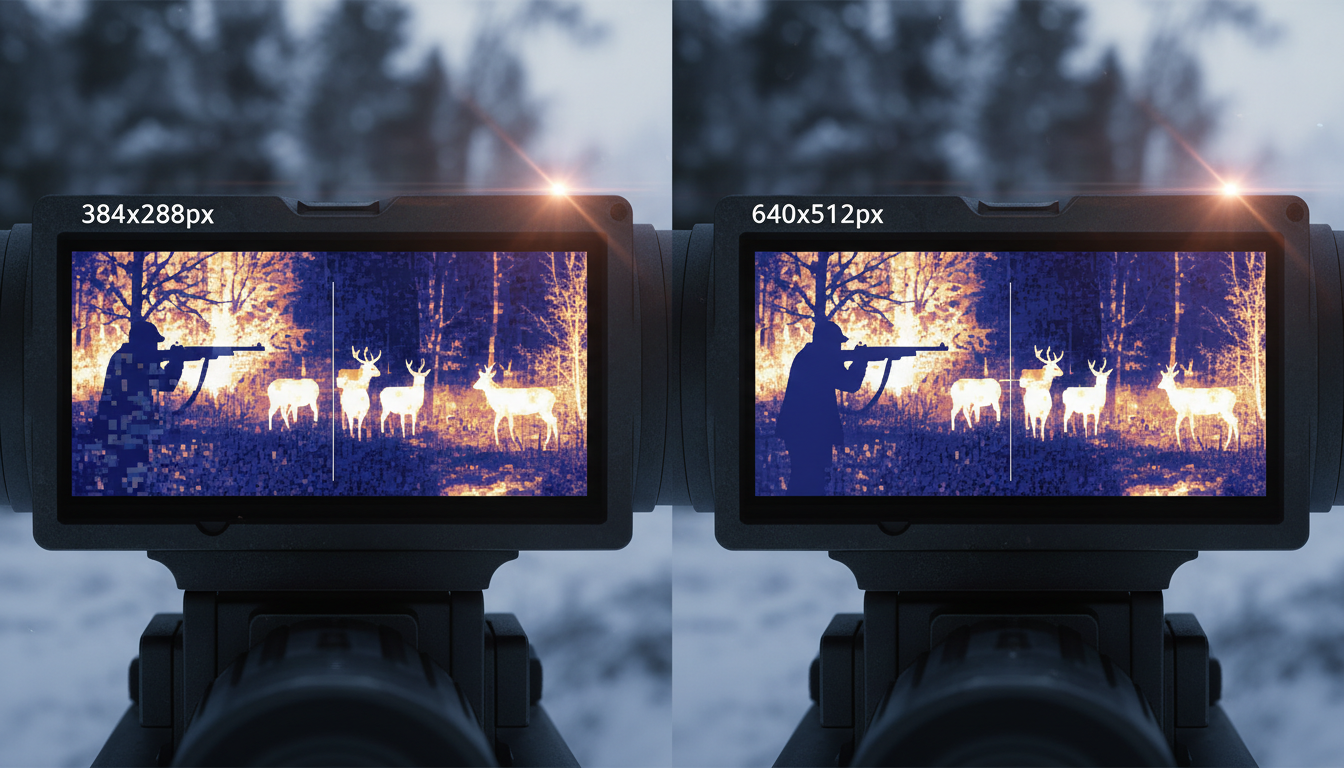
When you’re shopping for a thermal scope, the spec sheet can feel like alphabet soup. 640×512 resolution. 12µm pixel pitch. NETD values below 25mK. What do these numbers actually tell you about how the scope performs when you’re glassing for hogs at 300 yards or scanning timber for coyotes?
We’ve tested thermal optics in just about every condition you can imagine—from foggy mornings to bone-dry desert hunts. And here’s what we’ve learned: image quality isn’t defined by a single number but rather the result of how several specifications work together. You can’t just pick the highest resolution and call it done.
Let’s cut through the marketing speak and talk about what actually matters when you’re trying to spot game in the dark.
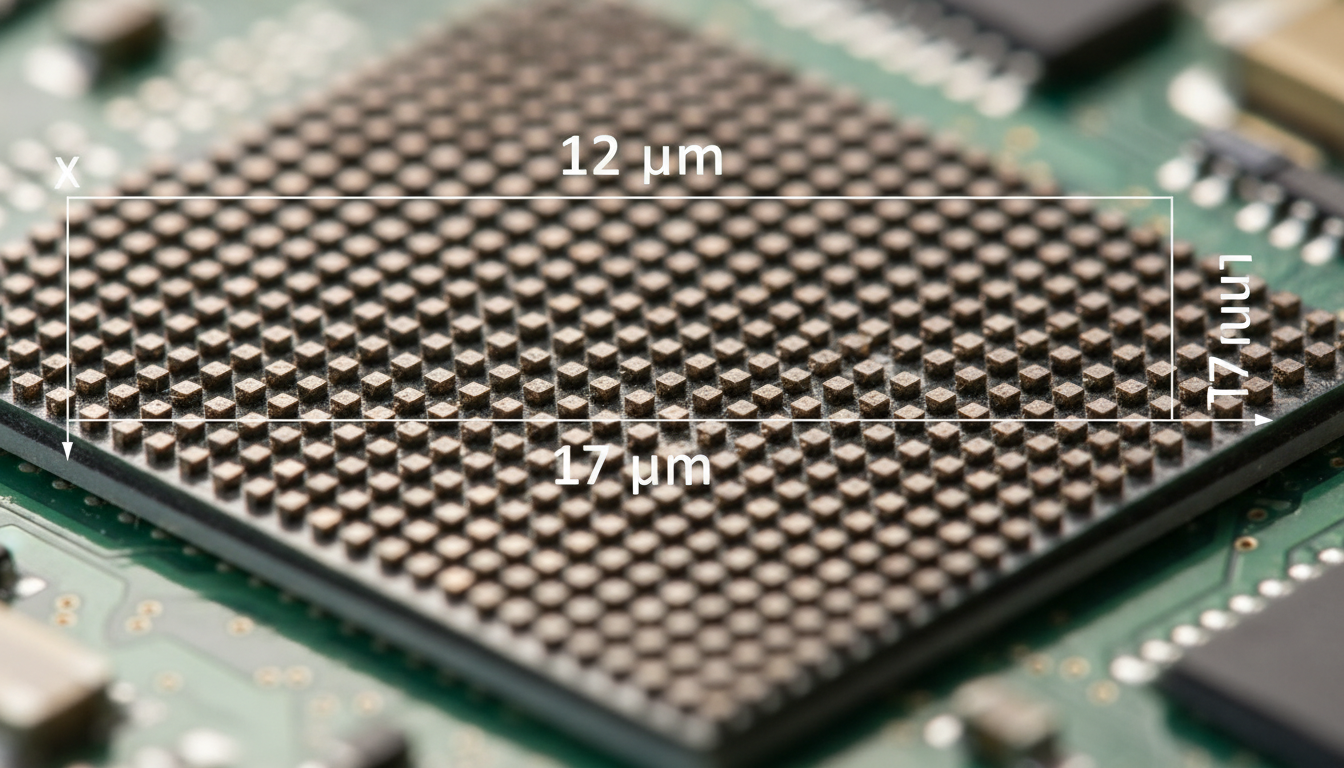
Thermal sensor resolution like 640×512 means the sensor captures 640 pixels horizontally and 512 pixels vertically—that’s 327,680 total pixels. Think of it like the megapixels on your phone’s camera. More pixels capture more thermal data points across the scene you’re viewing.
Common resolutions you’ll see include 384×288 (110,592 pixels), 640×512 (327,680 pixels), and high-end models at 1024×768 or even 1280×1024. A 640×512 sensor provides approximately 3 times more pixels than 384×288, but more pixels doesn’t automatically mean a proportionally better hunting experience.
Higher resolution, such as 1024×768, records more thermal data, resulting in sharper outlines, cleaner contours, and better object separation, especially when zooming in. But you’ll pay for those extra pixels—both in price and battery life. We’ve seen real results from thermal scopes in field conditions, and resolution is just one piece of the puzzle.
For most hunters, a 384×288 sensor handles close to mid-range work just fine. You’ll spot that coyote at 200 yards without issue. But for open country where you’re glassing at 850 yards, the 640×512 delivers crisp, well-defined images where you can clearly see the animal’s posture and movement.
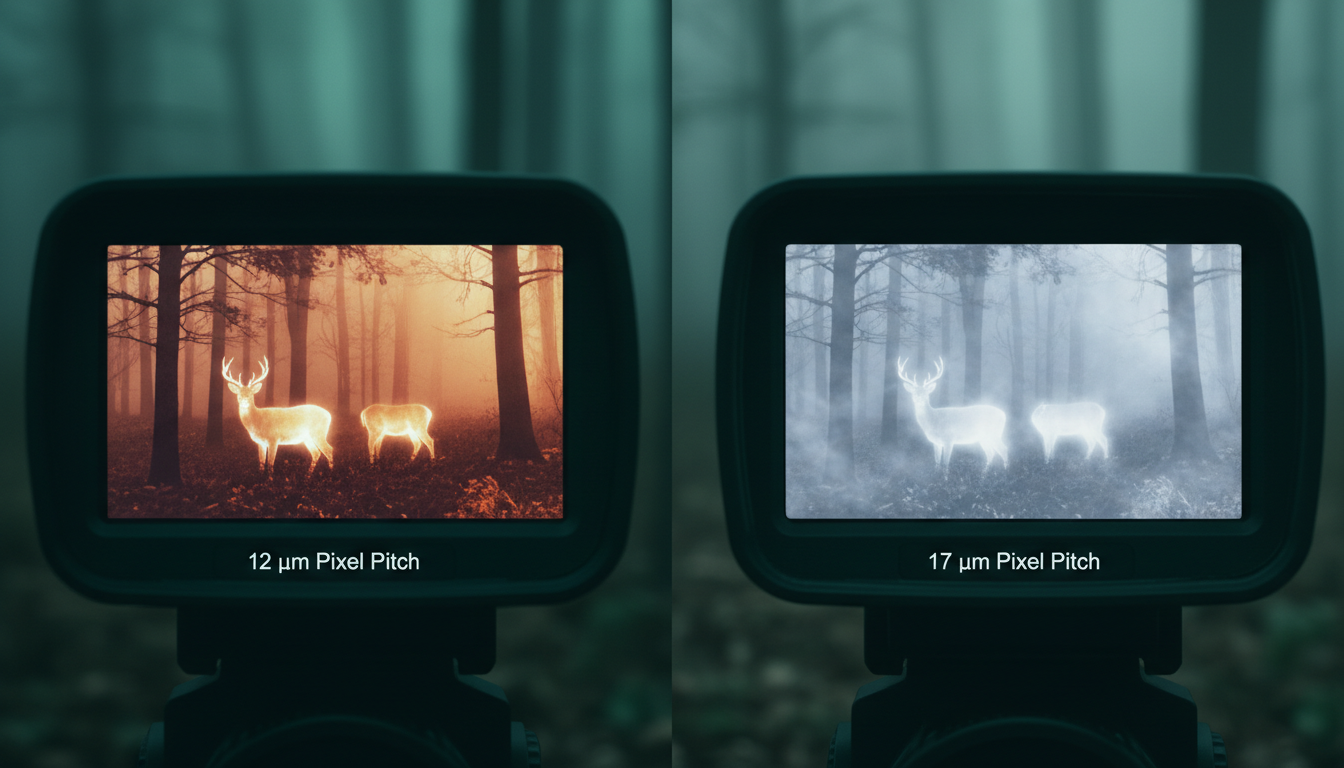
Pixel pitch refers to the size of each individual pixel on the sensor, measured in micrometers, typically 12µm or 17µm. It’s the distance between the centers of two pixels of a microbolometer, normally 12µm or 17µm in thermal imaging sensors.
And here’s where it gets interesting: smaller pixel pitch like 12µm means pixels are packed more closely together, allowing for higher resolution images and better detection of smaller objects, while larger pitch like 17µm means fewer pixels per unit area but potentially better sensitivity to thermal radiation.
Think of pixel pitch like bucket size. The larger the pixel and its area, the more Long Wavelength Infrared radiation it can receive and the higher the sensitivity of the entire thermal imaging sensor. A 17µm pixel collects more thermal energy than a 12µm pixel, which translates to better performance in challenging conditions.
Sensors with the same 640×480 resolution but different pixel sizes—17 microns versus 12 microns—result in better sensitivity for the larger pixel (NETD <25 mK vs. NETD <40 mK). That sensitivity difference shows up when you’re hunting in fog, rain, or high humidity—exactly when you need your scope to perform.
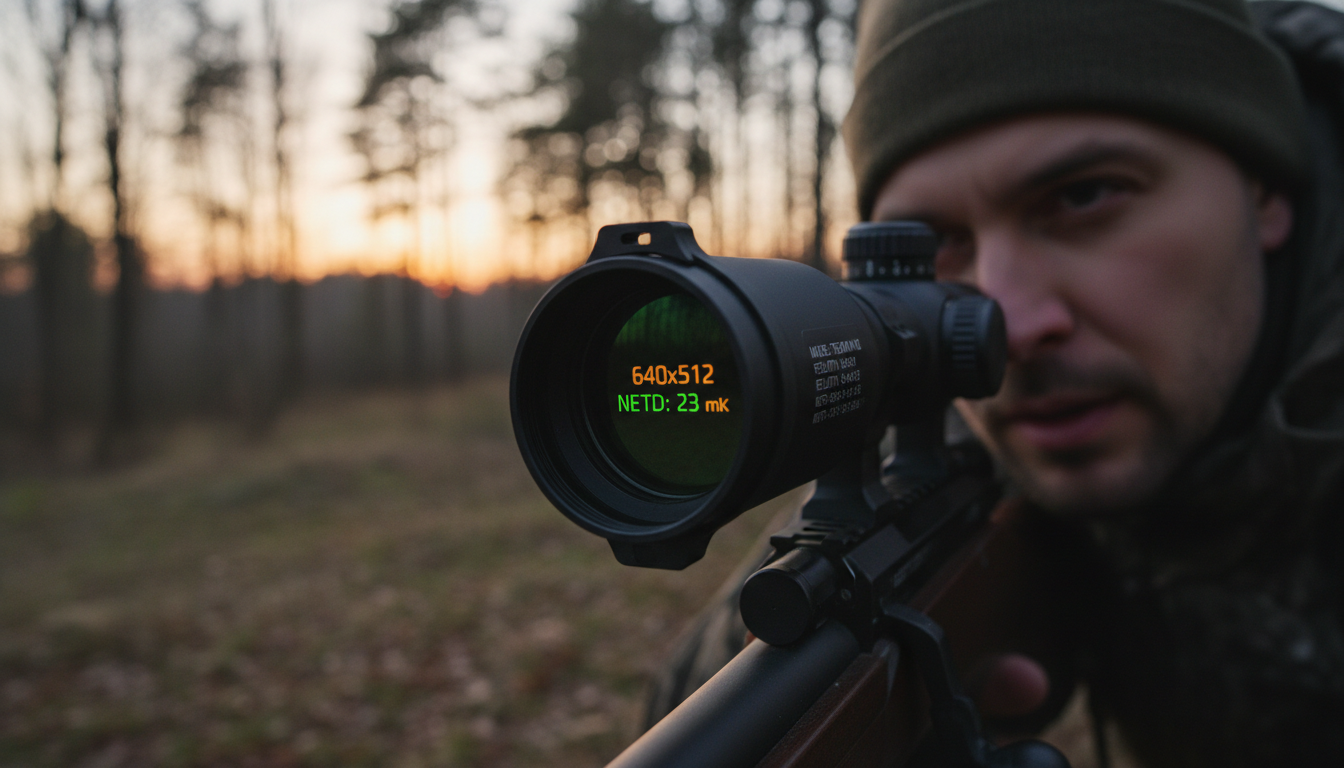
A 384×288 sensor at 17µm with NETD <25 mK can show low-contrast scenes in more detail than a 640×480 sensor at 12µm with NETD <40 mK. That seems backwards, right? More pixels should mean better images.
But thermal imaging doesn’t work like regular photography. Smaller 12µm pitch offers a sharper image at good distance when looking for small hot targets quite far from the observer, but for a more versatile device, 17µm will perform better.
We typically recommend our Sirius HD oppure Pegasus 2 LRF models for hunters who need that balance of resolution and real-world performance. These units consider the full system—not just one spec.
The pixel pitch affects more than just sensitivity. It also drives your base magnification and the physical size of the sensor. Pixel pitch directly influences base magnification, image quality and thermal imager sensitivity. You can’t optimize one factor without affecting the others.
You’ll see NETD (Noise Equivalent Temperature Difference) listed on every thermal scope spec sheet. NETD quantifies the sensitivity of a thermal sensor, measured in millikelvins (mK) with typical specifications like <25 mK or <20 mK—the lower the NETD value, the higher the sensor sensitivity and superior the image quality.
NETD measures how sensitive the sensor is to tiny differences in heat, and a lower number means the scope can see smaller temperature differences—like spotting a rabbit against warm ground.
In practical terms? Thermal scopes with higher NETD values tend to struggle in rain, fog, snow, and high humidity, producing noisy, low-contrast images, while a low-NETD thermal scope excels under these challenges. When you’re hunting at dawn and everything’s the same temperature, NETD makes the difference between detecting game and staring at thermal mush.
The best production batches of sensors with 17µm pixel pitch achieve NETD less than 25 mK, while 12µm sensors achieve less than 40 mK. That’s not marketing—it’s physics. Bigger pixels collect more thermal radiation, which means better sensitivity.
Let’s be honest about what these specs mean when you’re actually hunting. Resolution is just one piece of the puzzle—lens quality, sensor type, refresh rate, thermal sensitivity (NETD), and pixel pitch all matter significantly.
We’ve watched hunters obsess over getting a 640×512 scope only to be disappointed when a well-designed 384×288 unit outperforms it in fog. Two thermal devices can share identical specifications yet deliver noticeably different images because image quality depends on the entire imaging system—lens quality, display resolution, and image algorithms all influence the final result.
Battery life is another consideration nobody mentions in the marketing materials. 640×512 sensors consume more power than 384×288 units—maybe 20-30% faster battery drain—which matters on extended hunts. When you’re four hours into a hog eradication session, that extra battery capacity keeps you in the game.
Detection range matters more than pure resolution for long-distance work. Detection range is king for long distance—sensor doesn’t really matter that much for long range, but pixel pitch and focal length does. You need the right combination of optics, sensor size, and processing to spot game at distance.
Our Draco e Arc LRF models balance these factors for serious hunters who need dependable performance across varying conditions and ranges.
So what resolution and pixel pitch should you actually get? It depends on how and where you hunt.
For close to mid-range work (under 300 yards) in varied terrain, a 384×288 sensor with 17µm pitch gives you excellent versatility. You’ll spot game quickly, handle bad weather well, and save money for better optics or an IR torch to extend your effective range even further.
Quality 640×512 thermal scopes run $2,800-$5,500+, while 384×288 equivalents cost $1,200-$2,500—nearly double the investment, which is a deal-breaker for hobbyist hunters on a budget.
For open country hunting where you’re regularly engaging targets beyond 400 yards, the higher resolution pays off. The extra pixels mean finer detail—you can distinguish between a coyote and a fox at distance and read body language to determine if the animal is alert, feeding, or bedded. That information changes how you approach your stalk.
If you need a thermal unit able to properly work in different scenarios, with different weather conditions at different distances, go to 17µm with a low NETD and lens aperture of f1.0. That’s the all-around setup that handles whatever conditions you encounter.
A 640×480 sensor with 12µm pixels and NETD below 25 mK delivers both fine detail and strong contrast, but only when the optics and processing are equally well-tuned. You can’t just bolt a mediocre lens onto a great sensor and expect magic.
Display resolution matters too. Display resolution definitely should not be lower than sensor resolution—the display must not degrade the image produced by the sensor, and higher display resolution allows more quality and more complex overlay graphics. You need a screen that can actually show you the detail your sensor captures.
Refresh rate affects how smooth the image looks when tracking moving targets. Most thermal scopes run at 30Hz or 60Hz. The refresh rate tells you how many times per second the screen updates—most scopes are either 30Hz or 60Hz, with 60Hz giving you very smooth, fluid image especially helpful for tracking a running animal.
A Pixfra, we design every thermal scope as a complete imaging system. The sensor resolution and pixel pitch matter, but so do the germanium lens coatings, the signal processing algorithms, and how the whole package handles heat buildup during extended use. It all works together.
Sensor resolution and pixel pitch are just two pieces of what makes a thermal scope perform in the field. True thermal image quality is created through synergy between resolution, pixel pitch, and NETD, refined by proprietary image processing and system-level calibration.
You don’t need to be a thermal imaging engineer to make a smart choice. Focus on how you’ll actually use the scope. Close to mid-range hunting in varied weather? A 384×288 sensor with 17µm pitch and low NETD gives you versatility and value. Long-range work in open country? The extra pixels of a 640×512 sensor help you identify targets at distance.
And remember: the best thermal scope is the one that performs when you need it. Specs on paper don’t bag game—reliable performance in rain, fog, and darkness does. That’s what we build into every unit we design.
What’s more important: sensor resolution or pixel pitch?
Neither is “more important”—they work together. Higher resolution (like 640×512) gives you more detail and better zoom quality. Pixel pitch affects sensitivity and versatility. The main difference lies in resolution versus sensitivity, with 12µm sensors offering higher resolution and 17µm sensors potentially offering better sensitivity. Match the specs to your actual hunting conditions and distances.
Why do 17µm sensors perform better in fog and rain?
Larger pixels capture more Long Wavelength Infrared radiation, which increases the sensitivity of the entire thermal imaging sensor. When conditions are challenging and thermal contrast is low, that extra sensitivity lets you detect game that smaller pixels might miss. It’s the difference between seeing a heat signature and seeing nothing at all.
Is a 640×512 thermal scope worth the extra cost?
It depends on your hunting style. For long-range work at 850 yards, 640×512 provides crisp, well-defined images, while 384×288 shows the same target as visible but pixelated with fine details lost. For most hunters working under 300 yards, a quality 384×288 scope offers better value. Save the money for better glass or accessories.
What NETD should I look for in a thermal scope?
The ideal NETD range falls between <25mK and <40mK—a NETD below 25mK provides exceptional sensitivity suitable for highly detailed target detection at longer ranges, while values above 40mK may result in less precise thermal imagery. Lower is always better, but don’t sacrifice other features chasing the absolute lowest NETD number.
Can I get good performance from a budget thermal scope?
Yes, if you pick the right specs for your needs. Devices with 384×288px are the most popular in the market as they’re more affordable than top-line 640×512 thermal devices but still allow detection range out to 1800m depending on lens size. Focus on units that balance resolution, pixel pitch, and NETD rather than maxing out one spec at the expense of others.
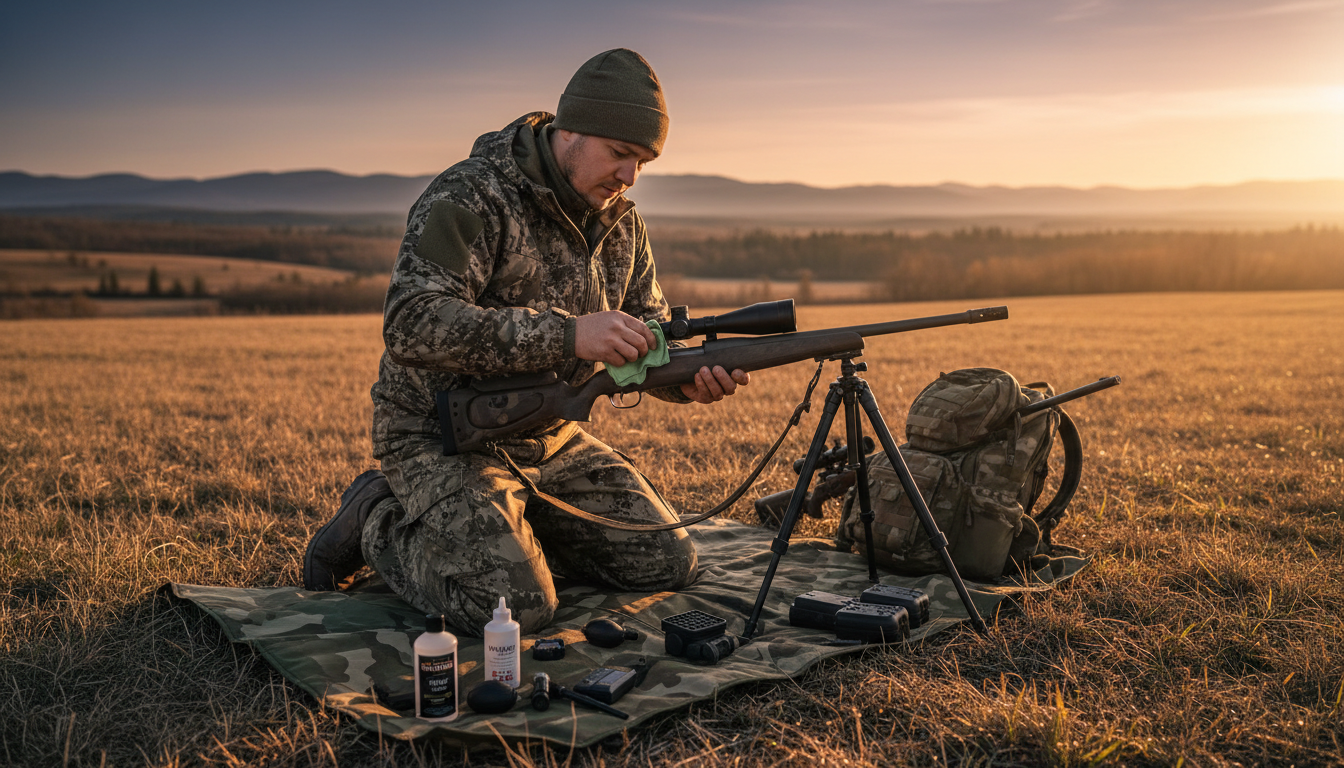
Your thermal scope is a serious investment, and keeping that lens in top shape makes all the difference between spotting your target and missing out. We’ve seen too many hunters damage their optics by using the wrong cleaning methods, and honestly, it doesn’t have to be that complicated.
Think of your thermal lens like the windshield on your truck. A little dust won’t kill you, but grime and fingerprints? That’ll mess with your clarity fast. But here’s the thing—thermal scope lenses aren’t regular glass. They’re made from germanium or other specialized materials with delicate coatings that need careful handling.
We’ve put together this guide to show you exactly how we maintain our thermal optics at Pixfra. Whether you’re running our Sirius HD, the Pegasus 2 LRF, or another thermal scope, these methods will keep your glass clean and your images sharp.
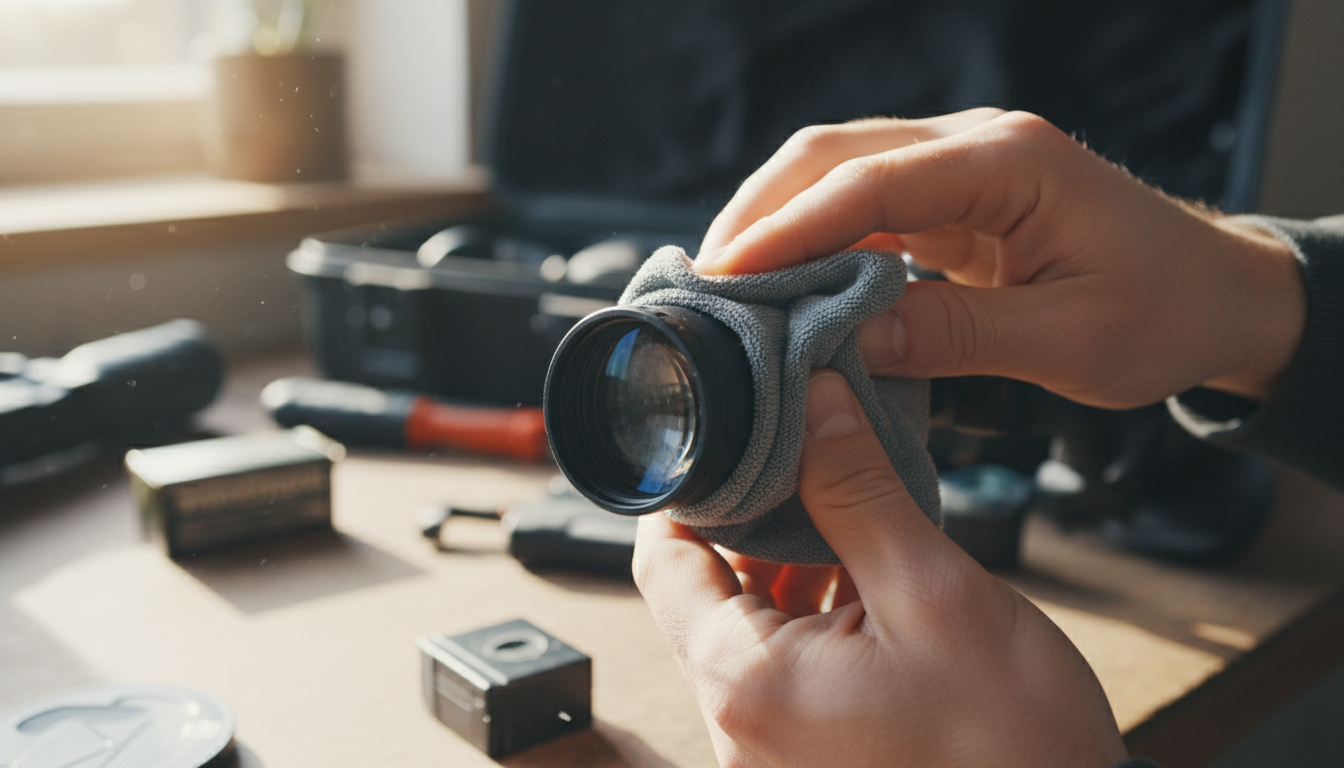
Fingerprint marks, water splashes, dirt, and dust can significantly impair your scope’s functionality, leading to subpar results.And we’re not just talking about slightly fuzzy images—we’re talking about losing contrast, missing heat signatures, and potentially blowing a hunt you’ve been planning for weeks.
The germanium lenses in thermal scopes cost way more than regular optical glass. Clean your thermal camera lens only when strictly necessary, and only when there is visible dirt or fingerprints. Over-cleaning can actually wear down the anti-reflective coating faster than a little dust ever would.
Let’s start with what’ll wreck your optics. We’ve seen people make these mistakes, and they’re expensive ones.
Never use your shirt, paper towels, or handkerchiefs to wipe the lens, as they can scratch the surface.Seriously, resist the urge. Your cotton t-shirt feels soft, but it’s basically sandpaper compared to proper lens cleaning materials.
DO NOT clean with ammonia-based solutions—this will degrade the special coating on the lens.Skip the Windex and household glass cleaners. They’re designed for windows, not precision optics with specialized coatings.
Don’t wipe a dusty lens without removing loose particles first. Those tiny bits of sand or grit act like little knives when you drag them across the coating.
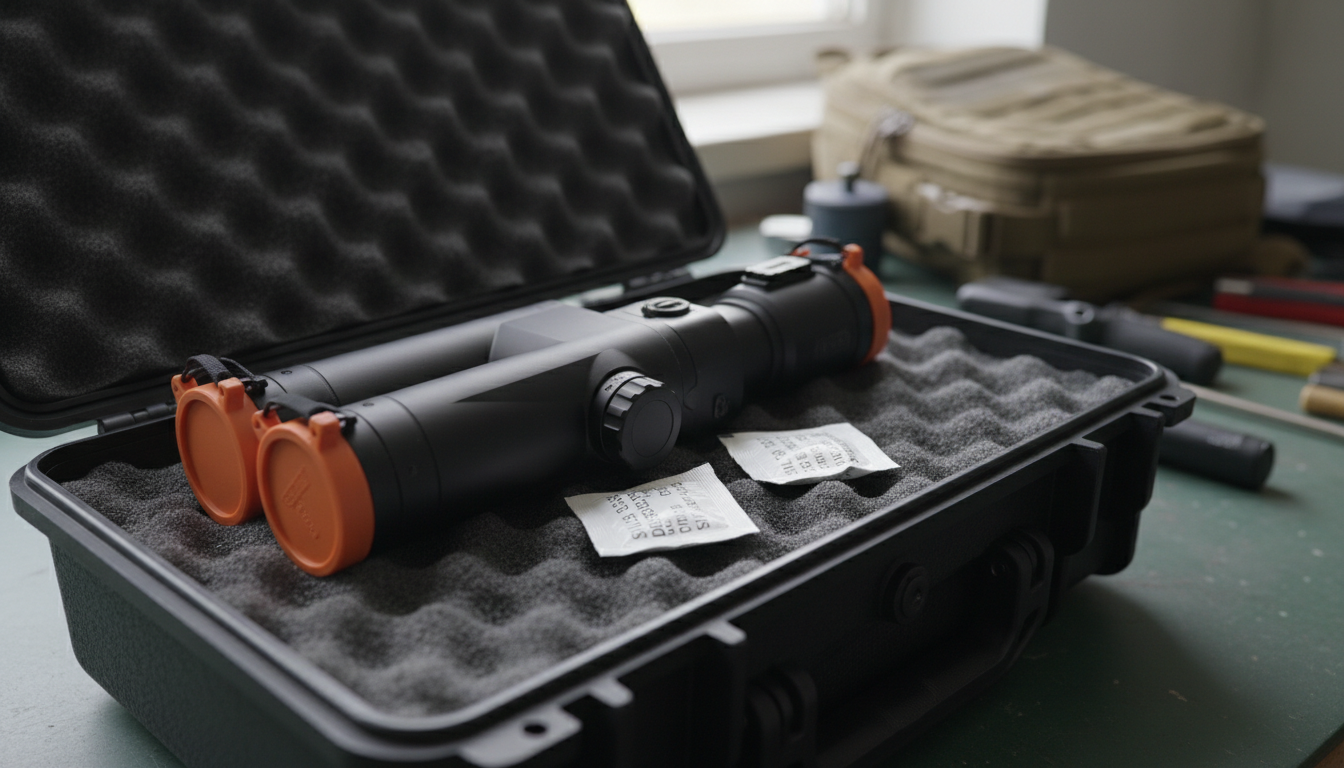
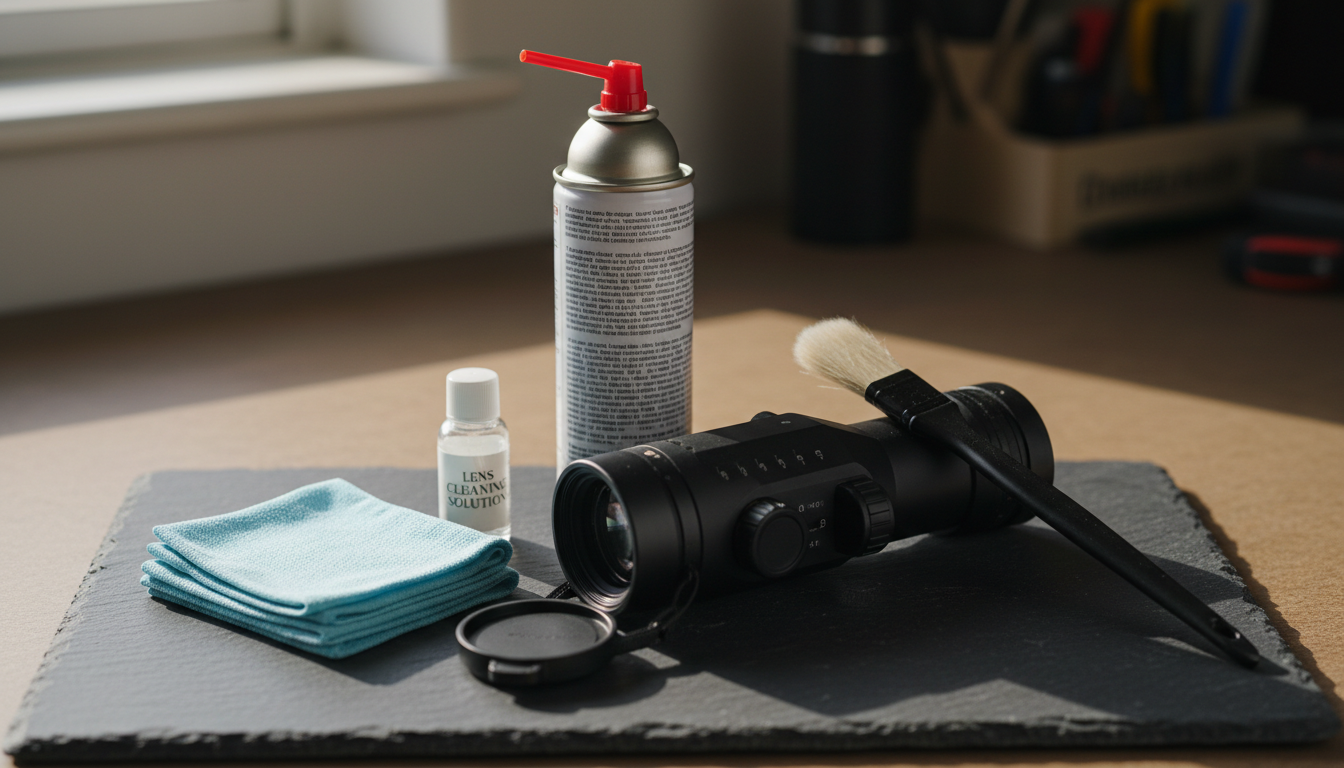
You don’t need a ton of gear, but you do need the right stuff. Here’s what should be in your cleaning kit:
Compressed air or rocket blower: Use compressed air aerosols to blow off loose dust.A rubber rocket blower works great too and won’t risk that cold blast that canned air sometimes gives.
Microfiber cloths: Not just any cloth—get optical-grade microfiber designed for camera lenses or precision optics. These won’t leave lint or scratch delicate coatings.
Lens cleaning solution: Use lens cleaner that is 96% isopropyl alcohol, or a commercial lens cleaner with at least 30% isopropyl alcohol.Stick to solutions made for coated optics.
Soft lens brush: A brush with ultra-fine bristles helps remove stubborn dust without touching the lens with your fingers.
Cotton swabs or lens tissue: For detailed work on stubborn spots, but use sparingly.
Here’s how we clean thermal scope lenses the right way. Follow this order—skipping steps is where people get into trouble.
Step 1: Remove loose debris
Never wipe a dusty lens directly. Loose particles of dust or sand can scratch the surface. Always start with a gentle air duster or a soft, optical brush to remove dirt without friction.
Point the lens downward so gravity works with you, not against you. Give it a few puffs with your air blower or compressed air from about 6 inches away. Watch those particles fall away.
Step 2: Brush away remaining dust
A soft brush removes dust before using a microfiber cloth or specialized wipes.Use gentle, sweeping motions from the center outward. Don’t press hard—let the brush do the work.
Step 3: Apply cleaning solution
If you still see smudges or fingerprints after steps 1 and 2, it’s time for liquid cleaner. Never spray directly on the lens. Instead, put a small amount of cleaning solution on your microfiber cloth.
Step 4: Wipe the lens
Wipe from center of lens to outer edges using a rolling motion that allows fresh cloth to contact the lens. Use gentle, circular motions and let the cloth glide across the surface. You’re not scrubbing a pan—you’re caressing precision optics.
Step 5: Final inspection
Hold the scope up to light and check for streaks or remaining spots. If you see any, repeat step 4 with a clean section of your cloth.
Cleaning is important, but prevention saves you way more time. Here’s what we do to keep our lenses cleaner longer.
During usage, always keep the lens covers closed to shield against scratches, dust, and debris. Those flip-up lens caps exist for a reason. Use them whenever you’re moving through brush or not actively glassing.
Store your thermal scope in a dedicated case with fabric cases with foam inserts or plastic or metal cases equipped with soft elements. To combat dampness, add silica gel bags inside the case. Moisture is the enemy of electronics and optics. A few desiccant packs are cheap insurance.
Keep your scope away from extreme temperature swings when possible. Even waterproof scopes can suffer from internal condensation if exposed to rapid temperature changes. If you’re going from a warm truck to freezing temps, let your scope acclimate gradually.
Don’t forget about the rest of your thermal scope. Wipe the exterior surfaces of metal and plastic parts off dust and dirt with a cotton cloth. A slightly damp cloth works fine for the housing—just keep moisture away from ports and seals.
Check rubber eyecups and armor for cracks or wear. These protect the internal electronics from moisture and impacts. If you spot damage, address it before it becomes a bigger problem.
Clean around buttons, dials, and adjustment knobs with a soft brush or cotton swab. Dirt buildup in these areas can affect functionality over time.
Here’s where people often go wrong—they clean too much or not enough.
Clean your lens whenever you notice dirt or smudges affecting your visibility, but avoid excessive cleaning to prevent unnecessary wear. We typically give our scopes a light cleaning after every hunt and a more thorough cleaning monthly during heavy use.
Clean the lens lightly after every hunt and perform a deeper cleaning if exposed to mud, rain, or heavy dust.If you’ve been in nasty weather or dusty conditions, don’t wait—clean it when you get home.
Store in a dry, shaded, and stable-temperature environment.We keep our thermal scopes in climate-controlled areas, away from windows and heat sources.
Check and remove the battery if storing long-term (set to 40–60% charge).This prevents battery degradation and potential leakage that could damage your scope’s internals.
Before the hunting season starts, run a pre-season check. About one month before the season, run a pre-season checklist: fully charge and test batteries, inspect the housing and rubber seals, clean and examine the lens, update firmware, check sensor calibration and dead pixels, verify mounts/accessories, and do a real-world night field test.This ensures you’re ready when it counts.
We’ve seen these errors too many times:
Over-cleaning: Clean the lens gently – excessive cleaning may wear away the anti-reflective coating, causing more transmission loss than a little dust. A few dust specks won’t hurt image quality as much as worn coatings will.
Using rough materials: Avoid harsh chemicals that can damage sensitive coatings. Never wipe a dry, dusty lens, as this can scratch the surface.
Ignoring the eyepiece: Don’t forget to clean the eyepiece lens too. Smudges on the rear lens affect image quality just like dirt on the objective lens.
Rushing the process: Take your time. A rushed cleaning job risks scratching or streaking the lens.
Sometimes you need expert help. If you notice persistent image quality issues after cleaning, declining performance, or visible damage to lens coatings, it’s time to contact the manufacturer or an authorized service center.
Most quality thermal scopes come with multi-year warranties. Don’t try to disassemble or deep-clean internal components yourself—that’ll void your warranty faster than anything.
Taking care of your thermal scope lens doesn’t require special skills or expensive equipment. It just takes the right tools, proper technique, and a little patience. Start with air to remove loose debris, use appropriate cleaning solutions, and always work gently.
A few minutes of attention after each outing can add years to your device’s lifespan and keep your vision clear in every condition. We’ve seen thermal scopes last 10+ years with proper care and maintenance.
Whether you’re using Pixfra’s Arc LRF for long-range work or the Draco for close-in hunting, these cleaning methods will keep your optics performing at their best. Pair your thermal scope with our Torcia IR for even better results in the field.
Remember, clean optics mean better detection, clearer images, and more successful hunts. Take care of your gear, and it’ll take care of you. For more real-world thermal scope performance data, check out our feral hog eradication case study showing how proper equipment maintenance contributed to successful results.
Can I use regular eyeglass cleaner on my thermal scope lens?
No, avoid regular eyeglass cleaners on thermal scopes. Thermal lenses use germanium or specialized materials with unique coatings that react differently than standard glass. Use lens cleaners specifically designed for optical instruments with at least 30% isopropyl alcohol, or 96% isopropyl alcohol solutions. Regular eyeglass cleaners may contain additives that damage thermal scope coatings and reduce image quality over time.
How do I remove fingerprints from my thermal scope lens without causing damage?
First, blow away any loose dust with compressed air or a rocket blower. Then apply a small amount of optical-grade lens cleaner to a microfiber cloth—never directly on the lens. Gently wipe from the center outward using circular motions with minimal pressure. The key is removing particles first before any wiping, which prevents scratching the delicate germanium surface.
Is it safe to clean my thermal scope in cold weather or should I wait?
You can clean your thermal scope in cold weather, but bring it inside first and let it acclimate to room temperature for 15-20 minutes. Rapid temperature changes can cause condensation inside the scope. Once acclimated, clean normally using your standard process. Never apply liquid cleaners to a frozen lens, as this can cause thermal shock and potentially crack coatings.
What should I do if moisture gets inside my thermal scope?
If you notice internal moisture or fogging, stop using the scope immediately. Place it in a warm, dry location with desiccant packs nearby, but don’t expose it to direct heat. Leave lens caps off to allow air circulation. If moisture persists after 48 hours, contact the manufacturer or an authorized service center—internal moisture often indicates seal failure that requires professional repair.
How can I tell if I’ve damaged the coating on my thermal lens?
Coating damage typically appears as permanent marks, scratches, or areas where the image looks degraded even after cleaning. You might notice reduced contrast, haziness, or rainbow-like patterns on the lens surface when viewed at an angle. If cleaning doesn’t improve image quality and you see visible marks on the lens, the coating may be compromised. Professional inspection can confirm coating damage and determine if repair or replacement is needed.
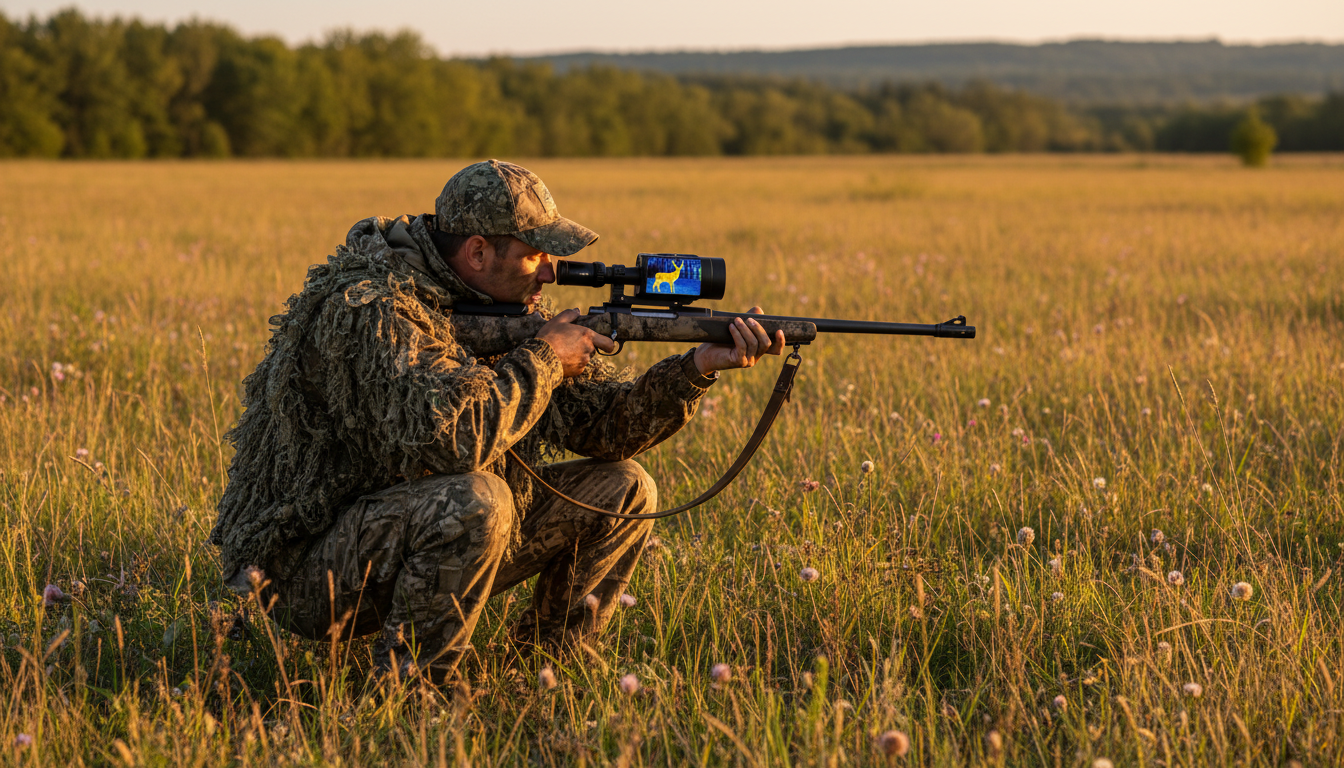
Walk into any hunting camp these days and you’ll hear someone talking about thermal scopes. But along with the growing popularity of these devices comes a whole lot of misinformation. We’ve heard it all—from claims that thermals can see through walls to the belief they only work at night.
Look, we get it. Thermal technology sounds like something straight out of a sci-fi movie. And honestly, that’s part of the problem. Hollywood has done a number on public perception, creating expectations that don’t match reality. After years of working with hunters and testing thermal devices like our Sirius HD e Pegasus 2 LRF, we’ve identified the most persistent myths that need debunking.
Here’s the thing—thermal scopes are amazing tools. But they work best when you actually understand what they can and can’t do. Let’s clear up the confusion.
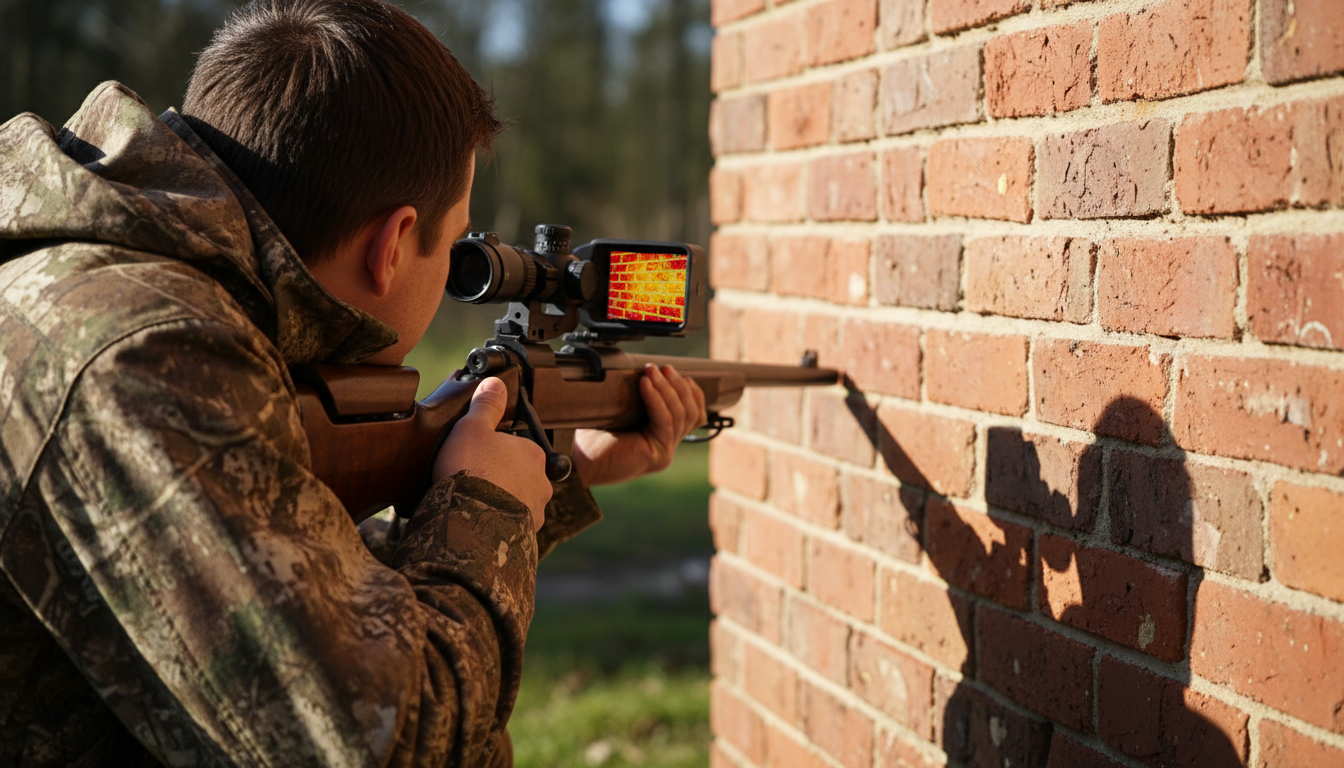
This one tops the list for a reason. It’s probably the most common misconception out there, and it’s completely false.
Thermal cameras detect infrared radiation—essentially heat energy—emitted from surfaces. They can’t penetrate solid materials like walls, doors, or concrete. When you point a thermal scope at a wall, you’re seeing the surface temperature of that wall, nothing more. A wall at uniform temperature will show up as a blank thermal image, even if there’s a person standing right behind it.
Think of it this way: thermal imaging detects surface heat, not X-rays. The infrared radiation that thermal sensors pick up doesn’t pass through most solid materials. In fact, some materials that are transparent to visible light—like glass and water—appear completely opaque when viewed through thermal imaging.
Now, there’s a tiny kernel of truth buried in this myth. If someone places their hand against a thin wall for an extended period, you might detect a slight temperature difference on the surface. But that’s just the wall warming up—you’re still not seeing through it. The same principle applies when we’re out in the field with our Draco thermal scope. It’ll spot a hog behind brush because the heat signature passes through vegetation gaps, not because it’s seeing through solid objects.
We hear this one constantly, and it drives us crazy because it limits how people use these tools.
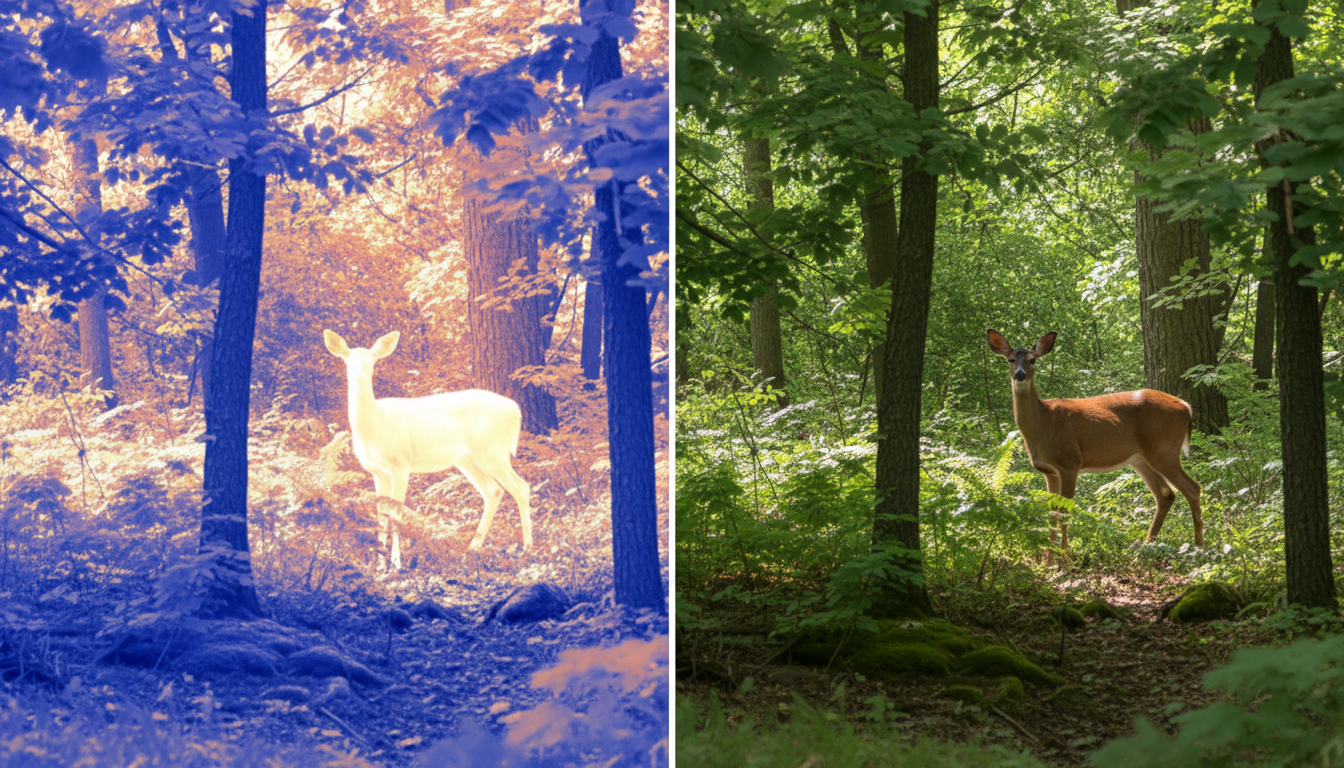
Thermal scopes work just as effectively during the day as they do at night. The reason is simple: thermal imaging doesn’t rely on visible light. It detects temperature differences, which exist 24/7. Whether it’s noon or midnight, warm-blooded animals still emit heat that contrasts with their surroundings.
During daylight hours, thermal scopes can actually give you advantages that traditional optics can’t match. Dense fog, heavy glare, or thick vegetation that would blind a regular scope? Not a problem. We’ve seen countless hunters use thermal devices to spot deer bedded in tall grass during midday scouting sessions—animals they would’ve walked right past with binoculars.
One real-world example really hammers this home. A group of hunters we know in Texas regularly use thermals during dawn and early morning hours to locate feral hogs in dense brush. The sun’s up, there’s plenty of light, but the vegetation is too thick for visual identification. Their thermal monocular picks up heat signatures in seconds that would take 10-15 minutes to spot with high-end glass.
Here’s what makes daytime thermal use so effective: while the ambient temperature rises, living creatures maintain their body temperature. That contrast is what thermal sensors pick up on. A deer at 98°F stands out whether the surrounding temperature is 40°F or 85°F.
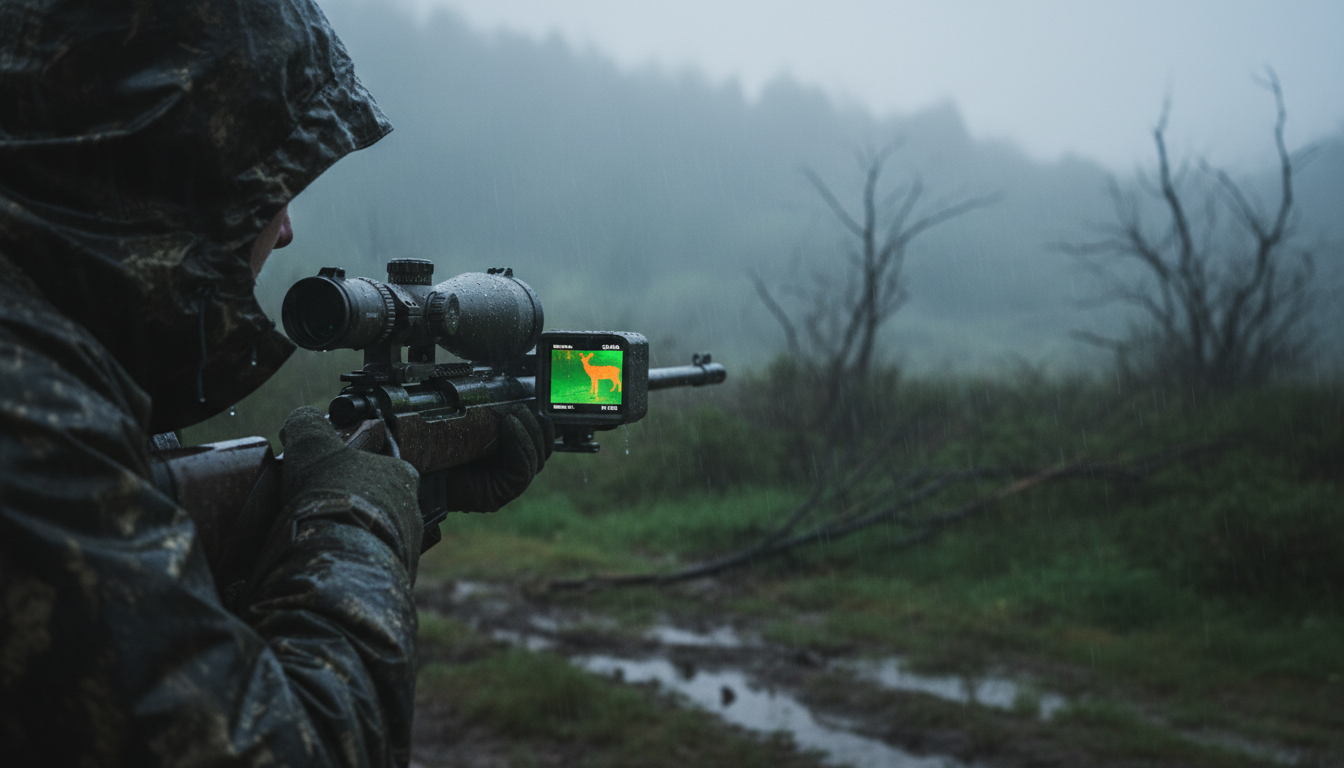
This myth swings too far in the other direction. Yes, thermal scopes perform better than traditional optics in adverse weather, but they’re not magic.
Rain, fog, and heavy snow can reduce thermal imaging effectiveness. While thermals cut through light fog and mist far better than night vision or standard scopes, extremely dense fog can shorten detection range. Heavy rain can mask heat signatures or create thermal “noise” that makes targets harder to identify at distance.
That said, thermal scopes still outperform other technologies in bad weather. We’ve tested our devices in everything from light drizzle to heavy downpours. Detection capability does decrease in extreme conditions, but we’ve never encountered a scenario where a traditional scope worked better than thermal in adverse weather.
Temperature contrast matters more than most people realize. In environments where ambient temperature closely matches body temperature—like a humid 95°F summer afternoon—thermal imaging becomes less effective. The heat signature contrast that makes thermals so useful diminishes when everything is roughly the same temperature.
Does this mean thermals are useless in hot weather? Not at all. But it does mean you need to adjust expectations and understand the technology’s limitations. A quality thermal device with good sensitivity, like those equipped with modern sensors, will still detect temperature differences as small as a few degrees.
We’ve saved this one for last because it involves actual money, and nobody wants to overspend based on false assumptions.
Detection range isn’t just about price—it’s about the right combination of sensor resolution, lens size, and pixel pitch. Sure, more expensive models often include these features, but the relationship isn’t as straightforward as “spend more, see farther.”
Here’s what actually determines detection range: sensor resolution (like 384×288 vs 640×480), lens diameter and focal length, and the quality of the thermal detector itself. A scope with a 640×480 sensor and 50mm lens will generally detect targets farther than a 384×288 sensor with the same lens. But throw a larger 75mm lens on that 384 model, and suddenly the comparison changes.
We’ve seen hunters drop serious cash on high-end thermal scopes expecting to spot game at 1,000+ yards, only to discover that detection and identification are two very different things. You might detect a heat signature at 800 yards, but recognizing whether it’s a coyote or a deer requires much closer range or higher magnification.
The detection ranges listed in technical specifications typically refer to a human-sized heat signature under ideal conditions. A coyote or hog—smaller targets—will have shorter effective detection ranges. And those “ideal conditions” rarely exist in real hunting scenarios.
Smart money focuses on matching the thermal scope to your actual hunting style. Predator hunters working open terrain need different specs than hog hunters in thick South Texas brush. Before maxing out your budget, think about your typical shooting distances and environments. Our case study on feral hog eradication shows how proper thermal selection based on actual needs delivers better results than simply buying the most expensive option.
Thermal scopes represent serious technology that deserves serious understanding. The four myths we’ve covered—seeing through walls, night-only operation, perfect all-weather performance, and price-equals-range—all stem from the same problem: assumptions based on limited information or Hollywood fiction.
Reality is more nuanced. Thermal scopes detect surface heat, not X-ray visions of hidden objects. They work around the clock because temperature differences exist day and night. Weather affects them, just less than it affects other optics. And price reflects features and build quality, not just raw detection distance.
We’ve found that hunters who take time to learn how thermal imaging actually works get far more value from their investment. Understanding these tools’ real capabilities—and limitations—leads to smarter purchasing decisions and more effective use in the field. Whether you’re just starting to explore thermal technology or looking to upgrade your current setup, knowledge beats marketing hype every single time.
Can thermal scopes detect animals hiding in water?
No, thermal scopes cannot see fish or animals submerged in water. Water blocks infrared radiation, appearing opaque to thermal sensors. You’ll only see the water’s surface temperature. However, animals partially in water—like a deer crossing a stream—will show their exposed body parts clearly on thermal imaging.
Do thermal scopes work through glass windows?
Thermal scopes cannot see through glass because glass reflects infrared radiation rather than allowing it to pass through. When you point a thermal device at a window, you’ll see reflections of heat signatures in front of the glass, not what’s behind it. This is true for both standard window glass and eyeglasses.
How long can a thermal scope hold a zero?
Modern thermal scopes hold their zero just as reliably as traditional scopes when properly mounted. Digital reticles in thermal devices are electronically overlaid on the image and maintain zero through the device’s internal calibration. Quality mounts and proper installation matter more than the technology type. Most thermal scopes feature one-shot zeroing that remains stable through hundreds of rounds.
Can you use an IR laser with a thermal scope?
No, infrared lasers don’t work with thermal scopes. IR lasers emit light in the near-infrared spectrum (850-950nm), while thermal scopes detect heat in the mid-wave or long-wave infrared spectrum. The thermal sensor can’t see the IR laser’s beam. IR lasers work with night vision devices, not thermal imaging. For thermal scopes, use the built-in digital reticle for aiming.
Are thermal scopes legal for hunting deer in the United States?
Thermal scopes themselves are legal to own and use for hunting in most states, but regulations vary significantly by state and species. Many states prohibit night hunting of game animals like deer, regardless of optic type. However, using thermal scopes during legal daylight hunting hours is typically permitted. Always check your specific state’s hunting regulations before using thermal technology in the field, as laws differ for game animals versus predators and nuisance species.
















