Thermal imaging has become a game-changer for everything from hunting and security to industrial inspections and medical diagnostics. But here’s the thing—not all thermal imaging works the same way. Different technologies operate at different wavelengths, and picking the right one can make or break your results.
We’re breaking down the three main types of thermal imaging technology based on wavelength ranges. Each type offers unique advantages and works best in specific situations. Whether you’re trying to spot heat loss in buildings, detect equipment failures, or track wildlife at night, knowing which technology to use will save you time and money.
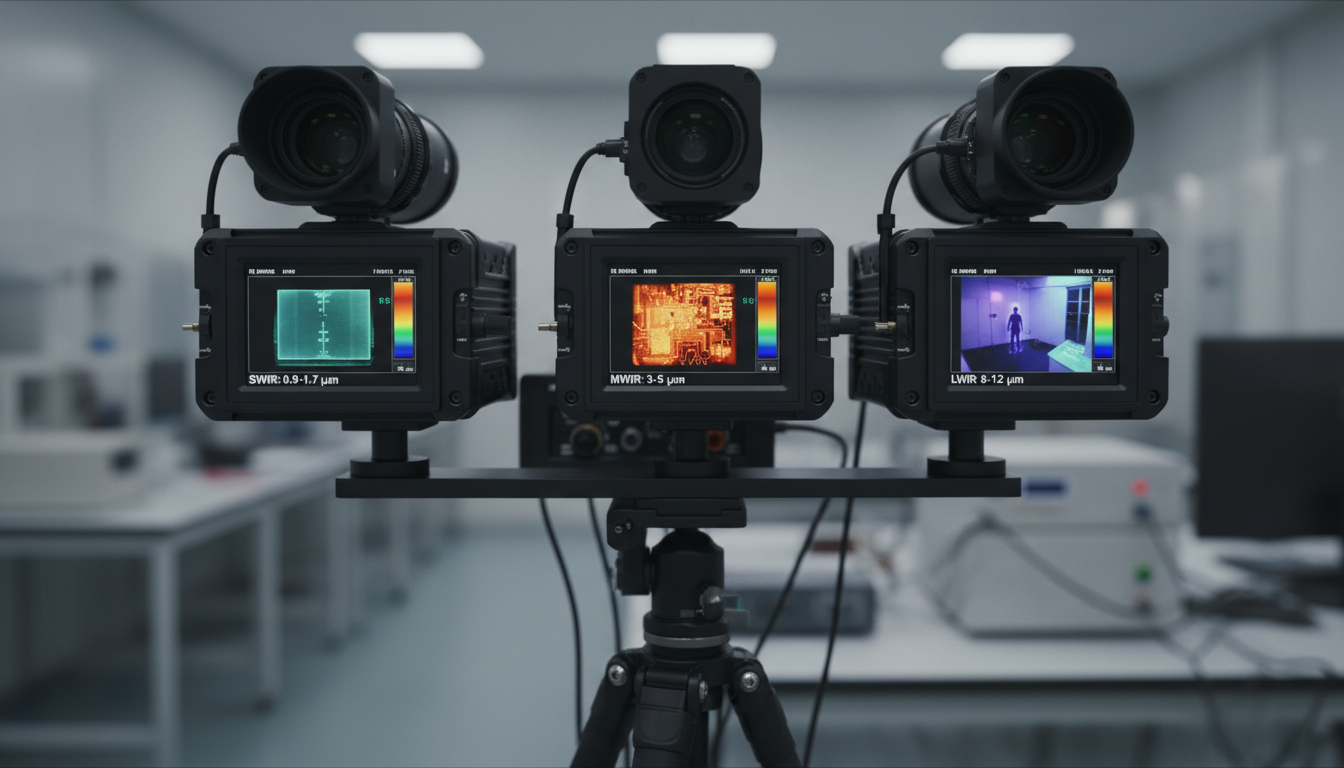
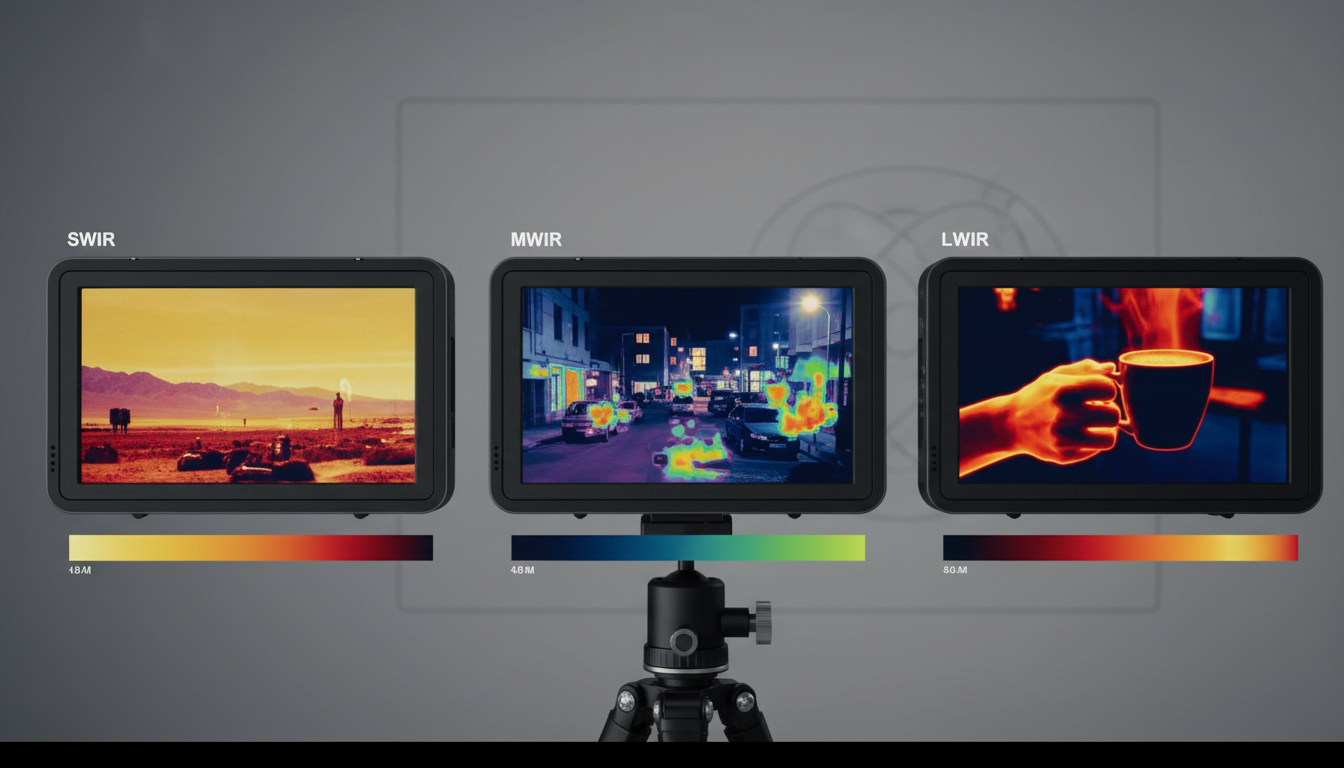
Thermal cameras come in three basic wavelength categories: short-wave infrared (SWIR), mid-wave infrared (MWIR), and long-wave infrared (LWIR). Think of these as different “channels” in the infrared spectrum, each tuned to capture specific types of heat signatures.
SWIR typically operates in the 0.9–1.7 μm wavelength range, while MWIR is defined as the 3.0–5.0 μm wavelength range. Long-wavelength cameras detect infrared wavelengths in the range of 7-12 microns. Each range reveals different information about the objects you’re viewing.
The wavelength you choose affects everything from image quality to what you can see through obstacles. Let’s look at how each type actually works.
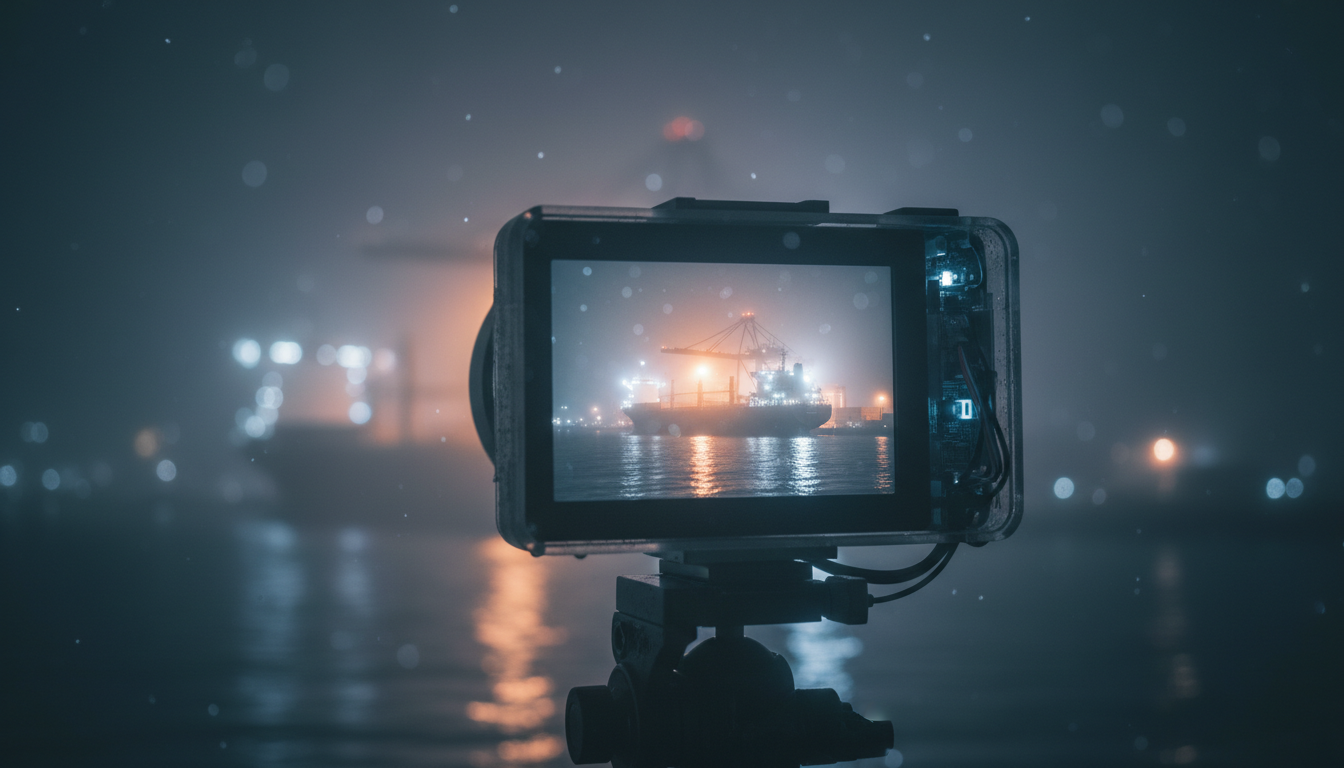
SWIR cameras work differently than you might expect. Short wave infrared uses reflected light imaging instead of thermal imaging. This means they’re more like enhanced vision cameras than traditional heat detectors.
An atmospheric phenomenon called night sky radiance emits five to seven times more illumination than starlight, nearly all of it in the SWIR wavelengths, allowing us to see objects with great clarity on moonless nights. Short-wave infrared is more like enhanced vision, and its image is very similar to that seen by human eyes.
SWIR cameras excel at penetrating haze, smoke, and fog. Short-wave infrared imaging has a major advantage that infrared thermal imaging technology does not have—it can image through the windshield. This makes SWIR perfect for surveillance, quality inspection, and applications where you need to see fine details rather than just heat signatures.
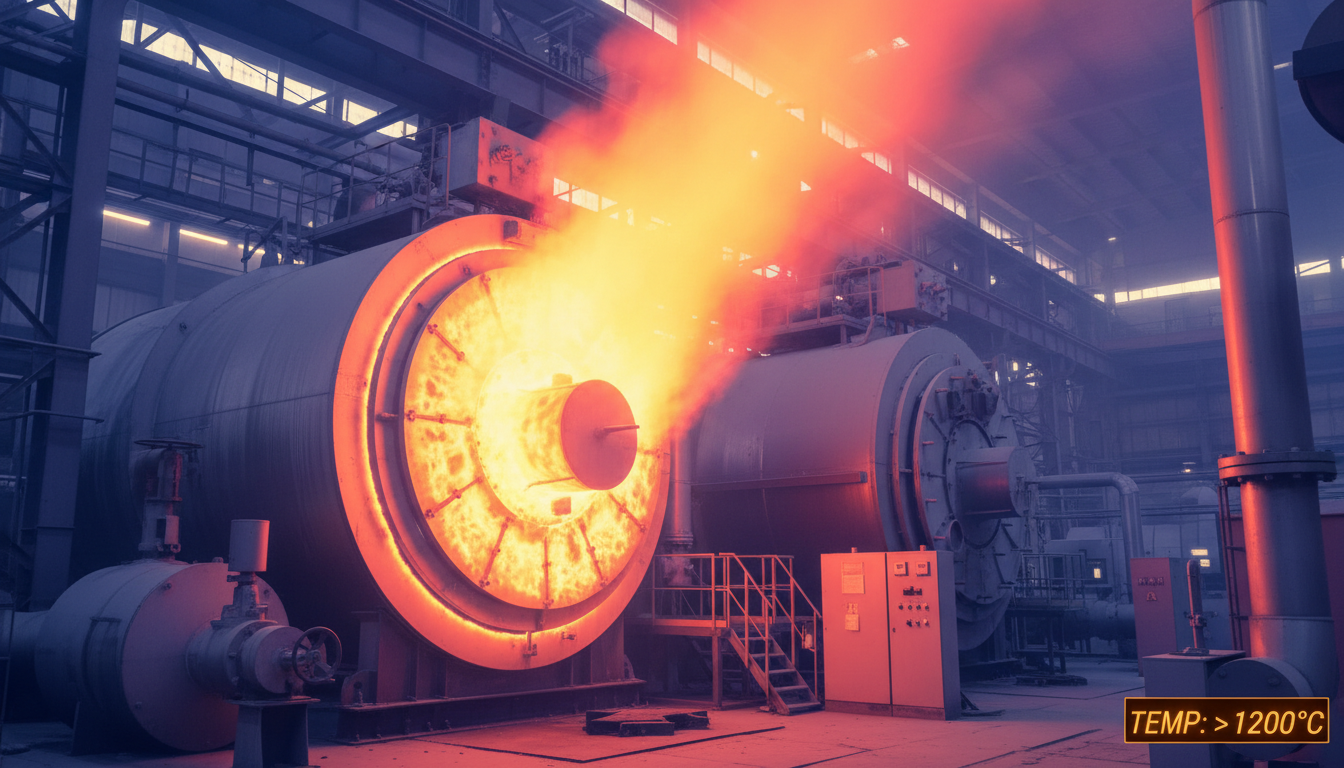
MWIR cameras sit in the middle ground between SWIR and LWIR. Mid-wavelength cameras typically detect infrared wavelengths in the spectral range of 2-5 microns and deliver higher resolution with accurate readings, though images are not as detailed as those produced by long wavelength cameras due to increased atmospheric absorption.
Cameras in this range are used for extreme high-temperature readings, such as scanning boiler applications and ballasted, single-ply roofing systems. When you need to measure really hot objects—think industrial furnaces or manufacturing processes—MWIR cameras give you the precision you need.
MWIR systems often require cooling to work properly, which makes them more expensive. But for gas leak detection and military applications, that extra cost pays off with better sensitivity and accuracy.
Long-wavelength cameras, the most popular infrared camera type, typically detect infrared wavelengths in the range of 7-12 microns and provide a great deal of detail because atmospheric absorption is minimal. This is what most people think of when they hear “thermal camera.”
Long Wavelength Infrared is the most commonly used form of infrared technology, with LWIR imagers detecting radiated temperatures that indicate information to the operator. These cameras work great for spotting people, animals, and equipment at normal temperatures.
The majority of all thermal cameras sold and used today operate in the LWIR band, using uncooled micro-bolometer detectors. They’re cheaper than MWIR cameras, don’t need cooling systems, and work reliably for building inspections, firefighting, and security applications.
Beyond wavelengths, thermal imaging can also be classified by how it captures heat. Thermography can be classified as either passive or active, with passive thermography involving observing an object’s naturally emitted thermal energy.
Active thermography applies external energy sources to an object or process to induce a variation in temperature for analysis with an infrared camera. If a defect is present inside an object, it interrupts the heat flow from an external source like a halogen lamp, causing a variation in temperature distribution at the object’s surface.
Passive thermography works well for electrical inspections, surveillance, and medical screenings where objects already have temperature differences. Active thermography shines when you’re looking for hidden defects in materials or checking composite structures like aircraft wings.
Another way to classify thermal cameras is by detector type. Thermographic cameras can be broadly divided into two types: those with cooled infrared image detectors and those with uncooled detectors.
Cooled detectors deliver better image quality and precision, while uncooled detectors are less precise but also less expensive. Uncooled detector resolution and image quality tend to be lower than cooled detectors, but they’re lighter, smaller, and start up instantly.
Most LWIR cameras use uncooled sensors, making them affordable for everyday use. MWIR cameras typically need cooling, which is why they cost more but perform better for demanding applications.
Picking the right thermal imaging type depends on what you’re trying to accomplish. For general surveillance, building inspections, or hunting applications like those we discuss in our professional hunting guide, LWIR cameras offer the best value and performance.
If you’re working in industrial settings with high-temperature equipment, MWIR gives you better accuracy. For seeing through smoke or capturing fine details, SWIR technology delivers images that look more natural to our eyes. Check out our Sirius HD thermal monocular to see how modern LWIR technology performs in real-world conditions.
The technology keeps evolving. Modern thermal cameras now combine features from different types, offering multi-spectral imaging that gives you the best of multiple wavelengths in one device.
Thermal imaging technology breaks down into three main wavelength types—SWIR, MWIR, and LWIR—each optimized for different applications. SWIR uses reflected light for detail-rich images, MWIR handles extreme temperatures with precision, and LWIR dominates everyday thermal imaging with affordable, reliable performance. You can also classify systems by passive versus active methods or cooled versus uncooled detectors.
Your choice depends on your specific needs: detection range, temperature measurement accuracy, environmental conditions, and budget. LWIR cameras handle most common tasks, MWIR excels at industrial applications, and SWIR works best when you need to see through obscurants or capture fine details. Understanding these differences helps you pick the right tool and get better results, whether you’re inspecting equipment, monitoring wildlife, or conducting security operations.
What’s the difference between SWIR and thermal imaging?
SWIR cameras detect reflected infrared light, similar to how visible cameras work, creating images based on light reflection rather than heat emission. Traditional thermal cameras (MWIR and LWIR) detect heat radiated by objects. SWIR produces images that look more like regular photographs but can see through smoke and haze, while thermal cameras show temperature differences regardless of lighting conditions.
Which type of thermal imaging camera is best for hunting?
LWIR cameras work best for hunting because they detect body heat from animals at normal outdoor temperatures. They’re more affordable than other types, don’t need external light sources, and can spot wildlife in complete darkness. LWIR cameras also come in compact, uncooled designs perfect for handheld monoculars and scopes. Visit our pagina iniziale to explore hunting-specific thermal devices.
Why are MWIR cameras more expensive than LWIR?
MWIR cameras typically require cryogenic cooling systems to reduce noise and maintain sensor sensitivity, which adds cost, weight, and power consumption. The cooling mechanism keeps the detector at very low temperatures for accurate readings at higher temperature ranges. LWIR cameras use uncooled microbolometer detectors that work at room temperature, making them cheaper and simpler to manufacture.
Can thermal cameras see through walls?
No, thermal cameras cannot see through solid walls. They detect infrared radiation from surfaces, not through them. However, they can detect temperature differences on wall surfaces caused by issues behind the wall, like water leaks, missing insulation, or electrical hot spots. SWIR cameras can penetrate some thin materials better than other types, but no thermal camera provides X-ray vision.
What does passive versus active thermography mean?
Passive thermography observes objects using their naturally occurring heat without adding external energy sources. It’s used for electrical inspections, building surveys, and security. Active thermography applies an external heat source to the object being inspected, then monitors how heat flows through it to reveal hidden defects or structural issues. Active methods work better for non-destructive testing of materials and finding subsurface problems.
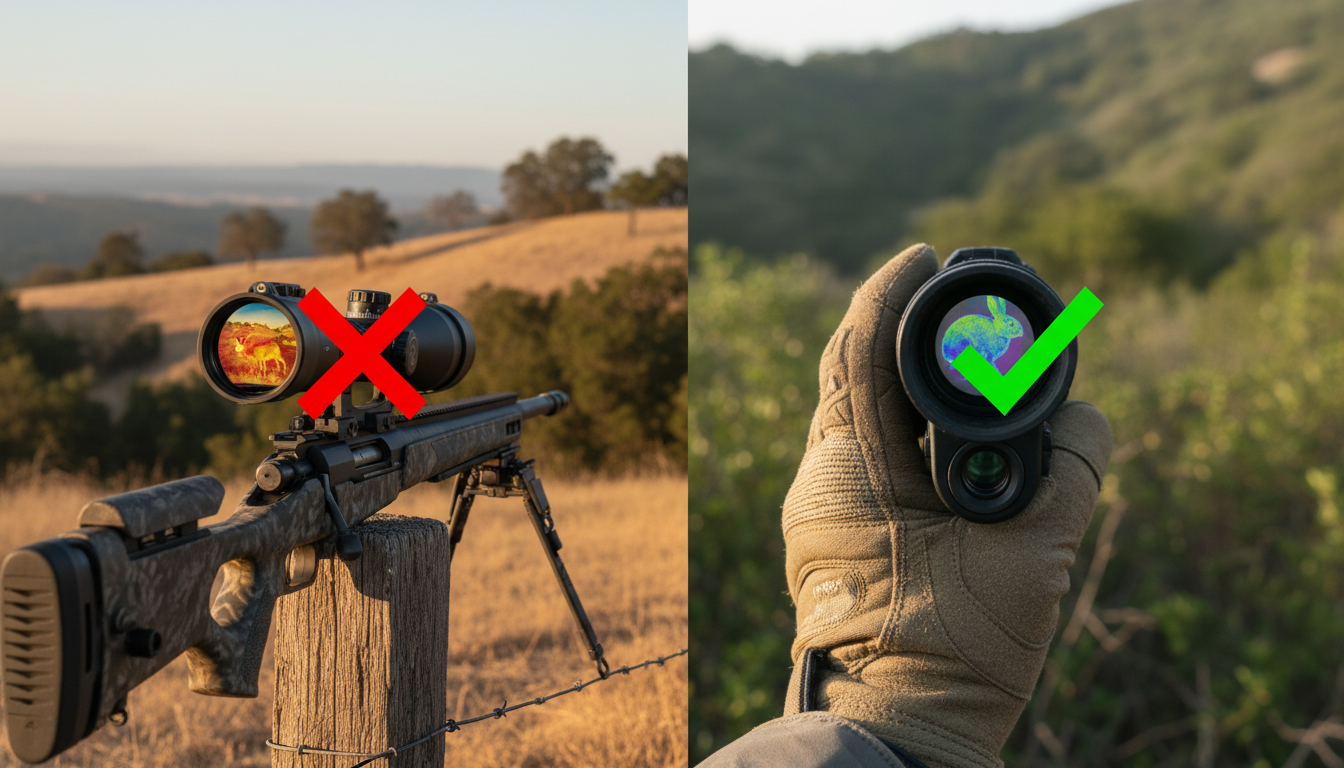
If you’re looking into thermal scopes in California, you’ve probably run into conflicting information. Some retailers won’t ship to the state, legal forums debate the fine print, and hunters aren’t sure what’s allowed. Let’s clear up the confusion around thermal scope legality in California and what the law actually says.

California Penal Code Section 468 defines a “sniperscope” as any device designed for use on a firearm that uses “a PROJECTED infrared light source and electronic telescope” to locate objects at night. The key word here is “projected.” This refers to flashlight-like devices that project IR light, which were common when the law was written decades ago.
Modern thermal scopes work differently. Thermal scopes detect heat signatures and typically do not emit visible or infrared light. They’re passive devices that read thermal radiation rather than projecting anything. This technical distinction matters when reading the law.
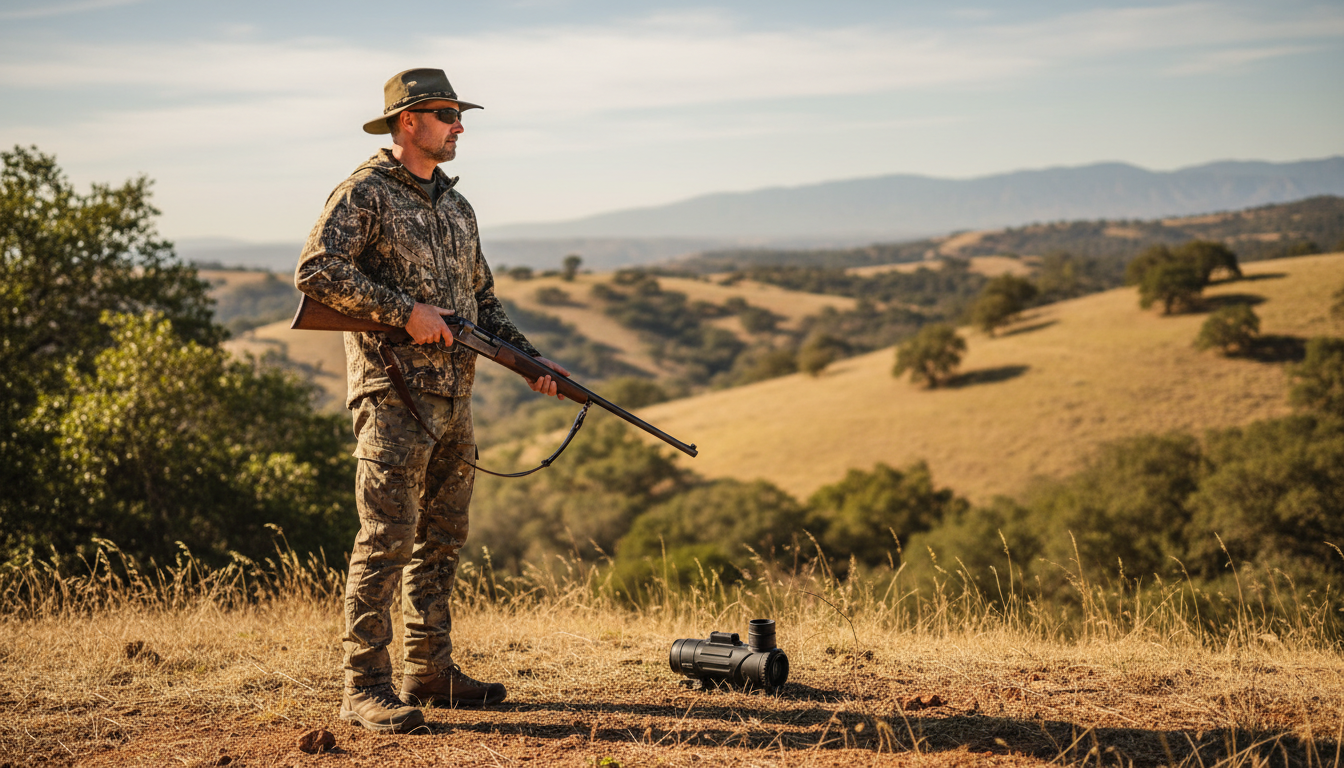
According to discussion among California gun owners and legal interpretations, a thermal scope on its own appears to be legal in the state. The problem starts when you talk about mounting it to a firearm. California law prohibits possessing devices like thermal imaging equipment “intended for use with or adapted for use with a firearm” that allow determining the presence of objects at night.
Here’s where things get murky. The issue is weapon mounting, and using a thermal scope for hunting while not attached to your rifle would be a grey area. Many retailers refuse to ship to California not because ownership is clearly illegal, but because they don’t want the legal headaches if someone mounts the device to a gun.
We recommend checking out our professional hunting guide for more context on thermal monocular applications.
For hunting purposes, California explicitly prohibits thermal devices mounted to firearms. Heat-sensing or other non-visible spectrum technology used to enhance visibility of animals or provide a visible point of aim is prohibited while taking or attempting to take big game.
But there are some exceptions worth knowing about. Fish and Game Code regulations vary by zone and species. Some interpretations suggest that landowners in agricultural areas might be able to use passive thermal for certain pest control situations like coyotes. Before you head out, check with local fish and game authorities for your specific area.
Looking for alternatives? Our Sirius HD thermal monocular offers powerful detection without the legal complications of scope mounting.
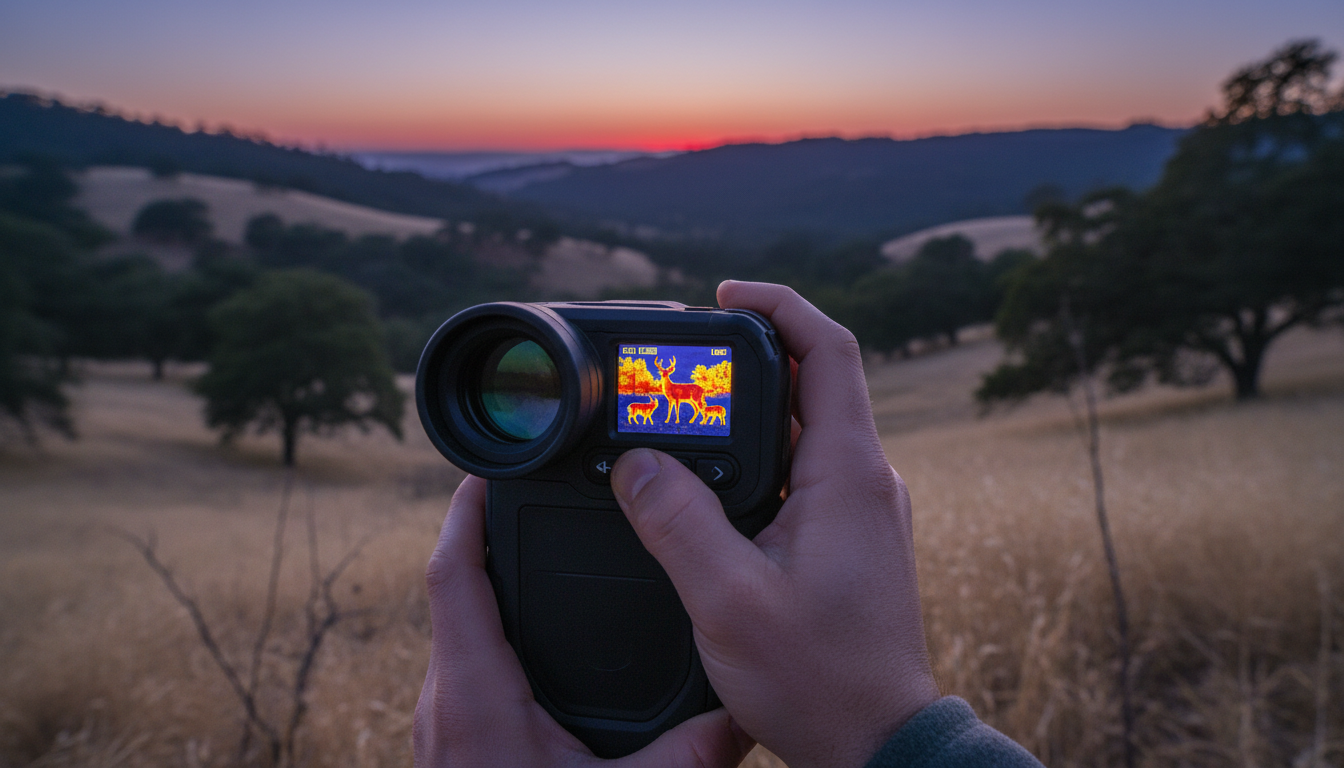
The prohibition does not apply to binoculars, monoculars with night vision function, or night vision goggles. This creates a practical workaround for many users. You can legally own and use thermal monoculars for observation, navigation, wildlife watching, and other non-hunting purposes.
Thermal monoculars are handheld devices that don’t attach to firearms. They’re used for spotting, tracking, and general thermal imaging without raising the same legal concerns as weapon-mounted scopes. We’ve seen growing interest in these devices precisely because they avoid the legal ambiguity.
Many vendors stay far away from legal boundaries and decline sales that could even remotely be viewed as illegal, because they lose more money in lawsuits than in potential sales. Even if a product might be legal under a strict reading of PC 468, companies don’t want to risk prosecution or bad publicity.
Many manufacturers list California as “ILLEGAL” in their state guides, stating that California law considers all night vision or thermal imaging devices for firearms illegal. This blanket approach is simpler than explaining nuances, but it doesn’t tell the full story about ownership for non-firearm uses.
For quality thermal imaging solutions that work within California’s framework, visit Pixfra’s homepage to explore our full range of thermal monoculars and imaging devices.
Based on current law and expert interpretation, here’s what we understand:
Likely legal: Owning a thermal scope or monocular for observation, research, or educational purposes. Using thermal binoculars or handheld monoculars for non-hunting activities.
Gray area: Possessing a thermal scope that could be mounted to a firearm, even if you don’t mount it. Using thermal devices for hunting when not attached to your weapon.
Clearly prohibited: Attaching a night vision or thermal device to a firearm. Using thermal scopes mounted to firearms for hunting.
The safest approach? Stick with handheld thermal monoculars for observation and leave weapon-mounted devices out of the picture. And definitely consult with a legal professional if you have specific questions about your situation.
The question “are thermal scopes legal in California” doesn’t have a simple yes or no answer. While thermal imaging technology itself isn’t banned, how you use it and whether it’s attached to a firearm makes all the difference. PC 468 technically targets devices with projected IR illuminators, which modern thermal scopes don’t use. But the broader interpretation and hunting regulations create real limitations.
For most California residents, thermal monoculars and binoculars offer the best path forward—you get thermal imaging capability without the legal concerns. Stay informed about current regulations, check with local authorities before hunting, and consider handheld options that keep you on the right side of the law.
Can I legally own a thermal scope in California?
Owning a thermal scope appears to be legal under a strict interpretation of PC 468, since thermal devices don’t use projected infrared illumination. However, possession with intent to mount it to a firearm creates legal risk. Many California residents own thermal monoculars and binoculars without issue since these aren’t designed for firearm mounting.
Is it illegal to hunt with thermal in California?
Yes, hunting with thermal devices mounted to firearms is prohibited in California. The state bans heat-sensing and non-visible spectrum technology for taking big game. Some exceptions may exist for agricultural landowners dealing with specific pests, but you should verify with California Department of Fish and Wildlife before hunting.
Why do so many websites say thermal scopes are illegal in California?
Retailers and manufacturers often take a conservative approach, listing California as “illegal” to avoid potential legal liability. While PC 468’s language specifically addresses projected IR illuminators (which thermal scopes don’t use), companies prefer blanket restrictions over explaining technical distinctions that could be challenged in court.
What’s the difference between thermal scopes and night vision under California law?
Both fall under similar restrictions when mounted to firearms. Night vision amplifies existing light (sometimes using IR illuminators), while thermal detects heat signatures. PC 468 targets devices with projected IR sources, but broader interpretations and hunting regulations restrict both technologies when attached to weapons.
Can I use a thermal monocular for wildlife observation in California?
Yes, thermal monoculars and binoculars are generally legal for observation, navigation, and non-hunting purposes. These handheld devices aren’t designed for firearm attachment and don’t fall under the same restrictions as weapon-mounted scopes. Many outdoor enthusiasts use them for wildlife watching, hiking, and property monitoring without legal concerns.
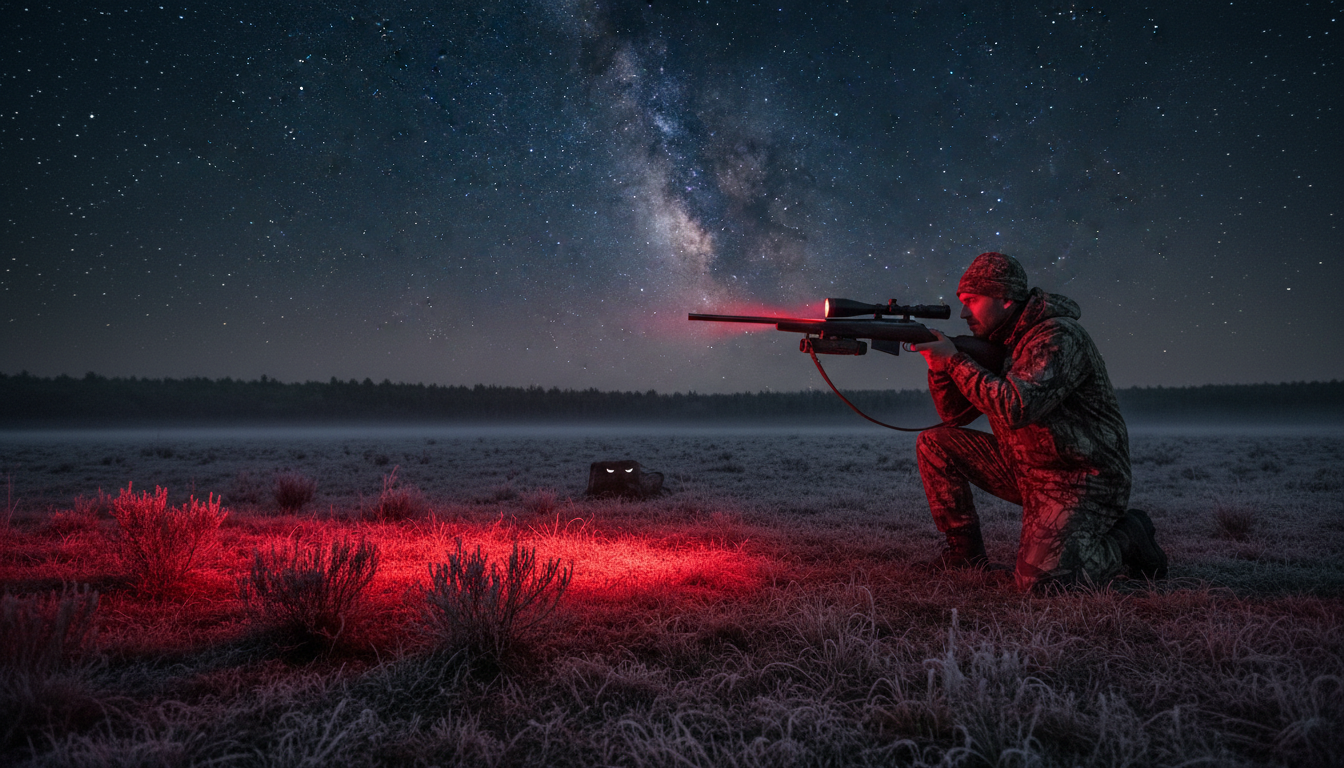
When you’re out hunting coyotes after dark, having the right light can make or break your entire night. We’ve spent countless hours in the field testing different hunting lights, and we know how frustrating it is to spook a coyote because your light wasn’t up to the task. The good news? Today’s hunting lights are better than ever, with advanced LED technology that gives you the brightness you need without sending every predator within a mile running for cover. Whether you’re a seasoned predator hunter or just getting started with nighttime pursuits, choosing the right light involves understanding color options, brightness levels, beam patterns, and mounting systems. Before we dive into specific recommendations, it’s worth noting that modern technology like thermal monoculars has changed the game for many hunters, but traditional hunting lights still play a crucial role in shot placement and ethical hunting practices.
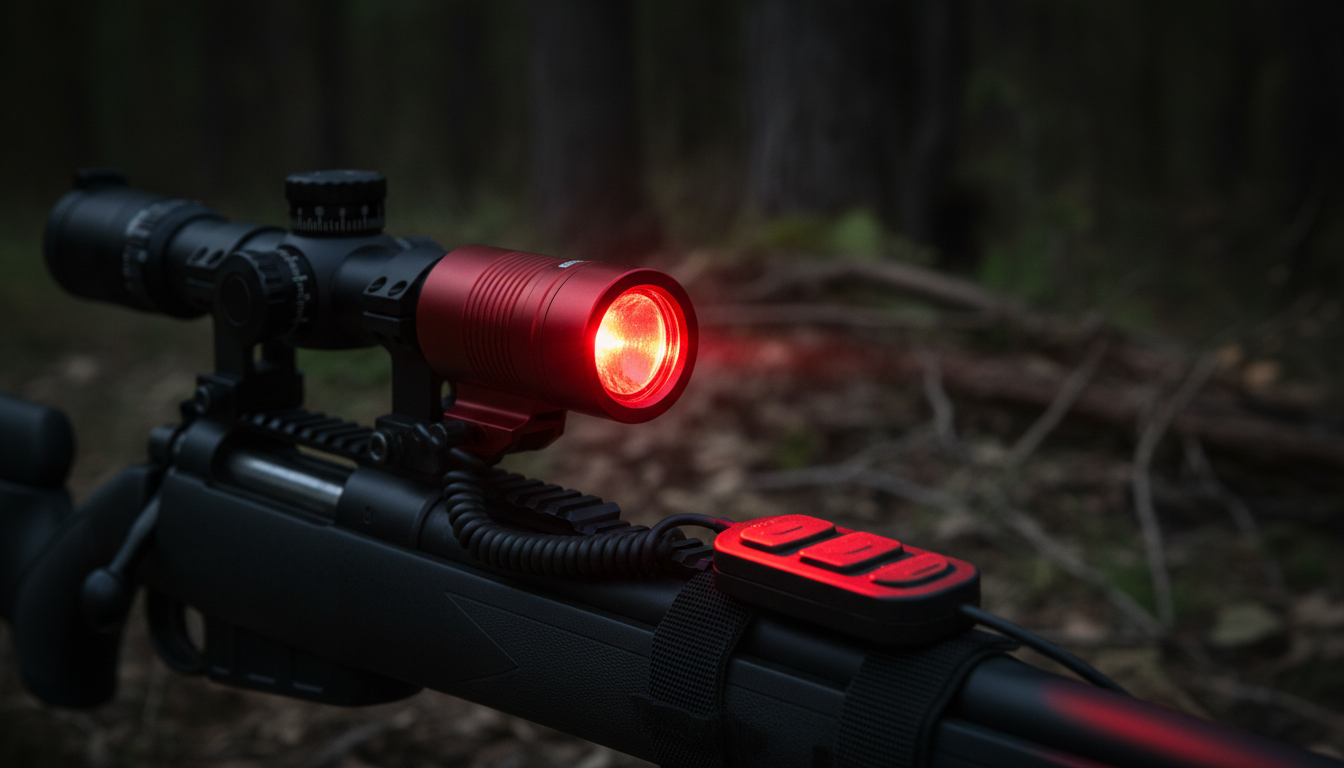
The color of your hunting light isn’t just about personal preference—it directly affects how coyotes react when you illuminate them. Red lights have been the go-to choice for predator hunters for decades, and there’s solid reasoning behind this. Coyotes have dichromatic vision, meaning they see the world primarily in shades of blue and yellow. They’re far less sensitive to red wavelengths, which is why a red light appears much dimmer to them than it does to us. This gives you a significant advantage when scanning fields or making that final shot.
Green lights have gained popularity in recent years because they offer a middle ground between visibility and stealth. While coyotes can see green better than red, green lights provide superior clarity for human eyes, making it easier to identify your target and assess the situation. Many experienced hunters report that green lights work especially well in areas with dense vegetation, where the enhanced contrast helps you pick out movement more easily. White lights are the brightest option and give you the best overall visibility, but they’re also the most likely to spook wary coyotes. Some hunters save white lights for the moment of the shot, using colored lights for scanning and switching to white for maximum clarity when it counts.
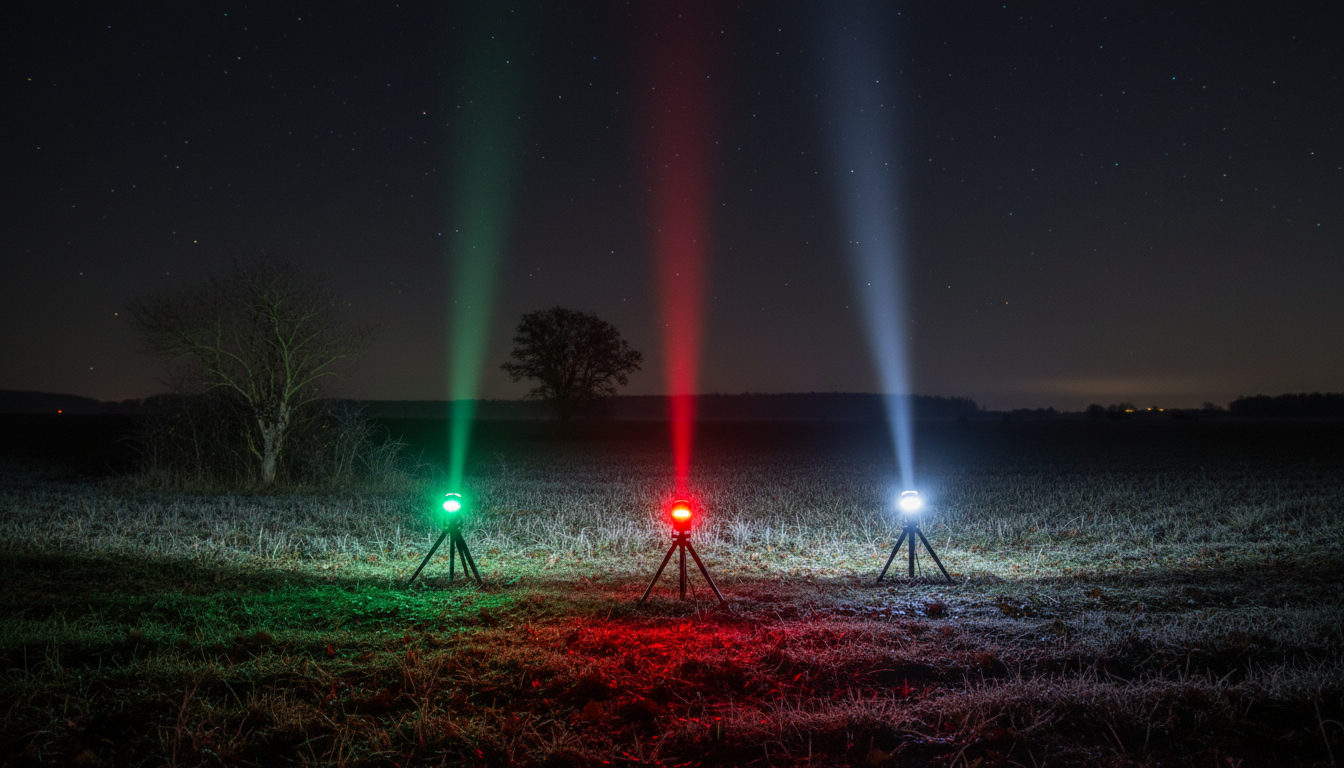
When you’re shopping for a hunting light, you’ll see lumens thrown around as the main specification, but raw lumen count doesn’t tell the whole story. Lumens measure the total amount of light output, but for hunting purposes, you need to pay equal attention to beam distance and beam pattern. A light with 1000 lumens and a focused beam will reach much farther than a 1000-lumen light with a flood pattern. For coyote hunting, you typically want a light that can reach at least 300-500 yards, though your actual shooting distance will likely be considerably less.
Most serious coyote hunters look for lights in the 500-1000 lumen range with a focused or mixed beam pattern. This gives you enough power to identify targets at distance while still maintaining good peripheral vision for scanning. Keep in mind that brighter isn’t always better—an overly powerful light can actually make it harder to see details because of glare and reflection. The sweet spot depends on your hunting environment. In open country with long sight lines, you might want more throw. In timber or broken terrain, a wider beam with moderate power often works better. Battery life also decreases as brightness increases, so you need to find a balance that works for your typical hunting sessions.
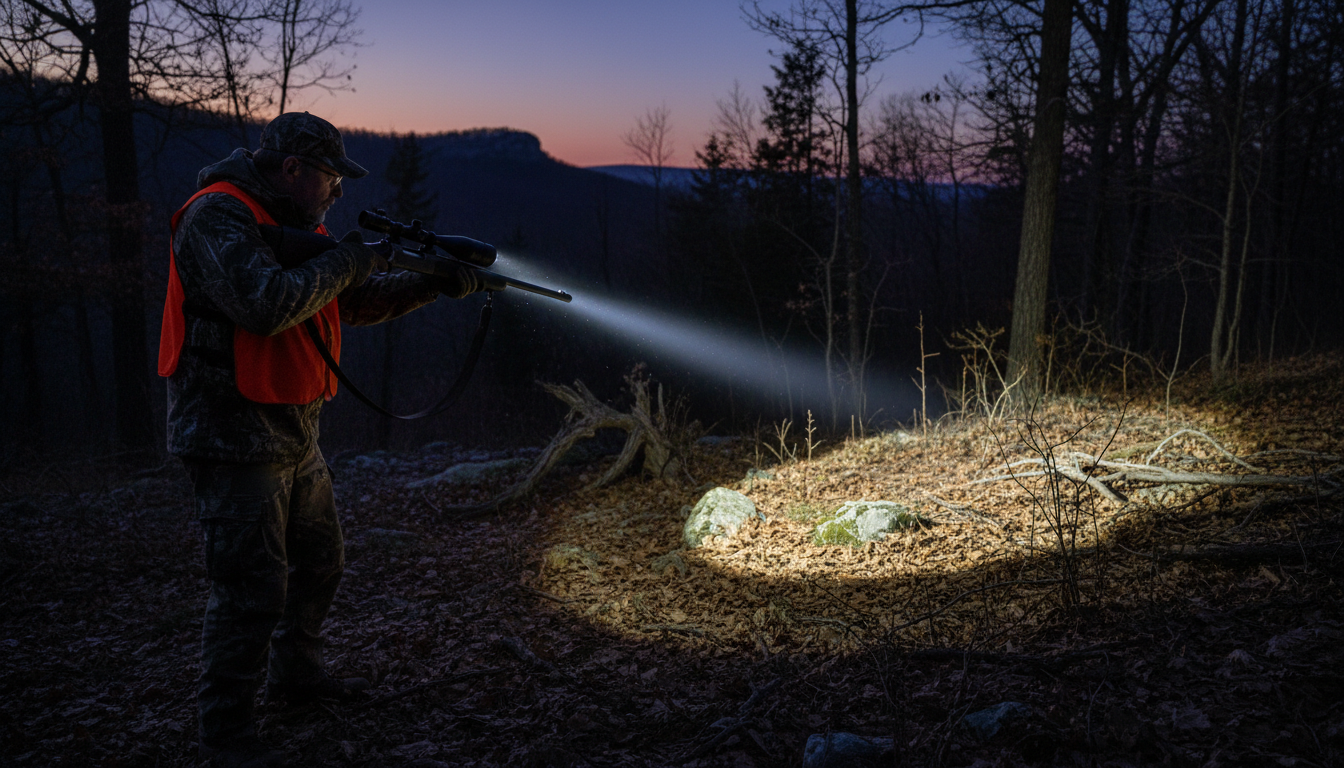
This debate rages on in hunting forums everywhere, and honestly, there’s no single right answer for everyone. Red lights remain the most popular choice among traditional predator hunters because they offer the best stealth factor. When you shine a red light on a coyote, especially from a distance, they often show minimal reaction. They might pause or look around, but they rarely bolt immediately like they would with a white light. This gives you precious seconds to assess the shot and settle your crosshairs. Red lights also preserve your night vision better than other colors, which matters if you’re hunting in areas where you might need to navigate in the dark between setups.
Green lights have carved out a significant following because of their superior performance for human eyes. The human eye is most sensitive to green wavelengths, which means a green light at the same power level as a red light will appear much brighter and clearer to you. This translates to better target identification and easier scanning. While coyotes can theoretically see green better than red, many hunters report excellent results with green lights, especially when calling in thick cover where you need every advantage to spot movement quickly. Some experts believe that coyote reactions have more to do with light intensity and movement than color alone.
White lights deliver unmatched clarity and color rendering, making species identification absolutely certain. This matters in areas where you might encounter non-target animals or where regulations require positive identification before shooting. The downside is that white lights are definitely the most visible to coyotes. Many experienced hunters use a combination approach: they scan with red or green and then switch to white for the final moments before the shot. This strategy gives you the best of both worlds—stealth when you need it and maximum visibility when accuracy matters most.
How you mount or carry your hunting light significantly impacts your success rate and hunting style. Gun-mounted lights are the most popular choice for serious predator hunters because they keep your hands free and ensure your light is always pointed exactly where your rifle is aimed. This coordination is critical when a coyote comes in fast or when you’re dealing with multiple animals. Quality gun-mounted systems attach to your rifle’s Picatinny rail or scope rings and offer quick-release mechanisms so you can adjust or remove the light as needed. The main downside is added weight on your rifle and the need for remote pressure switches, which add another element to manage.
Handheld spotlights give you maximum flexibility and often deliver the most powerful beam distances. They’re excellent for scanning large areas before a stand or checking out suspicious movement without moving your rifle. However, when it comes time to shoot, you face a dilemma: set the light down (and possibly lose your illumination angle) or try to manage both the light and your rifle simultaneously. Some hunters work with a partner where one person handles the light while the other shoots, which is arguably the most effective setup. Handheld lights also excel as backup options or for use when you’re calling in heavy cover where you might need to react quickly in any direction.
Headlamps offer the ultimate in hands-free convenience and are increasingly popular among mobile hunters who cover lots of ground. Modern hunting headlamps come with red, green, and white LED options, and they keep your hands completely free for carrying your rifle, using calls, or navigating terrain. The challenge with headlamps is that your light always points where your head points, which isn’t necessarily where your rifle points. This can create awkward situations when you need to illuminate a coyote while looking through your scope. Many hunters use headlamps for general tasks and navigation but switch to gun-mounted or handheld options when they’re actually set up and calling.
Durability ranks at the top of the must-have list because hunting lights take a beating in the field. Look for lights with aluminum or reinforced polymer bodies, proper waterproof ratings (IPX7 or better), and impact resistance. You’ll likely drop your light, bang it against equipment, and expose it to rain, snow, and temperature extremes. Cheap lights fail exactly when you need them most. Quality manufacturers back their products with solid warranties, which tells you something about their confidence in durability.
Battery life and power options deserve serious consideration. Nothing’s worse than having your light die in the middle of a productive night. Rechargeable lithium-ion batteries are convenient and cost-effective long-term, but they require planning and access to charging facilities. Lights that run on standard AA or CR123 batteries offer the advantage of field-swappable power—just carry spares and you’re good for days. Many modern lights offer multiple brightness modes, which lets you conserve battery when you don’t need full power. A good hunting light should give you at least 2-3 hours of runtime at the brightness level you’ll actually use in the field.
Beam adjustability and multiple color options in one package add versatility without requiring you to carry multiple lights. Some of the best hunting lights on the market today feature interchangeable lens covers or built-in LED arrays that let you switch between red, green, and white at the press of a button. Zoom or focus functions that let you adjust between spot and flood beams are also valuable. You might want a tight spot for long-range scanning and a wider flood for checking nearby cover. Remote pressure switches are essential for gun-mounted setups, and the quality of these switches varies widely. Look for switches with positive tactile feedback and durable cords that won’t fail after a season of use.
Understanding how brightness levels and beam patterns work together helps you match a light to your specific hunting situations. Beam patterns generally fall into three categories: spot, flood, and combination. A spot beam concentrates light into a narrow, focused column that reaches maximum distance. This pattern works great for scanning open fields or checking distant treelines, but it can be like looking through a tunnel—you see what’s directly in front of you but miss peripheral movement. Flood beams spread light across a wide area with less distance penetration. They’re excellent for close-range work in timber or when a coyote is working in close and you need to track movement across a broader field of view.
Combination beams, sometimes called mixed or hybrid beams, attempt to give you both distance and width. These patterns typically feature a bright central hotspot for distance work surrounded by a softer corona of spill light that maintains peripheral awareness. Many hunters find this the most versatile pattern for predator hunting because you can scan at distance while still catching movement to the sides. Some lights offer adjustable focus that lets you dial in the exact beam pattern you want, though this adds mechanical complexity that can potentially fail.
The relationship between brightness, distance, and usability isn’t linear. Doubling the lumens doesn’t double your effective range, and at some point, more brightness actually hurts more than it helps. Excessive brightness creates glare, washes out details, and can actually make it harder to see subtle movements or features. Most experienced coyote hunters settle on lights in the 500-800 lumen range for colored lights and 800-1200 lumens for white lights, with multiple brightness modes to adjust based on conditions.
How you use your hunting light matters just as much as which light you choose. One of the biggest mistakes new predator hunters make is leaving their light on constantly while calling. This reduces your battery life and potentially educates wary coyotes that might be hanging up just outside your beam. Instead, use an intermittent scanning technique: call for 30-60 seconds, then scan with your light for 10-15 seconds, then turn the light off and wait. This pattern lets you cover ground without constantly announcing your presence.
When you do illuminate a coyote, avoid the temptation to swing your light around erratically. Sudden, jerky movements with your light beam spook animals far more than steady illumination. If a coyote is approaching and you spot it with your light, keep the beam steady and let the animal continue its approach. If it stops and stares, which is common, keep the light on it and prepare for your shot. Many coyotes will stand still under light for several seconds, giving you time to aim carefully. If you’re using a handheld light, practice your shooting position beforehand so you know exactly how you’ll manage both the light and rifle when the moment comes.
For gun-mounted lights, zero your light beam to match your rifle’s point of impact at a specific distance—typically 100 yards. This ensures that when you’re aimed on target, your light is illuminating exactly where you’re shooting. Some hunters prefer to have their light positioned slightly to the side rather than directly above or below the bore, which can reduce shadows and give better definition. Remote switch placement is also critical. Position the switch where you can activate it naturally without breaking your shooting grip or having to shift your hand position. Practice dry runs in daylight until light activation becomes second nature.
The battery debate in hunting lights mirrors the same discussion in the flashlight world, but hunting adds specific considerations. Rechargeable lithium-ion batteries offer the best performance per weight, highest capacity, and lowest long-term cost. Modern Li-ion cells deliver consistent brightness throughout their discharge cycle and can be recharged hundreds of times. If you hunt from a base camp or vehicle where you can charge between outings, rechargeable systems make tremendous sense. They’re also better for the environment since you’re not constantly discarding disposable batteries.
However, rechargeable systems require planning and infrastructure. If you’re on an extended hunting trip far from power sources, or if you simply forget to charge your batteries between hunts, you’re stuck. This is where replaceable batteries shine—you can carry spares and swap them in seconds. CR123A lithium batteries are popular in hunting lights because they offer excellent cold-weather performance and long shelf life. They’re more expensive per use than rechargeables, but the reliability and convenience matter when you’re miles from civilization. AA batteries are even more accessible since you can buy them almost anywhere, though they generally don’t perform as well as CR123s in terms of output and cold tolerance.
Some of the best hunting lights offer hybrid systems that accept both rechargeable and disposable batteries. This flexibility means you can use rechargeables for regular hunting and keep disposable batteries as backup or for extended trips. Whatever system you choose, always carry spare batteries or a backup light. Murphy’s Law applies doubly to hunting equipment—lights fail when you need them most, usually right when a coyote is coming in. Smart hunters carry redundancy.
For the mobile hunter who covers lots of ground and sets up frequently, a combination of a good headlamp and a gun-mounted light delivers the best results. Use the headlamp for navigation, setting up equipment, and general tasks, then switch to the gun-mounted light when you’re actively calling and scanning. This setup keeps your hands free for carrying gear, using electronic or hand calls, and managing your rifle. Look for gun-mounted lights in the 600-800 lumen range with both red and green LED options, and choose headlamps with similar color choices plus white for camp tasks.
Static hunters who set up in blinds or use the same stands repeatedly often prefer the power and flexibility of handheld spotlights. These hunters can set up shooting sticks or rests, position their spotlight on a tripod or mount, and create a more controlled shooting environment. In this setup, maximum beam distance becomes more important since you’re covering the same territory repeatedly and might be working longer sight lines. Spotlights in the 1000+ lumen range with focused beams excel here. Having a hunting partner who handles the spotlight while you focus on shooting dramatically increases success rates in this scenario.
For those hunting in pressured areas where coyotes are educated and extremely wary, stealth matters more than raw power. Red lights in the 400-600 lumen range, used sparingly and strategically, work better than blasting high-powered beams across the landscape. These situations call for gun-mounted lights with excellent beam quality that delivers maximum effective illumination with minimum actual light output. Quality optics and LED selection matter more than raw lumens. Some specialized predator hunting lights are specifically designed for this application, with carefully tuned beam patterns that balance distance and discretion.
Remote pressure switches transform gun-mounted lights from awkward to essential. The switch lets you control your light without breaking your shooting grip or moving your hand. Quality matters enormously here—cheap switches fail regularly, often at the worst possible moment. Look for switches with coiled cords that stay out of the way, durable construction, and positive on/off feedback. Some advanced systems offer multiple activation modes (momentary, constant-on, and strobe) controlled through different press patterns.
Color filters or interchangeable lenses expand a single light’s versatility without requiring multiple complete lights. Many lights come with flip-up filters or screw-on lens covers in red, green, and sometimes amber. This lets you switch colors based on conditions, animal behavior, or personal preference. Some hunters carry multiple filters even if their light has built-in color options, since filters can add another layer of light control and beam modification. Diffusion filters that soften hard beam edges are also worth considering for close-range work.
Mounting solutions beyond basic scope rail mounts include barrel clamps, adjustable offset mounts, and magnetic mounts. Offset mounts position your light to the side of your scope, which some hunters prefer for reducing shadows and improving beam angle. Adjustable mounts let you fine-tune your light position without permanent modification to your rifle. Quick-detach systems are valuable if you use the same light on multiple rifles or if you want to remove the light for other uses. Quality mounts are rigid, hold zero, and survive recoil without loosening.
Before you invest in any night hunting equipment, thoroughly research your local regulations. Night hunting laws vary dramatically by state and even by county. Some states prohibit all night hunting, others allow it only for specific species with permits, and some have wide-open seasons for predators. Artificial light regulations can be particularly complex—some jurisdictions allow lights attached to firearms but prohibit handheld spotlights, or vice versa. Some areas restrict certain light colors or brightness levels. Ignorance isn’t a defense, so do your homework before heading out.
Ethical considerations extend beyond legal requirements. Night hunting demands absolute certainty in target identification because visibility is inherently limited. Using adequate lighting is actually an ethical requirement—you need enough light to be completely certain of your target species, to assess whether it’s a legal animal, and to make an accurate, humane shot. This is why many ethical hunters prefer white lights for the final moment before shooting, even if they use colored lights for scanning. Target identification errors are inexcusable and can have serious legal and ecological consequences.
Landowner relations also factor into night hunting ethics. Even in states where night hunting is legal, be considerate of neighbors and other landowners who might be disturbed by lights sweeping across their property or shots in the night. Communicate with adjacent landowners, stay well within your permission boundaries, and hunt responsibly. Building positive relationships with landowners and neighbors ensures continued access and helps maintain the reputation of the hunting community.
Proper care extends the life of your hunting lights and ensures they work when you need them. After each hunt, inspect your light for damage, clean off any mud or debris, and check that all O-rings and seals are intact. Even waterproof lights can fail if seals are compromised. Dry off your light thoroughly if it got wet, and store it with battery contacts clean and corrosion-free. Many hunters remove batteries during extended storage periods to prevent corrosion from battery leakage, though this is less of an issue with quality lithium cells.
For rechargeable lights, follow proper charging protocols. Lithium-ion batteries perform best when kept between 20-80% charge for storage. Fully discharging them regularly or keeping them at 100% charge for extended periods reduces overall lifespan. Most quality hunting lights have built-in charging protection, but it still pays to unplug them once charged rather than leaving them on the charger indefinitely. Keep spare O-rings and know how to disassemble and maintain your light’s waterproof seals. A small amount of silicone grease on O-rings maintains their flexibility and sealing performance.
Lens care often gets overlooked but matters significantly for beam quality. Scratched or dirty lenses scatter light, reduce effective distance, and create glare. Use proper lens cleaning solutions and soft cloths, never abrasive materials or harsh chemicals. Some hunters apply lens protectors or protective films to expensive lights, though these can slightly affect beam quality. Store your lights in padded cases or dedicated compartments rather than loose in a gear bag where they can get scratched or damaged. With proper care, a quality hunting light will provide years of reliable service.
What’s the best color light for coyote hunting at night? Red lights remain the most popular choice because coyotes are less sensitive to red wavelengths, making them harder to spook. However, green lights offer better visibility for human eyes and work well in many situations. Many experienced hunters carry both colors or use lights with multiple color options to adapt to different scenarios.
How many lumens do I need for night coyote hunting? Most hunters find that 500-800 lumens provides the sweet spot for colored lights (red or green), giving enough brightness to identify targets at 200-400 yards without excessive glare. White lights can go higher, up to 1000-1200 lumens, since they’re typically used briefly for final shot confirmation.
Should I use a gun-mounted light or handheld spotlight for coyotes? Gun-mounted lights are generally more effective for solo hunters because they keep your hands free and ensure your light always points where your rifle aims. Handheld spotlights work great if you’re hunting with a partner or if you need maximum beam distance for scanning large areas.
Will a bright hunting light scare away coyotes? It depends on the light color, brightness, and how you use it. Red lights used intermittently tend to spook coyotes less than constant white light. Sudden movements with your light beam alarm coyotes more than steady illumination. In heavily hunted areas, coyotes may be conditioned to avoid lights regardless of color.
Do I need special lights for thermal scope use at night? If you’re using thermal optics like those from Pixfra, you don’t need traditional hunting lights for target detection since thermal imaging works independently of visible light. However, many hunters still carry lights for navigation, safety, and confirming targets before shooting.
Thermal imaging technology has changed how we see the world around us. If you’ve ever wondered how firefighters find people in smoke-filled buildings or how electricians spot overheating wires without touching them, the answer is thermal cameras. These devices let us see heat instead of light, opening up a whole new way to detect problems, stay safe, and make smarter decisions across countless industries.
Whether you’re thinking about buying your first thermal camera, curious about how the technology works, or looking to expand your knowledge, this guide breaks down everything you need to know. We’ll walk through the science behind thermal imaging, the different types of cameras available, real-world uses, and practical tips for choosing the right equipment. If you’re interested in professional hunting applications, we’ve got you covered there too. Let’s get started and see what thermal imaging can do for you.
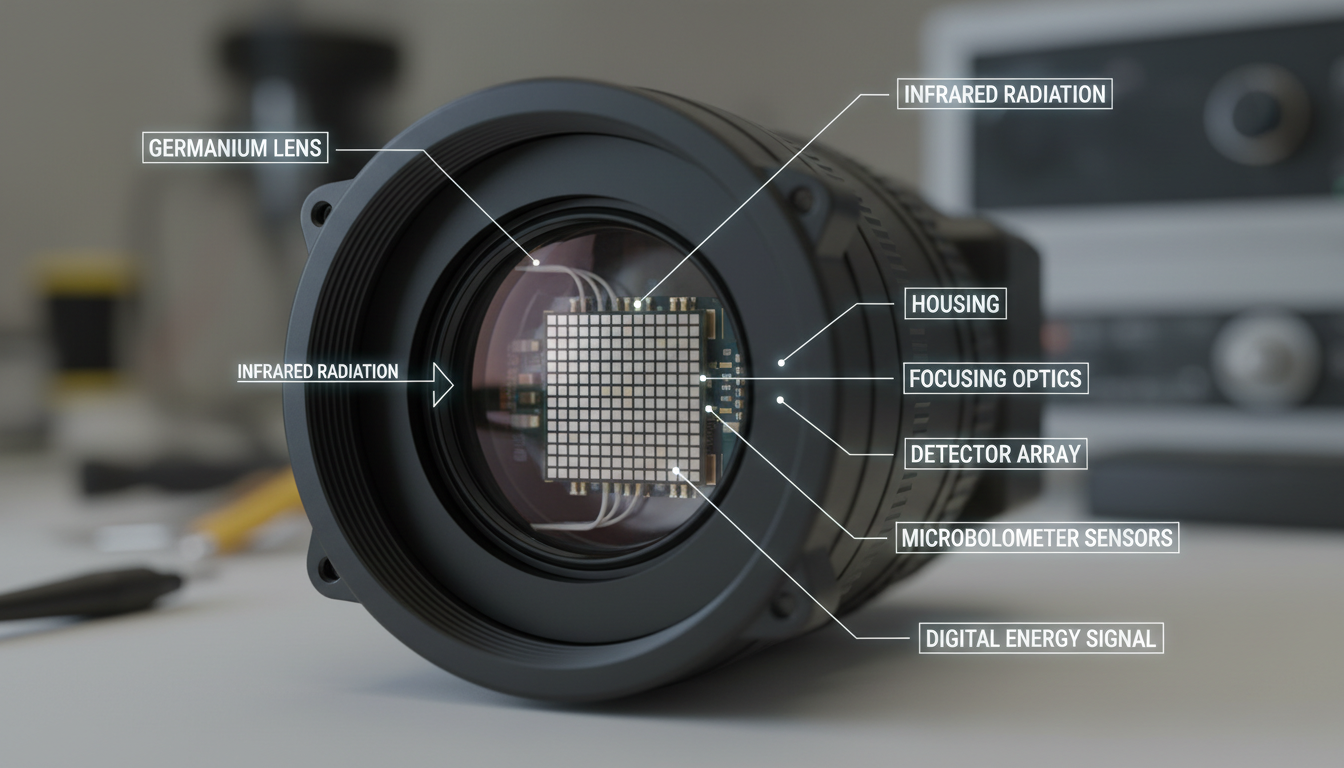
Thermal imaging, also known as thermography, is the process of capturing and analyzing the heat emitted by objects. Think of it as a way to see temperature differences instead of colors or shapes. Every object with a temperature above absolute zero (-273.15°C or -459.67°F) emits infrared radiation, which is invisible to the human eye. That’s where thermal cameras come in.
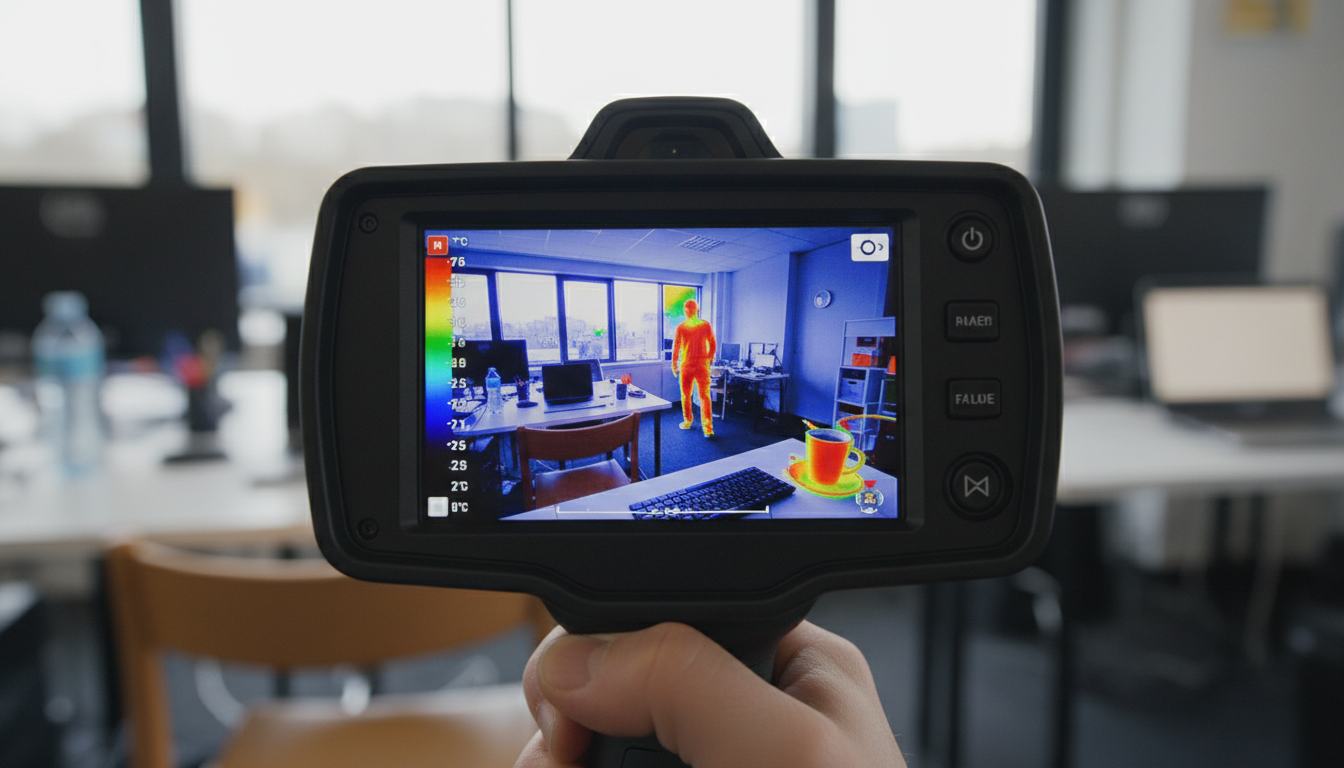
Thermal cameras detect this radiation and convert it into an image where different colors represent temperature variations. Typically, warmer areas show up in red or white, while cooler spots appear blue or purple. This color-coding makes it super easy to spot hot or cold areas at a glance. Unlike regular cameras that need light to work, thermal cameras can see in total darkness because they’re reading heat, not light. That’s why they’re so valuable for nighttime operations, search and rescue missions, and any situation where visibility is limited.
The key difference: Regular cameras capture visible light bouncing off objects. Thermal cameras capture infrared energy radiating from objects. This means a thermal camera can show you what’s hot or cold even when there’s no light at all.
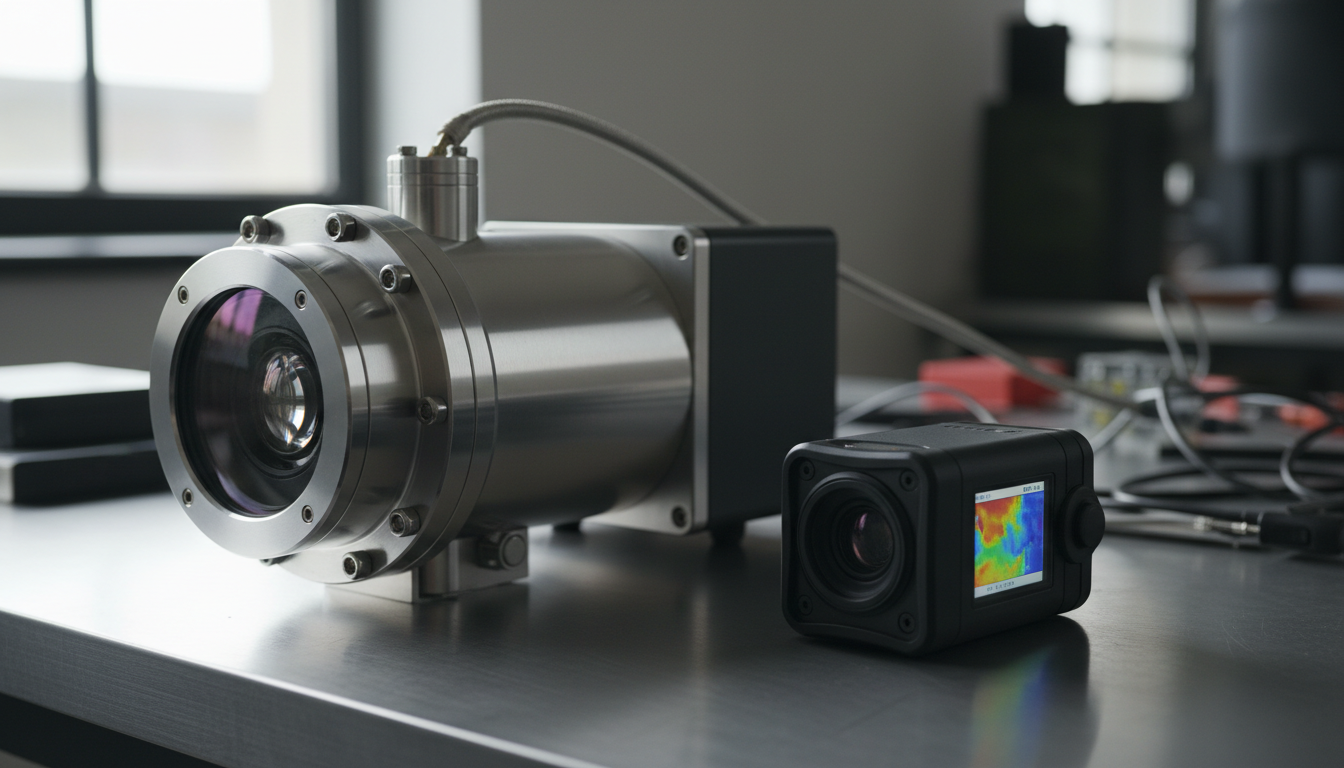
A thermal camera is made up of a lens, a thermal sensor, processing electronics, and a mechanical housing. Here’s how these parts work together to create those colorful heat maps you see:
The lens focuses infrared energy onto the sensor. This isn’t a regular glass lens like you’d find on a smartphone camera – it’s specially designed to let infrared wavelengths pass through. Once the heat hits the sensor, something interesting happens.
A bolometer is a simple sensor that absorbs thermal radiation and changes resistance as a result. This change in resistance can be electrically measured, and the incident radiation can be determined. Modern thermal cameras use thousands of these tiny sensors arranged in an array called a microbolometer. When infrared radiation reaches the microbolometer, each tiny sensor absorbs the energy and experiences a slight temperature increase.
The processing electronics then convert these resistance changes into electrical signals. These temperature readings are transformed into a colored image. A thermal camera typically displays warmer regions in tones such as red or yellow, while cooler surfaces take on colors like blue or green. All of this happens in real-time, so you’re seeing live heat patterns as they change.
The sensor can come in a variety of pixel configurations from 80 × 60 to 1280 × 1024 pixels or more. This is the resolution of the camera. These resolutions are low in comparison to visible light imagers because thermal detectors need to sense energy that has much larger wavelengths than visible light.
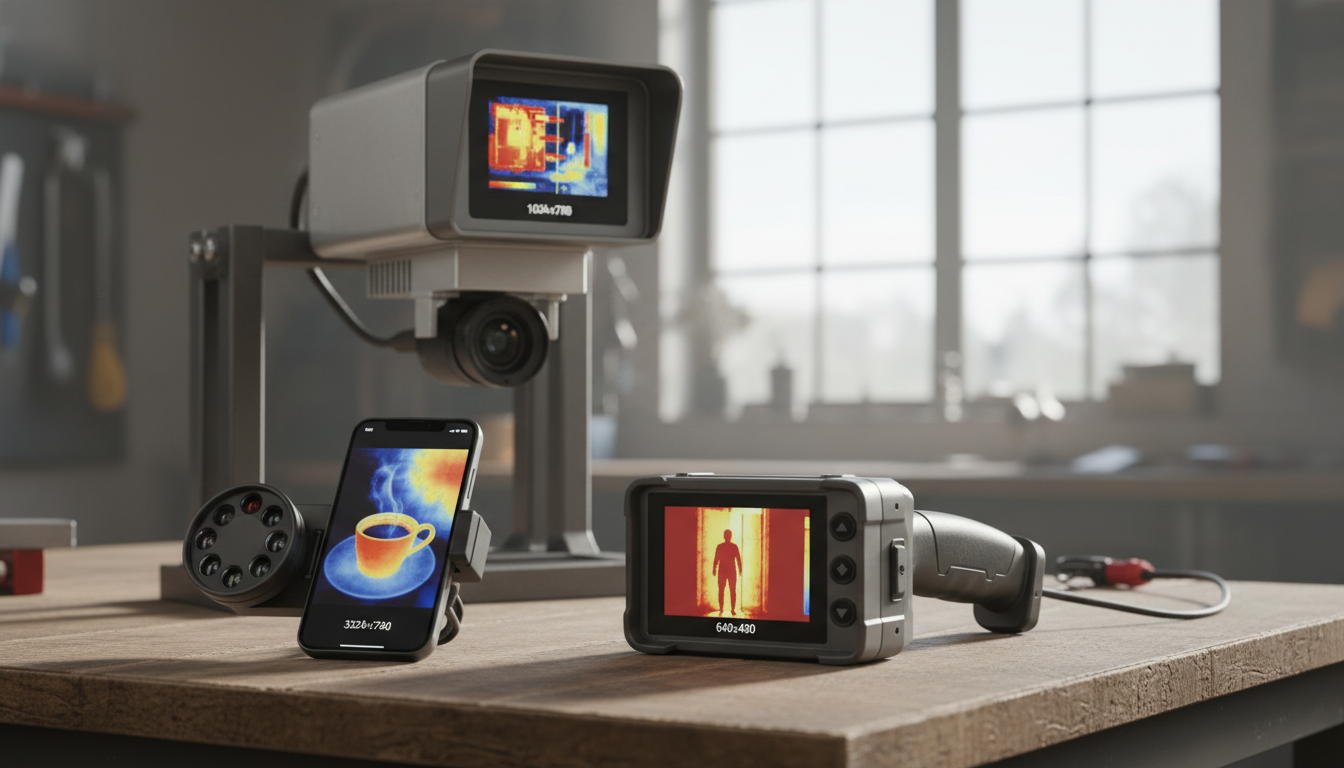
Not all thermal cameras are built the same. They fall into different categories based on how their sensors operate. Let’s break down the main types you’ll come across.
Cooled cameras have a cooling mechanism within the sensor to improve sensitivity. They are typically more expensive and used in high-precision tasks like military surveillance or medical diagnostics. They operate with sensors that are cryogenically cooled, usually within a vacuum-sealed case. This cooling process improves their sensitivity, allowing them to detect even the tiniest temperature differences.
Cooled detectors can sense temperature variations as small as 0.02°C. This level of precision makes them perfect for scientific research, military operations, and other specialized applications where every degree matters. The downside? They’re pricey, complex, and need time to cool down before they’re ready to use.
Uncooled thermal cameras use uncooled infrared sensors. They are common, cost-effective, and suitable for many applications such as building inspections and preventive maintenance. These cameras operate at room temperature, so they don’t need bulky cooling systems.
Uncooled thermal imaging cameras are more common and affordable. They operate at ambient temperature, without the need for complex cooling systems. These cameras are designed to detect temperature differences as small as 0.2°C. While they’re not quite as sensitive as cooled cameras, they’re more than good enough for most everyday uses – from home inspections to industrial maintenance to security work.
The big advantage here is simplicity. Uncooled cameras are lighter, more reliable, and way more budget-friendly. They’re the go-to choice for most commercial and consumer applications. If you’re browsing options at Pixfra, you’ll find plenty of uncooled models that deliver excellent performance without breaking the bank.
Focal plane arrays (FPAs) form the heart of both cooled and uncooled thermal cameras. Think of the FPA as the “film” in a thermal camera – it’s the grid of sensors that captures the heat image. Higher-quality FPAs have more pixels packed into the same space, which means sharper, more detailed images. Whether you’re looking at a cooled or uncooled camera, the FPA quality matters a lot for overall performance.
When you’re shopping for a thermal camera, the spec sheet can look like alphabet soup. Here are the most important numbers to pay attention to:
Thermal or infrared resolution indicates the detail captured by the thermal detector. For example, ‘160 x 120’ means the thermal camera has an array of 160 x 120 sensors or pixels that create its baseline thermal image. A higher thermal resolution provides more clarity, so more is better.
The standard resolutions are 160 x 120, 320 x 240 and 640 x 480 pixels. A 160 x 120 resolution will have 19,200 pixels while a 640 x 480 resolution will have 307,200 pixels. That’s a huge difference in image detail. Higher resolution lets you see smaller objects more clearly and work from farther away.
Thermal sensitivity defines the minimum temperature difference an infrared camera can detect. It is also called the Noise Equivalent Temperature Difference (NETD). The lower the number, the more sensitive the detector. Thermal sensitivity describes the smallest temperature difference observed when using a thermal device.
Most consumer cameras have NETD values around 40-100 mK (milliKelvins). High-performance models can go as low as 20 mK or even 10 mK. If you’re hunting for tiny temperature differences – like finding moisture behind walls or spotting early equipment failures – you’ll want a camera with better (lower) NETD.
According to the temperature ranges we want to measure, the most commonly used industrial thermal cameras are of the following: LWIR for “low” temperature measurements between -50°C and 900°C, NIR-SWIR for high temperature measurements (450°C to 2450°C), and MWIR for measuring low and intermediate temperatures with high precision.
For most home and general industrial use, a range of -20°C to 400°C will cover your needs. Specialized applications might need cameras that can handle much higher (or lower) temperatures.
The field of view (FOV) determines how wide an area your camera can see. A wider FOV is great for scanning large spaces, while a narrower FOV (telephoto lens) helps you zoom in on distant targets. Some advanced thermal cameras offer interchangeable lenses, giving you flexibility for different situations.
Thermal imaging isn’t just for one industry – it’s everywhere. Here are some of the most popular ways people put thermal cameras to work:
In construction, thermal cameras detect heat loss, moisture issues, and insulation problems in buildings, promoting energy efficiency and safety. You can spot drafts around windows, missing insulation in walls, and even hidden water leaks before they cause serious damage. Home inspectors and energy auditors rely on thermal cameras to give homeowners a clear picture of where their heating and cooling dollars are escaping.
Thermal imaging identifies overheating circuits or equipment that could lead to failures, allowing for proactive maintenance. An overheating electrical connection shows up bright on a thermal camera, giving electricians an early warning before things catch fire or fail completely. This predictive maintenance approach saves companies tons of money and prevents dangerous situations.
Thermal cameras aid firefighters and search & rescue teams in locating hotspots, victims, and hidden hazards in smoke-filled environments, enhancing safety and efficiency during emergency operations. When visibility drops to zero in a burning building, thermal cameras become a firefighter’s best friend. They can see through smoke to find people who need rescue and identify where the fire is burning hottest.
Thermal cameras are integrated into security systems for perimeter monitoring, intruder detection, and surveillance in low-light or adverse weather conditions. Unlike regular security cameras that need light or infrared illuminators, thermal cameras work in complete darkness, through fog, and even light rain. They can spot intruders from far away based on their heat signature.
Industrial plants use thermal cameras to monitor machinery, inspect manufacturing processes, and catch overheating components before damage occurs. From production lines to power plants, thermal cameras help keep operations running smoothly by identifying problems early.
Thermal technology has become hugely popular among hunters and outdoor enthusiasts. Thermal monoculars and scopes let you spot game in total darkness or thick brush. For a deep dive into this application, check out our guide on thermal monoculars for hunting oppure esplora il Sirius HD model.
In the medical field, thermal cameras are utilized for diagnostic purposes, detecting abnormalities in blood flow, inflammation, and tissue temperature. Doctors use thermal imaging to spot inflammation, monitor circulation, and even identify potential tumors based on temperature differences in body tissue.
Picking the right thermal camera depends on what you’re trying to do with it. Here’s a practical approach:
1. Define Your Use Case: Are you inspecting buildings? Monitoring electrical panels? Hunting? Each application has different requirements for resolution, temperature range, and features.
2. Set Your Budget: Thermal cameras range from a few hundred dollars for smartphone attachments to tens of thousands for high-end professional models. Know what you can spend before you start shopping.
3. Consider Resolution Needs: The higher the resolution of the detector, the sharper and more accurate each individual point in the image will be. Higher resolution infrared cameras can measure smaller targets at a greater distance. If you need to see fine details or work from a distance, invest in higher resolution.
4. Check Thermal Sensitivity: For applications that need to detect subtle temperature differences – like finding moisture or spotting early equipment wear – look for cameras with NETD values of 50 mK or better.
5. Verify Temperature Range: Make sure the camera can measure the temperatures you care about. Building inspections typically need -20°C to 150°C, while industrial monitoring might need much higher ranges.
6. Look for Useful Features: Modern thermal cameras often include extras like built-in digital cameras for context photos, WiFi connectivity for sharing images, picture-in-picture modes, and software for analysis. Decide which features actually add value for your work.
7. Think About Form Factor: Handheld cameras are great for walk-around inspections. Fixed-mount cameras work better for continuous monitoring. Smartphone attachments offer portability and affordability for casual use.
Once you have a thermal camera, here are some tips to get accurate, useful images:
Understand Emissivity: Different materials emit infrared radiation differently. Most thermal cameras let you adjust the emissivity setting to match what you’re measuring. Shiny metal surfaces have low emissivity and can be tricky – they reflect heat from other sources rather than showing their true temperature.
Watch for Reflections: Shiny surfaces can reflect heat from other objects, giving false readings. Be aware of this when interpreting your images.
Consider Environmental Factors: Wind, rain, and ambient temperature can all affect your readings. Try to measure in stable conditions when possible.
Get the Right Distance: Each camera has an optimal distance range. Too close or too far, and you might not get accurate measurements.
Use Context Images: Many thermal cameras can capture both thermal and visible light photos. These context images make it much easier to understand what you’re looking at and to communicate findings to others.
Can thermal cameras see through walls?
Contrary to popular belief, infrared cameras cannot see through walls or other solid objects. They can only measure the heat emitted by the scene being observed. A thermal image of a wall will show the flow of heat through the wall if there is a heat source behind it, but it cannot “see” the heat source itself. Thermal cameras detect surface temperatures, so they can reveal patterns that suggest what’s behind a wall (like a hot pipe), but they can’t actually see through solid objects.
Qual è la differenza tra la termografia e la visione notturna?
Regular cameras and the human eye both work on the same basic principle: visible light energy hits something, bounces off it, a detector receives the reflected light, and then turns it into an image. Thermal imagers make pictures from heat, not visible light. Heat and light are both parts of the electromagnetic spectrum, but a camera that can detect visible light won’t see thermal energy, and vice versa. Night vision amplifies available light to help you see in the dark. Thermal imaging detects heat and works even in total darkness.
How much does a good thermal camera cost?
Prices vary widely based on specifications and intended use. Entry-level smartphone attachments start around $200-400. Quality handheld cameras for home inspection and general use run $500-2,000. Professional-grade models for industrial or scientific applications can cost $5,000-$50,000 or more. For most DIY and professional trades applications, cameras in the $800-1,500 range offer excellent value.
Do thermal cameras work in daylight?
Yes! Because a thermal camera reads heat instead of visible light, it can reveal crucial information even in darkness or visually obstructed settings. Thermal cameras detect infrared radiation, which is always present regardless of lighting conditions. They work equally well day or night.
What resolution thermal camera do I need?
The two major factors that you should keep in mind when buying a thermal imager are Detector Resolution and Thermal Sensitivity. For basic home inspections and casual use, 160×120 resolution is adequate. For professional building inspection, electrical work, or industrial applications, 320×240 offers a good balance of detail and cost. High-end applications requiring precise measurements at distance should consider 640×480 or higher. Remember that more pixels mean more detail, which translates to better decisions and more accurate measurements.
Tutti noi amiamo l’emozione di avvistare gli animali selvatici nel loro habitat naturale. Che si tratti di intravedere un cervo che pascola in un prato o di osservare gli uccelli mentre costruiscono i loro nidi, l’osservazione della fauna selvatica ci mette in contatto con la natura come poche altre attività riescono a fare. Ma c’è un aspetto da tenere presente: avvicinarsi troppo o compiere movimenti sbagliati può stressare gli animali, interferire con il loro comportamento naturale e persino mettervi in pericolo.
Ecco perché abbiamo redatto questa guida per aiutarti a osservare la fauna selvatica nel modo giusto. Ti illustreremo le migliori pratiche collaudate che garantiscono la sicurezza sia tua che degli animali, così potrai goderti questi momenti straordinari senza causare alcun danno. Se ti interessa osservare la fauna selvatica di notte, dai un’occhiata alla nostra guida su Caccia alla volpe notturna: comportamento e tecniche per consigli più specifici.
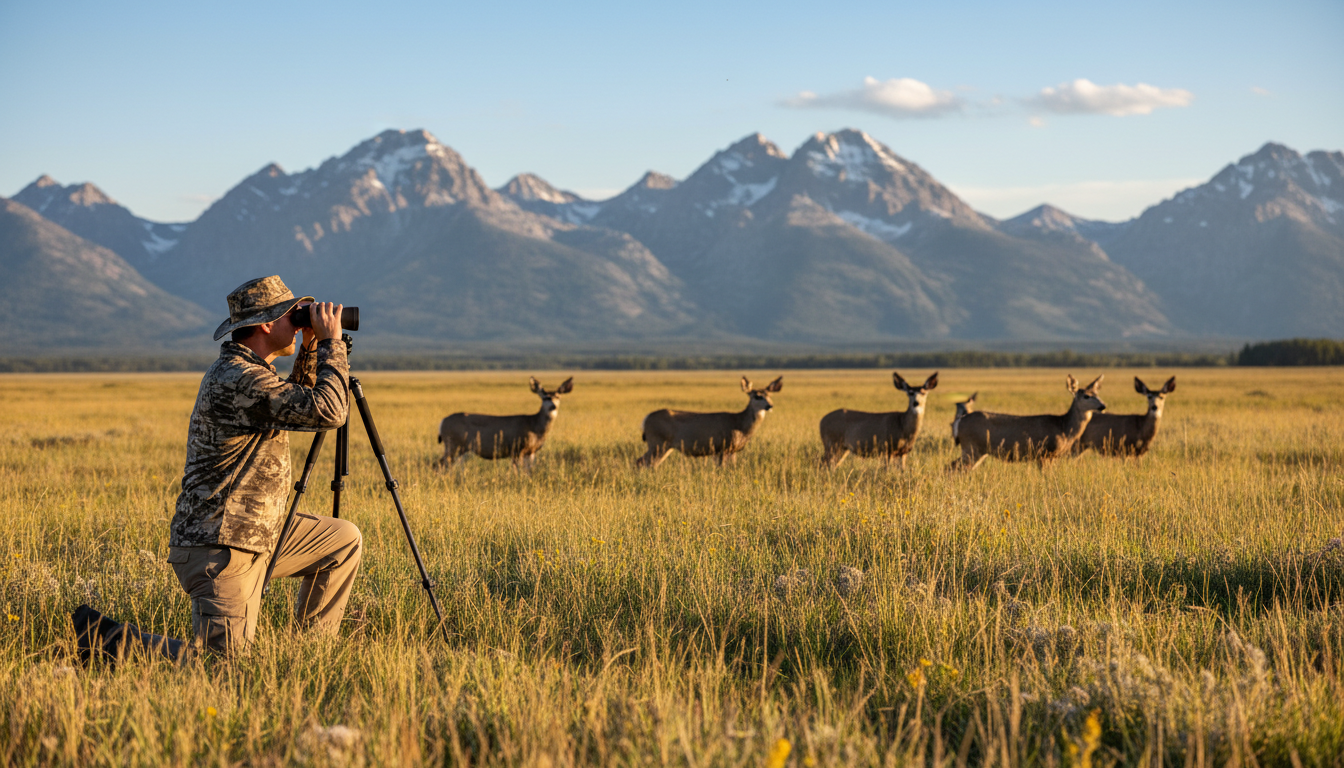
Molti parchi richiedono di mantenere una distanza minima di 25 iarde dalla maggior parte degli animali selvatici e di 100 iarde dai predatori come orsi e lupi. Si tratta all’incirca della lunghezza di due autobus per gli animali più piccoli e di un intero campo da football per i grandi predatori. Se riesci a scattare un selfie con un animale senza zoomare, sei decisamente troppo vicino.
Utilizzate binocoli, cannocchiali o fotocamere con obiettivi zoom per ottenere una visione migliore senza invadere lo spazio degli animali. Binocoli e teleobiettivi sono strumenti essenziali per mantenere la distanza fisica e consentono di osservare la fauna selvatica con discrezione, offrendo al contempo uno sguardo molto più appagante sul comportamento naturale degli animali. Quando gli animali non si accorgono di essere osservati, si comportano in modo naturale: ed è proprio in quei momenti che si vedono le cose davvero interessanti.
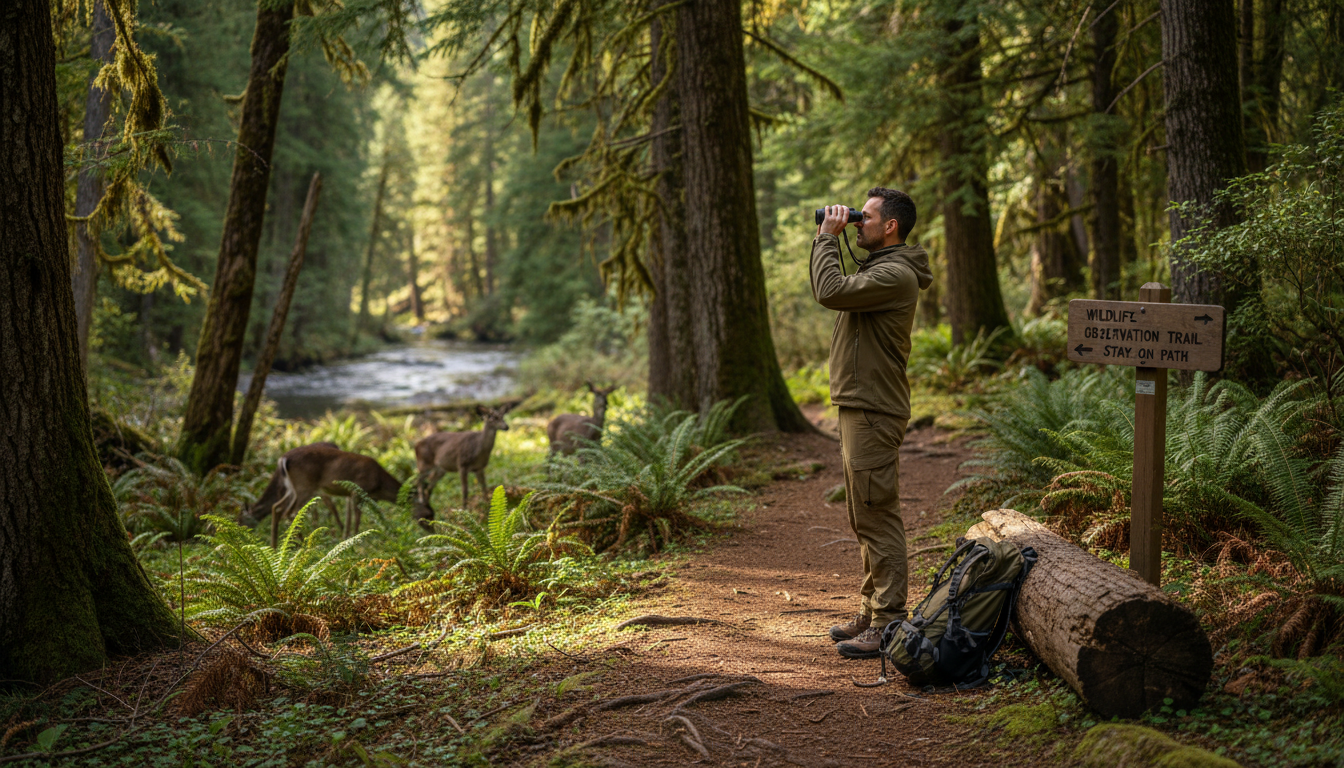
In poche parole, lasciate in pace gli animali: non toccateli, non date loro da mangiare e non infastiditeli. Sembra ovvio, ma rimarreste sorpresi nel sapere quante persone dimenticano questa regola fondamentale. È illegale dare da mangiare, toccare, stuzzicare, spaventare o disturbare intenzionalmente la fauna selvatica.
Dare da mangiare agli animali selvatici può sembrare innocuo o addirittura un gesto gentile, ma crea gravi problemi. Dar loro da mangiare nei parchi può indurli a tornare in cerca di altro cibo e, una volta che hanno imparato che le persone sono una fonte di cibo, gli animali selvatici possono diventare aggressivi nei loro confronti. Gli animali che si abituano al cibo umano perdono le loro naturali capacità di procurarsi il cibo e possono finire per dipendere dalle elargizioni. Peggio ancora, potrebbero avvicinarsi alle strade o alle zone popolate in cerca di cibo, il che spesso finisce male.
Il silenzio è fondamentale, sia che ci si muova sia che ci si limiti a osservare; gridare per attirare l’attenzione di un animale, imitare il canto degli uccelli per attirarne uno o riprodurre il verso di un animale non è consentito. L'uso di app che riproducono versi di animali o uccelli è considerato una forma di molestia ed è addirittura illegale in molti luoghi. Può indurre gli uccelli ad abbandonare i nidi, lasciando i loro piccoli in balia dei predatori, oppure costringere gli animali a sprecare energie preziose rispondendo a richiami falsi.
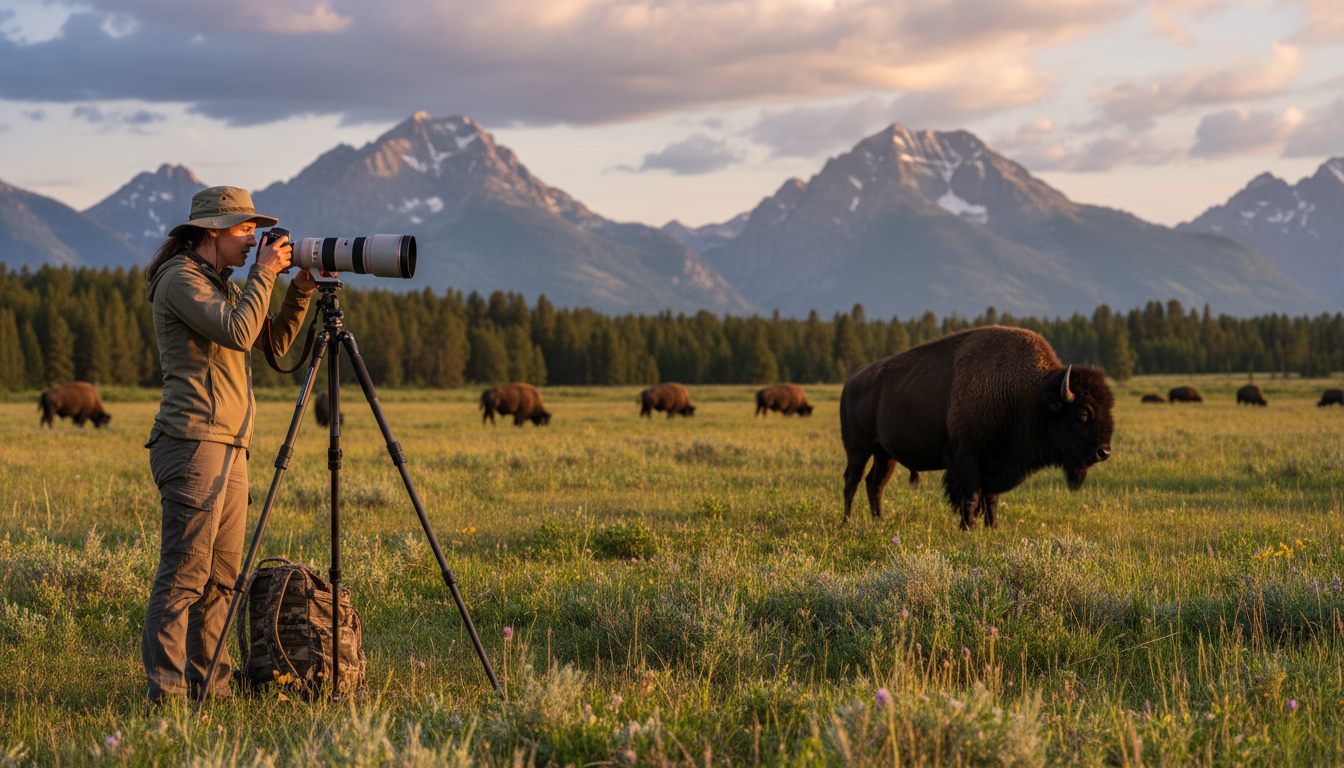
Rimanete sui sentieri per contribuire a mantenere la presenza umana in aree ben definite e, se i cani sono ammessi, teneteli al guinzaglio. Allontanarsi dai sentieri può sembrare un’avventura, ma può danneggiare habitat delicati e disturbare siti di nidificazione o tane che potreste nemmeno notare.
Rimanere sui sentieri segnalati contribuisce a proteggere la vegetazione che offre cibo e riparo a innumerevoli specie. Rimanendo sui sentieri segnalati, si riduce inoltre il rischio di disturbare gli habitat degli animali che si sta cercando di osservare; inoltre, questi sentieri contribuiscono a garantire la sicurezza dei visitatori e impediscono loro di calpestare accidentalmente piante delicate.
Se fate un'escursione in una zona in cui sono ammessi gli animali domestici, teneteli sempre al guinzaglio. Gli animali selvatici vedono i cani come predatori, il che può causare loro stress inutile o scatenare comportamenti difensivi. Inoltre, gli animali domestici possono trasmettere malattie alla fauna selvatica o contrarre essi stessi dei parassiti.
I rifiuti, e persino le briciole lasciate sui tavoli da picnic, possono attirare gli animali; inoltre, dare da mangiare alla fauna selvatica nei parchi può indurla a tornare in cerca di altro cibo. Per un animale, tutto ciò che odora di cibo è cibo. Ciò significa conservare correttamente gli snack e portare via ogni minimo residuo di rifiuti che si porta con sé.
Dare da mangiare agli animali selvatici espone voi al rischio di ferite e gli animali stessi al rischio di essere catturati e soppressi in modo umano dai responsabili della gestione della fauna selvatica: non siate responsabili della morte di animali selvatici! Utilizza contenitori a prova di orso dove richiesto e assicurati che i bidoni della spazzatura siano ben chiusi. Un campeggio o un’area picnic pulita non è solo una questione di buona educazione; è una questione di vita o di morte per alcuni animali.
Il principio del “non lasciare tracce” si applica a tutte le attività ricreative all’aperto. Tutto ciò che porti con te deve essere riportato indietro: involucri, bottiglie, avanzi di cibo, tutto. Gettare rifiuti rovina la bellezza della natura e rappresenta una vera minaccia per la fauna selvatica, che potrebbe mangiare i tuoi rifiuti o rimanervi impigliata.
Gli incidenti stradali rappresentano una delle cause più letali per la fauna selvatica nei parchi, poiché le strade attraversano i loro habitat o le loro rotte migratorie. Quando si guida in aree frequentate dalla fauna selvatica, è importante rallentare e prestare la massima attenzione. Gli animali possono sbucare improvvisamente sulla strada senza preavviso, specialmente all’alba e al tramonto, quando molte specie sono più attive.
Quando desideri fermarti per osservare la fauna selvatica, sposta completamente il veicolo fuori dalla carreggiata in un’area di sosta apposita: in questo modo garantisci la sicurezza sia degli animali che degli altri automobilisti. Non frenare bruscamente in mezzo alla strada. Trova un’area di sosta adeguata, parcheggia in sicurezza e poi goditi l’osservazione da lì.
Rispettare i limiti di velocità indicati ti consente di avere più tempo per reagire nel caso in cui compaia un animale. Inoltre, riduce la gravità di eventuali collisioni. Ricorda: stai guidando nel loro habitat naturale e loro hanno la precedenza.
Segnalate a un ranger se entrate in contatto fisico con animali selvatici e segnalate anche se vedete animali selvatici malati, morti o che si comportano in modo strano, compresi quelli che si avvicinano a voi. Segnalare questi episodi aiuta i responsabili del parco a monitorare i focolai di malattie, a osservare il comportamento degli animali e a garantire la sicurezza degli altri visitatori.
La cosa migliore che potete fare per aiutare in queste situazioni è mantenere le distanze e lasciare che se ne occupino gli esperti, poiché gli animali selvatici malati o morti potrebbero trasmettere malattie a voi o ai vostri animali domestici. Non cercate di soccorrere o toccare voi stessi gli animali malati. I professionisti che si occupano di fauna selvatica dispongono della formazione e dell’attrezzatura necessarie per gestire correttamente queste situazioni.
Se notate altri visitatori che infrangono le regole relative all’osservazione della fauna selvatica — avvicinandosi troppo, dando da mangiare agli animali o disturbandoli — intervenite con cortesia o segnalate l’accaduto al personale del parco. Tutti noi abbiamo un ruolo da svolgere nella protezione di questi animali e dei loro habitat.
Disporre dell'attrezzatura adeguata rende l'esperienza di osservazione della fauna selvatica più piacevole e sicura. Il binocolo è perfetto per osservare uccelli e animali di piccole dimensioni senza disturbarli. Scegli modelli con un buon ingrandimento e un ampio campo visivo, in modo da poter individuare rapidamente gli animali e seguirne facilmente i movimenti.
Per gli animali più grandi che si trovano a grandi distanze, un cannocchiale da osservazione fa miracoli. Si tratta fondamentalmente di un piccolo telescopio che permette di vedere dettagli e colori anche da lontano. Un cannocchiale da osservazione di qualità può trasformare un puntino in lontananza in un’immagine nitida di un alce o di un cervo che va avanti con la sua giornata.
Evita di usare il flash, poiché può spaventare gli animali e alterarne il comportamento naturale. Il flash può spaventare gli animali, causando loro stress e potenzialmente alterando i loro comportamenti naturali: cerca invece di armarti di pazienza e attendi la luce perfetta per immortalare il soggetto in modo naturale. La fotografia con luce naturale richiede maggiore pazienza, ma i risultati ne valgono la pena e non causi stress alla fauna selvatica.
Non portate con voi torce a fascio concentrato, puntatori laser o dispositivi che riproducono versi di animali. Questi oggetti possono disorientare gli animali, indurli ad abbandonare i nidi o scatenare reazioni difensive. Se desiderate documentare i vostri avvistamenti, prendete in considerazione l’uso di app come iNaturalist, che vi consentono di contribuire a progetti di citizen science.
Quando si osserva la fauna selvatica, le proprie azioni non dovrebbero mai provocare un cambiamento nel comportamento degli animali, poiché l’agitazione e la fuga sono segni universali di disturbo per la fauna selvatica. Imparare a interpretare il linguaggio del corpo degli animali aiuta a capire quando è necessario allontanarsi.
Per avere maggiori possibilità di osservare alcuni comportamenti naturali straordinari, evitate di stressare o minacciare gli animali mantenendovi alla distanza consigliata; se un animale inizia a fissarvi, a mostrarsi irrequieto o a fuggire, allontanatevi con calma e concedetegli più spazio. Se un cervo smette di mangiare e ti fissa, o se un uccello continua a lanciare sguardi nella tua direzione invece di occuparsi del proprio nido, significa che sei troppo vicino.
Alcuni animali, quando si sentono minacciati, rimangono immobili invece di scappare. Il fatto che un animale non si muova non significa che sia a proprio agio con la tua presenza. Presta attenzione alla posizione delle orecchie, alla tensione del corpo e ai versi che emette. Se un animale sembra consapevole della tua presenza, allontinati lentamente e con calma.
Le diverse specie manifestano lo stress in modi diversi. Gli uccelli potrebbero alzarsi in volo dai nidi, i mammiferi marini potrebbero immergersi ripetutamente, mentre i grandi mammiferi come gli orsi o le alci potrebbero abbassare la testa o scalciare il terreno. Informati bene prima di partire, in modo da sapere quali segnali di allarme tenere d’occhio nelle specie che speri di avvistare.
Prima di partire per un'escursione alla scoperta della fauna selvatica, informati sulla zona che intendi visitare. Informati sulle normative locali, sui permessi necessari e sulle chiusure stagionali. Alcune aree limitano l'accesso durante la stagione della nidificazione o in altri periodi delicati per proteggere la fauna selvatica.
L’osservazione della fauna selvatica e la fotografia naturalistica stanno diventando sempre più popolari e, sebbene non esista un manuale universale su come rispettare la natura, ecco cinque principi che vale la pena tenere a mente. Conoscere le specie che si spera di avvistare — le loro abitudini, i loro habitat e i loro comportamenti — rende l’esperienza più appagante e aiuta a sapere cosa aspettarsi.
Controlla le previsioni del tempo e vestiti in modo adeguato. Porta con te acqua in abbondanza, snack, protezione solare e un kit di pronto soccorso di base. Se ti avventuri in una zona popolata da orsi, porta con te uno spray anti-orso e assicurati di sapere come usarlo. Essere preparati significa potersi concentrare sul godersi la fauna selvatica piuttosto che dover affrontare situazioni di emergenza.
Valuta la possibilità di partecipare a visite guidate condotte da naturalisti esperti o da guardie forestali del parco. Queste visite offrono preziose informazioni sul comportamento degli animali e sulla conservazione degli habitat, assicurandoti al contempo di seguire le migliori pratiche. Per ulteriori consigli su come vivere avventure all’aria aperta nel rispetto della natura, visita il nostro pagina delle risorse per le attività all'aperto.
Qual è la distanza di sicurezza per osservare orsi e lupi in libertà?
Mantenete una distanza di almeno 100 iarde (la lunghezza di un campo da football) da orsi, lupi e altri grandi predatori. Se l’animale cambia comportamento a causa vostra, significa che siete troppo vicini: allontanatevi lentamente e con calma.
Posso dare da mangiare agli animali selvatici se offro loro solo cibo sano?
No, non date mai da mangiare agli animali selvatici. Anche il cibo “sano” destinato al consumo umano altera la loro dieta naturale e il loro comportamento di ricerca del cibo, li rende dipendenti dall’uomo e può renderli aggressivi. Dar da mangiare agli animali selvatici è illegale nella maggior parte dei parchi e delle aree protette.
Come faccio a capire se sto disturbando un animale mentre lo osservo?
Presta attenzione a eventuali cambiamenti nel comportamento, come fissarti con lo sguardo, interrompere le normali attività (mangiare, pulirsi), agitarsi, emettere versi o allontanarsi. Se l’animale sembra consapevole della tua presenza e modifica ciò che sta facendo, significa che sei troppo vicino e devi allontanarti.
Va bene usare l'app per i versi degli uccelli che ho sul cellulare per attirare gli uccelli e fotografarli?
Assolutamente no. L'uso di richiami di uccelli o versi di animali — sia tramite app che con la propria voce — è considerato una forma di molestia ed è illegale in molte zone. Può indurre gli uccelli ad abbandonare i nidi, a sprecare energie rispondendo a richiami falsi ed esporli ai predatori.
Cosa devo fare se un animale selvatico mi si avvicina?
Mantieni la calma e non correre. Allontanati lentamente rimanendo di fronte all’animale (ma evita il contatto visivo diretto con i predatori). Se si tratta di un predatore, cerca di sembrare più grande, parla con calma e lascia all’animale lo spazio necessario per allontanarsi. Successivamente, segnala l’incontro ai guardaparco.
Quando il sole tramonta e l’oscurità avvolge il paesaggio, prende vita un mondo completamente nuovo di predatori. I serpenti, quei misteriosi rettili che da secoli affascinano e spaventano le persone, sono tra i cacciatori notturni più abili del pianeta. Che tu sia curioso di sapere quando questi serpenti sono più attivi o come riescano a rintracciare le prede nell’oscurità totale, abbiamo le risposte che stavi cercando. E se ti interessa saperne di più su altri affascinanti predatori notturni, dai un’occhiata alla nostra guida su caccia alla volpe notturna per scoprire come le diverse specie si adattano all’oscurità.
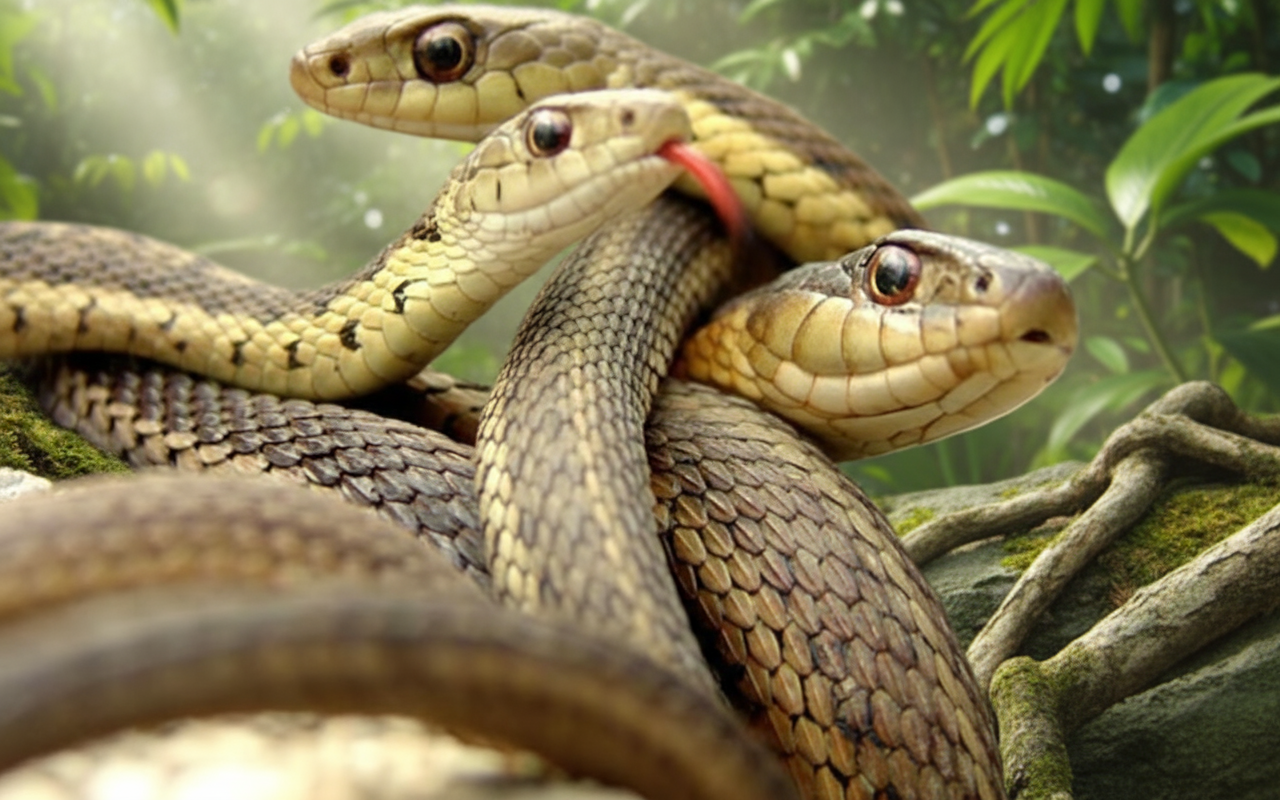
I serpenti hanno sviluppato alcuni stratagemmi davvero incredibili per sopravvivere e prosperare mentre la maggior parte di noi dorme profondamente. Dai superpoteri di rilevamento del calore alle tattiche di agguato silenzioso, questi rettili sono ben più che semplici creature striscianti e inquietanti. Immergiamoci nella vita segreta dei serpenti dopo il tramonto e scopriamo cosa li rende cacciatori così efficaci quando cala il buio.
Il punto è questo: non tutti i serpenti seguono lo stesso ritmo. La verità è in realtà molto più interessante di una semplice risposta sì o no. Le diverse specie di serpenti possono essere rigorosamente diurne (attive durante il giorno), crepuscolari (attive all’alba e al tramonto) o notturne (attive di notte). Ad esempio, il mamba nero è un serpente diurno, mentre il pitone reale è notturno e i serpenti del grano sono crepuscolari, il che significa che sono più attivi durante le ore del crepuscolo.
I serpenti decidono quando essere attivi in base a una serie di fattori. Alcuni sono geneticamente predisposti a cacciare in determinati momenti, mentre altri adattano i propri ritmi in base alla disponibilità di cibo, alla temperatura e al pericolo rappresentato dai predatori. Molte specie sono notturne principalmente per evitare i predatori e ridurre la competizione per il cibo. Le temperature più fresche della notte le aiutano inoltre a regolare il calore corporeo, specialmente nei climi più caldi, e cacciare di notte permette loro di catturare le prede senza essere individuate così facilmente.
La maggior parte dei serpenti è infatti più attiva nelle ore del crepuscolo – quei momenti immediatamente prima dell’alba e dopo il tramonto. In questi momenti, la temperatura raggiunge quel livello ideale che permette ai serpenti di muoversi agilmente senza surriscaldarsi né raffreddarsi troppo. La luce fioca offre loro inoltre un camuffamento naturale, rendendo più facile cacciare senza essere visti dai predatori più grandi o dalla loro prossima preda.
Se ti stai chiedendo quando è più probabile incontrare un serpente dopo il tramonto, la risposta dipende dalla stagione e dal clima locale. In generale, i serpenti sono più attivi durante le ore crepuscolari, sia al tramonto che all’alba. Questi periodi di transizione offrono le condizioni perfette per la caccia, grazie alle temperature moderate e alla luce fioca.

Durante i caldi mesi estivi, molti serpenti assumono un comportamento più notturno per sfuggire al caldo torrido delle ore diurne. Sono in grado di sopravvivere a temperature estreme solo per circa 10-20 minuti, quindi l’attività notturna rappresenta una strategia di sopravvivenza. Anche dopo il tramonto, queste creature a sangue freddo riescono ad assorbire il calore dalle rocce, dalle strade e da altri oggetti che trattengono il calore accumulato durante il giorno.
In primavera e in autunno, quando le temperature diurne sono più piacevoli, i serpenti tendono ad essere più attivi durante il giorno o al crepuscolo. La temperatura è il fattore principale che determina quando i serpenti escono a caccia. I serpenti sono ectotermici (a sangue freddo), il che significa che dipendono da fonti di calore esterne per alimentare il proprio organismo e regolare il metabolismo. Quando fa troppo freddo, diventano pigri e non riescono a cacciare efficacemente. Quando fa troppo caldo, rischiano il surriscaldamento e devono trovare rapidamente un riparo all’ombra.
I serpenti utilizzano due strategie di caccia principali, e comprenderle può fornirci importanti indicazioni sui loro comportamenti notturni. La stragrande maggioranza dei serpenti è predatori da agguato – preferiscono appostarsi in attesa che la preda si avvicini, piuttosto che inseguirla attivamente. Questi cacciatori pazienti fanno ampio ricorso al camuffamento per rimanere nascosti mentre attendono il momento perfetto per colpire.
I predatori da agguato, come i serpenti a sonagli, i pitoni e le vipere, hanno in genere corpi robusti e possenti e teste grandi. Questo tipo di corporatura non è l'ideale per la velocità, ma è perfetta per sferrare un attacco rapido e potente quando la preda si avvicina a portata di morsa. Questi serpenti spesso rimangono immobili per ore o addirittura giorni, in attesa che una preda ignara passi nelle loro vicinanze. La loro pazienza è davvero di un altro livello.
D'altra parte, alcuni serpenti sono cercatori attivi che perlustrano l’ambiente alla ricerca di cibo. I serpenti giarrettiera, i serpenti re e i serpenti ratto rientrano in questa categoria. Questi cacciatori tendono ad avere corpi più lunghi e snelli, che garantiscono loro maggiore agilità e velocità. Usano il loro eccellente senso dell’olfatto per rintracciare le prede, infilando la testa tra le foglie e il terreno smosso per trovare il cibo nascosto. I cercatori attivi fanno ampio ricorso al proprio organo vomeronasale (detto anche organo di Jacobson) per rilevare gli odori chimici presenti nell’ambiente circostante.
Una delle cose più affascinanti dei serpenti notturni è il modo in cui si sono adattati a cacciare quando non possono fare affidamento solo sulla vista. Questi rettili hanno sviluppato strumenti sensoriali davvero straordinari che consentono loro di individuare e catturare le prede nell’oscurità più totale.
Fosse termosensibili: Molti serpenti notturni, in particolare i viperi a fossa come i serpenti a sonagli e i copperhead, possiedono organi specializzati nella rilevazione del calore, chiamati “organi a fossa”, situati tra gli occhi e le narici. Queste fosse sono in grado di rilevare la radiazione infrarossa (calore corporeo) emessa dalle prede a sangue caldo come roditori e uccelli. Anche in condizioni di buio totale, questi serpenti sono in grado di «vedere» la traccia termica di un animale, il che li rende cacciatori notturni incredibilmente efficaci.
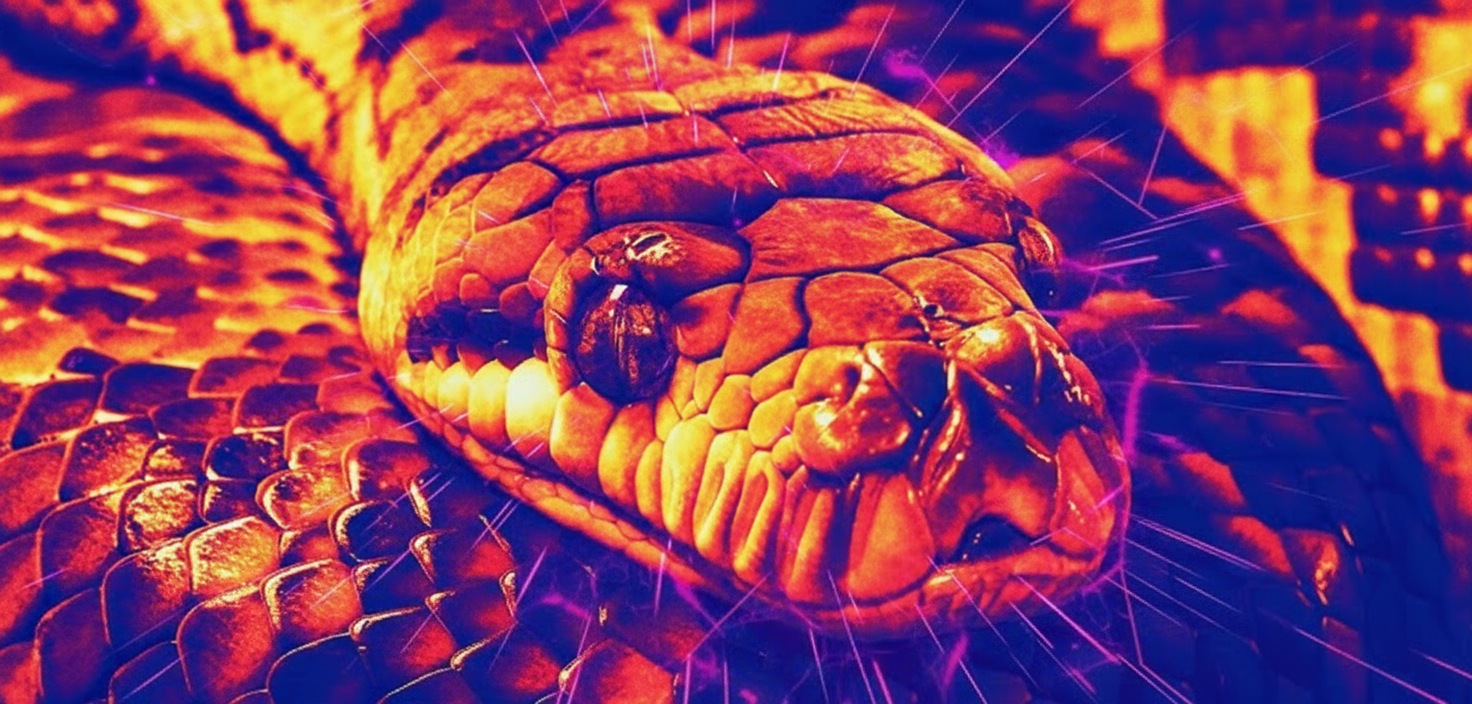
Rilevamento di sostanze chimiche: Tutti i serpenti hanno la lingua biforcuta, che muovono continuamente avanti e indietro. Non stanno “assaporando” l’aria, ma stanno in realtà raccogliendo informazioni chimiche. Quando un serpente muove la lingua, cattura particelle odorose dall’ambiente circostante. La forma biforcuta permette loro di determinare da quale direzione proviene un odore, poiché ciascuna punta raccoglie quantità leggermente diverse di odore. Queste informazioni vengono trasmesse all’organo vomeronasale situato sul palato, che elabora i dati chimici e aiuta il serpente a localizzare le prede, identificare potenziali compagni o individuare pericoli.
Rilevamento delle vibrazioni: I serpenti non hanno orecchie esterne, ma sono eccellenti nel percepire le vibrazioni attraverso il terreno. Le loro mascelle sono collegate alle strutture dell’orecchio interno che rilevano le vibrazioni, consentendo loro di individuare il movimento delle prede che camminano o si muovono rapidamente nelle vicinanze. Questo senso è particolarmente utile per i predatori che tendono agguati, in attesa in silenzio del momento giusto per attaccare.
Visione notturna: Sebbene i serpenti non abbiano in genere una vista eccezionale rispetto ad altri predatori, le specie notturne presentano spesso adattamenti che consentono loro di vedere in condizioni di scarsa illuminazione. Alcuni serpenti, come il serpente notturno del Texas, hanno pupille verticali in grado di dilatarsi ampiamente per far entrare più luce, in modo simile a come funzionano gli occhi dei gatti. Ciò garantisce loro una visione migliore al buio rispetto ai loro cugini diurni.
Una volta che un serpente ha individuato la sua preda, il passo successivo consiste nel catturarla e ucciderla. I serpenti hanno sviluppato due metodi principali per sopraffare le loro prede: veleno e costrizione.
Attacchi velenosi: I serpenti velenosi come i copperhead, i serpenti a sonagli e i cottonmouth utilizzano sostanze tossiche per immobilizzare la preda. Questi serpenti di solito attaccano rapidamente, iniettano il veleno attraverso le zanne e poi rilasciano la preda. Il veleno agisce immediatamente, attaccando il sistema nervoso (veleno neurotossico) o distruggendo le cellule del sangue e i tessuti (veleno ematotossico). Dopo l’attacco, il serpente spesso rintraccia l’animale morente utilizzando l’olfatto, seguendo la scia chimica fino a quando non trova la preda e la ingoia intera. Questo metodo “attacca e rilascia” è intelligente perché riduce il rischio di ferirsi a causa della resistenza dell’animale.
Costrizione: I pitoni, i boa e molti colubridi (come i serpenti dei ratti) adottano un approccio diverso. Questi serpenti non velenosi afferrano la preda con i denti e avvolgono rapidamente il loro potente corpo attorno ad essa. Contrariamente a quanto si crede comunemente, i serpenti costrittori non schiacciano la preda, ma la stringono con forza sufficiente a impedirle di respirare. Ogni volta che la preda espira, il serpente stringe la presa un po’ di più, finché l’animale non soffoca o muore per insufficienza circolatoria. Alcuni serpenti velenosi ricorrono alla costrizione in combinazione con il veleno per assicurarsi che la preda non riesca a fuggire o a ferirli durante la lotta.
Tattiche specializzate: La ricerca ha portato alla luce alcune tecniche di caccia davvero sorprendenti. Alcuni serpenti acquatici del Sud-Est asiatico cacciano i granchi utilizzando metodi che infrangono tutte le regole consolidate. Anziché il tipico attacco a bocca aperta, questi serpenti immobilizzano i granchi con il mento, per poi avvolgersi attorno a loro per manipolarli e inghiottirli. Ancora più interessante è il fatto che alcuni serpenti cacciano i granchi dal guscio morbido durante la muta, quando il guscio protettivo del granchio è temporaneamente vulnerabile, consentendo loro di consumare prede quattro volte più grandi di quelle che potrebbero normalmente inghiottire intere.
La temperatura è senza dubbio il fattore più significativo che determina quando e come i serpenti cacciano. Essendo animali ectotermici, i serpenti hanno bisogno di calore esterno per funzionare correttamente. Il loro organismo funziona al meglio quando la temperatura interna è compresa tra 70 e 90 gradi Fahrenheit. Al di sotto dei 60 gradi, i serpenti diventano pigri e fanno fatica a muoversi o a cacciare. Al di sopra dei 95 gradi, rischiano il surriscaldamento e devono trovare rapidamente un riparo.
Nei climi caldi come quelli del Texas, dell’Arizona e della Florida, i serpenti diventano spesso notturni durante l’estate per evitare il caldo mortale delle ore diurne. Escono dai loro nascondigli dopo il tramonto, quando l’aria si raffredda ma possono ancora assorbire il calore residuo dalle rocce e dall’asfalto riscaldati dal sole. Negli Stati settentrionali più freschi o durante la primavera e l’autunno, i serpenti tendono ad essere più attivi durante il giorno, quando hanno bisogno del calore del sole per aumentare la loro temperatura corporea.
Questa dipendenza dalla temperatura spiega anche i modelli stagionali. I serpenti escono tipicamente dalla brumazione (uno stato simile al letargo) a marzo o aprile, quando le temperature medie diurne raggiungono e si mantengono costantemente al di sopra dei 60 gradi Fahrenheit. Rimangono attivi fino a ottobre, prima di ritirarsi in tane sotterranee o in altri luoghi protetti per l’inverno. Durante i mesi di attività, i modelli di attività giornaliera variano in base alle fluttuazioni di temperatura.
I predatori intelligenti sanno che cacciare è più facile quando la preda è attiva, e i serpenti non fanno eccezione. Molti degli animali di cui i serpenti si nutrono sono a loro volta più attivi al crepuscolo o di notte, il che influenza i momenti in cui i serpenti scelgono di cacciare.
I roditori come topi e ratti, che costituiscono una parte consistente della dieta di molti serpenti, sono prevalentemente notturni. Questi piccoli mammiferi escono dopo il tramonto per cercare cibo, evitando i predatori diurni come falchi e aquile. I serpenti hanno adattato i propri orari di caccia in modo da coincidere con questo picco di attività delle prede. Anche gli anfibi, come rane e rospi, sono più attivi durante le ore notturne umide, specialmente in prossimità di fonti d’acqua. I serpenti notturni che vivono vicino a zone umide o stagni possono trarre vantaggio da questa abbondante fonte di cibo.
Alcune specie preda sono attive sia di giorno che di notte, il che offre ai serpenti una certa flessibilità nei loro orari di caccia. Le lucertole, ad esempio, possono crogiolarsi al sole durante il giorno, ma possono anche essere attive nelle notti calde. Ciò consente a specie come i serpenti ratto di adattare i propri schemi di attività in base alla temperatura e ad altre condizioni ambientali, anziché essere vincolate a un rigido orario notturno o diurno.
Sapere quando i serpenti sono più attivi può aiutarti a evitare incontri indesiderati, soprattutto se vivi o visiti zone in cui sono presenti serpenti. Ecco alcuni consigli pratici:
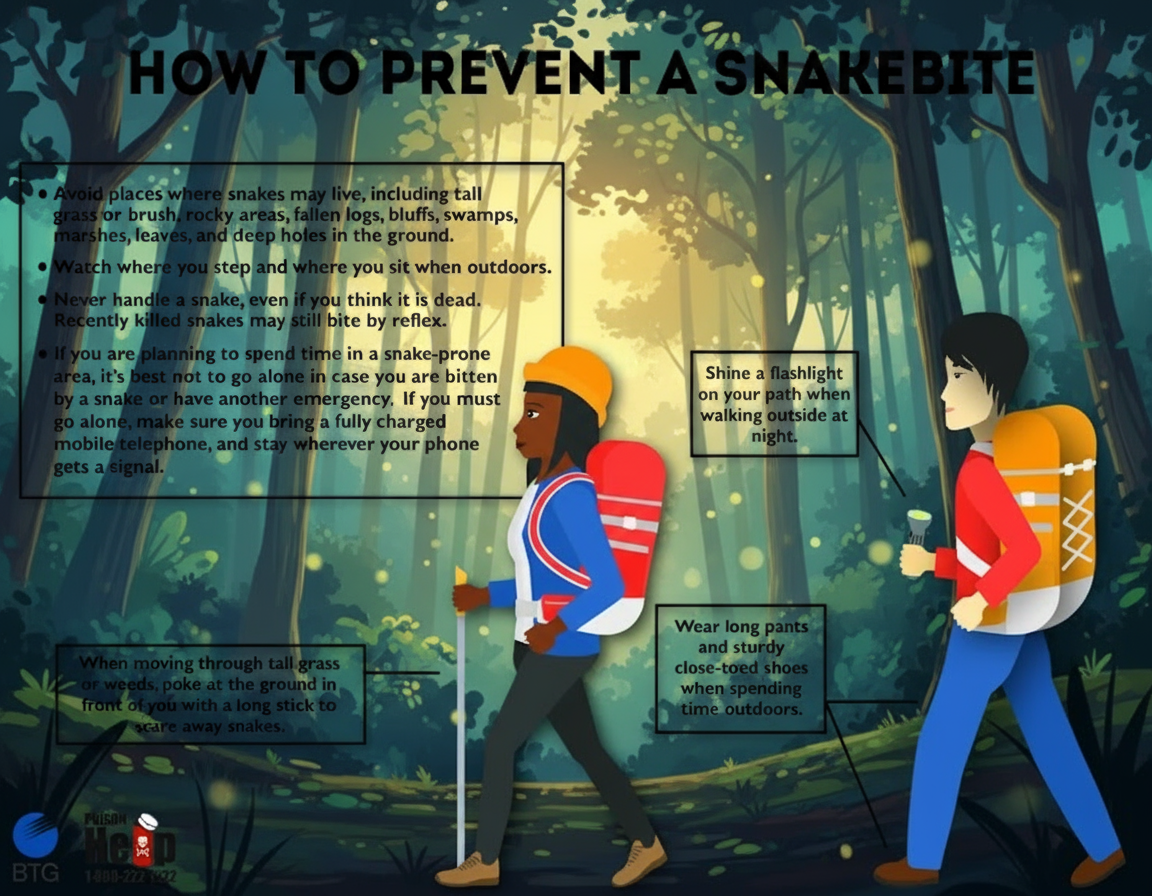
Organizza con saggezza le tue attività all’aperto: Se fate escursioni, campeggiate o lavorate all’aperto in zone dove vivono i serpenti, prestate particolare attenzione all’alba e al tramonto, quando i serpenti sono più attivi. Durante i caldi mesi estivi, ricordate che i serpenti potrebbero spostarsi di notte per stare al fresco.
Usa una torcia: Quando cammini di notte, porta sempre con te una torcia potente e scruta il terreno davanti a te. I serpenti possono essere difficili da individuare in condizioni di scarsa illuminazione, anche sui sentieri o sulle strade.
Attenzione a dove metti i piedi: Di notte, i serpenti si riposano spesso su superfici calde come rocce, tronchi o strade asfaltate. Camminate con cautela ed evitate di infilare le mani in luoghi che non riuscite a vedere chiaramente, come sotto le cataste di legna o tra l’erba alta.
Rendi la tua proprietà meno attraente: I serpenti si avvicinano al tuo giardino in cerca di cibo e riparo. Ridurre la popolazione di roditori, mettendo al sicuro i rifiuti ed eliminando le fonti di cibo, rende la tua proprietà meno attraente. Tieni l’erba ben tagliata e rimuovi i cumuli di sterpaglie, i cumuli di pietre e altri nascondigli.
Mantieni la calma durante gli incontri: Se dovessi avvistare un serpente, la cosa migliore da fare è lasciargli spazio e allontanarti lentamente. La maggior parte dei serpenti non è aggressiva nei confronti degli esseri umani e si ritirerà se ne avrà la possibilità. Non cercare mai di catturare o uccidere un serpente, poiché è proprio in questi casi che si verifica la maggior parte dei morsi.
Per ulteriori consigli sulla sicurezza all’aperto e approfondimenti sul comportamento della fauna selvatica, visita il nostro pagina iniziale per ulteriori risorse.
I serpenti riescono a vedere nel buio più totale? Sebbene i serpenti non dispongano di visori notturni, molte specie notturne hanno occhi adattati con pupille verticali che si dilatano per catturare più luce. Inoltre, i serpenti della famiglia dei Viperidi sono in grado di rilevare il calore a infrarossi emanato dalle prede a sangue caldo, il che consente loro, in sostanza, di “vedere” le tracce termiche anche nell’oscurità più totale.
Tutti i serpenti velenosi cacciano di notte? Non tutti i serpenti velenosi sono notturni. Mentre i copperhead e i serpenti a sonagli sono spesso più attivi dal tardo pomeriggio fino a sera (comportamento crepuscolare), altre specie velenose come il mamba nero sono rigorosamente diurne e cacciano durante le ore diurne. Dipende davvero dalla specie e dal clima del luogo in cui vivono.
Perché di notte vedo dei serpenti sulle strade? Le strade e l’asfalto trattengono il calore del sole e rimangono caldi a lungo dopo il tramonto. Durante le notti più fresche o in primavera e in autunno, i serpenti spesso si riposano su queste superfici calde per regolare la loro temperatura corporea. Questo comportamento si chiama termoregolazione ed è il motivo per cui capita spesso di vedere serpenti che attraversano le strade o che si crogiolano sull’asfalto dopo il tramonto.
Qual è la differenza traSono serpenti notturni e crepuscolari? I serpenti notturni sono attivi per tutta la notte, dal tramonto all’alba. I serpenti crepuscolari sono più attivi durante i periodi crepuscolari, in particolare all’alba e al tramonto. Molti credono che i serpenti siano notturni, ma in realtà un gran numero di specie è crepuscolare e approfitta di quei momenti di transizione in cui le temperature sono ideali e le prede sono attive.
I serpenti dormono con gli occhi aperti? Sì! I serpenti non hanno palpebre, quindi i loro occhi sono sempre “aperti”. Tuttavia, dormono chiudendo le retine, il che impedisce alla luce di entrare negli occhi. Se vedete un serpente completamente immobile e che non muove la lingua, probabilmente sta dormendo, anche se i suoi occhi sembrano spalancati.
















