Thermal imaging has become a game-changer for everything from hunting and security to industrial inspections and medical diagnostics. But here’s the thing—not all thermal imaging works the same way. Different technologies operate at different wavelengths, and picking the right one can make or break your results.
We’re breaking down the three main types of thermal imaging technology based on wavelength ranges. Each type offers unique advantages and works best in specific situations. Whether you’re trying to spot heat loss in buildings, detect equipment failures, or track wildlife at night, knowing which technology to use will save you time and money.
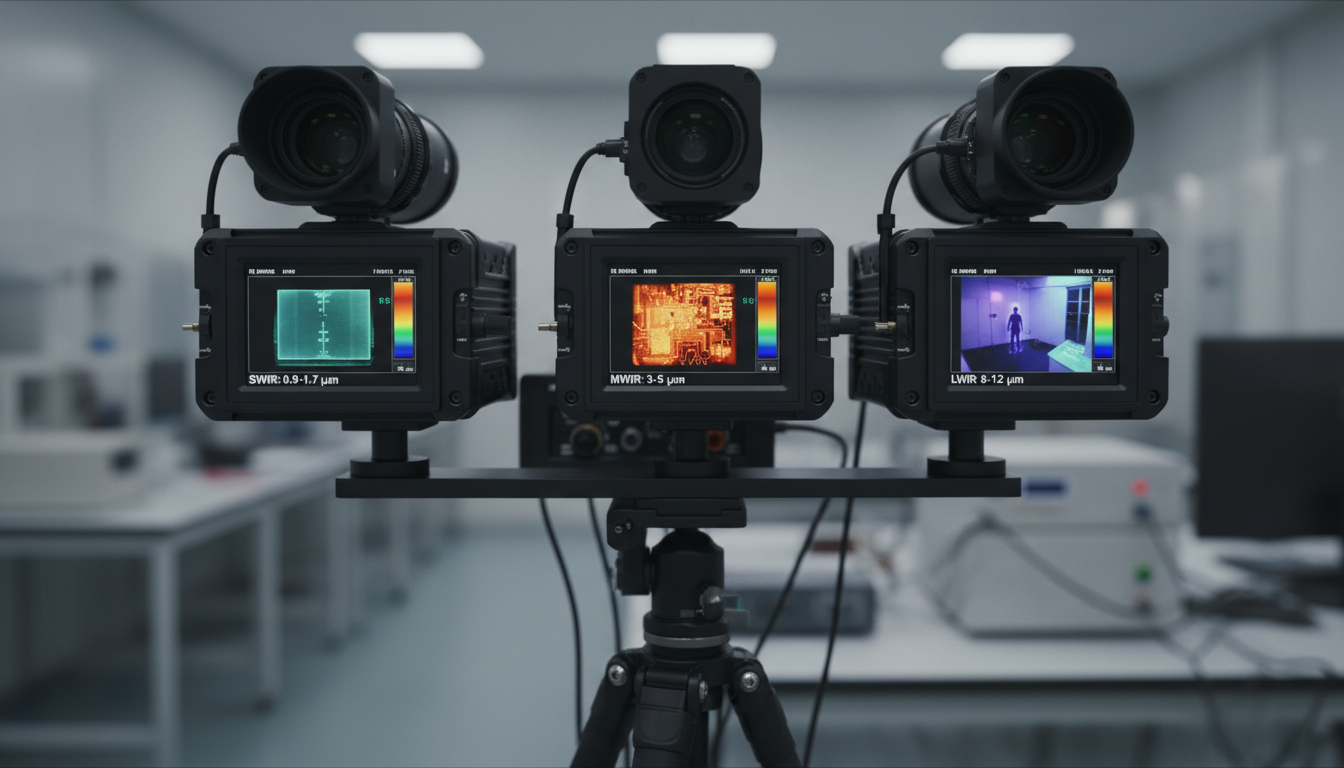
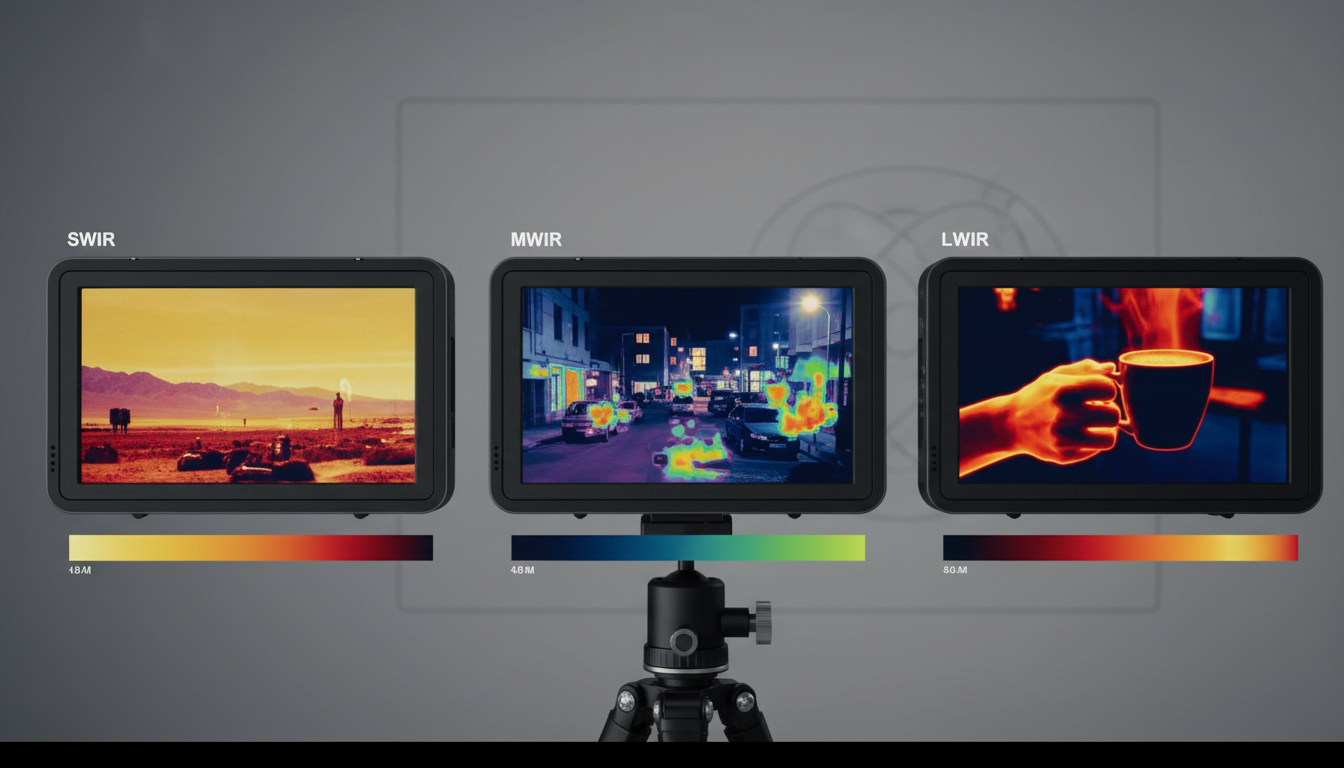
Thermal cameras come in three basic wavelength categories: short-wave infrared (SWIR), mid-wave infrared (MWIR), and long-wave infrared (LWIR). Think of these as different “channels” in the infrared spectrum, each tuned to capture specific types of heat signatures.
SWIR typically operates in the 0.9–1.7 μm wavelength range, while MWIR is defined as the 3.0–5.0 μm wavelength range. Long-wavelength cameras detect infrared wavelengths in the range of 7-12 microns. Each range reveals different information about the objects you’re viewing.
The wavelength you choose affects everything from image quality to what you can see through obstacles. Let’s look at how each type actually works.
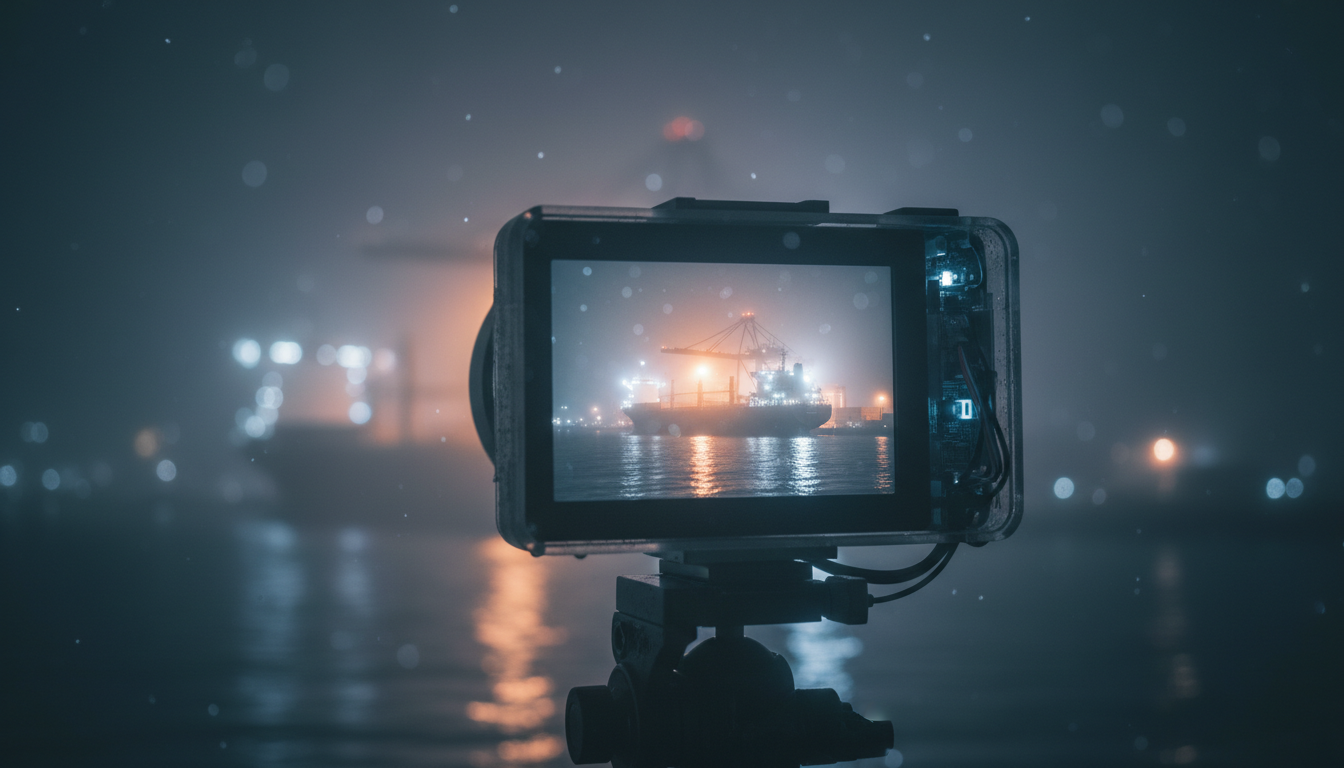
SWIR cameras work differently than you might expect. Short wave infrared uses reflected light imaging instead of thermal imaging. This means they’re more like enhanced vision cameras than traditional heat detectors.
An atmospheric phenomenon called night sky radiance emits five to seven times more illumination than starlight, nearly all of it in the SWIR wavelengths, allowing us to see objects with great clarity on moonless nights. Short-wave infrared is more like enhanced vision, and its image is very similar to that seen by human eyes.
SWIR cameras excel at penetrating haze, smoke, and fog. Short-wave infrared imaging has a major advantage that infrared thermal imaging technology does not have—it can image through the windshield. This makes SWIR perfect for surveillance, quality inspection, and applications where you need to see fine details rather than just heat signatures.
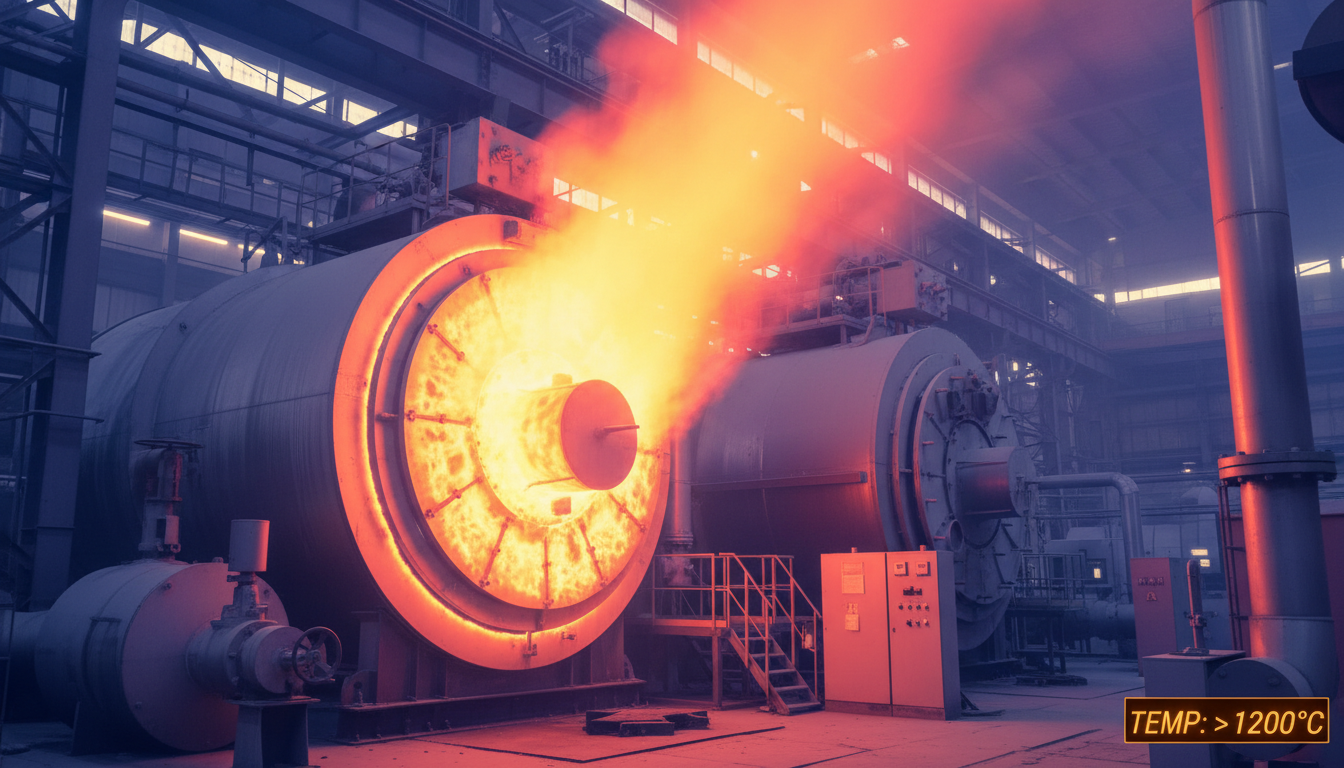
MWIR cameras sit in the middle ground between SWIR and LWIR. Mid-wavelength cameras typically detect infrared wavelengths in the spectral range of 2-5 microns and deliver higher resolution with accurate readings, though images are not as detailed as those produced by long wavelength cameras due to increased atmospheric absorption.
Cameras in this range are used for extreme high-temperature readings, such as scanning boiler applications and ballasted, single-ply roofing systems. When you need to measure really hot objects—think industrial furnaces or manufacturing processes—MWIR cameras give you the precision you need.
MWIR systems often require cooling to work properly, which makes them more expensive. But for gas leak detection and military applications, that extra cost pays off with better sensitivity and accuracy.
Long-wavelength cameras, the most popular infrared camera type, typically detect infrared wavelengths in the range of 7-12 microns and provide a great deal of detail because atmospheric absorption is minimal. This is what most people think of when they hear “thermal camera.”
Long Wavelength Infrared is the most commonly used form of infrared technology, with LWIR imagers detecting radiated temperatures that indicate information to the operator. These cameras work great for spotting people, animals, and equipment at normal temperatures.
The majority of all thermal cameras sold and used today operate in the LWIR band, using uncooled micro-bolometer detectors. They’re cheaper than MWIR cameras, don’t need cooling systems, and work reliably for building inspections, firefighting, and security applications.
Beyond wavelengths, thermal imaging can also be classified by how it captures heat. Thermography can be classified as either passive or active, with passive thermography involving observing an object’s naturally emitted thermal energy.
Active thermography applies external energy sources to an object or process to induce a variation in temperature for analysis with an infrared camera. If a defect is present inside an object, it interrupts the heat flow from an external source like a halogen lamp, causing a variation in temperature distribution at the object’s surface.
Passive thermography works well for electrical inspections, surveillance, and medical screenings where objects already have temperature differences. Active thermography shines when you’re looking for hidden defects in materials or checking composite structures like aircraft wings.
Another way to classify thermal cameras is by detector type. Thermographic cameras can be broadly divided into two types: those with cooled infrared image detectors and those with uncooled detectors.
Cooled detectors deliver better image quality and precision, while uncooled detectors are less precise but also less expensive. Uncooled detector resolution and image quality tend to be lower than cooled detectors, but they’re lighter, smaller, and start up instantly.
Most LWIR cameras use uncooled sensors, making them affordable for everyday use. MWIR cameras typically need cooling, which is why they cost more but perform better for demanding applications.
Picking the right thermal imaging type depends on what you’re trying to accomplish. For general surveillance, building inspections, or hunting applications like those we discuss in our professional hunting guide, LWIR cameras offer the best value and performance.
If you’re working in industrial settings with high-temperature equipment, MWIR gives you better accuracy. For seeing through smoke or capturing fine details, SWIR technology delivers images that look more natural to our eyes. Check out our Sirius HD thermal monocular to see how modern LWIR technology performs in real-world conditions.
The technology keeps evolving. Modern thermal cameras now combine features from different types, offering multi-spectral imaging that gives you the best of multiple wavelengths in one device.
Thermal imaging technology breaks down into three main wavelength types—SWIR, MWIR, and LWIR—each optimized for different applications. SWIR uses reflected light for detail-rich images, MWIR handles extreme temperatures with precision, and LWIR dominates everyday thermal imaging with affordable, reliable performance. You can also classify systems by passive versus active methods or cooled versus uncooled detectors.
Your choice depends on your specific needs: detection range, temperature measurement accuracy, environmental conditions, and budget. LWIR cameras handle most common tasks, MWIR excels at industrial applications, and SWIR works best when you need to see through obscurants or capture fine details. Understanding these differences helps you pick the right tool and get better results, whether you’re inspecting equipment, monitoring wildlife, or conducting security operations.
What’s the difference between SWIR and thermal imaging?
SWIR cameras detect reflected infrared light, similar to how visible cameras work, creating images based on light reflection rather than heat emission. Traditional thermal cameras (MWIR and LWIR) detect heat radiated by objects. SWIR produces images that look more like regular photographs but can see through smoke and haze, while thermal cameras show temperature differences regardless of lighting conditions.
Which type of thermal imaging camera is best for hunting?
LWIR cameras work best for hunting because they detect body heat from animals at normal outdoor temperatures. They’re more affordable than other types, don’t need external light sources, and can spot wildlife in complete darkness. LWIR cameras also come in compact, uncooled designs perfect for handheld monoculars and scopes. Visit our homepage to explore hunting-specific thermal devices.
Why are MWIR cameras more expensive than LWIR?
MWIR cameras typically require cryogenic cooling systems to reduce noise and maintain sensor sensitivity, which adds cost, weight, and power consumption. The cooling mechanism keeps the detector at very low temperatures for accurate readings at higher temperature ranges. LWIR cameras use uncooled microbolometer detectors that work at room temperature, making them cheaper and simpler to manufacture.
Can thermal cameras see through walls?
No, thermal cameras cannot see through solid walls. They detect infrared radiation from surfaces, not through them. However, they can detect temperature differences on wall surfaces caused by issues behind the wall, like water leaks, missing insulation, or electrical hot spots. SWIR cameras can penetrate some thin materials better than other types, but no thermal camera provides X-ray vision.
What does passive versus active thermography mean?
Passive thermography observes objects using their naturally occurring heat without adding external energy sources. It’s used for electrical inspections, building surveys, and security. Active thermography applies an external heat source to the object being inspected, then monitors how heat flows through it to reveal hidden defects or structural issues. Active methods work better for non-destructive testing of materials and finding subsurface problems.
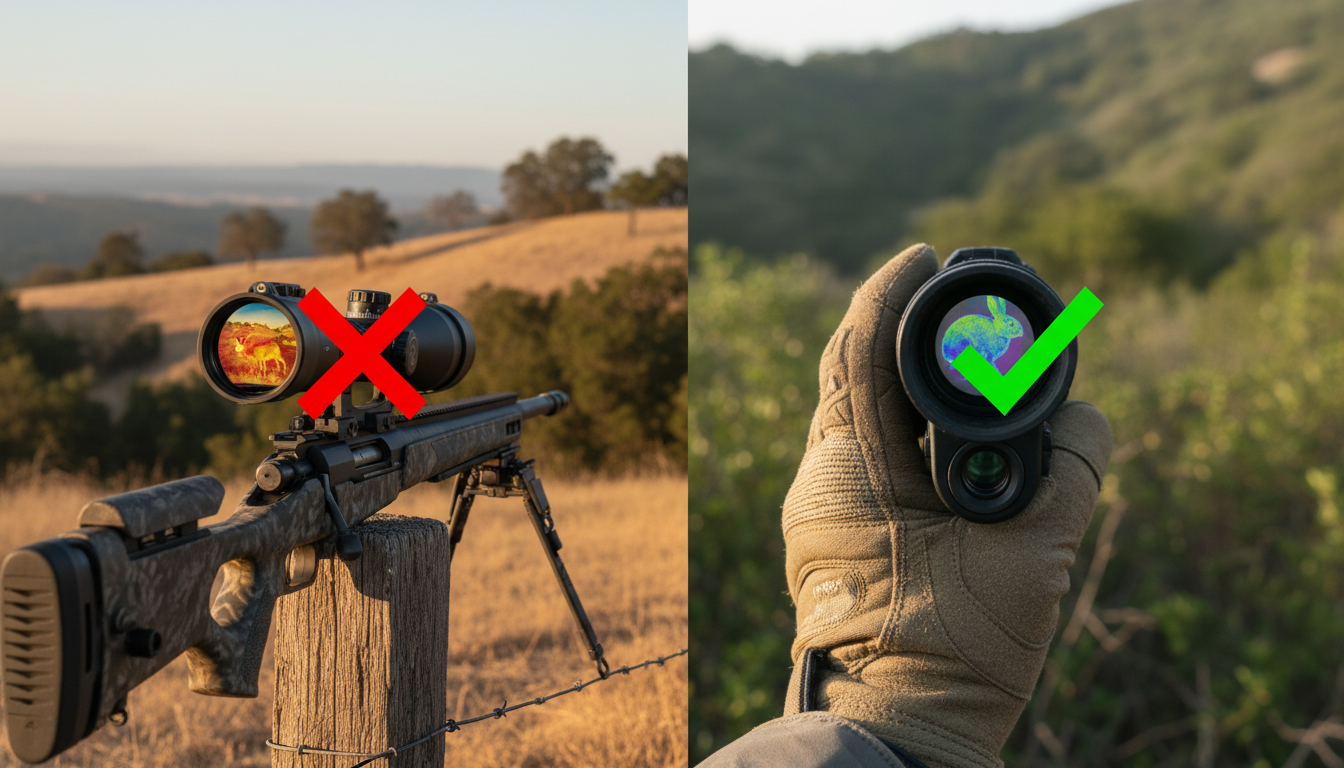
If you’re looking into thermal scopes in California, you’ve probably run into conflicting information. Some retailers won’t ship to the state, legal forums debate the fine print, and hunters aren’t sure what’s allowed. Let’s clear up the confusion around thermal scope legality in California and what the law actually says.

California Penal Code Section 468 defines a “sniperscope” as any device designed for use on a firearm that uses “a PROJECTED infrared light source and electronic telescope” to locate objects at night. The key word here is “projected.” This refers to flashlight-like devices that project IR light, which were common when the law was written decades ago.
Modern thermal scopes work differently. Thermal scopes detect heat signatures and typically do not emit visible or infrared light. They’re passive devices that read thermal radiation rather than projecting anything. This technical distinction matters when reading the law.
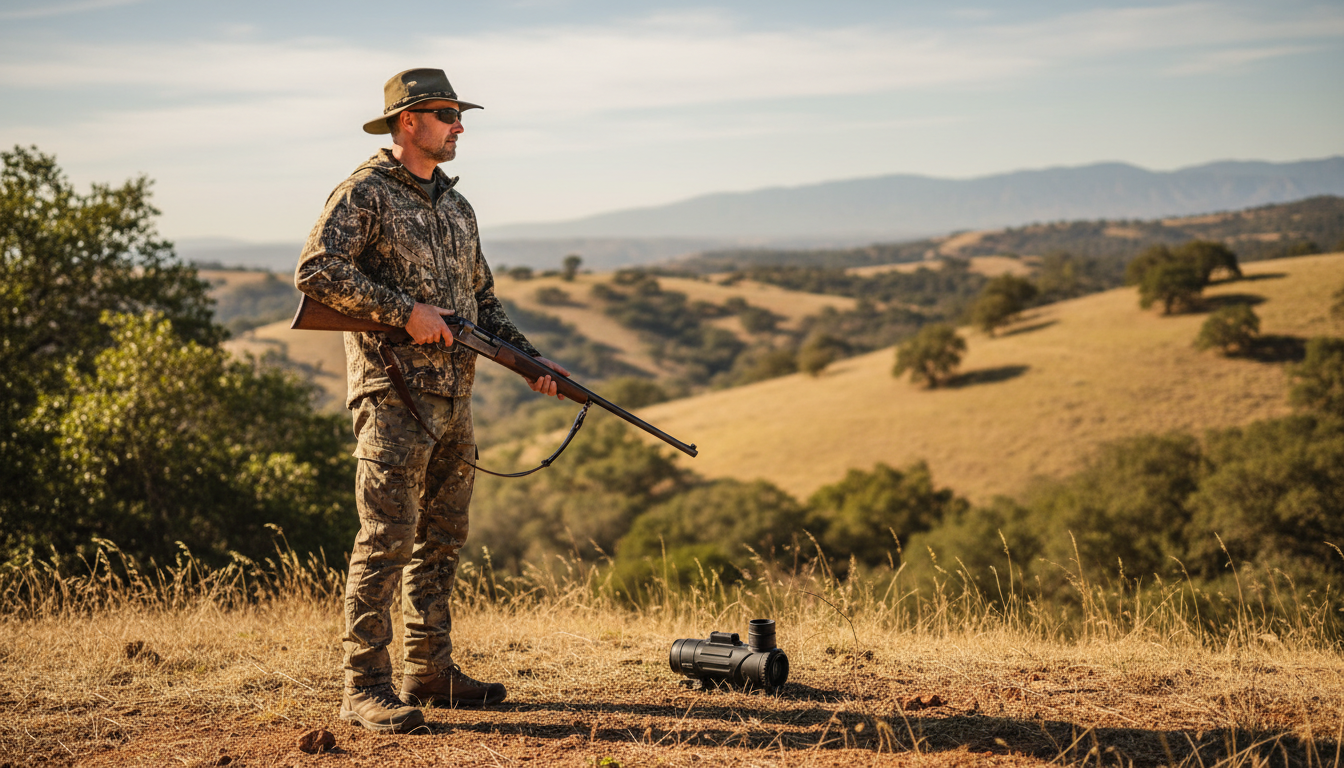
According to discussion among California gun owners and legal interpretations, a thermal scope on its own appears to be legal in the state. The problem starts when you talk about mounting it to a firearm. California law prohibits possessing devices like thermal imaging equipment “intended for use with or adapted for use with a firearm” that allow determining the presence of objects at night.
Here’s where things get murky. The issue is weapon mounting, and using a thermal scope for hunting while not attached to your rifle would be a grey area. Many retailers refuse to ship to California not because ownership is clearly illegal, but because they don’t want the legal headaches if someone mounts the device to a gun.
We recommend checking out our professional hunting guide for more context on thermal monocular applications.
For hunting purposes, California explicitly prohibits thermal devices mounted to firearms. Heat-sensing or other non-visible spectrum technology used to enhance visibility of animals or provide a visible point of aim is prohibited while taking or attempting to take big game.
But there are some exceptions worth knowing about. Fish and Game Code regulations vary by zone and species. Some interpretations suggest that landowners in agricultural areas might be able to use passive thermal for certain pest control situations like coyotes. Before you head out, check with local fish and game authorities for your specific area.
Looking for alternatives? Our Sirius HD thermal monocular offers powerful detection without the legal complications of scope mounting.
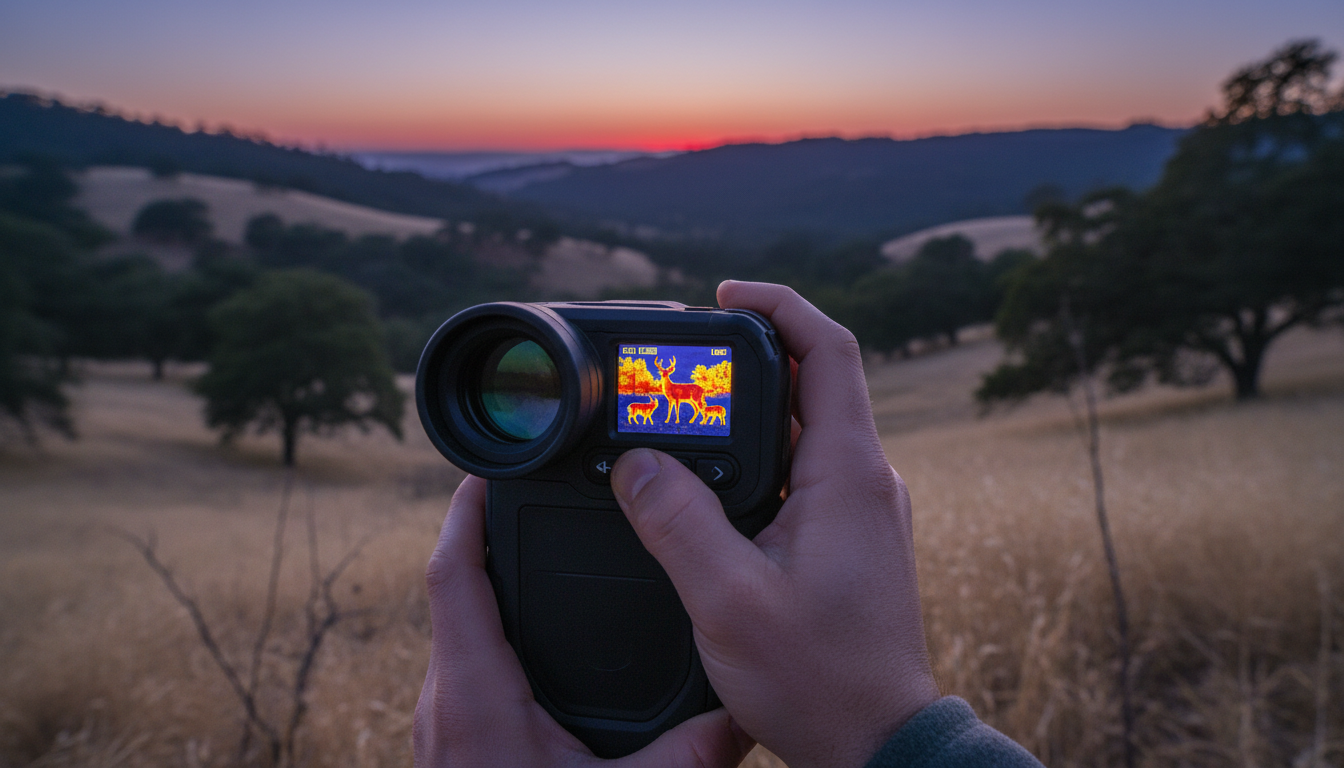
The prohibition does not apply to binoculars, monoculars with night vision function, or night vision goggles. This creates a practical workaround for many users. You can legally own and use thermal monoculars for observation, navigation, wildlife watching, and other non-hunting purposes.
Thermal monoculars are handheld devices that don’t attach to firearms. They’re used for spotting, tracking, and general thermal imaging without raising the same legal concerns as weapon-mounted scopes. We’ve seen growing interest in these devices precisely because they avoid the legal ambiguity.
Many vendors stay far away from legal boundaries and decline sales that could even remotely be viewed as illegal, because they lose more money in lawsuits than in potential sales. Even if a product might be legal under a strict reading of PC 468, companies don’t want to risk prosecution or bad publicity.
Many manufacturers list California as “ILLEGAL” in their state guides, stating that California law considers all night vision or thermal imaging devices for firearms illegal. This blanket approach is simpler than explaining nuances, but it doesn’t tell the full story about ownership for non-firearm uses.
For quality thermal imaging solutions that work within California’s framework, visit Pixfra’s homepage to explore our full range of thermal monoculars and imaging devices.
Based on current law and expert interpretation, here’s what we understand:
Likely legal: Owning a thermal scope or monocular for observation, research, or educational purposes. Using thermal binoculars or handheld monoculars for non-hunting activities.
Gray area: Possessing a thermal scope that could be mounted to a firearm, even if you don’t mount it. Using thermal devices for hunting when not attached to your weapon.
Clearly prohibited: Attaching a night vision or thermal device to a firearm. Using thermal scopes mounted to firearms for hunting.
The safest approach? Stick with handheld thermal monoculars for observation and leave weapon-mounted devices out of the picture. And definitely consult with a legal professional if you have specific questions about your situation.
The question “are thermal scopes legal in California” doesn’t have a simple yes or no answer. While thermal imaging technology itself isn’t banned, how you use it and whether it’s attached to a firearm makes all the difference. PC 468 technically targets devices with projected IR illuminators, which modern thermal scopes don’t use. But the broader interpretation and hunting regulations create real limitations.
For most California residents, thermal monoculars and binoculars offer the best path forward—you get thermal imaging capability without the legal concerns. Stay informed about current regulations, check with local authorities before hunting, and consider handheld options that keep you on the right side of the law.
Can I legally own a thermal scope in California?
Owning a thermal scope appears to be legal under a strict interpretation of PC 468, since thermal devices don’t use projected infrared illumination. However, possession with intent to mount it to a firearm creates legal risk. Many California residents own thermal monoculars and binoculars without issue since these aren’t designed for firearm mounting.
Is it illegal to hunt with thermal in California?
Yes, hunting with thermal devices mounted to firearms is prohibited in California. The state bans heat-sensing and non-visible spectrum technology for taking big game. Some exceptions may exist for agricultural landowners dealing with specific pests, but you should verify with California Department of Fish and Wildlife before hunting.
Why do so many websites say thermal scopes are illegal in California?
Retailers and manufacturers often take a conservative approach, listing California as “illegal” to avoid potential legal liability. While PC 468’s language specifically addresses projected IR illuminators (which thermal scopes don’t use), companies prefer blanket restrictions over explaining technical distinctions that could be challenged in court.
What’s the difference between thermal scopes and night vision under California law?
Both fall under similar restrictions when mounted to firearms. Night vision amplifies existing light (sometimes using IR illuminators), while thermal detects heat signatures. PC 468 targets devices with projected IR sources, but broader interpretations and hunting regulations restrict both technologies when attached to weapons.
Can I use a thermal monocular for wildlife observation in California?
Yes, thermal monoculars and binoculars are generally legal for observation, navigation, and non-hunting purposes. These handheld devices aren’t designed for firearm attachment and don’t fall under the same restrictions as weapon-mounted scopes. Many outdoor enthusiasts use them for wildlife watching, hiking, and property monitoring without legal concerns.
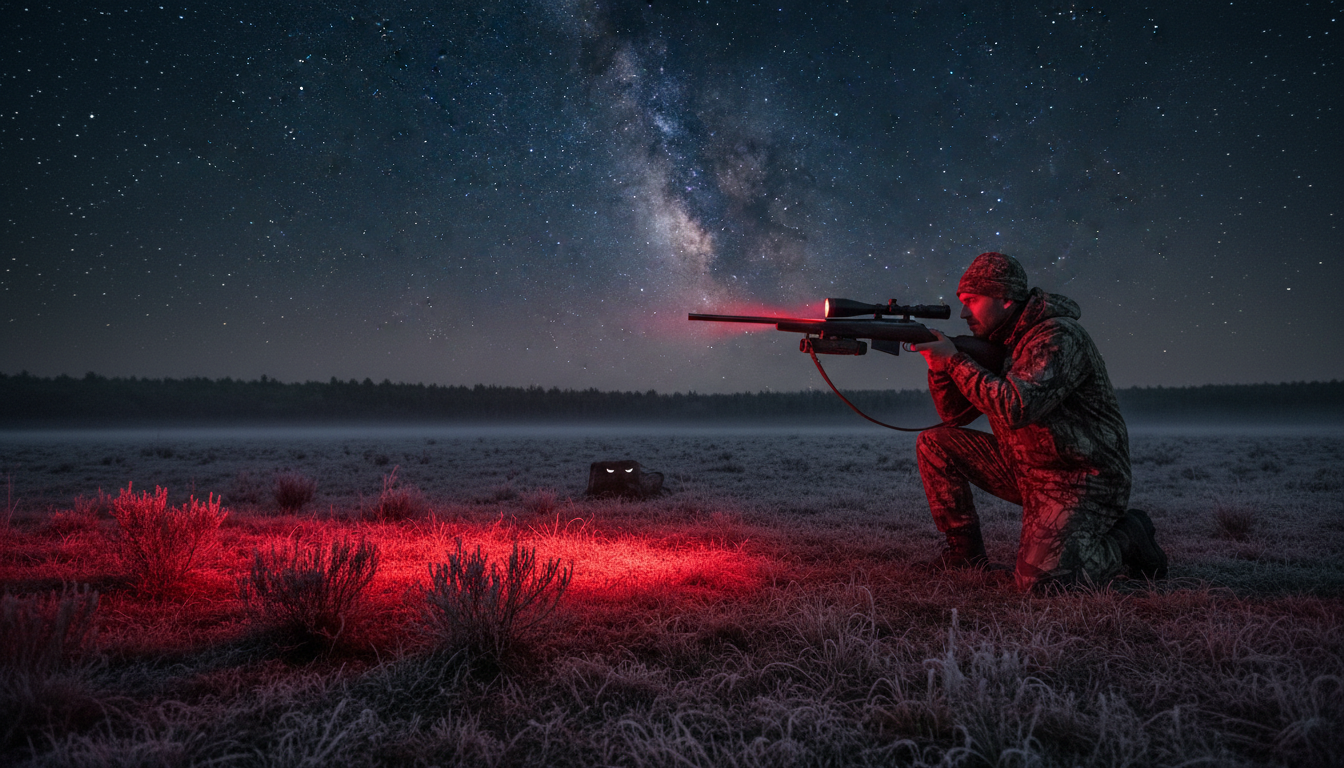
Wenn Sie nach Einbruch der Dunkelheit auf Kojotenjagd gehen, kann die richtige Beleuchtung über den Erfolg oder Misserfolg Ihrer gesamten Nacht entscheiden. Wir haben unzählige Stunden im Gelände damit verbracht, verschiedene Jagdscheinwerfer zu testen, und wir wissen, wie frustrierend es ist, einen Kojoten zu verscheuchen, weil Ihre Beleuchtung den Anforderungen nicht gewachsen war. Die gute Nachricht? Die heutigen Jagdscheinwerfer sind besser denn je – dank fortschrittlicher LED-Technologie, die Ihnen die benötigte Helligkeit liefert, ohne dass jedes Raubtier im Umkreis von einer Meile in Deckung rennt. Egal, ob Sie ein erfahrener Raubtierjäger sind oder gerade erst mit der Nachtjagd beginnen – um die richtige Lampe auszuwählen, müssen Sie sich mit Farboptionen, Helligkeitsstufen, Lichtverteilungen und Befestigungssystemen auskennen. Bevor wir auf konkrete Empfehlungen eingehen, sollte erwähnt werden, dass moderne Technologien wie Wärmebildmonokulare hat für viele Jäger neue Maßstäbe gesetzt, doch traditionelle Jagdleuchten spielen nach wie vor eine entscheidende Rolle bei der Platzierung der Schüsse und bei der ethischen Jagdausübung.
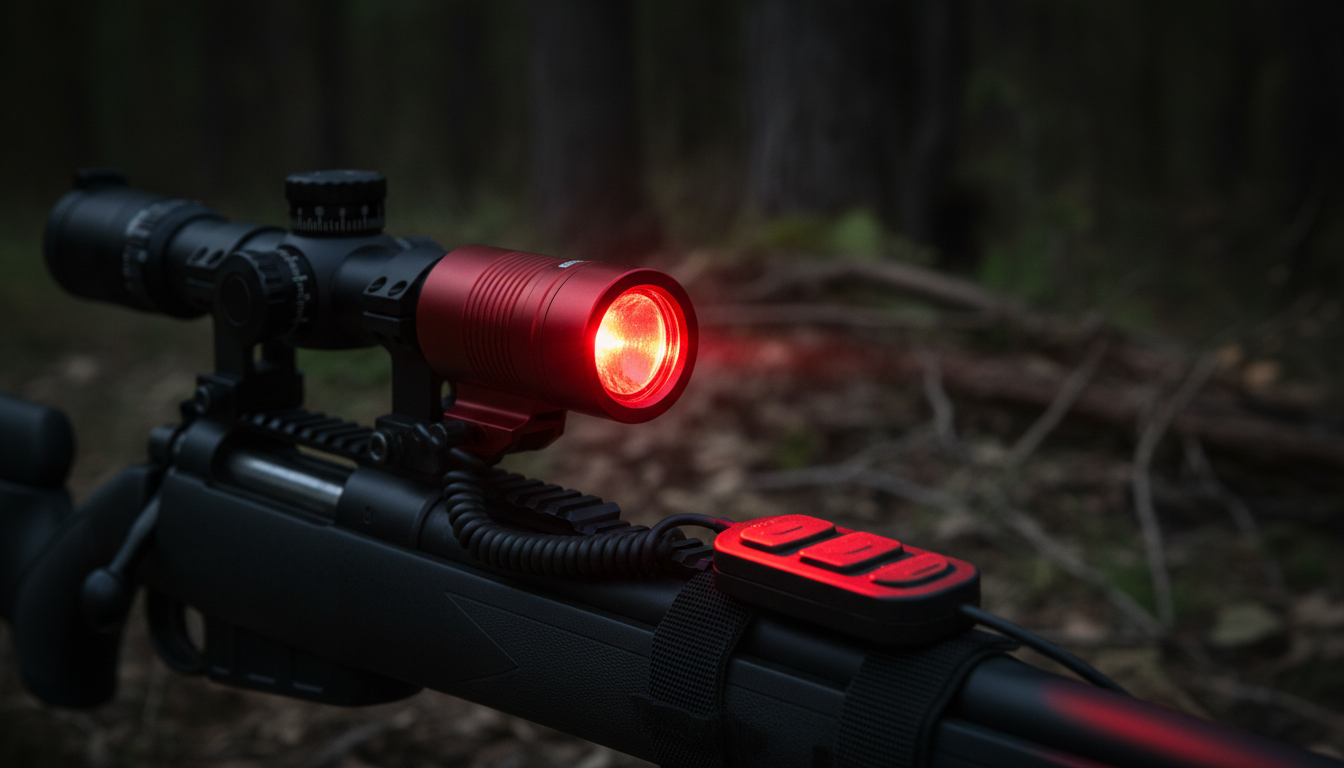
Bei der Farbe Ihrer Jagdlampe geht es nicht nur um persönliche Vorlieben – sie beeinflusst direkt, wie Kojoten reagieren, wenn Sie sie anleuchten. Rote Lampen sind seit Jahrzehnten die erste Wahl für Raubtierjäger, und dafür gibt es gute Gründe. Kojoten verfügen über ein dichromatisches Sehvermögen, was bedeutet, dass sie die Welt hauptsächlich in Blau- und Gelbtönen wahrnehmen. Sie reagieren weitaus weniger empfindlich auf rote Wellenlängen, weshalb ihnen rotes Licht viel schwächer erscheint als uns. Dies verschafft Ihnen einen erheblichen Vorteil, wenn Sie Felder absuchen oder den entscheidenden Schuss abgeben.
Grüne Lichter haben in den letzten Jahren an Beliebtheit gewonnen, da sie einen Mittelweg zwischen Sichtbarkeit und Unauffälligkeit bieten. Während Kojoten Grün besser sehen können als Rot, bieten grüne Lichter für das menschliche Auge eine hervorragende Klarheit, wodurch es einfacher wird, das Ziel zu identifizieren und die Situation einzuschätzen. Viele erfahrene Jäger berichten, dass grüne Lichter besonders gut in Gebieten mit dichter Vegetation funktionieren, wo der verstärkte Kontrast dabei hilft, Bewegungen leichter zu erkennen. Weiße Lichter sind die hellste Option und bieten insgesamt die beste Sicht, aber sie schrecken vorsichtige Kojoten auch am ehesten auf. Manche Jäger sparen sich weiße Lichter für den Moment des Schusses auf, nutzen farbige Lichter zum Absuchen der Umgebung und schalten auf Weiß um, um im entscheidenden Moment maximale Klarheit zu erzielen.
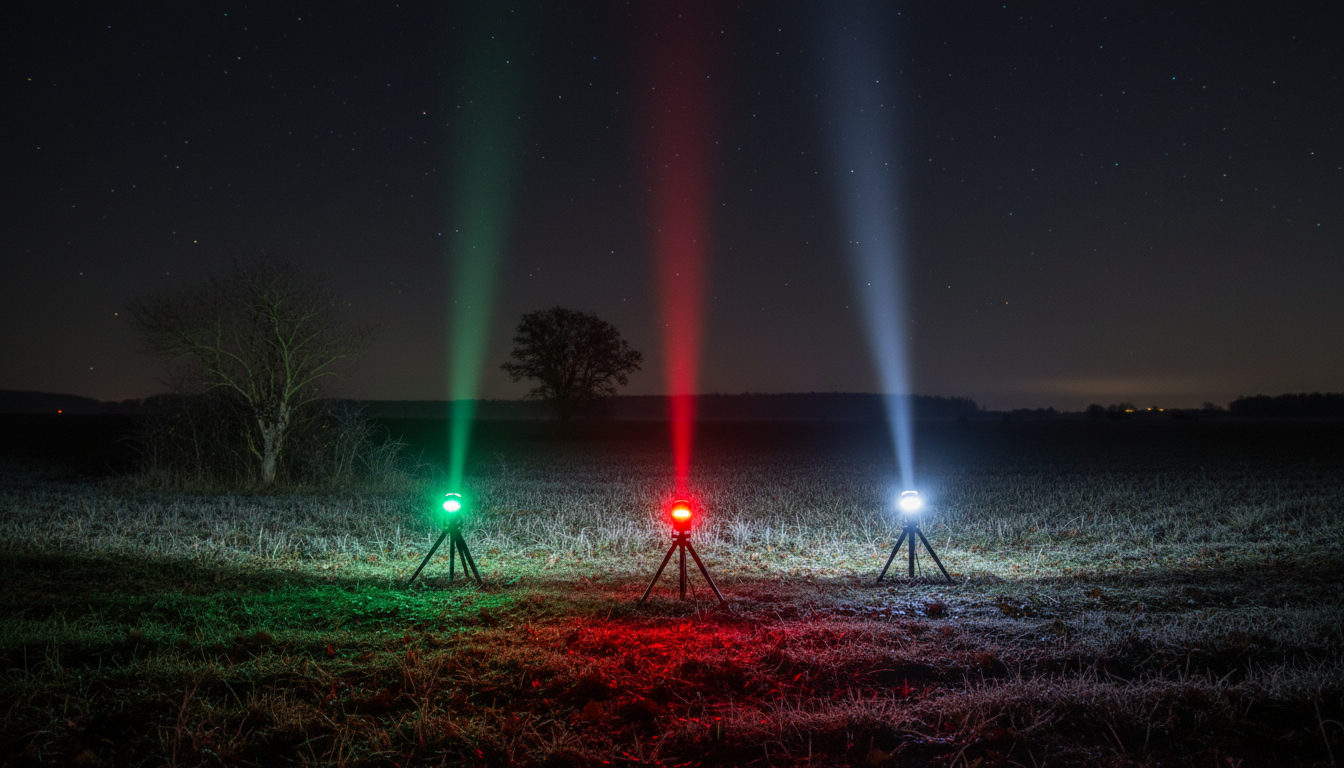
Wenn Sie sich nach einer Jagdlampe umsehen, werden Sie feststellen, dass Lumen als wichtigste Spezifikation genannt wird, doch die reine Lumenanzahl sagt nicht alles aus. Lumen messen die Gesamtlichtleistung, doch für die Jagd müssen Sie der Leuchtweite und dem Lichtkegel gleichermaßen Beachtung schenken. Eine Lampe mit 1.000 Lumen und einem gebündelten Lichtstrahl reicht viel weiter als eine 1.000-Lumen-Lampe mit einem breit gestreuten Lichtbild. Für die Kojotenjagd benötigen Sie in der Regel eine Lampe, die mindestens 300–500 Yards weit leuchtet, auch wenn Ihre tatsächliche Schussentfernung wahrscheinlich deutlich geringer sein wird.
Die meisten ernsthaften Kojotenjäger suchen nach Taschenlampen im Bereich von 500 bis 1.000 Lumen mit einem fokussierten oder gemischten Lichtkegel. Damit verfügen Sie über genügend Leuchtkraft, um Ziele aus der Ferne zu erkennen, und behalten gleichzeitig ein gutes peripheres Sichtfeld zum Absuchen der Umgebung bei. Beachten Sie, dass heller nicht immer besser ist – eine zu starke Leuchte kann es aufgrund von Blendung und Reflexionen sogar erschweren, Details zu erkennen. Der optimale Kompromiss hängt von Ihrer Jagdumgebung ab. In offenem Gelände mit langen Sichtlinien ist möglicherweise eine größere Reichweite wünschenswert. In Waldgebieten oder unwegsamem Gelände funktioniert ein breiterer Lichtkegel mit mäßiger Leistung oft besser. Da die Batterielaufzeit mit steigender Helligkeit abnimmt, müssen Sie ein Gleichgewicht finden, das für Ihre typischen Jagdausflüge geeignet ist.
Diese Debatte tobt überall in Jagdforen, und ehrlich gesagt gibt es keine einzige richtige Antwort, die für alle gilt. Rote Lichter sind nach wie vor die beliebteste Wahl unter traditionellen Raubtierjägern, da sie die beste Tarnung bieten. Wenn man ein rotes Licht auf einen Kojoten richtet, insbesondere aus der Ferne, zeigen diese oft nur eine minimale Reaktion. Er hält vielleicht kurz inne oder schaut sich um, rennt aber selten sofort davon, wie es bei weißem Licht der Fall wäre. Das verschafft dir wertvolle Sekunden, um den Schuss einzuschätzen und das Fadenkreuz auszurichten. Rotes Licht schont zudem deine Nachtsicht besser als andere Farben, was wichtig ist, wenn du in Gebieten jagst, in denen du dich möglicherweise im Dunkeln zwischen den Ansitzen fortbewegen musst.
Grüne Lichter haben sich aufgrund ihrer überragenden Leistung für das menschliche Auge eine große Anhängerschaft erobert. Das menschliche Auge ist am empfindlichsten für grüne Wellenlängen, was bedeutet, dass ein grünes Licht bei gleicher Lichtstärke wie ein rotes Licht für Sie viel heller und klarer erscheint. Dies führt zu einer besseren Zielerkennung und erleichtert das Abtasten der Umgebung. Obwohl Kojoten theoretisch Grün besser sehen können als Rot, berichten viele Jäger von hervorragenden Ergebnissen mit grünen Lichtern, insbesondere beim Anlocken in dichtem Unterholz, wo man jeden Vorteil braucht, um Bewegungen schnell zu erkennen. Einige Experten sind der Ansicht, dass die Reaktionen von Kojoten mehr mit der Lichtintensität und der Bewegung als mit der Farbe allein zu tun haben.
Weißes Licht bietet unübertroffene Klarheit und Farbwiedergabe, wodurch die Identifizierung der Tierart absolut sicher ist. Dies ist in Gebieten wichtig, in denen Sie möglicherweise auf Nichtzieltiere stoßen oder in denen die Vorschriften eine eindeutige Identifizierung vor dem Schuss vorschreiben. Der Nachteil ist, dass weißes Licht für Kojoten zweifellos am besten sichtbar ist. Viele erfahrene Jäger verfolgen einen kombinierten Ansatz: Sie suchen zunächst mit rotem oder grünem Licht und schalten dann in den letzten Augenblicken vor dem Schuss auf weißes Licht um. Diese Strategie bietet das Beste aus beiden Welten – Unauffälligkeit, wenn sie benötigt wird, und maximale Sichtbarkeit, wenn es auf Präzision ankommt.
Die Art und Weise, wie Sie Ihre Jagdlampe befestigen oder tragen, hat erheblichen Einfluss auf Ihre Erfolgsquote und Ihren Jagdstil. An der Waffe montierte Lampen sind die beliebteste Wahl für ernsthafte Raubtierjäger, da sie Ihnen die Hände frei halten und sicherstellen, dass das Licht immer genau dorthin gerichtet ist, wohin Ihr Gewehr zielt. Diese Koordination ist entscheidend, wenn ein Kojote schnell heranrannt oder wenn Sie es mit mehreren Tieren zu tun haben. Hochwertige, am Gewehr montierte Systeme lassen sich an der Picatinny-Schiene oder den Zielfernrohrringen Ihres Gewehrs befestigen und verfügen über Schnellverschlussmechanismen, sodass Sie die Lampe bei Bedarf anpassen oder abnehmen können. Der größte Nachteil ist das zusätzliche Gewicht am Gewehr sowie die Notwendigkeit von Fernauslösern, die ein weiteres Element darstellen, das Sie im Auge behalten müssen.
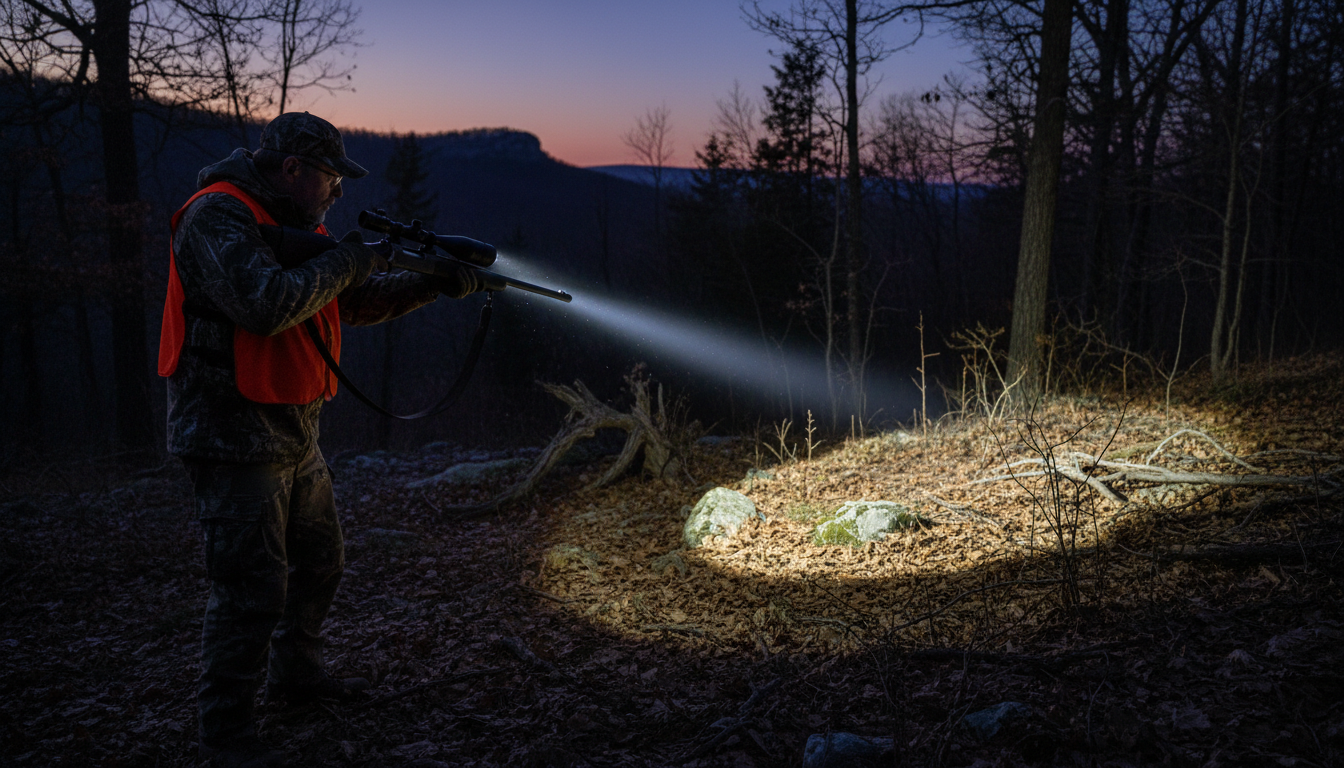
Handtaschen-Scheinwerfer bieten Ihnen maximale Flexibilität und erzielen oft die größten Leuchtweiten. Sie eignen sich hervorragend, um vor einem Ansitz große Flächen abzusuchen oder verdächtige Bewegungen zu überprüfen, ohne das Gewehr zu bewegen. Wenn es jedoch ans Schießen geht, stehen Sie vor einem Dilemma: Sie legen die Lampe ab (und verlieren möglicherweise Ihren Beleuchtungswinkel) oder versuchen, sowohl die Lampe als auch Ihr Gewehr gleichzeitig zu bedienen. Manche Jäger arbeiten mit einem Partner zusammen, wobei eine Person die Lampe bedient, während die andere schießt – was wohl die effektivste Vorgehensweise ist. Handlampen eignen sich zudem hervorragend als Reserveoption oder für den Einsatz beim Locken in dichtem Unterholz, wo man möglicherweise schnell in jede Richtung reagieren muss.
Stirnlampen bieten höchsten Komfort, da sie die Hände frei lassen, und werden bei mobilen Jägern, die große Gebiete abdecken, immer beliebter. Moderne Jagdstirnlampen sind mit roten, grünen und weißen LEDs erhältlich und lassen Ihnen die Hände völlig frei, um Ihr Gewehr zu tragen, Lockpfeifen zu benutzen oder sich im Gelände zurechtzufinden. Die Herausforderung bei Stirnlampen besteht darin, dass das Licht immer dorthin fällt, wohin Ihr Kopf zeigt – was nicht unbedingt die Richtung ist, in die Ihr Gewehr zeigt. Dies kann zu unangenehmen Situationen führen, wenn Sie einen Kojoten anleuchten müssen, während Sie durch Ihr Zielfernrohr blicken. Viele Jäger nutzen Stirnlampen für allgemeine Aufgaben und zur Orientierung, wechseln jedoch zu am Gewehr montierten oder handgeführten Lampen, wenn sie tatsächlich in Position sind und Lockrufe einsetzen.
Die Langlebigkeit steht ganz oben auf der Liste der unverzichtbaren Eigenschaften, da Jagdleuchten im Einsatz stark beansprucht werden. Achten Sie auf Leuchten mit Gehäusen aus Aluminium oder verstärktem Kunststoff, einer angemessenen Wasserdichtigkeitsklasse (IPX7 oder besser) und Stoßfestigkeit. Wahrscheinlich wird Ihnen die Lampe einmal herunterfallen, gegen Ihre Ausrüstung stoßen und Regen, Schnee sowie extremen Temperaturen ausgesetzt sein. Billige Lampen versagen genau dann, wenn man sie am dringendsten braucht. Seriöse Hersteller bieten solide Garantien auf ihre Produkte an, was viel über ihr Vertrauen in die Langlebigkeit aussagt.
Die Akkulaufzeit und die Stromversorgungsoptionen sollten sorgfältig abgewogen werden. Nichts ist schlimmer, als wenn die Lampe mitten in einer produktiven Nacht den Geist aufgibt. Wiederaufladbare Lithium-Ionen-Akkus sind praktisch und auf lange Sicht kostengünstig, erfordern jedoch Planung und Zugang zu Lademöglichkeiten. Taschenlampen, die mit handelsüblichen AA- oder CR123-Batterien betrieben werden, bieten den Vorteil, dass die Batterien unterwegs ausgetauscht werden können – man muss nur Ersatzbatterien mitnehmen und ist dann tagelang versorgt. Viele moderne Taschenlampen verfügen über mehrere Helligkeitsstufen, sodass Sie Batterie sparen können, wenn Sie nicht die volle Leistung benötigen. Eine gute Jagdlampe sollte Ihnen bei der Helligkeitsstufe, die Sie im Einsatz tatsächlich nutzen werden, eine Laufzeit von mindestens 2–3 Stunden bieten.
Die Einstellbarkeit des Lichtkegels und mehrere Farboptionen in einem Gerät sorgen für Vielseitigkeit, ohne dass Sie mehrere Lampen mit sich führen müssen. Einige der besten Jagdtaschenlampen, die derzeit auf dem Markt erhältlich sind, verfügen über austauschbare Linsenabdeckungen oder integrierte LED-Arrays, mit denen Sie per Knopfdruck zwischen rotem, grünem und weißem Licht umschalten können. Zoom- oder Fokussierfunktionen, mit denen Sie zwischen Punkt- und Flutlicht umschalten können, sind ebenfalls sehr nützlich. Möglicherweise benötigen Sie einen engen Punktlichtstrahl für die Fernsuche und einen breiteren Flutlichtstrahl zur Überprüfung des nahen Geländes. Fernbedienbare Druckschalter sind für an Waffen montierte Konfigurationen unverzichtbar, wobei die Qualität dieser Schalter stark variiert. Achten Sie auf Schalter mit deutlichem taktilen Rückmeldesignal und strapazierfähigen Kabeln, die auch nach einer Saison im Einsatz nicht versagen.
Wenn Sie verstehen, wie Helligkeitsstufen und Lichtverteilungen zusammenwirken, können Sie eine Lampe optimal an Ihre jeweiligen Jagdsituationen anpassen. Lichtverteilungen lassen sich im Allgemeinen in drei Kategorien einteilen: Spot, Flood und Kombination. Ein Spot-Lichtstrahl bündelt das Licht zu einer schmalen, fokussierten Säule, die eine maximale Reichweite erzielt. Dieses Muster eignet sich hervorragend zum Absuchen offener Felder oder zum Überprüfen entfernter Baumgrenzen, kann jedoch wie der Blick durch einen Tunnel wirken – man sieht zwar, was sich direkt vor einem befindet, übersieht jedoch Bewegungen am Rand des Sichtfelds. Flutlichtstrahlen verteilen das Licht über einen weiten Bereich, erreichen dabei jedoch eine geringere Reichweite. Sie eignen sich hervorragend für den Einsatz im Nahbereich im Wald oder wenn sich ein Kojote in unmittelbarer Nähe aufhält und Sie Bewegungen in einem breiteren Sichtfeld verfolgen müssen.
Kombinationsstrahlen, die manchmal auch als gemischte oder Hybridstrahlen bezeichnet werden, versuchen, sowohl Reichweite als auch Breite zu bieten. Diese Lichtverteilungen zeichnen sich typischerweise durch einen hellen zentralen Hotspot für die Fernsicht aus, der von einem weicheren Lichtkranz aus Streulicht umgeben ist, der die periphere Wahrnehmung gewährleistet. Viele Jäger halten dies für das vielseitigste Lichtbild bei der Raubtierjagd, da man damit den Fernbereich absuchen und gleichzeitig Bewegungen an den Seiten wahrnehmen kann. Einige Lampen verfügen über einen einstellbaren Fokus, mit dem man das gewünschte Lichtbild exakt einstellen kann, was jedoch eine zusätzliche mechanische Komplexität mit sich bringt, die möglicherweise zu Ausfällen führen kann.
Der Zusammenhang zwischen Helligkeit, Entfernung und Nutzbarkeit ist nicht linear. Eine Verdopplung der Lumen verdoppelt nicht die effektive Reichweite, und ab einem bestimmten Punkt schadet eine höhere Helligkeit sogar mehr, als sie nützt. Übermäßige Helligkeit führt zu Blendung, lässt Details verschwimmen und kann es tatsächlich erschweren, subtile Bewegungen oder Merkmale zu erkennen. Die meisten erfahrenen Kojotenjäger entscheiden sich für Lampen im Bereich von 500 bis 800 Lumen bei farbigem Licht und 800 bis 1.200 Lumen bei weißem Licht, mit mehreren Helligkeitsstufen, die je nach den Bedingungen angepasst werden können.
Wie Sie Ihre Jagdlampe einsetzen, ist genauso wichtig wie die Wahl der richtigen Lampe. Einer der größten Fehler, den Anfänger bei der Raubtierjagd begehen, ist, die Lampe während des Lockrufs ständig eingeschaltet zu lassen. Das verkürzt die Batterielebensdauer und macht möglicherweise vorsichtige Kojoten misstrauisch, die sich direkt außerhalb Ihres Lichtkegels aufhalten. Verwenden Sie stattdessen eine Technik mit intermittierendem Absuchen: Locken Sie 30 bis 60 Sekunden lang, leuchten Sie dann 10 bis 15 Sekunden lang mit Ihrer Lampe den Bereich ab, schalten Sie die Lampe anschließend aus und warten Sie. Mit diesem Muster können Sie das Gelände absuchen, ohne ständig Ihre Anwesenheit preiszugeben.
Wenn Sie einen Kojoten anleuchten, widerstehen Sie der Versuchung, die Lampe unregelmäßig hin und her zu schwenken. Plötzliche, ruckartige Bewegungen des Lichtstrahls verscheuchen Tiere weitaus stärker als eine gleichmäßige Ausleuchtung. Wenn sich ein Kojote nähert und Sie ihn mit Ihrer Lampe entdecken, halten Sie den Lichtstrahl ruhig und lassen Sie das Tier weiter auf Sie zukommen. Wenn es stehen bleibt und Sie anstarrt – was häufig vorkommt –, richten Sie die Lampe weiterhin auf das Tier und bereiten Sie sich auf den Schuss vor. Viele Kojoten bleiben mehrere Sekunden lang im Licht stehen, sodass Sie Zeit haben, sorgfältig zu zielen. Wenn Sie eine Handlampe verwenden, üben Sie Ihre Schussposition im Voraus, damit Sie genau wissen, wie Sie im entscheidenden Moment sowohl die Lampe als auch das Gewehr handhaben müssen.
Bei an Waffen montierten Lampen sollten Sie den Lichtstrahl so einstellen, dass er mit dem Auftreffpunkt Ihres Gewehrs auf eine bestimmte Entfernung – in der Regel 100 Yards – übereinstimmt. So stellen Sie sicher, dass das Licht genau den Punkt beleuchtet, auf den Sie schießen, wenn Sie auf das Ziel zielen. Manche Jäger ziehen es vor, ihre Lampe etwas seitlich statt direkt über oder unter der Laufachse zu positionieren, da dies Schatten reduzieren und eine bessere Konturierung ermöglichen kann. Auch die Platzierung des Fernschalters ist entscheidend. Bringen Sie den Schalter so an, dass Sie ihn ganz natürlich betätigen können, ohne Ihren Schussgriff zu unterbrechen oder Ihre Handposition verändern zu müssen. Üben Sie dies bei Tageslicht so lange, bis das Einschalten der Lampe zur zweiten Natur wird.
Die Debatte um Akkus bei Jagdscheinwerfern spiegelt die gleiche Diskussion in der Welt der Taschenlampen wider, doch bei der Jagd kommen spezifische Aspekte hinzu. Wiederaufladbare Lithium-Ionen-Akkus bieten das beste Leistungsverhältnis pro Gewicht, die höchste Kapazität und die niedrigsten Langzeitkosten. Moderne Li-Ionen-Zellen liefern über ihren gesamten Entladezyklus hinweg eine gleichbleibende Helligkeit und können hunderte Male wieder aufgeladen werden. Wenn Sie von einem Basislager oder einem Fahrzeug aus jagen, wo Sie die Lampen zwischen den Einsätzen aufladen können, sind wiederaufladbare Systeme äußerst sinnvoll. Sie sind zudem umweltfreundlicher, da Sie nicht ständig Einwegbatterien entsorgen müssen.
Wiederaufladbare Systeme erfordern jedoch Planung und entsprechende Infrastruktur. Wenn Sie sich auf einem längeren Jagdausflug fernab von Stromquellen befinden oder einfach vergessen haben, Ihre Akkus zwischen den Jagden aufzuladen, sitzen Sie fest. Hier spielen austauschbare Batterien ihre Stärken aus – Sie können Ersatzbatterien mitnehmen und diese in Sekundenschnelle austauschen. CR123A-Lithium-Batterien sind in Jagdtaschenlampen beliebt, da sie eine hervorragende Leistung bei kalten Temperaturen und eine lange Haltbarkeit bieten. Pro Einsatz sind sie zwar teurer als wiederaufladbare Batterien, doch wenn man meilenweit von der Zivilisation entfernt ist, zählen vor allem Zuverlässigkeit und Komfort. AA-Batterien sind noch leichter erhältlich, da man sie fast überall kaufen kann, auch wenn sie in Bezug auf Lichtleistung und Kältetoleranz in der Regel nicht so gut abschneiden wie CR123-Batterien.
Einige der besten Jagdlampen verfügen über Hybridsysteme, die sowohl wiederaufladbare als auch Einwegbatterien aufnehmen. Dank dieser Flexibilität können Sie wiederaufladbare Batterien für die regelmäßige Jagd verwenden und Einwegbatterien als Reserve oder für längere Ausflüge bereithalten. Egal, für welches System Sie sich entscheiden: Führen Sie immer Ersatzbatterien oder eine Ersatztaschenlampe mit. Murphys Gesetz gilt für Jagdausrüstung in doppeltem Maße – Taschenlampen fallen immer dann aus, wenn man sie am dringendsten braucht, meist genau in dem Moment, in dem sich ein Kojote nähert. Kluge Jäger sorgen für Redundanz.
Für den mobilen Jäger, der große Gebiete abdeckt und häufig seinen Standort wechselt, liefert eine Kombination aus einer guten Stirnlampe und einer am Gewehr montierten Lampe die besten Ergebnisse. Verwenden Sie die Stirnlampe zur Orientierung, zum Aufstellen der Ausrüstung und für allgemeine Aufgaben und schalten Sie dann auf die am Gewehr montierte Lampe um, wenn Sie aktiv Lockrufe einsetzen und die Umgebung absuchen. Mit dieser Konfiguration haben Sie die Hände frei, um Ausrüstung zu tragen, elektronische oder manuelle Lockpfeifen zu bedienen und Ihr Gewehr zu handhaben. Suchen Sie nach Waffenlampen im Bereich von 600 bis 800 Lumen mit roten und grünen LED-Optionen und wählen Sie Stirnlampen mit ähnlichen Farboptionen sowie einer weißen Lichtquelle für Aufgaben im Lager.
Jäger, die aus Tarnzelten jagen oder immer wieder dieselben Hochsitze nutzen, bevorzugen oft die Leistung und Flexibilität von Handscheinwerfern. Diese Jäger können Schießstöcke oder Auflagen aufstellen, ihren Scheinwerfer auf einem Stativ oder einer Halterung positionieren und so eine besser kontrollierte Schießumgebung schaffen. Bei dieser Vorgehensweise gewinnt die maximale Leuchtweite an Bedeutung, da man immer wieder dasselbe Gebiet absucht und möglicherweise mit längeren Sichtlinien arbeitet. Hier zeichnen sich Scheinwerfer im Bereich von über 1.000 Lumen mit gebündeltem Lichtstrahl besonders aus. Ein Jagdpartner, der sich um den Scheinwerfer kümmert, während Sie sich auf das Schießen konzentrieren, erhöht in dieser Situation die Erfolgsquote erheblich.
Für Jäger in Gebieten mit hohem Jagddruck, in denen Kojoten erfahren und äußerst vorsichtig sind, ist Tarnung wichtiger als reine Lichtleistung. Rotes Licht im Bereich von 400 bis 600 Lumen, das sparsam und strategisch eingesetzt wird, funktioniert besser als das Ausleuchten der Landschaft mit hochleistungsstarken Lichtstrahlen. In solchen Situationen sind an der Waffe montierte Leuchten mit hervorragender Strahlqualität gefragt, die bei minimaler tatsächlicher Lichtleistung eine maximale effektive Ausleuchtung gewährleisten. Hochwertige Optik und die Auswahl der LEDs sind wichtiger als die reine Lumenanzahl. Einige spezielle Leuchten für die Raubtierjagd wurden eigens für diesen Einsatzzweck entwickelt und verfügen über sorgfältig abgestimmte Strahlverteilungen, die ein Gleichgewicht zwischen Reichweite und Unauffälligkeit schaffen.
Ferngesteuerte Druckschalter machen an der Waffe montierte Lampen von einem umständlichen Accessoire zu einem unverzichtbaren Bestandteil. Mit dem Schalter können Sie Ihre Lampe steuern, ohne Ihren Schussgriff zu unterbrechen oder Ihre Hand zu bewegen. Hier kommt es enorm auf die Qualität an – billige Schalter versagen regelmäßig, oft im ungünstigsten Moment. Achten Sie auf Schalter mit Spiralkabeln, die nicht im Weg sind, auf eine robuste Bauweise und ein deutliches Ein-/Aus-Feedback. Einige fortschrittliche Systeme bieten mehrere Aktivierungsmodi (Momentbetrieb, Dauerbetrieb und Stroboskop), die durch unterschiedliche Druckmuster gesteuert werden.
Farbfilter oder austauschbare Linsen erweitern die Vielseitigkeit einer einzelnen Leuchte, ohne dass mehrere komplette Leuchten erforderlich sind. Viele Leuchten sind mit hochklappbaren Filtern oder aufschraubbaren Linsenabdeckungen in Rot, Grün und manchmal auch in Bernstein ausgestattet. So können Sie die Farbe je nach den Bedingungen, dem Verhalten der Tiere oder Ihren persönlichen Vorlieben wechseln. Manche Jäger führen mehrere Filter mit sich, auch wenn ihre Lampe über integrierte Farboptionen verfügt, da Filter eine zusätzliche Ebene der Lichtsteuerung und Strahlmodifikation bieten. Diffusionsfilter, die harte Strahlkanten abmildern, sind für den Einsatz im Nahbereich ebenfalls eine Überlegung wert.
Zu den Befestigungslösungen, die über einfache Zielfernrohrschienenhalterungen hinausgehen, gehören Laufklemmen, verstellbare Offset-Halterungen und Magnethalterungen. Bei Offset-Halterungen wird die Lampe seitlich am Zielfernrohr positioniert, was manche Jäger bevorzugen, um Schatten zu reduzieren und den Abstrahlwinkel zu verbessern. Mit verstellbaren Halterungen können Sie die Position Ihrer Lampe feinjustieren, ohne Ihr Gewehr dauerhaft verändern zu müssen. Schnellwechselsysteme sind besonders nützlich, wenn Sie dieselbe Lampe an mehreren Gewehren verwenden oder die Lampe für andere Zwecke abnehmen möchten. Hochwertige Halterungen sind stabil, halten die Nullstellung und überstehen den Rückstoß, ohne sich zu lockern.
Bevor Sie in Ausrüstung für die Nachtjagd investieren, sollten Sie sich gründlich über die örtlichen Vorschriften informieren. Die Gesetze zur Nachtjagd variieren stark je nach Bundesstaat und sogar je nach Landkreis. In einigen Bundesstaaten ist die Nachtjagd gänzlich verboten, in anderen ist sie nur für bestimmte Tierarten mit entsprechender Genehmigung erlaubt, und wieder andere haben uneingeschränkte Jagdsaisons für Raubtiere. Die Vorschriften für künstliches Licht können besonders komplex sein – in manchen Gerichtsbezirken sind an Schusswaffen befestigte Leuchten erlaubt, Handtaschenlampen jedoch verboten, oder umgekehrt. In manchen Gebieten sind bestimmte Lichtfarben oder Helligkeitsstufen eingeschränkt. Unwissenheit ist keine Entschuldigung, also informieren Sie sich gründlich, bevor Sie losziehen.
Ethische Überlegungen gehen über die gesetzlichen Anforderungen hinaus. Die Nachtjagd erfordert absolute Sicherheit bei der Identifizierung des Ziels, da die Sichtverhältnisse naturgemäß eingeschränkt sind. Der Einsatz einer angemessenen Beleuchtung ist tatsächlich eine ethische Notwendigkeit – man benötigt genügend Licht, um sich der Zielart vollkommen sicher zu sein, um zu beurteilen, ob es sich um ein erlaubtes Tier handelt, und um einen präzisen, humanen Schuss abzugeben. Aus diesem Grund bevorzugen viele ethisch handelnde Jäger im entscheidenden Moment vor dem Schuss weißes Licht, auch wenn sie zum Absuchen der Umgebung farbiges Licht verwenden. Fehler bei der Zielidentifizierung sind unverzeihlich und können schwerwiegende rechtliche und ökologische Folgen haben.
Auch die Beziehungen zu den Grundstückseigentümern spielen bei der Ethik der Nachtjagd eine Rolle. Selbst in Bundesstaaten, in denen die Nachtjagd legal ist, sollten Sie Rücksicht auf Nachbarn und andere Grundstückseigentümer nehmen, die sich durch Lichtstrahlen, die über ihr Grundstück schwenken, oder durch Schüsse in der Nacht gestört fühlen könnten. Sprechen Sie mit angrenzenden Landbesitzern, halten Sie sich strikt an die Grenzen Ihrer Genehmigungsfläche und jagen Sie verantwortungsbewusst. Der Aufbau positiver Beziehungen zu Landbesitzern und Nachbarn sichert den dauerhaften Zugang und trägt dazu bei, den guten Ruf der Jägergemeinschaft zu wahren.
Die richtige Pflege verlängert die Lebensdauer Ihrer Jagdlampen und stellt sicher, dass sie funktionieren, wenn Sie sie brauchen. Überprüfen Sie Ihre Lampe nach jeder Jagd auf Beschädigungen, entfernen Sie Schlamm und Schmutz und vergewissern Sie sich, dass alle O-Ringe und Dichtungen intakt sind. Selbst wasserdichte Lampen können ausfallen, wenn die Dichtungen beschädigt sind. Trocknen Sie Ihre Lampe gründlich ab, falls sie nass geworden ist, und lagern Sie sie so, dass die Batteriekontakte sauber und korrosionsfrei sind. Viele Jäger entfernen die Batterien bei längerer Lagerung, um Korrosion durch auslaufende Batterien zu vermeiden, obwohl dies bei hochwertigen Lithiumzellen weniger ein Problem darstellt.
Befolgen Sie bei wiederaufladbaren Lampen die richtigen Ladevorschriften. Lithium-Ionen-Akkus erzielen die beste Leistung, wenn sie bei einem Ladezustand zwischen 20 und 80 % gelagert werden. Regelmäßiges vollständige Entladen oder ein über längere Zeiträume aufrechterhaltener Ladezustand von 100 % verkürzt die Gesamtlebensdauer. Die meisten hochwertigen Jagdtaschenlampen verfügen über einen integrierten Ladeschutz, dennoch lohnt es sich, sie nach dem Aufladen vom Ladegerät zu trennen, anstatt sie unbegrenzt am Ladegerät zu lassen. Halten Sie Ersatz-O-Ringe bereit und machen Sie sich mit der Demontage und Wartung der wasserdichten Dichtungen Ihrer Taschenlampe vertraut. Eine kleine Menge Silikonfett auf den O-Ringen erhält deren Flexibilität und Dichtungsleistung.
Die Pflege der Linsen wird oft übersehen, ist jedoch für die Lichtqualität von großer Bedeutung. Zerkratzte oder verschmutzte Linsen streuen das Licht, verringern die effektive Leuchtweite und verursachen Blendung. Verwenden Sie geeignete Linsenreinigungsmittel und weiche Tücher, niemals scheuernde Materialien oder aggressive Chemikalien. Manche Jäger bringen an teuren Scheinwerfern Linsenschutz oder Schutzfolien an, obwohl diese die Lichtqualität leicht beeinträchtigen können. Bewahren Sie Ihre Lampen in gepolsterten Etuis oder speziellen Fächern auf, anstatt sie lose in einer Ausrüstungstasche zu verstauen, wo sie zerkratzt oder beschädigt werden können. Bei richtiger Pflege wird Ihnen eine hochwertige Jagdlampe jahrelang zuverlässige Dienste leisten.
Welche Lichtfarbe eignet sich am besten für die nächtliche Kojotenjagd? Rote Lichter sind nach wie vor die beliebteste Wahl, da Kojoten gegenüber roten Wellenlängen weniger empfindlich sind und sich daher schwerer verscheuchen lassen. Grüne Lichter bieten jedoch eine bessere Sichtbarkeit für das menschliche Auge und eignen sich in vielen Situationen gut. Viele erfahrene Jäger führen beide Farben mit sich oder verwenden Lampen mit mehreren Farboptionen, um sich an unterschiedliche Situationen anzupassen.
Wie viele Lumen brauche ich für die Nachtjagd auf Kojoten? Die meisten Jäger sind der Meinung, dass 500–800 Lumen den optimalen Bereich für farbige Lichter (rot oder grün) darstellen, da sie ausreichend Helligkeit bieten, um Ziele in einer Entfernung von 200–400 Yards zu erkennen, ohne dabei übermäßig zu blenden. Weißes Licht kann mit bis zu 1.000–1.200 Lumen auch heller sein, da es in der Regel nur kurz zur endgültigen Bestätigung des Schusses eingesetzt wird.
Sollte ich bei Kojoten eine am Gewehr montierte Lampe oder einen Handscheinwerfer verwenden? An das Gewehr montierte Lampen sind für Einzeljäger in der Regel effektiver, da sie die Hände frei halten und dafür sorgen, dass das Licht immer dorthin fällt, wohin das Gewehr zielt. Handtaschenlampen eignen sich hervorragend, wenn Sie mit einem Partner auf der Jagd sind oder wenn Sie eine maximale Leuchtweite benötigen, um große Gebiete abzusuchen.
Schreckt ein helles Jagdscheinwerferlicht Kojoten ab? Das hängt von der Lichtfarbe, der Helligkeit und der Art der Nutzung ab. Rotlicht, das nur zeitweise eingesetzt wird, schreckt Kojoten in der Regel weniger ab als konstantes weißes Licht. Plötzliche Bewegungen des Lichtstrahls beunruhigen Kojoten stärker als eine gleichmäßige Beleuchtung. In Gebieten mit intensiver Jagd sind Kojoten möglicherweise darauf konditioniert, Licht unabhängig von der Farbe zu meiden.
Benötige ich für den Einsatz eines Wärmebildgeräts bei Nacht eine spezielle Beleuchtung? Wenn Sie Wärmebildgeräte verwenden, wie beispielsweise die von Pixfra, man benötigt keine herkömmlichen Jagdleuchten zur Zielerfassung, da die Wärmebildtechnik unabhängig vom sichtbaren Licht funktioniert. Dennoch führen viele Jäger weiterhin Leuchten mit sich, um sich zu orientieren, die Sicherheit zu gewährleisten und Ziele vor dem Schuss zu bestätigen.
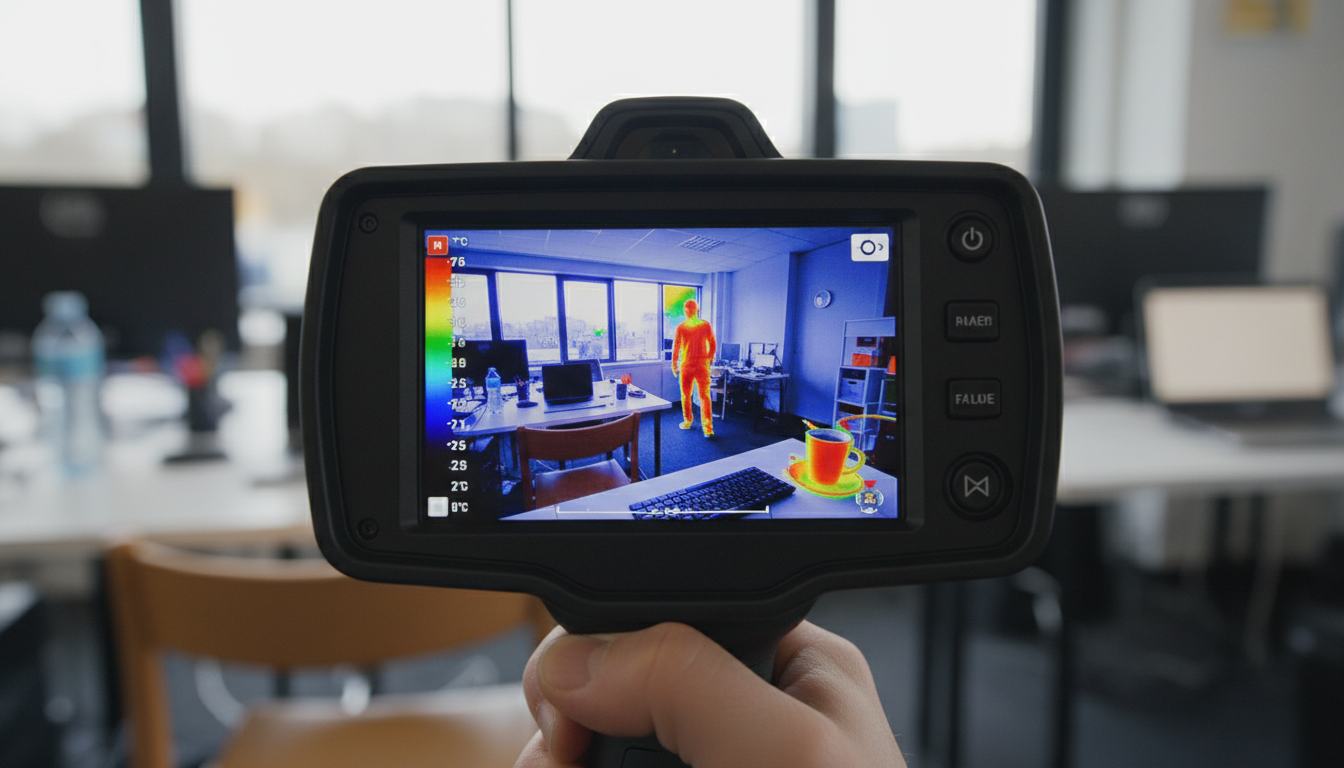
Thermal imaging technology has changed how we see the world around us. If you’ve ever wondered how firefighters find people in smoke-filled buildings or how electricians spot overheating wires without touching them, the answer is thermal cameras. These devices let us see heat instead of light, opening up a whole new way to detect problems, stay safe, and make smarter decisions across countless industries.
Whether you’re thinking about buying your first thermal camera, curious about how the technology works, or looking to expand your knowledge, this guide breaks down everything you need to know. We’ll walk through the science behind thermal imaging, the different types of cameras available, real-world uses, and practical tips for choosing the right equipment. If you’re interested in professional hunting applications, we’ve got you covered there too. Let’s get started and see what thermal imaging can do for you.
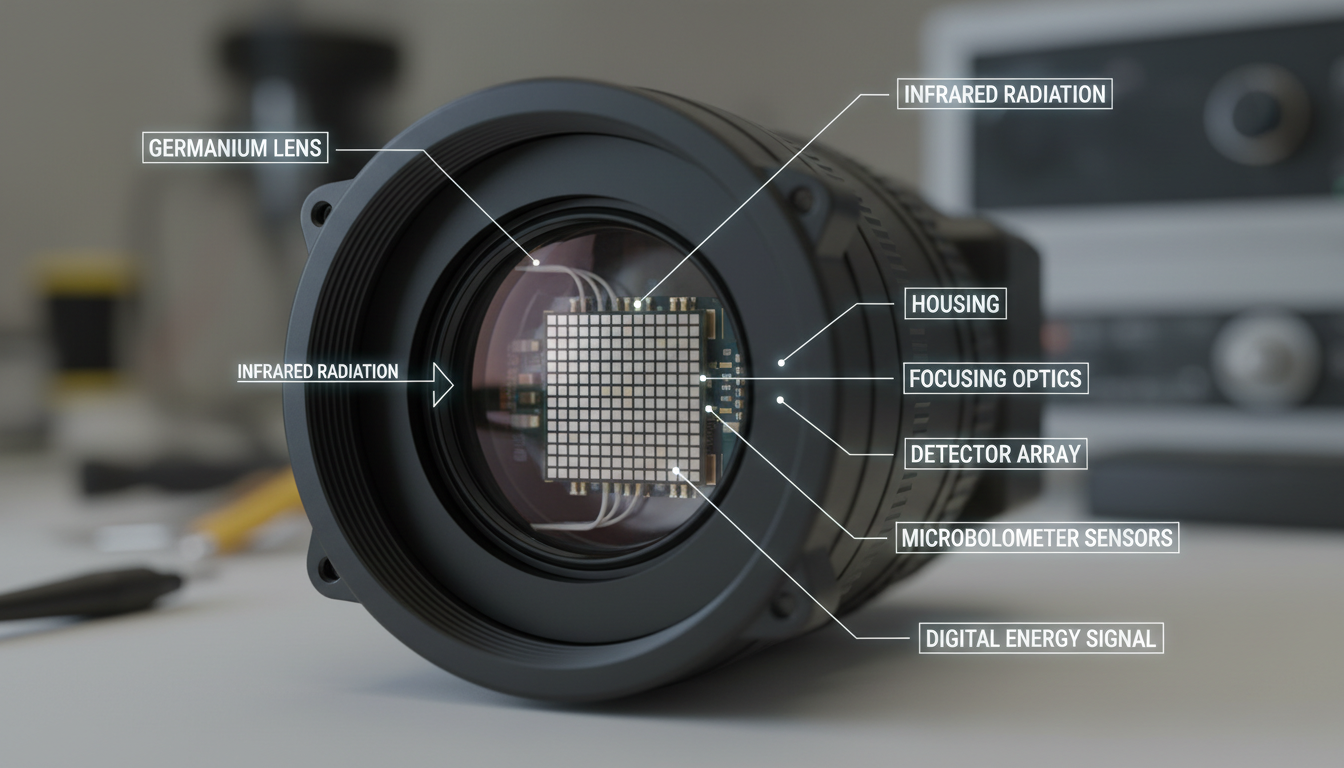
Thermal imaging, also known as thermography, is the process of capturing and analyzing the heat emitted by objects. Think of it as a way to see temperature differences instead of colors or shapes. Every object with a temperature above absolute zero (-273.15°C or -459.67°F) emits infrared radiation, which is invisible to the human eye. That’s where thermal cameras come in.
Thermal cameras detect this radiation and convert it into an image where different colors represent temperature variations. Typically, warmer areas show up in red or white, while cooler spots appear blue or purple. This color-coding makes it super easy to spot hot or cold areas at a glance. Unlike regular cameras that need light to work, thermal cameras can see in total darkness because they’re reading heat, not light. That’s why they’re so valuable for nighttime operations, search and rescue missions, and any situation where visibility is limited.
The key difference: Regular cameras capture visible light bouncing off objects. Thermal cameras capture infrared energy radiating from objects. This means a thermal camera can show you what’s hot or cold even when there’s no light at all.
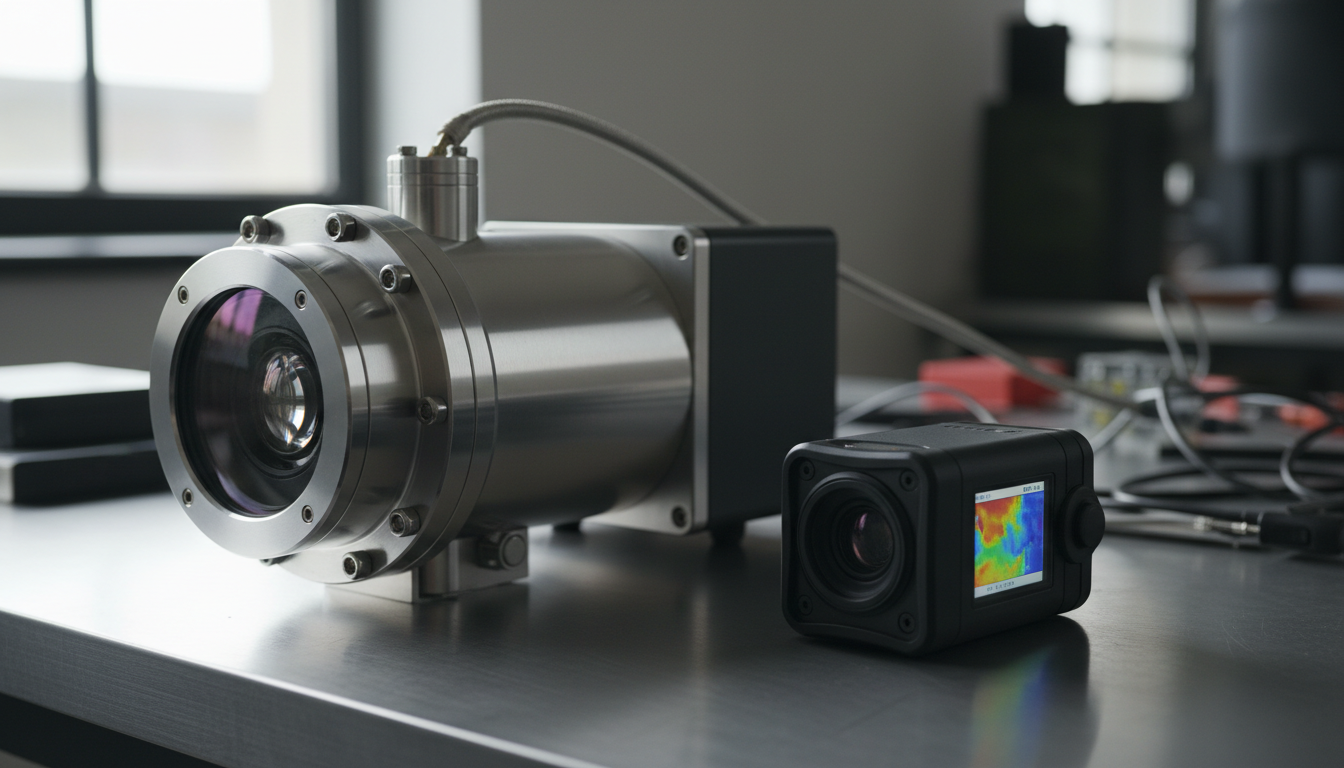
A thermal camera is made up of a lens, a thermal sensor, processing electronics, and a mechanical housing. Here’s how these parts work together to create those colorful heat maps you see:
The lens focuses infrared energy onto the sensor. This isn’t a regular glass lens like you’d find on a smartphone camera – it’s specially designed to let infrared wavelengths pass through. Once the heat hits the sensor, something interesting happens.
A bolometer is a simple sensor that absorbs thermal radiation and changes resistance as a result. This change in resistance can be electrically measured, and the incident radiation can be determined. Modern thermal cameras use thousands of these tiny sensors arranged in an array called a microbolometer. When infrared radiation reaches the microbolometer, each tiny sensor absorbs the energy and experiences a slight temperature increase.
The processing electronics then convert these resistance changes into electrical signals. These temperature readings are transformed into a colored image. A thermal camera typically displays warmer regions in tones such as red or yellow, while cooler surfaces take on colors like blue or green. All of this happens in real-time, so you’re seeing live heat patterns as they change.
The sensor can come in a variety of pixel configurations from 80 × 60 to 1280 × 1024 pixels or more. This is the resolution of the camera. These resolutions are low in comparison to visible light imagers because thermal detectors need to sense energy that has much larger wavelengths than visible light.
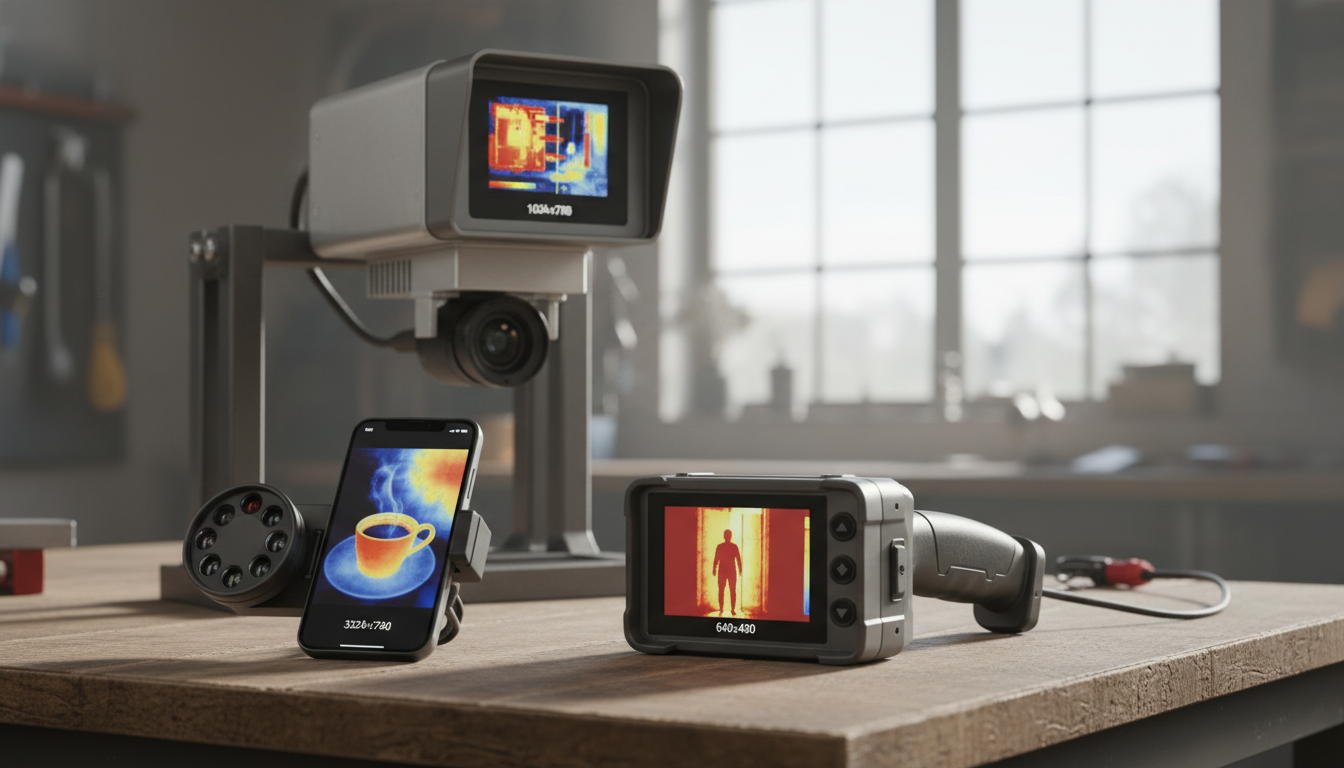
Not all thermal cameras are built the same. They fall into different categories based on how their sensors operate. Let’s break down the main types you’ll come across.
Cooled cameras have a cooling mechanism within the sensor to improve sensitivity. They are typically more expensive and used in high-precision tasks like military surveillance or medical diagnostics. They operate with sensors that are cryogenically cooled, usually within a vacuum-sealed case. This cooling process improves their sensitivity, allowing them to detect even the tiniest temperature differences.
Cooled detectors can sense temperature variations as small as 0.02°C. This level of precision makes them perfect for scientific research, military operations, and other specialized applications where every degree matters. The downside? They’re pricey, complex, and need time to cool down before they’re ready to use.
Uncooled thermal cameras use uncooled infrared sensors. They are common, cost-effective, and suitable for many applications such as building inspections and preventive maintenance. These cameras operate at room temperature, so they don’t need bulky cooling systems.
Uncooled thermal imaging cameras are more common and affordable. They operate at ambient temperature, without the need for complex cooling systems. These cameras are designed to detect temperature differences as small as 0.2°C. While they’re not quite as sensitive as cooled cameras, they’re more than good enough for most everyday uses – from home inspections to industrial maintenance to security work.
The big advantage here is simplicity. Uncooled cameras are lighter, more reliable, and way more budget-friendly. They’re the go-to choice for most commercial and consumer applications. If you’re browsing options at Pixfra, you’ll find plenty of uncooled models that deliver excellent performance without breaking the bank.
Focal plane arrays (FPAs) form the heart of both cooled and uncooled thermal cameras. Think of the FPA as the “film” in a thermal camera – it’s the grid of sensors that captures the heat image. Higher-quality FPAs have more pixels packed into the same space, which means sharper, more detailed images. Whether you’re looking at a cooled or uncooled camera, the FPA quality matters a lot for overall performance.
When you’re shopping for a thermal camera, the spec sheet can look like alphabet soup. Here are the most important numbers to pay attention to:
Thermal or infrared resolution indicates the detail captured by the thermal detector. For example, ‘160 x 120’ means the thermal camera has an array of 160 x 120 sensors or pixels that create its baseline thermal image. A higher thermal resolution provides more clarity, so more is better.
The standard resolutions are 160 x 120, 320 x 240 and 640 x 480 pixels. A 160 x 120 resolution will have 19,200 pixels while a 640 x 480 resolution will have 307,200 pixels. That’s a huge difference in image detail. Higher resolution lets you see smaller objects more clearly and work from farther away.
Thermal sensitivity defines the minimum temperature difference an infrared camera can detect. It is also called the Noise Equivalent Temperature Difference (NETD). Je niedriger der Wert, desto empfindlicher ist der Detektor. Die thermische Empfindlichkeit beschreibt die kleinste Temperaturdifferenz, die bei der Verwendung eines thermischen Geräts festgestellt werden kann.
Most consumer cameras have NETD values around 40-100 mK (milliKelvins). High-performance models can go as low as 20 mK or even 10 mK. If you’re hunting for tiny temperature differences – like finding moisture behind walls or spotting early equipment failures – you’ll want a camera with better (lower) NETD.
According to the temperature ranges we want to measure, the most commonly used industrial thermal cameras are of the following: LWIR for “low” temperature measurements between -50°C and 900°C, NIR-SWIR for high temperature measurements (450°C to 2450°C), and MWIR for measuring low and intermediate temperatures with high precision.
For most home and general industrial use, a range of -20°C to 400°C will cover your needs. Specialized applications might need cameras that can handle much higher (or lower) temperatures.
The field of view (FOV) determines how wide an area your camera can see. A wider FOV is great for scanning large spaces, while a narrower FOV (telephoto lens) helps you zoom in on distant targets. Some advanced thermal cameras offer interchangeable lenses, giving you flexibility for different situations.
Thermal imaging isn’t just for one industry – it’s everywhere. Here are some of the most popular ways people put thermal cameras to work:
In construction, thermal cameras detect heat loss, moisture issues, and insulation problems in buildings, promoting energy efficiency and safety. You can spot drafts around windows, missing insulation in walls, and even hidden water leaks before they cause serious damage. Home inspectors and energy auditors rely on thermal cameras to give homeowners a clear picture of where their heating and cooling dollars are escaping.
Thermal imaging identifies overheating circuits or equipment that could lead to failures, allowing for proactive maintenance. An overheating electrical connection shows up bright on a thermal camera, giving electricians an early warning before things catch fire or fail completely. This predictive maintenance approach saves companies tons of money and prevents dangerous situations.
Thermal cameras aid firefighters and search & rescue teams in locating hotspots, victims, and hidden hazards in smoke-filled environments, enhancing safety and efficiency during emergency operations. When visibility drops to zero in a burning building, thermal cameras become a firefighter’s best friend. They can see through smoke to find people who need rescue and identify where the fire is burning hottest.
Thermal cameras are integrated into security systems for perimeter monitoring, intruder detection, and surveillance in low-light or adverse weather conditions. Unlike regular security cameras that need light or infrared illuminators, thermal cameras work in complete darkness, through fog, and even light rain. They can spot intruders from far away based on their heat signature.
Industrial plants use thermal cameras to monitor machinery, inspect manufacturing processes, and catch overheating components before damage occurs. From production lines to power plants, thermal cameras help keep operations running smoothly by identifying problems early.
Thermal technology has become hugely popular among hunters and outdoor enthusiasts. Thermal monoculars and scopes let you spot game in total darkness or thick brush. For a deep dive into this application, check out our guide on thermal monoculars for hunting or explore the Sirius HD model.
In the medical field, thermal cameras are utilized for diagnostic purposes, detecting abnormalities in blood flow, inflammation, and tissue temperature. Doctors use thermal imaging to spot inflammation, monitor circulation, and even identify potential tumors based on temperature differences in body tissue.
Picking the right thermal camera depends on what you’re trying to do with it. Here’s a practical approach:
1. Define Your Use Case: Are you inspecting buildings? Monitoring electrical panels? Hunting? Each application has different requirements for resolution, temperature range, and features.
2. Set Your Budget: Thermal cameras range from a few hundred dollars for smartphone attachments to tens of thousands for high-end professional models. Know what you can spend before you start shopping.
3. Consider Resolution Needs: The higher the resolution of the detector, the sharper and more accurate each individual point in the image will be. Higher resolution infrared cameras can measure smaller targets at a greater distance. If you need to see fine details or work from a distance, invest in higher resolution.
4. Check Thermal Sensitivity: For applications that need to detect subtle temperature differences – like finding moisture or spotting early equipment wear – look for cameras with NETD values of 50 mK or better.
5. Verify Temperature Range: Make sure the camera can measure the temperatures you care about. Building inspections typically need -20°C to 150°C, while industrial monitoring might need much higher ranges.
6. Look for Useful Features: Modern thermal cameras often include extras like built-in digital cameras for context photos, WiFi connectivity for sharing images, picture-in-picture modes, and software for analysis. Decide which features actually add value for your work.
7. Think About Form Factor: Handheld cameras are great for walk-around inspections. Fixed-mount cameras work better for continuous monitoring. Smartphone attachments offer portability and affordability for casual use.
Once you have a thermal camera, here are some tips to get accurate, useful images:
Understand Emissivity: Different materials emit infrared radiation differently. Most thermal cameras let you adjust the emissivity setting to match what you’re measuring. Shiny metal surfaces have low emissivity and can be tricky – they reflect heat from other sources rather than showing their true temperature.
Watch for Reflections: Shiny surfaces can reflect heat from other objects, giving false readings. Be aware of this when interpreting your images.
Consider Environmental Factors: Wind, rain, and ambient temperature can all affect your readings. Try to measure in stable conditions when possible.
Get the Right Distance: Each camera has an optimal distance range. Too close or too far, and you might not get accurate measurements.
Use Context Images: Many thermal cameras can capture both thermal and visible light photos. These context images make it much easier to understand what you’re looking at and to communicate findings to others.
Can thermal cameras see through walls?
Contrary to popular belief, infrared cameras cannot see through walls or other solid objects. They can only measure the heat emitted by the scene being observed. A thermal image of a wall will show the flow of heat through the wall if there is a heat source behind it, but it cannot “see” the heat source itself. Thermal cameras detect surface temperatures, so they can reveal patterns that suggest what’s behind a wall (like a hot pipe), but they can’t actually see through solid objects.
Was ist der Unterschied zwischen Wärmebildtechnik und Nachtsicht?
Regular cameras and the human eye both work on the same basic principle: visible light energy hits something, bounces off it, a detector receives the reflected light, and then turns it into an image. Thermal imagers make pictures from heat, not visible light. Heat and light are both parts of the electromagnetic spectrum, but a camera that can detect visible light won’t see thermal energy, and vice versa. Night vision amplifies available light to help you see in the dark. Thermal imaging detects heat and works even in total darkness.
How much does a good thermal camera cost?
Prices vary widely based on specifications and intended use. Entry-level smartphone attachments start around $200-400. Quality handheld cameras for home inspection and general use run $500-2,000. Professional-grade models for industrial or scientific applications can cost $5,000-$50,000 or more. For most DIY and professional trades applications, cameras in the $800-1,500 range offer excellent value.
Do thermal cameras work in daylight?
Yes! Because a thermal camera reads heat instead of visible light, it can reveal crucial information even in darkness or visually obstructed settings. Thermal cameras detect infrared radiation, which is always present regardless of lighting conditions. They work equally well day or night.
What resolution thermal camera do I need?
The two major factors that you should keep in mind when buying a thermal imager are Detector Resolution and Thermal Sensitivity. For basic home inspections and casual use, 160×120 resolution is adequate. For professional building inspection, electrical work, or industrial applications, 320×240 offers a good balance of detail and cost. High-end applications requiring precise measurements at distance should consider 640×480 or higher. Remember that more pixels mean more detail, which translates to better decisions and more accurate measurements.
We all love the thrill of spotting wildlife in their natural surroundings. Whether you’re hoping to catch a glimpse of a deer grazing in a meadow or watching birds build their nests, wildlife observation connects us to nature in ways few other activities can. But here’s the thing—getting too close or making the wrong moves can stress animals out, mess with their natural behavior, and even put you in danger.
That’s why we put together this guide to help you watch wildlife the right way. We’ll walk you through proven best practices that keep both you and the animals safe, so you can enjoy these amazing moments without causing any harm. If you’re interested in observing wildlife at night, check out our guide on fox hunting at night behavior and techniques for more specialized tips.
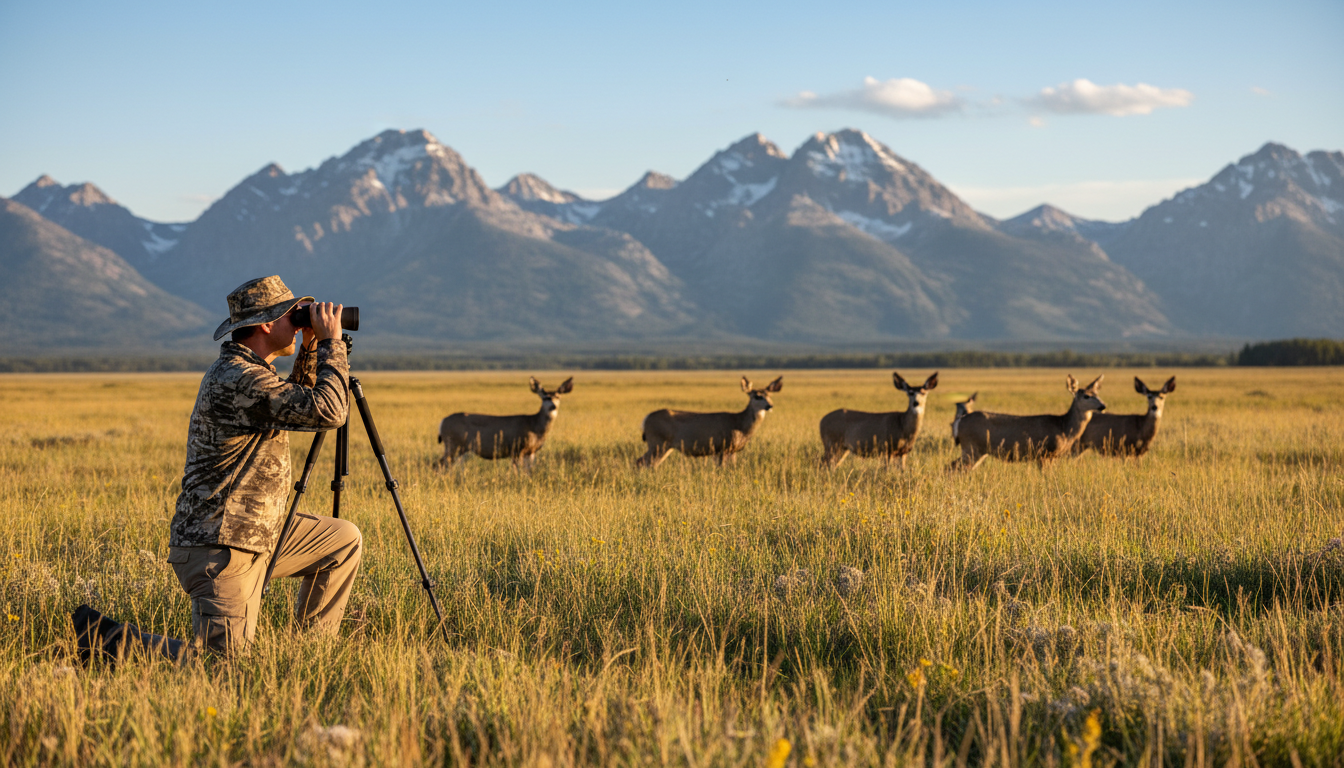
Many parks require you to stay a minimum distance of 25 yards from most wildlife and 100 yards from predators like bears and wolves. That’s roughly two bus lengths for smaller animals and a whole football field for the big predators. If you can take a selfie with an animal without zooming in, you’re way too close.
Use binoculars, spotting scopes, or cameras with zoom lenses to get a better view without crowding the animals. Binoculars and telephoto lenses are essential tools for creating physical distance and allow you to observe wildlife discreetly, while offering a much more rewarding glimpse into the animals’ natural behavior. When animals don’t know you’re watching, they act naturally—and that’s when you see the really cool stuff.
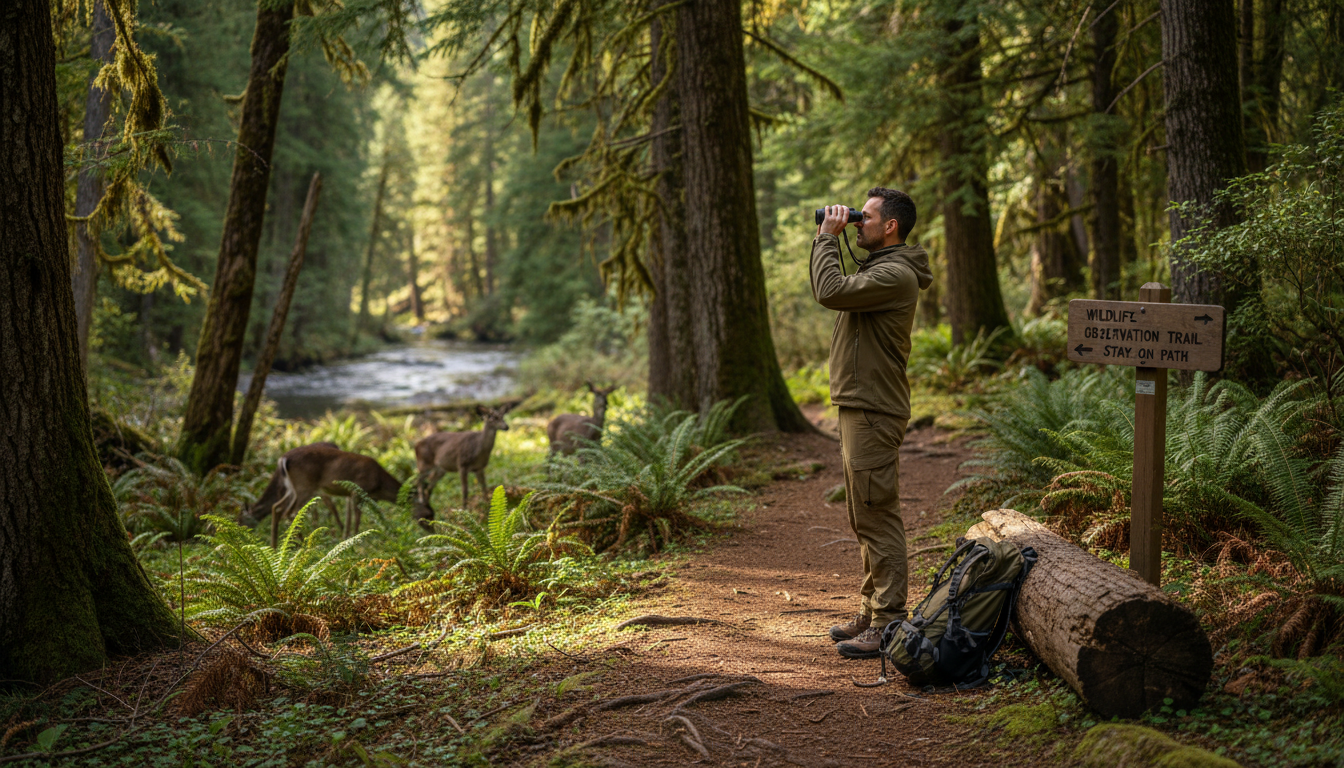
Simply put, leave animals alone—no touching, no feeding, no harassing. It sounds obvious, but you’d be surprised how many people forget this basic rule. It’s illegal to feed, touch, tease, frighten, or intentionally disturb wildlife.
Feeding wildlife might seem harmless or even kind, but it creates serious problems. Feeding wildlife in parks can make them come looking for more, and once they have learned that people are a source of food, wildlife can become aggressive toward people. Animals that get used to human food lose their natural foraging skills and can end up dependent on handouts. Worse, they might approach roads or populated areas looking for snacks, which often ends badly.
Silence is paramount, whether you’re in motion or simply observing, and shouting to catch the attention of an animal, imitating birdsong to attract a bird, or mimicking an animal call is not okay. Using animal calls or bird call apps counts as harassment and is actually illegal in many places. It can cause birds to abandon nests, leaving their babies vulnerable to predators, or make animals waste precious energy responding to fake calls.
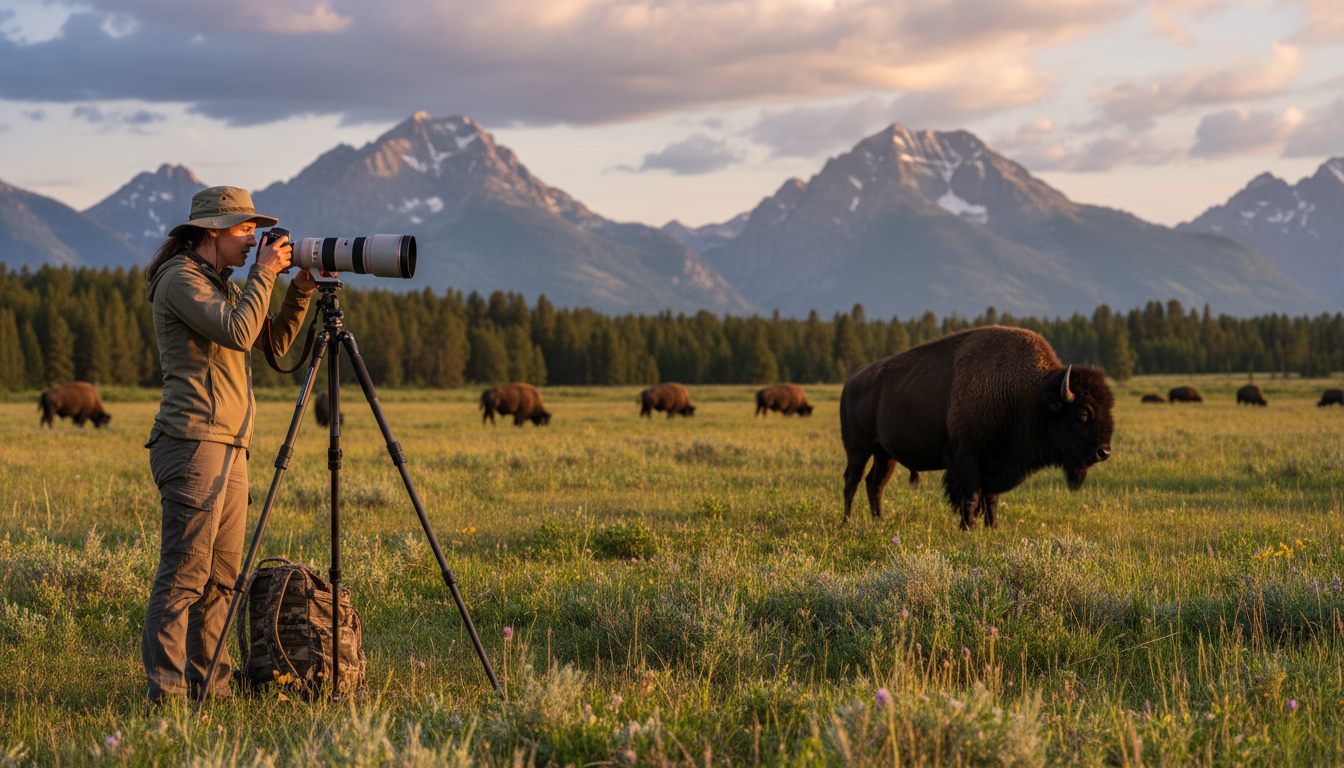
Stay on trails to help keep human presence in predictable areas, and if dogs are allowed, keep them on-leash. Wandering off-trail might feel adventurous, but it can damage delicate habitats and disturb nesting sites or burrows you might not even see.
Sticking to designated paths helps protect vegetation that provides food and shelter for countless species. By staying on marked trails, you’re also less likely to disturb the homes of the animals you’re trying to observe, and these paths help keep visitors safe and prevent them from accidentally trampling on delicate plants.
If you’re hiking in an area where pets are allowed, keep them leashed at all times. Wild animals see dogs as predators, which can cause unnecessary stress or trigger defensive behavior. Plus, pets can spread diseases to wildlife or pick up parasites themselves.
Access to trash, and even crumbs left on picnic tables can attract animals, and feeding wildlife in parks can make them come looking for more. To an animal, anything that smells like food is food. That means properly storing your snacks and packing out every bit of trash you bring.
Feeding wildlife puts you at risk of injury and the wildlife at risk of being removed and humanely killed by wildlife managers—don’t be responsible for the death of wildlife! Use bear-proof containers where required and make sure trash bins are fully closed. A clean campsite or picnic area isn’t just good manners; it’s a matter of life and death for some animals.
The “leave no trace” principle applies to all outdoor recreation. Everything you carry in should come back out with you—wrappers, bottles, food scraps, all of it. Littering spoils natural beauty and poses real threats to wildlife that might eat or get tangled in your garbage.
Vehicle strikes are one of the most deadly types of encounters for wildlife in parks, as roads cut through their habitats or migration routes. When you’re driving through wildlife areas, slow down and stay alert. Animals can dart into the road without warning, especially at dawn and dusk when many species are most active.
When you want to stop to watch wildlife, pull your vehicle completely off of the road into a designated pull-out—this keeps wildlife safe as well as other motorists. Don’t just slam on the brakes in the middle of the road. Find a proper pull-off, park safely, and then enjoy your observation from there.
Following posted speed limits gives you more time to react if an animal appears. It also reduces the severity of any collision that might occur. Remember, you’re driving through their home—they have the right of way.
Tell a ranger if you come into physical contact with wildlife, and also tell a ranger if you see wildlife that are sick, dead, or acting strangely, including wildlife that approach you. Reporting these incidents helps park managers track disease outbreaks, monitor animal behavior, and keep other visitors safe.
The best thing you can do to help in these situations is to keep your distance and leave it to the experts, as sick or dead wildlife can potentially transmit diseases to you or your pets. Don’t try to rescue or touch sick animals yourself. Wildlife professionals have the training and equipment to handle these situations properly.
If you see other visitors breaking wildlife observation rules—getting too close, feeding animals, or harassing wildlife—speak up politely or report it to park staff. We all have a role in protecting these animals and their habitats.
Having proper equipment makes your wildlife observation experience better and safer. Binoculars are perfect for watching birds and smaller animals without disturbing them. Look for models with good magnification and a wide field of view so you can spot animals quickly and track their movements easily.
For larger animals at greater distances, a spotting scope works wonders. It’s basically a small telescope that lets you see fine details and colors from far away. A quality spotting scope can turn a distant speck into a clear view of an elk or moose going about its day.
Avoid using flash photography, as it can startle animals and disrupt their natural behavior. Flash can startle animals, causing them stress and potentially disrupting their natural behaviors—instead, practice patience and wait for the perfect lighting to naturally capture your subject. Natural light photography takes more patience, but the results are worth it, and you’re not stressing out the wildlife.
Don’t bring spotlights, laser pointers, or devices that make animal sounds. These can disorient animals, cause them to abandon nests, or trigger defensive responses. If you want to document your sightings, consider using apps like iNaturalist that let you contribute to citizen science projects.
When viewing wildlife, your actions should never cause a change in animal behavior, as fidgeting and fleeing are universal signs of disturbance in wildlife. Learning to read animal body language helps you recognize when you need to back off.
For your best chance to observe some amazing natural behaviors, avoid making animals feel stressed or threatened by moving back to the recommended distance, and if an animal starts to stare, fidget or flee, calmly back away and give them more space. If a deer stops eating and stares at you, or if a bird keeps glancing your way instead of tending its nest, you’re too close.
Some animals freeze when threatened rather than running away. Just because an animal isn’t moving doesn’t mean it’s comfortable with your presence. Pay attention to ear position, body tension, and vocalizations. If an animal seems alert to your presence, increase your distance slowly and calmly.
Different species show stress in different ways. Birds might flush from nests, marine mammals might dive repeatedly, and large mammals like bears or moose might lower their heads or paw the ground. Do your homework before heading out so you know what warning signs to watch for with the species you hope to see.
Before heading out for wildlife observation, research the area you’ll be visiting. Learn about local regulations, required permits, and seasonal closures. Some areas restrict access during nesting season or other sensitive times to protect wildlife.
There has been an increase in the popularity of wildlife observation and nature photography, and while there is no universal manual for respecting nature, here are five principles worth keeping in mind. Understanding the species you hope to see—their habits, habitats, and behaviors—makes for a better experience and helps you know what to expect.
Check the weather forecast and dress appropriately. Bring plenty of water, snacks, sun protection, and a basic first aid kit. If you’re heading into bear country, carry bear spray and know how to use it. Being prepared means you can focus on enjoying wildlife rather than dealing with emergencies.
Consider joining guided tours led by experienced naturalists or park rangers. They offer valuable insights into animal behavior and habitat conservation while ensuring you follow best practices. For more tips on respectful outdoor adventures, visit our outdoor resources page.
What’s the safest distance for watching bears and wolves in the wild?
Stay at least 100 yards (the length of a football field) away from bears, wolves, and other large predators. If the animal changes its behavior because of you, you’re too close—back away slowly and calmly.
Can I feed wild animals if I’m just giving them healthy food?
No, never feed wildlife. Even “healthy” human food disrupts their natural diet and foraging behavior, causes them to become dependent on people, and can make them aggressive. Feeding wildlife is illegal in most parks and protected areas.
How can I tell if I’m disturbing an animal while watching it?
Watch for behavior changes like staring at you, stopping normal activities (eating, grooming), fidgeting, vocalizing, or moving away. If the animal seems aware of your presence and alters what it’s doing, you’re too close and need to back off.
Is it okay to use my phone’s bird call app to attract birds for photos?
Absolutely not. Using bird calls or animal sounds—whether from apps or your own voice—is considered harassment and is illegal in many areas. It can cause birds to abandon nests, waste energy responding to fake calls, and expose them to predators.
What should I do if a wild animal approaches me?
Stay calm and don’t run. Back away slowly while facing the animal (but avoid direct eye contact with predators). Make yourself look larger if it’s a predator, speak calmly, and give the animal space to leave. Report the encounter to park rangers afterward.
When the sun sets and darkness blankets the landscape, a whole new world of predators comes alive. Snakes, those mysterious reptiles that have fascinated and frightened people for centuries, are among the most skilled nocturnal hunters on the planet. Whether you’re curious about when these serpents are most active or how they track down prey in complete darkness, we’ve got the answers you’ve been looking for. And if you’re interested in learning more about other fascinating nighttime predators, check out our guide on fox hunting at night to see how different species master the dark.
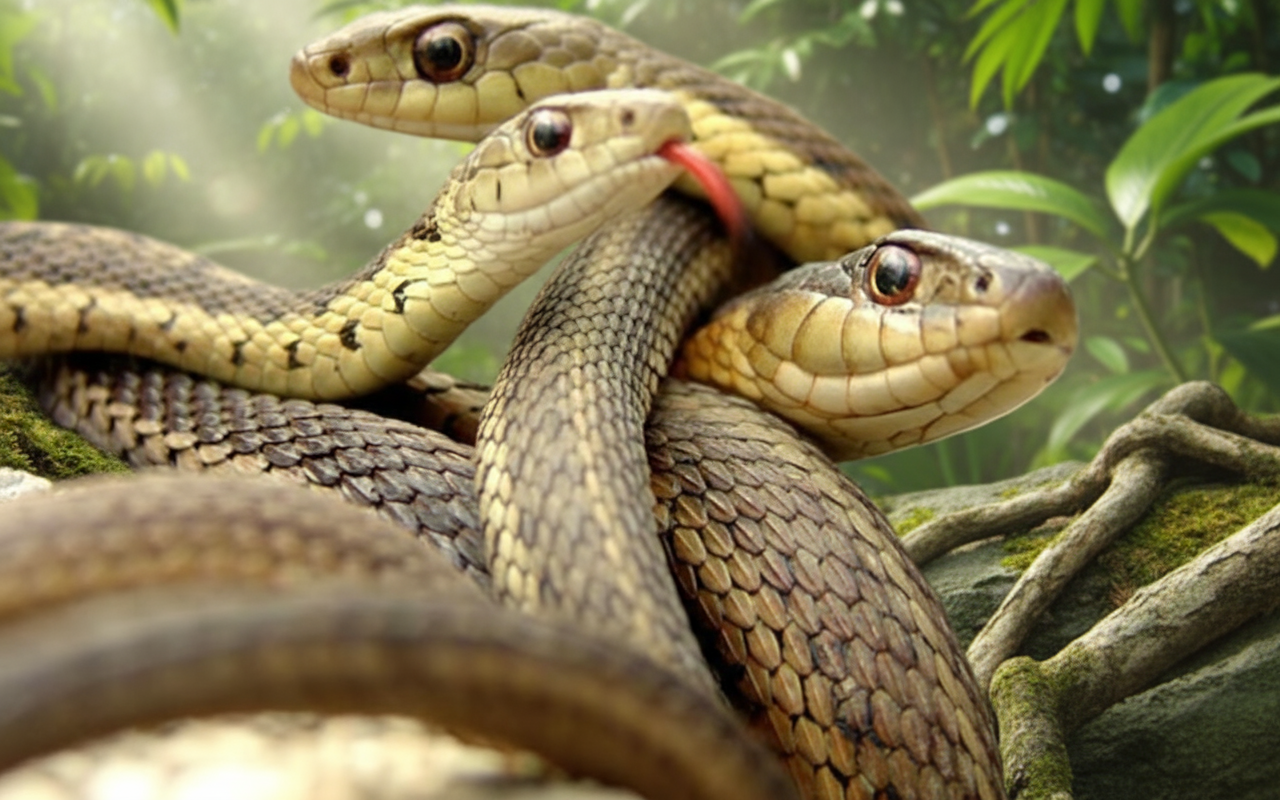
Snakes have evolved some seriously cool tricks to survive and thrive when most of us are fast asleep. From heat-sensing superpowers to silent ambush tactics, these reptiles are way more than just creepy crawlers. Let’s dive into the secret lives of snakes after dark and uncover what makes them such effective hunters when the lights go out.
Here’s the thing: not all snakes follow the same schedule. The truth is actually way more interesting than a simple yes or no answer. Different snake species can be strictly diurnal (active during the day), crepuscular (active at dawn and dusk), or nocturnal (active at night). For example, a black mamba is a diurnal snake, while a ball python is nocturnal, and corn snakes are crepuscular, meaning they’re most active during twilight hours.
Snakes decide when to be active based on a bunch of factors. Some are naturally wired to hunt at certain times because of their genes, while others adapt their schedules based on food availability, temperature, and danger from predators. Many species are nocturnal primarily to avoid predators and reduce competition for food. The cooler temperatures at night also help them manage body heat, especially in hotter climates, and hunting at night lets them catch prey without being spotted as easily.
Most snakes are actually most active during the twilight hours – those periods just before sunrise and after sunset. During these times, the temperature hits that sweet spot where snakes can move efficiently without overheating or getting too cold. The low light also gives them natural camouflage, making it easier to hunt without being seen by bigger predators or their next meal.
If you’re wondering when you’re most likely to encounter a snake after dark, the answer depends on the season and local climate. Generally, snakes are most active during the twilight hours – both at dusk and dawn. These transition periods offer the perfect hunting conditions with moderate temperatures and dim lighting.

During hot summer months, many snakes shift to being more nocturnal to escape the scorching daytime heat. They can only survive extreme temperatures for about 10-20 minutes, so nighttime activity is a survival strategy. Even after the sun goes down, these cold-blooded creatures can absorb warmth from rocks, roads, and other objects that retain heat from the day.
In spring and fall, when daytime temperatures are more comfortable, snakes tend to be more active during the day or at twilight. Temperature is the main driver behind when snakes come out to hunt. Snakes are ectothermic (cold-blooded), which means they rely on external heat sources to power their bodies and regulate their metabolism. When it’s too cold, they become sluggish and can’t hunt effectively. When it’s too hot, they risk overheating and must find shade quickly.
Snakes use two main hunting strategies, and understanding these can give us major insights into their after-dark behaviors. The vast majority of snakes are ambush predators – they prefer to lie in wait for prey to come close rather than actively chasing it down. These patient hunters rely heavily on camouflage to stay hidden while they wait for the perfect moment to strike.
Ambush predators like rattlesnakes, pythons, and vipers typically have thick, powerful bodies and large heads. This body type isn’t great for speed, but it’s perfect for delivering a quick, powerful strike when prey wanders within range. These snakes will often sit motionless for hours or even days, waiting for an unsuspecting meal to pass by. Their patience is seriously next-level.
On the flip side, some snakes are active foragers that search their environment for food. Garter snakes, king snakes, and rat snakes fall into this category. These hunters tend to have longer, thinner bodies that give them better agility and speed. They use their excellent sense of smell to track down prey, poking their heads through leaves and loose soil to find hidden meals. Active foragers rely heavily on their vomeronasal organ (also called Jacobson’s organ) to detect chemical scents in their environment.
One of the coolest things about nocturnal snakes is how they’ve adapted to hunt when they can’t rely on sight alone. These reptiles have developed some seriously impressive sensory tools that let them find and catch prey in complete darkness.
Heat-Sensing Pits: Many nocturnal snakes, especially pit vipers like rattlesnakes and copperheads, have specialized heat-sensing organs called pit organs located between their eyes and nostrils. These pits can detect the infrared radiation (body heat) given off by warm-blooded prey like rodents and birds. Even in pitch-black conditions, these snakes can “see” the heat signature of an animal, making them incredibly effective nighttime hunters.
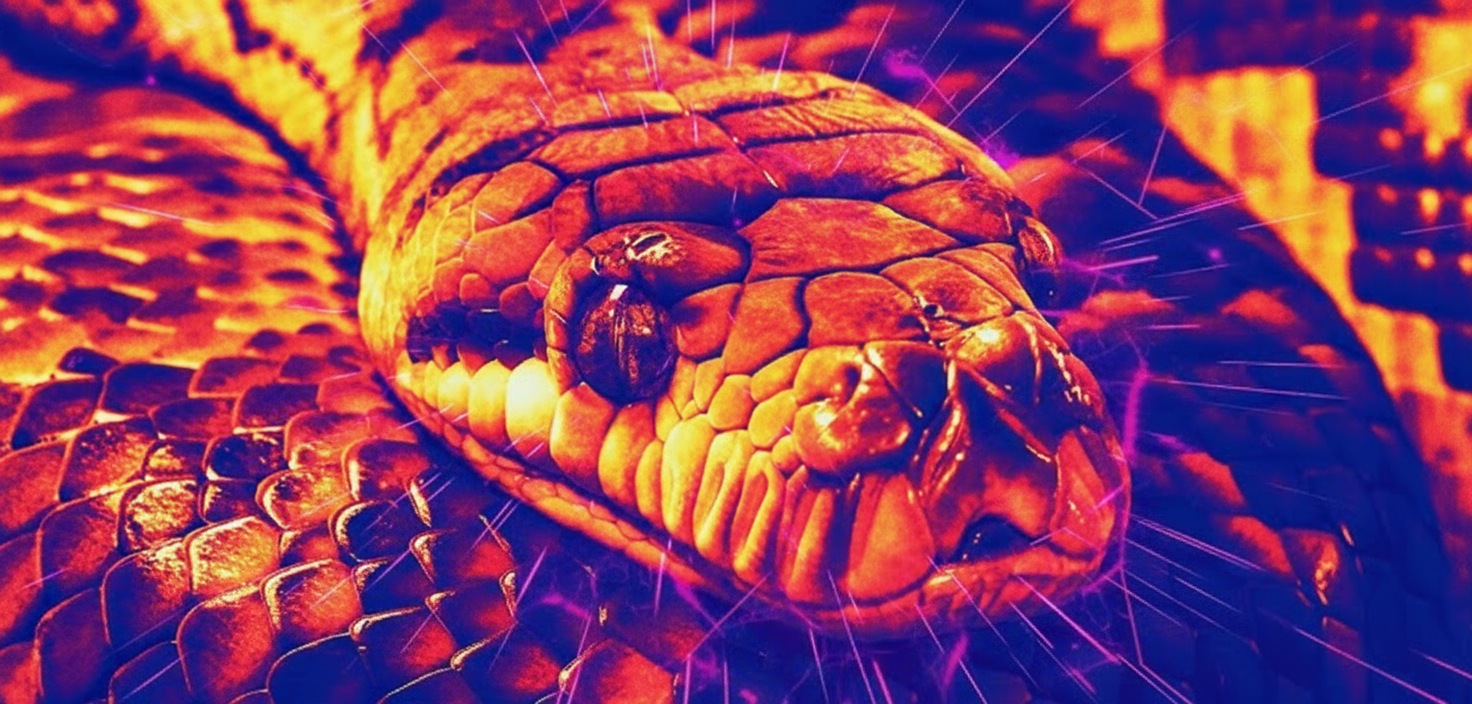
Chemical Detection: All snakes have forked tongues that they flick in and out constantly. They’re not tasting the air – they’re actually collecting chemical information. When a snake flicks its tongue, it picks up scent particles from the environment. The forked design lets them determine which direction a smell is coming from, since each tip collects slightly different amounts of scent. This information gets transferred to the vomeronasal organ on the roof of their mouth, which processes the chemical data and helps the snake locate prey, identify potential mates, or detect danger.
Vibration Detection: Snakes don’t have external ears, but they’re excellent at picking up vibrations through the ground. Their jawbones are connected to inner ear structures that sense vibrations, allowing them to detect the movement of prey animals walking or scurrying nearby. This sense is especially useful for ambush predators waiting silently for the right moment to strike.
Night Vision: While snakes generally don’t have amazing eyesight compared to other predators, nocturnal species often have adaptations for seeing in low light. Some snakes, like the Texas night snake, have vertical pupils that can expand widely to let in more light, similar to how a cat’s eyes work. This gives them better vision in darkness compared to their diurnal cousins.
Once a snake has located its prey, the next step is capturing and killing it. Snakes have evolved two primary methods for subduing their meals: venom und constriction.
Venomous Strikes: Venomous snakes like copperheads, rattlesnakes, and cottonmouths use toxic substances to immobilize prey. These snakes typically strike quickly, inject venom through their fangs, and then release the prey. The venom goes to work immediately, either attacking the nervous system (neurotoxic venom) or destroying blood cells and tissue (hemotoxic venom). After striking, the snake often tracks the dying animal using its sense of smell, following the chemical trail until it finds the prey and swallows it whole. This “strike and release” method is smart because it reduces the risk of injury from a struggling animal.
Constriction: Pythons, boas, and many colubrids (like rat snakes) use a different approach. These non-venomous snakes grab their prey with their teeth and quickly coil their powerful bodies around it. Contrary to popular belief, constrictors don’t crush their prey – instead, they squeeze tightly enough to prevent the animal from breathing. Each time the prey exhales, the snake tightens its grip a bit more until the animal suffocates or dies from circulatory failure. Some venomous snakes also use constriction along with their venom to ensure the prey doesn’t escape or injure them during the struggle.
Specialized Tactics: Research has revealed some truly surprising hunting techniques. Some water snakes in Southeast Asia hunt crabs using methods that break all the normal rules. Instead of the typical open-mouthed strike, these snakes pin crabs down with their chin, then coil around them to manipulate and swallow them. Even more interesting, some snakes hunt soft-shelled crabs during molting, when the crab’s hard protective shell is temporarily vulnerable, allowing them to consume prey four times bigger than they could normally swallow whole.
Temperature is hands-down the most significant factor controlling when and how snakes hunt. As ectothermic animals, snakes need external heat to function properly. Their bodies work best when their internal temperature is between 70-90 degrees Fahrenheit. Below 60 degrees, snakes become sluggish and struggle to move or hunt. Above 95 degrees, they risk overheating and must find shelter fast.

In hot climates like Texas, Arizona, and Florida, snakes often become nocturnal during summer to avoid deadly daytime heat. They emerge from their hiding spots after sunset when the air cools down but can still absorb residual warmth from sun-heated rocks and pavement. In cooler northern states or during spring and fall, snakes are more likely to be active during the day when they need the sun’s warmth to raise their body temperature.
This temperature dependency also explains seasonal patterns. Snakes typically emerge from brumation (a hibernation-like state) in March or April when average daytime temperatures consistently reach and stay above 60 degrees Fahrenheit. They remain active through October before retreating to underground burrows or other protected spots for the winter. During their active months, daily activity patterns shift based on temperature fluctuations.
Smart predators know that hunting is easier when your prey is active, and snakes are no exception. Many of the animals that snakes feed on are also most active during twilight hours or at night, which influences when snakes choose to hunt.
Rodents like mice and rats, which make up a huge part of many snakes’ diets, are primarily nocturnal. These small mammals come out after dark to forage for food while avoiding daytime predators like hawks and eagles. Snakes have adapted their hunting schedules to match this peak prey activity. Amphibians like frogs and toads are also more active during humid nighttime hours, especially near water sources. Nocturnal snakes living near wetlands or ponds can capitalize on this abundant food source.
Some prey species are active both day and night, giving snakes flexibility in their hunting schedules. Lizards, for example, might bask in the sun during the day but can also be active during warm nights. This allows species like ratsnakes to adjust their activity patterns based on temperature and other environmental conditions rather than being locked into a strict nocturnal or diurnal schedule.
Knowing when snakes are most active can help you avoid unwanted encounters, especially if you live in or visit snake country. Here are some practical tips:
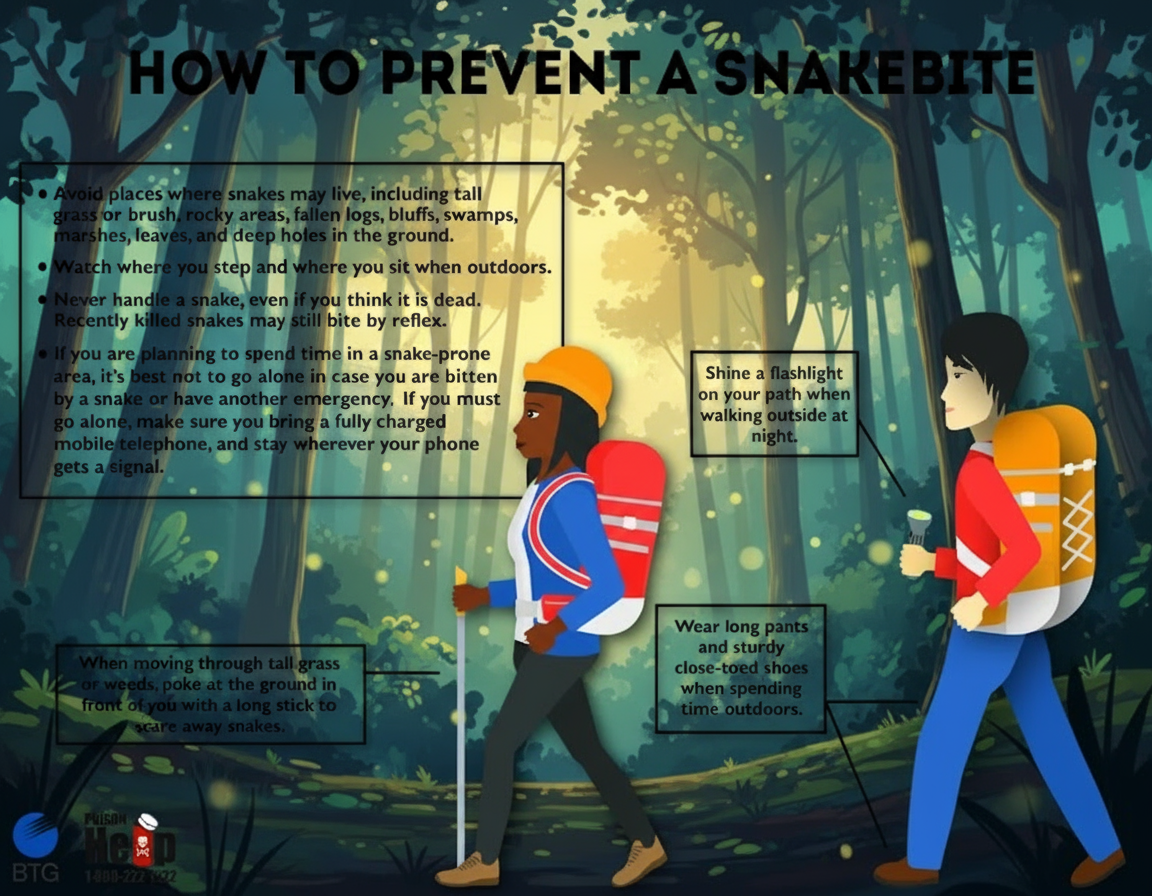
Time Your Outdoor Activities Wisely: If you’re hiking, camping, or working outdoors in snake habitat, be extra cautious during dawn and dusk hours when snakes are most active. During hot summer months, remember that snakes may be moving around at night to stay cool.
Use a Flashlight: Always carry a strong flashlight and scan the ground ahead of you when walking at night. Snakes can be difficult to spot in low light, even on trails or roads.
Watch Your Step: Snakes often rest on warm surfaces like rocks, logs, or paved roads at night. Step carefully and avoid reaching into areas you can’t see clearly, like under wood piles or inside tall grass.
Keep Your Property Less Attractive: Snakes come to your yard for food and shelter. Reducing rodent populations by securing garbage and eliminating food sources makes your property less appealing. Keep grass trimmed short and remove brush piles, rock piles, and other hiding spots.
Stay Calm During Encounters: If you do spot a snake, the best thing to do is give it space and back away slowly. Most snakes aren’t aggressive toward humans and will retreat if given the chance. Never try to catch or kill a snake, as this is when most bites occur.
For more outdoor safety tips and wildlife behavior insights, visit our homepage for additional resources.
Can snakes see in total darkness? While snakes don’t have night-vision goggles, many nocturnal species have adapted eyes with vertical pupils that expand to gather more light. Additionally, pit vipers can detect infrared heat from warm-blooded prey, essentially allowing them to “see” heat signatures even in complete darkness.
Do all venomous snakes hunt at night? Not all venomous snakes are nocturnal. While copperheads and rattlesnakes are often most active from late afternoon into the evening (crepuscular behavior), other venomous species like the black mamba are strictly diurnal and hunt during daylight hours. It really depends on the species and the climate where they live.
Why do I see snakes on roads at night? Roads and pavement retain heat from the sun and stay warm long after sunset. During cooler nights or in spring and fall, snakes will often rest on these warm surfaces to regulate their body temperature. This behavior is called thermoregulation, and it’s why you’ll frequently spot snakes crossing roads or basking on pavement after dark.
What’s the difference between nocturnal and crepuscular snakes? Nocturnal snakes are active throughout the night, from sunset to sunrise. Crepuscular snakes are most active during twilight periods – specifically at dawn and dusk. Many people think snakes are nocturnal, but the truth is that a large number of species are actually crepuscular, taking advantage of those in-between times when temperatures are ideal and prey is active.
Do snakes sleep with their eyes open? Yes! Snakes don’t have eyelids, so their eyes are always “open.” However, they sleep by closing their retinas, which prevents light from entering their eyes. If you see a snake that’s completely still and not flicking its tongue, it’s probably sleeping, even though its eyes appear wide open.
















