Metsästykseen tarkoitetun lämpökameran tulisi sopia juuri sinun metsästystapaasi, ei otsikossa mainittuun lukuun. Aloita maastosta, tavallisesta katseluetäisyydestä, siitä, tarvitsetko kädessä pidettävän skannerin vai kiinnitettävän optiikan, sekä siitä, kuinka kauan olet ulkona. Pixfra valmistaa lämpömonokulaareja, lämpökatselulaseja, lämpökamera-lisälaitteita ja monispektrisia kiikareita, joten oikeanlaisen kokoonpanon valinta alkaa siitä, millainen tehtävä sinulla on edessäsi.
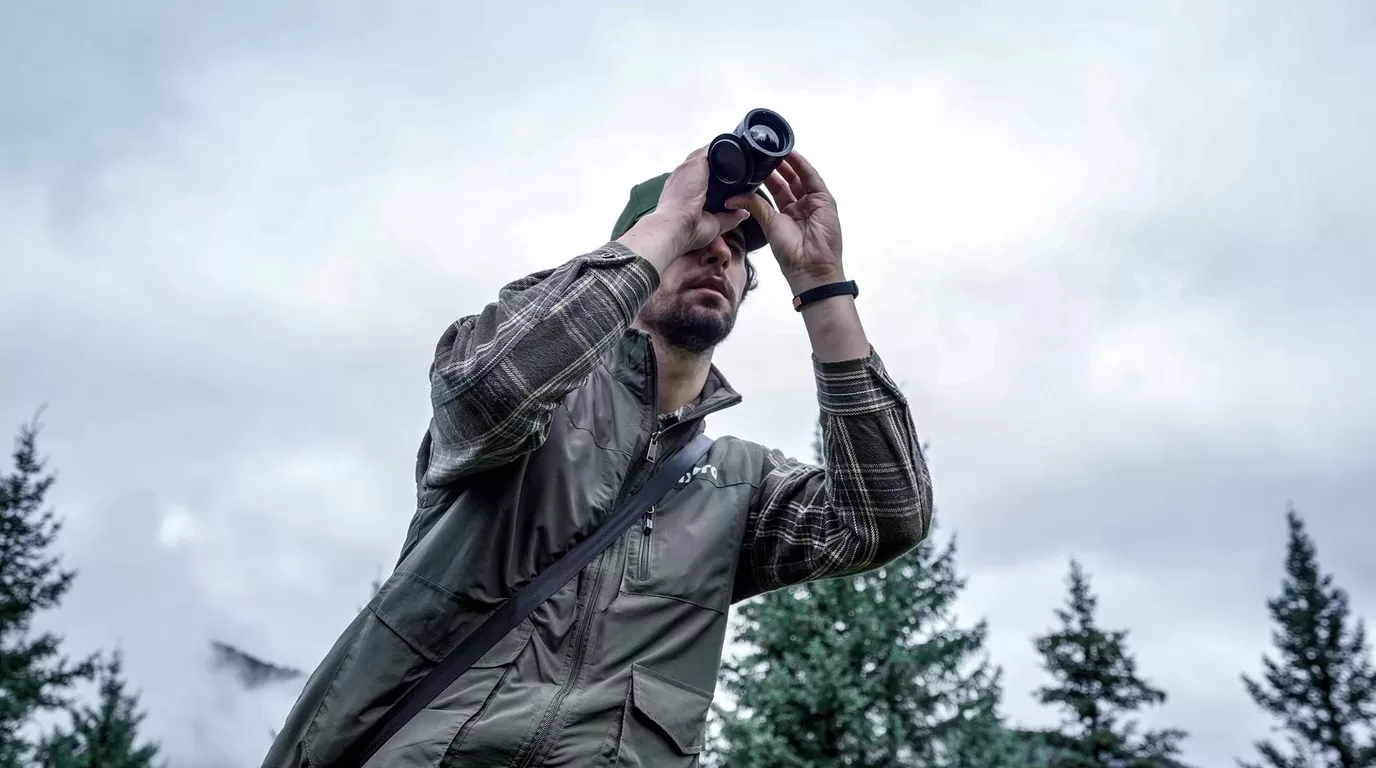
Tässä on koko päätös selkokielellä. Valitse ensin laitteen tyyppi. Vertaa sitten anturin tarkkuutta, NETD-arvoa, objektiivia, virkistystaajuutta, käyttöaikaa, ohjausmekanismeja ja myynninjälkeistä tukea.
Useimmat ostovirheet alkavat siitä, että metsästäjä lukee yhden vaikuttavan kantoluvun ja lakkaa ajattelemasta. Kantama kertoo vain, että laite pystyy havaitsemaan lämpimän kohteen etäältä. Se ei takaa tarkkaa tunnistusta, eikä se kerro, miltä optiikka tuntuu kylmissä käsissä kello kahdelta yöllä.
Kysy yksinkertaisempi kysymys: mitä yrität tehdä?
Villisikametsästäjä, joka tarkkailee ruokintapaikkoja ja puurajoja, tarvitsee nopean katselun, riittävän laajan näkökentän, vakaan akunkeston ja helppokäyttöiset hallintalaitteet. Avoimella maastolla kutsuja käyttävä kojootinmetsästäjä tarvitsee enemmän yksityiskohtia kaukaa ja voi hyötyä laseretäisyysmittarista. Hirvieläinten hoitaja, joka tarkastaa peltoja ennen aamunkoittoa, saattaa haluta havainnointiin kädessä pidettävän monokulaarin eikä kiinnitettävää optiikkaa. Ampuja, jolla on jo tarkasti säädetty päiväkiikari, saattaa mieluummin valita etukiinnitteisen laitteen kuin rakentaa kiväärinsä uudelleen erityisen lämpökiikarin ympärille.
Tässä kohtaa Pixfran tuotelinjat jakautuvat selkeästi. Mile 2 ja Arc kattavat kädessä pidettävät skannerit. Arc LRF tuo etäisyydenmittauksen kompaktiin monokulaariin. Taurus pitää päiväoptiikkasi järjestelmässä etuliittimenä. Chiron LRF- ja Pegasus-tuotelinjat on suunnattu erityisesti lämpökameroiden käyttöön. Sirius- ja monispektriset laitteet ovat avuksi tilanteissa, joissa havainnointi, yksityiskohdat ja sekavalo-olosuhteet ovat tärkeämpiä kuin yksittäisen laukauksen mahdollisuus.
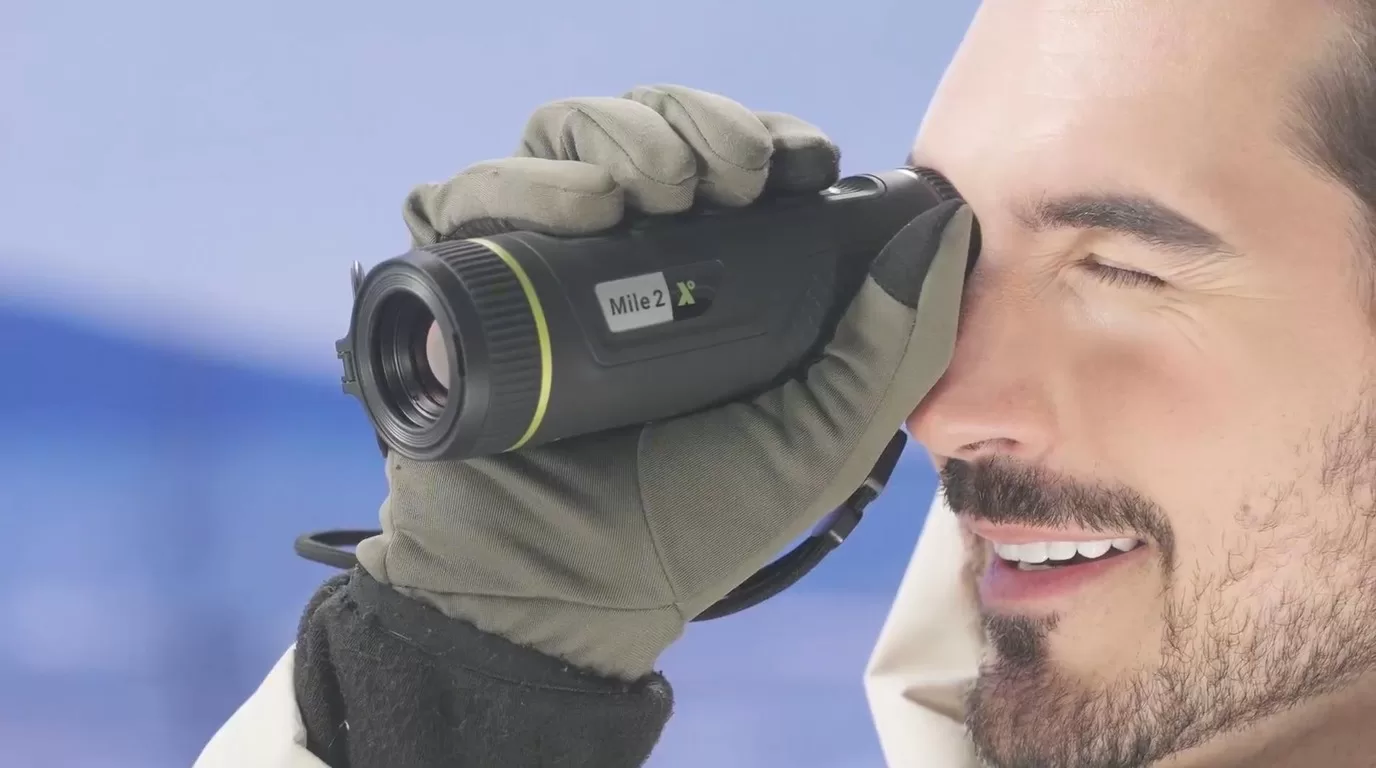
Monille metsästäjille ensimmäinen lämpökamera tulisi olla kädessä pidettävä monokulaari. Sen avulla voi tarkkailla peltoja, tutkia metsänreunoja, seurata lämpöjälkiä laukauksen jälkeen ja pitää kiväärin suunnattuna turvalliseen suuntaan, kunnes on syytä nostaa se olalle.
Pixfra Mile 2 on kompakti vaihtoehto tähän käyttötarkoitukseen. Mile 2 -mallissa yhdistyvät taskukokoinen kannettavuus, P3 AMOLED -näyttö, elektroninen kompassi sekä mallivaihtoehdot, joiden resoluutio on jopa 640 x 512. Se sopii hyvin tilanteisiin, joissa haluat laitteen, joka mahtuu takin taskuun eikä vie liikaa tilaa repussa.
Arc ja Arc LRF nousevat entistä monipuolisempaan rooliin kädessä pidettävänä laitteena. Arc LRF yhdittää lämpökuvauksen integroituun laseretäisyysmittariin, magnesiumseosrunkoon ja vaihdettavaan akkujärjestelmään. Jos metsästät epätasaisessa maastossa, epätasaisilla pelloilla tai vierailla maatiloilla, etäisyystiedot voivat estää virheellisiä arvioita.
Kädessä pidettävän laitteen sääntö on yksinkertainen: jos vietät enemmän aikaa etsimiseen kuin kohdistamiseen, osta ensin skanneri.
Lämpökuvat voivat vääristää etäisyyden. Pellolla juokseva villisika, aidan takana oleva kojootti ja pensaikon lähellä oleva peuranmuotoinen lämmönlähde voivat näyttää olevan lähempänä kuin ne todellisuudessa ovat. Siksi LRF-mallit ovat tärkeitä metsästäjille, jotka liikkuvat avoimilla väylillä tai vaihtelevassa maastossa.
Pixfran valikoimasta löytyy LRF-malleja sekä kädessä pidettäviin että kiinnitettäviin laitteisiin, kuten Arc LRF, Chiron LRF, Taurus LRF ja Pegasus 2 LRF. Etuna ei ole pelkästään näytöllä näkyvä luku, vaan myös selkeämpi päätöksentekoprosessi: kohteen paikantaminen, etäisyyden mittaaminen, tilanteen arviointi ja toimiminen ilman, että laitteita tarvitsee vaihtaa tai arvailla maamerkkien perusteella.
Valitse LRF, kun metsästät pelloilla, kukkuloilla, sähkölinjojen varrella tai suurilla maa-alueilla, joilla näköyhteydet ovat yöllä heikot. Et ehkä tarvitse sitä tiheässä metsässä tai lyhyillä lähestymisreiteillä, mutta kun etäisyys alkaa muuttua nopeasti, etäisyysmittari osoittautuu hyödylliseksi.
Tämä on päätös, joka vaatii eniten kärsivällisyyttä. Etukiinnikkeellä voit säilyttää päiväkäyttöön tarkoitetun optiikan ja lisätä sen eteen lämpökuvausominaisuuden. Erillinen lämpökamera tarjoaa sinulle nimenomaan tähän tarkoitukseen suunnitellun lämpökuvausjärjestelmän.
| Käyttöympäristösi | Pixfran suunta | Miksi se sopii |
|---|---|---|
| Luotat jo päiväkiikariisi ja kiväärisi nollapisteeseen | Taurus-etukiinnike | Säilytä päivän optinen työnkulku ja lisää lämpökuvaus tarvittaessa |
| Haluat integroidun lämpökuvauskiikarin | Chiron LRF- tai Pegasus-sarja | Käyttötarkoitukseen suunnitellut säätimet, lämpökuvaaja ja asennusjärjestely |
| Skannaat enemmän kuin kuvaat | Mile 2, Arc tai Arc LRF | Kädessä pidettävä havainnointi on nopeampaa ja turvallisempaa etsintätöissä |
| Sinun on tarkkailtava tilannetta vaihtelevissa valaistusolosuhteissa | Sirius-kiikari tai monispektrinen kiikari | Sopii paremmin pitkiin katselusessioihin ja vaihteleviin olosuhteisiin |
Taurus on kätevä valinta, kun kivääri on jo hyvin säädetty etkä halua rakentaa kaikkea uudelleen uuden optiikan ympärille. Chiron LRF- ja Pegasus-mallit ovat järkevämpiä valintoja, kun lämpökamera on pääasiallinen tähtäysjärjestelmä. Kumpikaan vaihtoehto ei ole automaattisesti parempi. Oikea ratkaisu riippuu siitä, miten kivääriä käytetään, kuka muu sitä käyttää ja vaihdatko päivä- ja yötyön välillä.
Anturin tarkkuus vaikuttaa siihen, kuinka paljon yksityiskohtia kuvassa näkyy. Pixfran tuotevalikoimaan kuuluu 256 x 192, 384 x 288, 640 x 512 sekä näitä korkeampia tarkkuusvaihtoehtoja tuoteryhmästä ja mallista riippuen. Suurempi pikselimäärä auttaa, kun tarvitset yksityiskohtia etäältä, mutta tarkkuus on vain yksi osa kuvaa.
NETD kertoo, kuinka hyvin laite pystyy erottamaan pieniä lämpötilaeroja. Alhaisempi NETD-arvo auttaa kosteissa olosuhteissa, sumussa ja kontrastin heikoissa kuvausolosuhteissa, joissa lämpimät kohteet eivät erotu selvästi. Pixfra julkaisee NETD-arvot mallikohtaisesti, joten tarkista tarkka tuotenumero ennen tilaamista.
Objektiivi ja kuvakulma vaikuttavat laitteen käyttökokemukseen. Laajempi kuvakulma helpottaa läheisen maaston tarkastelua. Kapeampi, pidempi objektiivi on hyödyllinen, kun tarvitset enemmän ulottuvuutta. Metsästäjät hankkivat usein liian pitkän ulottuvuuden ja kokevat sitten laitteen hitaaksi ahtaassa maastossa. Valitse objektiivi sen mukaan, missä todella metsästät.
Akun rakenne on tärkeämpi asia kuin miltä kuulostaa. Laitetta, jossa on vaihdettavat 18650-akut tai kätevä ulkoinen virtalähde, on helpompi hallita pitkien öiden aikana. Akun kestoa koskevat tiedot mitataan yleensä tietyissä olosuhteissa, joten laadi varavirtasuunnitelma ennen ensimmäistä matkaa.
Myös ohjaimet ovat tärkeitä. Käsineet, sade, kylmyys ja adrenaliini paljastavat huonon ergonomian nopeasti. Valitse laite, joka käynnistyy nopeasti, jossa on selkeä valikko, jossa väripaletin vaihtaminen on helppoa ja jonka painikkeet tuntuvat sormissa ilman, että joudut tuijottamaan laitteen koteloa.
Tiheässä kasvillisuudessa, ruokintapaikoilla ja lyhyillä reiteillä kannattaa aloittaa kädessä pidettävällä lämpömonokulaarilla. Mile 2 tai Arc mahdollistavat nopean skannauksen ilman, että kivääriin lisätään painoa. Jos suurin osa tilaisuuksista syntyy lähietäisyydeltä, näkökenttä ja käyttömukavuus ovat tärkeämpiä kuin suurin kantama.
Viljelypeltojen ja kumpuilevan maaston osalta siirrä Arc LRF listalla ylemmäs. Etäisyysmittari on avuksi, kun etäisyyttä on vaikea arvioida pimeässä, ja kädessä pidettävä malli tekee skannauksesta edelleen helppoa.
Jos etsit kivääriä, jossa lämpökamera toimii pääasiallisena tähtäysjärjestelmänä, vertaa Chiron LRF- ja Pegasus-malleja. Tarkista huolellisesti anturin tarkkuus, objektiivi, akku, kiinnitys sekä se, tuntuvatko hallintalaitteet luonnollisilta ampuma-asennossa.
Niille metsästäjille, jotka suosivat päiväkäyttöön tarkoitettua optiikkaa, Taurus on säilyttänyt järjestelmässä tutun optiikan. Tämä on hyödyllistä silloin, kun yhtä kivääriä on käytettävä sekä päivällä että yöllä.
Havainnointiin, tiedusteluun ja pitkäkestoisiin tarkkailutehtäviin Sirius- tai monispektriset kiikarit saattavat sopia paremmin kuin kivääriin kiinnitettävä lämpökamera. Kaikki lämpökameran käyttötarkoitukset eivät liity ampumiseen.
Älä valitse lämpökuvauslaitetta pelkästään havaitsemisalueen perusteella. Havaitsemisalue on helpoin mainostettava luku ja helpoin väärinymmärrettävä luku.
Älä osta kiinnitettävää kiikaria, jos tarvitset oikeasti skanneria. Jos ensisijaisena tehtävänä on eläinten etsiminen, kädessä pidettävä monokulaari on yleensä hyödyllisempi.
Älä sivuuta asiakastukea. Lämpökuvauslaitteet ovat ulkokäyttöön tarkoitettuja elektroniikkalaitteita. Laitteen myynnin jälkeen laiteohjelmisto, akut, tiivisteet, näytöt, painikkeet ja latausliitännät ovat kaikki tärkeitä. Osta laite virallisesta jälleenmyyjältä ja säilytä sarjanumeroa koskevat tiedot.
Älä sivuuta paikallisia määräyksiä. Yöjahdin säännöt vaihtelevat alueittain, lajeittain, vuodenaikojen mukaan sekä käytettävän laitteiston tyypin mukaan. Tutustu metsästysalueesi voimassa oleviin viranomaismääräyksiin ennen kuin otat lämpökameran käyttöön maastossa.
Kartoitukseen lämpömonokulaari on yleensä paras valinta ensimmäiseksi laitteeksi. Tähtäämiseen tarvitaan lämpökamera tai etukiinnike, jota käytetään sopivan päiväoptiikan kanssa. Monet metsästäjät käyttävät lopulta molempia: kädessä pidettävää monokulaaria lämmön paikantamiseen ja kiinnitettävää laitetta laukaisua varten.
Choose LRF if distance changes often or if you hunt open ground. It is less important for short, fixed lanes where you already know common distances. Pixfra offers LRF options in handheld, front attachment, and scope categories.
Match resolution to distance and detail needs. 256 x 192 can work for close scanning. 384 x 288 gives a stronger middle ground. 640 x 512 and above help when identification detail matters at longer distances. Always compare the exact model, lens, and NETD together.
Plan for the whole session, not the best-case runtime number. Check whether the device uses replaceable batteries, supports external power, and can be managed with gloves in cold weather. Carry spares when the device supports them.
If you are choosing a Pixfra thermal device for hunting, start with terrain and use case. Then shortlist the device type: handheld monocular, front attachment, dedicated thermal scope, or binocular. From there, compare exact model specs and ask Pixfra or an approved dealer to confirm the right fit for your rifle, distance, and support region.
The thermal device market in 2026 is loaded with more options and sharper tech at every price point than ever before. But figuring out how much to actually spend? That’s where most buyers get stuck. At Pixfra, we build thermal monoculars, scopes, front attachments, and multispectral binoculars — so we know where your money goes and where it gets wasted. This pricing guide breaks it all down so you spend smart and walk away with the right gear.
Before you set a budget, you need to know what you’re actually paying for. The price tag on a thermal imaging device isn’t random — it reflects a stack of components and engineering choices that directly affect what you see in the field. The biggest price driver is sensor resolution. A 256×192 sensor is the entry point for real thermal imaging. Step up to 384×288 and you get noticeably cleaner images with better edge definition, especially at distances past 200 yards. Go to 640×512 and you’re in professional territory. That price differential tells you all you need to know about thermal resolution in general — you can expect to pay approximately double for every doubling in the resolution of the thermal core. So when you see a $400 device next to a $1,500 device and wonder what changed, the sensor is usually the answer.

But resolution is only half the story. Thermal sensitivity, measured as NETD (Noise Equivalent Temperature Difference), decides how well the device picks up small heat differences. A lower NETD number means the device can separate a warm animal from a warm background on a humid summer night. For a deeper look at what separates a great thermal device from an average one, check out our breakdown of the 6 tärkeintä ominaisuutta, joita parhaalta lämpölaitteelta vaaditaan vuonna 2026. In short, NETD is the spec that cheap devices cut corners on first — and it’s the spec that matters most when the conditions get tough. Devices with NETD values of ≤18mK, like our Pixfra lineup, hold their image clarity in fog, rain, and heavy humidity when lesser devices wash out and give you nothing but flat, gray blobs.
Beyond the sensor, you’re paying for pixel pitch (12µm is the current standard, delivering sharper imagery than older 17µm designs), refresh rate (50Hz for smooth tracking versus choppy 25Hz), battery system, build quality, IP weatherproofing, and smart features like Wi-Fi connectivity, companion apps, and onboard recording. Laser rangefinders add cost too, but for anyone shooting past 150 yards at night, they pay for themselves in shot confidence. The thermal camera market is estimated to be valued at USD 6.15 Bn in 2026 and is expected to reach USD 11.92 Bn by 2033, growing at a compound annual growth rate (CAGR) of 9.9%. That growth means more competition, more innovation, and better value for buyers at every tier. The race to deliver more for less has never been hotter — and you benefit directly.
A few years ago, spending under $500 on a thermal device meant getting a toy. Not anymore. In 2026, the best budget thermal monocular options deliver genuine detection capability, smart features, and rugged construction — all without draining your bank account. At this price point, you’re typically looking at 256×192 resolution sensors with 12µm pixel pitch, NETD around ≤20-40mK, and detection ranges from 300 to 500 meters. These devices are real tools, not gimmicks. They’ll find deer in timber at 150 yards, track wounded game through thick cover, and give you solid heat detection on close-to-mid-range hunts.
What should you watch out for in this tier? Refresh rate, for one. Some budget devices drop to 25Hz to save cost, and that gives you stuttery, choppy imagery that makes tracking anything moving — a running hog, a coyote cutting across a field — genuinely frustrating. Hold out for 50Hz. Battery life is another place budget devices can sting you. A device with great image quality and a three-hour battery is basically a fancy paperweight by midnight. Look for devices with swappable batteries or at least USB-C power bank support for extended hunts. IP67 waterproofing should also be non-negotiable, even at this price. Rain, mud, and accidental drops happen — and if your device can’t handle a wet night, it doesn’t belong in your pack.
At Pixfra, our entry-level devices start at detection ranges around 500 meters and run NETD values of ≤18mK, which is better sensitivity than many competitors charge twice as much for. Our Mile 2 series and Draco series hit the sweet spot for anyone entering the thermal game without dropping a month’s rent. For first-time buyers, weekend hunters, property owners, and wildlife watchers who work inside 300 yards, the sub-$500 tier in 2026 is genuinely capable — just be picky about where the manufacturer cut costs.
This is where most serious hunters and outdoor enthusiasts should be shopping. For most users, this is the best thermal monocular for the money — where cost and capability finally align. At this price tier, expect 384×288 sensors as the standard. That resolution captures far more thermal detail than the 256×192 sensors in budget devices, giving you cleaner images, sharper edges, and more reliable target identification when you zoom in or scan at distance. The 640×512 resolution, while superior, typically enters the picture above $1,500–$2,000.

Detection range jumps significantly in this tier. Detection range in this category extends from 1,000 to 1,300 meters depending on lens configuration — a significant step up from the 345–460 meter range of entry-level units. That extra reach matters for open-terrain hunters, ranchers scanning big properties, and anyone who needs situational awareness beyond a few hundred yards. Refresh rates of 50Hz are standard here — you shouldn’t accept anything less. This is also the tier where integrated laser rangefinders start showing up. An LRF gives you exact distance to your target with the press of a button, which is a real advantage for ethical shot placement at night. Our Pixfra Arc LRF sits right in this range, pairing high thermal sensitivity with a built-in 1,000-meter laser rangefinder and a price that makes sense for dedicated hunters.
This is also where smart features stop being “nice to have” and become standard. Wi-Fi connectivity, companion app support, onboard video recording, multiple color palettes, and firmware updates over the air are all expected at this price. Our Pixfra Outdoor App connects to all our current models and lets you update firmware, adjust settings, and transfer images and video directly to your phone. At Pixfra, our mid-range lineup — the Arc LRF and Mile 2 series — delivers ≤18mK NETD sensitivity, 12µm pixel pitch, and IP67-rated builds at prices that won’t make your wallet cry. Consider total value: durability, battery life, software, warranty, and accuracy. Mid-range options often deliver 80–90% of high-end performance at half the cost. If you can only buy one thermal device and want it to cover most real-world use cases — night hunting, wildlife observation, property security, backcountry exploration — the $500-$2,000 range is your target.
When you step past $2,000, you’re shopping for the best thermal imaging the market can deliver — longer detection ranges, higher-resolution sensors, and integrated systems that combine ranging, ballistics, and recording into one package. Mid-high devices (384×288 or 640×512, 1,000–1,500m range) cover most professional hunting and security applications. Premium devices (1280×1024, 3,000+ meter detection) are for buyers who need maximum performance and are prepared to invest accordingly. At the top end, 640×512 and even 1280×1024 sensors give you identification-quality images at distances where lesser devices just show vague blobs. You’re not just detecting heat — you’re counting tines on a buck or telling a coyote from a dog at half a mile.

Our Pixfra Sirius HD series sits at the top of our lineup with detection ranges pushing out to 3,600 meters. For law enforcement, wildlife managers, outfitters running guided hunts, and serious predator hunters working open country, that kind of reach is not a luxury — it’s a tool you lean on every night. The Chiron LRF and Taurus LRF add integrated ballistic calculators that compute bullet drop and give you an adjusted aiming point on the fly. That turns a thermal scope into a complete targeting system — rangefinder, ballistic solver, and high-resolution thermal imager all in one unit. Our Volans series takes it another direction with all-day vision capability, featuring an adjustable aperture from F1.2 to F3.0 that adapts to any lighting condition, so you carry one device from sunup to sundown instead of juggling two.
Is premium worth it for everyone? No. The higher-end thermal viewers offer so much resolution and imaging talent that unless you’re using the devices frequently, you may be paying for more capability than you need. If you hunt a couple of weekends a year and work inside 200 yards, you don’t need a 640×512 sensor with 3,600-meter detection. But if you’re a professional, a guide, or someone who logs serious hours behind a thermal optic, the difference between a $1,500 device and a $3,000 device is immediately visible in image clarity, identification range, and the overall experience of spending long nights in the field.
The right thermal device isn’t the most expensive one you can afford — it’s the one that matches your actual use case without leaving performance on the table. When someone calls and asks what kind of money they should spend, it all comes down to what they want to do. Most often the big difference in prices is going to be based on the thermal sensor resolution and image quality of the scope. When we talk about the difference between a $3,000 and $6,000 scope, it is often going to come down to the identification range of the animal. So start with honest questions: What am I using this for? How far do I need to see? How often will I use it? How bad are the conditions I’ll face?
Here’s a quick reference table to help you match your use case to a price tier:
| Use Case | Recommended Tier | Hintaluokka | Tyypillinen anturi | Havaitsemisalue |
|---|---|---|---|---|
| First thermal / casual use | Talousarvio | Under $500 | 256×192 | 300–500m |
| Weekend hunting / property security | Mid-range | $500–$1,200 | 384×288 | 800–1,300m |
| Dedicated night hunting / outfitter use | Upper mid-range | $1,200–$2,000 | 384×288 or 640×512 | 1,000–1,800m |
| Professional / law enforcement / long-range | Premium | $2,000–$3,500+ | 640×512 or 1280×1024 | 1,800–3,600m |
One thing to keep in mind: if you’re a first-time buyer, you’ll probably want a handheld thermal monocular for scanning before investing in a thermal scope. It’s often smarter to spend less on the scope and budget for a monocular too, rather than putting everything into one device and having no scanning tool. At Pixfra, we built our lineup to cover this exact reality. Our monoculars, scopes, front attachments, and multispectral binoculars all share the same ≤18mK sensitivity and 12µm pixel pitch technology, so you get consistent image quality whether you’re glassing a field or looking through a scope.
And don’t overlook the cost of ownership beyond the sticker price. Battery systems matter — our Pixfra devices use standard 18650 batteries across many models, which means cheap, available replacements instead of expensive proprietary cells. Build quality matters too — a device with IP67 waterproofing and MIL-STD-810G shock resistance lasts years longer than a cheaper device you’ll replace in two seasons. The cheapest thermal device is rarely the best value. The best value is the one that does what you need, survives how you use it, and keeps working season after season. And at Pixfra, every product in our lineup is built around that idea — real features for real conditions, at a price tier that makes sense for your specific goals.
How much does a good thermal monocular cost in 2026?
In 2026, a solid entry-level thermal monocular starts around $300-$500 with a 256×192 sensor. Mid-range models with 384×288 resolution and integrated features like laser rangefinders run $800-$1,500. Premium handheld thermals with 640×512 sensors and extended detection ranges typically cost $1,500-$3,500+. Our Pixfra lineup offers devices across all three tiers, with ≤18mK NETD sensitivity as a consistent baseline.
Is it worth spending over $1,000 on a thermal device?
For hunters and outdoor professionals who work at distances beyond 300 yards or hunt multiple nights a season, yes — stepping up past $1,000 gets you meaningfully better sensor resolution, detection range, and target identification. If you only hunt a few times a year at close range, a quality device under $500 can handle the job. The question isn’t just what you can afford, but how much performance your specific use case demands.
What’s the best thermal device for the money right now?
Value depends on your use case. For short-range woodland hunting and property monitoring, a budget thermal monocular under $500 with 256×192 resolution and 50Hz refresh rate is the best bang for the buck. For all-around hunting and outdoor use, mid-range models around $800-$1,500 deliver the biggest jump in real-world performance per dollar. At Pixfra, our Arc LRF and Mile 2 series consistently hit the sweet spot between performance and price for most hunters and outdoor enthusiasts.
Why are thermal scopes more expensive than thermal monoculars?
Thermal scopes carry higher prices because they need to withstand heavy recoil, require precision zeroing systems, and often include features like ballistic calculators and integrated laser rangefinders. A quality thermal scope starts around $1,800-$3,000, while a capable monocular starts well under $500. If budget is tight, many experienced hunters recommend starting with a monocular for scanning and saving for a scope later.
Do cheaper thermal devices work in rain and fog?
That depends entirely on two specs: NETD sensitivity and IP rating. A budget device with poor NETD (above 35mK) will struggle in fog, rain, or high humidity — the image goes flat and washed out. A device with ≤18mK NETD, like our Pixfra lineup, keeps showing clear heat contrasts even in bad conditions. For weather resistance, look for IP67 waterproofing at any price point. Anything less than IP67 puts your gear at risk during real field conditions.
Buying a thermal device online can feel overwhelming—spec sheets are dense, prices jump all over the map, and everyone seems to have a different opinion. We get it. At Pixfra, we hear from first-time buyers every week who almost made costly mistakes based on bad info floating around the internet. Let’s set the record straight.
The thermal imaging market has changed fast. Thermal imaging technology changes faster than just about anything else in the hunting world—faster than rifles, scopes, or even ammo trends. What was premium two years ago now sits squarely in the mid-range. That speed of change is both exciting and confusing, and it creates a fertile ground for myths that never seem to die.

Part of the problem is how buyers shop for thermal cameras and thermal monoculars online. Most thermal customers buy online and have to go on specs, YouTube videos, and the sometimes compromised impressions of social media influencers to make buying decisions. You scroll through product pages, read conflicting Reddit threads, watch YouTube “reviews” that are really just paid promotions, and walk away more confused than when you started. Between marketing fluff and real user experiences, it’s tough to know what’s legit and what’s noise.
The truth is, buying a thermal device online isn’t any riskier than buying one at a brick-and-mortar store—as long as you know what you’re looking at. And that’s where these three myths do the most damage. They steer you toward the wrong device, or worse, they scare you away from buying altogether. Whether you’re shopping for a handheld thermal monocular, a thermal scope for night hunting, or an infrared camera for property inspection, the same myths keep popping up. So we’re going to walk through each one, tell you exactly why it’s wrong, and show you what actually matters when you’re picking the best thermal device online. Before we jump in, check out our guide on the 6 tärkeintä ominaisuutta, joita parhaalta lämpölaitteelta vaaditaan vuonna 2026 so you’ve got a solid baseline of what to look for.
This is probably the most widespread myth in the thermal device world, and it catches first-time buyers more than anyone else. On paper, it sounds logical: more pixels, better image, right? Not necessarily. The entire system—lens, sensor, processing algorithms, and display—has to work together. The takeaway here is simple: don’t buy a thermal scope based on resolution alone.
Here’s what most people miss. Resolution is just one piece of the puzzle. A sensor with 640×512 pixels sounds a lot better than one with 384×288 pixels. But resolution alone doesn’t tell you about thermal sensitivity, lens quality, or how the device processes the image it captures. High pixel count alone won’t help unless the sensor is sensitive enough to deliver clear contrast in real-world conditions like fog, humidity, or low temperature differences. A 640×480 sensor sounds impressive, but if it has poor thermal sensitivity (measured in NETD), the resulting image may appear washed out. That’s the part no one puts in the Instagram post.
NETD, or Noise Equivalent Temperature Difference, is where the real magic happens. It’s measured in millikelvins (mK), and it tells you how well the sensor can pick up small differences in heat. NETD stands for Noise Equivalent Temperature Difference. It measures how sensitive the thermal sensor is to tiny differences in heat, and it’s listed in millikelvins (mK). A lower NETD number means the sensor picks up finer heat differences, which translates to sharper contrast between the animal and the background. Our thermal devices at Pixfra achieve NETD values of ≤18mK, which puts them in the high-sensitivity category. That means you’re picking up heat signatures that a lesser sensor would miss completely—especially in summer conditions when the ambient temperature and the target’s heat are close together.
So what does this mean for you when shopping online? Stop sorting by resolution first. Look at the full spec picture: sensor resolution, NETD rating, pixel pitch (12µm vs. 17µm), refresh rate, and objective lens size. A well-balanced 384×288 thermal camera with elite sensitivity and a quality lens will outperform a poorly designed 640×512 device on most nights. Match the specs to your actual use case—close-range hog hunting in timber doesn’t need the same sensor as scanning open fields at 600 meters.
This one hurts wallets everywhere. The idea that you have to spend $5,000 or more to get a “real” thermal device just isn’t true anymore. It’s a myth that benefits sellers of premium-only brands and leaves first-time buyers stuck on the sidelines.
Let’s look at the real numbers. The technology keeps getting better while prices come down. What cost $10,000 a decade ago now delivers similar performance at $1,500. That’s not an exaggeration—it’s a function of how thermal sensor manufacturing has scaled up and matured. Sensor prices have dropped, production quality has risen, and brands like ours at Pixfra have put a priority on making professional-grade thermal imaging available at price points that make sense for regular hunters, homeowners, and outdoor enthusiasts.
The thermal device market in 2026 breaks into pretty clear tiers. Here’s a realistic snapshot of what you can expect at each price level:
| Hintaluokka | Anturin tarkkuus | Typical NETD | Sopii parhaiten |
|---|---|---|---|
| Under $500 | 256×192 | ≤40 mK | Close-range use, beginners, property monitoring |
| $500–$2,000 | 320×240 to 384×288 | ≤25 mK | Serious hunters, mid-range detection, all-weather use |
| $2 000–$4 000 | 640×480 to 640×512 | ≤20 mK | Long-range identification, predator control |
| $4,000+ | 1280×1024 | ≤15 mK | Professional and high-end specialty use |
Mid-range options often deliver 80–90% of high-end performance at half the cost. That’s an industry-wide reality, not just a marketing claim. You don’t need the $6,000 device to get a clear image of a hog at 200 yards. For most buyers, strong 384 and 640 options remain the smarter value.

Now, that doesn’t mean you should always go cheap, either. Value and cheap aren’t the same thing. A $250 thermal monocular with a sluggish 25 Hz refresh rate, mediocre NETD sensitivity, and no companion app isn’t a value pick—it’s a compromise that will frustrate you by the third use. The sweet spot is finding a device that gives you what you need, at a price that doesn’t gut your budget, from a brand that actually builds the technology themselves. Pixfra designs and manufactures its own thermal imaging cores and sensors—we’re not just slapping labels on someone else’s hardware. That vertical integration lets us deliver specs you’d normally only see in devices costing twice as much.
This myth pops up in every thermal forum, and we understand where it comes from. Thermal devices aren’t cheap, and dropping $1,000 or more on a product you’ve never held can feel like a gamble. But here’s the thing—buying online is how the vast majority of thermal buyers shop today, and there are solid reasons why it works.
First, think about the alternative. How many local stores near you stock more than one or two thermal monoculars, let alone a full range of thermal scopes, clip-ons, and handheld imagers? There’s no universal “best” thermal—only what’s best for your situation. If your local shop carries two or three brands, your “hands-on” experience is just a limited selection of what’s actually available. Shopping online gives you access to every model, every brand, every spec comparison you need—all in one session, from your couch.
Second, the buying experience has gotten a lot better. Reputable thermal brands now offer detailed spec sheets, real-world video demos, comparison charts, and responsive customer support. At Pixfra, we publish specs down to the click value of our thermal scopes (0.9cm@100m on our Taurus LRF series), and our Pixfra Outdoor App lets you connect to your device, stream live thermal video, and update firmware. That level of transparency didn’t exist five years ago.
Third, returns and warranties protect you. Investing in thermal gear without considering warranty coverage and support infrastructure can lead to expensive problems when repairs or service become necessary. Thermal imaging sensors and electronics require specialized expertise to repair, and devices from manufacturers without established service networks may become unusable after warranty expiration. Warranty terms vary significantly. Some manufacturers offer limited one-year coverage, while others provide extended warranties or explicitly support component upgrades and repairs. When you buy from a manufacturer that stands behind its products and has an established support network, the risk drops to nearly zero. You’re not rolling the dice—you’re making an informed purchase backed by real protection.
The real risk when buying online isn’t the channel itself. It’s buying from a brand you haven’t researched. That’s where the work goes: checking who makes the sensor, reading actual user reviews (not sponsored ones), comparing specs across models, and verifying that the company has a real support infrastructure. If a brand can’t tell you their NETD rating, their sensor origin, or their warranty terms, walk away—regardless of whether you’re shopping online or in person.
Now that we’ve killed the myths, let’s talk about what really matters when you’re shopping for a thermal device online. There are a handful of specs and features that separate a solid purchase from a regrettable one.

Sensor resolution still matters—it’s just not the only thing that matters. You’ll see specs like 256×192 or 384×288—these numbers tell you how many pixels detect heat. More pixels mean clearer images and better identification at distance. But pair resolution with NETD sensitivity, and you’ve got a much clearer picture of actual performance. Our Pixfra Sirius HD series, for example, combines 1280×1024 resolution with ≤18mK sensitivity—that’s not just a sharp image; it’s a sharp image in the worst conditions.
Refresh rate is another spec that gets overlooked. The difference between 25 Hz and 50 Hz is immediately apparent when scanning for moving targets. Don’t rationalize a 25 Hz device as “good enough”—you’ll notice the limitation every time you use it. If you’re scanning for predators, tracking hogs across a field, or monitoring your property perimeter, 50 Hz should be your floor.
Battery life is a deal-breaker for field use. Undervaluing battery life. An all-night predator hunt needs 8 hours minimum. Budget accordingly. Our Pixfra devices range from roughly 4.5 hours to 15 hours depending on the model, and many use standard 18650 batteries that you can swap in the field without going back to your truck.
Detection range vs. identification range—this is a big one. Manufacturers love huge detection numbers. Hunters need usable identification distance. Detection means you can tell something is there. Identification means you are confident what it is. A product page might say 2,000 meters of detection range, but if you can only positively identify your target at 400 meters, that’s the number that actually affects your experience. Always ask about both numbers before you buy.
And finally, don’t ignore build quality and weather resistance. Skipping the IP rating check. Field use means rain. IP54 is not IP67. An IP67 rating means your device can handle temporary submersion in water. If you hunt in the Southeast, run property security in the Pacific Northwest, or just don’t want to baby your gear, IP67 is the standard you should be targeting.
We built Pixfra around one idea: give everyone access to the thermal performance that used to be locked behind military budgets and five-figure price tags. Pixfra offers a wide range of products—from thermal imaging monoculars, add-ons, and riflescopes to thermal imaging and multispectral security cameras—and their mission is to provide professional grade thermal and multispectral optics at budget friendly price points.
Established in 2015, Pixfra has developed over two hundred patented technologies and thermal imaging products for industrial temperature measurement, biological temperature measurement, natural ecology, new energy, carbon neutrality, perimeter prevention, outdoor sports, and consumer electronics. We’re not a brand that repackages someone else’s sensors and charges a markup. We design our own thermal cores, build our own image processing algorithms, and test everything in real field conditions.
When you buy from us online, you’re buying directly from the people who designed and manufactured the technology. That cuts out middlemen, keeps prices honest, and means our support team can actually answer your questions about the product—not just read from a script. Whether you need a compact thermal monocular like the Mile 2 for close-range scouting or a 1280-class flagship like the Sirius HD for long-range observation, we’ve got options that match your actual needs—not just your budget or your ego.
Is it safe to buy a thermal imaging camera online?
Yes, absolutely. Buying a thermal imaging camera online is safe as long as you’re purchasing from a reputable manufacturer or authorized dealer. Look for brands that publish full spec sheets, offer warranty protection, and have responsive customer support. Buying from the manufacturer’s own website (like Pixfra.com) is often the best route because you get direct access to support, firmware updates, and product guarantees.
Does a higher resolution always mean better thermal image quality?
No. Resolution is one factor, but thermal sensitivity (NETD), lens quality, pixel pitch, and image processing all play a role. A 384×288 sensor with ≤20 mK NETD and a quality germanium lens can produce sharper, more usable images than a 640×512 sensor with poor sensitivity. Always look at the full spec picture, not just the pixel count.
What NETD value should I look for in a thermal device?
For most outdoor and hunting use, a NETD of ≤25 mK is solid. For demanding conditions like high humidity, fog, or summer heat where ambient and target temperatures are close, aim for ≤18 mK or lower. Pixfra’s lineup hits ≤18 mK across many of our models, putting them in the high-sensitivity category without the premium price tag.
How much should I spend on my first thermal monocular?
For most first-time buyers, the $500–$2,000 range offers the best balance of performance and value. You’ll get usable sensor resolution, decent NETD ratings, features like Wi-Fi and video recording, and enough battery life for a full night out. Going below $300 usually means real trade-offs in refresh rate, sensitivity, and build quality that you’ll notice quickly.
Can thermal devices work during the day?
Yes. Thermal imaging is unaffected by visible light, making it effective 24/7. Unlike night vision, which relies on amplifying ambient light, thermal cameras detect heat signatures. That means they work just as well at noon as they do at midnight—in darkness, fog, haze, or bright sunlight. Some Pixfra models, like the Volans Series, even feature adjustable apertures specifically designed to optimize daytime and nighttime performance.
Resolution is one of the first specs you’ll see on any thermal device — and for good reason. It shapes everything from how sharp your image looks to how far out you can tell a coyote from a fence post. But not all resolution numbers mean what you think they do. We’re here at Pixfra to break it all down so you can pick the right thermal monocular, scope, or front attachment without getting tricked by big numbers that don’t deliver in the field.
When we talk about resolution on a thermal device, we’re talking about the number of pixels on the infrared sensor itself — the detector array inside the device that picks up heat signatures and turns them into an image you can actually see. It’s expressed as two numbers, like 256×192, 384×288, or 640×512. Those numbers tell you how many tiny heat-detecting elements sit on the sensor. Thermal sensor resolution is expressed as two sets of numbers (vertical × horizontal), for example 640×512px. What you are looking for to determine resolution is the total number of pixels the sensor offers — for instance, a 640×512 sensor gives you a total of 327,680 pixels.

Think of each pixel as a tiny thermometer. Every single one records its own temperature reading, and the device stitches all those readings together into the heat image you see through the eyepiece. “Pixels are the data acquisition points for thermal measurement… More data points mean more information is provided for accurate thermal interpretation. More pixels also mean greater visual resolution in the thermal image.” So when you go from a 256×192 sensor (49,152 pixels) up to a 640×512 sensor (327,680 pixels), you’re not just getting “a better picture” — you’re getting more than six times the data points feeding that image. That’s a massive jump in the amount of thermal information your device can gather in a single frame.
Now here’s something that trips up a lot of buyers: sensor resolution and display resolution are not the same thing. It’s easy to confuse sensor resolution with display resolution or recording resolution. Display resolution is the resolution of the built-in screen you look through, and it will often be greater than the sensor resolution. A device can have a beautiful 1280×960 OLED display, but if the sensor behind it is only 256×192, you’re still seeing a 256×192 thermal image stretched across that screen. The sensor is the bottleneck. Always check the sensor specs first.
At Pixfra, we pair our high-resolution sensors with 12μm pixel pitch technology across our product lines — from the Mile 2 series for everyday use to the Sirius HD series for demanding professional applications — so you get sharp, high-contrast images no matter which model you choose. Before you go further, take a look at the 6 tärkeintä ominaisuutta, joita parhaalta lämpölaitteelta vaaditaan vuonna 2026 to see how resolution fits into the bigger picture of what makes a thermal device actually perform.
Here’s where resolution really earns its keep: detection range and target identification. A higher-resolution sensor doesn’t just give you a prettier picture — it lets you see farther and figure out what you’re looking at faster. Higher resolution means there are more observation and temperature measurement points, allowing for the observation and measurement of smaller targets and the ability to observe objects at greater distances.[4]
Let’s put it in hunting terms. You’re scanning a field at 400 meters with a 256×192 sensor. You see a warm blob. Could be a hog, could be a coyote, could be a stump that soaked up sun all day. With a 640×512 sensor at the same magnification and lens, you’re looking at that same blob with over six times more thermal data points. You can see legs, a head shape, movement — you can actually identify what you’re seeing without having to close the distance and risk spooking the animal.
Devices with a 384×288 pixel sensor are generally the most popular on the market since they’re more affordable than a 640×512 thermal device but still allow detection ranges out to 1,800 meters depending on lens size, and the higher number of pixels means the zoom function works more effectively.[5] That’s a real sweet spot for a lot of hunters, and it’s exactly why we offer the 384×288 configuration across several of our mid-range lines.
Digital zoom is a big factor here too, and this is where resolution differences really show up. The true advantage of higher resolution sensors is the ability to digitally zoom and maintain a higher degree of clarity and field of view. Since the zoom is digital and not optical, every time you double the zoom (from 1x to 2x for example), you halve both the pixels and field of view available. So on a 256×192 sensor at 2x digital zoom, you’re down to an effective 128×96 image — and that’s going to look noticeably grainy. On a 640×512 sensor at 2x zoom, you’re still working with 320×256, which is more than usable. If you plan on zooming in to identify targets at distance, a higher base resolution gives you much more room to work with before the image falls apart.
Our Pixfra lineup covers detection ranges from around 500 meters on entry-level devices all the way up to 3,600 meters on our premium Sirius HD series. But detection range and identification range are two different numbers — identification range, where you can actually confirm what you’re seeing, is always shorter. For most recreational hunters and outdoor enthusiasts working inside 300–600 meters, our mid-range models like the Arc LRF and Mile 2 series hit the sweet spot between resolution, range, and price.
Not every hunter, wildlife observer, or outdoor enthusiast needs the highest resolution on the shelf. The right resolution depends on how you use your device, how far you need to see, and what you’re willing to spend. Here’s a breakdown of the most common sensor configurations and where each one fits best.

256×192 (49,152 pixels) — This is the entry point for real thermal imaging. Devices with this configuration can only be used at shorter ranges and do not allow you to digitally magnify the image without a significant reduction in clarity. For short-range use — scouting your backyard for critters, quick property scans at night, or budget-friendly wildlife observation under 200 meters — it gets the job done. If you’re just getting started with thermal and want to keep costs low, this tier works.
384×288 (110,592 pixels) — This is where things get serious. At Pixfra, we consider this the workhorse resolution for most hunting and outdoor scenarios. You get enough pixels for clean digital zoom, solid identification range, and detail that lets you pick animals out of brush and treelines at real-world hunting distances. Resolution at this tier gives you sharper images for identifying targets at longer distances and makes it easier to separate animals from background clutter, especially in dense foliage.
640×512 (327,680 pixels) — The top tier for outdoor thermal devices. This configuration is generally the highest quality thermal sensor available in the market, producing high-definition thermal images with superior long-range detection, recognition, and identification. If you’re scanning large areas, working at extended distances, or need the clearest possible image for fast-moving targets, this is where you want to be. Our Sirius HD series runs at this resolution, and the difference in image quality is visible from the first time you look through the eyepiece.
Here’s a quick comparison table to help you match resolution to your needs:
| Anturin tarkkuus | Total Pixels | Best Use Case | Tyypillinen havaitsemisalue | Digital Zoom Quality |
|---|---|---|---|---|
| 256×192 | 49,152 | Budget scanning, short-range scouting | Up to 500m | Limited — degrades quickly |
| 384×288 | 110,592 | Hunting, wildlife observation, property security | Up to 1,800m | Good — usable at 2x–4x |
| 640×512 | 327,680 | Long-range hunting, law enforcement, professional use | Jopa 3 600 m | Excellent — sharp even at 4x+ |
We designed our product lines around these tiers. The Mile 2 series handles everyday hunting with a balance of resolution and portability. The Arc LRF adds a built-in laser rangefinder for distance-confident shooting. And the Sirius HD series pushes resolution and detection range to their limits for buyers who need every pixel they can get.
Resolution isn’t just about how many pixels sit on the sensor — it’s also about how big each pixel is. That measurement is called pixel pitch, and it plays a direct role in the sharpness and compactness of your thermal device. Pixel pitch is the distance between the centers of two adjacent pixels on the sensor, measured in micrometers (e.g., 12µm). Devices with smaller pixel pitches are more detailed since they have a higher density of pixels on the sensor, meaning the device can take more temperature point measurements.
The two pixel pitches you’ll see on most handheld thermal devices in 2026 are 12µm and 17µm. A smaller pixel pitch, such as 12µm, means pixels are packed more closely together, allowing for higher resolution images and better detection of smaller objects. A larger pixel pitch, like 17µm, means fewer pixels per unit area, resulting in lower resolution images but potentially better sensitivity to thermal radiation.
Here’s the practical takeaway: smaller pixel pitch means smaller sensors occupying less physical space — allowing more compact thermal scopes or enabling higher resolutions in the same sensor footprint. For the same physical sensor size, you can pack significantly more 12µm pixels than 17µm pixels. That’s why modern 12µm sensors have made compact, high-resolution thermal monoculars possible at prices that would’ve been unthinkable a few years ago.
For thermal imaging devices with a smaller pixel sensor, the same detection range, magnification, and field of view can be achieved with lenses that have a smaller focal length. Smaller lenses mean a smaller, lighter device overall. That’s a direct win for anyone carrying gear on multi-hour hunts or backcountry trips where every ounce counts.
At Pixfra, we use 12μm pixel pitch across our product lines. It’s a deliberate choice. It lets us deliver 384×288 and 640×512 resolutions in housings that stay compact and field-ready, without sacrificing detection range or image quality. Our Draco series, for example, was designed with a lightweight build specifically for hunters who need multi-functional performance without the bulk — and 12µm pixel pitch is a big part of how we got there.
We’ll be straight with you: resolution matters a lot, but it’s not the only thing that makes a thermal device perform well. Two thermal devices can share identical specifications — the same resolution, pixel pitch, and NETD — yet deliver noticeably different images. That’s because image quality depends on the entire imaging system, not just the sensor. If you buy a high-resolution device with poor thermal sensitivity or a sluggish refresh rate, you’re going to be disappointed.

NETD (Noise Equivalent Temperature Difference) is the spec that tells you how sensitive your sensor is to small heat differences. It’s measured in millikelvins (mK), and lower is better. The most defining characteristic that affects the thermal resolution of a thermal imaging device is the sensor’s NETD. It’s measured in millikelvins and represents the smallest temperature difference that the sensor can perceive. The lower the NETD value, the higher the sensor sensitivity. A device with amazing resolution but poor NETD will show you a sharp but flat, washed-out image on warm nights when everything is radiating heat at similar levels. Our Pixfra devices achieve NETD values of ≤18mK, which places them at the top end of sensitivity for hunting-grade thermal optics.
Päivittymisnopeus is the other spec that directly affects your experience. A 50Hz refresh rate is the baseline for any thermal device worth buying in 2026. That rate gives you smooth, fluid imagery so you can track moving targets — running hogs, trotting coyotes — without blur or stutter. Frame rate affects how smooth the image appears when moving the camera. Professional models with 25–60Hz refresh rates provide fluid, real-time imaging, while budget models at 9Hz show noticeable lag. This becomes relevant when scanning large areas or tracking moving heat sources.
Image quality in a thermal monocular depends on the balance between sensor resolution, pixel pitch (µm), and NETD sensitivity. Higher resolution captures more detail, smaller pixel pitch increases sharpness, and lower NETD improves contrast in low-visibility conditions. The best performance comes from optimizing all three.
That’s exactly how we approach product design at Pixfra. We don’t just chase resolution numbers — we balance resolution with ≤18mK NETD, 12µm pixel pitch, and high refresh rates across every device in our lineup. It’s the system that makes the image, not any single spec in isolation. That’s what separates a device that looks good on a spec sheet from one that actually performs at 2 AM in a foggy hunting blind.
Picking the right resolution comes down to a simple question: what are you actually going to do with your thermal device? There’s no point in paying for 640×512 if you’re mostly scouting your property line at 100 meters. And there’s no point in saving money on 256×192 if you’re hunting predators at 400+ meters and need to identify what you’re shooting at.

For short-range scouting, casual wildlife observation, and basic property checks, a 256×192 sensor keeps the price down and still gives you functional thermal imaging for close-up work. If you’re a first-time thermal buyer on a budget, this is a fine place to start.
For most hunters, wildlife observers, and outdoor enthusiasts, 384×288 is the resolution we recommend. It gives you enough pixels for clean images at real hunting distances, supports usable digital zoom, and balances cost against performance. It’s the resolution behind several of our most popular models, including the Mile 2 series and the Arc LRF.
For long-range detection, professional use, or anyone who wants the sharpest possible image under the toughest conditions, 640×512 is the move. Our Sirius HD series lives at this tier, and it’s built for people who need to scan fields at 1,000+ meters and still tell exactly what they’re looking at.
Here’s a final point worth remembering: resolution works best when it’s backed by the right supporting specs. A 640×512 sensor with poor NETD sensitivity, a low refresh rate, or a bad lens will underperform a well-tuned 384×288 system every time. At Pixfra, we build every thermal monocular, scope, and front attachment as a complete imaging system — resolution, pixel pitch, NETD, optics, and processing all working together. That’s how you get a thermal device that actually delivers in the field, not just on the spec sheet.
Is 384×288 resolution good enough for hunting?
For most hunting scenarios, 384×288 is more than good enough — it’s the most popular resolution tier on the market for a reason. It gives you solid image detail at distances between 200 and 600 meters, supports clean digital zoom up to 4x, and helps you tell the difference between a target animal and background clutter. Unless you’re doing long-range work past 800 meters or need pixel-perfect identification at extreme distances, 384×288 is the sweet spot where performance meets value.
Does higher resolution drain battery faster on a thermal device?
Higher resolution sensors do process more data, which can draw more power. But in practice, the difference between a 384×288 and a 640×512 sensor on battery life is smaller than most people expect. The bigger battery drains come from screen brightness, refresh rate, Wi-Fi streaming, and cold weather. At Pixfra, our devices range from about 4.5 to 15 hours of battery life depending on the model, and many use swappable 18650 batteries — so even if a higher-resolution model runs a bit shorter, you can pop in a fresh cell in seconds.
Can digital zoom replace higher sensor resolution?
No. Digital zoom magnifies existing pixels — it doesn’t create new detail. Every time you double the digital zoom (from 1x to 2x, for example), you halve both the pixels and field of view available. So starting with a higher base resolution gives you far more room to zoom before the image turns grainy. If you plan to zoom in often, invest in higher sensor resolution rather than relying on digital magnification to close the gap.
What’s the best resolution for a thermal monocular in 2026?
It depends on your use case and budget. For general-purpose hunting and outdoor use, 384×288 with a 12µm pixel pitch gives you the best balance of image clarity, detection range, and price. For professional or long-range applications, 640×512 delivers the sharpest image with the best zoom quality. What was once a premium-only resolution (640×512) has now become more accessible at the mid-range, so you’re getting more for your money than ever before.
Does resolution affect how far a thermal device can detect?
Yes, but not on its own. The key factors that affect detection distance include target size, temperature difference, sensor resolution, lens focal length, and more. A higher-resolution sensor captures more detail at distance, which stretches your identification range — the point where you can actually tell what a heat signature is. But lens quality and NETD sensitivity also play a big role. That’s why at Pixfra, we design the full optical system together so every spec supports the next.
The thermal device market in 2026 looks completely different from even two years ago. Sensor tech has leaped forward, prices have dropped, and the feature sets you can get today would’ve been premium-only a couple of seasons back. But with so many options out there, how do you know what actually matters? We’re here at Pixfra to cut through the noise and show you the top 6 features you need in the best thermal device this year.
Whether you’re a hunter tracking hogs after dark, an outdoor enthusiast exploring backcountry trails, or a wildlife observer watching nocturnal animals without disturbing them, your thermal device is only as good as its features. And not all features are equal. Some specs look flashy on paper but mean nothing in the field. Others seem small but make or break your experience at 2 AM in a hunting blind.

The thermal monocular market in 2026 looks significantly different from even two years ago, with three developments reshaping what buyers should expect at each price tier — including higher sensor resolutions at lower prices, where what was once a premium specification (640×512) has become a mid-range standard. That shift is great news for you, but it also means you’ve got to be more deliberate about what you’re shopping for. A cheaper price tag doesn’t always mean a better deal, and spending more doesn’t always buy you the features you actually need.
At Pixfra, we build thermal monoculars, thermal scopes, thermal front attachments, and multispectral binoculars — all designed for real outdoor conditions. We’ve used what we’ve learned from years of developing our proprietary heat-detection technology to boil down the six features that separate a great thermal device from one that’ll frustrate you by your third outing. If you’re also looking to get more out of your existing setup, check out the parhaat lisävarusteet lämpökameran suorituskyvyn parantamiseen for some practical add-ons that make a real-world difference.
If there’s one spec that defines how well a thermal device performs, it’s NETD — Noise Equivalent Temperature Difference. This number, measured in millikelvins (mK), tells you the smallest temperature difference the sensor can pick up. A lower NETD value generally indicates that the device can detect smaller temperature variations, resulting in a clearer and more detailed image. Think of it this way: on a warm summer night when the ground, trees, and air are all radiating heat at similar levels, a device with poor NETD gives you a washed-out, flat image. A device with strong NETD — say, ≤18mK like our Pixfra thermal devices — shows you crisp contrasts between an animal and its background, even in challenging conditions like fog, rain, or humidity.
NETD shows how well your thermal monocular can see small changes in heat. Lower NETD numbers mean clearer pictures. In 2026, the best models have NETD below 15 mK, so you can see tiny heat changes. Pixel pitch matters too — smaller pixel pitch, like 12 µm, gives you sharper pictures and helps you spot things better. Our devices at Pixfra achieve NETD values of ≤18mK, which places them at the high end of sensitivity for hunting-grade thermal optics. That kind of sensitivity means you’re not squinting at blurry shapes — you’re seeing defined outlines, even when conditions turn ugly.
Then there’s sensor resolution. This is the other half of the image quality equation. Resolution is expressed as the number of pixels on the thermal sensor — common options include 256×192, 384×288, and 640×512. Resolution is the heart of any thermal scope — it determines how clear and detailed your view will be. Lower resolutions like 256×192 are great for budget options and short-range hunting, while 384×288 or 640×512 offer sharper images for identifying targets at longer distances. Higher resolution scopes make it easier to distinguish between animals and background clutter, especially in dense foliage. But resolution isn’t everything; factors like sensor sensitivity and refresh rate also play a huge role in overall performance. At Pixfra, we pair our high-resolution sensors with 12μm pixel pitch technology across our product lines — from the Mile 2 series for everyday use to the Sirius HD series for demanding professional applications — so you get sharp, high-contrast images no matter which model you choose.
Detection range is one of the first specs people look at, and for good reason. It tells you how far out the device can spot a heat signature. But here’s a detail that trips up a lot of first-time buyers: detection range and identification range are different figures — identification range, where you can confirm what you’re seeing, is always shorter. A device might claim it can detect a heat source at 1,500 meters, but that doesn’t mean you’ll be able to tell if it’s a deer, a coyote, or a stump at that distance. For hunters, the identification range is what really counts. Always ask about both numbers before you buy.

Our Pixfra lineup covers a wide spectrum of detection ranges. Entry-level devices start at around 500 meters, while our premium Sirius HD series pushes out to 3,600 meters. That kind of reach gives law enforcement, wildlife managers, and serious hunters the ability to scan massive areas without moving a step. For most recreational hunters and outdoor enthusiasts working inside 300-600 meters, our mid-range models like the Arc LRF and Mile 2 series hit the sweet spot between performance and price.
Now let’s talk about laser rangefinders (LRF). For hunters taking shots beyond 150 yards at night, a built-in LRF significantly improves shot placement confidence and removes the need for a separate ranging device. An integrated LRF gives you exact distance to your target with the press of a button — no fumbling for a separate device in the dark. Our Pixfra models with “LRF” in their names, like the Arc LRF, Chiron LRF, and Taurus LRF, feature integrated laser rangefinders with 1,000-meter range capability. Paired with the built-in ballistic calculators found in models like the Chiron LRF and Taurus LRF, you get a system that computes bullet drop and gives you an adjusted aiming point on the fly. That’s not a gimmick — it’s the difference between a clean, ethical shot and a miss.
Here’s a feature that doesn’t get nearly enough attention until you’re three hours into a hunt and your screen goes dark. Thermal devices consume power quickly, especially at higher refresh rates and brightness. Look for at least 8 hours of continuous operation. Replaceable batteries or external power packs can be lifesavers during long hunts. Battery life is directly tied to how useful your thermal device actually is in the field. A device with incredible image quality and a two-hour battery is basically a very expensive paperweight by midnight.
Our Pixfra devices range from approximately 4.5 hours to 15 hours of battery life depending on the model and usage conditions. Many of our models use standard 18650 batteries that you can swap in seconds. That’s a deliberate design choice. Proprietary internal batteries might save a few grams of weight, but when you’re deep in a hunt and the power dies, being able to pop in a fresh 18650 from your pocket is worth its weight in gold. And here’s a pro tip from our own field experience: cold weather can slash battery performance by 30-50%. Always carry spare batteries in an inside pocket where your body heat keeps them warm.
The table below gives you a quick look at how battery life stacks up across different use cases and what you should be targeting:
| Use Case | Minimum Battery Life Needed | Recommended Battery Type |
|---|---|---|
| Short evening hunts (2-3 hrs) | 4-5 hours | Internal rechargeable |
| All-night predator control | 8-10 hours | Swappable 18650 |
| Multi-day backcountry trips | 10-15 hours | Swappable + spares |
| Property security patrols | 6-8 hours | Rechargeable w/ quick charge |
| Wildlife observation sessions | 5-7 hours | Either type works |
Match your expected use to the right battery system and you’ll never be caught in the dark with a dead device.
Your thermal device is outdoor gear. Full stop. It’s going to get rained on, dropped on rocks, tossed into a pack, and used in temperatures ranging from scorching summer nights to freezing winter mornings. If it can’t handle that, it doesn’t matter how pretty the images are.

Field gear must survive drops, rain, and dust. Devices with IP67-rated housing can withstand immersion in water up to one meter deep for 30 minutes. Non-slip rubber armor exteriors provide a secure grip even when wearing gloves or when the device is wet. Battery life is another critical factor. Look for an IP rating — IP67 is the gold standard for thermal devices in 2026. That means the device is fully sealed against dust and can survive submersion in water. Some cheaper devices only carry an IP54 rating, which handles splashes but won’t survive a dunk. If you hunt in rain, cross streams, or work in dusty environments, IP67 is non-negotiable.
At Pixfra, we build our devices for the same conditions we use them in. Our thermal scopes can handle heavy recoil, our monoculars survive drops, and our housing materials resist corrosion over years of use. Look for MIL-STD-810G or IP67/IP68 seals, impact-resistant housings, and waterproof controls. Choose models with sealed optics, antifog vents, and corrosion-resistant finishes. Make certain battery compartments stay secure in wet or muddy conditions, and confirm proper field-maintainable seals. If you’ll expose gear to rough terrain, prioritize durability over extra features. Weight also plays a role here — a thermal device that’s too heavy will tire you out during long sessions, affecting your aim and your patience. Our Draco series, for example, was designed with a lightweight build specifically for hunters who need multi-functional performance without the bulk.
Ergonomics tie into durability too. Cold, gloved hands at 2 AM in a hunting blind don’t mix well with complicated menus or finicky buttons. Intuitive button layouts, fast startup times, and polished companion apps that don’t require a manual to operate separate the genuinely usable devices from the frustrating ones. If you can’t operate your thermal device with one hand in the dark while wearing gloves, the design has failed. We keep our controls simple and accessible across the Pixfra lineup because real-world use demands it.
The best thermal device in 2026 doesn’t just show you a heat image — it connects to your phone, records video, streams live footage, and updates its own firmware over the air. Integrated feature sets like built-in laser rangefinders, onboard audio and video recording, Wi-Fi streaming, and companion app ecosystems are increasingly standard on serious devices rather than premium additions. The best thermal imaging monocular options in 2026 deliver an entire field toolkit in a single unit.
Our Pixfra Outdoor App supports all our current models, including the Sirius, Arc LRF, Mile 2, Pegasus Pro, Chiron LRF, Taurus, and Taurus LRF series. Through the app, you can update firmware, adjust settings, and transfer images and video directly to your smartphone. That kind of connectivity is more than a convenience — it’s a practical tool for documenting hunts, sharing scouting data with hunting partners, or keeping records of wildlife activity on your property.
Color palettes are another smart feature that experienced users swear by. White Hot is the most common mode, where heat sources appear white, and is ideal for general detection in open fields. Black Hot, where heat sources appear black, is preferred by many professional hunters for better detail on the animal’s body. Red Hot highlights the warmest parts of the image in red and is excellent for quickly picking out a target in a complex environment. Iron Bow and Rainbow use a spectrum of colors to show varying temperature gradients, helpful for identifying mechanical heat leaks or specific environmental features. Multiple palette options let you adapt your display to different terrain, weather conditions, and personal preference — without changing the detection ability of the device itself.
And let’s not overlook the refresh rate. A 50Hz refresh rate is the baseline for any thermal device worth buying in 2026. That rate delivers smooth, fluid imagery so you can track moving targets — like running hogs or coyotes — without blur or chop. Anything below 30Hz will give you a stuttering image that makes fast-moving targets hard to follow. Our Pixfra devices are built with high refresh rates across the board, because in the field, smooth imaging isn’t a luxury — it’s a necessity.
Our Volans series also stands out with its all-day vision capability. It features an adjustable aperture from F1.2 to F3.0 to adapt to different lighting conditions, making it one of the few thermal devices on the market that performs just as well in broad daylight as it does in total darkness. That kind of versatility means you carry one device instead of two.
Key Takeaway: The best thermal device in 2026 combines high thermal sensitivity (≤18mK NETD), a resolution that matches your use case, reliable detection range with an integrated laser rangefinder, a battery system that outlasts your hunting session, rugged IP67 construction, and smart features that keep you connected and in control. At Pixfra, we engineer every product in our lineup around these six features because we know what matters when conditions get real.
What NETD rating should I look for in a thermal monocular?
For most hunting, wildlife observation, and outdoor applications, you want a thermal device with an NETD of ≤25mK or lower. A device with an ultra-sensitive NETD rating of ≤18mK can detect incredibly minute temperature differences, providing a crisp, detailed image even in the most challenging environments like heavy fog, rain, or complete darkness. Our Pixfra devices achieve ≤18mK, putting them at the top end of thermal sensitivity for outdoor-grade optics.
Is a built-in laser rangefinder worth it on a thermal device?
If you’re hunting at distances beyond 150 yards or shooting at night, yes — a built-in LRF is a real advantage. It removes the need to carry a separate rangefinder and gives you instant distance data so you can adjust your shot. Our Pixfra Arc LRF, Chiron LRF, and Taurus LRF models all include integrated laser rangefinders with 1,000-meter range. Paired with a ballistic calculator, these models give you a complete targeting solution in one device.
How long does a thermal device battery last?
If you plan to hunt for a long time, you need a device with a long battery life. Many thermal imaging monoculars have a runtime of 6, 8, or 10 hours. If you know you only need an hour, you can get by with a cable-powered unit. Our Pixfra devices range from about 4.5 to 15 hours depending on the model. For all-night hunts, look for models with swappable 18650 batteries so you can carry spares and swap without downtime.
Voiko lämpölaitetta käyttää päivällä?
Absolutely. Thermal devices detect heat, not light, so they work just as well in daylight as they do at night. Our Pixfra Volans series goes a step further with all-day vision capability and an adjustable aperture (F1.2-F3.0) that adapts to changing light conditions, making it an especially strong pick for hunters and observers who need 24-hour coverage from a single device.
Minkä IP-luokituksen ulkokäyttöön tarkoitettu lämpölaite tarvitsee?
For any serious outdoor use — hunting, hiking, wildlife observation, property security — you want at least an IP67 rating. IP67 rating is legit. Rain, snow, condensation — none of it matters. The housing feels solid despite the price point. IP67 means full dust sealing and protection against temporary water submersion, which covers rain, stream crossings, snow, and accidental drops into puddles. Anything less than IP67 puts your gear at risk in real field conditions.
Olet juuri avannut uuden lämpökamerasi pakkauksen. Se näyttää upealta, tuntuu vankalta, ja olet valmis lähtemään maastoon. Ennen kuin lähdet, sinun on kuitenkin hyvä tietää muutamia asioita. Oikea kalibrointi ja säännöllinen huolto ovat se tekijä, joka erottaa lämpökameran, joka toimii hyvin vuosikymmenen ajan, sellaisesta, jonka kuva muuttuu epäselväksi jo yhden kauden jälkeen. Olemme koonneet tämän oppaan osoitteeseen Pixfra opastamaan sinua kaikessa — ensimmäisestä käynnistyksestä pitkäaikaiseen säilytykseen. Käytitpä sitten lämpökameraa, monokulaaria tai etukiinnikettä, nämä ohjeet pätevät kaikkiin laitteisiin.
Selvitetään yksi asia heti aluksi: kun puhumme lämpökameran kalibroinnista, emme tarkoita samaa asiaa kuin kiväärin kiikarin nollaus. Kalibrointi — jota kutsutaan joskus myös nimillä NUC (Non-Uniformity Correction) tai FFC (Flat Field Correction) — on anturitasolla tapahtuva prosessi, joka pitää lämpökuvan puhtaana, tasaisena ja ilman häiriöitä. Lämpökamerat ovat erittäin herkkiä ympäristön lämpötilan muutoksille, ja koska lämpötila vaihtelee jatkuvasti, laitteen on päivitettävä tietojaan säännöllisesti, jotta se voi mitata lämpötilaerot tarkasti. Ilman tätä prosessia kuva alkaa näyttää rakeiselta, haalistuneelta tai siinä näkyy viivoja, joiden ei pitäisi olla siellä.

Tässä on yksinkertaistettu selitys siitä, mitä kalibroinnin aikana tapahtuu. Kalibroinnin aikana laite peittää anturinsa hetkeksi sulkimella, jotta saadaan tasainen ja vakiolämpötilalukema. Laite käyttää tätä tasaista vertailuarvoa nollatakseen kunkin pikselin reagoinnin infrapunasäteilyyn. Voidaan ajatella, että kyseessä on lähtötason nollaaminen, jotta anturi tietää jälleen, miltä “neutraali” tilanne näyttää. Laitteen käytön aikana sisäiset lämpötilan muutokset saavat kunkin pikselin reagoimaan hieman eri tavalla, mikä aiheuttaa epätasaisuutta kuvassa. Ilman kalibrointia kuvaan syntyy näkyviä häiriöitä. Kun korjaus on suoritettu, nämä häiriöt katoavat ja kuva on jälleen terävä ja kontrastikas.
Useimmat huomaavat kalibroinnin ensimmäistä kertaa, kun näyttö jumiutuu hetkeksi. Kylmissä olosuhteissa kalibrointi tapahtuu useammin käytön ensimmäisten minuuttien aikana. Tämä on odotettua käyttäytymistä, ei vikaa. Lämpökuva jumiutuu, koska anturi ei pysty tuottamaan kelvollista kuvaa kalibroinnin aikana. Kun kalibrointi alkaa, vertailupinta estää anturin signaalin. Tällä hetkellä laitteella ei ole käyttökelpoista kuvatietoa. Virheellisten tietojen näyttämisen välttämiseksi järjestelmä pitää viimeisen kelvollisen kuvan näytöllä. Tämä aiheuttaa lyhyen jumiutumisen. Jumiutuminen ei ole toimintahäiriö. Se on toiminnallinen vaatimus, joka varmistaa kalibroinnin tarkkuuden ja estää kuvien vioittumisen. Älä siis hätäänny, kun näin tapahtuu – se tarkoittaa, että laitteesi toimii juuri niin kuin sen pitääkin. Kalibroinnin tiheys riippuu laitteen käyttöajasta. Mitä pidempään lämpökamera on jatkuvassa käytössä, sitä harvemmin kalibrointia tarvitaan. Huomaat, että kalibrointeja tarvitaan useammin laitteen käynnistämisen jälkeisinä ensimmäisinä minuutteina, etenkin kylmällä säällä, ja sitten harvemmin, kun laite lämpenee ja vakiintuu.
Useimmissa nykyaikaisissa lämpökameroissa on kolme kalibrointitilaa: automaattinen, puoliautomaattinen ja manuaalinen. Kalibrointitiloja on kolme: manuaalinen, automaattinen ja puoliautomaattinen. Jokaisella on oma käyttötarkoituksensa riippuen siitä, mitä kentällä teet. Käydään ne läpi, jotta voit valita tilanteeseesi sopivan.
Automaattitila Tätä suosittelemme useimmille käyttäjille, etenkin jos olet vasta-alkaja lämpökameran käytössä. Automaattisessa kalibroinnissa ohjelmistoalgoritmi käyttää ajastinta tai muuta ohjelmistotoimintoa, joka tarkkailee kuvan laadun heikkenemistä. Kun laitetta kalibroidaan, kuva jäätyy sekunniksi tai kahdeksi, ja useimmissa laitteissa suljin sulkeutuu kalibroinnin ajaksi. Sulkimen avautumiseen ja sulkeutumiseen liittyy selvä ääni. Sinun ei tarvitse miettiä asiaa – laite hoitaa kaiken itse. Ainoa haittapuoli on sisäisen sulkimen aiheuttama lyhyt napsahdusääni, jota jotkut metsästäjät eivät pidä, kun he istuvat hiljaisella metsästyspaikalla. Puoliautomaattinen tila sen avulla voit käynnistää kalibroinnin painikkeen painalluksella, mutta se käyttää sisäistä suljinta, joten se on silti nopeaa ja siistiä. Manuaalinen tila on hiljaisin vaihtoehto. Manuaalisessa kalibrointitilassa käyttäjän on painettava painiketta ja suljettava etusuojus käsin. Manuaalisen kalibrointitilan etuna on, että se on huomattavasti hiljaisempi kuin muut kaksi tilaa, joissa käytetään sulkimia. Painat painiketta ja peität objektiivin itse – joko objektiivin suojuksella tai kädelläsi – joten sulkimen napsahdusta ei kuulu lainkaan. Tämä on suosikki vaihtoehto metsästäjille, jotka tarvitsevat täydellistä hiljaisuutta lähietäisyydeltä tapahtuvassa saalistajien tai villisikojen metsästyksessä.

Riippumatta siitä, mitä tilaa käytät, on olemassa muutamia käytännön sääntöjä, joita on syytä noudattaa. Monet kuvanlaatuongelmat, jotka näyttävät huonolta kontrastilta tai heikolta terävyydeltä, johtuvat itse asiassa kalibroinnin siirtymästä. Suorita FFC-kalibrointi, kun kuva alkaa näyttää epätasaiselta näytön eri osissa. Yleisiä merkkejä ovat raidoitus, täplät tai samea “likaisen lasin” vaikutelma, jota ei ollut vielä muutama minuutti sitten. Huomaat tämän usein suuren lämpötilan muutoksen jälkeen, kuten astuessasi lämpimästä kuorma-autosta kylmään ilmaan. Neuvomme: Kalibroi laite uudelleen ennen kuin alat säätää asetuksia. Jos kuva on siirtynyt, saatat päätyä säätämään kontrastia tai terävyyttä liikaa kompensoidaksesi väliaikaista ongelmaa. Se johtaa yleensä myöhemmin karheampaan kuvaan. Parempi järjestys on yksinkertainen: tarkenna ensin, suorita sitten FFC ja arvioi vasta sen jälkeen kuva. Tämä työnkulku säästää sinut säätämästä asetuksia, jotka eivät olleet ongelman syy alun perinkään. Jos haluat perehtyä tarkemmin oikeaan kalibrointiin sopiviin varusteisiin – kuten laadukkaisiin kiinnikkeisiin ja akkuihin – tutustu oppaaseemme osoitteessa parhaat lisävarusteet lämpökameran suorituskyvyn parantamiseen.
Vielä yksi asia, joka aiheuttaa hämmennystä: kalibrointi ja nollaus ovat kaksi eri asiaa. Kalibrointi koskee anturin kuvanlaatua. Nollaus kohdistaa tähtäinristikon kiväärin osumapisteeseen. Tarkkaan ampumiseen lämpökamera on kalibroitava, jotta kuva kohdistuu oikein kiväärin laukauksen osumapisteeseen. Tarvitset molempia, ja ne toimivat yhdessä – mutta älä sekoita niitä keskenään. Suorita aina kalibrointi (NUC) ennen kuin aloitat nollapisteen säätämisen. Anturin kuvan siirtyminen voi saada tähtäyspisteesi näyttämään väärältä, vaikka todellinen ongelma onkin vain anturin kohina, ei kiikarin kohdistus.
Lämpökameraasi linssi ei ole sama kuin päiväkäyttöisen kiikarin lasi. Lämpökameran linssit eivät ole tavallista lasia. Ne on valmistettu germaniumista tai muista erikoismateriaaleista, ja niissä on herkät pinnoitteet, jotka vaativat varovaista käsittelyä. Germanium on kallista, ja näiden linssien heijastamattomat pinnoitteet ovat herkkiä paineelle, kemikaaleille ja jopa ihon rasvalle. Jos puhdistat ne väärin, aiheutat vaurioita, joita mikään kalibrointi ei voi korjata.

Tässä on suosittelemamme puhdistusmenettely. Älä koskaan pyyhi pölyistä linssiä suoraan. Irtonaiset pöly- tai hiekkahiukkaset voivat naarmuttaa pintaa. Aloita aina kevyellä paineilmapuhaltimella tai pehmeällä optisella harjalla, jotta lika irtoaa ilman kitkaa. Älä puhalla linssiin hengitykselläsi (kondenssijäljet) tai käytä paperipyyhkeitä, paperipyyhkeitä tai karkeita kankaita, sillä ne aiheuttavat mikroviiltoja. Kun irtonainen pöly on poistettu, laita muutama tippa optista puhdistusainetta suoraan liinaan, älä koskaan itse linssille, jotta neste ei pääse tunkeutumaan linssiin. Pyyhi linssiä varovasti pyörivin liikkein keskeltä ulospäin. Siinä kaikki. Ei mitään hienoja tekniikoita. Vain kärsivällisyyttä ja oikeat välineet.
Tässä on ammattilaisen vinkki, jonka olemme oppineet vuosien kenttäkokemuksen perusteella: Puhdista lämpökameran linssi vain silloin, kun se on ehdottoman välttämätöntä, ja vain silloin, kun siinä on näkyvää likaa tai sormenjälkiä. Liiallinen puhdistaminen voi itse asiassa kuluttaa heijastuksenestopäällysteen nopeammin kuin pieni pölymäärä ikinä tekisi. Ohut pölykerros on paljon vähemmän haitallista kuin hankaaminen väärällä liinalla. Ylös käännettävät objektiivinsuojukset ovat tässä paras ystäväsi – ne pitävät roskat poissa, joten sinun ei tarvitse puhdistaa niin usein. Ja kun kyse on kemikaaleista, vältä kokonaan kotitalouksien lasinpuhdistusaineita. Vältä tavallisten silmälasien puhdistusaineiden käyttöä lämpökameroissa. Lämpökameroiden linsseissä käytetään germaniumia tai erikoismateriaaleja, joiden ainutlaatuiset pinnoitteet reagoivat eri tavalla kuin tavallinen lasi. Käytä optisille laitteille erityisesti suunniteltuja linssipuhdistusaineita, jotka sisältävät vähintään 30%-isopropyylialkoholia tai 96%-isopropyylialkoholiliuoksia. Tavalliset silmälasien puhdistusaineet voivat sisältää lisäaineita, jotka vahingoittavat lämpökameran pinnoitteita ja heikentävät kuvanlaatua ajan myötä.
Objektiivien puhdistuksen pikaopas
Vaihe Työkalu Huomautukset 1. Poista irtonainen pöly Ilmapuhallin tai pehmeä optinen harja Älä koskaan pyyhi kuivaa, pölyistä linssiä 2. Levitä puhdistusainetta Optisen luokan liuos mikrokuituliinalla Älä koskaan suihkuta suoraan linssille 3. Pyyhi varovasti Mikrokuituliina, pyöreät liikkeet Keskitä ulospäin; älä paina 4. Tarkista Silmämääräinen tarkastus valaistuksessa Toista vain tarvittaessa 5. Suojaa Ylös käännettävä objektiivin suojus Peitä aina, kun laitetta ei käytetä
Akun hallintaan ei kiinnitetä tarpeeksi huomiota, ja se on yksi tärkeimmistä syistä, miksi lämpökamerat eivät toimi kentällä odotetulla tavalla. Useimmat lämpökamerat toimivat yhdellä latauksella 3–8 tuntia asetuksista, lämpötilasta ja näytön kirkkaudesta riippuen. Lämpökamerat kuluttavat paljon akkua, varsinkin jos niitä käytetään pitkiä aikoja. Varmistaaksesi, että laitteesi akku kestää, vältä näytön kirkkauden asettamista maksimitasolle, jos se ei ole tarpeen. Käytä virransäästötilaa aina kun mahdollista ja ota mukaan ylimääräisiä akkuja tai kannettava laturi, jos suunnittelet pitkää käyttöjaksoa.
Kylmä sää vaikuttaa akun suorituskykyyn enemmän kuin useimmat ihmiset ymmärtävät. Olemme havainneet, että täyteen ladatut litiumakut menettävät 20–30% tehollisesta kapasiteetistaan pakkaslämpötiloissa. Säilytä vara-akkuja sisätaskussa lähellä kehoasi, jotta ne pysyvät lämpiminä. Useimmat lämpökamerat toimivat ladattavilla tai vaihdettavilla akuilla. Asianmukainen akkujen hoito on ratkaisevan tärkeää, jotta laitteen toiminta pysyy keskeytyksettömänä. Pitkäaikaista varastointia varten poista akut aina laitteesta vuotojen estämiseksi, sillä vuodot voivat vahingoittaa sisäisiä komponentteja. Jos kiikarisi käyttää ladattavia akkuja, lataa niitä säännöllisesti, myös silloin kun laitetta ei käytetä, jotta niiden käyttöikä säilyy. Vältä ylilatausta, sillä se voi johtaa ylikuumenemiseen ja akun suorituskyvyn heikkenemiseen. Ota mukaan varaparistoja pitkille retkille, jotta laite ei lakkaa toimimasta maastossa. Ja jos olet koko yön kestävillä metsästysretkillä, harkitse laitteen yhdistämistä ulkoiseen virtapankkiin. Monet nykyaikaiset lämpökamerat tukevat USB-virransyöttöä, mikä tarkoittaa, että voit käyttää laitetta 10 tuntia tai kauemmin ilman huolta tyhjistä paristoista.
Keskeinen tieto: Useimpien lämpökameroiden lämpöanturin käyttöikä on 40 000–60 000 tuntia, kun taas näyttöjen käyttöikä on tyypillisesti noin 10 vuotta. Se on pitkä käyttöikä, jos laitetta hoidetaan asianmukaisesti – ja akun hallinta on tässä yhteydessä erittäin tärkeää.
Laiteohjelmisto on tämän osion toinen puoli, ja se jää usein kokonaan huomiotta. Tarkista laiteohjelmistopäivitykset säännöllisesti ja asenna ne valmistajan suositusten mukaisesti. Laiteohjelmistopäivitykset voivat parantaa laitteen suorituskykyä ja toiminnallisuutta. Me Pixfrassa julkaisemme laiteohjelmistopäivityksiä virheiden korjaamiseksi, kuvankäsittelyn parantamiseksi ja toisinaan jopa uusien ominaisuuksien lisäämiseksi. Vanhentuneen laiteohjelmiston käyttäminen on kuin ajaisi vanhoilla renkailla – se saattaa toimia, mutta et saa laitteistostasi parasta irti. Testaa akun kunto, päivitä laiteohjelmisto ja kalibroi anturi vähintään kuukautta ennen metsästyskauden alkua, jotta et jää paitsi kauden avausillasta. Sisällytä laiteohjelmiston tarkistukset kauden alkun valmisteluihin akkujen testaamisen ja anturin kalibroinnin ohella, niin vältät yllätykset juuri silloin, kun se on tärkeintä.
Se, miten säilytät lämpökameran, kun sitä ei käytetä, on yhtä tärkeää kuin se, miten käsittelet sitä maastossa. Metsästyksen jälkeen lämpökameran asianmukainen säilytys varmistaa, että se on valmiina tuleviin retkiin. Valitse viileä, kuiva paikka, jossa lämpötila on tasainen ja ilmankosteus alhainen, jotta vältät kondenssin muodostumisen. Ajattele sitä kuin varusteiden huolellista säilyttämistä, jotta ne säilyttävät huippukuntoonsa. Kosteus on tässä suurin vihollinen. Jopa vedenpitäviksi luokitelluissa kiikareissa voi muodostua sisäistä kondenssia, jos niitä siirretään liian nopeasti äärimmäisten olosuhteiden välillä. Jopa vedenpitävät kiikarit voivat kärsiä sisäisestä kondenssivedestä, jos ne altistuvat nopeille lämpötilan muutoksille. Huono sää, kuten sade tai äärimmäiset lämpötilat, voi vaikuttaa merkittävästi lämpökikareiden suorituskykyyn, minkä vuoksi on erittäin tärkeää suojata ne kosteudelta. Anna lämpökikarin aina sopeutua hitaasti, kun siirryt äärimmäisistä ympäristöistä toisiin.

Metsästysretkien väliseen lyhytaikaiseen säilytykseen sopii erinomaisesti pehmustettu taktinen laukku tai kova kotelo. Käytä säilytyskotelossa silikageelipusseja tai muita kosteutta imeviä materiaaleja kondenssiveden muodostumisen estämiseksi. Kuljetukseen sopivat parhaiten kovakuoriset laukut, joissa on mittatilaustyönä tehdyt vaahtomuovisisäkkeet, kun taas pehmustetut laukut, joissa on helposti avattavat lokerot, sopivat hyvin kenttäkäyttöön. Käsittelimme molempia aiheita yksityiskohtaisesti artikkelissamme lisävarusteopas. Pitkäaikaista säilytystä varten — esimerkiksi sesongin ulkopuolella — on syytä noudattaa muutamia lisäohjeita. Poista paristot, puhdista objektiivi vielä kerran varovasti, aseta suojukset paikoilleen ja säilytä laitetta ilmastoidussa tilassa. Poista kosteutta säilytystilasta ja käytä siellä ilmankuivaajaa optimaalisen kosteustason ylläpitämiseksi. Tarkista laiteohjelmistopäivitykset ennen varastointia varmistaaksesi, että kiikarin laiteohjelmisto on ajan tasalla, ja välttääksesi yhteensopivuusongelmia, kun otat sen uudelleen käyttöön. Kirjaa muistiin suosikkiasetuksesi ja -konfiguraatiosi, jotta voit asettaa kiikarin nopeasti käyttövalmiiksi tarvittaessa.
Älä unohda silmämääräisiä tarkastuksia. Tarkista säännöllisesti, onko laitteessa kulumisen tai vaurioiden merkkejä, kuten löysiä ruuveja, halkeamia tai kuluneita tiivisteitä. Pienten ongelmien korjaaminen varhaisessa vaiheessa estää suurempien ongelmien syntymisen myöhemmin. Jotkin optiset laitteet vaativat säännöllistä kalibrointia tarkkuuden ylläpitämiseksi, erityisesti pitkäaikaisen käytön tai äärimmäisissä olosuhteissa altistumisen jälkeen. Löysä kiinnitysruuvi tai haljennut tiiviste saattaa tuntua nyt vähäpätöiseltä, mutta jos niitä ei korjata, ne voivat johtaa nollapisteen siirtymiseen, kosteuden tunkeutumiseen tai anturin vaurioitumiseen. Ota tavaksi suorittaa nopea silmämääräinen ja toiminnallinen tarkastus aina, kun otat laitteen varastosta. Kytke virta, anna laitteen lämmetä, suorita kalibrointi, tarkista kuva ja varmista asetukset. Viiden minuutin tarkkaavaisuus säästää sinut ikäviltä yllätyksiltä, kun olet maastossa ja villisika astuu ampumaetäisyydelle.
Olemme havainneet, että lämpökamerat kestävät yli 10 vuotta, kun niitä hoidetaan ja huolletaan asianmukaisesti. Tämä on tiimimme keräämää todellista kokemustietoa, ei markkinointilukuja. Laitteet, jotka saavuttavat tämän käyttöiän, ovat niitä, joiden omistajat ovat noudattaneet seuraavia perusohjeita: puhdistaminen tarpeen mukaan, asianmukainen säilytys, akkujen oikea käsittely, laiteohjelmiston pitäminen ajan tasalla sekä anturin kalibroinnin salliminen ilman häiriöitä.
Toisinaan lämpökameran kuvanlaatu heikkenee niin vähitellen, ettet huomaa sitä heti. Varoitusmerkkien tunteminen estää sinua syyttämästä kameraa ongelmista, jotka voidaan korjata yksinkertaisella kalibroinnilla. Epäjohdonmukaiset lukemat, äkilliset vaihtelut tai odottamattomat lämpötilalukemat; epäselvät lämpökuvat, joiden terävyys on heikentynyt jopa linssin puhdistuksen jälkeen; epätavalliset häiriöt, kuten outoja kuvioita tai värejä, jotka eivät liity todellisiin lämpösignaaleihin; sekä voimakkaiden iskujen jälkeen – kameran pudottaminen voi aiheuttaa sisäisten anturien siirtymisen paikoiltaan.
Tähtäimen liikkeen tai kalibrointivirheen merkkejä ovat esimerkiksi äkilliset, selittämättömät kohdistuspisteen (POI) hyppäykset, renkaiden ruuvien näkyvä löystyminen, liukuminen kiskolla, ristikon epäjohdonmukainen käyttäytyminen tai jatkuvat siirtymät, joita ei voida korjata säätöpyörän napsautuksilla. Tarkista laitteiston osat löysien ruuvien, halkeamien renkaissa tai kiskon vääntymisen varalta. Tarkista, onko ristikon heilumista näkyvissä näytöllä, ja suorita NUC-testi varmistaaksesi sisäisen kalibroinnin vakauden. Jos NUC-testin suorittaminen ei ratkaise kuvan ongelmia, saattaa olla aika ammattimaiselle tehdaskalibroinnille. Suurin osa nykyisin markkinoilla olevista lämpökameroista on jo kalibroitu. Aivan kuten useimmat elektroniset mittauslaitteet, myös upouusi infrapunakamera on asetettu tehdasasetuksiin. Ajan myötä kalibroinnissa voi kuitenkin tapahtua muutoksia elektronisten komponenttien ikääntymisen vuoksi. Lämpökamerateollisuuden yleinen suositus on, että laite tarkastutetaan tehtaalla kerran vuodessa, jos olet ahkera käyttäjä, tai kahden vuoden välein satunnaisen käytön tapauksessa.
Kyseessä ei ole jumittuminen tai toimintahäiriö — laite kalibroi itseään. Kun otat lämpökameran ensimmäistä kertaa käyttöön, saatat yllättyä siitä, että se jumittuu toisinaan. Tämä ei ole toimintahäiriö — laite vain kalibroi itseään. Lämpökamerat ovat erittäin herkkiä ympäristön lämpötilan muutoksille. Näytössä näkyy viimeisin kuva, kun sisäinen suljin peittää anturin ja suorittaa epätasaisuuden korjausta. Se kestää vain sekunnin tai kaksi, ja se tapahtuu harvemmin, mitä pidempään laite on päällä.
Automaattitilassa laite hoitaa tämän puolestasi – sinun ei tarvitse miettiä asiaa. Jos käytät manuaalitilaa, kalibroi laite uudelleen aina, kun kuva alkaa näyttää kohinalta, raidoituneelta tai epätasaiselta. Käynnistä FFC, kun kuva alkaa näyttää epätasaiselta koko näytön alueella. Yleisiä merkkejä ovat raidoitus, täplät tai samea “likainen lasi” -ilme, jota ei ollut näkyvissä vielä muutama minuutti sitten. Huomaat tämän usein suuren lämpötilan muutoksen jälkeen, kuten astuessasi lämpimästä kuorma-autosta kylmään ilmaan. Hyvä tapa: suorita aina manuaalinen kalibrointi, kun käynnistät laitteen ensimmäisen kerran ja aina, kun siirryt hyvin erilaisiin lämpötilaolosuhteisiin.
Ei. Vältä tavallisten silmälasien puhdistusaineiden käyttöä lämpökameroissa. Lämpökameroiden linsseissä käytetään germaniumia tai erikoismateriaaleja, joissa on ainutlaatuiset pinnoitteet, jotka reagoivat eri tavalla kuin tavallinen lasi. Ammoniakkipohjaiset puhdistusaineet, kuten Windex, vahingoittavat heijastuksenestopinnoitteita. Käytä vain optisen luokan puhdistusaineita, jotka on suunniteltu pinnoitetuille linsseille, ja levitä aine aina ensin mikrokuituliinaan – älä koskaan suoraan linssille.
Hyvin huollettu lämpökamera voi kestää 5–10 vuotta tai jopa pidempään, riippuen sen valmistuslaadusta, käyttötiheydestä ja huoltokäytännöistä. Itse lämpöanturi voi toimia kymmeniä tuhansia tunteja. Suurimmat käyttöiän uhat ovat kosteusvauriot, vääränlaisesta puhdistuksesta johtuvat linssin naarmut sekä akun vuotaminen varastoinnin aikana. Noudata tämän oppaan hoito-ohjeita, niin laitteesi pysyy luotettavana vuosien ajan.
Kyllä. Pitkäaikaista varastointia varten poista paristot aina laitteesta vuotojen estämiseksi, sillä vuodot voivat vahingoittaa sisäisiä komponentteja. Jos laitteessasi käytetään ladattavia akkuja, lataa niitä säännöllisesti myös silloin, kun laitetta ei käytetä, jotta niiden käyttöikä säilyy. Lataa ladattavat akut osittain kahden tai kolmen kuukauden välein, jotta vältetään syväpurkautuminen, joka voi heikentää niiden kapasiteettia pysyvästi.
















