Et termisk utstyr til jakt bør passe til måten du jakter på, ikke til et tall i en overskrift. Ta utgangspunkt i terrenget, vanlig synsavstand, om du trenger en håndholdt skanner eller et montert optisk sikte, og hvor lenge du er ute. Pixfra produserer termiske monokularer, termiske kikkerter, termiske frontmonteringer og multispektrale kikkerter, så det riktige utstyret avhenger av oppgaven du står overfor.
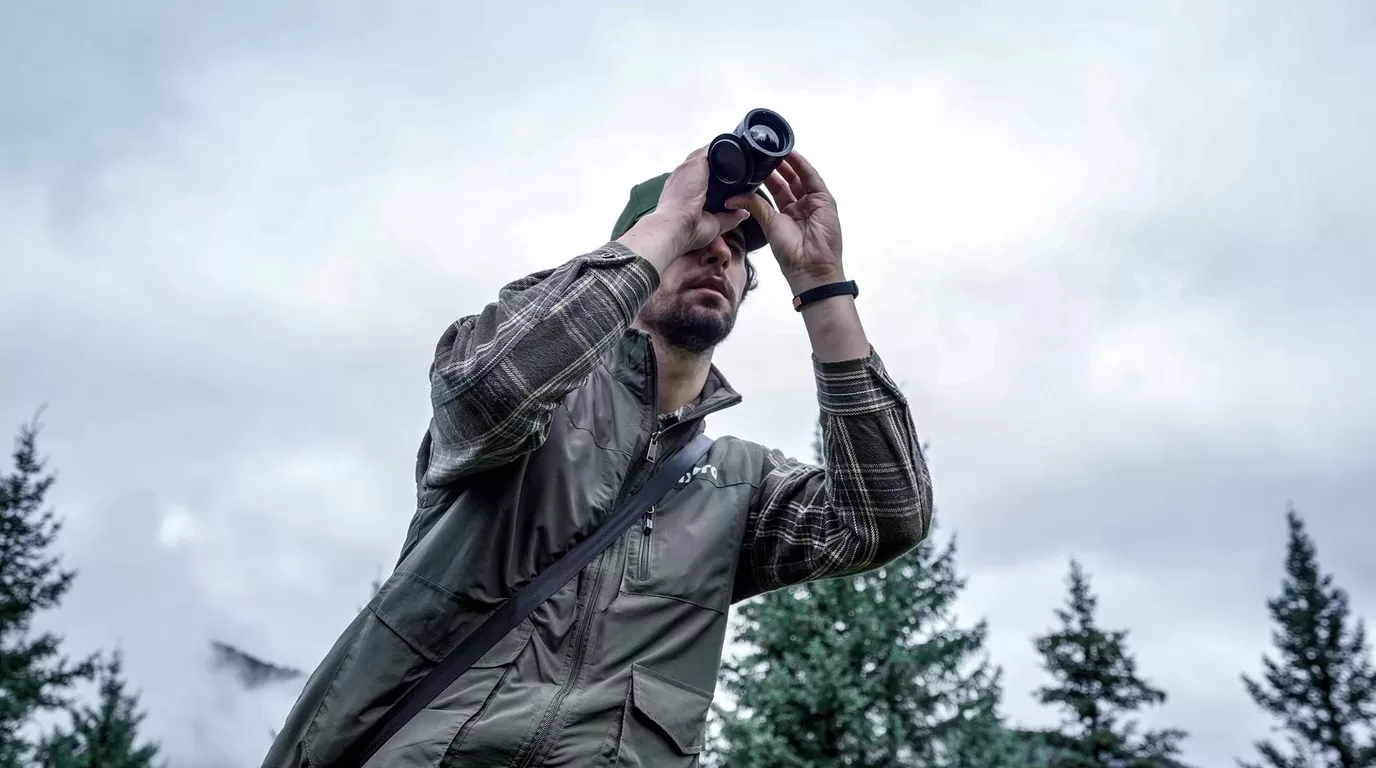
Det er hele beslutningen i klartekst. Velg først enhetstypen. Sammenlign deretter sensoroppløsning, NETD, objektiv, oppdateringsfrekvens, batteritid, betjeningselementer og kundestøtte.
De fleste feil ved kjøp oppstår når en jeger leser et imponerende rekkevidde-tall og slutter å tenke selv. Deteksjonsrekkevidden forteller deg bare at enheten kan oppdage et varmt objekt på avstand. Den garanterer ikke en sikker identifisering, og den forteller deg ikke hvordan kikkerten føles i kalde hender klokka to om natten.
Still et enklere spørsmål: hva er det du prøver å gjøre?
En villsvinjeger som holder øye med fôringssteder og skogkanter, trenger rask skanning, et tilstrekkelig bredt synsfelt, stabil batterilevetid og enkle betjeningsfunksjoner. En coyotejeger som lokker over åpent terreng trenger mer detaljert bilde på avstand og kan ha nytte av laseravstandsmåling. En hjorteforvalter som sjekker åkrene før daggry, vil kanskje foretrekke et håndholdt monokular for observasjon fremfor et fastmontert optisk sikte. En skytter som allerede har et innstilt dagsikte, vil kanskje foretrekke et frontmontert tilbehør fremfor å bygge om riflen for å tilpasse den til et dedikert termisk sikte.
Det er her Pixfras produktserier skiller seg tydelig fra hverandre. Mile 2 og Arc dekker håndholdt skanning. Arc LRF tilfører avstandsmåling i et kompakt monokulært kikkert. Taurus holder din dagoptikk i systemet som et fronttilbehør. Chiron LRF- og Pegasus-seriene er rettet mot dedikert bruk av termisk kikkert. Sirius og multispektrale enheter er nyttige når observasjon, detaljer og arbeid i blandet lys er viktigere enn et enkelt skuddvindu.
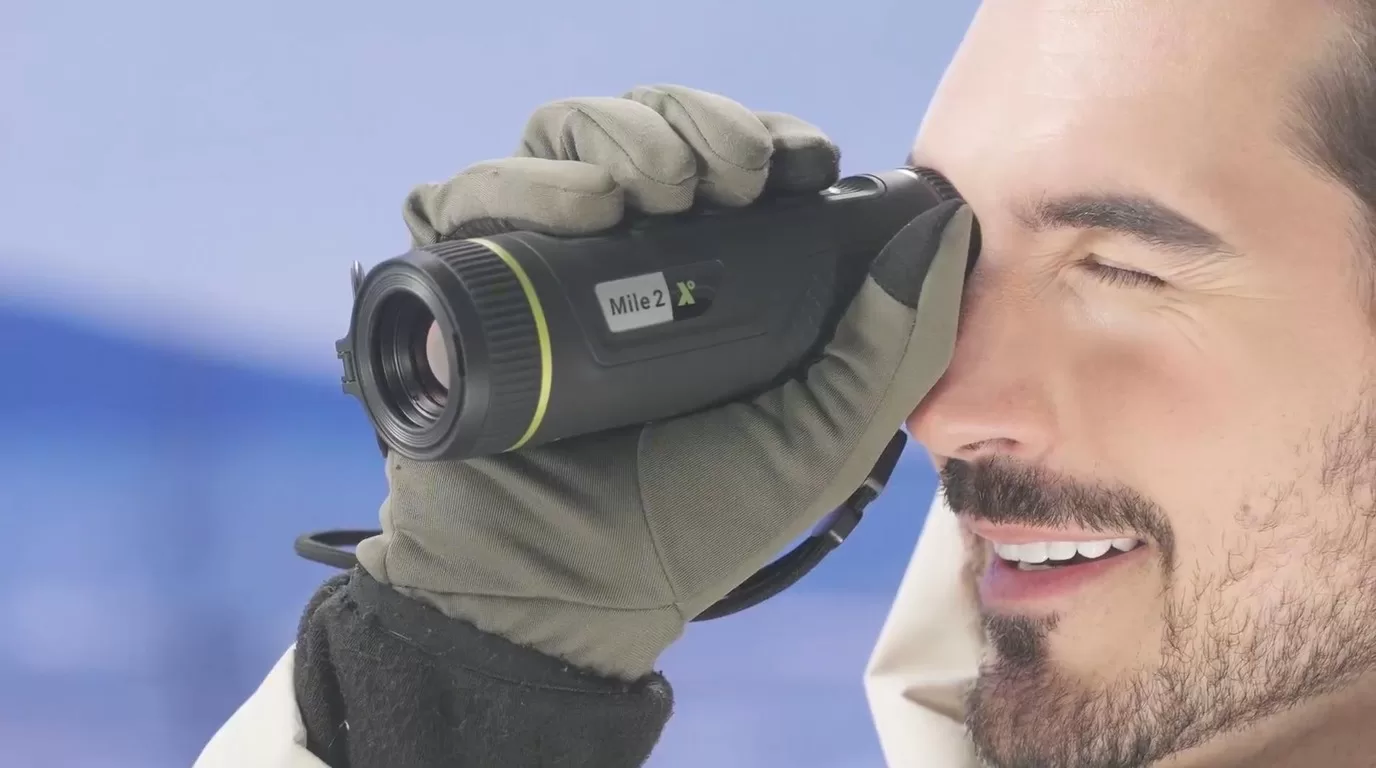
For mange jegere bør det første termiske utstyret være et håndholdt monokulært termisk kikkert. Du kan skanne åkrer, sjekke skogkanter, følge varmesignaturer etter et skudd og holde riflen rettet i en sikker retning inntil du har grunn til å legge den til skulderen.
Pixfra Mile 2 er det kompakte valget i denne kategorien. Mile 2-siden fremhever at den er lommevennlig, har en P3 AMOLED-skjerm, elektronisk kompass og modellalternativer med oppløsning på opptil 640 x 512. Den passer godt når du ønsker en enhet som kan ligge i jakkelommen i stedet for å ta opp plass i ryggsekken.
Arc og Arc LRF tar en mer allsidig rolle som håndholdte enheter. Arc LRF kombinerer termisk observasjon med en integrert laseravstandsmåler, et hus i magnesiumlegering og et utskiftbart batteri. Hvis du jakter i ulendt terreng, på ujevne åkrer eller på ukjente gårder, kan avstandsdata forhindre feilaktige anslag.
Regelen for håndholdte skannere er enkel: Hvis du bruker mer tid på å søke enn på å sikte, bør du kjøpe skanneren først.
Varmebilder kan gi et inntrykk av at avstanden er kortere enn den faktisk er. Et villsvin på en åker, en prærieulv bak et gjerde og en hjorteformet varmekilde nær kratt kan virke nærmere enn de egentlig er. Derfor er LRF-modeller viktige for jegere som beveger seg i åpne områder eller i variert terreng.
Pixfra tilbyr LRF-modeller både i håndholdte og monterte kategorier, blant annet Arc LRF, Chiron LRF, Taurus LRF og Pegasus 2 LRF. Fordelen er ikke bare et tall på skjermen. Det gir en mer strømlinjeformet beslutningsprosess: finn målet, må avstanden, vurder situasjonen og handle – uten å måtte bytte enhet eller gjette ut fra landemerker.
Velg LRF når du jakter i åkrer, åser, langs kraftledningsganger eller på store eiendommer der det er få visuelle referansepunkter om natten. Du trenger kanskje ikke den i tett skog eller på korte innløpsstier, men så snart avstanden begynner å endre seg raskt, kommer avstandsmåleren til sin rett.
Dette er den avgjørelsen som krever mest tålmodighet. Med et frontmontert tilbehør kan du beholde et optisk sikte for dagtid og legge til termisk funksjonalitet foran det. Et dedikert termisk sikte gir deg et spesialutviklet termisk siktesystem.
| Din konfigurasjon | Pixfra-retning | Hvorfor det passer |
|---|---|---|
| Du stoler allerede på dagskikket ditt og innstillingen på riflen din | Frontutstyr til Taurus | Behold den optiske arbeidsflyten og legg til termisk avbildning ved behov |
| Du ønsker et integrert termisk jaktkikkert | Chiron LRF- eller Pegasus-serien | Spesialutviklede betjeningselementer, termisk skjerm og monteringsløsning |
| Du skanner mer enn du fotograferer | Mile 2, Arc eller Arc LRF | Å observere med hånden er raskere og tryggere når man skal lete |
| Du må kunne observere under skiftende lysforhold | Sirius eller multispektral kikkert | Bedre passform for lengre seansene og varierende forhold |
Taurus er nyttig når riflen allerede er godt innstilt, og du ikke ønsker å omstille alt på nytt for å tilpasse den til et nytt siktesystem. Chiron LRF- og Pegasus-modellene er et mer fornuftig valg når termisk sikting er det primære siktesystemet. Ingen av alternativene er automatisk bedre enn det andre. Det riktige valget avhenger av hvordan riflen brukes, hvem andre som bruker den, og om du veksler mellom arbeid om dagen og om natten.
Sensoroppløsningen påvirker hvor mange detaljer bildet kan vise. Pixfras produktserier omfatter oppløsninger på 256 x 192, 384 x 288, 640 x 512 og høyere oppløsninger, avhengig av kategori og modell. Flere piksler er en fordel når du trenger detaljer på avstand, men oppløsningen er bare én del av bildet.
NETD angir hvor godt enheten klarer å skille mellom små temperaturforskjeller. En lavere NETD-verdi er en fordel i miljøer med høy luftfuktighet, tåke og lav kontrast, der varme former ikke fremstår tydelig. Pixfra oppgir NETD-verdier for hver enkelt modell, så sjekk den nøyaktige SKU-koden før du bestiller.
Objektivet og synsfeltet avgjør hvordan utstyret oppleves. Et bredere synsfelt gjør det lettere å skanne tett vegetasjon. Et smalere objektiv med lengre brennvidde er nyttig når du trenger større rekkevidde. Jegere velger ofte for stor rekkevidde og opplever deretter at de beveger seg tregt i trangt terreng. Velg objektivet ut fra hvor du faktisk jakter.
Batteridesignet er viktigere enn man skulle tro. En enhet med utskiftbare 18650-batterier eller en praktisk mulighet for ekstern strømforsyning er enklere å håndtere på lange netter. Oppgitte driftstider måles vanligvis under bestemte forhold, så lag en plan for reservestrøm før den første turen.
Kontrollene er også viktige. Hansker, regn, kulde og adrenalin avslører dårlig ergonomi på kort tid. Se etter rask oppstart, et oversiktlig menyvalg, enkle palettbyttinger og knapper du kan føle uten å måtte stirre på kontrolleren.
For tett vegetasjon, fôringssteder og korte skuddbaner bør du starte med et håndholdt termisk monokulær. Mile 2 eller Arc gir deg rask skanning uten å legge ekstra vekt på riflen. Hvis de fleste skuddmulighetene oppstår på nært hold, er synsfelt og brukerkomfort viktigere enn maksimal rekkevidde.
For åker og kupert terreng bør du flytte Arc LRF høyere opp på listen. Avstandsmåleren er til stor hjelp når det er vanskelig å vurdere avstanden i mørket, og den håndholdte utformingen gjør det fortsatt enkelt å måle avstander.
Hvis du er på utkikk etter et gevær der et termisk siktesystem er hovedet, bør du sammenligne modellene Chiron LRF og Pegasus. Se nøye på sensoroppløsningen, linsen, batteriet, monteringen og om betjeningselementene føles naturlige fra skytestillingen.
For jegere som foretrekker optikk til bruk på dagtid, har Taurus beholdt den velkjente optikken i systemet. Dette er nyttig når ett gevær skal brukes både på dagtid og om natten.
Til observasjon, speiding og lange observasjonsøkter kan Sirius eller multispektrale kikkertprodukter være et bedre valg enn et termisk kamera montert på riflen. Ikke alle oppgaver der termisk utstyr brukes, innebærer skyting.
Du bør ikke velge et termisk apparat utelukkende på grunnlag av deteksjonsrekkevidden. Deteksjonsrekkevidden er det tallet som er lettest å fremheve i markedsføringen, og det tallet som det er lettest å misforstå.
Ikke kjøp et optisk sikte som monteres på våpenet når du egentlig trenger en skanner. Hvis hovedoppgaven er å finne dyr, vil et håndholdt monokulært sikte vanligvis komme mer til nytte.
Ikke se bort fra kundestøtte. Termiske optiske enheter er elektronikk som brukes utendørs. Firmware, batterier, tetninger, skjermer, knapper og ladeportene er alle viktige faktorer etter kjøpet. Kjøp gjennom en godkjent forhandler og oppbevar dokumentasjon på serienummeret.
Ikke se bort fra lokale forskrifter. Reglene for nattjakt varierer etter region, dyreart, årstid og type utstyr. Sjekk de gjeldende reglene fra viltforvaltningsmyndighetene der du jakter, før du bruker termisk utstyr i felten.
Til å skanne omgivelsene er et termisk monokulær vanligvis det beste førstevalget. For å sikte trenger du et termisk kikkertsikte eller et frontmontert tilbehør som brukes sammen med et egnet dagslysoptikk. Mange jegere ender opp med å bruke begge deler: et håndholdt monokulær for å oppdage varme og en montert løsning for selve skuddet.
Velg LRF hvis avstanden endrer seg ofte, eller hvis du jakter i åpent terreng. Det er mindre viktig ved korte, faste jaktbaner der du allerede kjenner de vanlige avstandene. Pixfra tilbyr LRF-modeller i kategoriene håndholdt, frontmontert og kikkertsikte.
Tilpass oppløsningen etter avstand og detaljbehov. 256 x 192 kan fungere ved skanning på nært hold. 384 x 288 gir et bedre mellomnivå. 640 x 512 og høyere oppløsning er nyttig når identifikasjonsdetaljer er viktige på lengre avstander. Sammenlign alltid den nøyaktige modellen, objektivet og NETD-verdien.
Planlegg for hele økten, ikke ut fra det optimale driftstidstallet. Sjekk om enheten bruker utskiftbare batterier, støtter ekstern strømforsyning og kan betjenes med hansker i kaldt vær. Ta med ekstra batterier hvis enheten støtter dette.
Hvis du skal velge et Pixfra-termisk utstyr til jakt, bør du ta utgangspunkt i terrenget og bruksområdet. Deretter kan du begrense utvalget til en bestemt type utstyr: håndholdt monokulær, frontmontert enhet, dedikert termisk kikkert eller binokulær. Deretter kan du sammenligne de nøyaktige spesifikasjonene for de ulike modellene og be Pixfra eller en autorisert forhandler om å bekrefte at utstyret passer til ditt gevær, avstanden du skal skyte på og området der du skal bruke det.
The thermal device market in 2026 is loaded with more options and sharper tech at every price point than ever before. But figuring out how much to actually spend? That’s where most buyers get stuck. At Pixfra, we build thermal monoculars, scopes, front attachments, and multispectral binoculars — so we know where your money goes and where it gets wasted. This pricing guide breaks it all down so you spend smart and walk away with the right gear.
Before you set a budget, you need to know what you’re actually paying for. The price tag on a thermal imaging device isn’t random — it reflects a stack of components and engineering choices that directly affect what you see in the field. The biggest price driver is sensor resolution. A 256×192 sensor is the entry point for real thermal imaging. Step up to 384×288 and you get noticeably cleaner images with better edge definition, especially at distances past 200 yards. Go to 640×512 and you’re in professional territory. That price differential tells you all you need to know about thermal resolution in general — you can expect to pay approximately double for every doubling in the resolution of the thermal core. So when you see a $400 device next to a $1,500 device and wonder what changed, the sensor is usually the answer.

But resolution is only half the story. Thermal sensitivity, measured as NETD (Noise Equivalent Temperature Difference), decides how well the device picks up small heat differences. A lower NETD number means the device can separate a warm animal from a warm background on a humid summer night. For a deeper look at what separates a great thermal device from an average one, check out our breakdown of the De 6 viktigste funksjonene som må finnes i den beste termiske enheten i 2026. In short, NETD is the spec that cheap devices cut corners on first — and it’s the spec that matters most when the conditions get tough. Devices with NETD values of ≤18mK, like our Pixfra lineup, hold their image clarity in fog, rain, and heavy humidity when lesser devices wash out and give you nothing but flat, gray blobs.
Beyond the sensor, you’re paying for pixel pitch (12µm is the current standard, delivering sharper imagery than older 17µm designs), refresh rate (50Hz for smooth tracking versus choppy 25Hz), battery system, build quality, IP weatherproofing, and smart features like Wi-Fi connectivity, companion apps, and onboard recording. Laser rangefinders add cost too, but for anyone shooting past 150 yards at night, they pay for themselves in shot confidence. The thermal camera market is estimated to be valued at USD 6.15 Bn in 2026 and is expected to reach USD 11.92 Bn by 2033, growing at a compound annual growth rate (CAGR) of 9.9%. That growth means more competition, more innovation, and better value for buyers at every tier. The race to deliver more for less has never been hotter — and you benefit directly.
A few years ago, spending under $500 on a thermal device meant getting a toy. Not anymore. In 2026, the best budget thermal monocular options deliver genuine detection capability, smart features, and rugged construction — all without draining your bank account. At this price point, you’re typically looking at 256×192 resolution sensors with 12µm pixel pitch, NETD around ≤20-40mK, and detection ranges from 300 to 500 meters. These devices are real tools, not gimmicks. They’ll find deer in timber at 150 yards, track wounded game through thick cover, and give you solid heat detection on close-to-mid-range hunts.
What should you watch out for in this tier? Refresh rate, for one. Some budget devices drop to 25Hz to save cost, and that gives you stuttery, choppy imagery that makes tracking anything moving — a running hog, a coyote cutting across a field — genuinely frustrating. Hold out for 50Hz. Battery life is another place budget devices can sting you. A device with great image quality and a three-hour battery is basically a fancy paperweight by midnight. Look for devices with swappable batteries or at least USB-C power bank support for extended hunts. IP67 waterproofing should also be non-negotiable, even at this price. Rain, mud, and accidental drops happen — and if your device can’t handle a wet night, it doesn’t belong in your pack.
At Pixfra, our entry-level devices start at detection ranges around 500 meters and run NETD values of ≤18mK, which is better sensitivity than many competitors charge twice as much for. Our Mile 2 series and Draco series hit the sweet spot for anyone entering the thermal game without dropping a month’s rent. For first-time buyers, weekend hunters, property owners, and wildlife watchers who work inside 300 yards, the sub-$500 tier in 2026 is genuinely capable — just be picky about where the manufacturer cut costs.
This is where most serious hunters and outdoor enthusiasts should be shopping. For most users, this is the best thermal monocular for the money — where cost and capability finally align. At this price tier, expect 384×288 sensors as the standard. That resolution captures far more thermal detail than the 256×192 sensors in budget devices, giving you cleaner images, sharper edges, and more reliable target identification when you zoom in or scan at distance. The 640×512 resolution, while superior, typically enters the picture above $1,500–$2,000.

Detection range jumps significantly in this tier. Detection range in this category extends from 1,000 to 1,300 meters depending on lens configuration — a significant step up from the 345–460 meter range of entry-level units. That extra reach matters for open-terrain hunters, ranchers scanning big properties, and anyone who needs situational awareness beyond a few hundred yards. Refresh rates of 50Hz are standard here — you shouldn’t accept anything less. This is also the tier where integrated laser rangefinders start showing up. An LRF gives you exact distance to your target with the press of a button, which is a real advantage for ethical shot placement at night. Our Pixfra Arc LRF sits right in this range, pairing high thermal sensitivity with a built-in 1,000-meter laser rangefinder and a price that makes sense for dedicated hunters.
This is also where smart features stop being “nice to have” and become standard. Wi-Fi connectivity, companion app support, onboard video recording, multiple color palettes, and firmware updates over the air are all expected at this price. Our Pixfra Outdoor App connects to all our current models and lets you update firmware, adjust settings, and transfer images and video directly to your phone. At Pixfra, our mid-range lineup — the Arc LRF and Mile 2 series — delivers ≤18mK NETD sensitivity, 12µm pixel pitch, and IP67-rated builds at prices that won’t make your wallet cry. Consider total value: durability, battery life, software, warranty, and accuracy. Mid-range options often deliver 80–90% of high-end performance at half the cost. If you can only buy one thermal device and want it to cover most real-world use cases — night hunting, wildlife observation, property security, backcountry exploration — the $500-$2,000 range is your target.
When you step past $2,000, you’re shopping for the best thermal imaging the market can deliver — longer detection ranges, higher-resolution sensors, and integrated systems that combine ranging, ballistics, and recording into one package. Mid-high devices (384×288 or 640×512, 1,000–1,500m range) cover most professional hunting and security applications. Premium devices (1280×1024, 3,000+ meter detection) are for buyers who need maximum performance and are prepared to invest accordingly. At the top end, 640×512 and even 1280×1024 sensors give you identification-quality images at distances where lesser devices just show vague blobs. You’re not just detecting heat — you’re counting tines on a buck or telling a coyote from a dog at half a mile.

Our Pixfra Sirius HD series sits at the top of our lineup with detection ranges pushing out to 3,600 meters. For law enforcement, wildlife managers, outfitters running guided hunts, and serious predator hunters working open country, that kind of reach is not a luxury — it’s a tool you lean on every night. The Chiron LRF and Taurus LRF add integrated ballistic calculators that compute bullet drop and give you an adjusted aiming point on the fly. That turns a thermal scope into a complete targeting system — rangefinder, ballistic solver, and high-resolution thermal imager all in one unit. Our Volans series takes it another direction with all-day vision capability, featuring an adjustable aperture from F1.2 to F3.0 that adapts to any lighting condition, so you carry one device from sunup to sundown instead of juggling two.
Is premium worth it for everyone? No. The higher-end thermal viewers offer so much resolution and imaging talent that unless you’re using the devices frequently, you may be paying for more capability than you need. If you hunt a couple of weekends a year and work inside 200 yards, you don’t need a 640×512 sensor with 3,600-meter detection. But if you’re a professional, a guide, or someone who logs serious hours behind a thermal optic, the difference between a $1,500 device and a $3,000 device is immediately visible in image clarity, identification range, and the overall experience of spending long nights in the field.
The right thermal device isn’t the most expensive one you can afford — it’s the one that matches your actual use case without leaving performance on the table. When someone calls and asks what kind of money they should spend, it all comes down to what they want to do. Most often the big difference in prices is going to be based on the thermal sensor resolution and image quality of the scope. When we talk about the difference between a $3,000 and $6,000 scope, it is often going to come down to the identification range of the animal. So start with honest questions: What am I using this for? How far do I need to see? How often will I use it? How bad are the conditions I’ll face?
Here’s a quick reference table to help you match your use case to a price tier:
| Bruksscenario | Recommended Tier | Price Range | Typical Sensor | Deteksjonsområde |
|---|---|---|---|---|
| First thermal / casual use | Budsjett | Under $500 | 256×192 | 300–500m |
| Weekend hunting / property security | Mid-range | $500–$1,200 | 384×288 | 800–1,300m |
| Dedicated night hunting / outfitter use | Upper mid-range | $1,200–$2,000 | 384×288 or 640×512 | 1,000–1,800m |
| Professional / law enforcement / long-range | Premium | $2,000–$3,500+ | 640×512 or 1280×1024 | 1,800–3,600m |
One thing to keep in mind: if you’re a first-time buyer, you’ll probably want a handheld thermal monocular for scanning before investing in a thermal scope. It’s often smarter to spend less on the scope and budget for a monocular too, rather than putting everything into one device and having no scanning tool. At Pixfra, we built our lineup to cover this exact reality. Our monoculars, scopes, front attachments, and multispectral binoculars all share the same ≤18mK sensitivity and 12µm pixel pitch technology, so you get consistent image quality whether you’re glassing a field or looking through a scope.
And don’t overlook the cost of ownership beyond the sticker price. Battery systems matter — our Pixfra devices use standard 18650 batteries across many models, which means cheap, available replacements instead of expensive proprietary cells. Build quality matters too — a device with IP67 waterproofing and MIL-STD-810G shock resistance lasts years longer than a cheaper device you’ll replace in two seasons. The cheapest thermal device is rarely the best value. The best value is the one that does what you need, survives how you use it, and keeps working season after season. And at Pixfra, every product in our lineup is built around that idea — real features for real conditions, at a price tier that makes sense for your specific goals.
How much does a good thermal monocular cost in 2026?
In 2026, a solid entry-level thermal monocular starts around $300-$500 with a 256×192 sensor. Mid-range models with 384×288 resolution and integrated features like laser rangefinders run $800-$1,500. Premium handheld thermals with 640×512 sensors and extended detection ranges typically cost $1,500-$3,500+. Our Pixfra lineup offers devices across all three tiers, with ≤18mK NETD sensitivity as a consistent baseline.
Is it worth spending over $1,000 on a thermal device?
For hunters and outdoor professionals who work at distances beyond 300 yards or hunt multiple nights a season, yes — stepping up past $1,000 gets you meaningfully better sensor resolution, detection range, and target identification. If you only hunt a few times a year at close range, a quality device under $500 can handle the job. The question isn’t just what you can afford, but how much performance your specific use case demands.
What’s the best thermal device for the money right now?
Value depends on your use case. For short-range woodland hunting and property monitoring, a budget thermal monocular under $500 with 256×192 resolution and 50Hz refresh rate is the best bang for the buck. For all-around hunting and outdoor use, mid-range models around $800-$1,500 deliver the biggest jump in real-world performance per dollar. At Pixfra, our Arc LRF and Mile 2 series consistently hit the sweet spot between performance and price for most hunters and outdoor enthusiasts.
Why are thermal scopes more expensive than thermal monoculars?
Thermal scopes carry higher prices because they need to withstand heavy recoil, require precision zeroing systems, and often include features like ballistic calculators and integrated laser rangefinders. A quality thermal scope starts around $1,800-$3,000, while a capable monocular starts well under $500. If budget is tight, many experienced hunters recommend starting with a monocular for scanning and saving for a scope later.
Do cheaper thermal devices work in rain and fog?
That depends entirely on two specs: NETD sensitivity and IP rating. A budget device with poor NETD (above 35mK) will struggle in fog, rain, or high humidity — the image goes flat and washed out. A device with ≤18mK NETD, like our Pixfra lineup, keeps showing clear heat contrasts even in bad conditions. For weather resistance, look for IP67 waterproofing at any price point. Anything less than IP67 puts your gear at risk during real field conditions.
Buying a thermal device online can feel overwhelming—spec sheets are dense, prices jump all over the map, and everyone seems to have a different opinion. We get it. At Pixfra, we hear from first-time buyers every week who almost made costly mistakes based on bad info floating around the internet. Let’s set the record straight.
The thermal imaging market has changed fast. Thermal imaging technology changes faster than just about anything else in the hunting world—faster than rifles, scopes, or even ammo trends. What was premium two years ago now sits squarely in the mid-range. That speed of change is both exciting and confusing, and it creates a fertile ground for myths that never seem to die.

Part of the problem is how buyers shop for thermal cameras and thermal monoculars online. Most thermal customers buy online and have to go on specs, YouTube videos, and the sometimes compromised impressions of social media influencers to make buying decisions. You scroll through product pages, read conflicting Reddit threads, watch YouTube “reviews” that are really just paid promotions, and walk away more confused than when you started. Between marketing fluff and real user experiences, it’s tough to know what’s legit and what’s noise.
The truth is, buying a thermal device online isn’t any riskier than buying one at a brick-and-mortar store—as long as you know what you’re looking at. And that’s where these three myths do the most damage. They steer you toward the wrong device, or worse, they scare you away from buying altogether. Whether you’re shopping for a handheld thermal monocular, a thermal scope for night hunting, or an infrared camera for property inspection, the same myths keep popping up. So we’re going to walk through each one, tell you exactly why it’s wrong, and show you what actually matters when you’re picking the best thermal device online. Before we jump in, check out our guide on the De 6 viktigste funksjonene som må finnes i den beste termiske enheten i 2026 so you’ve got a solid baseline of what to look for.
This is probably the most widespread myth in the thermal device world, and it catches first-time buyers more than anyone else. On paper, it sounds logical: more pixels, better image, right? Not necessarily. The entire system—lens, sensor, processing algorithms, and display—has to work together. The takeaway here is simple: don’t buy a thermal scope based on resolution alone.
Here’s what most people miss. Resolution is just one piece of the puzzle. A sensor with 640×512 pixels sounds a lot better than one with 384×288 pixels. But resolution alone doesn’t tell you about thermal sensitivity, lens quality, or how the device processes the image it captures. High pixel count alone won’t help unless the sensor is sensitive enough to deliver clear contrast in real-world conditions like fog, humidity, or low temperature differences. A 640×480 sensor sounds impressive, but if it has poor thermal sensitivity (measured in NETD), the resulting image may appear washed out. That’s the part no one puts in the Instagram post.
NETD, or Noise Equivalent Temperature Difference, is where the real magic happens. It’s measured in millikelvins (mK), and it tells you how well the sensor can pick up small differences in heat. NETD stands for Noise Equivalent Temperature Difference. It measures how sensitive the thermal sensor is to tiny differences in heat, and it’s listed in millikelvins (mK). A lower NETD number means the sensor picks up finer heat differences, which translates to sharper contrast between the animal and the background. Our thermal devices at Pixfra achieve NETD values of ≤18mK, which puts them in the high-sensitivity category. That means you’re picking up heat signatures that a lesser sensor would miss completely—especially in summer conditions when the ambient temperature and the target’s heat are close together.
So what does this mean for you when shopping online? Stop sorting by resolution first. Look at the full spec picture: sensor resolution, NETD rating, pixel pitch (12µm vs. 17µm), refresh rate, and objective lens size. A well-balanced 384×288 thermal camera with elite sensitivity and a quality lens will outperform a poorly designed 640×512 device on most nights. Match the specs to your actual use case—close-range hog hunting in timber doesn’t need the same sensor as scanning open fields at 600 meters.
This one hurts wallets everywhere. The idea that you have to spend $5,000 or more to get a “real” thermal device just isn’t true anymore. It’s a myth that benefits sellers of premium-only brands and leaves first-time buyers stuck on the sidelines.
Let’s look at the real numbers. The technology keeps getting better while prices come down. What cost $10,000 a decade ago now delivers similar performance at $1,500. That’s not an exaggeration—it’s a function of how thermal sensor manufacturing has scaled up and matured. Sensor prices have dropped, production quality has risen, and brands like ours at Pixfra have put a priority on making professional-grade thermal imaging available at price points that make sense for regular hunters, homeowners, and outdoor enthusiasts.
The thermal device market in 2026 breaks into pretty clear tiers. Here’s a realistic snapshot of what you can expect at each price level:
| Price Range | Sensoroppløsning | Typical NETD | Best egnet for |
|---|---|---|---|
| Under $500 | 256×192 | ≤40 mK | Close-range use, beginners, property monitoring |
| $500–$2,000 | 320×240 to 384×288 | ≤25 mK | Serious hunters, mid-range detection, all-weather use |
| $2,000–$4,000 | 640×480 to 640×512 | ≤20 mK | Long-range identification, predator control |
| $4,000+ | 1280×1024 | ≤15 mK | Professional and high-end specialty use |
Mid-range options often deliver 80–90% of high-end performance at half the cost. That’s an industry-wide reality, not just a marketing claim. You don’t need the $6,000 device to get a clear image of a hog at 200 yards. For most buyers, strong 384 and 640 options remain the smarter value.

Now, that doesn’t mean you should always go cheap, either. Value and cheap aren’t the same thing. A $250 thermal monocular with a sluggish 25 Hz refresh rate, mediocre NETD sensitivity, and no companion app isn’t a value pick—it’s a compromise that will frustrate you by the third use. The sweet spot is finding a device that gives you what you need, at a price that doesn’t gut your budget, from a brand that actually builds the technology themselves. Pixfra designs and manufactures its own thermal imaging cores and sensors—we’re not just slapping labels on someone else’s hardware. That vertical integration lets us deliver specs you’d normally only see in devices costing twice as much.
This myth pops up in every thermal forum, and we understand where it comes from. Thermal devices aren’t cheap, and dropping $1,000 or more on a product you’ve never held can feel like a gamble. But here’s the thing—buying online is how the vast majority of thermal buyers shop today, and there are solid reasons why it works.
First, think about the alternative. How many local stores near you stock more than one or two thermal monoculars, let alone a full range of thermal scopes, clip-ons, and handheld imagers? There’s no universal “best” thermal—only what’s best for your situation. If your local shop carries two or three brands, your “hands-on” experience is just a limited selection of what’s actually available. Shopping online gives you access to every model, every brand, every spec comparison you need—all in one session, from your couch.
Second, the buying experience has gotten a lot better. Reputable thermal brands now offer detailed spec sheets, real-world video demos, comparison charts, and responsive customer support. At Pixfra, we publish specs down to the click value of our thermal scopes (0.9cm@100m on our Taurus LRF series), and our Pixfra Outdoor App lets you connect to your device, stream live thermal video, and update firmware. That level of transparency didn’t exist five years ago.
Third, returns and warranties protect you. Investing in thermal gear without considering warranty coverage and support infrastructure can lead to expensive problems when repairs or service become necessary. Thermal imaging sensors and electronics require specialized expertise to repair, and devices from manufacturers without established service networks may become unusable after warranty expiration. Warranty terms vary significantly. Some manufacturers offer limited one-year coverage, while others provide extended warranties or explicitly support component upgrades and repairs. When you buy from a manufacturer that stands behind its products and has an established support network, the risk drops to nearly zero. You’re not rolling the dice—you’re making an informed purchase backed by real protection.
The real risk when buying online isn’t the channel itself. It’s buying from a brand you haven’t researched. That’s where the work goes: checking who makes the sensor, reading actual user reviews (not sponsored ones), comparing specs across models, and verifying that the company has a real support infrastructure. If a brand can’t tell you their NETD rating, their sensor origin, or their warranty terms, walk away—regardless of whether you’re shopping online or in person.
Now that we’ve killed the myths, let’s talk about what really matters when you’re shopping for a thermal device online. There are a handful of specs and features that separate a solid purchase from a regrettable one.

Sensor resolution still matters—it’s just not the only thing that matters. You’ll see specs like 256×192 or 384×288—these numbers tell you how many pixels detect heat. More pixels mean clearer images and better identification at distance. But pair resolution with NETD sensitivity, and you’ve got a much clearer picture of actual performance. Our Pixfra Sirius HD series, for example, combines 1280×1024 resolution with ≤18mK sensitivity—that’s not just a sharp image; it’s a sharp image in the worst conditions.
Refresh rate is another spec that gets overlooked. The difference between 25 Hz and 50 Hz is immediately apparent when scanning for moving targets. Don’t rationalize a 25 Hz device as “good enough”—you’ll notice the limitation every time you use it. If you’re scanning for predators, tracking hogs across a field, or monitoring your property perimeter, 50 Hz should be your floor.
Battery life is a deal-breaker for field use. Undervaluing battery life. An all-night predator hunt needs 8 hours minimum. Budget accordingly. Our Pixfra devices range from roughly 4.5 hours to 15 hours depending on the model, and many use standard 18650 batteries that you can swap in the field without going back to your truck.
Detection range vs. identification range—this is a big one. Manufacturers love huge detection numbers. Hunters need usable identification distance. Detection means you can tell something is there. Identification means you are confident what it is. A product page might say 2,000 meters of detection range, but if you can only positively identify your target at 400 meters, that’s the number that actually affects your experience. Always ask about both numbers before you buy.
And finally, don’t ignore build quality and weather resistance. Skipping the IP rating check. Field use means rain. IP54 is not IP67. An IP67 rating means your device can handle temporary submersion in water. If you hunt in the Southeast, run property security in the Pacific Northwest, or just don’t want to baby your gear, IP67 is the standard you should be targeting.
We built Pixfra around one idea: give everyone access to the thermal performance that used to be locked behind military budgets and five-figure price tags. Pixfra offers a wide range of products—from thermal imaging monoculars, add-ons, and riflescopes to thermal imaging and multispectral security cameras—and their mission is to provide professional grade thermal and multispectral optics at budget friendly price points.
Established in 2015, Pixfra has developed over two hundred patented technologies and thermal imaging products for industrial temperature measurement, biological temperature measurement, natural ecology, new energy, carbon neutrality, perimeter prevention, outdoor sports, and consumer electronics. We’re not a brand that repackages someone else’s sensors and charges a markup. We design our own thermal cores, build our own image processing algorithms, and test everything in real field conditions.
When you buy from us online, you’re buying directly from the people who designed and manufactured the technology. That cuts out middlemen, keeps prices honest, and means our support team can actually answer your questions about the product—not just read from a script. Whether you need a compact thermal monocular like the Mile 2 for close-range scouting or a 1280-class flagship like the Sirius HD for long-range observation, we’ve got options that match your actual needs—not just your budget or your ego.
Is it safe to buy a thermal imaging camera online?
Yes, absolutely. Buying a thermal imaging camera online is safe as long as you’re purchasing from a reputable manufacturer or authorized dealer. Look for brands that publish full spec sheets, offer warranty protection, and have responsive customer support. Buying from the manufacturer’s own website (like Pixfra.com) is often the best route because you get direct access to support, firmware updates, and product guarantees.
Does a higher resolution always mean better thermal image quality?
No. Resolution is one factor, but thermal sensitivity (NETD), lens quality, pixel pitch, and image processing all play a role. A 384×288 sensor with ≤20 mK NETD and a quality germanium lens can produce sharper, more usable images than a 640×512 sensor with poor sensitivity. Always look at the full spec picture, not just the pixel count.
What NETD value should I look for in a thermal device?
For most outdoor and hunting use, a NETD of ≤25 mK is solid. For demanding conditions like high humidity, fog, or summer heat where ambient and target temperatures are close, aim for ≤18 mK or lower. Pixfra’s lineup hits ≤18 mK across many of our models, putting them in the high-sensitivity category without the premium price tag.
How much should I spend on my first thermal monocular?
For most first-time buyers, the $500–$2,000 range offers the best balance of performance and value. You’ll get usable sensor resolution, decent NETD ratings, features like Wi-Fi and video recording, and enough battery life for a full night out. Going below $300 usually means real trade-offs in refresh rate, sensitivity, and build quality that you’ll notice quickly.
Can thermal devices work during the day?
Yes. Thermal imaging is unaffected by visible light, making it effective 24/7. Unlike night vision, which relies on amplifying ambient light, thermal cameras detect heat signatures. That means they work just as well at noon as they do at midnight—in darkness, fog, haze, or bright sunlight. Some Pixfra models, like the Volans Series, even feature adjustable apertures specifically designed to optimize daytime and nighttime performance.
Oppløsning er en av de første spesifikasjonene du vil se på ethvert termisk utstyr – og det er det en god grunn til. Den påvirker alt fra hvor skarpt bildet ser ut til hvor langt unna du kan skille en prærieulv fra en gjerdestolpe. Men ikke alle oppløsningstall betyr det du tror de gjør. Vi er her på Pixfra for å forklare alt i detalj, slik at du kan velge riktig termisk monokulær, kikkert eller frontmontert tilbehør uten å la deg lure av store tall som ikke leverer i praksis.
Når vi snakker om oppløsning på et termisk apparat, mener vi antall piksler på selve den infrarøde sensoren – detektorarrayet inne i apparatet som fanger opp varmesignaturer og omdanner dem til et bilde du faktisk kan se. Den angis med to tall, for eksempel 256×192, 384×288 eller 640×512. Disse tallene angir hvor mange små varmesensorer som finnes på sensoren. Oppløsningen til en termisk sensor uttrykkes som to sett med tall (vertikalt × horisontalt), for eksempel 640×512 piksler. Det du må se etter for å bestemme oppløsningen, er det totale antallet piksler sensoren har – for eksempel gir en 640×512-sensor deg totalt 327 680 piksler.

Tenk på hver piksel som et bittelite termometer. Hver enkelt registrerer sin egen temperaturmåling, og enheten setter sammen alle disse målingene til det varmebildet du ser gjennom okularet. “Piksler er datainnsamlingspunktene for termisk måling… Flere datapunkter betyr at man får mer informasjon for en nøyaktig termisk tolkning. Flere piksler betyr også høyere visuell oppløsning i det termiske bildet.” Så når du går fra en 256×192-sensor (49 152 piksler) til en 640×512-sensor (327 680 piksler), får du ikke bare “et bedre bilde” – du får mer enn seks ganger så mange datapunkter som danner grunnlaget for det bildet. Det er et enormt sprang i mengden termisk informasjon enheten din kan samle inn i ett enkelt bilde.
Her er noe som forvirrer mange kjøpere: sensoroppløsning og skjermoppløsning er ikke det samme. Det er lett å forveksle sensoroppløsning med skjermoppløsning eller opptaksoppløsning. Skjermoppløsning er oppløsningen på den innebygde skjermen du ser gjennom, og den vil ofte være høyere enn sensoroppløsningen. En enhet kan ha en flott 1280×960 OLED-skjerm, men hvis sensoren bak den bare er 256×192, ser du likevel et termisk bilde på 256×192 som er strukket ut over skjermen. Sensoren er flaskehalsen. Sjekk alltid sensorspesifikasjonene først.
Hos Pixfra kombinerer vi våre høyoppløselige sensorer med teknologi som gir en pikselavstand på 12 μm i alle våre produktlinjer – fra Mile 2-serien for daglig bruk til Sirius HD-serien for krevende profesjonelle bruksområder – slik at du får skarpe bilder med høy kontrast uansett hvilken modell du velger. Før du leser videre, kan du ta en titt på De 6 viktigste funksjonene som må finnes i den beste termiske enheten i 2026 for å se hvordan oppløsningen passer inn i det større bildet av hva som faktisk avgjør ytelsen til et termisk apparat.
Det er her oppløsningen virkelig kommer til sin rett: deteksjonsrekkevidde og målidentifisering. En sensor med høyere oppløsning gir deg ikke bare et penere bilde – den lar deg se lenger og finne ut hva du ser på raskere. Høyere oppløsning betyr at det er flere observasjons- og temperaturmålepunkter, noe som gjør det mulig å observere og måle mindre mål og å observere objekter på større avstander.[4]
La oss si det med jaktterminologi. Du speider over et jaktfelt på 400 meter med en 256×192-sensor. Du ser en varm flekk. Det kan være et villsvin, det kan være en prærieulv, det kan være en stubbe som har ligget i solen hele dagen. Med en 640×512-sensor med samme forstørrelse og objektiv ser du på den samme flekken med over seks ganger flere termiske datapunkter. Du kan se ben, en hodeform, bevegelse – du kan faktisk identifisere hva du ser uten å måtte nærme deg og risikere å skremme dyret.
Enheter med en sensor på 384×288 piksler er generelt sett de mest populære på markedet, siden de er rimeligere enn termiske enheter med 640×512 piksler, men likevel gir en rekkevidde på opptil 1 800 meter, avhengig av objektivstørrelsen. Det høyere antallet piksler gjør dessuten at zoomfunksjonen fungerer mer effektivt.[5] Det er et virkelig populært valg blant mange jegere, og det er nettopp derfor vi tilbyr konfigurasjonen 384×288 i flere av våre mellomklasse-serier.
Digital zoom spiller også en stor rolle her, og det er her forskjellene i oppløsning virkelig kommer til syne. Den virkelige fordelen med sensorer med høyere oppløsning er muligheten til å zoome digitalt og samtidig opprettholde en høyere grad av klarhet og synsfelt. Siden zoomen er digital og ikke optisk, halverer du både antall piksler og det tilgjengelige synsfeltet hver gang du dobler zoomen (for eksempel fra 1x til 2x). Så på en 256×192-sensor med 2x digital zoom er du nede på et effektivt 128×96-bilde – og det kommer til å se merkbart kornete ut. På en 640×512-sensor ved 2x zoom har du fortsatt 320×256 å jobbe med, noe som er mer enn brukbart. Hvis du planlegger å zoome inn for å identifisere mål på avstand, gir en høyere grunnoppløsning deg mye mer spillerom før bildet går i oppløsning.
Vårt Pixfra-sortiment dekker deteksjonsavstander fra rundt 500 meter på enklere modeller helt opp til 3 600 meter på vår premium-serie Sirius HD. Men deteksjonsavstand og identifikasjonsavstand er to forskjellige verdier — identifikasjonsavstanden, der du faktisk kan bekrefte hva du ser, er alltid kortere. For de fleste fritidsjegere og friluftsentusiaster som opererer innenfor 300–600 meter, tilbyr våre mellomklasse-modeller som Arc LRF- og Mile 2-serien den perfekte balansen mellom oppløsning, rekkevidde og pris.
Ikke alle jegere, naturinteresserte eller friluftsentusiaster trenger den høyeste oppløsningen som finnes på markedet. Hvilken oppløsning som er riktig, avhenger av hvordan du bruker enheten, hvor langt du trenger å se, og hvor mye du er villig til å bruke. Her følger en oversikt over de vanligste sensorkonfigurasjonene og hvilke bruksområder de egner seg best til.

256×192 (49 152 piksler) — Dette er inngangsporten til ekte termisk avbildning. Enheter med denne konfigurasjonen kan kun brukes på kortere avstander, og lar deg ikke forstørre bildet digitalt uten at skarpheten reduseres betydelig. For bruk på kort avstand – for eksempel for å speide etter smådyr i hagen, for raske skanninger av eiendommen om natten eller for rimelig observasjon av dyreliv på avstander under 200 meter – gjør den jobben sin. Hvis du nettopp har begynt å bruke termisk teknologi og ønsker å holde kostnadene nede, er dette nivået et godt valg.
384×288 (110 592 piksler) — Nå blir det alvor. Hos Pixfra anser vi dette som den viktigste oppløsningen for de fleste jakt- og friluftssituasjoner. Du får nok piksler til skarp digital zoom, god identifikasjonsrekkevidde og detaljer som lar deg skille ut dyr fra kratt og skogkanter på realistiske jaktavstander. Oppløsningen på dette nivået gir deg skarpere bilder for å identifisere mål på lengre avstander og gjør det enklere å skille dyr fra forstyrrende elementer i bakgrunnen, spesielt i tett løvverk.
640×512 (327 680 piksler) — Toppklassen innen termiske utendørsenheter. Denne konfigurasjonen representerer generelt den høyeste kvaliteten på termiske sensorer som finnes på markedet, og gir termiske bilder i høy oppløsning med overlegen deteksjon, gjenkjenning og identifisering på lang avstand. Hvis du skal skanne store områder, arbeide på lange avstander eller trenger et så klart bilde som mulig av mål i rask bevegelse, er dette det rette valget for deg. Vår Sirius HD-serie har denne oppløsningen, og forskjellen i bildekvalitet merkes allerede første gang du ser gjennom okularet.
Her er en kort sammenligningstabell som hjelper deg med å velge oppløsning etter dine behov:
| Sensoroppløsning | Totalt antall piksler | Beste bruksområde | Typisk detekteringsrekkevidde | Kvaliteten på digital zoom |
|---|---|---|---|---|
| 256×192 | 49,152 | Kartlegging av budsjett, rekognosering på kort avstand | Opptil 500 m | Begrenset — brytes raskt ned |
| 384×288 | 110,592 | Jakt, naturobservasjon, eiendomssikkerhet | Opp til 1 800 m | God — kan brukes ved 2x–4x forstørrelse |
| 640×512 | 327,680 | Jakt på lang avstand, politiet, profesjonell bruk | Opp til 3 600 m | Utmerket — skarpt selv ved 4x+ |
Vi har utviklet produktseriene våre med utgangspunkt i disse nivåene. Mile 2-serien er egnet for daglig jakt og tilbyr en god balanse mellom oppløsning og bærbarhet. Arc LRF har en innebygd laseravstandsmåler som gir trygg skyting med nøyaktig avstandsmåling. Og Sirius HD-serien presser oppløsningen og deteksjonsrekkevidden til det ytterste for kunder som trenger hver eneste piksel de kan få.
Oppløsning handler ikke bare om hvor mange piksler som finnes på sensoren – det handler også om hvor stor hver enkelt piksel er. Dette målet kalles pikselavstand, og det har direkte innvirkning på skarpheten og kompaktheten til din termiske enhet. Pikselavstanden er avstanden mellom sentrene til to tilstøtende piksler på sensoren, målt i mikrometer (f.eks. 12 µm). Enheter med mindre pikselavstand gir mer detaljerte bilder, siden de har en høyere pikseltetthet på sensoren, noe som betyr at enheten kan utføre flere temperaturmålinger.
De to pikselavstandene du vil se på de fleste håndholdte termiske enheter i 2026, er 12 µm og 17 µm. En mindre pikselavstand, for eksempel 12 µm, betyr at pikslene ligger tettere sammen, noe som gir bilder med høyere oppløsning og bedre deteksjon av mindre objekter. En større pikselavstand, som 17 µm, betyr færre piksler per arealenhet, noe som gir bilder med lavere oppløsning, men potensielt bedre følsomhet for termisk stråling.
Her er det praktiske poenget: mindre pikselavstand betyr mindre sensorer som tar opp mindre fysisk plass – noe som gir mulighet for mer kompakte termiske kikkerter eller høyere oppløsning innenfor samme sensorareal. Med samme fysiske sensorstørrelse kan man få plass til betydelig flere 12 µm-piksler enn 17 µm-piksler. Det er derfor moderne 12 µm-sensorer har gjort det mulig å lage kompakte termiske monokularer med høy oppløsning til priser som ville vært utenkelige for noen år siden.
For termiske kameraer med en piksel-sensor med lavere oppløsning kan man oppnå samme deteksjonsrekkevidde, forstørrelse og synsfelt med objektiver som har kortere brennvidde. Mindre objektiver betyr at enheten blir mindre og lettere totalt sett. Det er en klar fordel for alle som bærer utstyr på flere timers jakt eller turer i villmarken, der hver ounce teller.
Hos Pixfra bruker vi en pikselavstand på 12 μm i alle våre produktserier. Dette er et bevisst valg. Det gjør at vi kan tilby oppløsningene 384×288 og 640×512 i kompakte og feltklare hus, uten å gå på akkord med deteksjonsrekkevidden eller bildekvaliteten. Vår Draco-serie, for eksempel, ble utviklet med en lett konstruksjon spesielt for jegere som trenger multifunksjonell ytelse uten at det går på bekostning av størrelsen – og en pikselavstand på 12 µm er en viktig del av hvordan vi har oppnådd dette.
Vi skal være ærlige: Oppløsningen er svært viktig, men den er ikke det eneste som avgjør om et termisk kamera gir gode resultater. To termiske enheter kan ha identiske spesifikasjoner – samme oppløsning, pikselavstand og NETD – men likevel gi merkbart forskjellige bilder. Det skyldes at bildekvaliteten avhenger av hele bildesystemet, ikke bare sensoren. Hvis du kjøper en enhet med høy oppløsning, men med dårlig termisk følsomhet eller en treg oppdateringsfrekvens, vil du bli skuffet.

NETD (støyekvivalent temperaturforskjell) er spesifikasjonen som angir hvor følsom sensoren er for små temperaturforskjeller. Den måles i millikelvin (mK), og jo lavere verdi, desto bedre. Den viktigste egenskapen som påvirker den termiske oppløsningen til et termisk kamera, er sensorens NETD. Den måles i millikelvin og representerer den minste temperaturforskjellen sensoren kan registrere. Jo lavere NETD-verdi, desto høyere er sensorens følsomhet. Et apparat med fantastisk oppløsning, men dårlig NETD, vil vise deg et skarpt, men flatt og utvasket bilde på varme netter når alt utstråler varme på omtrent samme nivå. Våre Pixfra-apparater oppnår NETD-verdier på ≤18 mK, noe som plasserer dem i den øverste enden av følsomhetsskalaen for termisk optikk beregnet på jakt.
Oppdateringsfrekvens er den andre spesifikasjonen som direkte påvirker brukeropplevelsen din. En oppdateringsfrekvens på 50 Hz er minimumsstandarden for alle termiske enheter som er verdt å kjøpe i 2026. Denne frekvensen gir deg jevne, flytende bilder, slik at du kan følge med på bevegelige mål – løpende villsvin, travende prærieulver – uten uskarphet eller hakking. Bildefrekvensen påvirker hvor jevnt bildet fremstår når du beveger kameraet. Profesjonelle modeller med oppdateringsfrekvenser på 25–60 Hz gir flytende bilder i sanntid, mens rimeligere modeller på 9 Hz viser merkbar forsinkelse. Dette blir viktig når du skanner store områder eller sporer bevegelige varmekilder.
Bildekvaliteten i et termisk monokulær avhenger av balansen mellom sensoroppløsning, pikselavstand (µm) og NETD-følsomhet. Høyere oppløsning fanger opp flere detaljer, mindre pikselavstand øker skarpheten, og lavere NETD forbedrer kontrasten under forhold med dårlig sikt. Den beste ytelsen oppnås ved å optimalisere alle tre faktorene.
Det er akkurat slik vi tilnærmer oss produktdesign hos Pixfra. Vi jakter ikke bare på oppløsningstall – vi balanserer oppløsningen med ≤18 mK NETD, 12 µm pikselavstand og høye oppdateringsfrekvenser på alle enhetene i sortimentet vårt. Det er systemet som skaper bildet, ikke en enkelt spesifikasjon isolert sett. Det er det som skiller en enhet som ser bra ut på et spesifikasjonsark fra en som faktisk fungerer klokka 02.00 om natten i et tåkete jaktskjul.
Valget av riktig oppløsning handler egentlig om et enkelt spørsmål: hva skal du egentlig bruke termokameraet til? Det er ingen vits i å betale for 640×512 hvis du for det meste speider langs eiendomsgrensen din på 100 meter. Og det er ingen vits i å spare penger på 256×192 hvis du jakter rovdyr på over 400 meter og trenger å identifisere det du skyter på.

For rekognosering på kort avstand, uformell observasjon av dyreliv og enkle eiendomskontroller holder en 256×192-sensor prisen nede, samtidig som den gir deg funksjonell termisk bildebehandling for arbeid på nært hold. Hvis du skal kjøpe et termisk kamera for første gang og har et begrenset budsjett, er dette et godt sted å starte.
For de fleste jegere, naturinteresserte og friluftsentusiaster er 384×288 den oppløsningen vi anbefaler. Den gir deg nok piksler til skarpe bilder på reelle jaktavstander, støtter brukbar digital zoom og gir en god balanse mellom pris og ytelse. Det er denne oppløsningen som ligger til grunn for flere av våre mest populære modeller, blant annet Mile 2-serien og Arc LRF.
For deteksjon på lang avstand, profesjonell bruk eller alle som ønsker et så skarpt bilde som mulig under de tøffeste forholdene, er 640×512 det rette valget. Vår Sirius HD-serie befinner seg i denne klassen, og er utviklet for brukere som trenger å skanne områder på over 1 000 meter og likevel kunne se nøyaktig hva de ser på.
Her er et siste poeng det er verdt å huske: Oppløsning fungerer best når den støttes av de riktige tekniske spesifikasjonene. En 640×512-sensor med dårlig NETD-følsomhet, lav oppdateringsfrekvens eller et dårlig objektiv vil alltid gi dårligere ytelse enn et godt innstilt 384×288-system. Hos Pixfra utvikler vi hvert termisk monokulær, kikkert og frontmontert tilbehør som et komplett bildesystem – oppløsning, pikselavstand, NETD, optikk og prosessering fungerer alle sammen. Slik får du et termisk utstyr som faktisk leverer i felten, ikke bare på spesifikasjonsarket.
Er en oppløsning på 384×288 god nok til jakt?
For de fleste jaktsituasjoner er 384×288 mer enn godt nok – det er ikke uten grunn at dette er det mest populære oppløsningsnivået på markedet. Den gir deg solide bildedetaljer på avstander mellom 200 og 600 meter, støtter skarpt digitalt zoom opptil 4x og hjelper deg med å skille mellom et byttedyr og forstyrrende elementer i bakgrunnen. Med mindre du driver med langdistanseskyting utover 800 meter eller trenger pikselnøyaktig identifisering på ekstreme avstander, er 384×288 det perfekte kompromisset der ytelse og pris går hånd i hånd.
Fører høyere oppløsning til raskere batteriforbruk på en enhet med termisk styring?
Sensorer med høyere oppløsning behandler riktignok mer data, noe som kan føre til høyere strømforbruk. Men i praksis er forskjellen mellom en 384×288- og en 640×512-sensor når det gjelder batterilevetid mindre enn de fleste forventer. Det som virkelig tømmer batteriet, er skjermens lysstyrke, oppdateringsfrekvens, Wi-Fi-strømming og kaldt vær. Hos Pixfra har enhetene våre en batterilevetid på mellom ca. 4,5 og 15 timer, avhengig av modellen, og mange bruker utskiftbare 18650-batterier – så selv om en modell med høyere oppløsning har litt kortere batterilevetid, kan du sette inn et nytt batteri på få sekunder.
Kan digital zoom erstatte en høyere sensoroppløsning?
Nei. Digital zoom forstørrer eksisterende piksler – den skaper ikke nye detaljer. Hver gang du dobler den digitale zoomen (for eksempel fra 1x til 2x), halveres både antall piksler og synsfeltet. Å starte med en høyere grunnoppløsning gir deg derfor langt større rom for å zoome inn før bildet blir kornete. Hvis du planlegger å zoome inn ofte, bør du investere i en sensor med høyere oppløsning i stedet for å stole på digital forstørrelse for å fylle gapet.
Hva er den beste oppløsningen for et termisk monokulær i 2026?
Det avhenger av bruksområdet og budsjettet ditt. For allmenn jakt og friluftsliv gir 384×288 med en pikselavstand på 12 µm den beste balansen mellom bildeklarhet, deteksjonsrekkevidde og pris. For profesjonell bruk eller langdistanseapplikasjoner gir 640×512 det skarpeste bildet med best zoommkvalitet. Det som en gang var en oppløsning forbeholdt premium-modeller (640×512), er nå blitt mer tilgjengelig i mellomklassen, slik at du får mer for pengene enn noensinne.
Har oppløsningen innvirkning på hvor langt en termisk enhet kan oppdage?
Ja, men ikke alene. De viktigste faktorene som påvirker deteksjonsavstanden, er blant annet målstørrelse, temperaturforskjell, sensoroppløsning, objektivets brennvidde og mer. En sensor med høyere oppløsning fanger opp flere detaljer på avstand, noe som utvider identifikasjonsområdet – det punktet hvor man faktisk kan skille ut hva en varmesignatur er. Men objektivets kvalitet og NETD-følsomheten spiller også en stor rolle. Derfor utvikler vi hos Pixfra hele det optiske systemet i sin helhet, slik at hver spesifikasjon støtter den neste.
The thermal device market in 2026 looks completely different from even two years ago. Sensor tech has leaped forward, prices have dropped, and the feature sets you can get today would’ve been premium-only a couple of seasons back. But with so many options out there, how do you know what actually matters? We’re here at Pixfra to cut through the noise and show you the top 6 features you need in the best thermal device this year.
Whether you’re a hunter tracking hogs after dark, an outdoor enthusiast exploring backcountry trails, or a wildlife observer watching nocturnal animals without disturbing them, your thermal device is only as good as its features. And not all features are equal. Some specs look flashy on paper but mean nothing in the field. Others seem small but make or break your experience at 2 AM in a hunting blind.

The thermal monocular market in 2026 looks significantly different from even two years ago, with three developments reshaping what buyers should expect at each price tier — including higher sensor resolutions at lower prices, where what was once a premium specification (640×512) has become a mid-range standard. That shift is great news for you, but it also means you’ve got to be more deliberate about what you’re shopping for. A cheaper price tag doesn’t always mean a better deal, and spending more doesn’t always buy you the features you actually need.
At Pixfra, we build thermal monoculars, thermal scopes, thermal front attachments, and multispectral binoculars — all designed for real outdoor conditions. We’ve used what we’ve learned from years of developing our proprietary heat-detection technology to boil down the six features that separate a great thermal device from one that’ll frustrate you by your third outing. If you’re also looking to get more out of your existing setup, check out the best accessories to upgrade your thermal scope performance for some practical add-ons that make a real-world difference.
If there’s one spec that defines how well a thermal device performs, it’s NETD — Noise Equivalent Temperature Difference. This number, measured in millikelvins (mK), tells you the smallest temperature difference the sensor can pick up. A lower NETD value generally indicates that the device can detect smaller temperature variations, resulting in a clearer and more detailed image. Think of it this way: on a warm summer night when the ground, trees, and air are all radiating heat at similar levels, a device with poor NETD gives you a washed-out, flat image. A device with strong NETD — say, ≤18mK like our Pixfra thermal devices — shows you crisp contrasts between an animal and its background, even in challenging conditions like fog, rain, or humidity.
NETD shows how well your thermal monocular can see small changes in heat. Lower NETD numbers mean clearer pictures. In 2026, the best models have NETD below 15 mK, so you can see tiny heat changes. Pixel pitch matters too — smaller pixel pitch, like 12 µm, gives you sharper pictures and helps you spot things better. Our devices at Pixfra achieve NETD values of ≤18mK, which places them at the high end of sensitivity for hunting-grade thermal optics. That kind of sensitivity means you’re not squinting at blurry shapes — you’re seeing defined outlines, even when conditions turn ugly.
Then there’s sensor resolution. This is the other half of the image quality equation. Resolution is expressed as the number of pixels on the thermal sensor — common options include 256×192, 384×288, and 640×512. Resolution is the heart of any thermal scope — it determines how clear and detailed your view will be. Lower resolutions like 256×192 are great for budget options and short-range hunting, while 384×288 or 640×512 offer sharper images for identifying targets at longer distances. Higher resolution scopes make it easier to distinguish between animals and background clutter, especially in dense foliage. But resolution isn’t everything; factors like sensor sensitivity and refresh rate also play a huge role in overall performance. At Pixfra, we pair our high-resolution sensors with 12μm pixel pitch technology across our product lines — from the Mile 2 series for everyday use to the Sirius HD series for demanding professional applications — so you get sharp, high-contrast images no matter which model you choose.
Detection range is one of the first specs people look at, and for good reason. It tells you how far out the device can spot a heat signature. But here’s a detail that trips up a lot of first-time buyers: detection range and identification range are different figures — identification range, where you can confirm what you’re seeing, is always shorter. A device might claim it can detect a heat source at 1,500 meters, but that doesn’t mean you’ll be able to tell if it’s a deer, a coyote, or a stump at that distance. For hunters, the identification range is what really counts. Always ask about both numbers before you buy.

Our Pixfra lineup covers a wide spectrum of detection ranges. Entry-level devices start at around 500 meters, while our premium Sirius HD series pushes out to 3,600 meters. That kind of reach gives law enforcement, wildlife managers, and serious hunters the ability to scan massive areas without moving a step. For most recreational hunters and outdoor enthusiasts working inside 300-600 meters, our mid-range models like the Arc LRF and Mile 2 series hit the sweet spot between performance and price.
Now let’s talk about laser rangefinders (LRF). For hunters taking shots beyond 150 yards at night, a built-in LRF significantly improves shot placement confidence and removes the need for a separate ranging device. An integrated LRF gives you exact distance to your target with the press of a button — no fumbling for a separate device in the dark. Our Pixfra models with “LRF” in their names, like the Arc LRF, Chiron LRF, and Taurus LRF, feature integrated laser rangefinders with 1,000-meter range capability. Paired with the built-in ballistic calculators found in models like the Chiron LRF and Taurus LRF, you get a system that computes bullet drop and gives you an adjusted aiming point on the fly. That’s not a gimmick — it’s the difference between a clean, ethical shot and a miss.
Here’s a feature that doesn’t get nearly enough attention until you’re three hours into a hunt and your screen goes dark. Thermal devices consume power quickly, especially at higher refresh rates and brightness. Look for at least 8 hours of continuous operation. Replaceable batteries or external power packs can be lifesavers during long hunts. Battery life is directly tied to how useful your thermal device actually is in the field. A device with incredible image quality and a two-hour battery is basically a very expensive paperweight by midnight.
Our Pixfra devices range from approximately 4.5 hours to 15 hours of battery life depending on the model and usage conditions. Many of our models use standard 18650 batteries that you can swap in seconds. That’s a deliberate design choice. Proprietary internal batteries might save a few grams of weight, but when you’re deep in a hunt and the power dies, being able to pop in a fresh 18650 from your pocket is worth its weight in gold. And here’s a pro tip from our own field experience: cold weather can slash battery performance by 30-50%. Always carry spare batteries in an inside pocket where your body heat keeps them warm.
The table below gives you a quick look at how battery life stacks up across different use cases and what you should be targeting:
| Bruksscenario | Minimum Battery Life Needed | Anbefalt batteritype |
|---|---|---|
| Short evening hunts (2-3 hrs) | 4-5 hours | Innebygd oppladbart batteri |
| All-night predator control | 8-10 hours | Utskiftbar 18650 |
| Multi-day backcountry trips | 10-15 hours | Utskiftbare + reservedeler |
| Property security patrols | 6-8 hours | Oppladbar med hurtiglading |
| Wildlife observation sessions | 5-7 hours | Either type works |
Match your expected use to the right battery system and you’ll never be caught in the dark with a dead device.
Your thermal device is outdoor gear. Full stop. It’s going to get rained on, dropped on rocks, tossed into a pack, and used in temperatures ranging from scorching summer nights to freezing winter mornings. If it can’t handle that, it doesn’t matter how pretty the images are.

Field gear must survive drops, rain, and dust. Devices with IP67-rated housing can withstand immersion in water up to one meter deep for 30 minutes. Non-slip rubber armor exteriors provide a secure grip even when wearing gloves or when the device is wet. Battery life is another critical factor. Look for an IP rating — IP67 is the gold standard for thermal devices in 2026. That means the device is fully sealed against dust and can survive submersion in water. Some cheaper devices only carry an IP54 rating, which handles splashes but won’t survive a dunk. If you hunt in rain, cross streams, or work in dusty environments, IP67 is non-negotiable.
At Pixfra, we build our devices for the same conditions we use them in. Our thermal scopes can handle heavy recoil, our monoculars survive drops, and our housing materials resist corrosion over years of use. Look for MIL-STD-810G or IP67/IP68 seals, impact-resistant housings, and waterproof controls. Choose models with sealed optics, antifog vents, and corrosion-resistant finishes. Make certain battery compartments stay secure in wet or muddy conditions, and confirm proper field-maintainable seals. If you’ll expose gear to rough terrain, prioritize durability over extra features. Weight also plays a role here — a thermal device that’s too heavy will tire you out during long sessions, affecting your aim and your patience. Our Draco series, for example, was designed with a lightweight build specifically for hunters who need multi-functional performance without the bulk.
Ergonomics tie into durability too. Cold, gloved hands at 2 AM in a hunting blind don’t mix well with complicated menus or finicky buttons. Intuitive button layouts, fast startup times, and polished companion apps that don’t require a manual to operate separate the genuinely usable devices from the frustrating ones. If you can’t operate your thermal device with one hand in the dark while wearing gloves, the design has failed. We keep our controls simple and accessible across the Pixfra lineup because real-world use demands it.
The best thermal device in 2026 doesn’t just show you a heat image — it connects to your phone, records video, streams live footage, and updates its own firmware over the air. Integrated feature sets like built-in laser rangefinders, onboard audio and video recording, Wi-Fi streaming, and companion app ecosystems are increasingly standard on serious devices rather than premium additions. The best thermal imaging monocular options in 2026 deliver an entire field toolkit in a single unit.
Our Pixfra Outdoor App supports all our current models, including the Sirius, Arc LRF, Mile 2, Pegasus Pro, Chiron LRF, Taurus, and Taurus LRF series. Through the app, you can update firmware, adjust settings, and transfer images and video directly to your smartphone. That kind of connectivity is more than a convenience — it’s a practical tool for documenting hunts, sharing scouting data with hunting partners, or keeping records of wildlife activity on your property.
Color palettes are another smart feature that experienced users swear by. White Hot is the most common mode, where heat sources appear white, and is ideal for general detection in open fields. Black Hot, where heat sources appear black, is preferred by many professional hunters for better detail on the animal’s body. Red Hot highlights the warmest parts of the image in red and is excellent for quickly picking out a target in a complex environment. Iron Bow and Rainbow use a spectrum of colors to show varying temperature gradients, helpful for identifying mechanical heat leaks or specific environmental features. Multiple palette options let you adapt your display to different terrain, weather conditions, and personal preference — without changing the detection ability of the device itself.
And let’s not overlook the refresh rate. A 50Hz refresh rate is the baseline for any thermal device worth buying in 2026. That rate delivers smooth, fluid imagery so you can track moving targets — like running hogs or coyotes — without blur or chop. Anything below 30Hz will give you a stuttering image that makes fast-moving targets hard to follow. Our Pixfra devices are built with high refresh rates across the board, because in the field, smooth imaging isn’t a luxury — it’s a necessity.
Our Volans series also stands out with its all-day vision capability. It features an adjustable aperture from F1.2 to F3.0 to adapt to different lighting conditions, making it one of the few thermal devices on the market that performs just as well in broad daylight as it does in total darkness. That kind of versatility means you carry one device instead of two.
Key Takeaway: The best thermal device in 2026 combines high thermal sensitivity (≤18mK NETD), a resolution that matches your use case, reliable detection range with an integrated laser rangefinder, a battery system that outlasts your hunting session, rugged IP67 construction, and smart features that keep you connected and in control. At Pixfra, we engineer every product in our lineup around these six features because we know what matters when conditions get real.
What NETD rating should I look for in a thermal monocular?
For most hunting, wildlife observation, and outdoor applications, you want a thermal device with an NETD of ≤25mK or lower. A device with an ultra-sensitive NETD rating of ≤18mK can detect incredibly minute temperature differences, providing a crisp, detailed image even in the most challenging environments like heavy fog, rain, or complete darkness. Our Pixfra devices achieve ≤18mK, putting them at the top end of thermal sensitivity for outdoor-grade optics.
Is a built-in laser rangefinder worth it on a thermal device?
If you’re hunting at distances beyond 150 yards or shooting at night, yes — a built-in LRF is a real advantage. It removes the need to carry a separate rangefinder and gives you instant distance data so you can adjust your shot. Our Pixfra Arc LRF, Chiron LRF, and Taurus LRF models all include integrated laser rangefinders with 1,000-meter range. Paired with a ballistic calculator, these models give you a complete targeting solution in one device.
How long does a thermal device battery last?
If you plan to hunt for a long time, you need a device with a long battery life. Many thermal imaging monoculars have a runtime of 6, 8, or 10 hours. If you know you only need an hour, you can get by with a cable-powered unit. Our Pixfra devices range from about 4.5 to 15 hours depending on the model. For all-night hunts, look for models with swappable 18650 batteries so you can carry spares and swap without downtime.
Can you use a thermal device during the day?
Absolutely. Thermal devices detect heat, not light, so they work just as well in daylight as they do at night. Our Pixfra Volans series goes a step further with all-day vision capability and an adjustable aperture (F1.2-F3.0) that adapts to changing light conditions, making it an especially strong pick for hunters and observers who need 24-hour coverage from a single device.
What IP rating do I need for a thermal device used outdoors?
For any serious outdoor use — hunting, hiking, wildlife observation, property security — you want at least an IP67 rating. IP67 rating is legit. Rain, snow, condensation — none of it matters. The housing feels solid despite the price point. IP67 means full dust sealing and protection against temporary water submersion, which covers rain, stream crossings, snow, and accidental drops into puddles. Anything less than IP67 puts your gear at risk in real field conditions.
You just unboxed your new thermal device. It looks great, feels solid, and you’re ready to get out in the field. But before you do, there are a few things you need to know. Proper calibration and regular maintenance are what separate a thermal scope that performs well for a decade from one that goes fuzzy after a season. We’ve put this guide together at Pixfra to walk you through everything — from your first power-on to long-term storage. Whether you’re running a thermal scope, a monocular, or a front attachment, these steps apply across the board.
Let’s clear something up right away: when we talk about calibrating a thermal device, we’re not talking about the same thing as zeroing your scope on a rifle. Calibration — sometimes called NUC (Non-Uniformity Correction) or FFC (Flat Field Correction) — is a sensor-level process that keeps your thermal image clean, even, and free of artifacts. Thermal devices are highly sensitive to temperature changes in their environment, and since temperature fluctuates constantly, the device needs to periodically refresh to accurately measure temperature differences. Without this process, your image starts to look grainy, washed out, or streaked with lines that shouldn’t be there.

Here’s the simple version of what happens during calibration. During calibration, the device briefly covers its sensor with a shutter to create a flat, constant temperature reading. The device uses that flat reference to reset how each pixel responds to infrared energy. Think of it like resetting the baseline so your sensor knows what “neutral” looks like again. As the device operates, internal temperature changes cause each pixel to respond slightly differently, creating non-uniformity across the image. Without calibration, the image develops visible artifacts. Once the correction runs, those artifacts disappear and you’re back to a sharp, high-contrast picture.
Most people notice calibration for the first time when their screen briefly freezes. In cold environments, calibration occurs more often during the first minutes of use. This is expected behavior, not a defect. A thermal image freezes because the sensor cannot produce a valid image during calibration. When calibration begins, the sensor input is blocked by a reference surface. During this moment, the device has no usable scene data. To avoid displaying incorrect information, the system holds the last valid frame on screen. This creates a brief freeze. The freeze is not a malfunction. It is a functional requirement that ensures calibration accuracy and prevents corrupted imagery. So don’t panic when it happens — it means your device is doing exactly what it should. The frequency of calibration depends on the operating time of the device. The longer the thermal imager runs continuously, the less frequently calibration is needed. You’ll notice more frequent calibrations in the first few minutes after powering on, especially in cold weather, and then fewer as your device warms up and stabilizes.
Most modern thermal devices offer three calibration modes: automatic, semi-automatic, and manual. There are three different calibration modes: manual, automatic, semi-automatic. Each has a place depending on what you’re doing in the field. Let’s break them down so you can pick the right one for your situation.
Automatic mode is what we recommend for most users, especially if you’re new to thermal. With automatic calibration, a software algorithm has a timer or some software that checks the image for drops in quality. When the device is being calibrated, the image freezes for a second or two and in most devices, the shutter closes for the time of the calibration. There is a distinct sound associated with shutters closing and opening. You don’t have to think about it — the device handles everything on its own. The only downside is the brief click sound the internal shutter makes, and some hunters don’t love that when they’re sitting in a quiet stand. Semi-automatic mode lets you trigger calibration with a button press but uses the internal shutter, so it’s still quick and clean. Manual mode is the quietest option. With the manual calibration mode, the user has to press a button and manually close the front cap. The advantage of the manual calibration mode is that it’s much quieter than the other two modes that use the shutters. You press a button and cover the lens yourself — either with the lens cap or your hand — so there’s no shutter click at all. This is a favorite for hunters who need total silence during close-in predator work or hog hunts.

Regardless of which mode you use, there are a few field rules to follow. A lot of image problems that look like bad contrast or weak sharpness actually start with calibration drift. Run FFC when the image starts to look uneven across the screen. Common signs include banding, blotches, or a hazy “dirty glass” look that was not there a few minutes ago. You will often notice this after a major temperature change, like stepping out of a warm truck into cold air. Our advice: Recalibrate before you start chasing settings. If the image has drifted, you may end up over-adjusting contrast or sharpness to compensate for a temporary issue. That usually leaves you with a harsher image later. A better order is simple: focus first, run FFC next, then evaluate the picture. That workflow saves you from fiddling with settings that weren’t the problem to begin with. For a deeper look at the gear that pairs with proper calibration — like quality mounts and battery packs — check out our guide on the best accessories to upgrade your thermal scope performance.
One more thing that trips people up: calibration and zeroing are two different jobs. Calibration deals with sensor image quality. Zeroing aligns your reticle with the point of impact on your rifle. To achieve accurate shooting, the thermal scope must be calibrated to ensure that the image aligns correctly with the point of impact of the rifle’s shot. You need both, and they work together — but don’t confuse the two. Always run a calibration (NUC) before you start adjusting your zero. A drifted sensor image can make your point of aim look off when the real problem is just sensor noise, not your scope’s alignment.
Your thermal lens is not the same as the glass on your day scope. Thermal scope lenses aren’t regular glass. They’re made from germanium or other specialized materials with delicate coatings that need careful handling. Germanium is expensive and the anti-reflective coatings on these lenses are sensitive to pressure, chemicals, and even the oils on your skin. Clean them wrong and you’ll cause damage that no amount of recalibration can fix.

Here’s our recommended cleaning process. Never wipe a dusty lens directly. Loose particles of dust or sand can scratch the surface. Always start with a gentle air duster or a soft, optical brush to remove dirt without friction. Do not blow on the lens with your breath (condensation streaks) or use tissues, paper towels, or rough fabrics, as these cause micro-scratches. Once the loose dust is gone, apply a few drops of optical-grade cleaning solution directly to the cloth, never to the lens itself, to prevent liquid seepage. Wipe the lens gently in circular motions, starting from the center and moving outward. That’s it. No fancy techniques. Just patience and the right materials.
Here’s a pro tip we’ve learned from years of field use: Clean your thermal camera lens only when strictly necessary, and only when there is visible dirt or fingerprints. Over-cleaning can actually wear down the anti-reflective coating faster than a little dust ever would. A light coat of dust is far less harmful than scrubbing with the wrong cloth. Flip-up lens covers are your best friend here — they keep debris out so you clean less often in the first place. And when it comes to chemicals, skip the household glass cleaners entirely. Avoid regular eyeglass cleaners on thermal scopes. Thermal lenses use germanium or specialized materials with unique coatings that react differently than standard glass. Use lens cleaners specifically designed for optical instruments with at least 30% isopropyl alcohol, or 96% isopropyl alcohol solutions. Regular eyeglass cleaners may contain additives that damage thermal scope coatings and reduce image quality over time.
Lens Cleaning Quick-Reference Table
Step Tool Notes 1. Remove loose dust Air blower or soft optical brush Never wipe a dry, dusty lens 2. Apply cleaner Optical-grade solution on microfiber cloth Never spray directly on lens 3. Wipe gently Microfiber cloth, circular motions Center outward; no pressure 4. Inspect Visual check under light Repeat only if needed 5. Protect Flip-up lens cap Always cover when not in use
Battery management doesn’t get enough attention, and it’s one of the top reasons thermal devices underperform in the field. Most thermal scopes run 3 to 8 hours on a single charge depending on settings, temperature, and display brightness. Scopes can eat up battery power, especially if you’re using them for extended periods. To make sure your scope lasts, try to avoid having the screen at maximum brightness when it’s not needed. Use a power-saving mode when possible and bring extra batteries or a portable charger if you’re planning a long session.
Cold weather hits battery performance harder than most people realize. We’ve seen fully charged lithium batteries lose 20–30% of their effective capacity in freezing temperatures. Keep spare batteries in an inside pocket close to your body to maintain warmth. Most thermal riflescopes are powered by rechargeable or replaceable batteries. Proper battery care is critical to ensure uninterrupted performance. For long-term storage, always remove the batteries to prevent leakage, which can damage internal components. If your scope uses rechargeable batteries, charge them periodically, even during periods of non-use, to maintain their lifespan. Avoid overcharging, as this can lead to overheating and degradation. Carry spare batteries during extended outings to avoid losing functionality in the field. And if you’re doing all-night hunts, consider pairing your device with an external power bank. Many modern thermal scopes accept USB power input, which means you can run your device for 10 or more hours without worrying about dead batteries.
Key Data Point: Most thermal scopes can last between 40,000 to 60,000 hours of operational time for the thermal sensor, while displays typically last about 10 years. That’s a long life if you take care of the device — and battery management is a big part of that equation.
Firmware is the other half of this section, and it’s often overlooked entirely. Check for firmware updates regularly and install them as recommended by the manufacturer. Firmware updates can improve the performance and functionality of the scope. We release firmware updates at Pixfra to fix bugs, improve image processing, and sometimes even add new features. Running outdated firmware is like driving on old tires — it might work, but you’re not getting the best from your equipment. At least one month before hunting season, test battery health, update firmware, and calibrate the sensor to avoid missing opening night. Build firmware checks into your pre-season routine along with battery testing and sensor calibration, and you’ll avoid surprises when it matters most.
How you store your thermal device when it’s not in use matters just as much as how you handle it in the field. After the hunt, proper storage of your thermal riflescope ensures it’s ready for future outings. Choose a cool, dry place with consistent temperature and low humidity to prevent condensation. Think of it as tucking away your gear to maintain peak performance. Moisture is the number one enemy here. Even waterproof-rated scopes can develop internal condensation if you move them too quickly between extreme environments. Even waterproof scopes can suffer from internal condensation if exposed to rapid temperature changes. Inclement weather, such as rain or extreme temperatures, can significantly affect the performance of thermal scopes, making it crucial to protect them from moisture. Always allow your thermal scope to acclimate slowly when moving between extreme environments.

For short-term storage between hunts, a padded tactical bag or hard case works great. Use silica gel packets or other moisture-absorbing materials in the storage case to prevent condensation buildup. Hard-shell cases with custom foam inserts are best for transport, while padded bags with quick-access compartments work well for field carry. We talked about both in detail in our accessories guide. For long-term storage — say, off-season — there are a few extra steps to take. Remove the batteries, give the lens a final gentle clean, put the caps on, and store the device in a climate-controlled space. Dehumidify the storage area and use a dehumidifier in the storage room to maintain optimal humidity levels. Check firmware updates before storage to ensure your scope’s firmware is up to date and to avoid compatibility issues when you use it again. Record your preferred settings and configurations so you can quickly set up your scope when needed.
Don’t forget physical inspections. Regularly check for any signs of wear or damage, such as loose screws, cracks, or degraded seals. Addressing small issues early prevents larger problems later. Some scopes require periodic calibration to maintain accuracy, especially after prolonged use or exposure to extreme conditions. A loose mount screw or a cracked seal might seem minor now, but left unchecked, they can lead to zero shift, moisture intrusion, or sensor damage. Make it a habit to run a quick visual and functional check every time you pull your device out of storage. Power it on, let it warm up, run a calibration, check the image, and confirm your settings. Five minutes of attention saves you from nasty surprises when you’re in the field and a hog steps into range.
We’ve seen thermal scopes last 10+ years with proper care and maintenance. That’s real-world data from our team, not a marketing number. The devices that hit that lifespan are the ones whose owners followed these basic routines: clean when needed, store properly, manage batteries, keep firmware current, and let the sensor calibrate without interference.
Sometimes the image quality on your thermal device degrades gradually enough that you don’t notice it right away. Knowing the warning signs saves you from blaming the scope for problems that a simple calibration can fix. Inconsistent readings, sudden fluctuations, or unexpected temperature readings; blurry thermal images with reduced image clarity, even after cleaning the lens; unusual artifacts like strange patterns or colors not related to actual heat signatures; and after major impacts — dropping the camera can misalign internal sensors.
Indicators of scope movement or calibration error include sudden, unexplained POI jumps, visible loosening of ring screws, slipping on the rail, inconsistent reticle behavior, or persistent offsets that cannot be corrected with turret clicks. Inspect hardware for loose screws, cracked rings, or rail deformation. Check for visible reticle wobble in the display and run a NUC to ensure internal calibration stability. If running a NUC doesn’t solve the image problems, it might be time for a professional factory recalibration. Most thermal cameras in the market today are already calibrated. Just like most electronic measuring devices, a brand new infrared camera is set to factory standards. Over time, however, calibration shifts may occur due to electronic component aging. The general recommendation across the thermal industry is to have your device factory-checked once a year if you’re a heavy user, or every two years for casual use.
That’s not a freeze or a glitch — it’s your device calibrating itself. When you first start using your thermal optic, you might be surprised when it occasionally freezes up on you. This isn’t a malfunction — it’s just your unit calibrating itself. Thermal devices are highly sensitive to temperature changes in their environment. The screen holds the last frame while the internal shutter covers the sensor and runs a non-uniformity correction. It only takes a second or two, and it happens less often the longer your device stays powered on.
In automatic mode, the device handles this for you — you don’t need to think about it. If you’re running manual mode, recalibrate whenever the image starts looking noisy, streaked, or uneven. Run FFC when the image starts to look uneven across the screen. Common signs include banding, blotches, or a hazy “dirty glass” look that was not there a few minutes ago. You will often notice this after a major temperature change, like stepping out of a warm truck into cold air. A good habit: always run a manual calibration when you first power on and whenever you move between very different temperature environments.
No. Avoid regular eyeglass cleaners on thermal scopes. Thermal lenses use germanium or specialized materials with unique coatings that react differently than standard glass. Ammonia-based cleaners like Windex will damage the anti-reflective coatings. Use only optical-grade cleaning solutions designed for coated lenses, and always apply the solution to a microfiber cloth first — never directly to the lens.
A well-maintained thermal scope can last 5 to 10 years or more, depending on its build quality, usage frequency, and maintenance practices. The thermal sensor itself can run for tens of thousands of hours. The biggest threats to lifespan are moisture damage, lens scratches from improper cleaning, and battery leakage during storage. Follow the care steps in this guide and your device will stay reliable for years.
Yes. For long-term storage, always remove the batteries to prevent leakage, which can damage internal components. If your scope uses rechargeable batteries, charge them periodically, even during periods of non-use, to maintain their lifespan. Give rechargeable batteries a partial charge every two to three months to prevent deep discharge, which can permanently reduce capacity.
















