A thermal device for hunting should match the way you hunt, not a number on a headline. Start with terrain, usual viewing distance, whether you need a handheld scanner or a mounted optic, and how long you stay out. Pixfra builds thermal monoculars, thermal scopes, thermal front attachments, and multispectral binoculars, so the right setup starts with the job in front of you.
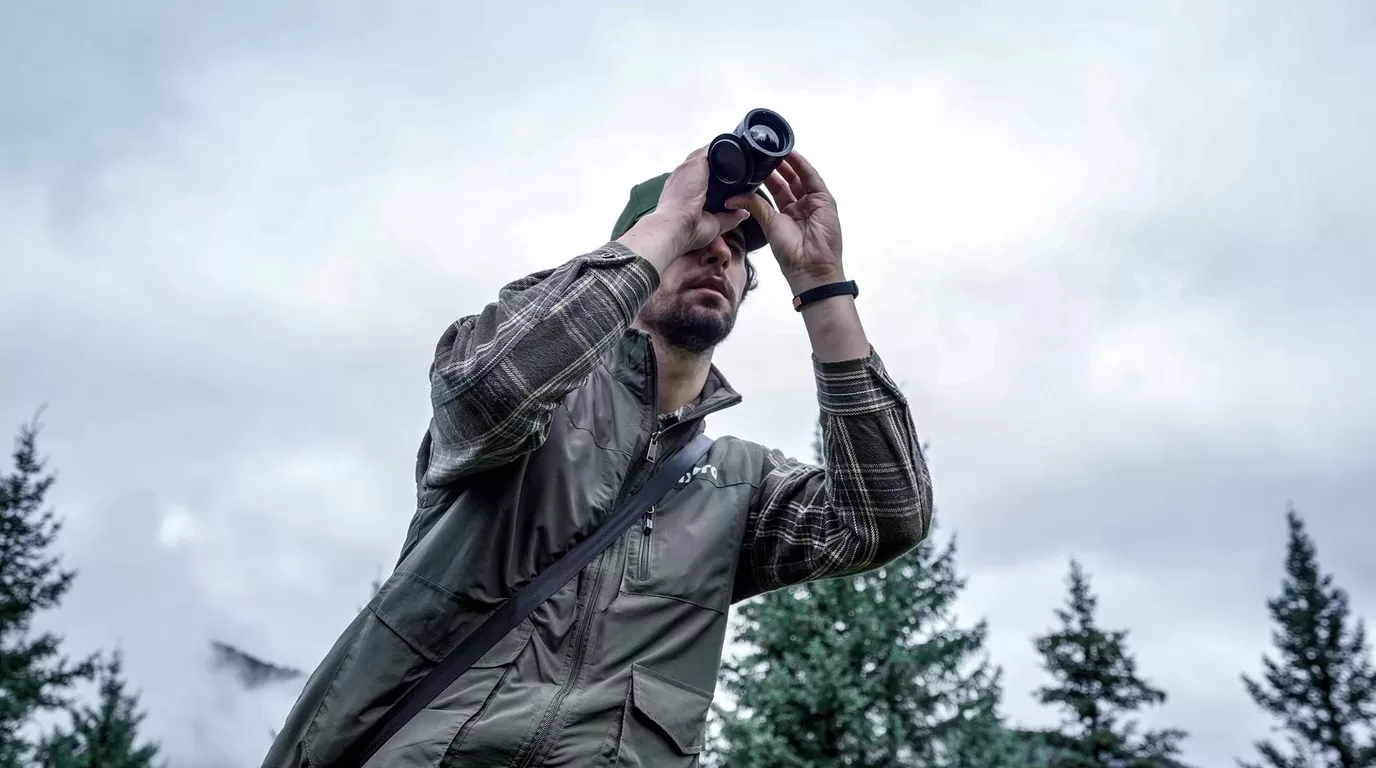
That is the whole decision in plain English. Pick the device type first. Then compare sensor resolution, NETD, lens, refresh rate, runtime, controls, and after-sales support.
Most buying mistakes start when a hunter reads one impressive range number and stops thinking. Detection range only tells you that the device can notice a warm object at distance. It does not promise clean identification, and it does not tell you how the optic feels in cold hands at 2 a.m.
Ask a simpler question: what are you trying to do?
A hog hunter watching feeders and tree lines needs fast scanning, a wide enough field of view, steady battery life, and simple controls. A coyote hunter calling across open ground needs more detail at distance and may benefit from laser rangefinding. A deer manager checking fields before first light may want a handheld monocular for observation, not a mounted optic. A shooter who already has a dialed-in day scope may prefer a front attachment rather than rebuilding the rifle around a dedicated thermal scope.
This is where Pixfra’s product lines split neatly. Mile 2 and Arc cover handheld scanning. Arc LRF adds rangefinding in a compact monocular. Taurus keeps your day optic in the system as a front attachment. Chiron LRF and Pegasus lines move toward dedicated thermal scope use. Sirius and multispectral devices help when observation, detail, and mixed-light work matter more than a single shot window.
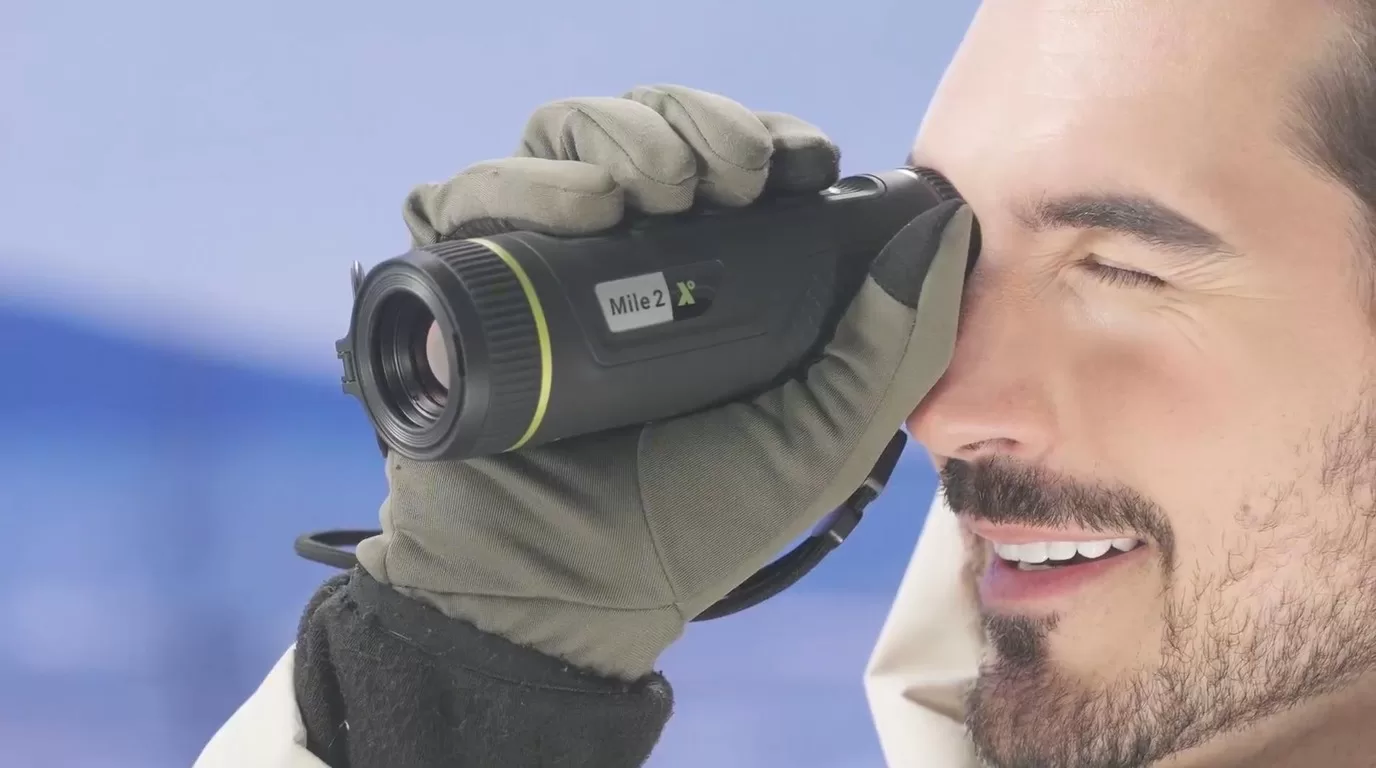
For many hunters, the first thermal device should be a handheld monocular. You can scan fields, check timber edges, follow heat signatures after a shot, and keep the rifle pointed in a safe direction until you have a reason to shoulder it.
Pixfra Mile 2 is the compact choice in this role. The Mile 2 page lists pocket-size portability, a P3 AMOLED display, electronic compass, and model options up to 640 x 512 resolution. It is a good fit when you want a device that lives in a jacket pocket instead of taking over your pack.
Arc and Arc LRF step into a more capable handheld role. Arc LRF combines thermal observation with an integrated laser rangefinder, magnesium alloy body, and replaceable battery setup. If you hunt broken ground, uneven fields, or unfamiliar farms, range data can prevent bad guesses.
The handheld rule is simple: if you spend more time searching than aiming, buy the scanner first.
Thermal images can flatten distance. A hog across a field, a coyote beyond a fence line, and a deer-shaped heat source near brush can look closer than they are. That is why LRF models matter for hunters who work open lanes or changing terrain.
Pixfra has LRF options across handheld and mounted categories, including Arc LRF, Chiron LRF, Taurus LRF, and Pegasus 2 LRF. The benefit is not just a number on the screen. It is a cleaner decision cycle: spot, range, judge, and act without switching devices or guessing from landmarks.
Choose LRF when you hunt fields, hills, power-line cuts, or large properties where visual reference points are weak at night. You may not need it for tight timber or short feeder lanes, but once distance starts changing fast, rangefinding earns its place.
This is the decision that deserves the most patience. A front attachment lets you keep a daytime optic and add thermal capability in front of it. A dedicated thermal scope gives you a purpose-built thermal aiming system.
| Your setup | Pixfra direction | Why it fits |
|---|---|---|
| You already trust your day scope and rifle zero | Taurus front attachment | Keep the day optic workflow and add thermal imaging when needed |
| You want an integrated thermal hunting optic | Chiron LRF or Pegasus series | Purpose-built controls, thermal display, and mounting setup |
| You scan more than you shoot | Mile 2, Arc, or Arc LRF | Handheld observation is faster and safer for searching |
| You need observation across changing light | Sirius or multispectral binocular | Better fit for longer watching sessions and mixed conditions |
Taurus is useful when the rifle is already set up well and you do not want to rebuild everything around a new optic. Chiron LRF and Pegasus models make more sense when thermal is the main aiming system. Neither path is automatically better. The right answer depends on how the rifle is used, who else uses it, and whether you switch between day and night work.
Sensor resolution affects how much detail the image can show. Pixfra product lines include 256 x 192, 384 x 288, 640 x 512, and higher-resolution options depending on category and model. More pixels help when you need detail at distance, but resolution is only one part of the image.
NETD tells you how well the device can separate small temperature differences. Lower NETD helps in humidity, fog, and low-contrast scenes where warm shapes do not stand out cleanly. Pixfra publishes NETD values by model, so check the exact SKU before ordering.
Lens and field of view decide how the device feels. A wider view helps scanning close cover. A narrower, longer lens helps when you need more reach. Hunters often overbuy reach and then feel slow in tight terrain. Match the lens to where you actually hunt.
Battery design matters more than it sounds. A device with replaceable 18650 batteries or a practical external power option is easier to manage on long nights. Runtime claims are usually measured under set conditions, so build a spare-power plan before the first trip.
Controls matter too. Gloves, rain, cold, and adrenaline expose bad ergonomics fast. Look for fast startup, a clean menu, easy palette changes, and buttons you can feel without staring at the housing.
For brush, feeders, and short lanes, start with a handheld thermal monocular. Mile 2 or Arc gives you quick scanning without adding weight to the rifle. If most opportunities happen close, field of view and comfort matter more than maximum reach.
For crop fields and rolling ground, move Arc LRF higher on the list. The rangefinder helps when distance is hard to judge in the dark, and the handheld format still keeps scanning simple.
For a rifle that needs thermal as the main sighting system, compare Chiron LRF and Pegasus options. Look closely at sensor resolution, lens, battery, mounting, and whether the controls feel natural from the shooting position.
For hunters who prefer their day optic, Taurus keeps the familiar glass in the system. That is useful when one rifle has to serve daytime and nighttime roles.
For observation, scouting, and long sits, Sirius or multispectral binocular products may fit better than a rifle-mounted thermal. Not every thermal job is a shooting job.
Do not choose a thermal device only by detection range. Detection is the easiest number to advertise and the easiest number to misunderstand.
Do not buy a mounted optic when you really need a scanner. If the first task is finding animals, a handheld monocular usually gets more use.
Do not ignore support. Thermal optics are electronics used outdoors. Firmware, batteries, seals, displays, buttons, and charging ports all matter after the sale. Buy through an approved channel and keep serial-number records.
Do not skip local regulations. Night hunting rules vary by region, species, season, and equipment type. Check the current wildlife agency rules where you hunt before using thermal equipment in the field.
For scanning, a thermal monocular is usually the better first device. For aiming, you need a thermal scope or a front attachment used with a suitable day optic. Many hunters eventually use both: a handheld monocular to find heat and a mounted solution for the shot.
Choose LRF if distance changes often or if you hunt open ground. It is less important for short, fixed lanes where you already know common distances. Pixfra offers LRF options in handheld, front attachment, and scope categories.
Match resolution to distance and detail needs. 256 x 192 can work for close scanning. 384 x 288 gives a stronger middle ground. 640 x 512 and above help when identification detail matters at longer distances. Always compare the exact model, lens, and NETD together.
Plan for the whole session, not the best-case runtime number. Check whether the device uses replaceable batteries, supports external power, and can be managed with gloves in cold weather. Carry spares when the device supports them.
If you are choosing a Pixfra thermal device for hunting, start with terrain and use case. Then shortlist the device type: handheld monocular, front attachment, dedicated thermal scope, or binocular. From there, compare exact model specs and ask Pixfra or an approved dealer to confirm the right fit for your rifle, distance, and support region.
The thermal device market in 2026 is loaded with more options and sharper tech at every price point than ever before. But figuring out how much to actually spend? That’s where most buyers get stuck. At Pixfra, we build thermal monoculars, scopes, front attachments, and multispectral binoculars — so we know where your money goes and where it gets wasted. This pricing guide breaks it all down so you spend smart and walk away with the right gear.
Before you set a budget, you need to know what you’re actually paying for. The price tag on a thermal imaging device isn’t random — it reflects a stack of components and engineering choices that directly affect what you see in the field. The biggest price driver is sensor resolution. A 256×192 sensor is the entry point for real thermal imaging. Step up to 384×288 and you get noticeably cleaner images with better edge definition, especially at distances past 200 yards. Go to 640×512 and you’re in professional territory. That price differential tells you all you need to know about thermal resolution in general — you can expect to pay approximately double for every doubling in the resolution of the thermal core. So when you see a $400 device next to a $1,500 device and wonder what changed, the sensor is usually the answer.

But resolution is only half the story. Thermal sensitivity, measured as NETD (Noise Equivalent Temperature Difference), decides how well the device picks up small heat differences. A lower NETD number means the device can separate a warm animal from a warm background on a humid summer night. For a deeper look at what separates a great thermal device from an average one, check out our breakdown of the De 6 belangrijkste functies die het beste thermische apparaat in 2026 moet hebben. In short, NETD is the spec that cheap devices cut corners on first — and it’s the spec that matters most when the conditions get tough. Devices with NETD values of ≤18mK, like our Pixfra lineup, hold their image clarity in fog, rain, and heavy humidity when lesser devices wash out and give you nothing but flat, gray blobs.
Beyond the sensor, you’re paying for pixel pitch (12µm is the current standard, delivering sharper imagery than older 17µm designs), refresh rate (50Hz for smooth tracking versus choppy 25Hz), battery system, build quality, IP weatherproofing, and smart features like Wi-Fi connectivity, companion apps, and onboard recording. Laser rangefinders add cost too, but for anyone shooting past 150 yards at night, they pay for themselves in shot confidence. The thermal camera market is estimated to be valued at USD 6.15 Bn in 2026 and is expected to reach USD 11.92 Bn by 2033, growing at a compound annual growth rate (CAGR) of 9.9%. That growth means more competition, more innovation, and better value for buyers at every tier. The race to deliver more for less has never been hotter — and you benefit directly.
A few years ago, spending under $500 on a thermal device meant getting a toy. Not anymore. In 2026, the best budget thermal monocular options deliver genuine detection capability, smart features, and rugged construction — all without draining your bank account. At this price point, you’re typically looking at 256×192 resolution sensors with 12µm pixel pitch, NETD around ≤20-40mK, and detection ranges from 300 to 500 meters. These devices are real tools, not gimmicks. They’ll find deer in timber at 150 yards, track wounded game through thick cover, and give you solid heat detection on close-to-mid-range hunts.
What should you watch out for in this tier? Refresh rate, for one. Some budget devices drop to 25Hz to save cost, and that gives you stuttery, choppy imagery that makes tracking anything moving — a running hog, a coyote cutting across a field — genuinely frustrating. Hold out for 50Hz. Battery life is another place budget devices can sting you. A device with great image quality and a three-hour battery is basically a fancy paperweight by midnight. Look for devices with swappable batteries or at least USB-C power bank support for extended hunts. IP67 waterproofing should also be non-negotiable, even at this price. Rain, mud, and accidental drops happen — and if your device can’t handle a wet night, it doesn’t belong in your pack.
At Pixfra, our entry-level devices start at detection ranges around 500 meters and run NETD values of ≤18mK, which is better sensitivity than many competitors charge twice as much for. Our Mile 2 series and Draco series hit the sweet spot for anyone entering the thermal game without dropping a month’s rent. For first-time buyers, weekend hunters, property owners, and wildlife watchers who work inside 300 yards, the sub-$500 tier in 2026 is genuinely capable — just be picky about where the manufacturer cut costs.
This is where most serious hunters and outdoor enthusiasts should be shopping. For most users, this is the best thermal monocular for the money — where cost and capability finally align. At this price tier, expect 384×288 sensors as the standard. That resolution captures far more thermal detail than the 256×192 sensors in budget devices, giving you cleaner images, sharper edges, and more reliable target identification when you zoom in or scan at distance. The 640×512 resolution, while superior, typically enters the picture above $1,500–$2,000.

Detection range jumps significantly in this tier. Detection range in this category extends from 1,000 to 1,300 meters depending on lens configuration — a significant step up from the 345–460 meter range of entry-level units. That extra reach matters for open-terrain hunters, ranchers scanning big properties, and anyone who needs situational awareness beyond a few hundred yards. Refresh rates of 50Hz are standard here — you shouldn’t accept anything less. This is also the tier where integrated laser rangefinders start showing up. An LRF gives you exact distance to your target with the press of a button, which is a real advantage for ethical shot placement at night. Our Pixfra Arc LRF sits right in this range, pairing high thermal sensitivity with a built-in 1,000-meter laser rangefinder and a price that makes sense for dedicated hunters.
This is also where smart features stop being “nice to have” and become standard. Wi-Fi connectivity, companion app support, onboard video recording, multiple color palettes, and firmware updates over the air are all expected at this price. Our Pixfra Outdoor App connects to all our current models and lets you update firmware, adjust settings, and transfer images and video directly to your phone. At Pixfra, our mid-range lineup — the Arc LRF and Mile 2 series — delivers ≤18mK NETD sensitivity, 12µm pixel pitch, and IP67-rated builds at prices that won’t make your wallet cry. Consider total value: durability, battery life, software, warranty, and accuracy. Mid-range options often deliver 80–90% of high-end performance at half the cost. If you can only buy one thermal device and want it to cover most real-world use cases — night hunting, wildlife observation, property security, backcountry exploration — the $500-$2,000 range is your target.
When you step past $2,000, you’re shopping for the best thermal imaging the market can deliver — longer detection ranges, higher-resolution sensors, and integrated systems that combine ranging, ballistics, and recording into one package. Mid-high devices (384×288 or 640×512, 1,000–1,500m range) cover most professional hunting and security applications. Premium devices (1280×1024, 3,000+ meter detection) are for buyers who need maximum performance and are prepared to invest accordingly. At the top end, 640×512 and even 1280×1024 sensors give you identification-quality images at distances where lesser devices just show vague blobs. You’re not just detecting heat — you’re counting tines on a buck or telling a coyote from a dog at half a mile.

Our Pixfra Sirius HD series sits at the top of our lineup with detection ranges pushing out to 3,600 meters. For law enforcement, wildlife managers, outfitters running guided hunts, and serious predator hunters working open country, that kind of reach is not a luxury — it’s a tool you lean on every night. The Chiron LRF and Taurus LRF add integrated ballistic calculators that compute bullet drop and give you an adjusted aiming point on the fly. That turns a thermal scope into a complete targeting system — rangefinder, ballistic solver, and high-resolution thermal imager all in one unit. Our Volans series takes it another direction with all-day vision capability, featuring an adjustable aperture from F1.2 to F3.0 that adapts to any lighting condition, so you carry one device from sunup to sundown instead of juggling two.
Is premium worth it for everyone? No. The higher-end thermal viewers offer so much resolution and imaging talent that unless you’re using the devices frequently, you may be paying for more capability than you need. If you hunt a couple of weekends a year and work inside 200 yards, you don’t need a 640×512 sensor with 3,600-meter detection. But if you’re a professional, a guide, or someone who logs serious hours behind a thermal optic, the difference between a $1,500 device and a $3,000 device is immediately visible in image clarity, identification range, and the overall experience of spending long nights in the field.
The right thermal device isn’t the most expensive one you can afford — it’s the one that matches your actual use case without leaving performance on the table. When someone calls and asks what kind of money they should spend, it all comes down to what they want to do. Most often the big difference in prices is going to be based on the thermal sensor resolution and image quality of the scope. When we talk about the difference between a $3,000 and $6,000 scope, it is often going to come down to the identification range of the animal. So start with honest questions: What am I using this for? How far do I need to see? How often will I use it? How bad are the conditions I’ll face?
Here’s a quick reference table to help you match your use case to a price tier:
| Gebruiksscenario | Recommended Tier | Price Range | Typical Sensor | Detectiebereik |
|---|---|---|---|---|
| First thermal / casual use | Begroting | Under $500 | 256×192 | 300–500m |
| Weekend hunting / property security | Mid-range | $500–$1,200 | 384×288 | 800–1,300m |
| Dedicated night hunting / outfitter use | Upper mid-range | $1,200–$2,000 | 384×288 or 640×512 | 1,000–1,800m |
| Professional / law enforcement / long-range | Premium | $2,000–$3,500+ | 640×512 or 1280×1024 | 1,800–3,600m |
One thing to keep in mind: if you’re a first-time buyer, you’ll probably want a handheld thermal monocular for scanning before investing in a thermal scope. It’s often smarter to spend less on the scope and budget for a monocular too, rather than putting everything into one device and having no scanning tool. At Pixfra, we built our lineup to cover this exact reality. Our monoculars, scopes, front attachments, and multispectral binoculars all share the same ≤18mK sensitivity and 12µm pixel pitch technology, so you get consistent image quality whether you’re glassing a field or looking through a scope.
And don’t overlook the cost of ownership beyond the sticker price. Battery systems matter — our Pixfra devices use standard 18650 batteries across many models, which means cheap, available replacements instead of expensive proprietary cells. Build quality matters too — a device with IP67 waterproofing and MIL-STD-810G shock resistance lasts years longer than a cheaper device you’ll replace in two seasons. The cheapest thermal device is rarely the best value. The best value is the one that does what you need, survives how you use it, and keeps working season after season. And at Pixfra, every product in our lineup is built around that idea — real features for real conditions, at a price tier that makes sense for your specific goals.
How much does a good thermal monocular cost in 2026?
In 2026, a solid entry-level thermal monocular starts around $300-$500 with a 256×192 sensor. Mid-range models with 384×288 resolution and integrated features like laser rangefinders run $800-$1,500. Premium handheld thermals with 640×512 sensors and extended detection ranges typically cost $1,500-$3,500+. Our Pixfra lineup offers devices across all three tiers, with ≤18mK NETD sensitivity as a consistent baseline.
Is it worth spending over $1,000 on a thermal device?
For hunters and outdoor professionals who work at distances beyond 300 yards or hunt multiple nights a season, yes — stepping up past $1,000 gets you meaningfully better sensor resolution, detection range, and target identification. If you only hunt a few times a year at close range, a quality device under $500 can handle the job. The question isn’t just what you can afford, but how much performance your specific use case demands.
What’s the best thermal device for the money right now?
Value depends on your use case. For short-range woodland hunting and property monitoring, a budget thermal monocular under $500 with 256×192 resolution and 50Hz refresh rate is the best bang for the buck. For all-around hunting and outdoor use, mid-range models around $800-$1,500 deliver the biggest jump in real-world performance per dollar. At Pixfra, our Arc LRF and Mile 2 series consistently hit the sweet spot between performance and price for most hunters and outdoor enthusiasts.
Why are thermal scopes more expensive than thermal monoculars?
Thermal scopes carry higher prices because they need to withstand heavy recoil, require precision zeroing systems, and often include features like ballistic calculators and integrated laser rangefinders. A quality thermal scope starts around $1,800-$3,000, while a capable monocular starts well under $500. If budget is tight, many experienced hunters recommend starting with a monocular for scanning and saving for a scope later.
Do cheaper thermal devices work in rain and fog?
That depends entirely on two specs: NETD sensitivity and IP rating. A budget device with poor NETD (above 35mK) will struggle in fog, rain, or high humidity — the image goes flat and washed out. A device with ≤18mK NETD, like our Pixfra lineup, keeps showing clear heat contrasts even in bad conditions. For weather resistance, look for IP67 waterproofing at any price point. Anything less than IP67 puts your gear at risk during real field conditions.
Buying a thermal device online can feel overwhelming—spec sheets are dense, prices jump all over the map, and everyone seems to have a different opinion. We get it. At Pixfra, we hear from first-time buyers every week who almost made costly mistakes based on bad info floating around the internet. Let’s set the record straight.
The thermal imaging market has changed fast. Thermal imaging technology changes faster than just about anything else in the hunting world—faster than rifles, scopes, or even ammo trends. What was premium two years ago now sits squarely in the mid-range. That speed of change is both exciting and confusing, and it creates a fertile ground for myths that never seem to die.

Part of the problem is how buyers shop for thermal cameras and thermal monoculars online. Most thermal customers buy online and have to go on specs, YouTube videos, and the sometimes compromised impressions of social media influencers to make buying decisions. You scroll through product pages, read conflicting Reddit threads, watch YouTube “reviews” that are really just paid promotions, and walk away more confused than when you started. Between marketing fluff and real user experiences, it’s tough to know what’s legit and what’s noise.
The truth is, buying a thermal device online isn’t any riskier than buying one at a brick-and-mortar store—as long as you know what you’re looking at. And that’s where these three myths do the most damage. They steer you toward the wrong device, or worse, they scare you away from buying altogether. Whether you’re shopping for a handheld thermal monocular, a thermal scope for night hunting, or an infrared camera for property inspection, the same myths keep popping up. So we’re going to walk through each one, tell you exactly why it’s wrong, and show you what actually matters when you’re picking the best thermal device online. Before we jump in, check out our guide on the De 6 belangrijkste functies die het beste thermische apparaat in 2026 moet hebben so you’ve got a solid baseline of what to look for.
This is probably the most widespread myth in the thermal device world, and it catches first-time buyers more than anyone else. On paper, it sounds logical: more pixels, better image, right? Not necessarily. The entire system—lens, sensor, processing algorithms, and display—has to work together. The takeaway here is simple: don’t buy a thermal scope based on resolution alone.
Here’s what most people miss. Resolution is just one piece of the puzzle. A sensor with 640×512 pixels sounds a lot better than one with 384×288 pixels. But resolution alone doesn’t tell you about thermal sensitivity, lens quality, or how the device processes the image it captures. High pixel count alone won’t help unless the sensor is sensitive enough to deliver clear contrast in real-world conditions like fog, humidity, or low temperature differences. A 640×480 sensor sounds impressive, but if it has poor thermal sensitivity (measured in NETD), the resulting image may appear washed out. That’s the part no one puts in the Instagram post.
NETD, or Noise Equivalent Temperature Difference, is where the real magic happens. It’s measured in millikelvins (mK), and it tells you how well the sensor can pick up small differences in heat. NETD stands for Noise Equivalent Temperature Difference. It measures how sensitive the thermal sensor is to tiny differences in heat, and it’s listed in millikelvins (mK). A lower NETD number means the sensor picks up finer heat differences, which translates to sharper contrast between the animal and the background. Our thermal devices at Pixfra achieve NETD values of ≤18mK, which puts them in the high-sensitivity category. That means you’re picking up heat signatures that a lesser sensor would miss completely—especially in summer conditions when the ambient temperature and the target’s heat are close together.
So what does this mean for you when shopping online? Stop sorting by resolution first. Look at the full spec picture: sensor resolution, NETD rating, pixel pitch (12µm vs. 17µm), refresh rate, and objective lens size. A well-balanced 384×288 thermal camera with elite sensitivity and a quality lens will outperform a poorly designed 640×512 device on most nights. Match the specs to your actual use case—close-range hog hunting in timber doesn’t need the same sensor as scanning open fields at 600 meters.
This one hurts wallets everywhere. The idea that you have to spend $5,000 or more to get a “real” thermal device just isn’t true anymore. It’s a myth that benefits sellers of premium-only brands and leaves first-time buyers stuck on the sidelines.
Let’s look at the real numbers. The technology keeps getting better while prices come down. What cost $10,000 a decade ago now delivers similar performance at $1,500. That’s not an exaggeration—it’s a function of how thermal sensor manufacturing has scaled up and matured. Sensor prices have dropped, production quality has risen, and brands like ours at Pixfra have put a priority on making professional-grade thermal imaging available at price points that make sense for regular hunters, homeowners, and outdoor enthusiasts.
The thermal device market in 2026 breaks into pretty clear tiers. Here’s a realistic snapshot of what you can expect at each price level:
| Price Range | Resolutie van de sensor | Typical NETD | Best For |
|---|---|---|---|
| Under $500 | 256×192 | ≤40 mK | Close-range use, beginners, property monitoring |
| $500–$2,000 | 320×240 to 384×288 | ≤25 mK | Serious hunters, mid-range detection, all-weather use |
| $2,000–$4,000 | 640×480 to 640×512 | ≤20 mK | Long-range identification, predator control |
| $4,000+ | 1280×1024 | ≤15 mK | Professional and high-end specialty use |
Mid-range options often deliver 80–90% of high-end performance at half the cost. That’s an industry-wide reality, not just a marketing claim. You don’t need the $6,000 device to get a clear image of a hog at 200 yards. For most buyers, strong 384 and 640 options remain the smarter value.

Now, that doesn’t mean you should always go cheap, either. Value and cheap aren’t the same thing. A $250 thermal monocular with a sluggish 25 Hz refresh rate, mediocre NETD sensitivity, and no companion app isn’t a value pick—it’s a compromise that will frustrate you by the third use. The sweet spot is finding a device that gives you what you need, at a price that doesn’t gut your budget, from a brand that actually builds the technology themselves. Pixfra designs and manufactures its own thermal imaging cores and sensors—we’re not just slapping labels on someone else’s hardware. That vertical integration lets us deliver specs you’d normally only see in devices costing twice as much.
This myth pops up in every thermal forum, and we understand where it comes from. Thermal devices aren’t cheap, and dropping $1,000 or more on a product you’ve never held can feel like a gamble. But here’s the thing—buying online is how the vast majority of thermal buyers shop today, and there are solid reasons why it works.
First, think about the alternative. How many local stores near you stock more than one or two thermal monoculars, let alone a full range of thermal scopes, clip-ons, and handheld imagers? There’s no universal “best” thermal—only what’s best for your situation. If your local shop carries two or three brands, your “hands-on” experience is just a limited selection of what’s actually available. Shopping online gives you access to every model, every brand, every spec comparison you need—all in one session, from your couch.
Second, the buying experience has gotten a lot better. Reputable thermal brands now offer detailed spec sheets, real-world video demos, comparison charts, and responsive customer support. At Pixfra, we publish specs down to the click value of our thermal scopes (0.9cm@100m on our Taurus LRF series), and our Pixfra Outdoor App lets you connect to your device, stream live thermal video, and update firmware. That level of transparency didn’t exist five years ago.
Third, returns and warranties protect you. Investing in thermal gear without considering warranty coverage and support infrastructure can lead to expensive problems when repairs or service become necessary. Thermal imaging sensors and electronics require specialized expertise to repair, and devices from manufacturers without established service networks may become unusable after warranty expiration. Warranty terms vary significantly. Some manufacturers offer limited one-year coverage, while others provide extended warranties or explicitly support component upgrades and repairs. When you buy from a manufacturer that stands behind its products and has an established support network, the risk drops to nearly zero. You’re not rolling the dice—you’re making an informed purchase backed by real protection.
The real risk when buying online isn’t the channel itself. It’s buying from a brand you haven’t researched. That’s where the work goes: checking who makes the sensor, reading actual user reviews (not sponsored ones), comparing specs across models, and verifying that the company has a real support infrastructure. If a brand can’t tell you their NETD rating, their sensor origin, or their warranty terms, walk away—regardless of whether you’re shopping online or in person.
Now that we’ve killed the myths, let’s talk about what really matters when you’re shopping for a thermal device online. There are a handful of specs and features that separate a solid purchase from a regrettable one.

Sensor resolution still matters—it’s just not the only thing that matters. You’ll see specs like 256×192 or 384×288—these numbers tell you how many pixels detect heat. More pixels mean clearer images and better identification at distance. But pair resolution with NETD sensitivity, and you’ve got a much clearer picture of actual performance. Our Pixfra Sirius HD series, for example, combines 1280×1024 resolution with ≤18mK sensitivity—that’s not just a sharp image; it’s a sharp image in the worst conditions.
Refresh rate is another spec that gets overlooked. The difference between 25 Hz and 50 Hz is immediately apparent when scanning for moving targets. Don’t rationalize a 25 Hz device as “good enough”—you’ll notice the limitation every time you use it. If you’re scanning for predators, tracking hogs across a field, or monitoring your property perimeter, 50 Hz should be your floor.
Battery life is a deal-breaker for field use. Undervaluing battery life. An all-night predator hunt needs 8 hours minimum. Budget accordingly. Our Pixfra devices range from roughly 4.5 hours to 15 hours depending on the model, and many use standard 18650 batteries that you can swap in the field without going back to your truck.
Detection range vs. identification range—this is a big one. Manufacturers love huge detection numbers. Hunters need usable identification distance. Detection means you can tell something is there. Identification means you are confident what it is. A product page might say 2,000 meters of detection range, but if you can only positively identify your target at 400 meters, that’s the number that actually affects your experience. Always ask about both numbers before you buy.
And finally, don’t ignore build quality and weather resistance. Skipping the IP rating check. Field use means rain. IP54 is not IP67. An IP67 rating means your device can handle temporary submersion in water. If you hunt in the Southeast, run property security in the Pacific Northwest, or just don’t want to baby your gear, IP67 is the standard you should be targeting.
We built Pixfra around one idea: give everyone access to the thermal performance that used to be locked behind military budgets and five-figure price tags. Pixfra offers a wide range of products—from thermal imaging monoculars, add-ons, and riflescopes to thermal imaging and multispectral security cameras—and their mission is to provide professional grade thermal and multispectral optics at budget friendly price points.
Established in 2015, Pixfra has developed over two hundred patented technologies and thermal imaging products for industrial temperature measurement, biological temperature measurement, natural ecology, new energy, carbon neutrality, perimeter prevention, outdoor sports, and consumer electronics. We’re not a brand that repackages someone else’s sensors and charges a markup. We design our own thermal cores, build our own image processing algorithms, and test everything in real field conditions.
When you buy from us online, you’re buying directly from the people who designed and manufactured the technology. That cuts out middlemen, keeps prices honest, and means our support team can actually answer your questions about the product—not just read from a script. Whether you need a compact thermal monocular like the Mile 2 for close-range scouting or a 1280-class flagship like the Sirius HD for long-range observation, we’ve got options that match your actual needs—not just your budget or your ego.
Is it safe to buy a thermal imaging camera online?
Yes, absolutely. Buying a thermal imaging camera online is safe as long as you’re purchasing from a reputable manufacturer or authorized dealer. Look for brands that publish full spec sheets, offer warranty protection, and have responsive customer support. Buying from the manufacturer’s own website (like Pixfra.com) is often the best route because you get direct access to support, firmware updates, and product guarantees.
Does a higher resolution always mean better thermal image quality?
No. Resolution is one factor, but thermal sensitivity (NETD), lens quality, pixel pitch, and image processing all play a role. A 384×288 sensor with ≤20 mK NETD and a quality germanium lens can produce sharper, more usable images than a 640×512 sensor with poor sensitivity. Always look at the full spec picture, not just the pixel count.
What NETD value should I look for in a thermal device?
For most outdoor and hunting use, a NETD of ≤25 mK is solid. For demanding conditions like high humidity, fog, or summer heat where ambient and target temperatures are close, aim for ≤18 mK or lower. Pixfra’s lineup hits ≤18 mK across many of our models, putting them in the high-sensitivity category without the premium price tag.
How much should I spend on my first thermal monocular?
For most first-time buyers, the $500–$2,000 range offers the best balance of performance and value. You’ll get usable sensor resolution, decent NETD ratings, features like Wi-Fi and video recording, and enough battery life for a full night out. Going below $300 usually means real trade-offs in refresh rate, sensitivity, and build quality that you’ll notice quickly.
Can thermal devices work during the day?
Yes. Thermal imaging is unaffected by visible light, making it effective 24/7. Unlike night vision, which relies on amplifying ambient light, thermal cameras detect heat signatures. That means they work just as well at noon as they do at midnight—in darkness, fog, haze, or bright sunlight. Some Pixfra models, like the Volans Series, even feature adjustable apertures specifically designed to optimize daytime and nighttime performance.
De resolutie is een van de eerste specificaties die je op elk warmtebeeldapparaat tegenkomt — en daar is een goede reden voor. Het bepaalt namelijk alles: van hoe scherp je beeld eruitziet tot hoe ver je een coyote van een hekpaal kunt onderscheiden. Maar niet alle resolutiecijfers betekenen wat je denkt dat ze betekenen. We zijn hier bij Pixfra om alles duidelijk uit te leggen, zodat je de juiste thermische monoculair, richtkijker of voorzetlens kunt kiezen zonder je te laten misleiden door indrukwekkende cijfers die in de praktijk niets opleveren.
Als we het bij een thermisch apparaat over resolutie hebben, bedoelen we het aantal pixels op de infraroodsensor zelf — de detectorarray in het apparaat die warmtesignaturen oppikt en deze omzet in een beeld dat je daadwerkelijk kunt zien. Dit wordt uitgedrukt in twee getallen, zoals 256×192, 384×288 of 640×512. Deze getallen geven aan hoeveel kleine warmtedetectie-elementen er op de sensor zitten. De resolutie van een thermische sensor wordt uitgedrukt als twee reeksen getallen (verticaal × horizontaal), bijvoorbeeld 640×512px. Om de resolutie te bepalen, moet je kijken naar het totale aantal pixels dat de sensor biedt — een sensor van 640×512 levert bijvoorbeeld in totaal 327.680 pixels op.

Zie elke pixel als een minuscule thermometer. Elke pixel registreert zijn eigen temperatuurwaarde, en het apparaat voegt al die waarden samen tot het warmtebeeld dat je door het oculair ziet. “Pixels zijn de meetpunten voor thermische metingen… Meer meetpunten betekenen dat er meer informatie beschikbaar is voor een nauwkeurige thermische interpretatie. Meer pixels betekenen ook een hogere visuele resolutie in het warmtebeeld.” Dus wanneer je overstapt van een 256×192-sensor (49.152 pixels) naar een 640×512-sensor (327.680 pixels), krijg je niet alleen “een beter beeld” – je krijgt meer dan zes keer zoveel gegevenspunten die dat beeld voeden. Dat is een enorme sprong in de hoeveelheid thermische informatie die je apparaat in één enkel beeld kan verzamelen.
Hier is iets waar veel kopers over struikelen: de resolutie van de sensor en de schermresolutie zijn niet hetzelfde. Het is gemakkelijk om de resolutie van de sensor te verwarren met de schermresolutie of de opnameresolutie. De schermresolutie is de resolutie van het ingebouwde scherm waar je doorheen kijkt, en die is vaak hoger dan de resolutie van de sensor. Een apparaat kan een prachtig OLED-scherm van 1280×960 hebben, maar als de sensor erachter slechts 256×192 is, zie je nog steeds een warmtebeeld van 256×192 dat over dat scherm is uitgerekt. De sensor is de bottleneck. Controleer altijd eerst de specificaties van de sensor.
Bij Pixfra combineren we onze sensoren met hoge resolutie met 12 μm pixelafstand in al onze productlijnen — van de Mile 2-serie voor dagelijks gebruik tot de Sirius HD-serie voor veeleisende professionele toepassingen — zodat u scherpe beelden met een hoog contrast krijgt, ongeacht welk model u kiest. Bekijk, voordat u verdergaat, even de De 6 belangrijkste functies die het beste thermische apparaat in 2026 moet hebben om te zien hoe de resolutie past in het bredere plaatje van wat ervoor zorgt dat een thermisch apparaat daadwerkelijk goed presteert.
Hier komt de resolutie pas echt tot zijn recht: het detectiebereik en de identificatie van doelen. Een sensor met een hogere resolutie geeft je niet alleen een mooier beeld — je kunt er ook verder mee kijken en sneller vaststellen wat je ziet. Een hogere resolutie betekent dat er meer observatie- en temperatuurmeetpunten zijn, waardoor kleinere doelen kunnen worden waargenomen en gemeten en objecten op grotere afstanden kunnen worden waargenomen.[4]
Laten we het eens in jachttermen uitleggen. Je speurt een veld af op 400 meter afstand met een sensor van 256×192. Je ziet een warme vlek. Dat kan een wild zwijn zijn, een coyote, of een boomstronk die de hele dag in de zon heeft gelegen. Met een 640×512-sensor bij dezelfde vergroting en lens bekijk je diezelfde vlek met meer dan zes keer zoveel thermische gegevenspunten. Je ziet poten, de vorm van een kop, beweging — je kunt daadwerkelijk vaststellen wat je ziet zonder dichterbij te hoeven komen en het risico te lopen het dier te laten schrikken.
Apparaten met een sensor van 384×288 pixels zijn over het algemeen het populairst op de markt, omdat ze goedkoper zijn dan een thermisch apparaat met een resolutie van 640×512, maar toch een detectiebereik tot 1.800 meter bieden, afhankelijk van de lensgrootte. Bovendien zorgt het hogere aantal pixels ervoor dat de zoomfunctie effectiever werkt.[5] Dat is voor veel jagers echt een ideale combinatie, en dat is precies de reden waarom we de 384×288-configuratie in verschillende van onze middenklasse-series aanbieden.
Ook hier speelt de digitale zoom een grote rol, en juist hier komen de verschillen in resolutie echt tot uiting. Het echte voordeel van sensoren met een hogere resolutie is de mogelijkheid om digitaal in te zoomen en toch een hogere mate van scherpte en een groter gezichtsveld te behouden. Aangezien de zoom digitaal is en niet optisch, halveer je elke keer dat je de zoom verdubbelt (bijvoorbeeld van 1x naar 2x) zowel het aantal beschikbare pixels als het gezichtsveld. Dus bij een 256×192-sensor en 2x digitale zoom blijft er in feite een beeld van 128×96 over – en dat ziet er merkbaar korrelig uit. Bij een 640×512-sensor en 2x zoom werk je nog steeds met 320×256, wat ruim voldoende is. Als je van plan bent in te zoomen om doelen op afstand te identificeren, biedt een hogere basisresolutie je veel meer speelruimte voordat het beeld aan kwaliteit inboet.
Ons Pixfra-assortiment bestrijkt detectiebereiken van ongeveer 500 meter bij instapmodellen tot wel 3.600 meter bij onze premium Sirius HD-serie. Maar detectiebereik en identificatiebereik zijn twee verschillende waarden — het identificatiebereik, waarbij je daadwerkelijk kunt vaststellen wat je ziet, is altijd korter. Voor de meeste recreatieve jagers en outdoorliefhebbers die binnen een bereik van 300–600 meter actief zijn, bieden onze modellen uit het middensegment, zoals de Arc LRF- en Mile 2-serie, de ideale balans tussen resolutie, bereik en prijs.
Niet elke jager, natuurliefhebber of outdoorliefhebber heeft de hoogste resolutie nodig die er te koop is. De juiste resolutie hangt af van hoe je je apparaat gebruikt, hoe ver je moet kunnen kijken en hoeveel je bereid bent te betalen. Hieronder vind je een overzicht van de meest voorkomende sensorconfiguraties en waar elke configuratie het best tot zijn recht komt.

256×192 (49.152 pixels) — Dit is de instapvariant voor echte warmtebeeldtechniek. Apparaten met deze configuratie kunnen alleen op kortere afstanden worden gebruikt en bieden geen mogelijkheid om het beeld digitaal te vergroten zonder dat de scherpte aanzienlijk afneemt. Voor gebruik op korte afstand — bijvoorbeeld om je achtertuin te verkennen op zoek naar dieren, snelle scans van je terrein ’s nachts of betaalbare observatie van wilde dieren binnen 200 meter — voldoet het prima. Als je net begint met warmtebeeldtechnologie en de kosten laag wilt houden, is dit niveau een goede keuze.
384×288 (110.592 pixels) — Nu wordt het serieus. Bij Pixfra beschouwen we dit als de standaardresolutie voor de meeste jacht- en outdoorsituaties. Je krijgt voldoende pixels voor een zuivere digitale zoom, een betrouwbaar identificatiebereik en voldoende detail om dieren uit struikgewas en tussen de bomen te onderscheiden op realistische jachtafstanden. De resolutie op dit niveau levert scherpere beelden op voor het identificeren van doelen op grotere afstanden en maakt het gemakkelijker om dieren te onderscheiden van de rommelige achtergrond, vooral in dicht gebladerte.
640×512 (327.680 pixels) — De topklasse voor thermische apparatuur voor buitengebruik. Deze configuratie biedt doorgaans de hoogste kwaliteit thermische sensoren die op de markt verkrijgbaar zijn en levert thermische beelden in hoge resolutie met superieure detectie, herkenning en identificatie op grote afstand. Als u grote gebieden scant, op grote afstanden werkt of een zo scherp mogelijk beeld nodig hebt voor snel bewegende doelen, dan is dit de juiste keuze voor u. Onze Sirius HD-serie werkt met deze resolutie, en het verschil in beeldkwaliteit is al vanaf de eerste keer dat u door het oculair kijkt duidelijk zichtbaar.
Hieronder vind je een beknopte vergelijkingstabel om je te helpen de juiste resolutie te kiezen die bij je behoeften past:
| Resolutie van de sensor | Totaal aantal pixels | Beste toepassingsvoorbeeld | Typisch detectiebereik | Kwaliteit van de digitale zoom |
|---|---|---|---|---|
| 256×192 | 49,152 | Budgetverkenning, verkenning op korte termijn | Tot 500 m | Beperkt — gaat snel achteruit |
| 384×288 | 110,592 | Jagen, het observeren van wilde dieren, beveiliging van eigendommen | Tot 1.800 m | Goed — bruikbaar bij 2x–4x vergroting |
| 640×512 | 327,680 | Jacht op grote afstand, wetshandhaving, professioneel gebruik | Tot 3.600 m | Uitstekend — scherp, zelfs bij 4x+ |
We hebben onze productlijnen op basis van deze niveaus ontworpen. De Mile 2-serie is geschikt voor de dagelijkse jacht en biedt een goede balans tussen resolutie en draagbaarheid. De Arc LRF is voorzien van een ingebouwde laserafstandsmeter voor schieten met zekerheid over de afstand. En de Sirius HD-serie verlegt de grenzen van resolutie en detectiebereik voor kopers die elke pixel nodig hebben die ze kunnen krijgen.
Resolutie gaat niet alleen over het aantal pixels op de sensor, maar ook over hoe groot elke pixel is. Die maat wordt ‘pixelafstand’ genoemd en speelt een directe rol in de scherpte en compactheid van je thermische apparaat. De pixelafstand is de afstand tussen de middelpunten van twee aangrenzende pixels op de sensor, gemeten in micrometer (bijv. 12 µm). Apparaten met een kleinere pixelafstand bieden meer detail omdat ze een hogere pixeldichtheid op de sensor hebben, wat betekent dat het apparaat meer temperatuurmetingen kan uitvoeren.
De twee pixelafstanden die je in 2026 op de meeste draagbare warmtebeeldapparaten zult zien, zijn 12 µm en 17 µm. Een kleinere pixelafstand, zoals 12 µm, betekent dat de pixels dichter bij elkaar liggen, wat beelden met een hogere resolutie en een betere detectie van kleinere objecten mogelijk maakt. Een grotere pixelafstand, zoals 17 µm, betekent dat er minder pixels per oppervlakte-eenheid zijn, wat resulteert in beelden met een lagere resolutie, maar mogelijk een betere gevoeligheid voor warmtestraling.
Dit is de praktische conclusie: een kleinere pixelafstand betekent kleinere sensoren die minder fysieke ruimte innemen — waardoor compactere warmtebeeldkijkers mogelijk worden of hogere resoluties kunnen worden bereikt binnen dezelfde sensorafmetingen. Bij dezelfde fysieke sensorgrootte kun je aanzienlijk meer 12 µm-pixels kwijt dan 17 µm-pixels. Daarom hebben moderne 12 µm-sensoren compacte, thermische monoculairs met hoge resolutie mogelijk gemaakt tegen prijzen die een paar jaar geleden nog ondenkbaar waren.
Bij warmtebeeldapparaten met een sensor met kleinere pixels kunnen hetzelfde detectiebereik, dezelfde vergroting en hetzelfde gezichtsveld worden bereikt met lenzen met een kortere brandpuntsafstand. Kleinere lenzen zorgen voor een kleiner en lichter apparaat in zijn geheel. Dat is een groot voordeel voor iedereen die apparatuur meeneemt op jachttochten van meerdere uren of tochten door de wildernis, waar elke ounce telt.
Bij Pixfra hanteren we in al onze productlijnen een pixelafstand van 12 μm. Dat is een bewuste keuze. Hierdoor kunnen we resoluties van 384×288 en 640×512 aanbieden in behuizingen die compact en geschikt voor gebruik in het veld blijven, zonder in te boeten aan detectiebereik of beeldkwaliteit. Onze Draco-serie is bijvoorbeeld ontworpen met een lichtgewicht constructie, speciaal voor jagers die multifunctionele prestaties nodig hebben zonder dat dit ten koste gaat van de draagbaarheid — en de pixelafstand van 12 µm heeft hier een grote rol in gespeeld.
We zullen eerlijk zijn: de resolutie is erg belangrijk, maar het is niet het enige dat bepaalt of een warmtebeeldcamera goed presteert. Twee warmtebeeldcamera’s kunnen identieke specificaties hebben – dezelfde resolutie, pixelafstand en NETD – en toch merkbaar verschillende beelden weergeven. Dat komt omdat de beeldkwaliteit afhangt van het gehele beeldvormingssysteem, niet alleen van de sensor. Als u een apparaat met een hoge resolutie koopt dat een slechte thermische gevoeligheid of een trage verversingssnelheid heeft, zult u teleurgesteld zijn.

NETD (geluids-equivalent temperatuurverschil) is de specificatie die aangeeft hoe gevoelig je sensor is voor kleine temperatuurverschillen. Deze wordt gemeten in millikelvin (mK), en hoe lager de waarde, hoe beter. Het belangrijkste kenmerk dat de thermische resolutie van een warmtebeeldcamera beïnvloedt, is de NETD van de sensor. Deze wordt gemeten in millikelvin en geeft het kleinste temperatuurverschil weer dat de sensor kan waarnemen. Hoe lager de NETD-waarde, hoe hoger de gevoeligheid van de sensor. Een apparaat met een verbluffende resolutie maar een slechte NETD zal op warme nachten, wanneer alles op vergelijkbare niveaus warmte uitstraalt, een scherp maar vlak en vaal beeld weergeven. Onze Pixfra-apparaten bereiken NETD-waarden van ≤18 mK, waarmee ze tot de top behoren wat betreft gevoeligheid voor warmtebeeldapparatuur van jachtkwaliteit.
Vernieuwingsfrequentie is de andere specificatie die een directe invloed heeft op je gebruikerservaring. Een verversingsfrequentie van 50 Hz is de minimumnorm voor elk thermisch apparaat dat in 2026 de moeite waard is om aan te schaffen. Deze frequentie zorgt voor vloeiende beelden, zodat je bewegende doelen — rennende wilde zwijnen, dravende coyotes — kunt volgen zonder wazigheid of haperingen. De beeldsnelheid bepaalt hoe vloeiend het beeld eruitziet wanneer je de camera beweegt. Professionele modellen met een verversingsfrequentie van 25–60 Hz bieden vloeiende, realtime beelden, terwijl goedkopere modellen met 9 Hz een merkbare vertraging vertonen. Dit is van belang bij het scannen van grote gebieden of het volgen van bewegende warmtebronnen.
De beeldkwaliteit van een thermische monoculair hangt af van de balans tussen de resolutie van de sensor, de pixelafstand (µm) en de NETD-gevoeligheid. Een hogere resolutie zorgt voor meer detail, een kleinere pixelafstand verhoogt de scherpte en een lagere NETD verbetert het contrast bij slecht zicht. De beste prestaties worden bereikt door alle drie deze factoren te optimaliseren.
Dat is precies hoe we bij Pixfra productontwerp benaderen. We jagen niet alleen op resolutiecijfers — we zorgen voor een evenwicht tussen resolutie en een NETD van ≤18 mK, een pixelafstand van 12 µm en hoge verversingsfrequenties bij elk apparaat in ons assortiment. Het is het systeem dat het beeld bepaalt, niet één afzonderlijke specificatie. Dat is wat het verschil maakt tussen een apparaat dat er op papier goed uitziet en een apparaat dat daadwerkelijk presteert om 2 uur ’s nachts in een mistige jachthut.
Het kiezen van de juiste resolutie komt neer op één simpele vraag: wat ga je eigenlijk met je warmtebeeldcamera doen? Het heeft geen zin om te betalen voor 640×512 als je vooral je perceelgrens op 100 meter afstand in de gaten houdt. En het heeft geen zin om geld te besparen op 256×192 als je op roofdieren jaagt op meer dan 400 meter afstand en moet kunnen zien waarop je schiet.

Voor verkenning op korte afstand, informele observatie van wilde dieren en eenvoudige controles van je terrein houdt een sensor van 256×192 de prijs laag en biedt toch functionele warmtebeeldtechniek voor werkzaamheden van dichtbij. Als je voor het eerst een warmtebeeldcamera aanschaft en een beperkt budget hebt, is dit een prima manier om te beginnen.
Voor de meeste jagers, natuurliefhebbers en outdoorliefhebbers is 384×288 de resolutie die wij aanbevelen. Deze resolutie biedt voldoende pixels voor scherpe beelden op reële jachtafstanden, maakt bruikbare digitale zoom mogelijk en biedt een goede balans tussen prijs en prestaties. Het is de resolutie die wordt gebruikt in verschillende van onze populairste modellen, waaronder de Mile 2-serie en de Arc LRF.
Voor detectie op grote afstand, professioneel gebruik of voor iedereen die onder de zwaarste omstandigheden een zo scherp mogelijk beeld wil, is 640×512 de juiste keuze. Onze Sirius HD-serie behoort tot deze klasse en is ontworpen voor mensen die velden op meer dan 1.000 meter afstand moeten scannen en toch precies moeten kunnen zien wat ze zien.
Tot slot nog een belangrijk punt om in gedachten te houden: resolutie komt pas optimaal tot zijn recht als deze wordt ondersteund door de juiste technische specificaties. Een 640×512-sensor met een slechte NETD-gevoeligheid, een lage verversingssnelheid of een slechte lens zal steevast minder goed presteren dan een goed afgestemd 384×288-systeem. Bij Pixfra bouwen we elke thermische monoculair, kijker en frontbevestiging als een compleet beeldvormingssysteem — resolutie, pixelafstand, NETD, optiek en verwerking werken allemaal samen. Zo krijg je een thermisch apparaat dat daadwerkelijk presteert in de praktijk, en niet alleen op papier.
Is een resolutie van 384×288 goed genoeg om te jagen?
Voor de meeste jachtsituaties is 384×288 ruimschoots voldoende — het is niet voor niets de populairste resolutieklasse op de markt. Het biedt gedetailleerde beelden op afstanden tussen de 200 en 600 meter, ondersteunt een scherpe digitale zoom tot 4x en helpt je het verschil te zien tussen een doelwit en ruis in de achtergrond. Tenzij je op grote afstanden van meer dan 800 meter jaagt of pixelprecieze identificatie nodig hebt op extreme afstanden, is 384×288 de ideale balans tussen prestaties en prijs-kwaliteitverhouding.
Zorgt een hogere resolutie ervoor dat de batterij van een apparaat met actieve koeling sneller leegraakt?
Sensoren met een hogere resolutie verwerken inderdaad meer gegevens, waardoor ze meer stroom verbruiken. Maar in de praktijk is het verschil in batterijduur tussen een sensor van 384×288 en een van 640×512 kleiner dan de meeste mensen verwachten. De grootste belasting voor de batterij komt van de schermhelderheid, de verversingssnelheid, het streamen via wifi en koud weer. Bij Pixfra hebben onze apparaten een batterijduur van ongeveer 4,5 tot 15 uur, afhankelijk van het model, en veel modellen maken gebruik van verwisselbare 18650-batterijen — dus zelfs als een model met een hogere resolutie iets minder lang meegaat, kun je binnen enkele seconden een nieuwe batterij plaatsen.
Kan digitale zoom een hogere sensorresolutie vervangen?
Nee. Digitale zoom vergroot bestaande pixels — het creëert geen nieuwe details. Elke keer dat je de digitale zoom verdubbelt (bijvoorbeeld van 1x naar 2x), halveer je zowel het aantal pixels als het beschikbare gezichtsveld. Als je dus begint met een hogere basisresolutie, heb je veel meer ruimte om in te zoomen voordat het beeld korrelig wordt. Als je van plan bent vaak in te zoomen, investeer dan in een hogere sensorresolutie in plaats van te vertrouwen op digitale vergroting om het verschil te overbruggen.
Wat is in 2026 de beste resolutie voor een thermische monoculair?
Dat hangt af van je gebruiksdoel en budget. Voor algemene jacht- en outdoortoepassingen biedt 384×288 met een pixelafstand van 12 µm de beste balans tussen beeldscherpte, detectiebereik en prijs. Voor professionele toepassingen of toepassingen op grote afstand levert 640×512 het scherpste beeld met de beste zoomkwaliteit. Wat ooit een resolutie was die alleen in het topsegment te vinden was (640×512), is nu ook in het middensegment toegankelijker geworden, waardoor u meer waar voor uw geld krijgt dan ooit tevoren.
Heeft de resolutie invloed op het bereik van een thermisch detectieapparaat?
Ja, maar niet op zichzelf. De belangrijkste factoren die van invloed zijn op de detectieafstand zijn onder meer de grootte van het doel, het temperatuurverschil, de resolutie van de sensor, de brandpuntsafstand van de lens en nog meer. Een sensor met een hogere resolutie legt op afstand meer details vast, waardoor je identificatiebereik wordt vergroot — het punt waarop je daadwerkelijk kunt onderscheiden wat een warmtesignatuur is. Maar ook de kwaliteit van de lens en de NETD-gevoeligheid spelen een grote rol. Daarom ontwerpen we bij Pixfra het volledige optische systeem als één geheel, zodat elke specificatie de volgende ondersteunt.
De markt voor thermische apparatuur ziet er in 2026 totaal anders uit dan zelfs twee jaar geleden. De sensortechnologie heeft een enorme sprong voorwaarts gemaakt, de prijzen zijn gedaald en de functies die je tegenwoordig kunt krijgen, waren een paar seizoenen geleden nog voorbehouden aan het topsegment. Maar met zoveel keuzemogelijkheden, hoe weet je dan wat er echt toe doet? Wij zijn hier bij Pixfra om door alle ruis heen te prikken en je de zes belangrijkste functies te laten zien die je nodig hebt in het beste warmtebeeldapparaat van dit jaar.
Of je nu een jager bent die ’s nachts op wilde zwijnen jaagt, een outdoorliefhebber die paden in de wildernis verkent, of een natuurliefhebber die nachtdieren observeert zonder ze te storen: je warmtebeeldapparaat is slechts zo goed als zijn functies. En niet alle functies zijn even goed. Sommige specificaties zien er op papier indrukwekkend uit, maar betekenen in de praktijk niets. Andere lijken onbeduidend, maar kunnen je ervaring om 2 uur ’s nachts in een jachthut maken of breken.

De markt voor thermische monoculairs ziet er in 2026 aanzienlijk anders uit dan zelfs twee jaar geleden, met drie ontwikkelingen die de verwachtingen van kopers in elke prijsklasse ingrijpend veranderen — waaronder hogere sensorresoluties tegen lagere prijzen, waarbij wat ooit een premiumspecificatie was (640×512) nu de norm in het middensegment is geworden. Die verschuiving is geweldig nieuws voor u, maar het betekent ook dat u bewuster moet nadenken over wat u koopt. Een lager prijskaartje betekent niet altijd een betere koop, en meer uitgeven levert niet altijd de functies op die u daadwerkelijk nodig hebt.
Bij Pixfra ontwikkelen we warmtebeeldmonoculairs, warmtebeeldkijkers, warmtebeeldvoorzetstukken en multispectrale verrekijkers — allemaal ontworpen voor echte omstandigheden in de buitenlucht. Op basis van wat we hebben geleerd tijdens jarenlange ontwikkeling van onze eigen warmtedetectietechnologie, hebben we de zes kenmerken op een rijtje gezet die het verschil maken tussen een geweldig thermisch apparaat en een apparaat dat je al bij je derde uitstapje zal frustreren. Als je ook meer uit je bestaande uitrusting wilt halen, bekijk dan de de beste accessoires om de prestaties van je warmtebeeldkijker te verbeteren voor een aantal praktische extra's die in de praktijk echt een verschil maken.
Als er één specificatie is die bepaalt hoe goed een warmtebeeldcamera presteert, dan is het wel de NETD — Noise Equivalent Temperature Difference. Dit getal, gemeten in millikelvin (mK), geeft aan wat het kleinste temperatuurverschil is dat de sensor kan waarnemen. Een lagere NETD-waarde geeft over het algemeen aan dat het apparaat kleinere temperatuurverschillen kan detecteren, wat resulteert in een scherper en gedetailleerder beeld. Bekijk het eens zo: op een warme zomernacht, wanneer de grond, de bomen en de lucht allemaal ongeveer evenveel warmte uitstralen, levert een apparaat met een slechte NETD een vaag, vlak beeld op. Een apparaat met een sterke NETD — bijvoorbeeld ≤18 mK, zoals onze Pixfra-thermische apparaten — toont u scherpe contrasten tussen een dier en de achtergrond, zelfs onder uitdagende omstandigheden zoals mist, regen of vochtigheid.
De NETD geeft aan hoe goed je thermische monoculair kleine warmteveranderingen kan waarnemen. Lagere NETD-waarden betekenen scherpere beelden. In 2026 hebben de beste modellen een NETD van minder dan 15 mK, waardoor je minuscule warmteveranderingen kunt waarnemen. Ook de pixelafstand is van belang: een kleinere pixelafstand, zoals 12 µm, zorgt voor scherpere beelden en helpt je om objecten beter te herkennen. Onze apparaten bij Pixfra behalen NETD-waarden van ≤18 mK, waarmee ze tot de top behoren wat betreft gevoeligheid voor thermische optiek voor de jacht. Dankzij die gevoeligheid hoeft u niet met samengeknepen ogen naar vage vormen te turen — u ziet scherpe contouren, zelfs wanneer de omstandigheden slecht worden.
Dan is er nog de resolutie van de sensor. Dit is de andere helft van de vergelijking voor beeldkwaliteit. De resolutie wordt uitgedrukt als het aantal pixels op de thermische sensor — veelvoorkomende opties zijn onder meer 256×192, 384×288 en 640×512. De resolutie vormt het hart van elke warmtebeeldkijker — deze bepaalt hoe scherp en gedetailleerd uw beeld zal zijn. Lagere resoluties zoals 256×192 zijn ideaal voor budgetmodellen en de jacht op korte afstand, terwijl 384×288 of 640×512 scherpere beelden bieden voor het identificeren van doelen op grotere afstanden. Vizieren met een hogere resolutie maken het gemakkelijker om onderscheid te maken tussen dieren en ruis in de achtergrond, vooral in dicht gebladerte. Maar resolutie is niet alles; factoren zoals de gevoeligheid van de sensor en de verversingssnelheid spelen ook een grote rol in de algehele prestaties. Bij Pixfra combineren we onze sensoren met hoge resolutie met 12μm-pixelafstandtechnologie in al onze productlijnen — van de Mile 2-serie voor dagelijks gebruik tot de Sirius HD-serie voor veeleisende professionele toepassingen — zodat u scherpe beelden met een hoog contrast krijgt, ongeacht welk model u kiest.
Het detectiebereik is een van de eerste specificaties waar mensen naar kijken, en dat is niet voor niets. Het geeft aan hoe ver het apparaat een warmtesignaal kan detecteren. Maar hier is een detail waar veel beginnende kopers over struikelen: het detectiebereik en het identificatiebereik zijn verschillende waarden — het identificatiebereik, waarbij je kunt vaststellen wat je ziet, is altijd korter. Een apparaat kan weliswaar beweren dat het een warmtebron op 1.500 meter kan detecteren, maar dat betekent niet dat je op die afstand kunt zien of het een hert, een coyote of een boomstronk is. Voor jagers is het identificatiebereik wat echt telt. Vraag altijd naar beide waarden voordat je tot aankoop overgaat.

Ons Pixfra-assortiment bestrijkt een breed spectrum aan detectiebereiken. Instapmodellen beginnen bij ongeveer 500 meter, terwijl onze premium Sirius HD-serie een bereik heeft tot 3.600 meter. Dankzij dit bereik kunnen wetshandhavers, natuurbeheerders en serieuze jagers enorme gebieden scannen zonder ook maar een stap te zetten. Voor de meeste recreatieve jagers en outdoorliefhebbers die binnen een bereik van 300 tot 600 meter actief zijn, bieden onze modellen uit het middensegment, zoals de Arc LRF- en Mile 2-serie, de ideale balans tussen prestaties en prijs.
Laten we het nu eens hebben over laserafstandsmeters (LRF). Voor jagers die “s nachts schoten lossen op afstanden van meer dan 150 yards, zorgt een ingebouwde LRF ervoor dat je veel zekerder bent van je schot en heb je geen apart afstandsmeterapparaat meer nodig. Met een geïntegreerde LRF weet u met één druk op de knop de exacte afstand tot uw doel – u hoeft in het donker niet meer naar een apart apparaat te zoeken. Onze Pixfra-modellen met ”LRF’ in de naam, zoals de Arc LRF, Chiron LRF en Taurus LRF, zijn voorzien van geïntegreerde laserafstandsmeters met een bereik van 1.000 meter. In combinatie met de ingebouwde ballistische rekenmodules in modellen als de Chiron LRF en Taurus LRF beschikt u over een systeem dat de kogelval berekent en u direct een aangepast richtpunt geeft. Dat is geen gimmick — het is het verschil tussen een zuiver, ethisch verantwoord schot en een misser.
Hier is een functie die veel te weinig aandacht krijgt, totdat je al drie uur aan het jagen bent en je scherm plotseling donker wordt. Warmtebeeldapparaten verbruiken snel stroom, vooral bij hogere verversingsfrequenties en helderheid. Kies voor een apparaat dat minstens 8 uur ononderbroken meegaat. Verwisselbare batterijen of externe accu's kunnen tijdens lange jachttochten van onschatbare waarde zijn. De levensduur van de batterij is rechtstreeks bepalend voor hoe bruikbaar je warmtebeeldapparaat daadwerkelijk is in het veld. Een apparaat met een ongelooflijke beeldkwaliteit en een batterij die maar twee uur meegaat, is tegen middernacht in feite niet meer dan een erg dure presse-papier.
De batterijduur van onze Pixfra-apparaten varieert van ongeveer 4,5 uur tot 15 uur, afhankelijk van het model en de gebruiksomstandigheden. Veel van onze modellen maken gebruik van standaard 18650-batterijen die je binnen enkele seconden kunt verwisselen. Dat is een bewuste ontwerpkeuze. Eigen ingebouwde batterijen besparen misschien een paar gram aan gewicht, maar als je midden in een jacht zit en de batterij leegraakt, is de mogelijkheid om een nieuwe 18650 uit je zak te halen goud waard. En hier is een tip van professionals uit onze eigen praktijkervaring: koud weer kan de batterijprestaties met 30-50% verminderen. Neem altijd reservebatterijen mee in een binnenzak, waar je lichaamswarmte ze warm houdt.
In de onderstaande tabel zie je in één oogopslag hoe de batterijduur zich bij verschillende gebruikssituaties verhoudt en wat je als streefwaarde zou moeten hanteren:
| Gebruiksscenario | Vereiste minimale batterijduur | Aanbevolen batterijtype |
|---|---|---|
| Korte avondjachten (2-3 uur) | 4-5 uur | Intern oplaadbaar |
| De hele nacht door bestrijding van roofdieren | 8-10 uur | Verwisselbare 18650 |
| Meerdaagse tochten door de wildernis | 10-15 uur | Verwisselbaar + reserveonderdelen |
| Beveiligingsrondes bij onroerend goed | 6-8 uur | Oplaadbaar met snellaadfunctie |
| Wildobservatiesessies | 5-7 uur | Beide varianten zijn mogelijk |
Kies het batterijsysteem dat het beste bij je verwachte gebruik past, dan kom je nooit in het donker te zitten met een leeg apparaat.
Je warmtebeeldapparaat is outdooruitrusting. Punt uit. Het zal worden blootgesteld aan regen, op rotsen vallen, in een rugzak worden gegooid en worden gebruikt bij temperaturen die variëren van verzengende zomernachten tot ijskoude winterochtenden. Als het dat niet aankan, maakt het niet uit hoe mooi de beelden zijn.

Veldapparatuur moet bestand zijn tegen vallen, regen en stof. Apparaten met een behuizing met IP67-classificatie kunnen 30 minuten lang onderdompeling in water tot een diepte van één meter weerstaan. De antislip rubberen buitenkant zorgt voor een stevige grip, zelfs met handschoenen aan of wanneer het apparaat nat is. De levensduur van de batterij is een andere cruciale factor. Let op de IP-classificatie — IP67 is in 2026 de gouden standaard voor thermische apparaten. Dat betekent dat het apparaat volledig stofdicht is en onderdompeling in water kan doorstaan. Sommige goedkopere apparaten hebben slechts een IP54-classificatie, waardoor ze wel tegen spatten bestand zijn, maar een onderdompeling niet overleven. Als je in de regen jaagt, beekjes oversteekt of in stoffige omgevingen werkt, is IP67 een absolute must.
Bij Pixfra bouwen we onze apparaten voor dezelfde omstandigheden waarin we ze gebruiken. Onze warmtebeeldkijkers zijn bestand tegen hevige terugslag, onze monoculairs overleven valpartijen en de materialen van onze behuizingen zijn bestand tegen corrosie, zelfs na jarenlang gebruik. Let op MIL-STD-810G- of IP67/IP68-certificeringen, schokbestendige behuizingen en waterdichte bedieningselementen. Kies modellen met afgedichte optiek, anticondensventilatieopeningen en corrosiebestendige afwerkingen. Zorg ervoor dat batterijcompartimenten goed afgesloten blijven in natte of modderige omstandigheden, en controleer of de afdichtingen ter plaatse goed te onderhouden zijn. Als u uw uitrusting blootstelt aan ruw terrein, geef dan de voorkeur aan duurzaamheid boven extra functies. Ook het gewicht speelt hierbij een rol — een warmtebeeldapparaat dat te zwaar is, zal u tijdens lange sessies vermoeien, wat uw richtvermogen en uw geduld beïnvloedt. Onze Draco-serie is bijvoorbeeld ontworpen met een lichtgewicht constructie, speciaal voor jagers die multifunctionele prestaties nodig hebben zonder dat het apparaat te omvangrijk is.
Ergonomie hangt ook samen met duurzaamheid. Koude handen in handschoenen om 2 uur ’s nachts in een jachthut gaan niet goed samen met ingewikkelde menu’s of lastige knoppen. Intuïtieve knopindelingen, snelle opstarttijden en goed doordachte bijbehorende apps die je zonder handleiding kunt bedienen, maken het verschil tussen apparaten die echt bruikbaar zijn en apparaten die frustrerend zijn. Als je je warmtebeeldapparaat niet met één hand in het donker kunt bedienen terwijl je handschoenen draagt, is het ontwerp mislukt. We houden de bediening in het hele Pixfra-assortiment eenvoudig en toegankelijk, omdat het gebruik in de praktijk dat vereist.
Het beste warmtebeeldapparaat van 2026 toont je niet alleen een warmtebeeld — het maakt verbinding met je telefoon, neemt video op, streamt livebeelden en werkt zijn eigen firmware draadloos bij. Geïntegreerde functies zoals ingebouwde laserafstandsmeters, ingebouwde audio- en video-opname, Wi-Fi-streaming en bijbehorende app-ecosystemen worden steeds vaker standaard op serieuze apparaten in plaats van dat ze als premium extra's worden aangeboden. De beste monoculaire warmtebeeldapparaten van 2026 bieden een complete velduitrusting in één enkel apparaat.
Onze Pixfra Outdoor-app ondersteunt al onze huidige modellen, waaronder de Sirius-, Arc LRF-, Mile 2-, Pegasus Pro-, Chiron LRF-, Taurus- en Taurus LRF-series. Via de app kunt u de firmware updaten, instellingen aanpassen en foto's en video's rechtstreeks naar uw smartphone overzetten. Deze connectiviteit is meer dan alleen maar handig — het is een praktisch hulpmiddel om jachtpartijen vast te leggen, verkenninggegevens te delen met jachtpartners of de activiteiten van wilde dieren op uw terrein bij te houden.
Kleurenpaletten zijn een andere handige functie waar ervaren gebruikers bij zweren. „White Hot“ is de meest gangbare modus, waarbij warmtebronnen wit worden weergegeven, en is ideaal voor algemene detectie in open terrein. Black Hot, waarbij warmtebronnen zwart worden weergegeven, heeft de voorkeur van veel professionele jagers omdat het meer detail van het dierlijk lichaam laat zien. Red Hot markeert de warmste delen van het beeld in rood en is uitstekend geschikt om snel een doelwit te herkennen in een complexe omgeving. Iron Bow en Rainbow maken gebruik van een kleurenspectrum om verschillende temperatuurgradiënten weer te geven, wat handig is voor het identificeren van mechanische warmtelekken of specifieke kenmerken van de omgeving. Dankzij de vele paletopties kunt u uw weergave aanpassen aan verschillende terreinen, weersomstandigheden en persoonlijke voorkeuren — zonder dat dit ten koste gaat van het detectievermogen van het apparaat zelf.
En laten we de verversingsfrequentie niet uit het oog verliezen. Een verversingsfrequentie van 50 Hz is de basisnorm voor elk thermisch apparaat dat in 2026 de moeite waard is om aan te schaffen. Die frequentie zorgt voor vloeiende beelden, zodat je bewegende doelen — zoals rennende wilde zwijnen of coyotes — kunt volgen zonder wazigheid of haperingen. Bij alles onder de 30 Hz krijg je een haperend beeld, waardoor snel bewegende doelen moeilijk te volgen zijn. Onze Pixfra-apparaten zijn zonder uitzondering uitgerust met hoge verversingsfrequenties, want in het veld is een vloeiend beeld geen luxe, maar een noodzaak.
Onze Volans-serie onderscheidt zich ook door zijn vermogen om de hele dag door beelden vast te leggen. De serie beschikt over een instelbaar diafragma van F1.2 tot F3.0 om zich aan te passen aan verschillende lichtomstandigheden, waardoor het een van de weinige thermische apparaten op de markt is dat zowel bij fel daglicht als in totale duisternis even goed presteert. Dankzij die veelzijdigheid hoeft u slechts één apparaat mee te nemen in plaats van twee.
Belangrijkste conclusie: Het beste thermische apparaat van 2026 combineert een hoge thermische gevoeligheid (≤18 mK NETD), een resolutie die aansluit bij uw toepassing, een betrouwbaar detectiebereik met een geïntegreerde laserafstandsmeter, een batterijsysteem dat langer meegaat dan uw jachtsessie, een robuuste IP67-constructie en slimme functies waarmee u verbonden blijft en de controle behoudt. Bij Pixfra ontwerpen we elk product in ons assortiment rond deze zes kenmerken, omdat we weten wat er telt als het er echt op aankomt.
Op welke NETD-waarde moet ik letten bij een thermische monoculair?
Voor de meeste toepassingen op het gebied van jacht, het observeren van wilde dieren en buitenactiviteiten heeft u een warmtebeeldapparaat nodig met een NETD van ≤25 mK of lager. Een apparaat met een uiterst gevoelige NETD-waarde van ≤18 mK kan ongelooflijk kleine temperatuurverschillen detecteren en levert een scherp, gedetailleerd beeld, zelfs in de meest uitdagende omstandigheden zoals dichte mist, regen of volledige duisternis. Onze Pixfra-apparaten halen ≤18 mK, waarmee ze tot de top behoren wat betreft thermische gevoeligheid voor optische apparatuur die geschikt is voor gebruik in de buitenlucht.
Is een ingebouwde laserafstandsmeter de moeite waard op een warmtebeeldcamera?
Als je op afstanden van meer dan 150 yards jaagt of ’s nachts schiet, dan is een ingebouwde LRF inderdaad een groot voordeel. Je hoeft dan geen aparte afstandsmeter mee te nemen en je krijgt direct informatie over de afstand, zodat je je schot kunt aanpassen. Onze Pixfra Arc LRF-, Chiron LRF- en Taurus LRF-modellen zijn allemaal voorzien van een geïntegreerde laserafstandsmeter met een bereik van 1.000 meter. In combinatie met een ballistische calculator bieden deze modellen je een complete oplossing voor het richten in één apparaat.
Hoe lang gaat de batterij van een thermisch apparaat mee?
Als je van plan bent om lang te gaan jagen, heb je een apparaat nodig met een lange batterijduur. Veel warmtebeeldmonoculairs hebben een gebruiksduur van 6, 8 of 10 uur. Als je weet dat je maar een uur nodig hebt, kun je volstaan met een apparaat dat via een kabel wordt gevoed. Onze Pixfra-apparaten hebben een gebruiksduur van ongeveer 4,5 tot 15 uur, afhankelijk van het model. Voor jachtpartijen die de hele nacht duren, kun je het beste kiezen voor modellen met verwisselbare 18650-batterijen, zodat je reservebatterijen mee kunt nemen en deze zonder onderbreking kunt verwisselen.
Mag je overdag een warmteapparaat gebruiken?
Absoluut. Thermische apparaten detecteren warmte, geen licht, dus ze werken overdag net zo goed als ’s nachts. Onze Pixfra Volans-serie gaat nog een stap verder met zichtmogelijkheden gedurende de hele dag en een instelbaar diafragma (F1.2-F3.0) dat zich aanpast aan veranderende lichtomstandigheden, waardoor het een bijzonder goede keuze is voor jagers en waarnemers die 24 uur per dag dekking nodig hebben met één enkel apparaat.
Welke IP-classificatie heb ik nodig voor een thermisch apparaat dat buiten wordt gebruikt?
Voor elk serieus gebruik in de buitenlucht — jagen, wandelen, het observeren van wilde dieren, beveiliging van eigendommen — wil je minimaal een IP67-classificatie. De IP67-classificatie is betrouwbaar. Regen, sneeuw, condensatie — het maakt allemaal niets uit. De behuizing voelt stevig aan, ondanks de prijs. IP67 betekent volledige stofdichtheid en bescherming tegen tijdelijke onderdompeling in water, wat geldt voor regen, het oversteken van beekjes, sneeuw en het per ongeluk vallen in plassen. Alles wat lager is dan IP67 brengt je uitrusting in gevaar onder echte veldomstandigheden.
You just unboxed your new thermal device. It looks great, feels solid, and you’re ready to get out in the field. But before you do, there are a few things you need to know. Proper calibration and regular maintenance are what separate a thermal scope that performs well for a decade from one that goes fuzzy after a season. We’ve put this guide together at Pixfra to walk you through everything — from your first power-on to long-term storage. Whether you’re running a thermal scope, a monocular, or a front attachment, these steps apply across the board.
Let’s clear something up right away: when we talk about calibrating a thermal device, we’re not talking about the same thing as zeroing your scope on a rifle. Calibration — sometimes called NUC (Non-Uniformity Correction) or FFC (Flat Field Correction) — is a sensor-level process that keeps your thermal image clean, even, and free of artifacts. Thermal devices are highly sensitive to temperature changes in their environment, and since temperature fluctuates constantly, the device needs to periodically refresh to accurately measure temperature differences. Without this process, your image starts to look grainy, washed out, or streaked with lines that shouldn’t be there.

Here’s the simple version of what happens during calibration. During calibration, the device briefly covers its sensor with a shutter to create a flat, constant temperature reading. The device uses that flat reference to reset how each pixel responds to infrared energy. Think of it like resetting the baseline so your sensor knows what “neutral” looks like again. As the device operates, internal temperature changes cause each pixel to respond slightly differently, creating non-uniformity across the image. Without calibration, the image develops visible artifacts. Once the correction runs, those artifacts disappear and you’re back to a sharp, high-contrast picture.
Most people notice calibration for the first time when their screen briefly freezes. In cold environments, calibration occurs more often during the first minutes of use. This is expected behavior, not a defect. A thermal image freezes because the sensor cannot produce a valid image during calibration. When calibration begins, the sensor input is blocked by a reference surface. During this moment, the device has no usable scene data. To avoid displaying incorrect information, the system holds the last valid frame on screen. This creates a brief freeze. The freeze is not a malfunction. It is a functional requirement that ensures calibration accuracy and prevents corrupted imagery. So don’t panic when it happens — it means your device is doing exactly what it should. The frequency of calibration depends on the operating time of the device. The longer the thermal imager runs continuously, the less frequently calibration is needed. You’ll notice more frequent calibrations in the first few minutes after powering on, especially in cold weather, and then fewer as your device warms up and stabilizes.
Most modern thermal devices offer three calibration modes: automatic, semi-automatic, and manual. There are three different calibration modes: manual, automatic, semi-automatic. Each has a place depending on what you’re doing in the field. Let’s break them down so you can pick the right one for your situation.
Automatic mode is what we recommend for most users, especially if you’re new to thermal. With automatic calibration, a software algorithm has a timer or some software that checks the image for drops in quality. When the device is being calibrated, the image freezes for a second or two and in most devices, the shutter closes for the time of the calibration. There is a distinct sound associated with shutters closing and opening. You don’t have to think about it — the device handles everything on its own. The only downside is the brief click sound the internal shutter makes, and some hunters don’t love that when they’re sitting in a quiet stand. Semi-automatic mode lets you trigger calibration with a button press but uses the internal shutter, so it’s still quick and clean. Manual mode is the quietest option. With the manual calibration mode, the user has to press a button and manually close the front cap. The advantage of the manual calibration mode is that it’s much quieter than the other two modes that use the shutters. You press a button and cover the lens yourself — either with the lens cap or your hand — so there’s no shutter click at all. This is a favorite for hunters who need total silence during close-in predator work or hog hunts.

Regardless of which mode you use, there are a few field rules to follow. A lot of image problems that look like bad contrast or weak sharpness actually start with calibration drift. Run FFC when the image starts to look uneven across the screen. Common signs include banding, blotches, or a hazy “dirty glass” look that was not there a few minutes ago. You will often notice this after a major temperature change, like stepping out of a warm truck into cold air. Our advice: Recalibrate before you start chasing settings. If the image has drifted, you may end up over-adjusting contrast or sharpness to compensate for a temporary issue. That usually leaves you with a harsher image later. A better order is simple: focus first, run FFC next, then evaluate the picture. That workflow saves you from fiddling with settings that weren’t the problem to begin with. For a deeper look at the gear that pairs with proper calibration — like quality mounts and battery packs — check out our guide on the de beste accessoires om de prestaties van je warmtebeeldkijker te verbeteren.
One more thing that trips people up: calibration and zeroing are two different jobs. Calibration deals with sensor image quality. Zeroing aligns your reticle with the point of impact on your rifle. To achieve accurate shooting, the thermal scope must be calibrated to ensure that the image aligns correctly with the point of impact of the rifle’s shot. You need both, and they work together — but don’t confuse the two. Always run a calibration (NUC) before you start adjusting your zero. A drifted sensor image can make your point of aim look off when the real problem is just sensor noise, not your scope’s alignment.
Your thermal lens is not the same as the glass on your day scope. Thermal scope lenses aren’t regular glass. They’re made from germanium or other specialized materials with delicate coatings that need careful handling. Germanium is expensive and the anti-reflective coatings on these lenses are sensitive to pressure, chemicals, and even the oils on your skin. Clean them wrong and you’ll cause damage that no amount of recalibration can fix.

Here’s our recommended cleaning process. Never wipe a dusty lens directly. Loose particles of dust or sand can scratch the surface. Always start with a gentle air duster or a soft, optical brush to remove dirt without friction. Do not blow on the lens with your breath (condensation streaks) or use tissues, paper towels, or rough fabrics, as these cause micro-scratches. Once the loose dust is gone, apply a few drops of optical-grade cleaning solution directly to the cloth, never to the lens itself, to prevent liquid seepage. Wipe the lens gently in circular motions, starting from the center and moving outward. That’s it. No fancy techniques. Just patience and the right materials.
Here’s a pro tip we’ve learned from years of field use: Clean your thermal camera lens only when strictly necessary, and only when there is visible dirt or fingerprints. Over-cleaning can actually wear down the anti-reflective coating faster than a little dust ever would. A light coat of dust is far less harmful than scrubbing with the wrong cloth. Flip-up lens covers are your best friend here — they keep debris out so you clean less often in the first place. And when it comes to chemicals, skip the household glass cleaners entirely. Avoid regular eyeglass cleaners on thermal scopes. Thermal lenses use germanium or specialized materials with unique coatings that react differently than standard glass. Use lens cleaners specifically designed for optical instruments with at least 30% isopropyl alcohol, or 96% isopropyl alcohol solutions. Regular eyeglass cleaners may contain additives that damage thermal scope coatings and reduce image quality over time.
Lens Cleaning Quick-Reference Table
Step Tool Notes 1. Remove loose dust Air blower or soft optical brush Never wipe a dry, dusty lens 2. Apply cleaner Optical-grade solution on microfiber cloth Never spray directly on lens 3. Wipe gently Microfiber cloth, circular motions Center outward; no pressure 4. Inspect Visual check under light Repeat only if needed 5. Protect Flip-up lens cap Always cover when not in use
Battery management doesn’t get enough attention, and it’s one of the top reasons thermal devices underperform in the field. Most thermal scopes run 3 to 8 hours on a single charge depending on settings, temperature, and display brightness. Scopes can eat up battery power, especially if you’re using them for extended periods. To make sure your scope lasts, try to avoid having the screen at maximum brightness when it’s not needed. Use a power-saving mode when possible and bring extra batteries or a portable charger if you’re planning a long session.
Cold weather hits battery performance harder than most people realize. We’ve seen fully charged lithium batteries lose 20–30% of their effective capacity in freezing temperatures. Keep spare batteries in an inside pocket close to your body to maintain warmth. Most thermal riflescopes are powered by rechargeable or replaceable batteries. Proper battery care is critical to ensure uninterrupted performance. For long-term storage, always remove the batteries to prevent leakage, which can damage internal components. If your scope uses rechargeable batteries, charge them periodically, even during periods of non-use, to maintain their lifespan. Avoid overcharging, as this can lead to overheating and degradation. Carry spare batteries during extended outings to avoid losing functionality in the field. And if you’re doing all-night hunts, consider pairing your device with an external power bank. Many modern thermal scopes accept USB power input, which means you can run your device for 10 or more hours without worrying about dead batteries.
Key Data Point: Most thermal scopes can last between 40,000 to 60,000 hours of operational time for the thermal sensor, while displays typically last about 10 years. That’s a long life if you take care of the device — and battery management is a big part of that equation.
Firmware is the other half of this section, and it’s often overlooked entirely. Check for firmware updates regularly and install them as recommended by the manufacturer. Firmware updates can improve the performance and functionality of the scope. We release firmware updates at Pixfra to fix bugs, improve image processing, and sometimes even add new features. Running outdated firmware is like driving on old tires — it might work, but you’re not getting the best from your equipment. At least one month before hunting season, test battery health, update firmware, and calibrate the sensor to avoid missing opening night. Build firmware checks into your pre-season routine along with battery testing and sensor calibration, and you’ll avoid surprises when it matters most.
How you store your thermal device when it’s not in use matters just as much as how you handle it in the field. After the hunt, proper storage of your thermal riflescope ensures it’s ready for future outings. Choose a cool, dry place with consistent temperature and low humidity to prevent condensation. Think of it as tucking away your gear to maintain peak performance. Moisture is the number one enemy here. Even waterproof-rated scopes can develop internal condensation if you move them too quickly between extreme environments. Even waterproof scopes can suffer from internal condensation if exposed to rapid temperature changes. Inclement weather, such as rain or extreme temperatures, can significantly affect the performance of thermal scopes, making it crucial to protect them from moisture. Always allow your thermal scope to acclimate slowly when moving between extreme environments.

For short-term storage between hunts, a padded tactical bag or hard case works great. Use silica gel packets or other moisture-absorbing materials in the storage case to prevent condensation buildup. Hard-shell cases with custom foam inserts are best for transport, while padded bags with quick-access compartments work well for field carry. We talked about both in detail in our accessories guide. For long-term storage — say, off-season — there are a few extra steps to take. Remove the batteries, give the lens a final gentle clean, put the caps on, and store the device in a climate-controlled space. Dehumidify the storage area and use a dehumidifier in the storage room to maintain optimal humidity levels. Check firmware updates before storage to ensure your scope’s firmware is up to date and to avoid compatibility issues when you use it again. Record your preferred settings and configurations so you can quickly set up your scope when needed.
Don’t forget physical inspections. Regularly check for any signs of wear or damage, such as loose screws, cracks, or degraded seals. Addressing small issues early prevents larger problems later. Some scopes require periodic calibration to maintain accuracy, especially after prolonged use or exposure to extreme conditions. A loose mount screw or a cracked seal might seem minor now, but left unchecked, they can lead to zero shift, moisture intrusion, or sensor damage. Make it a habit to run a quick visual and functional check every time you pull your device out of storage. Power it on, let it warm up, run a calibration, check the image, and confirm your settings. Five minutes of attention saves you from nasty surprises when you’re in the field and a hog steps into range.
We’ve seen thermal scopes last 10+ years with proper care and maintenance. That’s real-world data from our team, not a marketing number. The devices that hit that lifespan are the ones whose owners followed these basic routines: clean when needed, store properly, manage batteries, keep firmware current, and let the sensor calibrate without interference.
Sometimes the image quality on your thermal device degrades gradually enough that you don’t notice it right away. Knowing the warning signs saves you from blaming the scope for problems that a simple calibration can fix. Inconsistent readings, sudden fluctuations, or unexpected temperature readings; blurry thermal images with reduced image clarity, even after cleaning the lens; unusual artifacts like strange patterns or colors not related to actual heat signatures; and after major impacts — dropping the camera can misalign internal sensors.
Indicators of scope movement or calibration error include sudden, unexplained POI jumps, visible loosening of ring screws, slipping on the rail, inconsistent reticle behavior, or persistent offsets that cannot be corrected with turret clicks. Inspect hardware for loose screws, cracked rings, or rail deformation. Check for visible reticle wobble in the display and run a NUC to ensure internal calibration stability. If running a NUC doesn’t solve the image problems, it might be time for a professional factory recalibration. Most thermal cameras in the market today are already calibrated. Just like most electronic measuring devices, a brand new infrared camera is set to factory standards. Over time, however, calibration shifts may occur due to electronic component aging. The general recommendation across the thermal industry is to have your device factory-checked once a year if you’re a heavy user, or every two years for casual use.
That’s not a freeze or a glitch — it’s your device calibrating itself. When you first start using your thermal optic, you might be surprised when it occasionally freezes up on you. This isn’t a malfunction — it’s just your unit calibrating itself. Thermal devices are highly sensitive to temperature changes in their environment. The screen holds the last frame while the internal shutter covers the sensor and runs a non-uniformity correction. It only takes a second or two, and it happens less often the longer your device stays powered on.
In automatic mode, the device handles this for you — you don’t need to think about it. If you’re running manual mode, recalibrate whenever the image starts looking noisy, streaked, or uneven. Run FFC when the image starts to look uneven across the screen. Common signs include banding, blotches, or a hazy “dirty glass” look that was not there a few minutes ago. You will often notice this after a major temperature change, like stepping out of a warm truck into cold air. A good habit: always run a manual calibration when you first power on and whenever you move between very different temperature environments.
No. Avoid regular eyeglass cleaners on thermal scopes. Thermal lenses use germanium or specialized materials with unique coatings that react differently than standard glass. Ammonia-based cleaners like Windex will damage the anti-reflective coatings. Use only optical-grade cleaning solutions designed for coated lenses, and always apply the solution to a microfiber cloth first — never directly to the lens.
A well-maintained thermal scope can last 5 to 10 years or more, depending on its build quality, usage frequency, and maintenance practices. The thermal sensor itself can run for tens of thousands of hours. The biggest threats to lifespan are moisture damage, lens scratches from improper cleaning, and battery leakage during storage. Follow the care steps in this guide and your device will stay reliable for years.
Yes. For long-term storage, always remove the batteries to prevent leakage, which can damage internal components. If your scope uses rechargeable batteries, charge them periodically, even during periods of non-use, to maintain their lifespan. Give rechargeable batteries a partial charge every two to three months to prevent deep discharge, which can permanently reduce capacity.
















