A thermal device for hunting should match the way you hunt, not a number on a headline. Start with terrain, usual viewing distance, whether you need a handheld scanner or a mounted optic, and how long you stay out. Pixfra builds thermal monoculars, thermal scopes, thermal front attachments, and multispectral binoculars, so the right setup starts with the job in front of you.
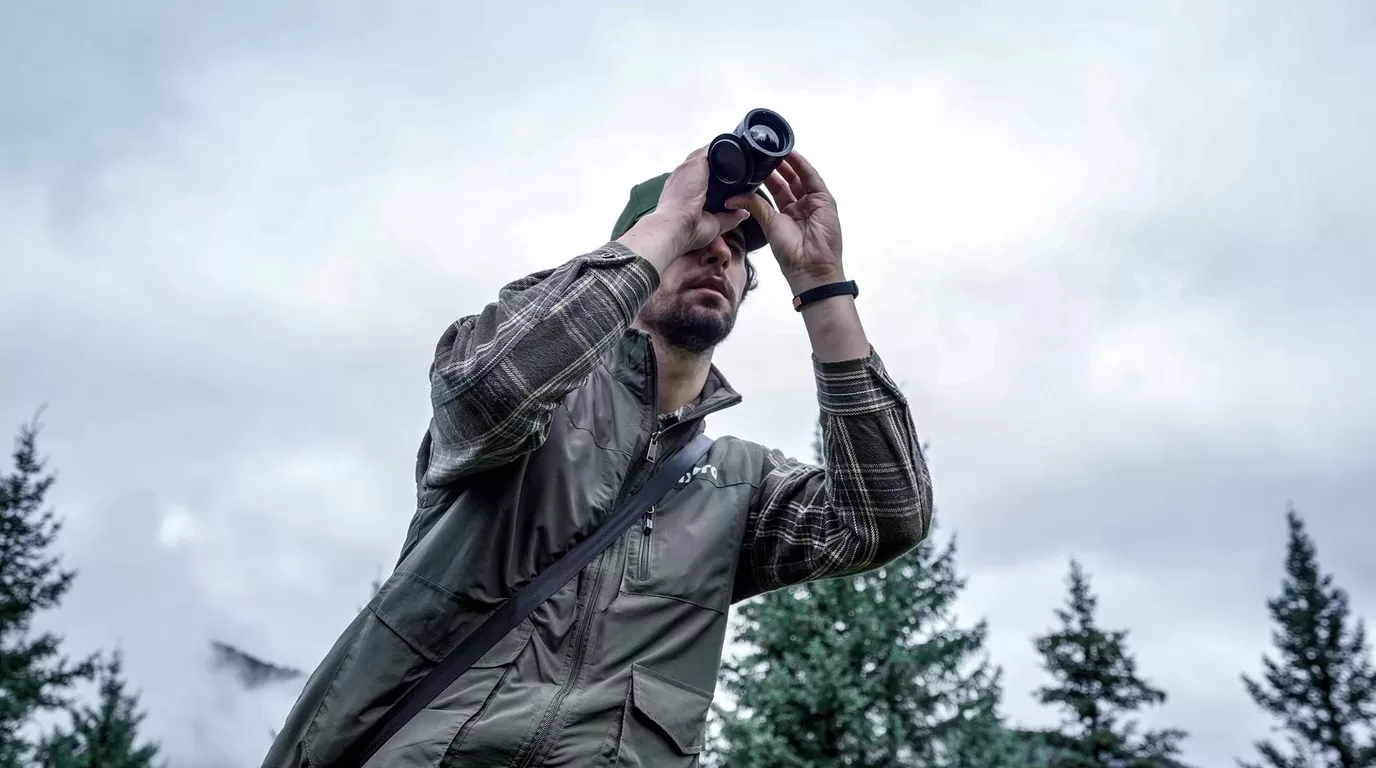
That is the whole decision in plain English. Pick the device type first. Then compare sensor resolution, NETD, lens, refresh rate, runtime, controls, and after-sales support.
Most buying mistakes start when a hunter reads one impressive range number and stops thinking. Detection range only tells you that the device can notice a warm object at distance. It does not promise clean identification, and it does not tell you how the optic feels in cold hands at 2 a.m.
Ask a simpler question: what are you trying to do?
A hog hunter watching feeders and tree lines needs fast scanning, a wide enough field of view, steady battery life, and simple controls. A coyote hunter calling across open ground needs more detail at distance and may benefit from laser rangefinding. A deer manager checking fields before first light may want a handheld monocular for observation, not a mounted optic. A shooter who already has a dialed-in day scope may prefer a front attachment rather than rebuilding the rifle around a dedicated thermal scope.
This is where Pixfra’s product lines split neatly. Mile 2 and Arc cover handheld scanning. Arc LRF adds rangefinding in a compact monocular. Taurus keeps your day optic in the system as a front attachment. Chiron LRF and Pegasus lines move toward dedicated thermal scope use. Sirius and multispectral devices help when observation, detail, and mixed-light work matter more than a single shot window.
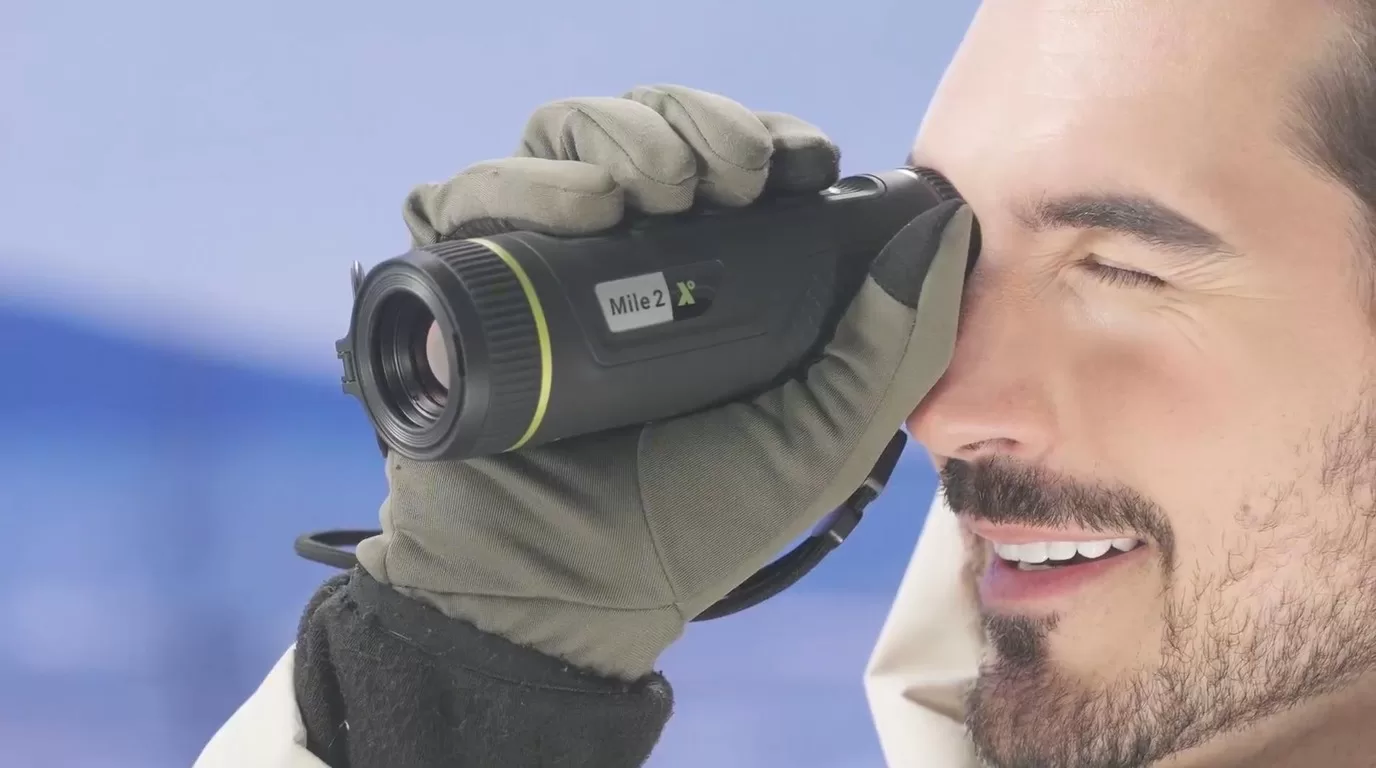
For many hunters, the first thermal device should be a handheld monocular. You can scan fields, check timber edges, follow heat signatures after a shot, and keep the rifle pointed in a safe direction until you have a reason to shoulder it.
Pixfra Mile 2 is the compact choice in this role. The Mile 2 page lists pocket-size portability, a P3 AMOLED display, electronic compass, and model options up to 640 x 512 resolution. It is a good fit when you want a device that lives in a jacket pocket instead of taking over your pack.
Arc and Arc LRF step into a more capable handheld role. Arc LRF combines thermal observation with an integrated laser rangefinder, magnesium alloy body, and replaceable battery setup. If you hunt broken ground, uneven fields, or unfamiliar farms, range data can prevent bad guesses.
The handheld rule is simple: if you spend more time searching than aiming, buy the scanner first.
Thermal images can flatten distance. A hog across a field, a coyote beyond a fence line, and a deer-shaped heat source near brush can look closer than they are. That is why LRF models matter for hunters who work open lanes or changing terrain.
Pixfra has LRF options across handheld and mounted categories, including Arc LRF, Chiron LRF, Taurus LRF, and Pegasus 2 LRF. The benefit is not just a number on the screen. It is a cleaner decision cycle: spot, range, judge, and act without switching devices or guessing from landmarks.
Choose LRF when you hunt fields, hills, power-line cuts, or large properties where visual reference points are weak at night. You may not need it for tight timber or short feeder lanes, but once distance starts changing fast, rangefinding earns its place.
This is the decision that deserves the most patience. A front attachment lets you keep a daytime optic and add thermal capability in front of it. A dedicated thermal scope gives you a purpose-built thermal aiming system.
| Your setup | Pixfra direction | Why it fits |
|---|---|---|
| You already trust your day scope and rifle zero | Taurus front attachment | Keep the day optic workflow and add thermal imaging when needed |
| You want an integrated thermal hunting optic | Chiron LRF or Pegasus series | Purpose-built controls, thermal display, and mounting setup |
| You scan more than you shoot | Mile 2, Arc, or Arc LRF | Handheld observation is faster and safer for searching |
| You need observation across changing light | Sirius or multispectral binocular | Better fit for longer watching sessions and mixed conditions |
Taurus is useful when the rifle is already set up well and you do not want to rebuild everything around a new optic. Chiron LRF and Pegasus models make more sense when thermal is the main aiming system. Neither path is automatically better. The right answer depends on how the rifle is used, who else uses it, and whether you switch between day and night work.
Sensor resolution affects how much detail the image can show. Pixfra product lines include 256 x 192, 384 x 288, 640 x 512, and higher-resolution options depending on category and model. More pixels help when you need detail at distance, but resolution is only one part of the image.
NETD tells you how well the device can separate small temperature differences. Lower NETD helps in humidity, fog, and low-contrast scenes where warm shapes do not stand out cleanly. Pixfra publishes NETD values by model, so check the exact SKU before ordering.
Lens and field of view decide how the device feels. A wider view helps scanning close cover. A narrower, longer lens helps when you need more reach. Hunters often overbuy reach and then feel slow in tight terrain. Match the lens to where you actually hunt.
Battery design matters more than it sounds. A device with replaceable 18650 batteries or a practical external power option is easier to manage on long nights. Runtime claims are usually measured under set conditions, so build a spare-power plan before the first trip.
Controls matter too. Gloves, rain, cold, and adrenaline expose bad ergonomics fast. Look for fast startup, a clean menu, easy palette changes, and buttons you can feel without staring at the housing.
For brush, feeders, and short lanes, start with a handheld thermal monocular. Mile 2 or Arc gives you quick scanning without adding weight to the rifle. If most opportunities happen close, field of view and comfort matter more than maximum reach.
For crop fields and rolling ground, move Arc LRF higher on the list. The rangefinder helps when distance is hard to judge in the dark, and the handheld format still keeps scanning simple.
For a rifle that needs thermal as the main sighting system, compare Chiron LRF and Pegasus options. Look closely at sensor resolution, lens, battery, mounting, and whether the controls feel natural from the shooting position.
For hunters who prefer their day optic, Taurus keeps the familiar glass in the system. That is useful when one rifle has to serve daytime and nighttime roles.
For observation, scouting, and long sits, Sirius or multispectral binocular products may fit better than a rifle-mounted thermal. Not every thermal job is a shooting job.
Do not choose a thermal device only by detection range. Detection is the easiest number to advertise and the easiest number to misunderstand.
Do not buy a mounted optic when you really need a scanner. If the first task is finding animals, a handheld monocular usually gets more use.
Do not ignore support. Thermal optics are electronics used outdoors. Firmware, batteries, seals, displays, buttons, and charging ports all matter after the sale. Buy through an approved channel and keep serial-number records.
Do not skip local regulations. Night hunting rules vary by region, species, season, and equipment type. Check the current wildlife agency rules where you hunt before using thermal equipment in the field.
For scanning, a thermal monocular is usually the better first device. For aiming, you need a thermal scope or a front attachment used with a suitable day optic. Many hunters eventually use both: a handheld monocular to find heat and a mounted solution for the shot.
Choose LRF if distance changes often or if you hunt open ground. It is less important for short, fixed lanes where you already know common distances. Pixfra offers LRF options in handheld, front attachment, and scope categories.
Match resolution to distance and detail needs. 256 x 192 can work for close scanning. 384 x 288 gives a stronger middle ground. 640 x 512 and above help when identification detail matters at longer distances. Always compare the exact model, lens, and NETD together.
Plan for the whole session, not the best-case runtime number. Check whether the device uses replaceable batteries, supports external power, and can be managed with gloves in cold weather. Carry spares when the device supports them.
If you are choosing a Pixfra thermal device for hunting, start with terrain and use case. Then shortlist the device type: handheld monocular, front attachment, dedicated thermal scope, or binocular. From there, compare exact model specs and ask Pixfra or an approved dealer to confirm the right fit for your rifle, distance, and support region.
Markedet for termiske enheder i 2026 byder på flere valgmuligheder og mere avanceret teknologi i alle prisklasser end nogensinde før. Men hvordan finder man ud af, hvor meget man rent faktisk skal bruge? Det er her, de fleste købere går i stå. På Pixfra, vi fremstiller termiske monokularer, kikkerter, frontmonterede tilbehørsdele og multispektrale kikkerter — så vi ved præcis, hvor dine penge går hen, og hvor de bliver spildt. Denne prisguide giver dig et klart overblik, så du kan handle klogt og gå derfra med det rigtige udstyr.
Inden du fastlægger et budget, skal du vide, hvad du rent faktisk betaler for. Prisen på et termisk kamera er ikke tilfældig — den afspejler en række komponenter og tekniske valg, der har direkte indflydelse på det, du ser i felten. Den største prisfaktor er sensorens opløsning. En 256×192-sensor er indgangsniveauet for ægte termisk billedbehandling. Går du op til 384×288, får du mærkbart skarpere billeder med bedre kantdefinition, især på afstande over 200 yards. Går du op til 640×512, er du inde på professionelt territorium. Denne prisforskel fortæller dig alt, hvad du behøver at vide om termisk opløsning generelt – du kan forvente at betale cirka det dobbelte for hver fordobling af den termiske kernes opløsning. Så når du ser en $400-enhed ved siden af en $1.500-enhed og undrer dig over, hvad der er ændret, er sensoren som regel svaret.

Men opløsningen er kun halvdelen af historien. Den termiske følsomhed, målt som NETD (Noise Equivalent Temperature Difference), afgør, hvor godt enheden registrerer små temperaturforskelle. Et lavere NETD-tal betyder, at enheden kan skelne et varmt dyr fra en varm baggrund på en fugtig sommernat. Hvis du vil have et mere indgående indblik i, hvad der adskiller et fremragende termisk kamera fra et gennemsnitligt, kan du læse vores gennemgang af De 6 vigtigste funktioner, som den bedste termiske enhed skal have i 2026. Kort sagt er NETD den specifikation, som billige enheder først sparer på — og det er den specifikation, der betyder mest, når forholdene bliver krævende. Enheder med NETD-værdier på ≤18 mK, som vores Pixfra-serie, bevarer billedklarheden i tåge, regn og høj luftfugtighed, mens enheder af lavere kvalitet bliver udvaskede og kun viser flade, grå klatter.
Ud over selve sensoren betaler man for pixelafstanden (12 µm er den nuværende standard, der giver skarpere billeder end ældre 17 µm-modeller), opdateringshastigheden (50 Hz for jævn sporing modsat den hakkeagtige 25 Hz), batterisystemet, byggekvaliteten, IP-vejrbestandighed samt smarte funktioner som Wi-Fi-forbindelse, ledsagerapps og indbygget optagelse. Laserafstandsmålere øger også prisen, men for alle, der skyder længere end 150 yards om natten, tjener de sig selv ind i form af større sikkerhed ved skuddet. Markedet for termiske kameraer anslås at have en værdi på 6,15 mia. USD i 2026 og forventes at nå 11,92 mia. USD i 2033 med en sammensat årlig vækstrate (CAGR) på 9,9%. Denne vækst betyder mere konkurrence, mere innovation og bedre værdi for købere på alle niveauer. Kapløbet om at levere mere for mindre har aldrig været mere intens – og det kommer dig direkte til gode.
For et par år siden betød det, at man fik et legetøj, hvis man brugte under $500 på et termisk udstyr. Sådan er det ikke længere. I 2026 tilbyder de bedste prisvenlige termiske monokularer ægte detekteringskapacitet, smarte funktioner og robust konstruktion – alt sammen uden at tømme din bankkonto. I denne prisklasse får du typisk sensorer med en opløsning på 256×192 og en pixelafstand på 12 µm, en NETD på ca. ≤20–40 mK og en detekteringsrækkevidde på 300 til 500 meter. Disse enheder er rigtige værktøjer, ikke bare gimmicks. De kan finde hjorte i skoven på 150 yards afstand, spore såret vildt gennem tæt bevoksning og give dig pålidelig varmesporing på jagt på kort til mellemlang afstand.
Hvad skal du være opmærksom på i denne prisklasse? For det første opdateringshastigheden. Nogle budgetmodeller falder ned på 25 Hz for at spare på omkostningerne, og det giver et hakket og uroligt billede, der gør det virkelig frustrerende at følge med i alt, hvad der bevæger sig – en løbende vildsvin, en prærieulv, der løber tværs over en mark. Hold ud til 50 Hz. Batterilevetiden er et andet område, hvor budgetmodeller kan skuffe dig. En enhed med fantastisk billedkvalitet og et batteri, der kun holder tre timer, er stort set bare en fancy brevpresser ved midnat. Gå efter enheder med udskiftelige batterier eller i det mindste understøttelse af USB-C-powerbank til længere jagtudflugter. IP67-vandtæthed bør også være et must, selv i denne prisklasse. Regn, mudder og utilsigtede fald sker – og hvis din enhed ikke kan klare en våd nat, hører den ikke hjemme i din rygsæk.
Hos Pixfra starter vores basismodeller med en detekteringsrækkevidde på omkring 500 meter og NETD-værdier på ≤18 mK, hvilket er en bedre følsomhed end mange konkurrenter tilbyder til det dobbelte af prisen. Vores Mile 2-serie og Draco-serie rammer den perfekte balance for alle, der vil prøve kræfter med termisk billedbehandling uden at skulle bruge en hel måneds husleje. For førstegangskøbere, weekendjægere, ejendomsejere og naturinteresserede, der opererer inden for 300 yards, er klassen under $500 i 2026 virkelig velfungerende – man skal bare være opmærksom på, hvor producenten har sparet på omkostningerne.
Det er her, de fleste seriøse jægere og friluftsentusiaster bør handle. For de fleste brugere er dette det bedste termiske monokular i denne prisklasse — hvor pris og ydeevne endelig går op i en højere enhed. I denne prisklasse kan du forvente 384×288-sensorer som standard. Denne opløsning fanger langt flere termiske detaljer end 256×192-sensorerne i budgetmodellerne, hvilket giver dig klarere billeder, skarpere kanter og mere pålidelig målidentifikation, når du zoomer ind eller scanner på afstand. Opløsningen på 640×512 er ganske vist overlegen, men kommer typisk først i spil i prisklasser over $1.500–$2.000.

Detektionsrækkevidden stiger markant i denne klasse. Detektionsrækkevidden i denne kategori strækker sig fra 1.000 til 1.300 meter afhængigt af objektivkonfigurationen — et markant fremskridt i forhold til rækkevidden på 345–460 meter hos modellerne i entry-level-klassen. Den ekstra rækkevidde er vigtig for jægere i åbent terræn, ranchere, der overvåger store ejendomme, og alle, der har brug for situationsbevidsthed ud over et par hundrede yards. Opdateringshastigheder på 50 Hz er standard her – du bør ikke nøjes med mindre. Det er også i denne kategori, at integrerede laserafstandsmålere begynder at dukke op. En LRF giver dig den nøjagtige afstand til dit mål med et enkelt tryk på en knap, hvilket er en reel fordel for etisk skudplacering om natten. Vores Pixfra Arc LRF ligger lige i denne klasse og kombinerer høj termisk følsomhed med en indbygget 1.000-meter laserafstandsmåler og en pris, der giver mening for dedikerede jægere.
Det er også her, at smarte funktioner ikke længere blot er “en ekstra bonus”, men bliver standard. Wi-Fi-forbindelse, understøttelse af ledsager-app, indbygget videooptagelse, flere farvepaletter og trådløse firmwareopdateringer er alt sammen noget, man forventer i denne prisklasse. Vores Pixfra Outdoor-app kan oprette forbindelse til alle vores nuværende modeller og giver dig mulighed for at opdatere firmware, justere indstillinger og overføre billeder og video direkte til din telefon. Hos Pixfra leverer vores mellemklasse-serie – Arc LRF- og Mile 2-serierne – en NETD-følsomhed på ≤18 mK, en pixelafstand på 12 µm og IP67-klassificerede konstruktioner til priser, der ikke tømmer din tegnebog. Overvej den samlede værdi: holdbarhed, batterilevetid, software, garanti og nøjagtighed. Mellemklasse-modellerne leverer ofte 80–90% af high-end-ydeevne til halv pris. Hvis du kun kan købe én termisk enhed og ønsker, at den skal dække de fleste anvendelsessituationer i den virkelige verden – nattjagt, observation af vilde dyr, ejendomssikkerhed, udforskning af vildmarken – er prisintervallet $500–$2.000 det rette valg for dig.
Når du går over $2.000, er du på udkig efter det bedste termiske billedudstyr, markedet kan tilbyde — længere detekteringsafstande, sensorer med højere opløsning og integrerede systemer, der kombinerer afstandsmåling, ballistik og optagelse i én samlet løsning. Enheder i mellem- til højprissegmentet (384×288 eller 640×512, rækkevidde på 1.000–1.500 m) dækker de fleste professionelle jagt- og sikkerhedsformål. Premium-enheder (1280×1024, rækkevidde på over 3.000 meter) er til købere, der har brug for maksimal ydeevne og er parate til at investere i overensstemmelse hermed. I den øverste ende giver 640×512- og endda 1280×1024-sensorer billeder i identifikationskvalitet på afstande, hvor enheder af lavere kvalitet kun viser vage klatter. Du registrerer ikke blot varme – du tæller takkerne på en hjort eller skelner en prærieulv fra en hund på en halv mile.

Vores Pixfra Sirius HD-serie ligger i toppen af vores sortiment med en detekteringsrækkevidde på op til 3.600 meter. For politiet, vildtforvaltere, jagtarrangører, der afholder guidede jagter, og seriøse rovdyrjægere, der arbejder i åbent terræn, er en sådan rækkevidde ikke en luksus — det er et værktøj, man er afhængig af hver eneste nat. Chiron LRF og Taurus LRF er udstyret med integrerede ballistiske regnemaskiner, der beregner kuglens fald og giver dig et justeret sigtepunkt på farten. Det forvandler et termisk sigte til et komplet målsøgningssystem – afstandsmåler, ballistisk beregner og termisk kamera med høj opløsning, alt i én enhed. Vores Volans-serie går i en anden retning med synsevne hele dagen igennem, med en justerbar blænde fra F1,2 til F3,0, der tilpasser sig alle lysforhold, så du kun behøver at medbringe én enhed fra solopgang til solnedgang i stedet for at skifte mellem to.
Er premium-modellerne pengene værd for alle? Nej. De dyrere termiske kikkertmodeller tilbyder så høj opløsning og så gode billedegenskaber, at man – medmindre man bruger udstyret ofte – risikerer at betale for flere funktioner, end man har brug for. Hvis du jager et par weekender om året og jager inden for 200 yards, har du ikke brug for en 640×512-sensor med en rækkevidde på 3.600 meter. Men hvis du er professionel, jagtguide eller en person, der bruger mange timer bag et termisk kikkert, er forskellen mellem en $1.500-enhed og en $3.000-enhed umiddelbart synlig i billedklarhed, identifikationsrækkevidde og den samlede oplevelse af at tilbringe lange nætter i felten.
Det rigtige termiske udstyr er ikke det dyreste, du har råd til — det er det, der passer til dit konkrete anvendelsesformål, uden at du går på kompromis med ydeevnen. Når nogen ringer og spørger, hvor meget de bør bruge, kommer det helt an på, hvad de vil bruge det til. Oftest skyldes den store prisforskel termisk sensorens opløsning og billedkvaliteten på termisk kameraet. Når vi taler om forskellen mellem et $3.000- og et $6.000-termisk kamera, handler det ofte om, hvor langt væk dyret kan identificeres. Så start med nogle ærlige spørgsmål: Hvad skal jeg bruge det til? Hvor langt skal jeg kunne se? Hvor ofte vil jeg bruge det? Hvor dårlige er de forhold, jeg kommer til at stå over for?
Her er en oversigt, der hjælper dig med at finde det prisniveau, der passer til dit anvendelsestilfælde:
| Anvendelsestilfælde | Anbefalet niveau | Prisinterval | Typisk sensor | Detektionsrækkevidde |
|---|---|---|---|---|
| Første brug til opvarmning / fritid | Budget | Under $500 | 256×192 | 300–500 m |
| Jagt i weekenden / ejendomssikkerhed | Mellemklasse | $500–$1.200 | 384×288 | 800–1.300 m |
| Eksklusiv brug til natjagt / jagtarrangører | Den øvre del af mellemklassen | $1.200–$2.000 | 384×288 eller 640×512 | 1.000–1.800 m |
| Professionel / retshåndhævelse / langdistance | Premium | $2.000–$3.500+ | 640×512 eller 1280×1024 | 1.800–3.600 m |
En ting, du skal huske på: Hvis du er førstegangskøber, vil du sandsynligvis have brug for et håndholdt termisk monokular til scanning, før du investerer i et termisk sigte. Det er ofte klogere at bruge færre penge på sigteet og afsætte midler til et monokular også, frem for at lægge alt i én enhed og dermed mangle et scanningsværktøj. Hos Pixfra har vi sammensat vores produktsortiment netop med denne virkelighed for øje. Vores monokularer, kikkertsigter, frontmonterede tilbehør og multispektrale kikkerter har alle den samme følsomhed på ≤18 mK og 12 µm pixelafstand, så du får ensartet billedkvalitet, uanset om du spejder over en mark eller kigger gennem et kikkertsigte.
Og glem ikke de samlede ejeromkostninger ud over den angivne pris. Batterisystemer er vigtige — vores Pixfra-enheder bruger standard 18650-batterier på tværs af mange modeller, hvilket betyder billige, tilgængelige erstatningsbatterier i stedet for dyre, proprietære celler. Byggekvaliteten er også vigtig — en enhed med IP67-vandtæthed og MIL-STD-810G-stødsikkerhed holder i mange år længere end en billigere enhed, som du skal udskifte efter to sæsoner. Den billigste termiske enhed er sjældent den bedste investering. Den bedste investering er den, der gør det, du har brug for, holder til den måde, du bruger den på, og fortsætter med at fungere sæson efter sæson. Og hos Pixfra, og hvert eneste produkt i vores sortiment er udviklet ud fra netop denne tanke — praktiske funktioner til virkelige forhold, til en pris, der passer til netop dine mål.
Hvor meget koster et godt termisk monokular i 2026?
I 2026 vil en solid termisk monokular i entry-level-klassen koste omkring $300-$500 med en 256×192-sensor. Modeller i mellemklassen med en opløsning på 384×288 og integrerede funktioner som laser-afstandsmålere koster mellem $800 og $1.500. Håndholdte termiske monokularer i premiumklassen med 640×512-sensorer og udvidet detektionsrækkevidde koster typisk mellem $1.500 og $3.500+. Vores Pixfra-serie tilbyder enheder i alle tre prisklasser, med en NETD-følsomhed på ≤18 mK som en ensartet standard.
Er det pengene værd at bruge over $1.000 på et termisk apparat?
For jægere og friluftsprofessionelle, der arbejder på afstande over 300 yards eller jager flere nætter i løbet af en sæson, ja — hvis man går op over $1.000, får man en markant bedre sensoropløsning, detekteringsrækkevidde og målidentifikation. Hvis du kun jager et par gange om året på tæt hold, kan et kvalitetsapparat under $500 klare opgaven. Spørgsmålet handler ikke kun om, hvad du har råd til, men også om, hvor meget ydeevne dit specifikke anvendelsesformål kræver.
Hvilket termisk udstyr giver mest værdi for pengene lige nu?
Værdien afhænger af dit anvendelsesformål. Til jagt i skovområder på kort afstand og overvågning af ejendomme giver et prisvenligt termisk monokular til under $500 med en opløsning på 256×192 og en opdateringshastighed på 50 Hz det bedste udbytte for pengene. Til alsidig jagt og udendørs brug giver mellemklasse-modeller i prisklassen omkring $800–$1.500 det største løft i faktisk ydeevne pr. dollar. Hos Pixfra rammer vores Arc LRF- og Mile 2-serier konsekvent det perfekte balancepunkt mellem ydeevne og pris for de fleste jægere og friluftsentusiaster.
Hvorfor er termiske kikkerter dyrere end termiske monokularer?
Termiske kikkerter er dyrere, fordi de skal kunne modstå kraftig rekyl, kræver præcise indstillingssystemer og ofte indeholder funktioner som ballistiske regnemaskiner og indbyggede laser-afstandsmålere. Et termisk sigte af god kvalitet koster fra omkring $1.800 til $3.000, mens et godt monokulært sigte kan fås til langt under $500. Hvis budgettet er stramt, anbefaler mange erfarne jægere at starte med et monokulært sigte til at spejde med og spare sammen til et termisk sigte senere.
Fungerer billigere termiske enheder i regn og tåge?
Det afhænger helt af to specifikationer: NETD-følsomhed og IP-klassificering. En billig enhed med dårlig NETD (over 35 mK) vil have svært ved at fungere i tåge, regn eller høj luftfugtighed — billedet bliver fladt og udvasket. En enhed med en NETD på ≤18 mK, som vores Pixfra-serie, viser fortsat tydelige varmekontraster selv under dårlige forhold. Når det gælder vejrbestandighed, skal du gå efter IP67-vandtæthed uanset prisniveau. Alt under IP67 udsætter dit udstyr for risiko under reelle feltforhold.
Buying a thermal device online can feel overwhelming—spec sheets are dense, prices jump all over the map, and everyone seems to have a different opinion. We get it. At Pixfra, we hear from first-time buyers every week who almost made costly mistakes based on bad info floating around the internet. Let’s set the record straight.
The thermal imaging market has changed fast. Thermal imaging technology changes faster than just about anything else in the hunting world—faster than rifles, scopes, or even ammo trends. What was premium two years ago now sits squarely in the mid-range. That speed of change is both exciting and confusing, and it creates a fertile ground for myths that never seem to die.

Part of the problem is how buyers shop for thermal cameras and thermal monoculars online. Most thermal customers buy online and have to go on specs, YouTube videos, and the sometimes compromised impressions of social media influencers to make buying decisions. You scroll through product pages, read conflicting Reddit threads, watch YouTube “reviews” that are really just paid promotions, and walk away more confused than when you started. Between marketing fluff and real user experiences, it’s tough to know what’s legit and what’s noise.
The truth is, buying a thermal device online isn’t any riskier than buying one at a brick-and-mortar store—as long as you know what you’re looking at. And that’s where these three myths do the most damage. They steer you toward the wrong device, or worse, they scare you away from buying altogether. Whether you’re shopping for a handheld thermal monocular, a thermal scope for night hunting, or an infrared camera for property inspection, the same myths keep popping up. So we’re going to walk through each one, tell you exactly why it’s wrong, and show you what actually matters when you’re picking the best thermal device online. Before we jump in, check out our guide on the De 6 vigtigste funktioner, som den bedste termiske enhed skal have i 2026 so you’ve got a solid baseline of what to look for.
This is probably the most widespread myth in the thermal device world, and it catches first-time buyers more than anyone else. On paper, it sounds logical: more pixels, better image, right? Not necessarily. The entire system—lens, sensor, processing algorithms, and display—has to work together. The takeaway here is simple: don’t buy a thermal scope based on resolution alone.
Here’s what most people miss. Resolution is just one piece of the puzzle. A sensor with 640×512 pixels sounds a lot better than one with 384×288 pixels. But resolution alone doesn’t tell you about thermal sensitivity, lens quality, or how the device processes the image it captures. High pixel count alone won’t help unless the sensor is sensitive enough to deliver clear contrast in real-world conditions like fog, humidity, or low temperature differences. A 640×480 sensor sounds impressive, but if it has poor thermal sensitivity (measured in NETD), the resulting image may appear washed out. That’s the part no one puts in the Instagram post.
NETD, or Noise Equivalent Temperature Difference, is where the real magic happens. It’s measured in millikelvins (mK), and it tells you how well the sensor can pick up small differences in heat. NETD stands for Noise Equivalent Temperature Difference. It measures how sensitive the thermal sensor is to tiny differences in heat, and it’s listed in millikelvins (mK). A lower NETD number means the sensor picks up finer heat differences, which translates to sharper contrast between the animal and the background. Our thermal devices at Pixfra achieve NETD values of ≤18mK, which puts them in the high-sensitivity category. That means you’re picking up heat signatures that a lesser sensor would miss completely—especially in summer conditions when the ambient temperature and the target’s heat are close together.
So what does this mean for you when shopping online? Stop sorting by resolution first. Look at the full spec picture: sensor resolution, NETD rating, pixel pitch (12µm vs. 17µm), refresh rate, and objective lens size. A well-balanced 384×288 thermal camera with elite sensitivity and a quality lens will outperform a poorly designed 640×512 device on most nights. Match the specs to your actual use case—close-range hog hunting in timber doesn’t need the same sensor as scanning open fields at 600 meters.
This one hurts wallets everywhere. The idea that you have to spend $5,000 or more to get a “real” thermal device just isn’t true anymore. It’s a myth that benefits sellers of premium-only brands and leaves first-time buyers stuck on the sidelines.
Let’s look at the real numbers. The technology keeps getting better while prices come down. What cost $10,000 a decade ago now delivers similar performance at $1,500. That’s not an exaggeration—it’s a function of how thermal sensor manufacturing has scaled up and matured. Sensor prices have dropped, production quality has risen, and brands like ours at Pixfra have put a priority on making professional-grade thermal imaging available at price points that make sense for regular hunters, homeowners, and outdoor enthusiasts.
The thermal device market in 2026 breaks into pretty clear tiers. Here’s a realistic snapshot of what you can expect at each price level:
| Prisinterval | Sensoropløsning | Typical NETD | Bedst egnet til |
|---|---|---|---|
| Under $500 | 256×192 | ≤40 mK | Close-range use, beginners, property monitoring |
| $500–$2,000 | 320×240 to 384×288 | ≤25 mK | Serious hunters, mid-range detection, all-weather use |
| $2,000–$4,000 | 640×480 to 640×512 | ≤20 mK | Long-range identification, predator control |
| $4,000+ | 1280×1024 | ≤15 mK | Professional and high-end specialty use |
Mid-range options often deliver 80–90% of high-end performance at half the cost. That’s an industry-wide reality, not just a marketing claim. You don’t need the $6,000 device to get a clear image of a hog at 200 yards. For most buyers, strong 384 and 640 options remain the smarter value.

Now, that doesn’t mean you should always go cheap, either. Value and cheap aren’t the same thing. A $250 thermal monocular with a sluggish 25 Hz refresh rate, mediocre NETD sensitivity, and no companion app isn’t a value pick—it’s a compromise that will frustrate you by the third use. The sweet spot is finding a device that gives you what you need, at a price that doesn’t gut your budget, from a brand that actually builds the technology themselves. Pixfra designs and manufactures its own thermal imaging cores and sensors—we’re not just slapping labels on someone else’s hardware. That vertical integration lets us deliver specs you’d normally only see in devices costing twice as much.
This myth pops up in every thermal forum, and we understand where it comes from. Thermal devices aren’t cheap, and dropping $1,000 or more on a product you’ve never held can feel like a gamble. But here’s the thing—buying online is how the vast majority of thermal buyers shop today, and there are solid reasons why it works.
First, think about the alternative. How many local stores near you stock more than one or two thermal monoculars, let alone a full range of thermal scopes, clip-ons, and handheld imagers? There’s no universal “best” thermal—only what’s best for your situation. If your local shop carries two or three brands, your “hands-on” experience is just a limited selection of what’s actually available. Shopping online gives you access to every model, every brand, every spec comparison you need—all in one session, from your couch.
Second, the buying experience has gotten a lot better. Reputable thermal brands now offer detailed spec sheets, real-world video demos, comparison charts, and responsive customer support. At Pixfra, we publish specs down to the click value of our thermal scopes (0.9cm@100m on our Taurus LRF series), and our Pixfra Outdoor App lets you connect to your device, stream live thermal video, and update firmware. That level of transparency didn’t exist five years ago.
Third, returns and warranties protect you. Investing in thermal gear without considering warranty coverage and support infrastructure can lead to expensive problems when repairs or service become necessary. Thermal imaging sensors and electronics require specialized expertise to repair, and devices from manufacturers without established service networks may become unusable after warranty expiration. Warranty terms vary significantly. Some manufacturers offer limited one-year coverage, while others provide extended warranties or explicitly support component upgrades and repairs. When you buy from a manufacturer that stands behind its products and has an established support network, the risk drops to nearly zero. You’re not rolling the dice—you’re making an informed purchase backed by real protection.
The real risk when buying online isn’t the channel itself. It’s buying from a brand you haven’t researched. That’s where the work goes: checking who makes the sensor, reading actual user reviews (not sponsored ones), comparing specs across models, and verifying that the company has a real support infrastructure. If a brand can’t tell you their NETD rating, their sensor origin, or their warranty terms, walk away—regardless of whether you’re shopping online or in person.
Now that we’ve killed the myths, let’s talk about what really matters when you’re shopping for a thermal device online. There are a handful of specs and features that separate a solid purchase from a regrettable one.

Sensor resolution still matters—it’s just not the only thing that matters. You’ll see specs like 256×192 or 384×288—these numbers tell you how many pixels detect heat. More pixels mean clearer images and better identification at distance. But pair resolution with NETD sensitivity, and you’ve got a much clearer picture of actual performance. Our Pixfra Sirius HD series, for example, combines 1280×1024 resolution with ≤18mK sensitivity—that’s not just a sharp image; it’s a sharp image in the worst conditions.
Refresh rate is another spec that gets overlooked. The difference between 25 Hz and 50 Hz is immediately apparent when scanning for moving targets. Don’t rationalize a 25 Hz device as “good enough”—you’ll notice the limitation every time you use it. If you’re scanning for predators, tracking hogs across a field, or monitoring your property perimeter, 50 Hz should be your floor.
Battery life is a deal-breaker for field use. Undervaluing battery life. An all-night predator hunt needs 8 hours minimum. Budget accordingly. Our Pixfra devices range from roughly 4.5 hours to 15 hours depending on the model, and many use standard 18650 batteries that you can swap in the field without going back to your truck.
Detection range vs. identification range—this is a big one. Manufacturers love huge detection numbers. Hunters need usable identification distance. Detection means you can tell something is there. Identification means you are confident what it is. A product page might say 2,000 meters of detection range, but if you can only positively identify your target at 400 meters, that’s the number that actually affects your experience. Always ask about both numbers before you buy.
And finally, don’t ignore build quality and weather resistance. Skipping the IP rating check. Field use means rain. IP54 is not IP67. An IP67 rating means your device can handle temporary submersion in water. If you hunt in the Southeast, run property security in the Pacific Northwest, or just don’t want to baby your gear, IP67 is the standard you should be targeting.
We built Pixfra around one idea: give everyone access to the thermal performance that used to be locked behind military budgets and five-figure price tags. Pixfra offers a wide range of products—from thermal imaging monoculars, add-ons, and riflescopes to thermal imaging and multispectral security cameras—and their mission is to provide professional grade thermal and multispectral optics at budget friendly price points.
Established in 2015, Pixfra has developed over two hundred patented technologies and thermal imaging products for industrial temperature measurement, biological temperature measurement, natural ecology, new energy, carbon neutrality, perimeter prevention, outdoor sports, and consumer electronics. We’re not a brand that repackages someone else’s sensors and charges a markup. We design our own thermal cores, build our own image processing algorithms, and test everything in real field conditions.
When you buy from us online, you’re buying directly from the people who designed and manufactured the technology. That cuts out middlemen, keeps prices honest, and means our support team can actually answer your questions about the product—not just read from a script. Whether you need a compact thermal monocular like the Mile 2 for close-range scouting or a 1280-class flagship like the Sirius HD for long-range observation, we’ve got options that match your actual needs—not just your budget or your ego.
Is it safe to buy a thermal imaging camera online?
Yes, absolutely. Buying a thermal imaging camera online is safe as long as you’re purchasing from a reputable manufacturer or authorized dealer. Look for brands that publish full spec sheets, offer warranty protection, and have responsive customer support. Buying from the manufacturer’s own website (like Pixfra.com) is often the best route because you get direct access to support, firmware updates, and product guarantees.
Does a higher resolution always mean better thermal image quality?
No. Resolution is one factor, but thermal sensitivity (NETD), lens quality, pixel pitch, and image processing all play a role. A 384×288 sensor with ≤20 mK NETD and a quality germanium lens can produce sharper, more usable images than a 640×512 sensor with poor sensitivity. Always look at the full spec picture, not just the pixel count.
What NETD value should I look for in a thermal device?
For most outdoor and hunting use, a NETD of ≤25 mK is solid. For demanding conditions like high humidity, fog, or summer heat where ambient and target temperatures are close, aim for ≤18 mK or lower. Pixfra’s lineup hits ≤18 mK across many of our models, putting them in the high-sensitivity category without the premium price tag.
How much should I spend on my first thermal monocular?
For most first-time buyers, the $500–$2,000 range offers the best balance of performance and value. You’ll get usable sensor resolution, decent NETD ratings, features like Wi-Fi and video recording, and enough battery life for a full night out. Going below $300 usually means real trade-offs in refresh rate, sensitivity, and build quality that you’ll notice quickly.
Can thermal devices work during the day?
Yes. Thermal imaging is unaffected by visible light, making it effective 24/7. Unlike night vision, which relies on amplifying ambient light, thermal cameras detect heat signatures. That means they work just as well at noon as they do at midnight—in darkness, fog, haze, or bright sunlight. Some Pixfra models, like the Volans Series, even feature adjustable apertures specifically designed to optimize daytime and nighttime performance.
Resolution is one of the first specs you’ll see on any thermal device — and for good reason. It shapes everything from how sharp your image looks to how far out you can tell a coyote from a fence post. But not all resolution numbers mean what you think they do. We’re here at Pixfra to break it all down so you can pick the right thermal monocular, scope, or front attachment without getting tricked by big numbers that don’t deliver in the field.
When we talk about resolution on a thermal device, we’re talking about the number of pixels on the infrared sensor itself — the detector array inside the device that picks up heat signatures and turns them into an image you can actually see. It’s expressed as two numbers, like 256×192, 384×288, or 640×512. Those numbers tell you how many tiny heat-detecting elements sit on the sensor. Thermal sensor resolution is expressed as two sets of numbers (vertical × horizontal), for example 640×512px. What you are looking for to determine resolution is the total number of pixels the sensor offers — for instance, a 640×512 sensor gives you a total of 327,680 pixels.

Think of each pixel as a tiny thermometer. Every single one records its own temperature reading, and the device stitches all those readings together into the heat image you see through the eyepiece. “Pixels are the data acquisition points for thermal measurement… More data points mean more information is provided for accurate thermal interpretation. More pixels also mean greater visual resolution in the thermal image.” So when you go from a 256×192 sensor (49,152 pixels) up to a 640×512 sensor (327,680 pixels), you’re not just getting “a better picture” — you’re getting more than six times the data points feeding that image. That’s a massive jump in the amount of thermal information your device can gather in a single frame.
Now here’s something that trips up a lot of buyers: sensor resolution and display resolution are not the same thing. It’s easy to confuse sensor resolution with display resolution or recording resolution. Display resolution is the resolution of the built-in screen you look through, and it will often be greater than the sensor resolution. A device can have a beautiful 1280×960 OLED display, but if the sensor behind it is only 256×192, you’re still seeing a 256×192 thermal image stretched across that screen. The sensor is the bottleneck. Always check the sensor specs first.
At Pixfra, we pair our high-resolution sensors with 12μm pixel pitch technology across our product lines — from the Mile 2 series for everyday use to the Sirius HD series for demanding professional applications — so you get sharp, high-contrast images no matter which model you choose. Before you go further, take a look at the De 6 vigtigste funktioner, som den bedste termiske enhed skal have i 2026 to see how resolution fits into the bigger picture of what makes a thermal device actually perform.
Here’s where resolution really earns its keep: detection range and target identification. A higher-resolution sensor doesn’t just give you a prettier picture — it lets you see farther and figure out what you’re looking at faster. Higher resolution means there are more observation and temperature measurement points, allowing for the observation and measurement of smaller targets and the ability to observe objects at greater distances.[4]
Let’s put it in hunting terms. You’re scanning a field at 400 meters with a 256×192 sensor. You see a warm blob. Could be a hog, could be a coyote, could be a stump that soaked up sun all day. With a 640×512 sensor at the same magnification and lens, you’re looking at that same blob with over six times more thermal data points. You can see legs, a head shape, movement — you can actually identify what you’re seeing without having to close the distance and risk spooking the animal.
Devices with a 384×288 pixel sensor are generally the most popular on the market since they’re more affordable than a 640×512 thermal device but still allow detection ranges out to 1,800 meters depending on lens size, and the higher number of pixels means the zoom function works more effectively.[5] That’s a real sweet spot for a lot of hunters, and it’s exactly why we offer the 384×288 configuration across several of our mid-range lines.
Digital zoom is a big factor here too, and this is where resolution differences really show up. The true advantage of higher resolution sensors is the ability to digitally zoom and maintain a higher degree of clarity and field of view. Since the zoom is digital and not optical, every time you double the zoom (from 1x to 2x for example), you halve both the pixels and field of view available. So on a 256×192 sensor at 2x digital zoom, you’re down to an effective 128×96 image — and that’s going to look noticeably grainy. On a 640×512 sensor at 2x zoom, you’re still working with 320×256, which is more than usable. If you plan on zooming in to identify targets at distance, a higher base resolution gives you much more room to work with before the image falls apart.
Our Pixfra lineup covers detection ranges from around 500 meters on entry-level devices all the way up to 3,600 meters on our premium Sirius HD series. But detection range and identification range are two different numbers — identification range, where you can actually confirm what you’re seeing, is always shorter. For most recreational hunters and outdoor enthusiasts working inside 300–600 meters, our mid-range models like the Arc LRF and Mile 2 series hit the sweet spot between resolution, range, and price.
Not every hunter, wildlife observer, or outdoor enthusiast needs the highest resolution on the shelf. The right resolution depends on how you use your device, how far you need to see, and what you’re willing to spend. Here’s a breakdown of the most common sensor configurations and where each one fits best.

256×192 (49,152 pixels) — This is the entry point for real thermal imaging. Devices with this configuration can only be used at shorter ranges and do not allow you to digitally magnify the image without a significant reduction in clarity. For short-range use — scouting your backyard for critters, quick property scans at night, or budget-friendly wildlife observation under 200 meters — it gets the job done. If you’re just getting started with thermal and want to keep costs low, this tier works.
384×288 (110,592 pixels) — This is where things get serious. At Pixfra, we consider this the workhorse resolution for most hunting and outdoor scenarios. You get enough pixels for clean digital zoom, solid identification range, and detail that lets you pick animals out of brush and treelines at real-world hunting distances. Resolution at this tier gives you sharper images for identifying targets at longer distances and makes it easier to separate animals from background clutter, especially in dense foliage.
640×512 (327,680 pixels) — The top tier for outdoor thermal devices. This configuration is generally the highest quality thermal sensor available in the market, producing high-definition thermal images with superior long-range detection, recognition, and identification. If you’re scanning large areas, working at extended distances, or need the clearest possible image for fast-moving targets, this is where you want to be. Our Sirius HD series runs at this resolution, and the difference in image quality is visible from the first time you look through the eyepiece.
Here’s a quick comparison table to help you match resolution to your needs:
| Sensoropløsning | Total Pixels | Best Use Case | Typical Detection Range | Digital Zoom Quality |
|---|---|---|---|---|
| 256×192 | 49,152 | Budget scanning, short-range scouting | Up to 500m | Limited — degrades quickly |
| 384×288 | 110,592 | Hunting, wildlife observation, property security | Up to 1,800m | Good — usable at 2x–4x |
| 640×512 | 327,680 | Long-range hunting, law enforcement, professional use | Op til 3.600 m | Excellent — sharp even at 4x+ |
We designed our product lines around these tiers. The Mile 2 series handles everyday hunting with a balance of resolution and portability. The Arc LRF adds a built-in laser rangefinder for distance-confident shooting. And the Sirius HD series pushes resolution and detection range to their limits for buyers who need every pixel they can get.
Resolution isn’t just about how many pixels sit on the sensor — it’s also about how big each pixel is. That measurement is called pixel pitch, and it plays a direct role in the sharpness and compactness of your thermal device. Pixel pitch is the distance between the centers of two adjacent pixels on the sensor, measured in micrometers (e.g., 12µm). Devices with smaller pixel pitches are more detailed since they have a higher density of pixels on the sensor, meaning the device can take more temperature point measurements.
The two pixel pitches you’ll see on most handheld thermal devices in 2026 are 12µm and 17µm. A smaller pixel pitch, such as 12µm, means pixels are packed more closely together, allowing for higher resolution images and better detection of smaller objects. A larger pixel pitch, like 17µm, means fewer pixels per unit area, resulting in lower resolution images but potentially better sensitivity to thermal radiation.
Here’s the practical takeaway: smaller pixel pitch means smaller sensors occupying less physical space — allowing more compact thermal scopes or enabling higher resolutions in the same sensor footprint. For the same physical sensor size, you can pack significantly more 12µm pixels than 17µm pixels. That’s why modern 12µm sensors have made compact, high-resolution thermal monoculars possible at prices that would’ve been unthinkable a few years ago.
For thermal imaging devices with a smaller pixel sensor, the same detection range, magnification, and field of view can be achieved with lenses that have a smaller focal length. Smaller lenses mean a smaller, lighter device overall. That’s a direct win for anyone carrying gear on multi-hour hunts or backcountry trips where every ounce counts.
At Pixfra, we use 12μm pixel pitch across our product lines. It’s a deliberate choice. It lets us deliver 384×288 and 640×512 resolutions in housings that stay compact and field-ready, without sacrificing detection range or image quality. Our Draco series, for example, was designed with a lightweight build specifically for hunters who need multi-functional performance without the bulk — and 12µm pixel pitch is a big part of how we got there.
We’ll be straight with you: resolution matters a lot, but it’s not the only thing that makes a thermal device perform well. Two thermal devices can share identical specifications — the same resolution, pixel pitch, and NETD — yet deliver noticeably different images. That’s because image quality depends on the entire imaging system, not just the sensor. If you buy a high-resolution device with poor thermal sensitivity or a sluggish refresh rate, you’re going to be disappointed.

NETD (Noise Equivalent Temperature Difference) is the spec that tells you how sensitive your sensor is to small heat differences. It’s measured in millikelvins (mK), and lower is better. The most defining characteristic that affects the thermal resolution of a thermal imaging device is the sensor’s NETD. It’s measured in millikelvins and represents the smallest temperature difference that the sensor can perceive. The lower the NETD value, the higher the sensor sensitivity. A device with amazing resolution but poor NETD will show you a sharp but flat, washed-out image on warm nights when everything is radiating heat at similar levels. Our Pixfra devices achieve NETD values of ≤18mK, which places them at the top end of sensitivity for hunting-grade thermal optics.
Refresh rate is the other spec that directly affects your experience. A 50Hz refresh rate is the baseline for any thermal device worth buying in 2026. That rate gives you smooth, fluid imagery so you can track moving targets — running hogs, trotting coyotes — without blur or stutter. Frame rate affects how smooth the image appears when moving the camera. Professional models with 25–60Hz refresh rates provide fluid, real-time imaging, while budget models at 9Hz show noticeable lag. This becomes relevant when scanning large areas or tracking moving heat sources.
Image quality in a thermal monocular depends on the balance between sensor resolution, pixel pitch (µm), and NETD sensitivity. Higher resolution captures more detail, smaller pixel pitch increases sharpness, and lower NETD improves contrast in low-visibility conditions. The best performance comes from optimizing all three.
That’s exactly how we approach product design at Pixfra. We don’t just chase resolution numbers — we balance resolution with ≤18mK NETD, 12µm pixel pitch, and high refresh rates across every device in our lineup. It’s the system that makes the image, not any single spec in isolation. That’s what separates a device that looks good on a spec sheet from one that actually performs at 2 AM in a foggy hunting blind.
Picking the right resolution comes down to a simple question: what are you actually going to do with your thermal device? There’s no point in paying for 640×512 if you’re mostly scouting your property line at 100 meters. And there’s no point in saving money on 256×192 if you’re hunting predators at 400+ meters and need to identify what you’re shooting at.

For short-range scouting, casual wildlife observation, and basic property checks, a 256×192 sensor keeps the price down and still gives you functional thermal imaging for close-up work. If you’re a first-time thermal buyer on a budget, this is a fine place to start.
For most hunters, wildlife observers, and outdoor enthusiasts, 384×288 is the resolution we recommend. It gives you enough pixels for clean images at real hunting distances, supports usable digital zoom, and balances cost against performance. It’s the resolution behind several of our most popular models, including the Mile 2 series and the Arc LRF.
For long-range detection, professional use, or anyone who wants the sharpest possible image under the toughest conditions, 640×512 is the move. Our Sirius HD series lives at this tier, and it’s built for people who need to scan fields at 1,000+ meters and still tell exactly what they’re looking at.
Here’s a final point worth remembering: resolution works best when it’s backed by the right supporting specs. A 640×512 sensor with poor NETD sensitivity, a low refresh rate, or a bad lens will underperform a well-tuned 384×288 system every time. At Pixfra, we build every thermal monocular, scope, and front attachment as a complete imaging system — resolution, pixel pitch, NETD, optics, and processing all working together. That’s how you get a thermal device that actually delivers in the field, not just on the spec sheet.
Is 384×288 resolution good enough for hunting?
For most hunting scenarios, 384×288 is more than good enough — it’s the most popular resolution tier on the market for a reason. It gives you solid image detail at distances between 200 and 600 meters, supports clean digital zoom up to 4x, and helps you tell the difference between a target animal and background clutter. Unless you’re doing long-range work past 800 meters or need pixel-perfect identification at extreme distances, 384×288 is the sweet spot where performance meets value.
Does higher resolution drain battery faster on a thermal device?
Higher resolution sensors do process more data, which can draw more power. But in practice, the difference between a 384×288 and a 640×512 sensor on battery life is smaller than most people expect. The bigger battery drains come from screen brightness, refresh rate, Wi-Fi streaming, and cold weather. At Pixfra, our devices range from about 4.5 to 15 hours of battery life depending on the model, and many use swappable 18650 batteries — so even if a higher-resolution model runs a bit shorter, you can pop in a fresh cell in seconds.
Can digital zoom replace higher sensor resolution?
No. Digital zoom magnifies existing pixels — it doesn’t create new detail. Every time you double the digital zoom (from 1x to 2x, for example), you halve both the pixels and field of view available. So starting with a higher base resolution gives you far more room to zoom before the image turns grainy. If you plan to zoom in often, invest in higher sensor resolution rather than relying on digital magnification to close the gap.
What’s the best resolution for a thermal monocular in 2026?
It depends on your use case and budget. For general-purpose hunting and outdoor use, 384×288 with a 12µm pixel pitch gives you the best balance of image clarity, detection range, and price. For professional or long-range applications, 640×512 delivers the sharpest image with the best zoom quality. What was once a premium-only resolution (640×512) has now become more accessible at the mid-range, so you’re getting more for your money than ever before.
Does resolution affect how far a thermal device can detect?
Yes, but not on its own. The key factors that affect detection distance include target size, temperature difference, sensor resolution, lens focal length, and more. A higher-resolution sensor captures more detail at distance, which stretches your identification range — the point where you can actually tell what a heat signature is. But lens quality and NETD sensitivity also play a big role. That’s why at Pixfra, we design the full optical system together so every spec supports the next.
The thermal device market in 2026 looks completely different from even two years ago. Sensor tech has leaped forward, prices have dropped, and the feature sets you can get today would’ve been premium-only a couple of seasons back. But with so many options out there, how do you know what actually matters? We’re here at Pixfra to cut through the noise and show you the top 6 features you need in the best thermal device this year.
Whether you’re a hunter tracking hogs after dark, an outdoor enthusiast exploring backcountry trails, or a wildlife observer watching nocturnal animals without disturbing them, your thermal device is only as good as its features. And not all features are equal. Some specs look flashy on paper but mean nothing in the field. Others seem small but make or break your experience at 2 AM in a hunting blind.

The thermal monocular market in 2026 looks significantly different from even two years ago, with three developments reshaping what buyers should expect at each price tier — including higher sensor resolutions at lower prices, where what was once a premium specification (640×512) has become a mid-range standard. That shift is great news for you, but it also means you’ve got to be more deliberate about what you’re shopping for. A cheaper price tag doesn’t always mean a better deal, and spending more doesn’t always buy you the features you actually need.
At Pixfra, we build thermal monoculars, thermal scopes, thermal front attachments, and multispectral binoculars — all designed for real outdoor conditions. We’ve used what we’ve learned from years of developing our proprietary heat-detection technology to boil down the six features that separate a great thermal device from one that’ll frustrate you by your third outing. If you’re also looking to get more out of your existing setup, check out the best accessories to upgrade your thermal scope performance for some practical add-ons that make a real-world difference.
If there’s one spec that defines how well a thermal device performs, it’s NETD — Noise Equivalent Temperature Difference. This number, measured in millikelvins (mK), tells you the smallest temperature difference the sensor can pick up. A lower NETD value generally indicates that the device can detect smaller temperature variations, resulting in a clearer and more detailed image. Think of it this way: on a warm summer night when the ground, trees, and air are all radiating heat at similar levels, a device with poor NETD gives you a washed-out, flat image. A device with strong NETD — say, ≤18mK like our Pixfra thermal devices — shows you crisp contrasts between an animal and its background, even in challenging conditions like fog, rain, or humidity.
NETD shows how well your thermal monocular can see small changes in heat. Lower NETD numbers mean clearer pictures. In 2026, the best models have NETD below 15 mK, so you can see tiny heat changes. Pixel pitch matters too — smaller pixel pitch, like 12 µm, gives you sharper pictures and helps you spot things better. Our devices at Pixfra achieve NETD values of ≤18mK, which places them at the high end of sensitivity for hunting-grade thermal optics. That kind of sensitivity means you’re not squinting at blurry shapes — you’re seeing defined outlines, even when conditions turn ugly.
Then there’s sensor resolution. This is the other half of the image quality equation. Resolution is expressed as the number of pixels on the thermal sensor — common options include 256×192, 384×288, and 640×512. Resolution is the heart of any thermal scope — it determines how clear and detailed your view will be. Lower resolutions like 256×192 are great for budget options and short-range hunting, while 384×288 or 640×512 offer sharper images for identifying targets at longer distances. Higher resolution scopes make it easier to distinguish between animals and background clutter, especially in dense foliage. But resolution isn’t everything; factors like sensor sensitivity and refresh rate also play a huge role in overall performance. At Pixfra, we pair our high-resolution sensors with 12μm pixel pitch technology across our product lines — from the Mile 2 series for everyday use to the Sirius HD series for demanding professional applications — so you get sharp, high-contrast images no matter which model you choose.
Detection range is one of the first specs people look at, and for good reason. It tells you how far out the device can spot a heat signature. But here’s a detail that trips up a lot of first-time buyers: detection range and identification range are different figures — identification range, where you can confirm what you’re seeing, is always shorter. A device might claim it can detect a heat source at 1,500 meters, but that doesn’t mean you’ll be able to tell if it’s a deer, a coyote, or a stump at that distance. For hunters, the identification range is what really counts. Always ask about both numbers before you buy.

Our Pixfra lineup covers a wide spectrum of detection ranges. Entry-level devices start at around 500 meters, while our premium Sirius HD series pushes out to 3,600 meters. That kind of reach gives law enforcement, wildlife managers, and serious hunters the ability to scan massive areas without moving a step. For most recreational hunters and outdoor enthusiasts working inside 300-600 meters, our mid-range models like the Arc LRF and Mile 2 series hit the sweet spot between performance and price.
Now let’s talk about laser rangefinders (LRF). For hunters taking shots beyond 150 yards at night, a built-in LRF significantly improves shot placement confidence and removes the need for a separate ranging device. An integrated LRF gives you exact distance to your target with the press of a button — no fumbling for a separate device in the dark. Our Pixfra models with “LRF” in their names, like the Arc LRF, Chiron LRF, and Taurus LRF, feature integrated laser rangefinders with 1,000-meter range capability. Paired with the built-in ballistic calculators found in models like the Chiron LRF and Taurus LRF, you get a system that computes bullet drop and gives you an adjusted aiming point on the fly. That’s not a gimmick — it’s the difference between a clean, ethical shot and a miss.
Here’s a feature that doesn’t get nearly enough attention until you’re three hours into a hunt and your screen goes dark. Thermal devices consume power quickly, especially at higher refresh rates and brightness. Look for at least 8 hours of continuous operation. Replaceable batteries or external power packs can be lifesavers during long hunts. Battery life is directly tied to how useful your thermal device actually is in the field. A device with incredible image quality and a two-hour battery is basically a very expensive paperweight by midnight.
Our Pixfra devices range from approximately 4.5 hours to 15 hours of battery life depending on the model and usage conditions. Many of our models use standard 18650 batteries that you can swap in seconds. That’s a deliberate design choice. Proprietary internal batteries might save a few grams of weight, but when you’re deep in a hunt and the power dies, being able to pop in a fresh 18650 from your pocket is worth its weight in gold. And here’s a pro tip from our own field experience: cold weather can slash battery performance by 30-50%. Always carry spare batteries in an inside pocket where your body heat keeps them warm.
The table below gives you a quick look at how battery life stacks up across different use cases and what you should be targeting:
| Anvendelsestilfælde | Minimum Battery Life Needed | Recommended Battery Type |
|---|---|---|
| Short evening hunts (2-3 hrs) | 4-5 hours | Internal rechargeable |
| All-night predator control | 8-10 hours | Swappable 18650 |
| Multi-day backcountry trips | 10-15 hours | Swappable + spares |
| Property security patrols | 6-8 hours | Rechargeable w/ quick charge |
| Wildlife observation sessions | 5-7 hours | Either type works |
Match your expected use to the right battery system and you’ll never be caught in the dark with a dead device.
Your thermal device is outdoor gear. Full stop. It’s going to get rained on, dropped on rocks, tossed into a pack, and used in temperatures ranging from scorching summer nights to freezing winter mornings. If it can’t handle that, it doesn’t matter how pretty the images are.

Field gear must survive drops, rain, and dust. Devices with IP67-rated housing can withstand immersion in water up to one meter deep for 30 minutes. Non-slip rubber armor exteriors provide a secure grip even when wearing gloves or when the device is wet. Battery life is another critical factor. Look for an IP rating — IP67 is the gold standard for thermal devices in 2026. That means the device is fully sealed against dust and can survive submersion in water. Some cheaper devices only carry an IP54 rating, which handles splashes but won’t survive a dunk. If you hunt in rain, cross streams, or work in dusty environments, IP67 is non-negotiable.
At Pixfra, we build our devices for the same conditions we use them in. Our thermal scopes can handle heavy recoil, our monoculars survive drops, and our housing materials resist corrosion over years of use. Look for MIL-STD-810G or IP67/IP68 seals, impact-resistant housings, and waterproof controls. Choose models with sealed optics, antifog vents, and corrosion-resistant finishes. Make certain battery compartments stay secure in wet or muddy conditions, and confirm proper field-maintainable seals. If you’ll expose gear to rough terrain, prioritize durability over extra features. Weight also plays a role here — a thermal device that’s too heavy will tire you out during long sessions, affecting your aim and your patience. Our Draco series, for example, was designed with a lightweight build specifically for hunters who need multi-functional performance without the bulk.
Ergonomics tie into durability too. Cold, gloved hands at 2 AM in a hunting blind don’t mix well with complicated menus or finicky buttons. Intuitive button layouts, fast startup times, and polished companion apps that don’t require a manual to operate separate the genuinely usable devices from the frustrating ones. If you can’t operate your thermal device with one hand in the dark while wearing gloves, the design has failed. We keep our controls simple and accessible across the Pixfra lineup because real-world use demands it.
The best thermal device in 2026 doesn’t just show you a heat image — it connects to your phone, records video, streams live footage, and updates its own firmware over the air. Integrated feature sets like built-in laser rangefinders, onboard audio and video recording, Wi-Fi streaming, and companion app ecosystems are increasingly standard on serious devices rather than premium additions. The best thermal imaging monocular options in 2026 deliver an entire field toolkit in a single unit.
Our Pixfra Outdoor App supports all our current models, including the Sirius, Arc LRF, Mile 2, Pegasus Pro, Chiron LRF, Taurus, and Taurus LRF series. Through the app, you can update firmware, adjust settings, and transfer images and video directly to your smartphone. That kind of connectivity is more than a convenience — it’s a practical tool for documenting hunts, sharing scouting data with hunting partners, or keeping records of wildlife activity on your property.
Color palettes are another smart feature that experienced users swear by. White Hot is the most common mode, where heat sources appear white, and is ideal for general detection in open fields. Black Hot, where heat sources appear black, is preferred by many professional hunters for better detail on the animal’s body. Red Hot highlights the warmest parts of the image in red and is excellent for quickly picking out a target in a complex environment. Iron Bow and Rainbow use a spectrum of colors to show varying temperature gradients, helpful for identifying mechanical heat leaks or specific environmental features. Multiple palette options let you adapt your display to different terrain, weather conditions, and personal preference — without changing the detection ability of the device itself.
And let’s not overlook the refresh rate. A 50Hz refresh rate is the baseline for any thermal device worth buying in 2026. That rate delivers smooth, fluid imagery so you can track moving targets — like running hogs or coyotes — without blur or chop. Anything below 30Hz will give you a stuttering image that makes fast-moving targets hard to follow. Our Pixfra devices are built with high refresh rates across the board, because in the field, smooth imaging isn’t a luxury — it’s a necessity.
Our Volans series also stands out with its all-day vision capability. It features an adjustable aperture from F1.2 to F3.0 to adapt to different lighting conditions, making it one of the few thermal devices on the market that performs just as well in broad daylight as it does in total darkness. That kind of versatility means you carry one device instead of two.
Key Takeaway: The best thermal device in 2026 combines high thermal sensitivity (≤18mK NETD), a resolution that matches your use case, reliable detection range with an integrated laser rangefinder, a battery system that outlasts your hunting session, rugged IP67 construction, and smart features that keep you connected and in control. At Pixfra, we engineer every product in our lineup around these six features because we know what matters when conditions get real.
What NETD rating should I look for in a thermal monocular?
For most hunting, wildlife observation, and outdoor applications, you want a thermal device with an NETD of ≤25mK or lower. A device with an ultra-sensitive NETD rating of ≤18mK can detect incredibly minute temperature differences, providing a crisp, detailed image even in the most challenging environments like heavy fog, rain, or complete darkness. Our Pixfra devices achieve ≤18mK, putting them at the top end of thermal sensitivity for outdoor-grade optics.
Is a built-in laser rangefinder worth it on a thermal device?
If you’re hunting at distances beyond 150 yards or shooting at night, yes — a built-in LRF is a real advantage. It removes the need to carry a separate rangefinder and gives you instant distance data so you can adjust your shot. Our Pixfra Arc LRF, Chiron LRF, and Taurus LRF models all include integrated laser rangefinders with 1,000-meter range. Paired with a ballistic calculator, these models give you a complete targeting solution in one device.
How long does a thermal device battery last?
If you plan to hunt for a long time, you need a device with a long battery life. Many thermal imaging monoculars have a runtime of 6, 8, or 10 hours. If you know you only need an hour, you can get by with a cable-powered unit. Our Pixfra devices range from about 4.5 to 15 hours depending on the model. For all-night hunts, look for models with swappable 18650 batteries so you can carry spares and swap without downtime.
Can you use a thermal device during the day?
Absolutely. Thermal devices detect heat, not light, so they work just as well in daylight as they do at night. Our Pixfra Volans series goes a step further with all-day vision capability and an adjustable aperture (F1.2-F3.0) that adapts to changing light conditions, making it an especially strong pick for hunters and observers who need 24-hour coverage from a single device.
What IP rating do I need for a thermal device used outdoors?
For any serious outdoor use — hunting, hiking, wildlife observation, property security — you want at least an IP67 rating. IP67 rating is legit. Rain, snow, condensation — none of it matters. The housing feels solid despite the price point. IP67 means full dust sealing and protection against temporary water submersion, which covers rain, stream crossings, snow, and accidental drops into puddles. Anything less than IP67 puts your gear at risk in real field conditions.
You just unboxed your new thermal device. It looks great, feels solid, and you’re ready to get out in the field. But before you do, there are a few things you need to know. Proper calibration and regular maintenance are what separate a thermal scope that performs well for a decade from one that goes fuzzy after a season. We’ve put this guide together at Pixfra to walk you through everything — from your first power-on to long-term storage. Whether you’re running a thermal scope, a monocular, or a front attachment, these steps apply across the board.
Let’s clear something up right away: when we talk about calibrating a thermal device, we’re not talking about the same thing as zeroing your scope on a rifle. Calibration — sometimes called NUC (Non-Uniformity Correction) or FFC (Flat Field Correction) — is a sensor-level process that keeps your thermal image clean, even, and free of artifacts. Thermal devices are highly sensitive to temperature changes in their environment, and since temperature fluctuates constantly, the device needs to periodically refresh to accurately measure temperature differences. Without this process, your image starts to look grainy, washed out, or streaked with lines that shouldn’t be there.

Here’s the simple version of what happens during calibration. During calibration, the device briefly covers its sensor with a shutter to create a flat, constant temperature reading. The device uses that flat reference to reset how each pixel responds to infrared energy. Think of it like resetting the baseline so your sensor knows what “neutral” looks like again. As the device operates, internal temperature changes cause each pixel to respond slightly differently, creating non-uniformity across the image. Without calibration, the image develops visible artifacts. Once the correction runs, those artifacts disappear and you’re back to a sharp, high-contrast picture.
Most people notice calibration for the first time when their screen briefly freezes. In cold environments, calibration occurs more often during the first minutes of use. This is expected behavior, not a defect. A thermal image freezes because the sensor cannot produce a valid image during calibration. When calibration begins, the sensor input is blocked by a reference surface. During this moment, the device has no usable scene data. To avoid displaying incorrect information, the system holds the last valid frame on screen. This creates a brief freeze. The freeze is not a malfunction. It is a functional requirement that ensures calibration accuracy and prevents corrupted imagery. So don’t panic when it happens — it means your device is doing exactly what it should. The frequency of calibration depends on the operating time of the device. The longer the thermal imager runs continuously, the less frequently calibration is needed. You’ll notice more frequent calibrations in the first few minutes after powering on, especially in cold weather, and then fewer as your device warms up and stabilizes.
Most modern thermal devices offer three calibration modes: automatic, semi-automatic, and manual. There are three different calibration modes: manual, automatic, semi-automatic. Each has a place depending on what you’re doing in the field. Let’s break them down so you can pick the right one for your situation.
Automatic mode is what we recommend for most users, especially if you’re new to thermal. With automatic calibration, a software algorithm has a timer or some software that checks the image for drops in quality. When the device is being calibrated, the image freezes for a second or two and in most devices, the shutter closes for the time of the calibration. There is a distinct sound associated with shutters closing and opening. You don’t have to think about it — the device handles everything on its own. The only downside is the brief click sound the internal shutter makes, and some hunters don’t love that when they’re sitting in a quiet stand. Semi-automatic mode lets you trigger calibration with a button press but uses the internal shutter, so it’s still quick and clean. Manual mode is the quietest option. With the manual calibration mode, the user has to press a button and manually close the front cap. The advantage of the manual calibration mode is that it’s much quieter than the other two modes that use the shutters. You press a button and cover the lens yourself — either with the lens cap or your hand — so there’s no shutter click at all. This is a favorite for hunters who need total silence during close-in predator work or hog hunts.

Regardless of which mode you use, there are a few field rules to follow. A lot of image problems that look like bad contrast or weak sharpness actually start with calibration drift. Run FFC when the image starts to look uneven across the screen. Common signs include banding, blotches, or a hazy “dirty glass” look that was not there a few minutes ago. You will often notice this after a major temperature change, like stepping out of a warm truck into cold air. Our advice: Recalibrate before you start chasing settings. If the image has drifted, you may end up over-adjusting contrast or sharpness to compensate for a temporary issue. That usually leaves you with a harsher image later. A better order is simple: focus first, run FFC next, then evaluate the picture. That workflow saves you from fiddling with settings that weren’t the problem to begin with. For a deeper look at the gear that pairs with proper calibration — like quality mounts and battery packs — check out our guide on the best accessories to upgrade your thermal scope performance.
One more thing that trips people up: calibration and zeroing are two different jobs. Calibration deals with sensor image quality. Zeroing aligns your reticle with the point of impact on your rifle. To achieve accurate shooting, the thermal scope must be calibrated to ensure that the image aligns correctly with the point of impact of the rifle’s shot. You need both, and they work together — but don’t confuse the two. Always run a calibration (NUC) before you start adjusting your zero. A drifted sensor image can make your point of aim look off when the real problem is just sensor noise, not your scope’s alignment.
Your thermal lens is not the same as the glass on your day scope. Thermal scope lenses aren’t regular glass. They’re made from germanium or other specialized materials with delicate coatings that need careful handling. Germanium is expensive and the anti-reflective coatings on these lenses are sensitive to pressure, chemicals, and even the oils on your skin. Clean them wrong and you’ll cause damage that no amount of recalibration can fix.

Here’s our recommended cleaning process. Never wipe a dusty lens directly. Loose particles of dust or sand can scratch the surface. Always start with a gentle air duster or a soft, optical brush to remove dirt without friction. Do not blow on the lens with your breath (condensation streaks) or use tissues, paper towels, or rough fabrics, as these cause micro-scratches. Once the loose dust is gone, apply a few drops of optical-grade cleaning solution directly to the cloth, never to the lens itself, to prevent liquid seepage. Wipe the lens gently in circular motions, starting from the center and moving outward. That’s it. No fancy techniques. Just patience and the right materials.
Here’s a pro tip we’ve learned from years of field use: Clean your thermal camera lens only when strictly necessary, and only when there is visible dirt or fingerprints. Over-cleaning can actually wear down the anti-reflective coating faster than a little dust ever would. A light coat of dust is far less harmful than scrubbing with the wrong cloth. Flip-up lens covers are your best friend here — they keep debris out so you clean less often in the first place. And when it comes to chemicals, skip the household glass cleaners entirely. Avoid regular eyeglass cleaners on thermal scopes. Thermal lenses use germanium or specialized materials with unique coatings that react differently than standard glass. Use lens cleaners specifically designed for optical instruments with at least 30% isopropyl alcohol, or 96% isopropyl alcohol solutions. Regular eyeglass cleaners may contain additives that damage thermal scope coatings and reduce image quality over time.
Lens Cleaning Quick-Reference Table
Trin Tool Notes 1. Remove loose dust Air blower or soft optical brush Never wipe a dry, dusty lens 2. Apply cleaner Optical-grade solution on microfiber cloth Never spray directly on lens 3. Wipe gently Microfiber cloth, circular motions Center outward; no pressure 4. Inspect Visual check under light Repeat only if needed 5. Protect Flip-up lens cap Always cover when not in use
Battery management doesn’t get enough attention, and it’s one of the top reasons thermal devices underperform in the field. Most thermal scopes run 3 to 8 hours on a single charge depending on settings, temperature, and display brightness. Scopes can eat up battery power, especially if you’re using them for extended periods. To make sure your scope lasts, try to avoid having the screen at maximum brightness when it’s not needed. Use a power-saving mode when possible and bring extra batteries or a portable charger if you’re planning a long session.
Cold weather hits battery performance harder than most people realize. We’ve seen fully charged lithium batteries lose 20–30% of their effective capacity in freezing temperatures. Keep spare batteries in an inside pocket close to your body to maintain warmth. Most thermal riflescopes are powered by rechargeable or replaceable batteries. Proper battery care is critical to ensure uninterrupted performance. For long-term storage, always remove the batteries to prevent leakage, which can damage internal components. If your scope uses rechargeable batteries, charge them periodically, even during periods of non-use, to maintain their lifespan. Avoid overcharging, as this can lead to overheating and degradation. Carry spare batteries during extended outings to avoid losing functionality in the field. And if you’re doing all-night hunts, consider pairing your device with an external power bank. Many modern thermal scopes accept USB power input, which means you can run your device for 10 or more hours without worrying about dead batteries.
Key Data Point: Most thermal scopes can last between 40,000 to 60,000 hours of operational time for the thermal sensor, while displays typically last about 10 years. That’s a long life if you take care of the device — and battery management is a big part of that equation.
Firmware is the other half of this section, and it’s often overlooked entirely. Check for firmware updates regularly and install them as recommended by the manufacturer. Firmware updates can improve the performance and functionality of the scope. We release firmware updates at Pixfra to fix bugs, improve image processing, and sometimes even add new features. Running outdated firmware is like driving on old tires — it might work, but you’re not getting the best from your equipment. At least one month before hunting season, test battery health, update firmware, and calibrate the sensor to avoid missing opening night. Build firmware checks into your pre-season routine along with battery testing and sensor calibration, and you’ll avoid surprises when it matters most.
How you store your thermal device when it’s not in use matters just as much as how you handle it in the field. After the hunt, proper storage of your thermal riflescope ensures it’s ready for future outings. Choose a cool, dry place with consistent temperature and low humidity to prevent condensation. Think of it as tucking away your gear to maintain peak performance. Moisture is the number one enemy here. Even waterproof-rated scopes can develop internal condensation if you move them too quickly between extreme environments. Even waterproof scopes can suffer from internal condensation if exposed to rapid temperature changes. Inclement weather, such as rain or extreme temperatures, can significantly affect the performance of thermal scopes, making it crucial to protect them from moisture. Always allow your thermal scope to acclimate slowly when moving between extreme environments.

For short-term storage between hunts, a padded tactical bag or hard case works great. Use silica gel packets or other moisture-absorbing materials in the storage case to prevent condensation buildup. Hard-shell cases with custom foam inserts are best for transport, while padded bags with quick-access compartments work well for field carry. We talked about both in detail in our accessories guide. For long-term storage — say, off-season — there are a few extra steps to take. Remove the batteries, give the lens a final gentle clean, put the caps on, and store the device in a climate-controlled space. Dehumidify the storage area and use a dehumidifier in the storage room to maintain optimal humidity levels. Check firmware updates before storage to ensure your scope’s firmware is up to date and to avoid compatibility issues when you use it again. Record your preferred settings and configurations so you can quickly set up your scope when needed.
Don’t forget physical inspections. Regularly check for any signs of wear or damage, such as loose screws, cracks, or degraded seals. Addressing small issues early prevents larger problems later. Some scopes require periodic calibration to maintain accuracy, especially after prolonged use or exposure to extreme conditions. A loose mount screw or a cracked seal might seem minor now, but left unchecked, they can lead to zero shift, moisture intrusion, or sensor damage. Make it a habit to run a quick visual and functional check every time you pull your device out of storage. Power it on, let it warm up, run a calibration, check the image, and confirm your settings. Five minutes of attention saves you from nasty surprises when you’re in the field and a hog steps into range.
We’ve seen thermal scopes last 10+ years with proper care and maintenance. That’s real-world data from our team, not a marketing number. The devices that hit that lifespan are the ones whose owners followed these basic routines: clean when needed, store properly, manage batteries, keep firmware current, and let the sensor calibrate without interference.
Sometimes the image quality on your thermal device degrades gradually enough that you don’t notice it right away. Knowing the warning signs saves you from blaming the scope for problems that a simple calibration can fix. Inconsistent readings, sudden fluctuations, or unexpected temperature readings; blurry thermal images with reduced image clarity, even after cleaning the lens; unusual artifacts like strange patterns or colors not related to actual heat signatures; and after major impacts — dropping the camera can misalign internal sensors.
Indicators of scope movement or calibration error include sudden, unexplained POI jumps, visible loosening of ring screws, slipping on the rail, inconsistent reticle behavior, or persistent offsets that cannot be corrected with turret clicks. Inspect hardware for loose screws, cracked rings, or rail deformation. Check for visible reticle wobble in the display and run a NUC to ensure internal calibration stability. If running a NUC doesn’t solve the image problems, it might be time for a professional factory recalibration. Most thermal cameras in the market today are already calibrated. Just like most electronic measuring devices, a brand new infrared camera is set to factory standards. Over time, however, calibration shifts may occur due to electronic component aging. The general recommendation across the thermal industry is to have your device factory-checked once a year if you’re a heavy user, or every two years for casual use.
That’s not a freeze or a glitch — it’s your device calibrating itself. When you first start using your thermal optic, you might be surprised when it occasionally freezes up on you. This isn’t a malfunction — it’s just your unit calibrating itself. Thermal devices are highly sensitive to temperature changes in their environment. The screen holds the last frame while the internal shutter covers the sensor and runs a non-uniformity correction. It only takes a second or two, and it happens less often the longer your device stays powered on.
In automatic mode, the device handles this for you — you don’t need to think about it. If you’re running manual mode, recalibrate whenever the image starts looking noisy, streaked, or uneven. Run FFC when the image starts to look uneven across the screen. Common signs include banding, blotches, or a hazy “dirty glass” look that was not there a few minutes ago. You will often notice this after a major temperature change, like stepping out of a warm truck into cold air. A good habit: always run a manual calibration when you first power on and whenever you move between very different temperature environments.
No. Avoid regular eyeglass cleaners on thermal scopes. Thermal lenses use germanium or specialized materials with unique coatings that react differently than standard glass. Ammonia-based cleaners like Windex will damage the anti-reflective coatings. Use only optical-grade cleaning solutions designed for coated lenses, and always apply the solution to a microfiber cloth first — never directly to the lens.
A well-maintained thermal scope can last 5 to 10 years or more, depending on its build quality, usage frequency, and maintenance practices. The thermal sensor itself can run for tens of thousands of hours. The biggest threats to lifespan are moisture damage, lens scratches from improper cleaning, and battery leakage during storage. Follow the care steps in this guide and your device will stay reliable for years.
Yes. For long-term storage, always remove the batteries to prevent leakage, which can damage internal components. If your scope uses rechargeable batteries, charge them periodically, even during periods of non-use, to maintain their lifespan. Give rechargeable batteries a partial charge every two to three months to prevent deep discharge, which can permanently reduce capacity.
















