A thermal device for hunting should match the way you hunt, not a number on a headline. Start with terrain, usual viewing distance, whether you need a handheld scanner or a mounted optic, and how long you stay out. Pixfra builds thermal monoculars, thermal scopes, thermal front attachments, and multispectral binoculars, so the right setup starts with the job in front of you.
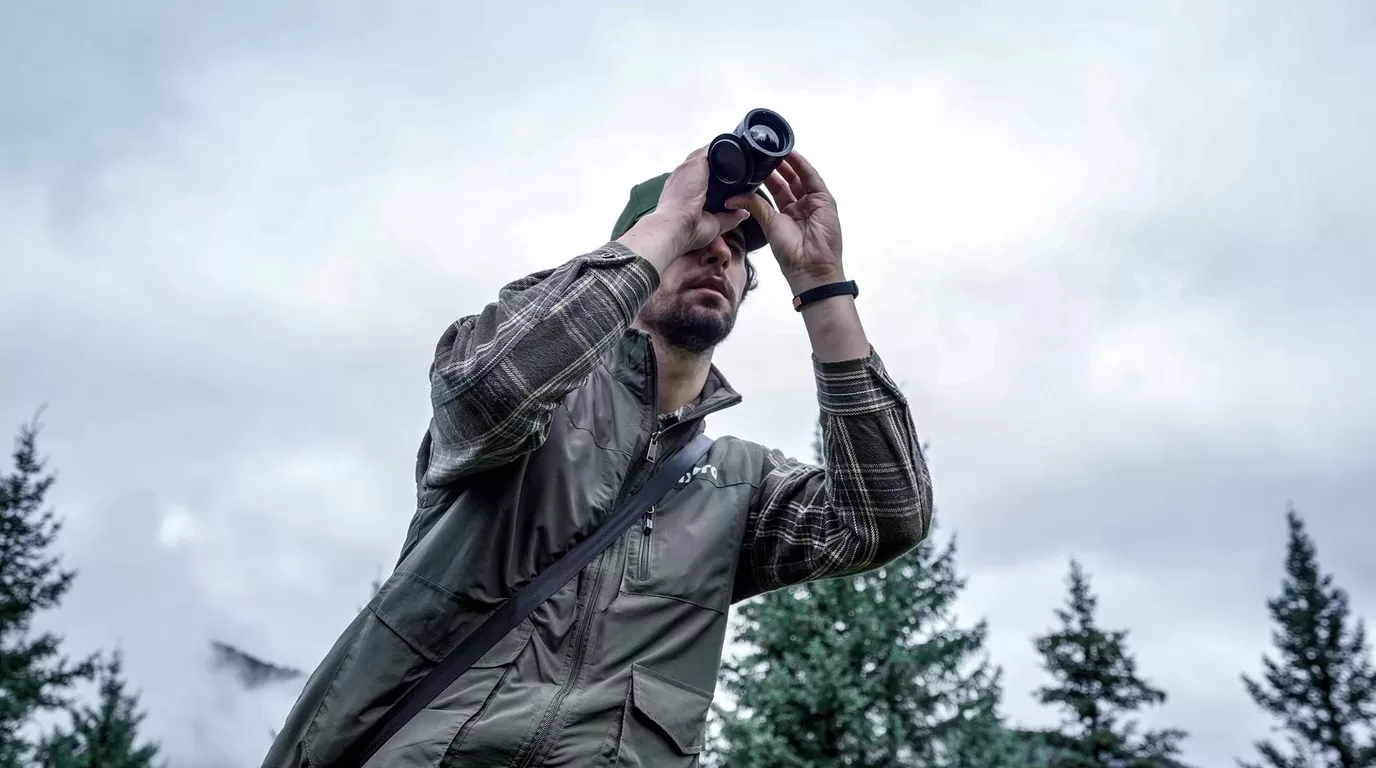
That is the whole decision in plain English. Pick the device type first. Then compare sensor resolution, NETD, lens, refresh rate, runtime, controls, and after-sales support.
Most buying mistakes start when a hunter reads one impressive range number and stops thinking. Detection range only tells you that the device can notice a warm object at distance. It does not promise clean identification, and it does not tell you how the optic feels in cold hands at 2 a.m.
Ask a simpler question: what are you trying to do?
A hog hunter watching feeders and tree lines needs fast scanning, a wide enough field of view, steady battery life, and simple controls. A coyote hunter calling across open ground needs more detail at distance and may benefit from laser rangefinding. A deer manager checking fields before first light may want a handheld monocular for observation, not a mounted optic. A shooter who already has a dialed-in day scope may prefer a front attachment rather than rebuilding the rifle around a dedicated thermal scope.
This is where Pixfra’s product lines split neatly. Mile 2 and Arc cover handheld scanning. Arc LRF adds rangefinding in a compact monocular. Taurus keeps your day optic in the system as a front attachment. Chiron LRF and Pegasus lines move toward dedicated thermal scope use. Sirius and multispectral devices help when observation, detail, and mixed-light work matter more than a single shot window.
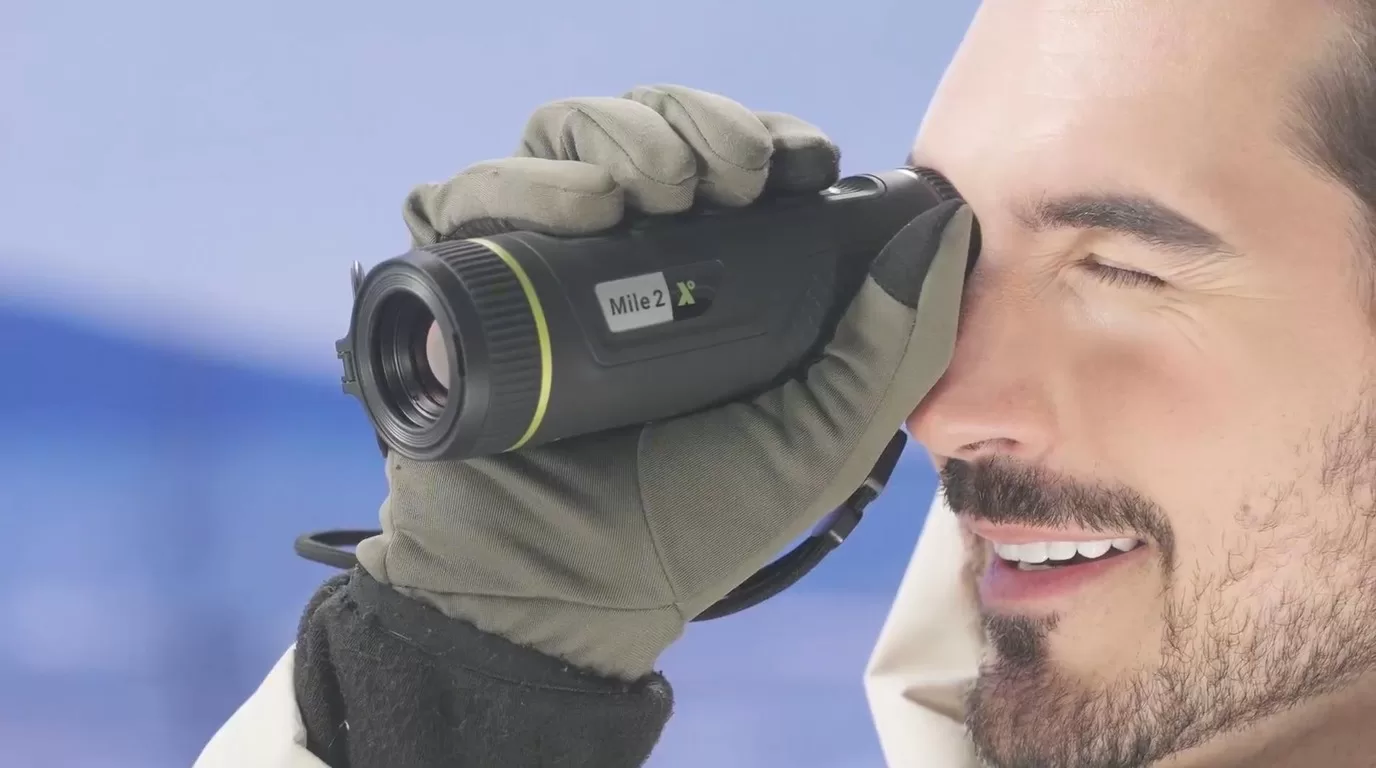
For many hunters, the first thermal device should be a handheld monocular. You can scan fields, check timber edges, follow heat signatures after a shot, and keep the rifle pointed in a safe direction until you have a reason to shoulder it.
Pixfra Mile 2 is the compact choice in this role. The Mile 2 page lists pocket-size portability, a P3 AMOLED display, electronic compass, and model options up to 640 x 512 resolution. It is a good fit when you want a device that lives in a jacket pocket instead of taking over your pack.
Arc and Arc LRF step into a more capable handheld role. Arc LRF combines thermal observation with an integrated laser rangefinder, magnesium alloy body, and replaceable battery setup. If you hunt broken ground, uneven fields, or unfamiliar farms, range data can prevent bad guesses.
The handheld rule is simple: if you spend more time searching than aiming, buy the scanner first.
Thermal images can flatten distance. A hog across a field, a coyote beyond a fence line, and a deer-shaped heat source near brush can look closer than they are. That is why LRF models matter for hunters who work open lanes or changing terrain.
Pixfra has LRF options across handheld and mounted categories, including Arc LRF, Chiron LRF, Taurus LRF, and Pegasus 2 LRF. The benefit is not just a number on the screen. It is a cleaner decision cycle: spot, range, judge, and act without switching devices or guessing from landmarks.
Choose LRF when you hunt fields, hills, power-line cuts, or large properties where visual reference points are weak at night. You may not need it for tight timber or short feeder lanes, but once distance starts changing fast, rangefinding earns its place.
This is the decision that deserves the most patience. A front attachment lets you keep a daytime optic and add thermal capability in front of it. A dedicated thermal scope gives you a purpose-built thermal aiming system.
| Your setup | Pixfra direction | Why it fits |
|---|---|---|
| You already trust your day scope and rifle zero | Taurus front attachment | Keep the day optic workflow and add thermal imaging when needed |
| You want an integrated thermal hunting optic | Chiron LRF or Pegasus series | Purpose-built controls, thermal display, and mounting setup |
| You scan more than you shoot | Mile 2, Arc, or Arc LRF | Handheld observation is faster and safer for searching |
| You need observation across changing light | Sirius or multispectral binocular | Better fit for longer watching sessions and mixed conditions |
Taurus is useful when the rifle is already set up well and you do not want to rebuild everything around a new optic. Chiron LRF and Pegasus models make more sense when thermal is the main aiming system. Neither path is automatically better. The right answer depends on how the rifle is used, who else uses it, and whether you switch between day and night work.
Sensor resolution affects how much detail the image can show. Pixfra product lines include 256 x 192, 384 x 288, 640 x 512, and higher-resolution options depending on category and model. More pixels help when you need detail at distance, but resolution is only one part of the image.
NETD tells you how well the device can separate small temperature differences. Lower NETD helps in humidity, fog, and low-contrast scenes where warm shapes do not stand out cleanly. Pixfra publishes NETD values by model, so check the exact SKU before ordering.
Lens and field of view decide how the device feels. A wider view helps scanning close cover. A narrower, longer lens helps when you need more reach. Hunters often overbuy reach and then feel slow in tight terrain. Match the lens to where you actually hunt.
Battery design matters more than it sounds. A device with replaceable 18650 batteries or a practical external power option is easier to manage on long nights. Runtime claims are usually measured under set conditions, so build a spare-power plan before the first trip.
Controls matter too. Gloves, rain, cold, and adrenaline expose bad ergonomics fast. Look for fast startup, a clean menu, easy palette changes, and buttons you can feel without staring at the housing.
For brush, feeders, and short lanes, start with a handheld thermal monocular. Mile 2 or Arc gives you quick scanning without adding weight to the rifle. If most opportunities happen close, field of view and comfort matter more than maximum reach.
For crop fields and rolling ground, move Arc LRF higher on the list. The rangefinder helps when distance is hard to judge in the dark, and the handheld format still keeps scanning simple.
For a rifle that needs thermal as the main sighting system, compare Chiron LRF and Pegasus options. Look closely at sensor resolution, lens, battery, mounting, and whether the controls feel natural from the shooting position.
For hunters who prefer their day optic, Taurus keeps the familiar glass in the system. That is useful when one rifle has to serve daytime and nighttime roles.
For observation, scouting, and long sits, Sirius or multispectral binocular products may fit better than a rifle-mounted thermal. Not every thermal job is a shooting job.
Do not choose a thermal device only by detection range. Detection is the easiest number to advertise and the easiest number to misunderstand.
Do not buy a mounted optic when you really need a scanner. If the first task is finding animals, a handheld monocular usually gets more use.
Do not ignore support. Thermal optics are electronics used outdoors. Firmware, batteries, seals, displays, buttons, and charging ports all matter after the sale. Buy through an approved channel and keep serial-number records.
Do not skip local regulations. Night hunting rules vary by region, species, season, and equipment type. Check the current wildlife agency rules where you hunt before using thermal equipment in the field.
For scanning, a thermal monocular is usually the better first device. For aiming, you need a thermal scope or a front attachment used with a suitable day optic. Many hunters eventually use both: a handheld monocular to find heat and a mounted solution for the shot.
Choose LRF if distance changes often or if you hunt open ground. It is less important for short, fixed lanes where you already know common distances. Pixfra offers LRF options in handheld, front attachment, and scope categories.
Match resolution to distance and detail needs. 256 x 192 can work for close scanning. 384 x 288 gives a stronger middle ground. 640 x 512 and above help when identification detail matters at longer distances. Always compare the exact model, lens, and NETD together.
Plan for the whole session, not the best-case runtime number. Check whether the device uses replaceable batteries, supports external power, and can be managed with gloves in cold weather. Carry spares when the device supports them.
If you are choosing a Pixfra thermal device for hunting, start with terrain and use case. Then shortlist the device type: handheld monocular, front attachment, dedicated thermal scope, or binocular. From there, compare exact model specs and ask Pixfra or an approved dealer to confirm the right fit for your rifle, distance, and support region.
The thermal device market in 2026 is loaded with more options and sharper tech at every price point than ever before. But figuring out how much to actually spend? That’s where most buyers get stuck. At Pixfra, we build thermal monoculars, scopes, front attachments, and multispectral binoculars — so we know where your money goes and where it gets wasted. This pricing guide breaks it all down so you spend smart and walk away with the right gear.
Before you set a budget, you need to know what you’re actually paying for. The price tag on a thermal imaging device isn’t random — it reflects a stack of components and engineering choices that directly affect what you see in the field. The biggest price driver is sensor resolution. A 256×192 sensor is the entry point for real thermal imaging. Step up to 384×288 and you get noticeably cleaner images with better edge definition, especially at distances past 200 yards. Go to 640×512 and you’re in professional territory. That price differential tells you all you need to know about thermal resolution in general — you can expect to pay approximately double for every doubling in the resolution of the thermal core. So when you see a $400 device next to a $1,500 device and wonder what changed, the sensor is usually the answer.

But resolution is only half the story. Thermal sensitivity, measured as NETD (Noise Equivalent Temperature Difference), decides how well the device picks up small heat differences. A lower NETD number means the device can separate a warm animal from a warm background on a humid summer night. For a deeper look at what separates a great thermal device from an average one, check out our breakdown of the top 6 features needed in the best thermal device in 2026. In short, NETD is the spec that cheap devices cut corners on first — and it’s the spec that matters most when the conditions get tough. Devices with NETD values of ≤18mK, like our Pixfra lineup, hold their image clarity in fog, rain, and heavy humidity when lesser devices wash out and give you nothing but flat, gray blobs.
Beyond the sensor, you’re paying for pixel pitch (12µm is the current standard, delivering sharper imagery than older 17µm designs), refresh rate (50Hz for smooth tracking versus choppy 25Hz), battery system, build quality, IP weatherproofing, and smart features like Wi-Fi connectivity, companion apps, and onboard recording. Laser rangefinders add cost too, but for anyone shooting past 150 yards at night, they pay for themselves in shot confidence. The thermal camera market is estimated to be valued at USD 6.15 Bn in 2026 and is expected to reach USD 11.92 Bn by 2033, growing at a compound annual growth rate (CAGR) of 9.9%. That growth means more competition, more innovation, and better value for buyers at every tier. The race to deliver more for less has never been hotter — and you benefit directly.
A few years ago, spending under $500 on a thermal device meant getting a toy. Not anymore. In 2026, the best budget thermal monocular options deliver genuine detection capability, smart features, and rugged construction — all without draining your bank account. At this price point, you’re typically looking at 256×192 resolution sensors with 12µm pixel pitch, NETD around ≤20-40mK, and detection ranges from 300 to 500 meters. These devices are real tools, not gimmicks. They’ll find deer in timber at 150 yards, track wounded game through thick cover, and give you solid heat detection on close-to-mid-range hunts.
What should you watch out for in this tier? Refresh rate, for one. Some budget devices drop to 25Hz to save cost, and that gives you stuttery, choppy imagery that makes tracking anything moving — a running hog, a coyote cutting across a field — genuinely frustrating. Hold out for 50Hz. Battery life is another place budget devices can sting you. A device with great image quality and a three-hour battery is basically a fancy paperweight by midnight. Look for devices with swappable batteries or at least USB-C power bank support for extended hunts. IP67 waterproofing should also be non-negotiable, even at this price. Rain, mud, and accidental drops happen — and if your device can’t handle a wet night, it doesn’t belong in your pack.
At Pixfra, our entry-level devices start at detection ranges around 500 meters and run NETD values of ≤18mK, which is better sensitivity than many competitors charge twice as much for. Our Mile 2 series and Draco series hit the sweet spot for anyone entering the thermal game without dropping a month’s rent. For first-time buyers, weekend hunters, property owners, and wildlife watchers who work inside 300 yards, the sub-$500 tier in 2026 is genuinely capable — just be picky about where the manufacturer cut costs.
This is where most serious hunters and outdoor enthusiasts should be shopping. For most users, this is the best thermal monocular for the money — where cost and capability finally align. At this price tier, expect 384×288 sensors as the standard. That resolution captures far more thermal detail than the 256×192 sensors in budget devices, giving you cleaner images, sharper edges, and more reliable target identification when you zoom in or scan at distance. The 640×512 resolution, while superior, typically enters the picture above $1,500–$2,000.

Detection range jumps significantly in this tier. Detection range in this category extends from 1,000 to 1,300 meters depending on lens configuration — a significant step up from the 345–460 meter range of entry-level units. That extra reach matters for open-terrain hunters, ranchers scanning big properties, and anyone who needs situational awareness beyond a few hundred yards. Refresh rates of 50Hz are standard here — you shouldn’t accept anything less. This is also the tier where integrated laser rangefinders start showing up. An LRF gives you exact distance to your target with the press of a button, which is a real advantage for ethical shot placement at night. Our Pixfra Arc LRF sits right in this range, pairing high thermal sensitivity with a built-in 1,000-meter laser rangefinder and a price that makes sense for dedicated hunters.
This is also where smart features stop being “nice to have” and become standard. Wi-Fi connectivity, companion app support, onboard video recording, multiple color palettes, and firmware updates over the air are all expected at this price. Our Pixfra Outdoor App connects to all our current models and lets you update firmware, adjust settings, and transfer images and video directly to your phone. At Pixfra, our mid-range lineup — the Arc LRF and Mile 2 series — delivers ≤18mK NETD sensitivity, 12µm pixel pitch, and IP67-rated builds at prices that won’t make your wallet cry. Consider total value: durability, battery life, software, warranty, and accuracy. Mid-range options often deliver 80–90% of high-end performance at half the cost. If you can only buy one thermal device and want it to cover most real-world use cases — night hunting, wildlife observation, property security, backcountry exploration — the $500-$2,000 range is your target.
When you step past $2,000, you’re shopping for the best thermal imaging the market can deliver — longer detection ranges, higher-resolution sensors, and integrated systems that combine ranging, ballistics, and recording into one package. Mid-high devices (384×288 or 640×512, 1,000–1,500m range) cover most professional hunting and security applications. Premium devices (1280×1024, 3,000+ meter detection) are for buyers who need maximum performance and are prepared to invest accordingly. At the top end, 640×512 and even 1280×1024 sensors give you identification-quality images at distances where lesser devices just show vague blobs. You’re not just detecting heat — you’re counting tines on a buck or telling a coyote from a dog at half a mile.

Our Pixfra Sirius HD series sits at the top of our lineup with detection ranges pushing out to 3,600 meters. For law enforcement, wildlife managers, outfitters running guided hunts, and serious predator hunters working open country, that kind of reach is not a luxury — it’s a tool you lean on every night. The Chiron LRF and Taurus LRF add integrated ballistic calculators that compute bullet drop and give you an adjusted aiming point on the fly. That turns a thermal scope into a complete targeting system — rangefinder, ballistic solver, and high-resolution thermal imager all in one unit. Our Volans series takes it another direction with all-day vision capability, featuring an adjustable aperture from F1.2 to F3.0 that adapts to any lighting condition, so you carry one device from sunup to sundown instead of juggling two.
Is premium worth it for everyone? No. The higher-end thermal viewers offer so much resolution and imaging talent that unless you’re using the devices frequently, you may be paying for more capability than you need. If you hunt a couple of weekends a year and work inside 200 yards, you don’t need a 640×512 sensor with 3,600-meter detection. But if you’re a professional, a guide, or someone who logs serious hours behind a thermal optic, the difference between a $1,500 device and a $3,000 device is immediately visible in image clarity, identification range, and the overall experience of spending long nights in the field.
The right thermal device isn’t the most expensive one you can afford — it’s the one that matches your actual use case without leaving performance on the table. When someone calls and asks what kind of money they should spend, it all comes down to what they want to do. Most often the big difference in prices is going to be based on the thermal sensor resolution and image quality of the scope. When we talk about the difference between a $3,000 and $6,000 scope, it is often going to come down to the identification range of the animal. So start with honest questions: What am I using this for? How far do I need to see? How often will I use it? How bad are the conditions I’ll face?
Here’s a quick reference table to help you match your use case to a price tier:
| Naudojimo atvejis | Recommended Tier | Price Range | Typical Sensor | Aptikimo nuotolis |
|---|---|---|---|---|
| First thermal / casual use | Biudžetas | Under $500 | 256×192 | 300–500m |
| Weekend hunting / property security | Mid-range | $500–$1,200 | 384×288 | 800–1,300m |
| Dedicated night hunting / outfitter use | Upper mid-range | $1,200–$2,000 | 384×288 or 640×512 | 1,000–1,800m |
| Professional / law enforcement / long-range | Premium | $2,000–$3,500+ | 640×512 or 1280×1024 | 1,800–3,600m |
One thing to keep in mind: if you’re a first-time buyer, you’ll probably want a handheld thermal monocular for scanning before investing in a thermal scope. It’s often smarter to spend less on the scope and budget for a monocular too, rather than putting everything into one device and having no scanning tool. At Pixfra, we built our lineup to cover this exact reality. Our monoculars, scopes, front attachments, and multispectral binoculars all share the same ≤18mK sensitivity and 12µm pixel pitch technology, so you get consistent image quality whether you’re glassing a field or looking through a scope.
And don’t overlook the cost of ownership beyond the sticker price. Battery systems matter — our Pixfra devices use standard 18650 batteries across many models, which means cheap, available replacements instead of expensive proprietary cells. Build quality matters too — a device with IP67 waterproofing and MIL-STD-810G shock resistance lasts years longer than a cheaper device you’ll replace in two seasons. The cheapest thermal device is rarely the best value. The best value is the one that does what you need, survives how you use it, and keeps working season after season. And at Pixfra, every product in our lineup is built around that idea — real features for real conditions, at a price tier that makes sense for your specific goals.
How much does a good thermal monocular cost in 2026?
In 2026, a solid entry-level thermal monocular starts around $300-$500 with a 256×192 sensor. Mid-range models with 384×288 resolution and integrated features like laser rangefinders run $800-$1,500. Premium handheld thermals with 640×512 sensors and extended detection ranges typically cost $1,500-$3,500+. Our Pixfra lineup offers devices across all three tiers, with ≤18mK NETD sensitivity as a consistent baseline.
Is it worth spending over $1,000 on a thermal device?
For hunters and outdoor professionals who work at distances beyond 300 yards or hunt multiple nights a season, yes — stepping up past $1,000 gets you meaningfully better sensor resolution, detection range, and target identification. If you only hunt a few times a year at close range, a quality device under $500 can handle the job. The question isn’t just what you can afford, but how much performance your specific use case demands.
What’s the best thermal device for the money right now?
Value depends on your use case. For short-range woodland hunting and property monitoring, a budget thermal monocular under $500 with 256×192 resolution and 50Hz refresh rate is the best bang for the buck. For all-around hunting and outdoor use, mid-range models around $800-$1,500 deliver the biggest jump in real-world performance per dollar. At Pixfra, our Arc LRF and Mile 2 series consistently hit the sweet spot between performance and price for most hunters and outdoor enthusiasts.
Why are thermal scopes more expensive than thermal monoculars?
Thermal scopes carry higher prices because they need to withstand heavy recoil, require precision zeroing systems, and often include features like ballistic calculators and integrated laser rangefinders. A quality thermal scope starts around $1,800-$3,000, while a capable monocular starts well under $500. If budget is tight, many experienced hunters recommend starting with a monocular for scanning and saving for a scope later.
Do cheaper thermal devices work in rain and fog?
That depends entirely on two specs: NETD sensitivity and IP rating. A budget device with poor NETD (above 35mK) will struggle in fog, rain, or high humidity — the image goes flat and washed out. A device with ≤18mK NETD, like our Pixfra lineup, keeps showing clear heat contrasts even in bad conditions. For weather resistance, look for IP67 waterproofing at any price point. Anything less than IP67 puts your gear at risk during real field conditions.
Buying a thermal device online can feel overwhelming—spec sheets are dense, prices jump all over the map, and everyone seems to have a different opinion. We get it. At Pixfra, we hear from first-time buyers every week who almost made costly mistakes based on bad info floating around the internet. Let’s set the record straight.
The thermal imaging market has changed fast. Thermal imaging technology changes faster than just about anything else in the hunting world—faster than rifles, scopes, or even ammo trends. What was premium two years ago now sits squarely in the mid-range. That speed of change is both exciting and confusing, and it creates a fertile ground for myths that never seem to die.

Part of the problem is how buyers shop for thermal cameras and thermal monoculars online. Most thermal customers buy online and have to go on specs, YouTube videos, and the sometimes compromised impressions of social media influencers to make buying decisions. You scroll through product pages, read conflicting Reddit threads, watch YouTube “reviews” that are really just paid promotions, and walk away more confused than when you started. Between marketing fluff and real user experiences, it’s tough to know what’s legit and what’s noise.
The truth is, buying a thermal device online isn’t any riskier than buying one at a brick-and-mortar store—as long as you know what you’re looking at. And that’s where these three myths do the most damage. They steer you toward the wrong device, or worse, they scare you away from buying altogether. Whether you’re shopping for a handheld thermal monocular, a thermal scope for night hunting, or an infrared camera for property inspection, the same myths keep popping up. So we’re going to walk through each one, tell you exactly why it’s wrong, and show you what actually matters when you’re picking the best thermal device online. Before we jump in, check out our guide on the top 6 features needed in the best thermal device in 2026 so you’ve got a solid baseline of what to look for.
This is probably the most widespread myth in the thermal device world, and it catches first-time buyers more than anyone else. On paper, it sounds logical: more pixels, better image, right? Not necessarily. The entire system—lens, sensor, processing algorithms, and display—has to work together. The takeaway here is simple: don’t buy a thermal scope based on resolution alone.
Here’s what most people miss. Resolution is just one piece of the puzzle. A sensor with 640×512 pixels sounds a lot better than one with 384×288 pixels. But resolution alone doesn’t tell you about thermal sensitivity, lens quality, or how the device processes the image it captures. High pixel count alone won’t help unless the sensor is sensitive enough to deliver clear contrast in real-world conditions like fog, humidity, or low temperature differences. A 640×480 sensor sounds impressive, but if it has poor thermal sensitivity (measured in NETD), the resulting image may appear washed out. That’s the part no one puts in the Instagram post.
NETD, or Noise Equivalent Temperature Difference, is where the real magic happens. It’s measured in millikelvins (mK), and it tells you how well the sensor can pick up small differences in heat. NETD stands for Noise Equivalent Temperature Difference. It measures how sensitive the thermal sensor is to tiny differences in heat, and it’s listed in millikelvins (mK). A lower NETD number means the sensor picks up finer heat differences, which translates to sharper contrast between the animal and the background. Our thermal devices at Pixfra achieve NETD values of ≤18mK, which puts them in the high-sensitivity category. That means you’re picking up heat signatures that a lesser sensor would miss completely—especially in summer conditions when the ambient temperature and the target’s heat are close together.
So what does this mean for you when shopping online? Stop sorting by resolution first. Look at the full spec picture: sensor resolution, NETD rating, pixel pitch (12µm vs. 17µm), refresh rate, and objective lens size. A well-balanced 384×288 thermal camera with elite sensitivity and a quality lens will outperform a poorly designed 640×512 device on most nights. Match the specs to your actual use case—close-range hog hunting in timber doesn’t need the same sensor as scanning open fields at 600 meters.
This one hurts wallets everywhere. The idea that you have to spend $5,000 or more to get a “real” thermal device just isn’t true anymore. It’s a myth that benefits sellers of premium-only brands and leaves first-time buyers stuck on the sidelines.
Let’s look at the real numbers. The technology keeps getting better while prices come down. What cost $10,000 a decade ago now delivers similar performance at $1,500. That’s not an exaggeration—it’s a function of how thermal sensor manufacturing has scaled up and matured. Sensor prices have dropped, production quality has risen, and brands like ours at Pixfra have put a priority on making professional-grade thermal imaging available at price points that make sense for regular hunters, homeowners, and outdoor enthusiasts.
The thermal device market in 2026 breaks into pretty clear tiers. Here’s a realistic snapshot of what you can expect at each price level:
| Price Range | Jutiklio skiriamoji geba | Typical NETD | Tinkamiausias |
|---|---|---|---|
| Under $500 | 256×192 | ≤40 mK | Close-range use, beginners, property monitoring |
| $500–$2,000 | 320×240 to 384×288 | ≤25 mK | Serious hunters, mid-range detection, all-weather use |
| $2,000–$4,000 | 640×480 to 640×512 | ≤20 mK | Long-range identification, predator control |
| $4,000+ | 1280×1024 | ≤15 mK | Professional and high-end specialty use |
Mid-range options often deliver 80–90% of high-end performance at half the cost. That’s an industry-wide reality, not just a marketing claim. You don’t need the $6,000 device to get a clear image of a hog at 200 yards. For most buyers, strong 384 and 640 options remain the smarter value.

Now, that doesn’t mean you should always go cheap, either. Value and cheap aren’t the same thing. A $250 thermal monocular with a sluggish 25 Hz refresh rate, mediocre NETD sensitivity, and no companion app isn’t a value pick—it’s a compromise that will frustrate you by the third use. The sweet spot is finding a device that gives you what you need, at a price that doesn’t gut your budget, from a brand that actually builds the technology themselves. Pixfra designs and manufactures its own thermal imaging cores and sensors—we’re not just slapping labels on someone else’s hardware. That vertical integration lets us deliver specs you’d normally only see in devices costing twice as much.
This myth pops up in every thermal forum, and we understand where it comes from. Thermal devices aren’t cheap, and dropping $1,000 or more on a product you’ve never held can feel like a gamble. But here’s the thing—buying online is how the vast majority of thermal buyers shop today, and there are solid reasons why it works.
First, think about the alternative. How many local stores near you stock more than one or two thermal monoculars, let alone a full range of thermal scopes, clip-ons, and handheld imagers? There’s no universal “best” thermal—only what’s best for your situation. If your local shop carries two or three brands, your “hands-on” experience is just a limited selection of what’s actually available. Shopping online gives you access to every model, every brand, every spec comparison you need—all in one session, from your couch.
Second, the buying experience has gotten a lot better. Reputable thermal brands now offer detailed spec sheets, real-world video demos, comparison charts, and responsive customer support. At Pixfra, we publish specs down to the click value of our thermal scopes (0.9cm@100m on our Taurus LRF series), and our Pixfra Outdoor App lets you connect to your device, stream live thermal video, and update firmware. That level of transparency didn’t exist five years ago.
Third, returns and warranties protect you. Investing in thermal gear without considering warranty coverage and support infrastructure can lead to expensive problems when repairs or service become necessary. Thermal imaging sensors and electronics require specialized expertise to repair, and devices from manufacturers without established service networks may become unusable after warranty expiration. Warranty terms vary significantly. Some manufacturers offer limited one-year coverage, while others provide extended warranties or explicitly support component upgrades and repairs. When you buy from a manufacturer that stands behind its products and has an established support network, the risk drops to nearly zero. You’re not rolling the dice—you’re making an informed purchase backed by real protection.
The real risk when buying online isn’t the channel itself. It’s buying from a brand you haven’t researched. That’s where the work goes: checking who makes the sensor, reading actual user reviews (not sponsored ones), comparing specs across models, and verifying that the company has a real support infrastructure. If a brand can’t tell you their NETD rating, their sensor origin, or their warranty terms, walk away—regardless of whether you’re shopping online or in person.
Now that we’ve killed the myths, let’s talk about what really matters when you’re shopping for a thermal device online. There are a handful of specs and features that separate a solid purchase from a regrettable one.

Sensor resolution still matters—it’s just not the only thing that matters. You’ll see specs like 256×192 or 384×288—these numbers tell you how many pixels detect heat. More pixels mean clearer images and better identification at distance. But pair resolution with NETD sensitivity, and you’ve got a much clearer picture of actual performance. Our Pixfra Sirius HD series, for example, combines 1280×1024 resolution with ≤18mK sensitivity—that’s not just a sharp image; it’s a sharp image in the worst conditions.
Refresh rate is another spec that gets overlooked. The difference between 25 Hz and 50 Hz is immediately apparent when scanning for moving targets. Don’t rationalize a 25 Hz device as “good enough”—you’ll notice the limitation every time you use it. If you’re scanning for predators, tracking hogs across a field, or monitoring your property perimeter, 50 Hz should be your floor.
Battery life is a deal-breaker for field use. Undervaluing battery life. An all-night predator hunt needs 8 hours minimum. Budget accordingly. Our Pixfra devices range from roughly 4.5 hours to 15 hours depending on the model, and many use standard 18650 batteries that you can swap in the field without going back to your truck.
Detection range vs. identification range—this is a big one. Manufacturers love huge detection numbers. Hunters need usable identification distance. Detection means you can tell something is there. Identification means you are confident what it is. A product page might say 2,000 meters of detection range, but if you can only positively identify your target at 400 meters, that’s the number that actually affects your experience. Always ask about both numbers before you buy.
And finally, don’t ignore build quality and weather resistance. Skipping the IP rating check. Field use means rain. IP54 is not IP67. An IP67 rating means your device can handle temporary submersion in water. If you hunt in the Southeast, run property security in the Pacific Northwest, or just don’t want to baby your gear, IP67 is the standard you should be targeting.
We built Pixfra around one idea: give everyone access to the thermal performance that used to be locked behind military budgets and five-figure price tags. Pixfra offers a wide range of products—from thermal imaging monoculars, add-ons, and riflescopes to thermal imaging and multispectral security cameras—and their mission is to provide professional grade thermal and multispectral optics at budget friendly price points.
Established in 2015, Pixfra has developed over two hundred patented technologies and thermal imaging products for industrial temperature measurement, biological temperature measurement, natural ecology, new energy, carbon neutrality, perimeter prevention, outdoor sports, and consumer electronics. We’re not a brand that repackages someone else’s sensors and charges a markup. We design our own thermal cores, build our own image processing algorithms, and test everything in real field conditions.
When you buy from us online, you’re buying directly from the people who designed and manufactured the technology. That cuts out middlemen, keeps prices honest, and means our support team can actually answer your questions about the product—not just read from a script. Whether you need a compact thermal monocular like the Mile 2 for close-range scouting or a 1280-class flagship like the Sirius HD for long-range observation, we’ve got options that match your actual needs—not just your budget or your ego.
Is it safe to buy a thermal imaging camera online?
Yes, absolutely. Buying a thermal imaging camera online is safe as long as you’re purchasing from a reputable manufacturer or authorized dealer. Look for brands that publish full spec sheets, offer warranty protection, and have responsive customer support. Buying from the manufacturer’s own website (like Pixfra.com) is often the best route because you get direct access to support, firmware updates, and product guarantees.
Does a higher resolution always mean better thermal image quality?
No. Resolution is one factor, but thermal sensitivity (NETD), lens quality, pixel pitch, and image processing all play a role. A 384×288 sensor with ≤20 mK NETD and a quality germanium lens can produce sharper, more usable images than a 640×512 sensor with poor sensitivity. Always look at the full spec picture, not just the pixel count.
What NETD value should I look for in a thermal device?
For most outdoor and hunting use, a NETD of ≤25 mK is solid. For demanding conditions like high humidity, fog, or summer heat where ambient and target temperatures are close, aim for ≤18 mK or lower. Pixfra’s lineup hits ≤18 mK across many of our models, putting them in the high-sensitivity category without the premium price tag.
How much should I spend on my first thermal monocular?
For most first-time buyers, the $500–$2,000 range offers the best balance of performance and value. You’ll get usable sensor resolution, decent NETD ratings, features like Wi-Fi and video recording, and enough battery life for a full night out. Going below $300 usually means real trade-offs in refresh rate, sensitivity, and build quality that you’ll notice quickly.
Can thermal devices work during the day?
Yes. Thermal imaging is unaffected by visible light, making it effective 24/7. Unlike night vision, which relies on amplifying ambient light, thermal cameras detect heat signatures. That means they work just as well at noon as they do at midnight—in darkness, fog, haze, or bright sunlight. Some Pixfra models, like the Volans Series, even feature adjustable apertures specifically designed to optimize daytime and nighttime performance.
Resolution is one of the first specs you’ll see on any thermal device — and for good reason. It shapes everything from how sharp your image looks to how far out you can tell a coyote from a fence post. But not all resolution numbers mean what you think they do. We’re here at Pixfra to break it all down so you can pick the right thermal monocular, scope, or front attachment without getting tricked by big numbers that don’t deliver in the field.
When we talk about resolution on a thermal device, we’re talking about the number of pixels on the infrared sensor itself — the detector array inside the device that picks up heat signatures and turns them into an image you can actually see. It’s expressed as two numbers, like 256×192, 384×288, or 640×512. Those numbers tell you how many tiny heat-detecting elements sit on the sensor. Thermal sensor resolution is expressed as two sets of numbers (vertical × horizontal), for example 640×512px. What you are looking for to determine resolution is the total number of pixels the sensor offers — for instance, a 640×512 sensor gives you a total of 327,680 pixels.

Think of each pixel as a tiny thermometer. Every single one records its own temperature reading, and the device stitches all those readings together into the heat image you see through the eyepiece. “Pixels are the data acquisition points for thermal measurement… More data points mean more information is provided for accurate thermal interpretation. More pixels also mean greater visual resolution in the thermal image.” So when you go from a 256×192 sensor (49,152 pixels) up to a 640×512 sensor (327,680 pixels), you’re not just getting “a better picture” — you’re getting more than six times the data points feeding that image. That’s a massive jump in the amount of thermal information your device can gather in a single frame.
Now here’s something that trips up a lot of buyers: sensor resolution and display resolution are not the same thing. It’s easy to confuse sensor resolution with display resolution or recording resolution. Display resolution is the resolution of the built-in screen you look through, and it will often be greater than the sensor resolution. A device can have a beautiful 1280×960 OLED display, but if the sensor behind it is only 256×192, you’re still seeing a 256×192 thermal image stretched across that screen. The sensor is the bottleneck. Always check the sensor specs first.
At Pixfra, we pair our high-resolution sensors with 12μm pixel pitch technology across our product lines — from the Mile 2 series for everyday use to the Sirius HD series for demanding professional applications — so you get sharp, high-contrast images no matter which model you choose. Before you go further, take a look at the top 6 features needed in the best thermal device in 2026 to see how resolution fits into the bigger picture of what makes a thermal device actually perform.
Here’s where resolution really earns its keep: detection range and target identification. A higher-resolution sensor doesn’t just give you a prettier picture — it lets you see farther and figure out what you’re looking at faster. Higher resolution means there are more observation and temperature measurement points, allowing for the observation and measurement of smaller targets and the ability to observe objects at greater distances.[4]
Let’s put it in hunting terms. You’re scanning a field at 400 meters with a 256×192 sensor. You see a warm blob. Could be a hog, could be a coyote, could be a stump that soaked up sun all day. With a 640×512 sensor at the same magnification and lens, you’re looking at that same blob with over six times more thermal data points. You can see legs, a head shape, movement — you can actually identify what you’re seeing without having to close the distance and risk spooking the animal.
Devices with a 384×288 pixel sensor are generally the most popular on the market since they’re more affordable than a 640×512 thermal device but still allow detection ranges out to 1,800 meters depending on lens size, and the higher number of pixels means the zoom function works more effectively.[5] That’s a real sweet spot for a lot of hunters, and it’s exactly why we offer the 384×288 configuration across several of our mid-range lines.
Digital zoom is a big factor here too, and this is where resolution differences really show up. The true advantage of higher resolution sensors is the ability to digitally zoom and maintain a higher degree of clarity and field of view. Since the zoom is digital and not optical, every time you double the zoom (from 1x to 2x for example), you halve both the pixels and field of view available. So on a 256×192 sensor at 2x digital zoom, you’re down to an effective 128×96 image — and that’s going to look noticeably grainy. On a 640×512 sensor at 2x zoom, you’re still working with 320×256, which is more than usable. If you plan on zooming in to identify targets at distance, a higher base resolution gives you much more room to work with before the image falls apart.
Our Pixfra lineup covers detection ranges from around 500 meters on entry-level devices all the way up to 3,600 meters on our premium Sirius HD series. But detection range and identification range are two different numbers — identification range, where you can actually confirm what you’re seeing, is always shorter. For most recreational hunters and outdoor enthusiasts working inside 300–600 meters, our mid-range models like the Arc LRF and Mile 2 series hit the sweet spot between resolution, range, and price.
Not every hunter, wildlife observer, or outdoor enthusiast needs the highest resolution on the shelf. The right resolution depends on how you use your device, how far you need to see, and what you’re willing to spend. Here’s a breakdown of the most common sensor configurations and where each one fits best.

256×192 (49,152 pixels) — This is the entry point for real thermal imaging. Devices with this configuration can only be used at shorter ranges and do not allow you to digitally magnify the image without a significant reduction in clarity. For short-range use — scouting your backyard for critters, quick property scans at night, or budget-friendly wildlife observation under 200 meters — it gets the job done. If you’re just getting started with thermal and want to keep costs low, this tier works.
384×288 (110,592 pixels) — This is where things get serious. At Pixfra, we consider this the workhorse resolution for most hunting and outdoor scenarios. You get enough pixels for clean digital zoom, solid identification range, and detail that lets you pick animals out of brush and treelines at real-world hunting distances. Resolution at this tier gives you sharper images for identifying targets at longer distances and makes it easier to separate animals from background clutter, especially in dense foliage.
640×512 (327,680 pixels) — The top tier for outdoor thermal devices. This configuration is generally the highest quality thermal sensor available in the market, producing high-definition thermal images with superior long-range detection, recognition, and identification. If you’re scanning large areas, working at extended distances, or need the clearest possible image for fast-moving targets, this is where you want to be. Our Sirius HD series runs at this resolution, and the difference in image quality is visible from the first time you look through the eyepiece.
Here’s a quick comparison table to help you match resolution to your needs:
| Jutiklio skiriamoji geba | Total Pixels | Best Use Case | Typical Detection Range | Digital Zoom Quality |
|---|---|---|---|---|
| 256×192 | 49,152 | Budget scanning, short-range scouting | Up to 500m | Limited — degrades quickly |
| 384×288 | 110,592 | Hunting, wildlife observation, property security | Up to 1,800m | Good — usable at 2x–4x |
| 640×512 | 327,680 | Long-range hunting, law enforcement, professional use | Up to 3,600m | Excellent — sharp even at 4x+ |
We designed our product lines around these tiers. The Mile 2 series handles everyday hunting with a balance of resolution and portability. The Arc LRF adds a built-in laser rangefinder for distance-confident shooting. And the Sirius HD series pushes resolution and detection range to their limits for buyers who need every pixel they can get.
Resolution isn’t just about how many pixels sit on the sensor — it’s also about how big each pixel is. That measurement is called pixel pitch, and it plays a direct role in the sharpness and compactness of your thermal device. Pixel pitch is the distance between the centers of two adjacent pixels on the sensor, measured in micrometers (e.g., 12µm). Devices with smaller pixel pitches are more detailed since they have a higher density of pixels on the sensor, meaning the device can take more temperature point measurements.
The two pixel pitches you’ll see on most handheld thermal devices in 2026 are 12µm and 17µm. A smaller pixel pitch, such as 12µm, means pixels are packed more closely together, allowing for higher resolution images and better detection of smaller objects. A larger pixel pitch, like 17µm, means fewer pixels per unit area, resulting in lower resolution images but potentially better sensitivity to thermal radiation.
Here’s the practical takeaway: smaller pixel pitch means smaller sensors occupying less physical space — allowing more compact thermal scopes or enabling higher resolutions in the same sensor footprint. For the same physical sensor size, you can pack significantly more 12µm pixels than 17µm pixels. That’s why modern 12µm sensors have made compact, high-resolution thermal monoculars possible at prices that would’ve been unthinkable a few years ago.
For thermal imaging devices with a smaller pixel sensor, the same detection range, magnification, and field of view can be achieved with lenses that have a smaller focal length. Smaller lenses mean a smaller, lighter device overall. That’s a direct win for anyone carrying gear on multi-hour hunts or backcountry trips where every ounce counts.
At Pixfra, we use 12μm pixel pitch across our product lines. It’s a deliberate choice. It lets us deliver 384×288 and 640×512 resolutions in housings that stay compact and field-ready, without sacrificing detection range or image quality. Our Draco series, for example, was designed with a lightweight build specifically for hunters who need multi-functional performance without the bulk — and 12µm pixel pitch is a big part of how we got there.
We’ll be straight with you: resolution matters a lot, but it’s not the only thing that makes a thermal device perform well. Two thermal devices can share identical specifications — the same resolution, pixel pitch, and NETD — yet deliver noticeably different images. That’s because image quality depends on the entire imaging system, not just the sensor. If you buy a high-resolution device with poor thermal sensitivity or a sluggish refresh rate, you’re going to be disappointed.

NETD (Noise Equivalent Temperature Difference) is the spec that tells you how sensitive your sensor is to small heat differences. It’s measured in millikelvins (mK), and lower is better. The most defining characteristic that affects the thermal resolution of a thermal imaging device is the sensor’s NETD. It’s measured in millikelvins and represents the smallest temperature difference that the sensor can perceive. The lower the NETD value, the higher the sensor sensitivity. A device with amazing resolution but poor NETD will show you a sharp but flat, washed-out image on warm nights when everything is radiating heat at similar levels. Our Pixfra devices achieve NETD values of ≤18mK, which places them at the top end of sensitivity for hunting-grade thermal optics.
Refresh rate is the other spec that directly affects your experience. A 50Hz refresh rate is the baseline for any thermal device worth buying in 2026. That rate gives you smooth, fluid imagery so you can track moving targets — running hogs, trotting coyotes — without blur or stutter. Frame rate affects how smooth the image appears when moving the camera. Professional models with 25–60Hz refresh rates provide fluid, real-time imaging, while budget models at 9Hz show noticeable lag. This becomes relevant when scanning large areas or tracking moving heat sources.
Image quality in a thermal monocular depends on the balance between sensor resolution, pixel pitch (µm), and NETD sensitivity. Higher resolution captures more detail, smaller pixel pitch increases sharpness, and lower NETD improves contrast in low-visibility conditions. The best performance comes from optimizing all three.
That’s exactly how we approach product design at Pixfra. We don’t just chase resolution numbers — we balance resolution with ≤18mK NETD, 12µm pixel pitch, and high refresh rates across every device in our lineup. It’s the system that makes the image, not any single spec in isolation. That’s what separates a device that looks good on a spec sheet from one that actually performs at 2 AM in a foggy hunting blind.
Picking the right resolution comes down to a simple question: what are you actually going to do with your thermal device? There’s no point in paying for 640×512 if you’re mostly scouting your property line at 100 meters. And there’s no point in saving money on 256×192 if you’re hunting predators at 400+ meters and need to identify what you’re shooting at.

For short-range scouting, casual wildlife observation, and basic property checks, a 256×192 sensor keeps the price down and still gives you functional thermal imaging for close-up work. If you’re a first-time thermal buyer on a budget, this is a fine place to start.
For most hunters, wildlife observers, and outdoor enthusiasts, 384×288 is the resolution we recommend. It gives you enough pixels for clean images at real hunting distances, supports usable digital zoom, and balances cost against performance. It’s the resolution behind several of our most popular models, including the Mile 2 series and the Arc LRF.
For long-range detection, professional use, or anyone who wants the sharpest possible image under the toughest conditions, 640×512 is the move. Our Sirius HD series lives at this tier, and it’s built for people who need to scan fields at 1,000+ meters and still tell exactly what they’re looking at.
Here’s a final point worth remembering: resolution works best when it’s backed by the right supporting specs. A 640×512 sensor with poor NETD sensitivity, a low refresh rate, or a bad lens will underperform a well-tuned 384×288 system every time. At Pixfra, we build every thermal monocular, scope, and front attachment as a complete imaging system — resolution, pixel pitch, NETD, optics, and processing all working together. That’s how you get a thermal device that actually delivers in the field, not just on the spec sheet.
Is 384×288 resolution good enough for hunting?
For most hunting scenarios, 384×288 is more than good enough — it’s the most popular resolution tier on the market for a reason. It gives you solid image detail at distances between 200 and 600 meters, supports clean digital zoom up to 4x, and helps you tell the difference between a target animal and background clutter. Unless you’re doing long-range work past 800 meters or need pixel-perfect identification at extreme distances, 384×288 is the sweet spot where performance meets value.
Does higher resolution drain battery faster on a thermal device?
Higher resolution sensors do process more data, which can draw more power. But in practice, the difference between a 384×288 and a 640×512 sensor on battery life is smaller than most people expect. The bigger battery drains come from screen brightness, refresh rate, Wi-Fi streaming, and cold weather. At Pixfra, our devices range from about 4.5 to 15 hours of battery life depending on the model, and many use swappable 18650 batteries — so even if a higher-resolution model runs a bit shorter, you can pop in a fresh cell in seconds.
Can digital zoom replace higher sensor resolution?
No. Digital zoom magnifies existing pixels — it doesn’t create new detail. Every time you double the digital zoom (from 1x to 2x, for example), you halve both the pixels and field of view available. So starting with a higher base resolution gives you far more room to zoom before the image turns grainy. If you plan to zoom in often, invest in higher sensor resolution rather than relying on digital magnification to close the gap.
What’s the best resolution for a thermal monocular in 2026?
It depends on your use case and budget. For general-purpose hunting and outdoor use, 384×288 with a 12µm pixel pitch gives you the best balance of image clarity, detection range, and price. For professional or long-range applications, 640×512 delivers the sharpest image with the best zoom quality. What was once a premium-only resolution (640×512) has now become more accessible at the mid-range, so you’re getting more for your money than ever before.
Does resolution affect how far a thermal device can detect?
Yes, but not on its own. The key factors that affect detection distance include target size, temperature difference, sensor resolution, lens focal length, and more. A higher-resolution sensor captures more detail at distance, which stretches your identification range — the point where you can actually tell what a heat signature is. But lens quality and NETD sensitivity also play a big role. That’s why at Pixfra, we design the full optical system together so every spec supports the next.
2026 m. šiluminių prietaisų rinka atrodo visiškai kitaip nei dar prieš dvejus metus. Jutiklių technologijos žengė didžiulį žingsnį į priekį, kainos nukrito, o funkcijos, kurias galite gauti šiandien, prieš porą sezonų būtų buvusios prieinamos tik aukščiausios klasės modeliuose. Tačiau kai pasirinkimas toks didelis, kaip žinoti, kas iš tiesų svarbu? Mes esame čia, Pixfra kad atsiribotume nuo nereikalingos informacijos ir pristatytume 6 svarbiausias funkcijas, kurių reikia geriausiame šių metų šiluminiame prietaiso modelyje.
Nesvarbu, ar esate medžiotojas, sekantis šernus sutemus, ar gamtos mėgėjas, tyrinėjantis atokius takus, ar laukinės gamtos stebėtojas, stebintis naktinius gyvūnus jų netrikdydamas – jūsų šiluminis prietaisas yra tik toks geras, kokios yra jo funkcijos. O ne visos funkcijos yra vienodos. Kai kurios specifikacijos popieriuje atrodo įspūdingos, bet praktikoje neturi jokios reikšmės. Kitos atrodo nereikšmingos, bet gali lemti jūsų patirtį 2 val. nakties medžioklės slėptuvėje.

2026 m. šiluminių monokuliarių rinka atrodo žymiai kitaip nei dar prieš dvejus metus, o trys pokyčiai keičia pirkėjų lūkesčius kiekvienoje kainų kategorijoje – įskaitant didesnę jutiklių skiriamąją gebą už mažesnę kainą, kur tai, kas anksčiau buvo aukščiausios klasės specifikacija (640×512), tapo vidutinės klasės standartu. Šis pokytis yra puiki naujiena jums, tačiau tai taip pat reiškia, kad turėsite apgalvoti, ką perkate. Mažesnė kaina ne visada reiškia geresnį sandorį, o išleidus daugiau pinigų ne visada gausite tas funkcijas, kurių jums iš tikrųjų reikia.
„Pixfra“ gaminame šiluminius monokuliarus, šiluminius taikiklius, priekinės dalies šiluminius priedus ir daugiaspektrinius žiūronus – visi šie prietaisai sukurti tikroms lauko sąlygoms. Remdamiesi ilgamete patirtimi, sukaupta kuriant mūsų patentuotą šilumos aptikimo technologiją, išskyrėme šešias savybes, kurios išskiria puikų šiluminį prietaisą nuo to, kuris jau po trečiosios išvykos jus nuvils. Jei ir jūs norite išgauti daugiau naudos iš savo turimos įrangos, peržiūrėkite geriausi priedai, padėsiantys pagerinti jūsų šiluminio matymo prietaiso veikimą keletas praktiškų papildinių, kurie iš tiesų daro skirtumą.
Jei yra vienas parametras, kuris apibrėžia, kaip gerai veikia šiluminis prietaisas, tai NETD – triukšmo ekvivalentinis temperatūrų skirtumas. Šis skaičius, matuojamas milikelvinais (mK), nurodo mažiausią temperatūrų skirtumą, kurį gali užfiksuoti jutiklis. Mažesnė NETD vertė paprastai reiškia, kad prietaisas gali aptikti mažesnius temperatūros svyravimus, todėl vaizdas tampa aiškesnis ir išsamesnis. Įsivaizduokite taip: šilta vasaros naktį, kai žemė, medžiai ir oras spinduliuoja panašaus lygio šilumą, prietaisas su prastu NETD rodo išblukusį, plokščią vaizdą. Prietaisas su aukštu NETD rodikliu – tarkime, ≤18 mK, kaip mūsų „Pixfra“ šiluminiai prietaisai – parodys ryškų kontrastą tarp gyvūno ir fono net sudėtingomis sąlygomis, pavyzdžiui, esant rūkiui, lietui ar drėgmei.
NETD rodo, kaip gerai jūsų šiluminis monokuliaras gali užfiksuoti nedidelius šilumos pokyčius. Mažesni NETD rodikliai reiškia aiškesnius vaizdus. 2026 m. geriausių modelių NETD rodiklis yra mažesnis nei 15 mK, todėl galite pastebėti net menkiausius šilumos pokyčius. Taip pat svarbus pikselių žingsnis – kuo jis mažesnis (pavyzdžiui, 12 µm), tuo ryškesni vaizdai ir lengviau pastebėti objektus. „Pixfra“ prietaisai pasiekia NETD reikšmes, neviršijančias 18 mK, todėl jie priskiriami jautriausių medžioklės klasės šiluminių optinių prietaisų kategorijai. Toks jautrumas reiškia, kad jums nereikės žiopčioti į neryškius kontūrus – matysite aiškius kontūrus net ir esant nepalankioms sąlygoms.
Tada yra jutiklio skiriamoji geba. Tai – kita vaizdo kokybės lygties pusė. Skiriamoji geba išreiškiama pikselių skaičiumi šiluminiame jutiklyje – dažniausiai pasitaikančios galimybės yra 256×192, 384×288 ir 640×512. Skiriamoji geba yra bet kurio šiluminio taikiklio širdis – ji nulemia, koks aiškus ir detalus bus jūsų vaizdas. Mažesnės skiriamosios gebos, pavyzdžiui, 256×192, puikiai tinka ekonomiškiems variantams ir medžioklei iš artimo atstumo, o 384×288 arba 640×512 užtikrina ryškesnius vaizdus, leidžiančius atpažinti taikinius iš didesnio atstumo. Aukštesnės skiriamosios gebos prietaisai leidžia lengviau atskirti gyvūnus nuo fono detalių, ypač tankioje augmenijoje. Tačiau skiriamoji geba nėra viskas; tokie veiksniai kaip jutiklio jautrumas ir atnaujinimo dažnis taip pat vaidina didelį vaidmenį užtikrinant bendrą veikimą. „Pixfra“ visuose savo gaminiuose – nuo kasdieniam naudojimui skirtos „Mile 2“ serijos iki sudėtingoms profesionalioms užduotims skirtos „Sirius HD“ serijos – derina aukštos skiriamosios gebos jutiklius su 12 μm pikselių žingsnio technologija, todėl, nesvarbu, kokį modelį pasirinksite, gausite ryškius, didelio kontrasto vaizdus.
Aptikimo nuotolis yra viena iš pirmųjų specifikacijų, į kurią žmonės atkreipia dėmesį, ir ne be priežasties. Ji rodo, kokiu atstumu prietaisas gali aptikti šiluminį pėdsaką. Tačiau čia yra vienas niuansas, dėl kurio daugelis pirmą kartą perkančių žmonių suklysta: aptikimo nuotolis ir identifikavimo nuotolis yra skirtingi dydžiai – identifikavimo nuotolis, per kurį galite patvirtinti, ką matote, visada yra trumpesnis. Prietaiso gamintojas gali teigti, kad jis gali aptikti šilumos šaltinį 1 500 metrų atstumu, tačiau tai nereiškia, kad iš tokio atstumo galėsite nustatyti, ar tai elnias, kojotas, ar kelmas. Medžiotojams iš tikrųjų svarbus yra atpažinimo nuotolis. Prieš pirkdami visada pasiteiraukite apie abu skaičius.

Mūsų „Pixfra“ produktų asortimentas apima platų aptikimo nuotolio spektrą. Pradinio lygio prietaisų veikimo nuotolis prasideda nuo maždaug 500 metrų, o mūsų aukščiausios klasės „Sirius HD“ serijos prietaisai pasiekia net 3 600 metrų. Toks veikimo nuotolis suteikia teisėsaugos pareigūnams, laukinės gamtos valdytojams ir rimtiems medžiotojams galimybę apžvelgti didžiulius plotus neišjudant iš vietos. Daugumai pramoginių medžiotojų ir gamtos mėgėjų, dirbančių 300–600 metrų atstumu, mūsų vidutinės klasės modeliai, tokie kaip „Arc LRF“ ir „Mile 2“ serijos, yra puikus kompromisas tarp našumo ir kainos.
Dabar pakalbėkime apie lazerinius tolimačius (LRF). Medžiotojams, kurie naktį šaudo iš toliau nei 150 jardų, įmontuotas LRF žymiai padidina pasitikėjimą šūvio tikslumu ir pašalina būtinybę naudoti atskirą tolimačio prietaisą. Integruotas LRF vienu mygtuko paspaudimu parodo tikslų atstumą iki taikinio – nebereikia tamsoje ieškoti atskiro prietaiso. Mūsų “Pixfra” modeliai, kurių pavadinimuose yra žodis „LRF“, pavyzdžiui, „Arc LRF“, „Chiron LRF“ ir „Taurus LRF“, turi integruotus lazerinius tolimačius, kurių matavimo nuotolis siekia 1 000 metrų. Kartu su įmontuotais balistiniais skaičiuotuvais, kuriuos rasite tokiuose modeliuose kaip „Chiron LRF“ ir „Taurus LRF“, gaunate sistemą, kuri apskaičiuoja kulkos kritimą ir iškart pateikia pakoreguotą taikymo tašką. Tai ne paprastas triukas – tai skirtumas tarp švaraus, etiško šūvio ir nepataikymo.
Ši funkcija dažnai lieka nepakankamai įvertinta, kol praėjus trims medžioklės valandoms ekranas netampa tamsus. Šiluminiai prietaisai greitai eikvoja energiją, ypač esant didesniam atnaujinimo dažniui ir ryškumui. Rinkitės prietaisą, galintį veikti nepertraukiamai bent 8 valandas. Keičiamos baterijos ar išoriniai maitinimo blokai gali tapti tikru išsigelbėjimu per ilgus medžioklės maratonus. Baterijos veikimo trukmė yra tiesiogiai susijusi su tuo, kiek jūsų šiluminis prietaisas iš tiesų yra naudingas lauke. Prietaisas su neįtikėtina vaizdo kokybe ir dviejų valandų baterija iki vidurnakčio iš esmės tampa labai brangiu popieriaus svoriu.
Mūsų „Pixfra“ įrenginių baterijos veikia nuo maždaug 4,5 valandos iki 15 valandų, priklausomai nuo modelio ir naudojimo sąlygų. Daugelyje mūsų modelių naudojamos standartinės 18650 baterijos, kurias galima pakeisti per kelias sekundes. Tai sąmoningas dizaino sprendimas. Specialiai suprojektuoti vidiniai akumuliatoriai galbūt sutaupytų kelis gramus svorio, tačiau kai esate įsitraukę į medžioklę ir išsikrauna baterija, galimybė iš kišenės išsitraukti naują „18650“ tipo bateriją yra neįkainojama. O čia – profesionalus patarimas, pagrįstas mūsų pačių patirtimi lauke: šaltas oras gali sumažinti baterijos našumą 30–50%. Visada nešiokitės atsargines baterijas vidinėje kišenėje, kur jas šildo jūsų kūno šiluma.
Toliau pateiktoje lentelėje galite greitai susipažinti su baterijos veikimo trukme skirtingais naudojimo atvejais ir sužinoti, kokių rezultatų turėtumėte siekti:
| Naudojimo atvejis | Reikalingas minimalus akumuliatoriaus veikimo laikas | Rekomenduojamas akumuliatoriaus tipas |
|---|---|---|
| Trumpi vakariniai medžioklės išėjimai (2–3 val.) | 4–5 valandos | Vidinė įkraunama baterija |
| Visą naktį trunkanti plėšrūnų kontrolė | 8–10 valandų | Keičiamas 18650 tipo akumuliatorius |
| Kelių dienų žygiai į atokias vietoves | 10–15 valandų | Keičiamos dalys + atsarginės dalys |
| Nekilnojamojo turto apsaugos patruliai | 6–8 valandos | Įkraunamas su greito įkrovimo funkcija |
| Gamtos stebėjimo užsiėmimai | 5–7 valandos | Tinka bet kuris iš šių tipų |
Pasirinkite tinkamą akumuliatorių sistemą, atsižvelgdami į numatomą naudojimą, ir niekada neliksite tamsoje su išsikrovusiu įrenginiu.
Jūsų šiluminis prietaisas yra lauko įranga. Ir taškas. Jis bus apipiltas lietumi, nukris ant akmenų, bus įmestas į kuprinę ir naudojamas esant temperatūroms, svyruojančioms nuo karštų vasaros naktų iki šaltų žiemos rytų. Jei jis to neišlaikys, nesvarbu, kokie gražūs būtų vaizdai.

Lauko įranga turi atlaikyti kritimus, lietų ir dulkes. Įrenginiai su IP67 klasės korpusu gali ištverti panardinimą į vandenį iki vieno metro gylio 30 minučių. Neslystantis guminis apvalkalas užtikrina patikimą sukibimą net ir dėvint pirštines arba kai įrenginys yra šlapias. Akumuliatoriaus veikimo trukmė yra dar vienas svarbus veiksnys. Atkreipkite dėmesį į IP klasę – 2026 m. „IP67“ yra aukščiausias standartas šiluminiams prietaisams. Tai reiškia, kad prietaisas yra visiškai apsaugotas nuo dulkių ir gali atlaikyti panardinimą į vandenį. Kai kurie pigesni prietaisai turi tik „IP54“ klasę, kuri apsaugo nuo purslų, bet neatsilaiko prieš visišką panardinimą. Jei medžiojate lietuje, perbrendate upelius arba dirbate dulkėtoje aplinkoje, IP67 klasė yra būtina.
„Pixfra“ gaminame savo prietaisus atsižvelgdami į tas pačias sąlygas, kuriomis juos naudojame. Mūsų šiluminiai taikikliai atlaiko stiprų atatranką, mūsų monokuliarai išlieka nesugadinti nukritę, o korpuso medžiagos atsparios korozijai net po daugelio naudojimo metų. Atkreipkite dėmesį į „MIL-STD-810G“ arba „IP67/IP68“ sertifikatus, smūgiams atsparius korpusus ir vandeniui atsparius valdymo elementus. Rinkitės modelius su hermetiška optika, apsauga nuo rasos susidarymo ir korozijai atspariais paviršiais. Įsitikinkite, kad baterijų skyrius lieka saugus drėgnomis ar purvinomis sąlygomis, ir patikrinkite, ar sandarikliai gali būti tinkamai prižiūrimi lauke. Jei įrangą naudosite nelygiame reljefe, teikite pirmenybę patvarumui, o ne papildomoms funkcijoms. Čia svarbus ir svoris – pernelyg sunkus šiluminis prietaisas ilgų sesijų metu jus išvargins, o tai paveiks jūsų taikymąsi ir kantrybę. Pavyzdžiui, mūsų „Draco“ serija buvo sukurta su lengva konstrukcija specialiai medžiotojams, kuriems reikalingas daugiafunkcis prietaisas be nereikalingo svorio.
Ergonomika taip pat susijusi su patvarumu. Šaltos, pirštinėmis apmautos rankos 2 val. nakties medžioklės slėptuvėje nelabai dera su sudėtingais meniu ar kaprizingais mygtukais. Intuityvus mygtukų išdėstymas, greitas įjungimas ir išbaigtos papildomos programėlės, kurių naudojimui nereikia instrukcijos, atskiria tikrai patogius prietaisus nuo tų, kurie kelia frustraciją. Jei tamsoje, dėvėdami pirštines, negalite valdyti savo šiluminio įrenginio viena ranka, tai reiškia, kad jo dizainas yra nesėkmingas. Visose „Pixfra“ serijos priemonėse valdymo elementus laikome paprastais ir lengvai pasiekiamais, nes to reikalauja realus naudojimas.
Geriausias 2026 m. šiluminis prietaisas ne tik rodo šiluminį vaizdą – jis prisijungia prie jūsų telefono, įrašo vaizdo įrašus, transliuoja vaizdą tiesiogiai ir nuotoliniu būdu atnaujina savo programinę įrangą. Integruotos funkcijos, tokios kaip įmontuoti lazeriniai tolimačiai, integruotas garso ir vaizdo įrašymas, transliacija per „Wi-Fi“ ir papildomų programėlių ekosistemos, vis dažniau tampa standartine rimtų prietaisų funkcija, o ne prabangia papildoma funkcija. Geriausi 2026 m. terminio vaizdo monokuliarai viename įrenginyje suteikia visą lauko įrangos rinkinį.
Mūsų „Pixfra Outdoor“ programa palaiko visus dabartinius mūsų modelius, įskaitant „Sirius“, „Arc LRF“, „Mile 2“, „Pegasus Pro“, „Chiron LRF“, „Taurus“ ir „Taurus LRF“ serijas. Naudodamiesi šia programėle galite atnaujinti programinę įrangą, keisti nustatymus bei perkelti nuotraukas ir vaizdo įrašus tiesiai į savo išmanųjį telefoną. Toks ryšys yra ne tik patogumas – tai praktiškas įrankis, leidžiantis dokumentuoti medžioklę, dalytis žvalgybos duomenimis su medžioklės partneriais arba fiksuoti laukinių gyvūnų veiklą jūsų sklype.
Spalvų paletės – dar viena išmanioji funkcija, kuria pasitiki patyrę vartotojai. „White Hot“ yra labiausiai paplitęs režimas, kuriame šilumos šaltiniai rodomi balti; jis idealiai tinka bendram aptikimui atvirose vietovėse. „Black Hot“, kuriame šilumos šaltiniai rodomi juodai, yra daugelio profesionalių medžiotojų mėgstamas režimas, nes jis leidžia geriau matyti gyvūno kūno detales. „Red Hot“ paryškina šilčiausias vaizdo vietas raudona spalva ir puikiai tinka greitai aptikti tikslą sudėtingoje aplinkoje. „Iron Bow“ ir „Rainbow“ režimai naudoja spalvų spektrą, kad parodytų skirtingus temperatūros gradientus, o tai padeda nustatyti mechaninius šilumos nuotėkius ar specifinius aplinkos bruožus. Įvairios paletės parinktys leidžia pritaikyti ekraną prie skirtingo reljefo, oro sąlygų ir asmeninių pageidavimų – nekeičiant paties prietaiso aptikimo gebėjimų.
Nepamirškime ir atnaujinimo dažnio. 50 Hz atnaujinimo dažnis yra būtinas reikalavimas bet kuriam šiluminiam prietaisui, kurį verta įsigyti 2026 m. Šis dažnis užtikrina sklandų, plūstančią vaizdą, todėl galėsite sekti judančius taikinius – pavyzdžiui, bėgančius šernus ar kojotus – be išsiliejimo ar trūkčiojimo. Jei atnaujinimo dažnis bus mažesnis nei 30 Hz, vaizdas bus trūkčiojantis, todėl greitai judančius taikinius bus sunku sekti. Mūsų „Pixfra“ įrenginiai yra sukurti taip, kad visi be išimties pasižymėtų aukštu atnaujinimo dažniu, nes lauke sklandus vaizdas nėra prabanga – tai būtinybė.
Mūsų „Volans“ serija taip pat išsiskiria savo gebėjimu matyti visą dieną. Jo diafragma reguliuojama nuo F1,2 iki F3,0, todėl prietaisas prisitaiko prie įvairių apšvietimo sąlygų – tai vienas iš nedaugelio rinkoje esančių šiluminių prietaisų, kuris vienodai gerai veikia tiek dienos šviesoje, tiek visiškoje tamsoje. Dėl tokio universalumo jums užtenka nešiotis vieną prietaisą, o ne du.
Svarbiausia išvada: Geriausias 2026 m. šiluminis prietaisas derina aukštą šiluminį jautrumą (≤18 mK NETD), jūsų naudojimo atvejui pritaikytą skiriamąją gebą, patikimą aptikimo nuotolį su integruotu lazeriniu tolimačiu, baterijų sistemą, kurios veikimo laikas viršija jūsų medžioklės sesijos trukmę, tvirtą IP67 klasės konstrukciją ir išmaniąsias funkcijas, kurios leidžia jums likti prisijungusiam ir išlaikyti kontrolę. „Pixfra“ kompanijoje kiekvieną savo asortimento produktą kuriame atsižvelgdami į šias šešias savybes, nes žinome, kas svarbu, kai sąlygos tampa tikros.
Kokį NETD rodiklį turėčiau rinktis renkantis šiluminį monokuliarą?
Daugeliui medžioklės, laukinės gamtos stebėjimo ir lauko veiklos atvejų reikalingas šiluminis prietaisas, kurio NETD rodiklis yra ≤25 mK arba mažesnis. Prietaisas su itin jautriu NETD rodikliu ≤18 mK gali aptikti neįtikėtinai mažus temperatūros skirtumus, užtikrindamas ryškų ir detalų vaizdą net sudėtingiausiomis sąlygomis, pavyzdžiui, esant tirštam rūkui, lietui ar visiškoje tamsoje. Mūsų „Pixfra“ prietaisai pasiekia ≤18 mK, todėl jie yra vieni iš jautriausių lauko sąlygoms pritaikytų optinių prietaisų.
Ar termovizoriuje verta turėti įmontuotą lazerinį tolmatį?
Jei medžiojate iš toliau nei 150 jardų arba šaudote naktį, taip – įmontuotas lazerinis tolimaatis yra tikras privalumas. Dėl jo nebereikia nešiotis atskiro tolimačio, o atstumo duomenys pateikiami akimirksniu, todėl galite atitinkamai pakoreguoti šūvį. Mūsų „Pixfra Arc LRF“, „Chiron LRF“ ir „Taurus LRF“ modeliuose yra integruoti lazeriniai tolimačiai, kurių matavimo nuotolis siekia 1 000 metrų. Kartu su balistiniu skaičiuokliu šie modeliai viename įrenginyje suteikia jums išsamų taikymosi sprendimą.
Kiek laiko veikia šiluminio prietaiso baterija?
Jei planuojate medžioti ilgą laiką, jums reikės prietaiso su ilga baterijos veikimo trukme. Daugelis šiluminių vaizdo monokuliarių veikia 6, 8 arba 10 valandų. Jei žinote, kad jums reikės tik valandos, galite apsieiti su prietaisu, maitinamu iš laido. Mūsų „Pixfra“ prietaisų baterijos veikia nuo maždaug 4,5 iki 15 valandų, priklausomai nuo modelio. Jei ketinate medžioti visą naktį, rinkitės modelius su keičiamomis 18650 baterijomis, kad galėtumėte pasiimti atsargines ir jas pakeisti be pertraukos.
Ar galima naudoti šiluminį prietaisą dienos metu?
Be abejo. Terminiai prietaisai fiksuoja šilumą, o ne šviesą, todėl jie veikia vienodai gerai tiek dienos šviesoje, tiek naktį. Mūsų „Pixfra Volans“ serija žengia dar vienu žingsniu toliau, siūlydama visos dienos matymo galimybę ir reguliuojamą diafragmą (F1,2–F3,0), kuri prisitaiko prie besikeičiančių apšvietimo sąlygų, todėl tai ypač puikus pasirinkimas medžiotojams ir stebėtojams, kuriems reikia, kad vienas prietaisas užtikrintų 24 valandų stebėjimą.
Kokio IP laipsnio reikia lauke naudojamam šiluminiam įrenginiui?
Jei ketinate prietaisą naudoti sudėtingomis lauko sąlygomis – medžioklėje, žygiais, stebint laukinę gamtą ar saugant nuosavybę – jums reikės bent jau IP67 klasės. IP67 klasė yra patikima. Lietus, sniegas, kondensatas – niekas iš to neturi reikšmės. Korpusas atrodo tvirtas, nepaisant nedidelės kainos. IP67 reiškia visišką apsaugą nuo dulkių ir apsaugą nuo laikino panardinimo į vandenį, įskaitant lietų, upelių perėjimus, sniegą ir atsitiktinį įkritimą į balas. Bet koks žemesnis nei IP67 laipsnis kelia pavojų jūsų įrangai realiomis lauko sąlygomis.
Jūs ką tik išpakavote savo naują šiluminį prietaisą. Jis atrodo puikiai, yra tvirtas, ir jūs jau esate pasiruošę išeiti į lauką. Tačiau prieš tai turite žinoti keletą dalykų. Tinkamas kalibravimas ir reguliari priežiūra – tai, kas skiria šiluminį taikiklį, kuris puikiai veikia dešimtmetį, nuo to, kurio vaizdas tampa neryškus jau po vieno sezono. Šį vadovą parengėme adresu Pixfra kad padėtume jums susipažinti su viskuo – nuo pirmojo įjungimo iki ilgalaikio laikymo. Nesvarbu, ar naudojate šiluminį taikiklį, monokuliarą ar priekinį priedą, šie veiksmai tinka visais atvejais.
Iš karto išsiaiškinkime vieną dalyką: kai kalbame apie šiluminio prietaiso kalibravimą, tai nėra tas pats, kas šautuvo optinio taikiklio nulinimas. Kalibravimas – kartais vadinamas NUC (nevienodumo korekcija) arba FFC (lygaus lauko korekcija) – yra jutiklio lygio procesas, užtikrinantis, kad jūsų terminis vaizdas būtų aiškus, tolygus ir be artefaktų. Terminiai prietaisai yra labai jautrūs aplinkos temperatūros pokyčiams, o kadangi temperatūra nuolat svyruoja, prietaisas turi periodiškai atsinaujinti, kad galėtų tiksliai matuoti temperatūrų skirtumus. Be šio proceso vaizdas tampa grūdėtas, išblukęs arba jame atsiranda linijų, kurių ten neturėtų būti.

Štai paprastas paaiškinimas, kas vyksta kalibravimo metu. Kalibruojant prietaisas trumpam uždengia jutiklį užraktu, kad gautų stabilų, pastovios temperatūros rodmenį. Šį stabilų atskaitos tašką prietaisas naudoja, kad iš naujo nustatytų, kaip kiekvienas pikselis reaguoja į infraraudonųjų spindulių energiją. Galima tai įsivaizduoti kaip bazinės linijos nustatymą iš naujo, kad jutiklis vėl žinotų, kaip atrodo “neutralus” vaizdas. Prietaisui veikiant, dėl vidinių temperatūros pokyčių kiekvienas pikselis reaguoja šiek tiek skirtingai, todėl vaizde atsiranda nevienodumas. Be kalibravimo vaizde atsiranda matomi artefaktai. Atlikus korekciją, šie artefaktai išnyksta ir vėl gaunamas ryškus, didelio kontrasto vaizdas.
Dauguma žmonių pirmą kartą pastebi kalibravimą, kai jų ekranas trumpam užstringa. Šaltose aplinkose kalibravimas vyksta dažniau per pirmąsias naudojimo minutes. Tai yra numatytas elgesys, o ne gedimas. Terminis vaizdas užstringa, nes jutiklis negali sukurti tinkamo vaizdo kalibravimo metu. Prasidėjus kalibravimui, jutiklio įvestis užblokuojama etaloniniu paviršiumi. Tuo metu prietaisas neturi naudingų vaizdo duomenų. Siekdama išvengti neteisingos informacijos rodymo, sistema ekrane išlaiko paskutinį tinkamą kadrą. Dėl to vaizdas trumpam užstringa. Užstrigimas nėra gedimas. Tai yra funkcinis reikalavimas, užtikrinantis kalibravimo tikslumą ir užkertantis kelią vaizdo iškraipymams. Taigi, kai tai atsitinka, nepulkite į paniką – tai reiškia, kad jūsų prietaisas veikia būtent taip, kaip turėtų. Kalibravimo dažnumas priklauso nuo prietaiso veikimo trukmės. Kuo ilgiau šiluminis vaizdo registratorius veikia nepertraukiamai, tuo rečiau reikia atlikti kalibravimą. Pirmosiomis minutėmis po įjungimo, ypač šaltu oru, pastebėsite dažnesnius kalibravimus, o vėliau, kai prietaisas įšils ir stabilizuosis, jų bus mažiau.
Dauguma šiuolaikinių šiluminių prietaisų siūlo tris kalibravimo režimus: automatinį, pusiau automatinį ir rankinį. Yra trys skirtingi kalibravimo režimai: rankinis, automatinis ir pusiau automatinis. Kiekvienas iš jų tinka tam tikroms aplinkybėms, priklausomai nuo to, ką darote lauke. Panagrinėkime juos išsamiau, kad galėtumėte pasirinkti tinkamiausią savo situacijai.
Automatinis režimas tai, ką rekomenduojame daugumai vartotojų, ypač jei esate naujokas termovizijos srityje. Naudojant automatinį kalibravimą, programinis algoritmas, laikmatis ar kita programinė įranga tikrina, ar vaizdo kokybė nesumažėja. Kalibruojant prietaisą, vaizdas užšąla vienai ar dviem sekundėms, o daugumoje prietaisų užraktas kalibravimo metu užsidaro. Užrakto uždarymą ir atidarymą lydi aiškiai išgirstamas garsas. Jums nereikia apie tai galvoti – prietaisas viską tvarko pats. Vienintelis trūkumas – trumpas spragtelėjimas, kurį išleidžia vidinis užraktas, ir kai kuriems medžiotojams tai nepatinka, kai jie sėdi tylioje medžioklės vietoje. Pusiau automatinis režimas leidžia paleisti kalibravimą vienu mygtuko paspaudimu, tačiau naudoja vidinį užraktą, todėl procesas vis tiek vyksta greitai ir sklandžiai. Rankinis režimas yra tyliausias variantas. Naudojant rankinio kalibravimo režimą, vartotojas turi paspausti mygtuką ir rankiniu būdu uždaryti priekinį dangtelį. Rankinio kalibravimo režimo privalumas yra tas, kad jis yra daug tylesnis nei kiti du režimai, kuriuose naudojami užraktai. Paspausite mygtuką ir patys uždengiate objektyvą – objektyvo dangteliu arba ranka – todėl užrakto spragtelėjimo iš viso nesigirdi. Tai mėgstamas pasirinkimas medžiotojams, kuriems reikia visiškos tylos medžiojant plėšrūnus iš arti arba medžiojant šernus.

Nepriklausomai nuo to, kokį režimą naudojate, reikia laikytis kelių praktinių taisyklių. Daugelis vaizdo problemų, kurios atrodo kaip prastas kontrastas ar silpnas ryškumas, iš tiesų kyla dėl kalibravimo nukrypimo. Paleiskite FFC, kai vaizdas ekrane pradeda atrodyti nevienodas. Dažni požymiai yra juostos, dėmės arba miglotas “nešvaraus stiklo” vaizdas, kurio prieš keletą minučių dar nebuvo. Tai dažnai pastebėsite po didelių temperatūros pokyčių, pavyzdžiui, išlipus iš šiltos sunkvežimio kabinos į šaltą orą. Mūsų patarimas: prieš pradėdami ieškoti nustatymų, atlikite pakartotinį kalibravimą. Jei vaizdas nukrypo, galite pernelyg sureguliuoti kontrastą ar ryškumą, bandydami kompensuoti laikiną problemą. Dėl to vėliau dažniausiai gaunate grubesnį vaizdą. Geresnė tvarka yra paprasta: pirmiausia sufokusuokite, tada paleiskite FFC, o po to įvertinkite nuotrauką. Ši darbo eiga padės jums išvengti veltui gaišimo su nustatymais, kurie iš pradžių nebuvo problema. Norėdami išsamiau susipažinti su įranga, kuri dera su tinkamu kalibravimu – pavyzdžiui, kokybiškais tvirtinimais ir baterijų komplektais – peržiūrėkite mūsų vadovą apie geriausi priedai, padėsiantys pagerinti jūsų šiluminio matymo prietaiso veikimą.
Dar vienas dalykas, dėl kurio žmonės susipainioja: kalibravimas ir nulinis nustatymas yra du skirtingi veiksmai. Kalibravimas susijęs su jutiklio vaizdo kokybe. Nulinis nustatymas suderina jūsų taikiklį su šautuvo smūgio tašku. Norint pasiekti tikslų šaudymą, šiluminis taikiklis turi būti kalibruotas, kad vaizdas būtų teisingai suderintas su šautuvo šūvio smūgio tašku. Reikia atlikti abu veiksmus, jie veikia kartu – tačiau jų nereikia painioti. Visada atlikite kalibravimą (NUC), prieš pradėdami reguliuoti nulinį tašką. Nuslinkęs jutiklio vaizdas gali sukelti įspūdį, kad taikinio taškas yra netikslus, nors tikroji problema yra tik jutiklio triukšmas, o ne optinio taikiklio suderinimas.
Jūsų terminio matymo lęšis skiriasi nuo įprasto dieninio žiūrovo stiklo. Terminio matymo žiūrovo lęšiai nėra pagaminti iš įprasto stiklo. Jie pagaminti iš germanio ar kitų specialių medžiagų su plonais dangalais, todėl juos reikia elgtis atsargiai. Germanis yra brangus, o šių lęšių antirefleksinės dangos yra jautrios spaudimui, cheminėms medžiagoms ir netgi odos riebalams. Jei juos valysite netinkamai, padarysite žalą, kurios nebus galima ištaisyti jokiu kalibravimu.

Štai mūsų rekomenduojama valymo tvarka. Niekada tiesiogiai nenuvalykite dulkėto objektyvo. Laisvos dulkių ar smėlio dalelės gali subraižyti paviršių. Visada pradėkite nuo švelnaus oro purkštuvo arba minkšto optinio šepetėlio, kad pašalintumėte nešvarumus be trinties. Nepūskite į objektyvą savo kvėpavimu (atsiranda kondensato dryžiai) ir nenaudokite servetėlių, popierinių rankšluosčių ar šiurkščių audinių, nes jie sukelia mikropabrėžimus. Pašalinus laisvą dulkių sluoksnį, užlašinkite keletą lašų optiniam valymui skirto tirpalo tiesiai ant šluostės, jokiu būdu ne ant paties objektyvo, kad skystis nesusigertų. Švelniai nuvalykite objektyvą apskritiminiais judesiais, pradėdami nuo centro ir judėdami į išorę. Viskas. Jokių sudėtingų technikų. Tiesiog kantrybė ir tinkamos priemonės.
Štai profesionalus patarimas, kurį išmokome per ilgus praktinio naudojimo metus: valykite savo šiluminės kameros objektyvą tik tada, kai tai yra tikrai būtina, ir tik tada, kai matosi nešvarumai ar pirštų atspaudai. Per dažnas valymas iš tiesų gali greičiau susidėvinti antirefleksinę dangą nei tai padarytų nedidelis dulkių sluoksnis. Plonas dulkių sluoksnis yra kur kas mažiau žalingas nei trynimas netinkama šluoste. Šiuo atveju geriausi jūsų pagalbininkai yra atverčiamieji objektyvo dangteliai – jie apsaugo nuo nešvarumų, todėl iš pradžių valyti tenka rečiau. O kalbant apie chemines medžiagas, visiškai atsisakykite buitinių stiklo valiklių. Venkite naudoti įprastus akinių valiklius ant šiluminių vaizdo ieškiklių. Šiluminių vaizdo ieškiklių lęšiuose naudojamas germanis arba specializuotos medžiagos su unikaliais danga, kurios reaguoja kitaip nei įprastas stiklas. Naudokite specialiai optiniams prietaisams skirtus lęšių valiklius, kurių sudėtyje yra ne mažiau kaip 30% izopropilo alkoholio arba 96% izopropilo alkoholio tirpalų. Įprasti akinių valikliai gali turėti priedų, kurie laikui bėgant pažeidžia termovizoriaus dangas ir pablogina vaizdo kokybę.
Objektyvo valymo greitojo naudojimo lentelė
Žingsnis Įrankis Pastabos 1. Pašalinkite laisvą dulkių sluoksnį Oro pūstuvas arba švelnus optinis šepetėlis Niekada nenuvalykite sauso, dulkėto objektyvo 2. Užtepkite valiklį Optinio kokybės tirpalas ant mikropluošto šluostės Niekada nepurkškite tiesiai ant lęšio 3. Švelniai nuvalykite Mikropluošto šluostė, sukamaisiais judesiais Sutelk dėmesį į išorę; nespaudžiok 4. Patikrinkite Akių patikrinimas esant apšvietimui Pakartokite tik jei reikia 5. Apsaugoti Atsilenkiamas objektyvo dangtelis Kai nenaudojate, visada uždenkite
Akumuliatoriaus valdymui skiriama per mažai dėmesio, o tai yra viena iš pagrindinių priežasčių, kodėl šiluminiai prietaisai praktikoje veikia ne taip, kaip turėtų. Dauguma šiluminių taikiklių, priklausomai nuo nustatymų, temperatūros ir ekrano ryškumo, veikia nuo 3 iki 8 valandų su vienu įkrovimu. Taikikliai gali greitai išeikvoti akumuliatoriaus energiją, ypač jei juos naudojate ilgą laiką. Kad prietaisas veiktų ilgiau, stenkitės nenaudoti maksimalaus ekrano ryškumo, kai to nereikia. Kai įmanoma, naudokite energijos taupymo režimą, o jei planuojate ilgą sesiją, pasiimkite atsarginių baterijų arba nešiojamąjį įkroviklį.
Šaltas oras akumuliatorių veikimui daro didesnį poveikį, nei dauguma žmonių įsivaizduoja. Esame pastebėję, kad esant minusinei temperatūrai visiškai įkrauti ličio akumuliatoriai praranda 20–30% savo efektyvios talpos. Atsarginius akumuliatorius laikykite vidinėje kišenėje arti kūno, kad jie išliktų šilti. Dauguma šiluminių optinių taikiklių maitinami iš įkraunamų arba keičiamų akumuliatorių. Tinkama baterijų priežiūra yra labai svarbi, siekiant užtikrinti nepertraukiamą veikimą. Ilgalaikiam saugojimui visada išimkite baterijas, kad išvengtumėte nuotėkio, kuris gali sugadinti vidinius komponentus. Jei jūsų taikiklis naudoja įkraunamas baterijas, periodiškai jas įkraukite, net ir tada, kai prietaiso nenaudojate, kad išlaikytumėte jų tarnavimo laiką. Venkite per didelio įkrovimo, nes tai gali sukelti perkaitimą ir baterijų susidėvėjimą. Ilgų išvykų metu nešiokitės atsargines baterijas, kad lauke neprarastumėte prietaiso funkcionalumo. O jei medžioklė trunka visą naktį, apsvarstykite galimybę prijungti prie prietaiso išorinį maitinimo bloką. Daugelis šiuolaikinių šiluminių taikiklių palaiko USB maitinimą, o tai reiškia, kad galite naudoti prietaisą 10 ar daugiau valandų, nesijaudindami dėl išsikrovusių baterijų.
Pagrindinis duomenų rodiklis: Daugumos šiluminių vaizdo įrenginių šiluminio jutiklio veikimo trukmė svyruoja nuo 40 000 iki 60 000 valandų, o ekranai paprastai tarnauja apie 10 metų. Tai ilgas tarnavimo laikas, jei tinkamai prižiūrite prietaisą – o baterijos valdymas yra labai svarbi šio proceso dalis.
Programinė įranga – tai kita šio skyriaus pusė, kuri dažnai visiškai pamirštama. Reguliariai tikrinkite, ar nėra programinės įrangos atnaujinimų, ir įdiekite juos pagal gamintojo rekomendacijas. Programinės įrangos atnaujinimai gali pagerinti teleskopo našumą ir funkcionalumą. „Pixfra“ išleidžia programinės įrangos atnaujinimus, siekdama ištaisyti klaidas, pagerinti vaizdo apdorojimą, o kartais netgi pridėti naujų funkcijų. Naudoti pasenusią programinę įrangą yra tarsi važiuoti su senomis padangomis – galbūt viskas veiks, bet jūs neišnaudojate visų savo įrangos galimybių. Bent jau prieš mėnesį iki medžioklės sezono pradžios patikrinkite baterijos būklę, atnaujinkite programinę įrangą ir kalibruokite jutiklį, kad nepraleistumėte sezono atidarymo nakties. Įtraukite programinės įrangos patikrinimus į savo pasirengimo sezonui rutiną kartu su akumuliatoriaus būklės tikrinimu ir jutiklio kalibravimu – taip išvengsite netikėtumų, kai tai bus svarbiausia.
Tai, kaip laikote savo šiluminį prietaisą, kai jo nenaudojate, yra lygiai taip pat svarbu, kaip ir tai, kaip elgiatės su juo lauke. Po medžioklės tinkamas šiluminio optinio taikiklio laikymas užtikrina, kad jis bus paruoštas būsimiems išėjimams į gamtą. Pasirinkite vėsų, sausą vietą su pastovia temperatūra ir mažu drėgniu, kad išvengtumėte kondensato susidarymo. Galvokite apie tai kaip apie įrangos sutvarkymą, kad ji išlaikytų aukščiausią našumą. Drėgmė čia yra pagrindinis priešas. Net ir vandeniui atsparūs taikikliai gali susidaryti vidinis kondensatas, jei juos per greitai perkeliate iš vienos ekstremalios aplinkos į kitą. Net ir vandeniui atsparūs taikikliai gali susidurti su vidiniu kondensatu, jei patiria staigius temperatūros pokyčius. Nepalankios oro sąlygos, tokios kaip lietus ar ekstremalios temperatūros, gali smarkiai paveikti šiluminių taikiklių veikimą, todėl labai svarbu juos apsaugoti nuo drėgmės. Visada leiskite savo šiluminiam taikikliui lėtai prisitaikyti prie aplinkos, kai jį perkeliate iš vienos ekstremalios aplinkos į kitą.

Trumpalaikiam laikymui tarp medžioklių puikiai tinka paminkštintas taktinis krepšys arba kietasis dėklas. Laikymo dėžutėje naudokite silikagelio pakelius ar kitas drėgmę sugeriančias medžiagas, kad išvengtumėte kondensato susidarymo. Transportavimui geriausiai tinka kietos dėžės su individualiai pritaikytais putų įdėklais, o nešiojimui lauke puikiai tinka paminkštintos kuprinės su greitai pasiekiamais skyreliais. Apie abu šiuos variantus išsamiai kalbėjome mūsų priedų vadovas. Ilgalaikiam saugojimui — pavyzdžiui, ne sezono metu — reikia atlikti keletą papildomų veiksmų. Išimkite baterijas, dar kartą švelniai nuvalykite objektyvą, uždėkite dangtelius ir laikykite prietaisą patalpoje su reguliuojama temperatūra. Išdžiovinkite saugojimo vietą ir naudokite oro sausintuvą saugojimo patalpoje, kad palaikytumėte optimalų drėgmės lygį. Prieš saugojimą patikrinkite programinės įrangos atnaujinimus, kad įsitikintumėte, jog jūsų optinio taikiklio programinė įranga yra naujausia, ir išvengtumėte suderinamumo problemų, kai jį vėl naudosite. Užsirašykite pageidaujamus nustatymus ir konfigūracijas, kad prireikus galėtumėte greitai sureguliuoti optinį taikiklį.
Nepamirškite fizinių patikrinimų. Reguliariai tikrinkite, ar nėra nusidėvėjimo ar pažeidimų požymių, pavyzdžiui, laisvų varžtų, įtrūkimų ar susidėvėjusių sandariklių. Laiku pašalinus nedidelius trūkumus, vėliau galima išvengti didesnių problemų. Kai kuriems optiniams prietaisams, siekiant išlaikyti tikslumą, reikalingas periodinis kalibravimas, ypač po ilgo naudojimo ar veikimo ekstremaliomis sąlygomis. Atsilaisvinęs tvirtinimo varžtas ar įtrūkusi sandariklio danga dabar gali atrodyti nereikšmingi dalykai, tačiau, jei jų nepatikrinsite, jie gali sukelti nulinės padėties poslinkį, drėgmės patekimą arba jutiklio sugadinimą. Įpraskite atlikti greitą vizualinį ir funkcinį patikrinimą kiekvieną kartą, kai išimsite prietaisą iš saugojimo vietos. Įjunkite jį, leiskite įkaisti, atlikite kalibravimą, patikrinkite vaizdą ir patvirtinkite nustatymus. Penkios minutės dėmesio apsaugos jus nuo nemalonių staigmenų, kai būsite lauke ir į taikymo zoną įžengs šernas.
Esame matę, kad tinkamai prižiūrimi ir eksploatuojami šiluminiai taikikliai tarnauja daugiau nei 10 metų. Tai mūsų komandos surinkti realūs duomenys, o ne rinkodaros skaičiai. Tokį tarnavimo laiką pasiekia tie prietaisai, kurių savininkai laikėsi šių pagrindinių taisyklių: valė prireikus, tinkamai laikė, tinkamai prižiūrėjo baterijas, atnaujindavo programinę įrangą ir leisdavo jutikliui kalibruotis be trukdžių.
Kartais jūsų šiluminio vaizdo įrenginio vaizdo kokybė blogėja taip palaipsniui, kad to iš karto nepastebite. Žinodami įspėjamuosius požymius, išvengsite situacijos, kai dėl problemų, kurias galima išspręsti paprastu kalibravimu, kaltinsite patį prietaisą. Nenuoseklūs rodmenys, staigūs svyravimai arba netikėti temperatūros rodmenys; neryškūs terminiai vaizdai, kurių aiškumas sumažėjęs net po objektyvo valymo; neįprasti artefaktai, pavyzdžiui, keisti raštai ar spalvos, nesusijusios su tikraisiais šilumos pėdsakais; taip pat po stiprių smūgių – nukritus kamerai gali būti išsiderinę vidiniai jutikliai.
Teleskopo judėjimo ar kalibravimo paklaidos požymiai apima staigius, nepaaiškinamus taikinio taško (POI) šuolius, matomą žiedinių varžtų atsipalaidavimą, slydimą ant bėgelio, nenuoseklų tinklelio elgesį arba nuolatinius nuokrypius, kurių neįmanoma ištaisyti sukant kalibravimo ratuką. Patikrinkite įrangą, ar nėra atsipalaidavusių varžtų, įtrūkusių žiedų ar bėgelio deformacijų. Patikrinkite, ar ekrane matomas retikulo virpėjimas, ir paleiskite NUC, kad įsitikintumėte vidinio kalibravimo stabilumu. Jei NUC paleidimas neišsprendžia vaizdo problemų, galbūt atėjo laikas profesionaliam gamykliniam pakalibravimui. Dauguma šiandien rinkoje esančių šiluminių kamerų jau yra kalibruotos. Kaip ir dauguma elektroninių matavimo prietaisų, visiškai nauja infraraudonųjų spindulių kamera yra nustatoma pagal gamyklinius standartus. Tačiau laikui bėgant dėl elektroninių komponentų senėjimo gali atsirasti kalibravimo nukrypimų. Bendras rekomendacinis reikalavimas šiluminės vaizdo įrangos pramonėje yra kartą per metus atlikti gamyklinį prietaiso patikrinimą, jei jį intensyviai naudojate, arba kas dvejus metus – jei naudojate retai.
Tai nėra įšalimas ar gedimas – tai jūsų prietaisas atlieka savikalibravimą. Kai pirmą kartą pradėsite naudoti savo šiluminę optiką, galite nustebti, kad ji kartais užstringa. Tai nėra gedimas – tiesiog jūsų prietaisas atlieka savikalibravimą. Terminiai prietaisai yra labai jautrūs aplinkos temperatūros pokyčiams. Ekrane rodomas paskutinis kadras, o vidinis užraktas uždengia jutiklį ir atlieka nevienodumo korekciją. Tai trunka tik sekundę ar dvi, ir kuo ilgiau jūsų prietaisas lieka įjungtas, tuo rečiau tai pasikartoja.
Automatiniame režime prietaisas tai atlieka už jus – jums nereikia apie tai galvoti. Jei naudojate rankinį režimą, pakalibruokite prietaisą, kai vaizdas pradeda atrodyti triukšmingas, dryžuotas arba nevienodas. Paleiskite FFC, kai vaizdas ekrane pradeda atrodyti nevienodas. Dažni požymiai – juostos, dėmės arba miglotas “nešvaraus stiklo” vaizdas, kurio prieš kelias minutes dar nebuvo. Tai dažnai pastebėsite po didelio temperatūros pokyčio, pavyzdžiui, išlipus iš šiltos sunkvežimio kabinos į šaltą orą. Geras įprotis: visada atlikite rankinį kalibravimą, kai pirmą kartą įjungiate prietaisą ir kiekvieną kartą, kai pereinate iš vienos labai skirtingos temperatūros aplinkos į kitą.
Ne. Venkite naudoti įprastus akinių valiklius ant šiluminių vaizdo prietaisų. Šiluminių vaizdo prietaisų lęšiuose naudojamas germanis arba specialios medžiagos su unikaliomis dangomis, kurios reaguoja kitaip nei įprastas stiklas. Amoniako pagrindu pagaminti valikliai, tokie kaip „Windex“, sugadins atspindžių mažinančias dangas. Naudokite tik optinio lygio valymo skysčius, skirtus padengtiems lęšiams, ir visada pirmiausia užtepkite skystį ant mikropluošto šluostės – niekada tiesiogiai ant lęšio.
Tinkamai prižiūrimas šiluminis taikiklis gali tarnauti nuo 5 iki 10 metų ar ilgiau, priklausomai nuo jo gamybos kokybės, naudojimo dažnumo ir priežiūros būdų. Pats šiluminis jutiklis gali veikti dešimtis tūkstančių valandų. Didžiausią grėsmę prietaiso tarnavimo laikui kelia drėgmės žala, objektyvo įbrėžimai dėl netinkamo valymo ir baterijos išsiliejimas laikymo metu. Laikykitės šioje instrukcijoje nurodytų priežiūros nurodymų, ir jūsų prietaisas veiks patikimai daugelį metų.
Taip. Ilgalaikio saugojimo atveju visada išimkite baterijas, kad išvengtumėte nuotėkio, kuris gali sugadinti vidinius komponentus. Jei jūsų optinis taikiklis naudoja įkraunamas baterijas, jas periodiškai įkraukite, net ir tada, kai prietaisas nenaudojamas, kad išsaugotumėte jų tarnavimo laiką. Kas du–tris mėnesius iš dalies įkraukite įkraunamas baterijas, kad išvengtumėte gilaus išsikrovimo, kuris gali negrįžtamai sumažinti jų talpą.
















